This document describes how to quickly integrate the Tencent Push Notification Service SDK into your Android application. You can use the Tencent Push Notification Service on your application after performing the following steps.
Note:
To avoid your app from being criticized in a circulated notice or removed from the market by regulatory authorities, be sure to add mobile push related instructions in the Privacy Policy according to the Android Compliance Guide before integrating the Tencent Push Notification Service SDK and initialize the SDK after the user agrees to the Privacy Policy.
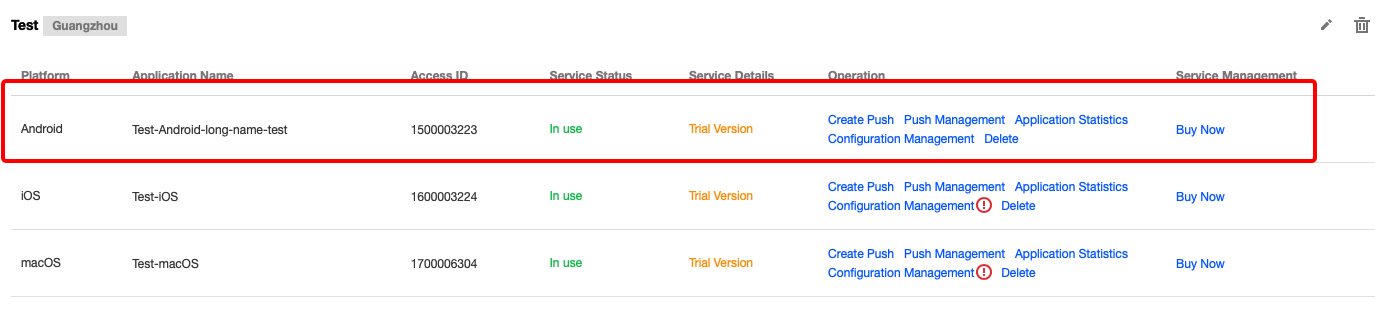
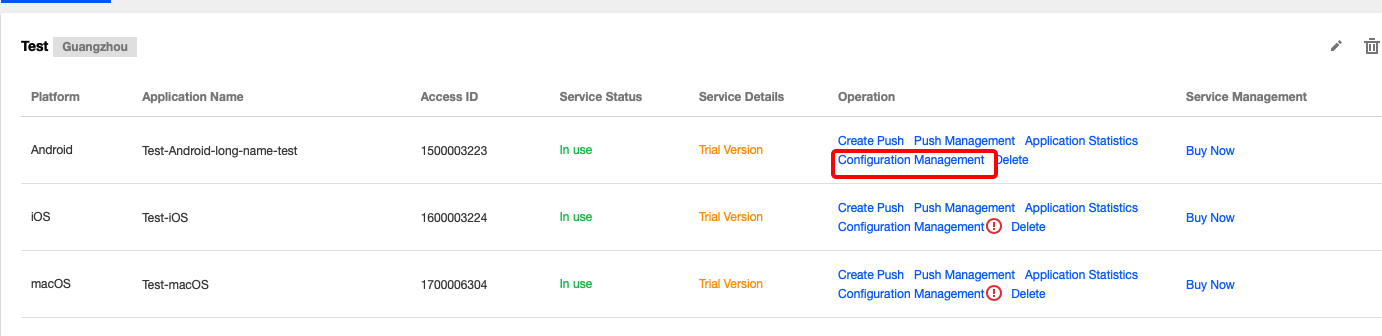
2. Go to the Configuration Management page of the application to prepare for the integration.
Starting Integration
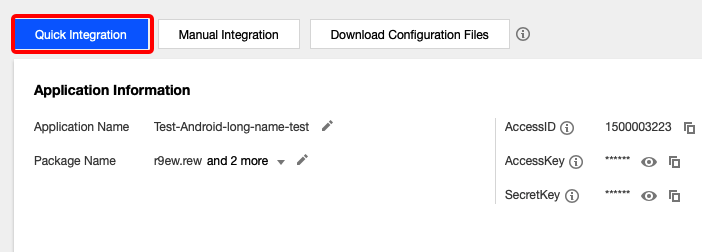
1. On the Configuration Management page, click Quick Integration.
2. Complete the configuration as instructed and click Click to verify.
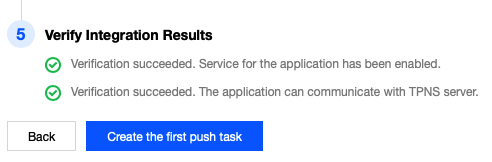
3. If the following prompt is displayed, the Tencent Push Notification Service SDK is successfully integrated.
If verification failure information as shown in the figure below is reported, check whether the application has been successfully registered with the Tencent Push Notification Service as instructed in Verifying the Integration Result.
Caution:
To increase the offline reach rate, the Tencent Push Notification Service SDK enables the session keep-alive feature by default. To disable the feature, see here.
Verifying the Integration Result
1. Run the application, filter logs by the "TPush" keyword, and view the displayed logs.
If a log similar to that shown in the preceding figure is displayed, the Tencent Push Notification Service SDK has been successfully integrated as a plugin.
2. Check whether the registration with the push service is successful. The following log indicates successful registration.
XG register push success with token:6ed8af8d7b18049d9fed116a9db9c71ab4aabb65
If the token cannot be found, please check the error code returned by the registration API and troubleshoot as instructed in Error Code.
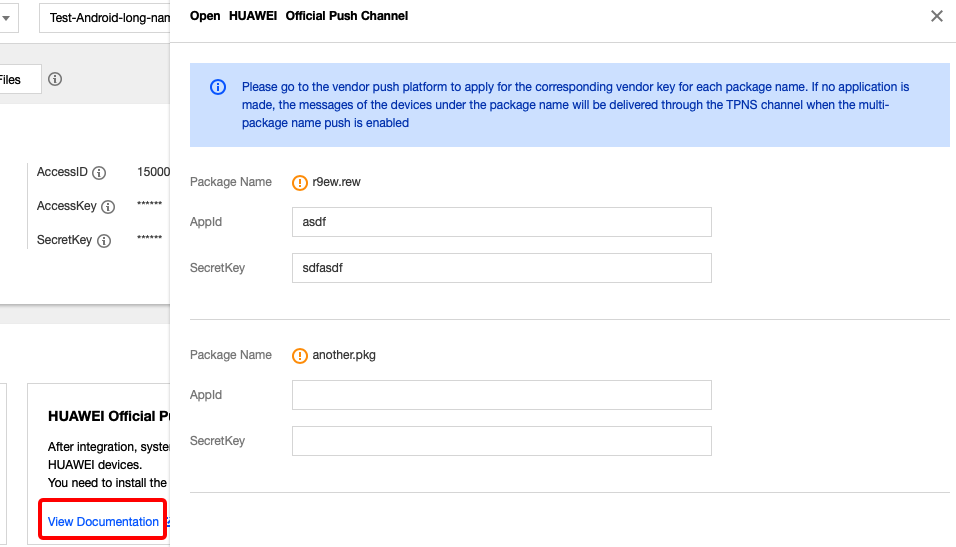
Quickly Integrating with a Vendor Channel
1. On the Configuration Management page, enable the vendor push channel and configure the application information such as AppId and SecretKey. For more information about how to apply for such information, see the documentation of the vendor channel.
Click View Documentation to see the vendor channel description.
Configure AppId, AppKey, and AppSecret for the vendor channel.
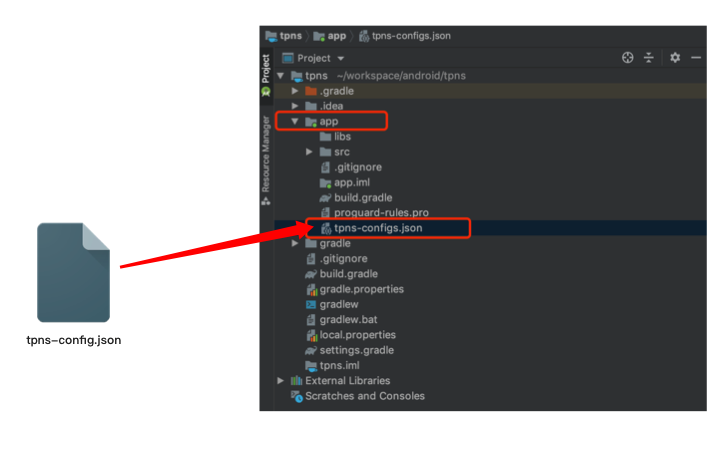
2. After configuring the vendor channel information, click Download Configuration File at the top of the page to download the vendor channel configuration file and use it to replace the legacy one in the project file.
Troubleshooting
1. View the Android Gradle plugin logs.
If an exception occurs during integration, set the debug field in the tpns-configs.json file to true and run the following command:
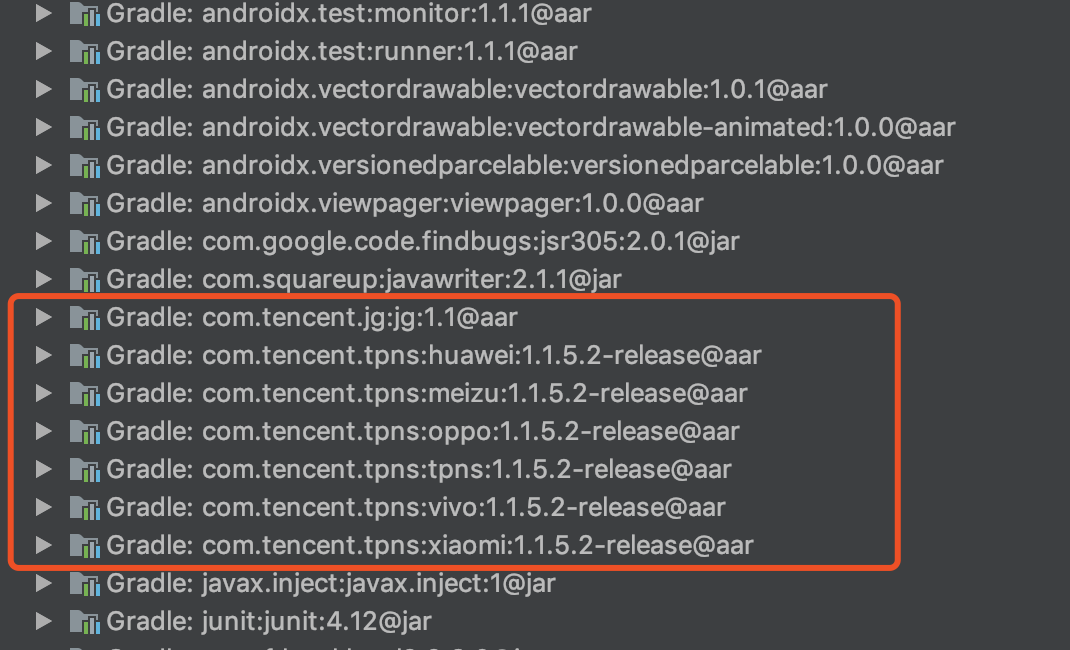
3. Check whether relevant dependencies exist in External Libraries of the project.
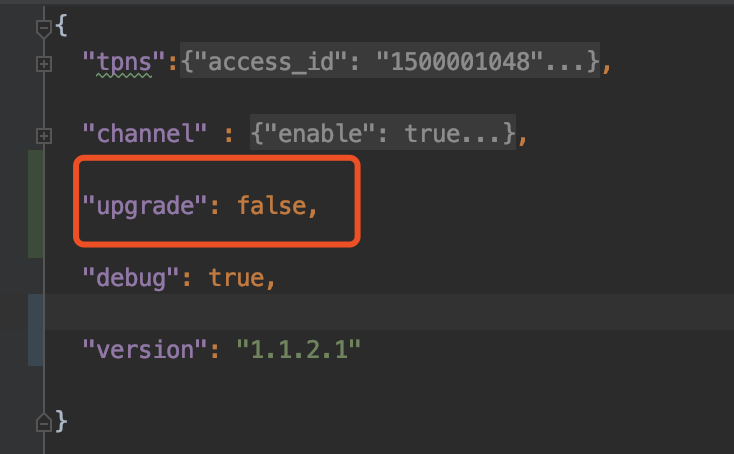
4. If the log displays Execution failed for task ':Paracraft:checkTPNS', the Tencent Push Notification Service Android SDK can be updated to a later version. If you do not want to check for updates, add "upgrade": false to the tpns-configs.json file, as shown below:
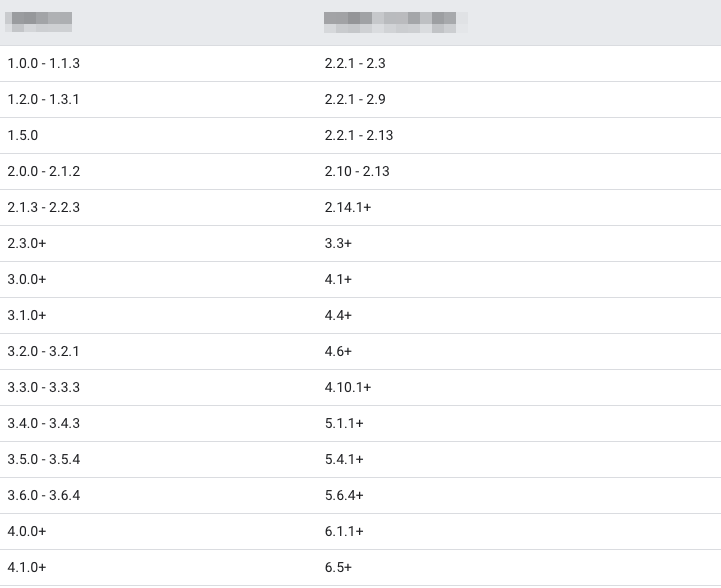
5. If you encounter the version mismatch between the Android Gradle plugin and Gradle version when using the plugin, upgrade the Gradle version by referring to Android Gradle plugin release notes. The table in following figure lists which version of Gradle is required for each version of the Android Gradle plugin.