The following describes how to configure fully managed and semi-managed migration tasks to migrate data from Alibaba Cloud OSS to Tencent Cloud COS.
Note:
This operation guide is for reference only, aiming to provide users with clear guidance. Some materials come from third-party public information. For specifics, refer to the relevant pages of the third party.
Preparations
Alibaba Cloud OSS
Create a RAM sub-account and grant the required permissions:
2.2 In the left sidebar select User > List of Users to go to the user list page.
2.3 Create a sub-user, select programmatic access and Tencent Cloud console access.
2.4 Search and select the QcloudMSPFullAccess and QcloudCOSAccessForMSPRole policies.
2.5 Complete sub-user creation and save the sub-user username, access login password, SecretId, and SecretKey.
Note:
Cloud migration can also be performed using the root account. However, for security reasons, it is recommended to create a sub-account and use the sub-account API key for migration. After migration, delete the key.
2. Click Object Storage Migration in the left sidebar to enter the object storage migration page.
Creating Migration Task
1. On the object storage migration page, click Create task to enter the migration task configuration page and set the migration parameters.
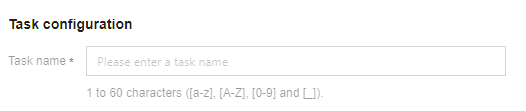
2. Specify the migration task name.
Task name: The character length is 1 to 60 characters. Allowed characters include Chinese, English, 0-9, _, and -. The name set here will be used to view the migration status and migration progress in the task list.
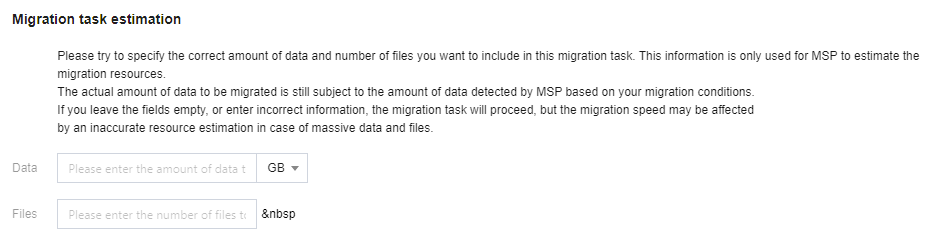
3. Task size estimation. Please accurately fill in the task size so that Tencent Cloud can better prepare resources. This field is optional.
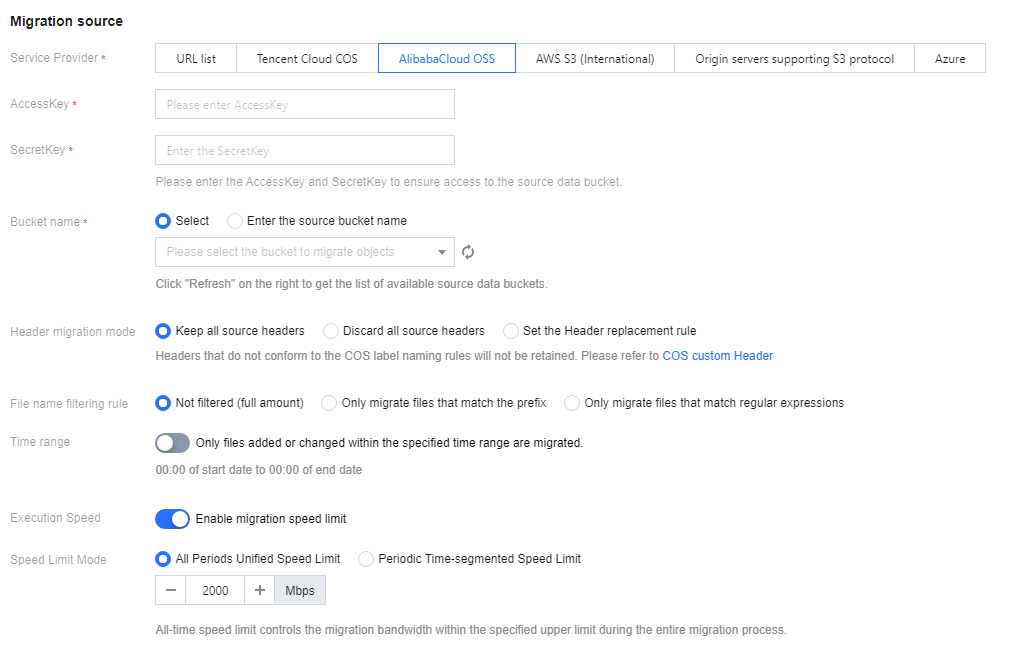
4. Set the file source for migration.
Service Provider: The migration source service provider here should be AlibabaCloud OSS.
AccessKey, SecretKey: Enter the AccessKeyID and AccessKeySecret of the account used for migration in the text boxes.
Bucket name: Upon entering the key, click the Refresh button to the right of the "Bucket name" dropdown menu to retrieve a list of source object storage buckets. Alternatively, you may opt to manually input the name of the source bucket.
Header migration mode: If the file in the source bucket has headers and tags that need to be retained after migration, please select the retention option or set the replacement rule.
File name filtering rules: Choose to migrate all the files of the specified bucket or migrate only files with the specified prefix.
No filtering (full): Select to migrate all files in the specified bucket.
Migrate only files matching the prefix: Only migrate files with the specified prefix. For example, if there are files AA.jpg and AA/B.jpg in the root path of the bucket, entering the prefix AA will match and migrate files AA.jpg and AA/B.jpg.
Migrate only files matching the regular expression: Support input partial regular expression to match files. For example:
.*\\.jpg$ matches all files ending with .jpg.
^test.* means matching all files under the root path that start with test. If files share the same prefix, such as doc/AA/, use ^doc/AA/test.* to match all files starting with test under the specified prefix.
.*/test/.* matches files with a subpath named test.
Time range: Specify the time range. Migrate files that are added or modified within this time period.
Execution Speed, Speed Limit Mode: All public cloud object storage services have speed limits. To ensure business stability, please confirm with the service provider and set the maximum available migration bandwidth in Mbps before migrating.
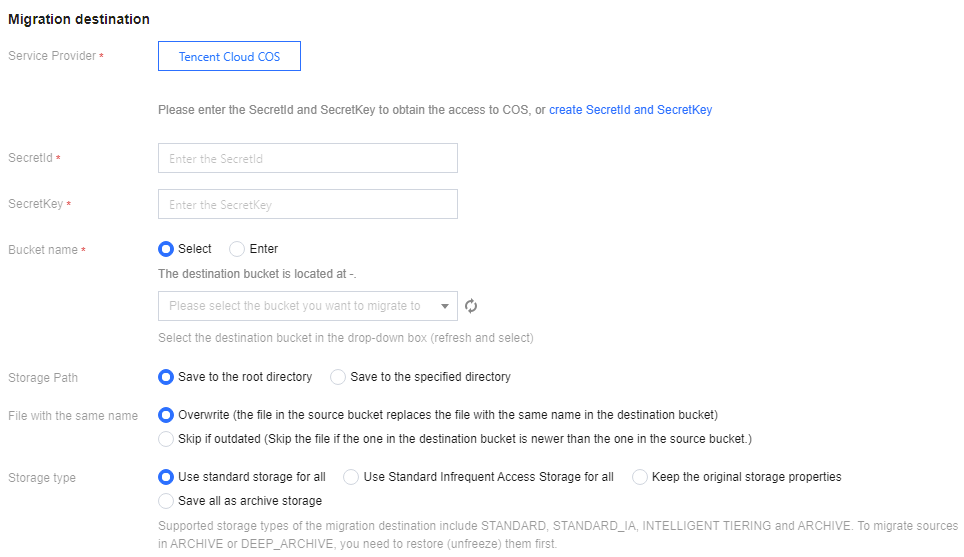
5. Select the destination for migration.
Service Provider: The default value is Tencent Cloud COS.
SecretId, SecretKey: Enter the SecretId and SecretKey of the sub-user for migration.
Bucket name: After you enter the Key, click Refresh on the right side of the "Bucket Name" drop-down box to view the list of destination COS buckets.
Storage Path: Specify the directory in the destination bucket for migration.
Save to root directory: Directly save files in the source bucket to the root directory of the target bucket with their original relative paths. For example, if the original relative path of a file in the source bucket is /dir/a.txt, the file will be saved to the target bucket path /dir/a.txt.
Save to specified directory: Save files in the source bucket to the specified directory with their original relative paths. For example, if the original relative path of a file in the source bucket is /dir/a.txt and the specified directory is doc, the file will be saved to the target bucket path /doc/dir/a.txt.
File with the same name: Specify the handling method for files with the same name.
Notes:
If the method is Overwrite, files in the destination bucket will be overwritten directly during migration.
If the method is Skip, judgment will be performed based on the last modification time (LastModified). Specifically:
If the last modification time of the file in the source bucket is later than or the same as that of the file in the destination bucket, then overwrite the file in the destination bucket.
If the last modification time of the file in the source bucket is earlier than that of the file in the destination bucket, skip the file in the source bucket.
Secondary migration is required if the object (file) content is changed during migration.
Storage type: Set the storage class for migrated files according to the migration requirements. Available options: Use standard storage for all, Use Standard Infrequent Access Storage for all, Keep the original storage properties, and Save all as archive storage.
6. Select migration mode.
Mode Selection:
Create a migration task and start fully-managed migration immediately: When fully-managed migration is used, Cloud Migration will access the source bucket via the public network for migration after you click "Create and Start".
Create a migration task and download the Agent manually to start migration: When semi-managed migration is used, only task creation is completed after you click "Create and Start". You need to manually download the Agent and deploy it on the origin server before you can start the migration. For Agent deployment, see Using Semi-Managed Migration Agent.
Scheduled Task: Start a scheduled task can repeat task execution and migrate incremental files from the source bucket. Except for the first task which is immediate execution, subsequent tasks will trigger re-run based on the schedule type set at fixed intervals or according to Cron settings. During re-run, "file with the same name" will change to "skip (retain existing files with the same name in the destination bucket)", meaning only synchronous increment files are synced.
Note:
For example, set the scheduled run count to 3, repeat every hour, start the first task at 13:00, and execute the second task at 14:00 (if the first task is not completed at this time, wait until the first task is completed before executing the second task, and so on, until all 3 tasks are completed).
7. Click Create and Start to start the migration task.
Viewing Migration Status and Progress
In the Object Storage Migration interface, you can view the status and progress of all file migration tasks.:
For completed tasks, the message in green indicates the task is completed with all files successfully migrated, while the message in yellow indicates the migration task is completed but some files failed to be migrated.
You can click Retry failed task to retry the migration of failed files involved in the task. Files that have been successfully migrated will not be retried.
You can click Export list of failed files to export the list of files that failed to be migrated.
Estimating File Migration Time
The migration speed is subject to the lowest speed at each stage of the migration process and is affected by the network transmission speed and maximum concurrency level. For more details, see Estimating File Migration Time.