快速入门
Download
聚焦模式
字号
本文档能帮助您快速了解和接入媒体处理服务。使用媒体处理服务的主要步骤参见下文。
前提条件
注册与登录
1. 注册腾讯云 账户。
2. 登录腾讯云官网,选择云产品 > 视频服务 > 媒体处理,进入媒体处理控制台,免费开通服务。

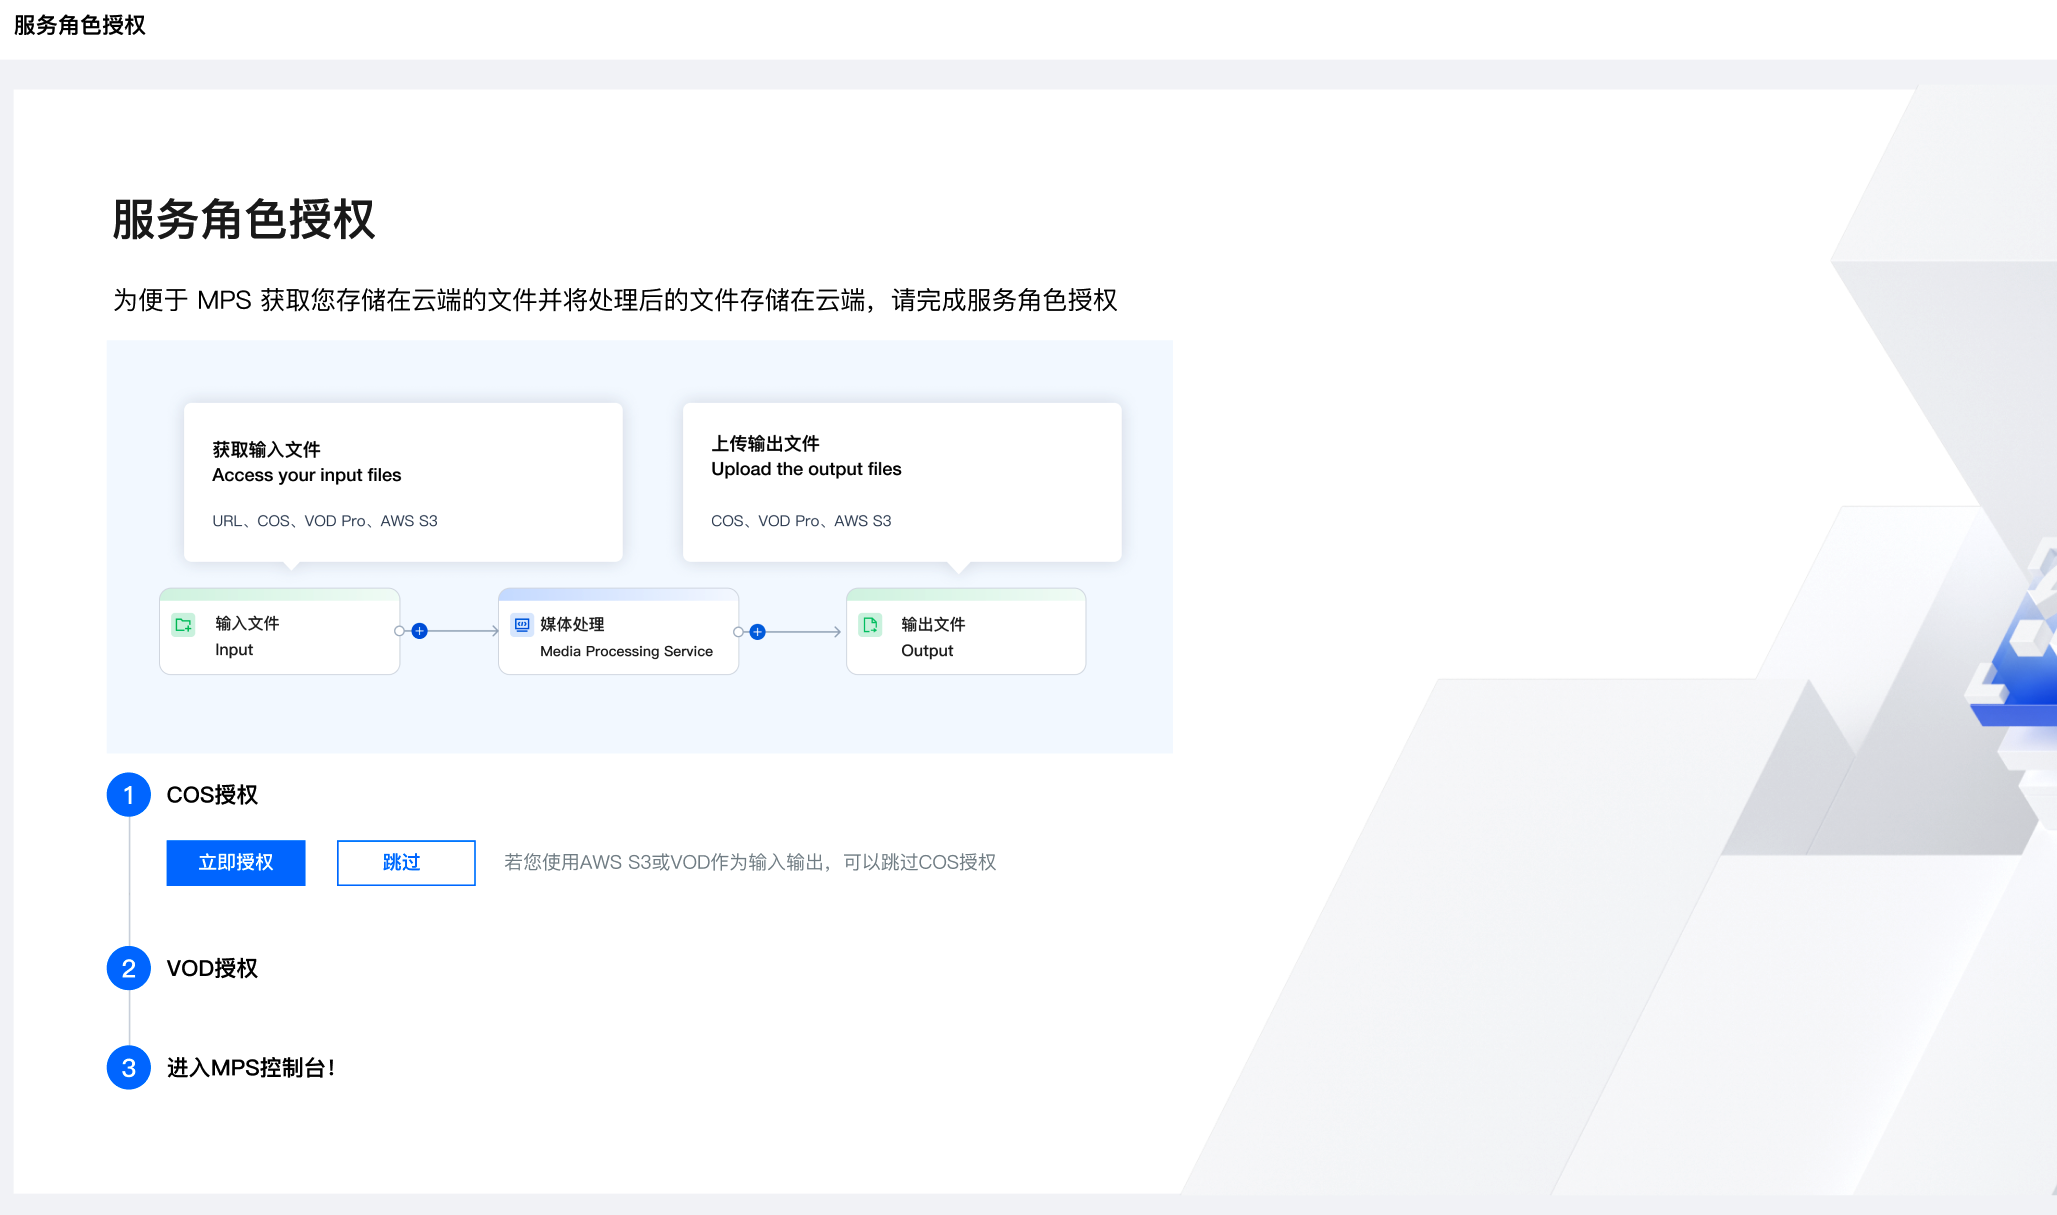
授权
1、服务角色授权
使用 COS:需要完成 COS 服务角色授权,允许 MPS 对您 COS 存储桶中的文件进行下载、转码和上传等读写操作。
使用 VOD Pro:需要完成 VOD 服务角色授权,允许 MPS 对您 VOD 专业版应用中的文件进行下载、转码和上传等读写操作。
使用 AWS S3:可以跳过服务角色授权,但需完成 AWS 对接 MPS 。
使用 URL 下载地址:可公网访问的文件下载 URL(必须是直接下载方式,暂不支持 Chunked 模式)。选择该输入方式,输出方式暂仅支持 COS 和 VOD Pro,因此您也需要完成服务角色授权。
说明
2、子账号授权
操作步骤
媒体处理可以对您的音视频文件或直播流进行处理。
离线媒体处理:对离线音视频文件进行处理。
直播媒体处理:对直播流进行录制、智能识别与分析、质检等实时媒体处理。
离线媒体处理
步骤一:发起任务
目前支持发起离线媒体处理任务的方式:
控制台快速创建任务:手动在控制台选择文件并发起处理任务。
自动触发任务:文件上传至 COS / AWS S3 存储桶后自动发起处理任务,无需手动在控制台创建任务。
API 发起任务:调用 API 接口发起任务,适用于批量处理已上传文件的场景。
方式一:控制台快速创建任务
1. 进入 控制台创建任务页面,单击快速创建离线处理任务。
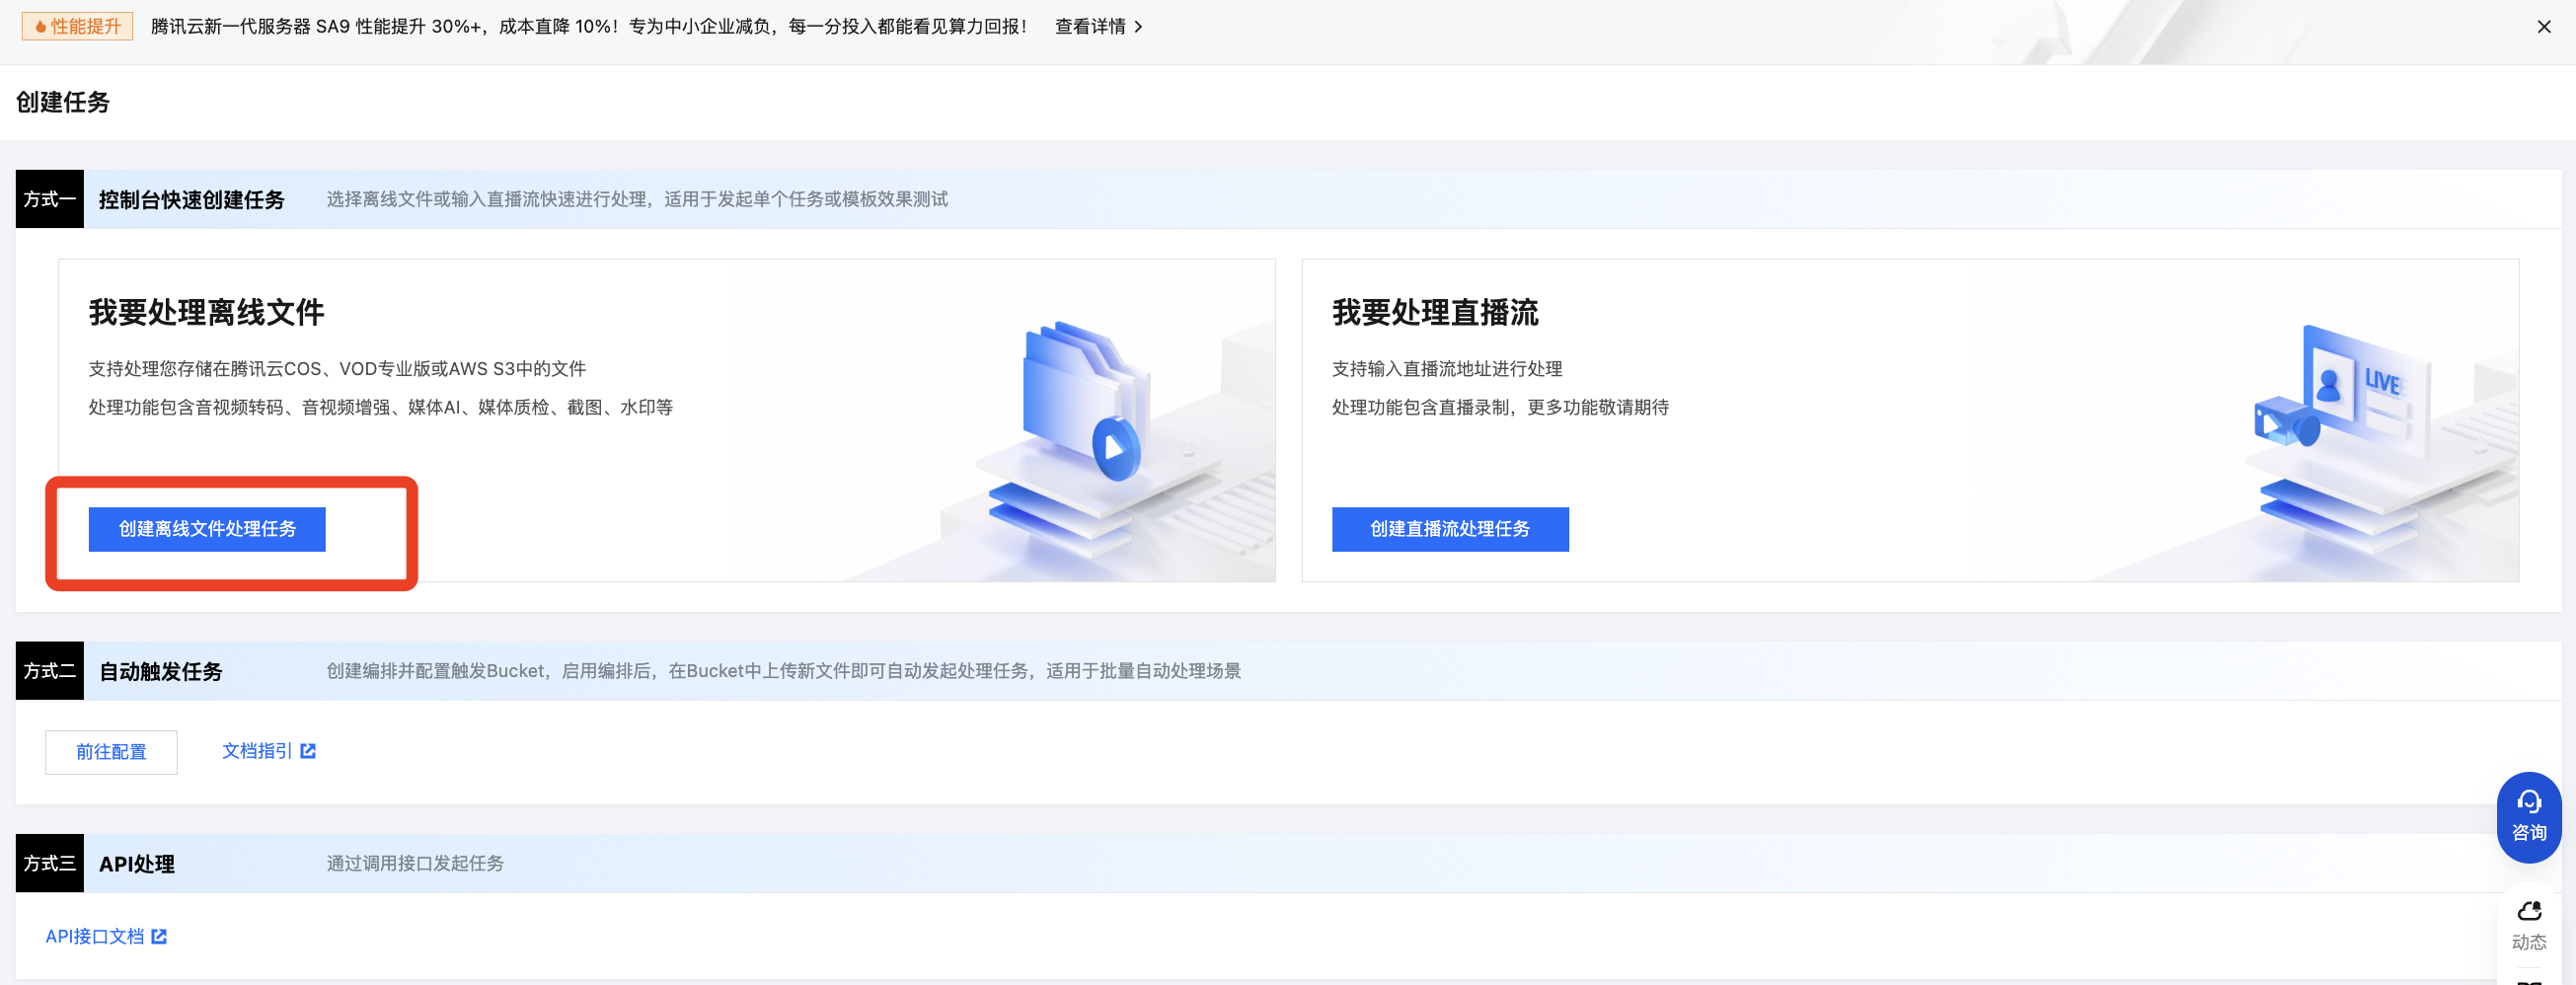
2. 在快速创建离线处理任务页面填写如下信息:
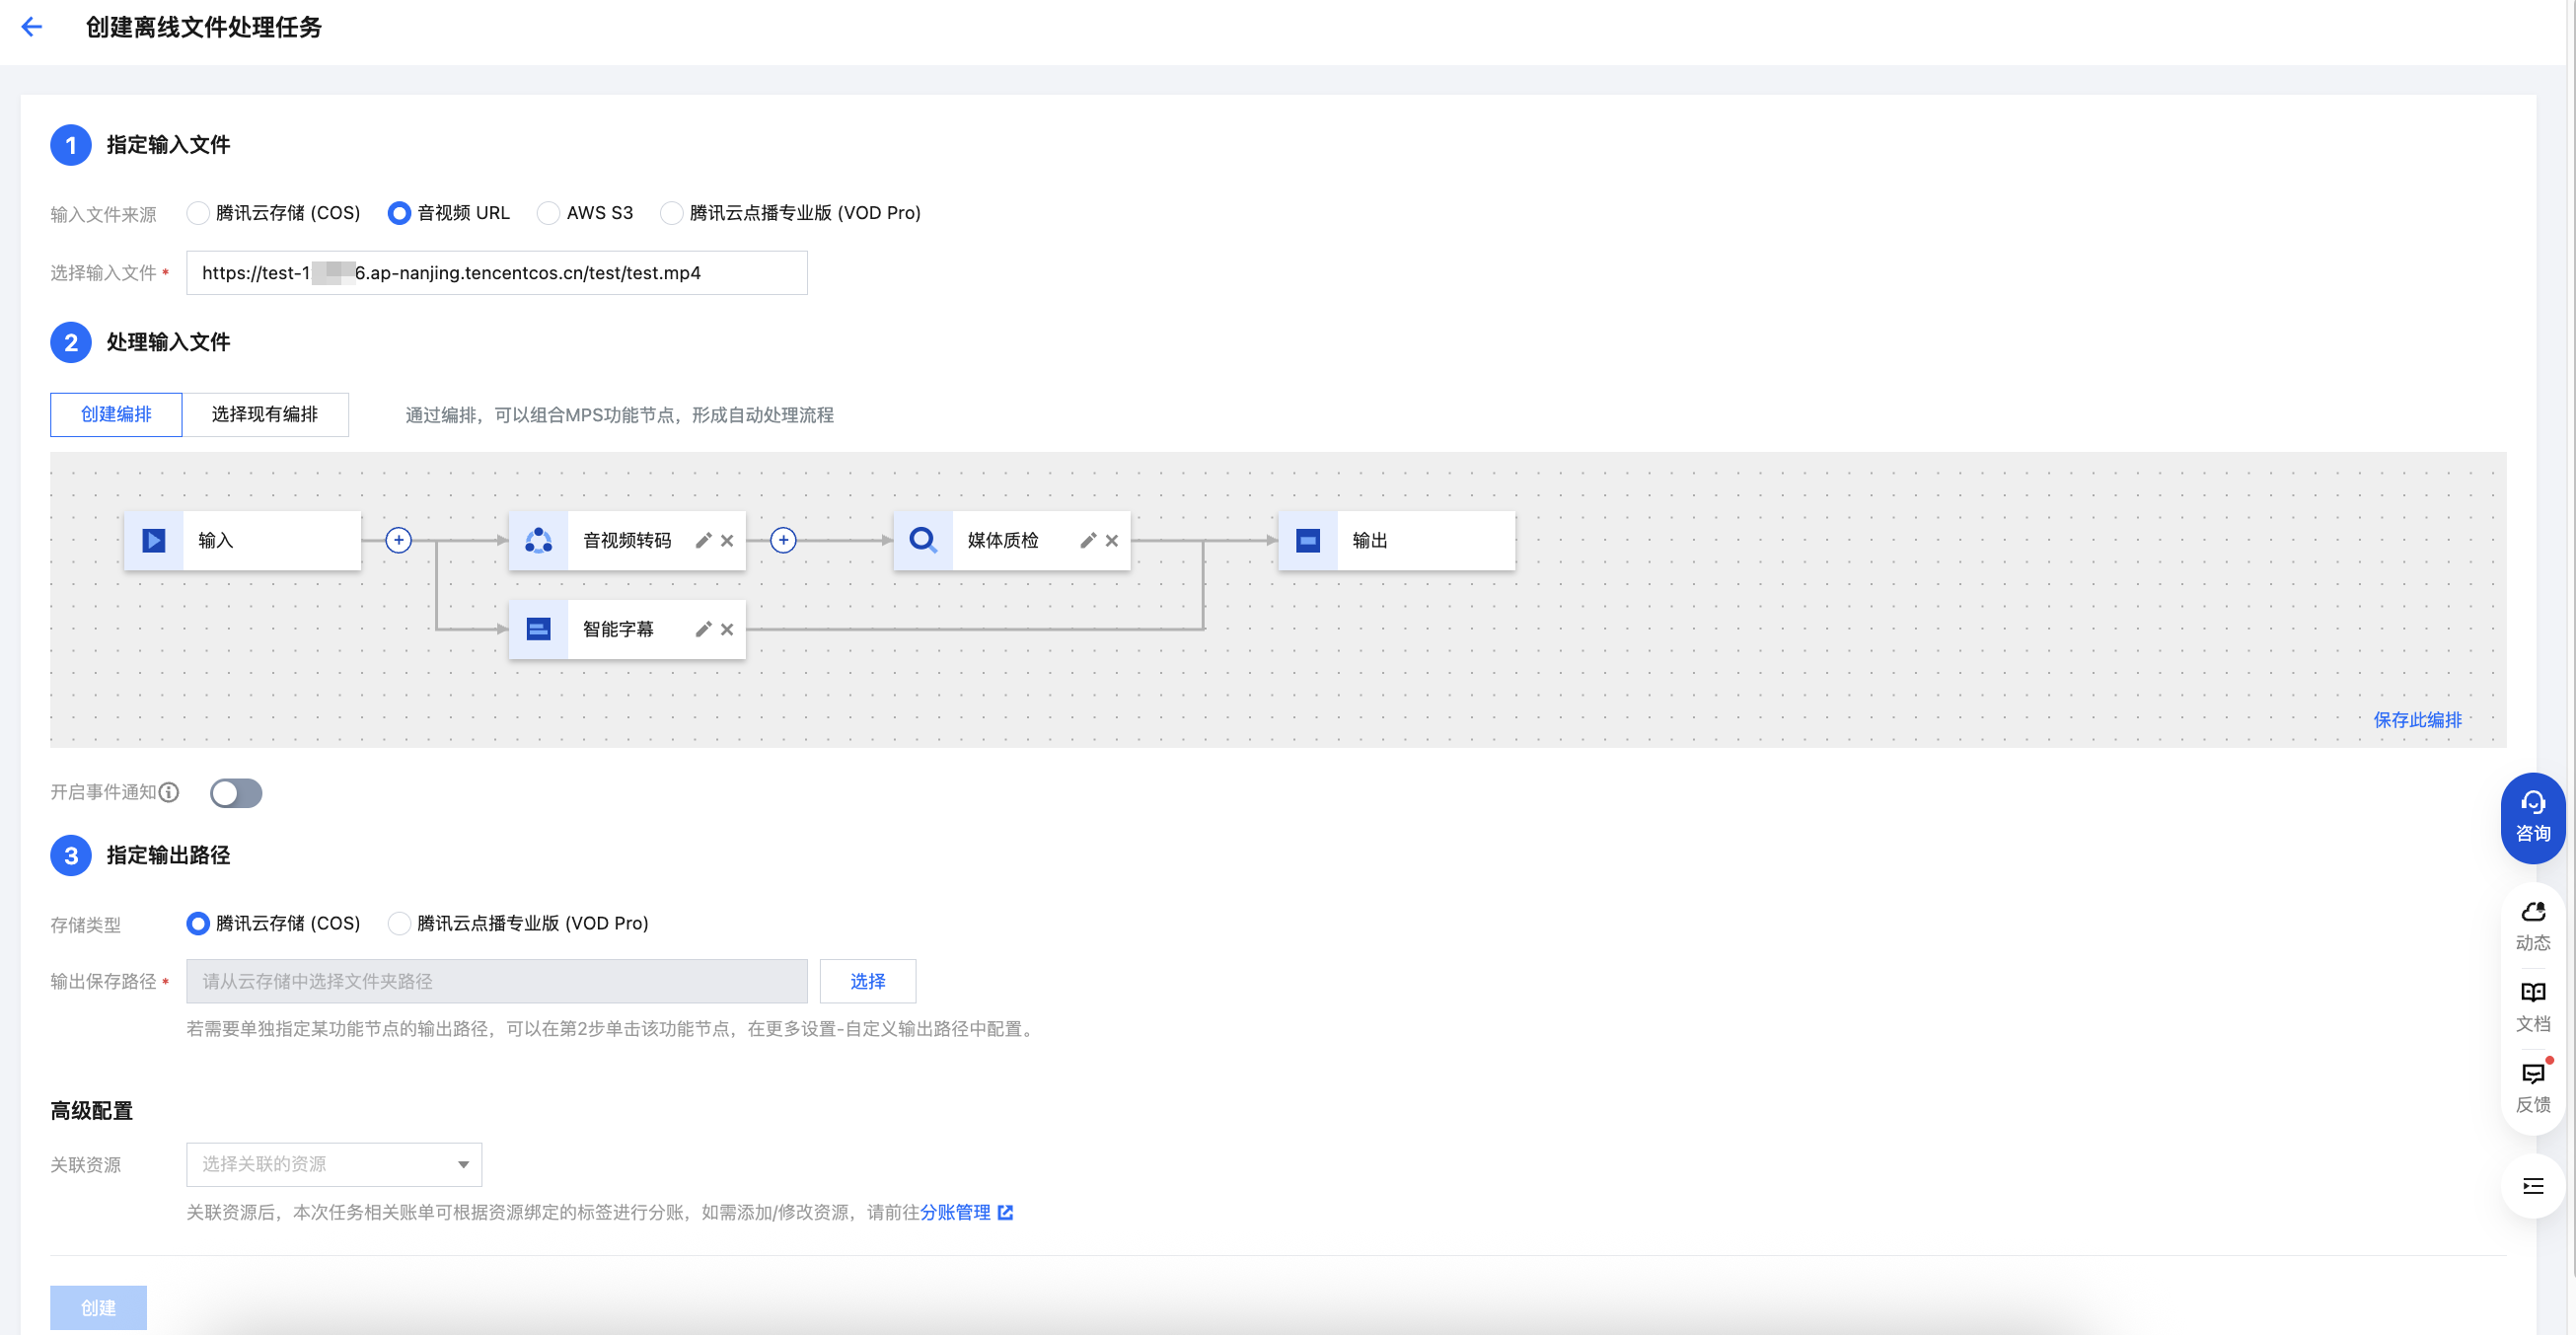
2.1 指定输入文件
指定需要进行媒体处理的文件路径或 URL 地址。
2.2
编
排处理流程通过编排,您可以组合各功能,形成自动处理流程。
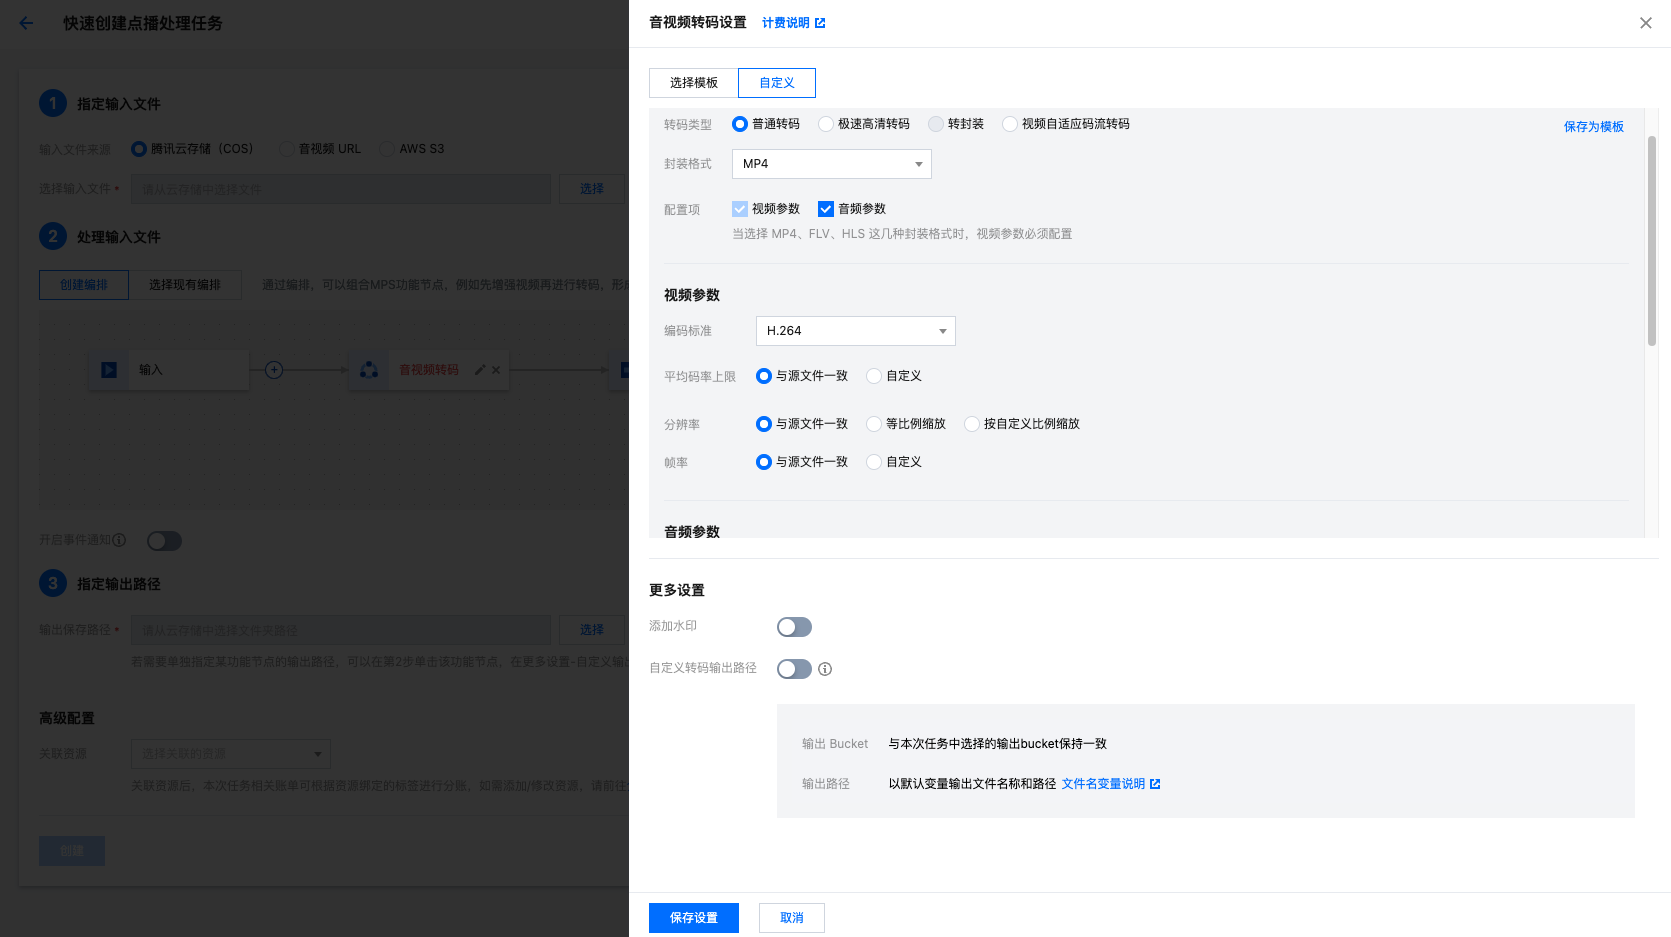
单击可添加功能节点,您可以在打开的抽屉浮层中编辑参数。
选择模板:使用系统预设或之前保存的模板参数。
自定义:自定义参数。
2.3 指定输出路径
指定处理后的输出文件的默认保存路径。
若您需要单独设置编排中某功能节点的输出路径,例如您在编排中添加了转码、增强、截图三个功能而您期望截图的输出文件存储在不同的路径中,可以在 第2步 单击截图节点,在更多设置 > 自定义截图输出路径中配置。您也可以调整不同功能输出文件的命名方式,详细可参见 文件名变量 说明。
方式二:自动触发任务
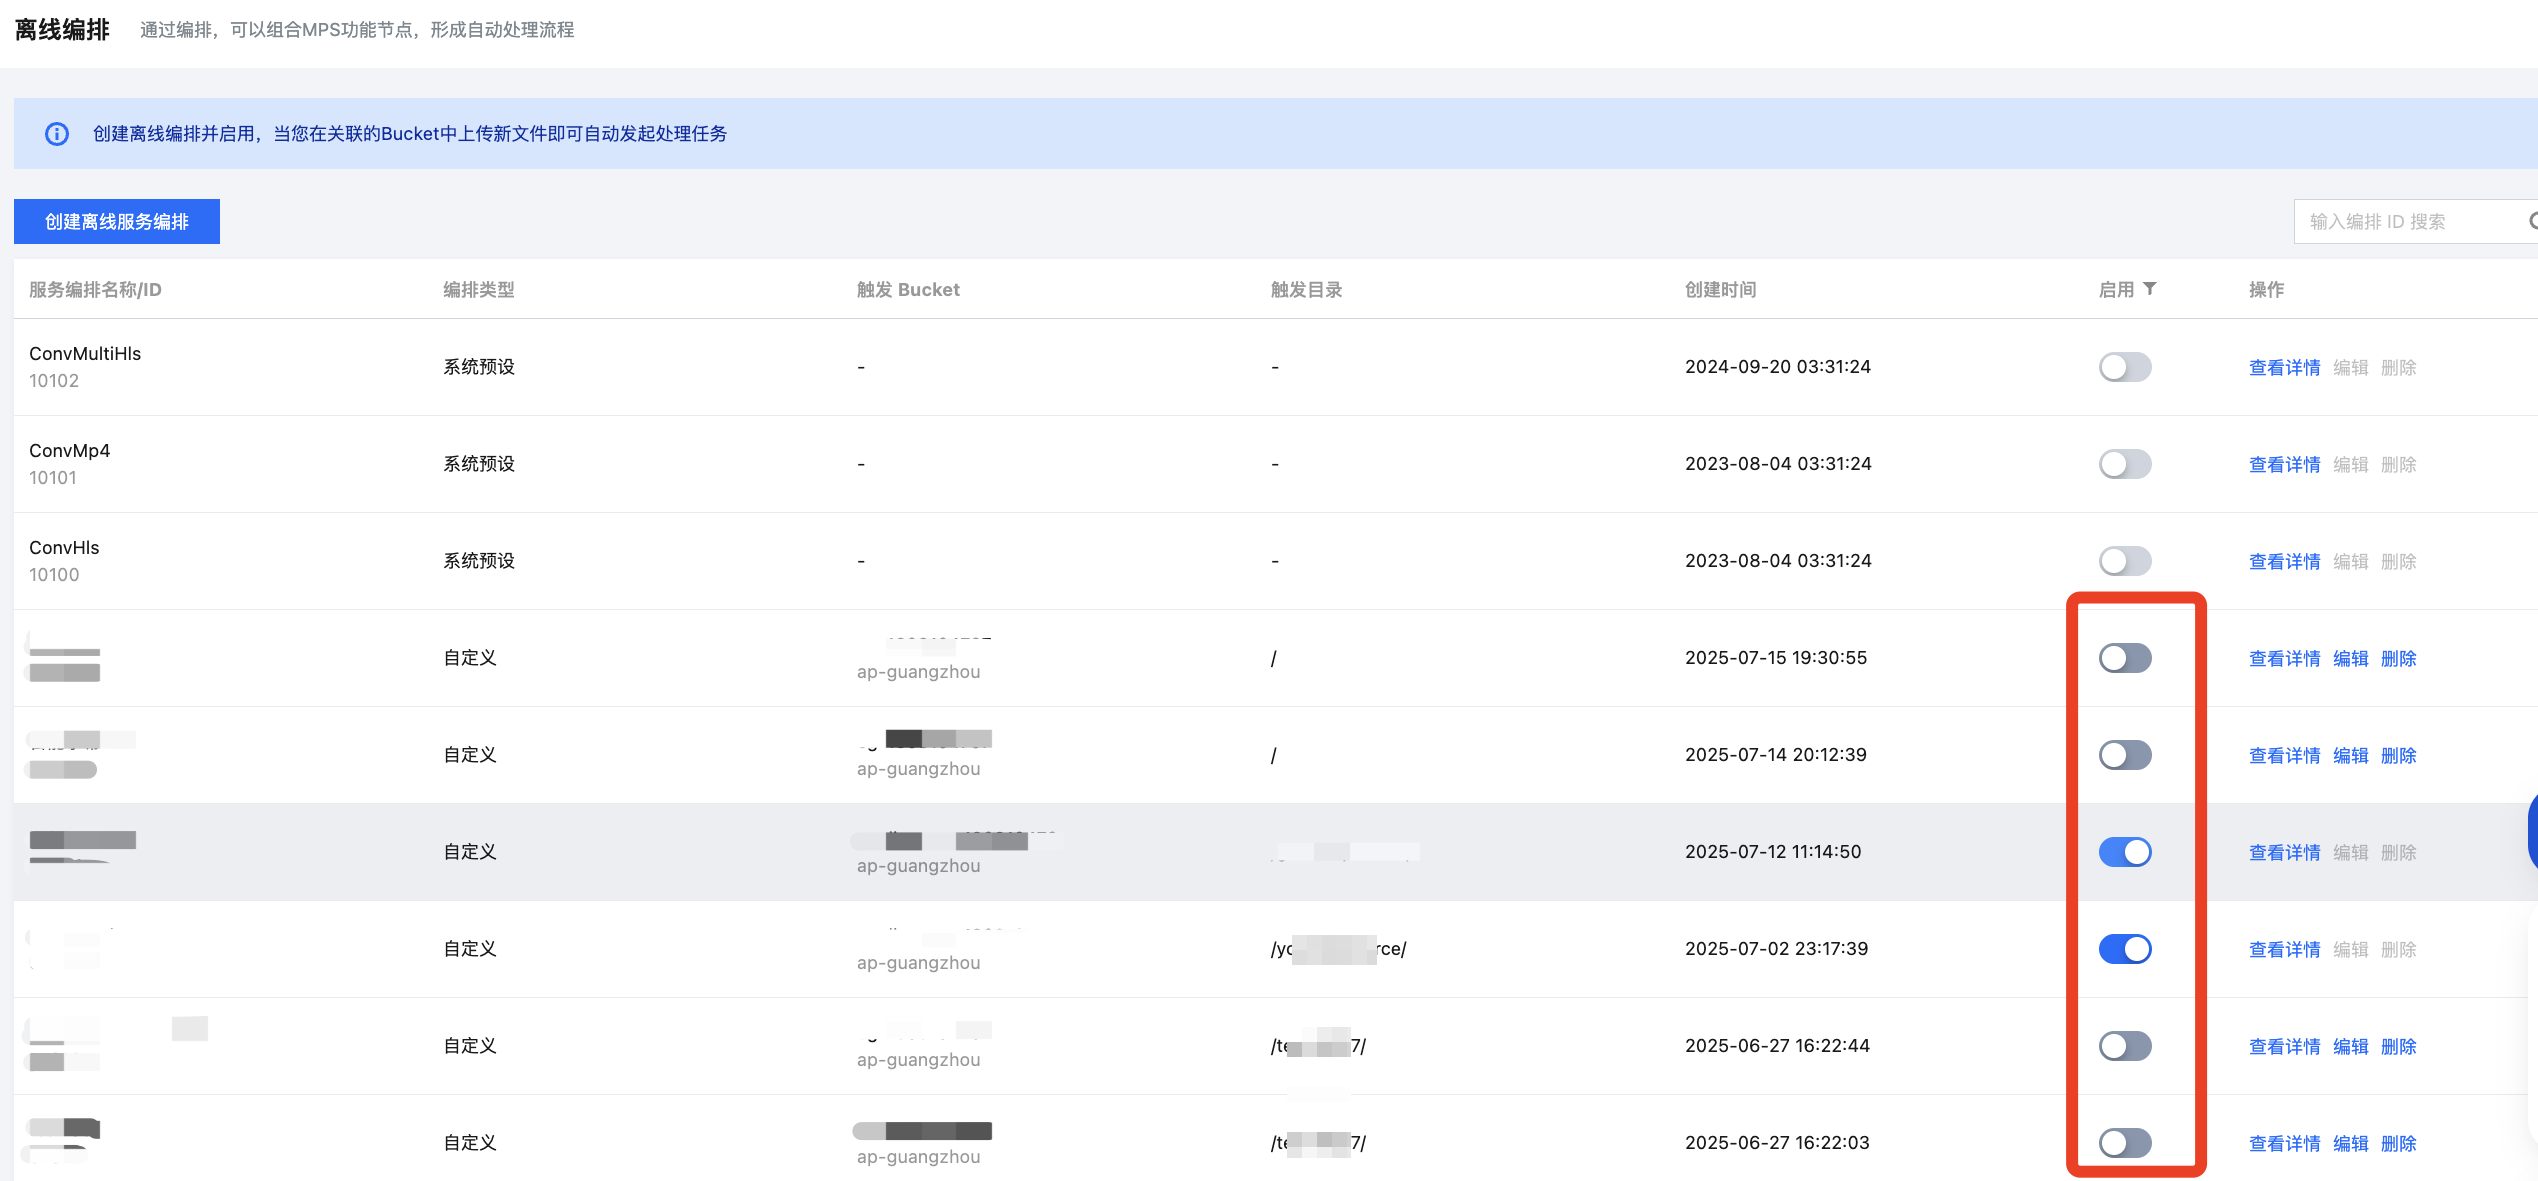
1. 进入 编排管理 > 离线服务编排 页面,单击创建离线服务编排。
2. 配置触发 Bucket 与目录、输出 Bucket 与目录、具体任务流程等。具体配置说明请参见 离线服务编排配置说明。
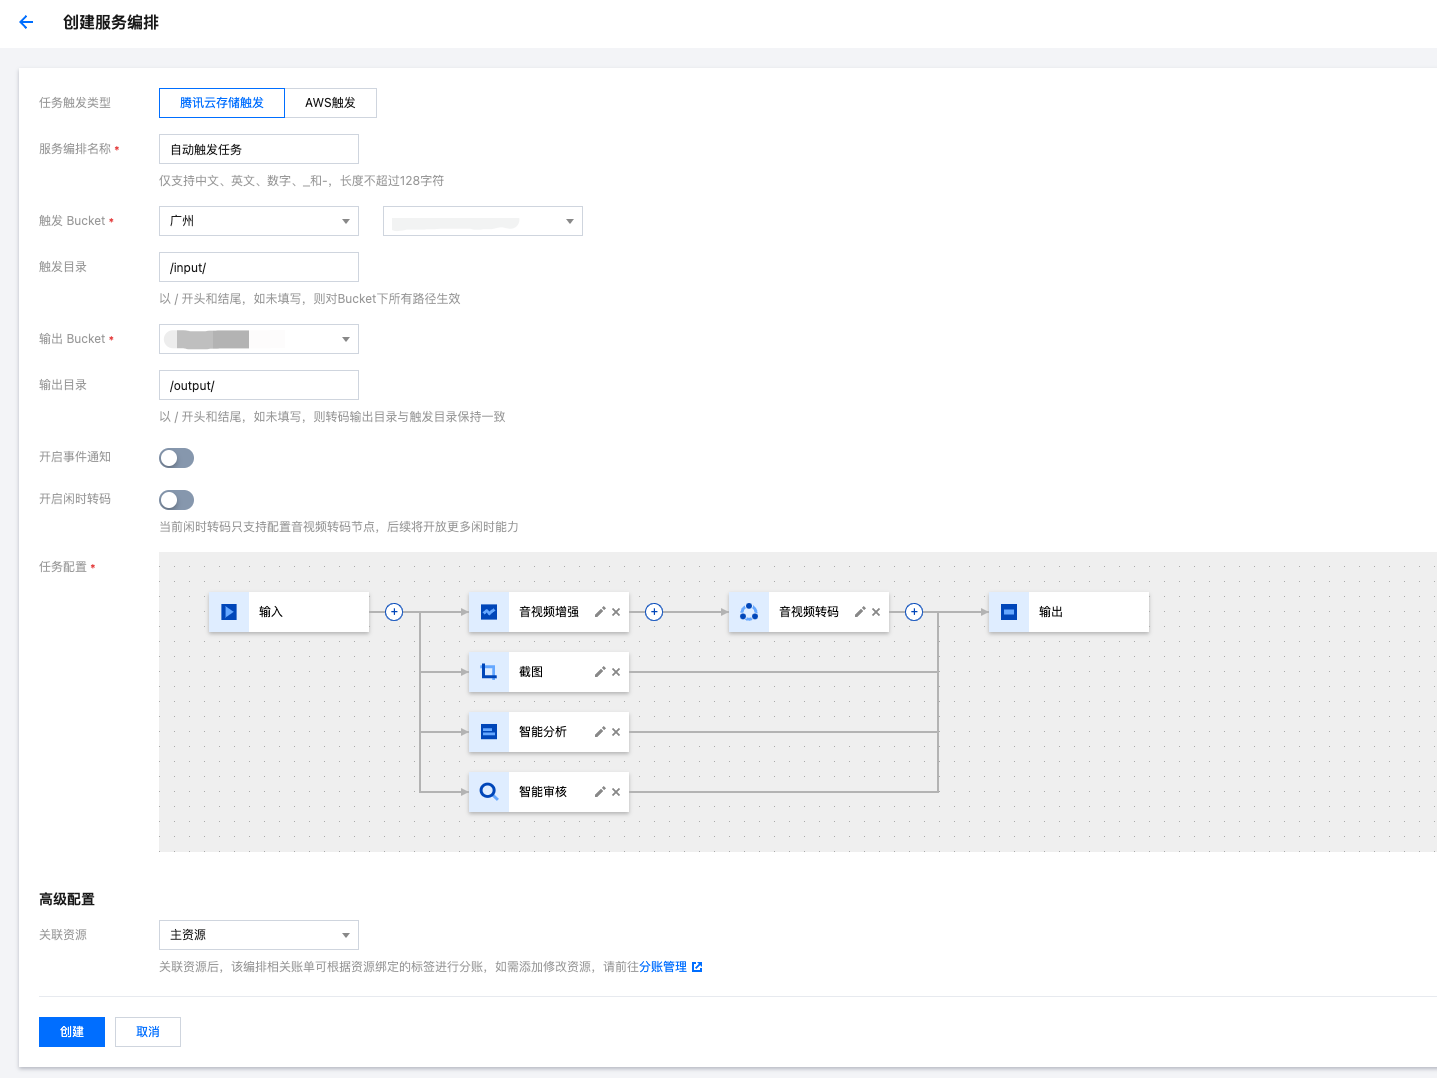
3. 编排默认为未启用自动触发状态。回到编排管理 > 离线服务编排页面,打开启用,即可开启自动触发功能。
4. 在编排设置的触发 Bucket 中上传需要处理的视频文件,将自动按照编排中的任务配置处理新上传的视频,无需手动在控制台创建任务。
说明
编排启用自动触发后,只对新上传至触发 Bucket 的视频文件生效,之前存放在触发 Bucket 中的文件不会被自动处理。
方式三:API 发起任务
步骤二:管理任务
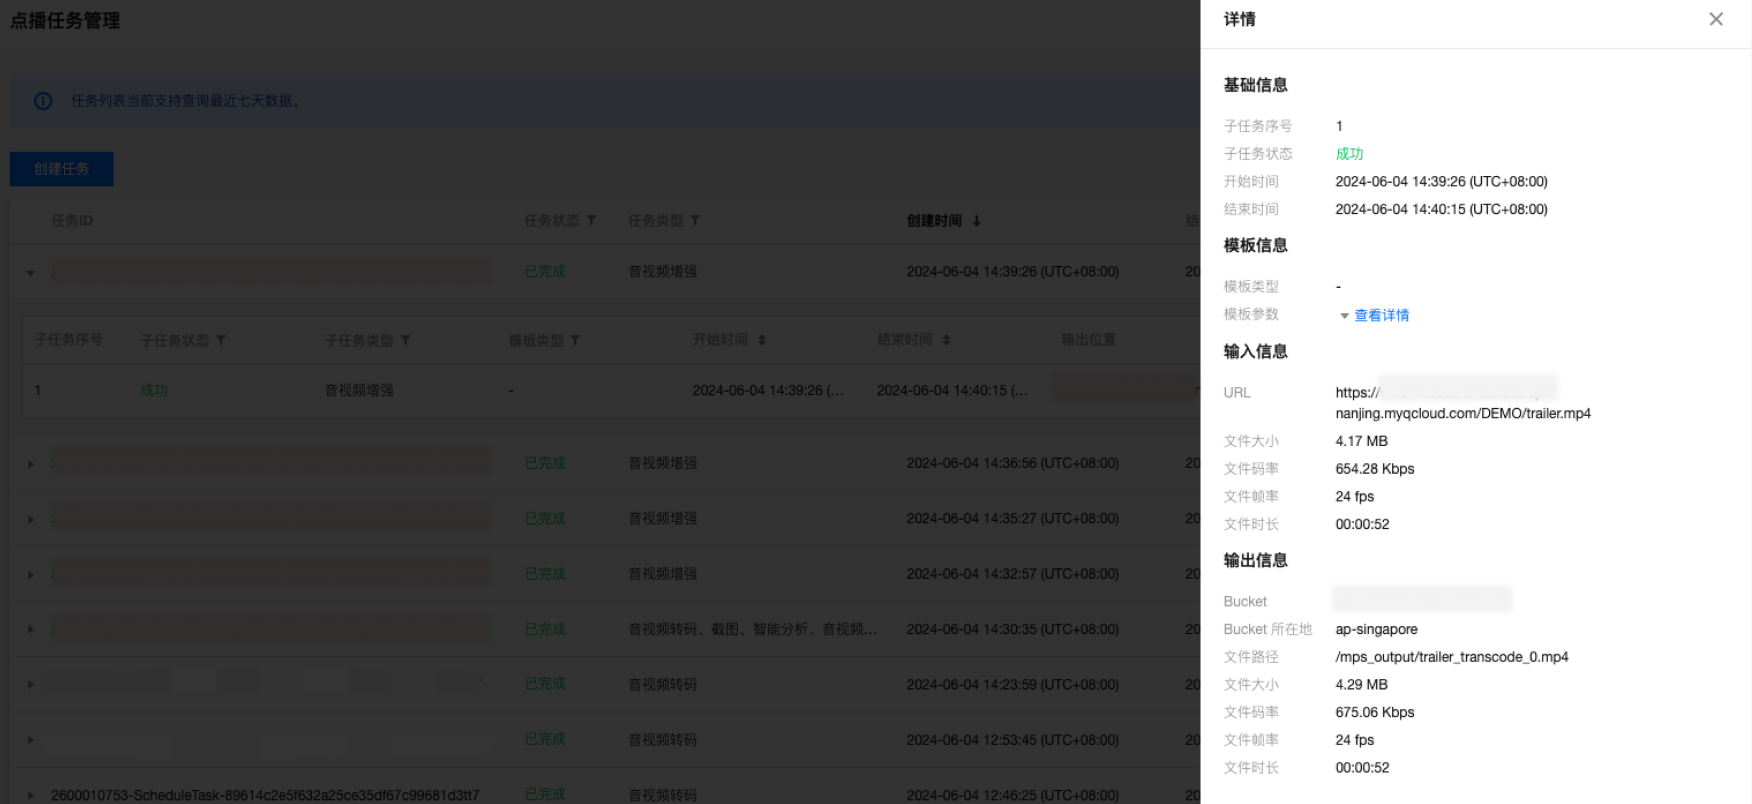
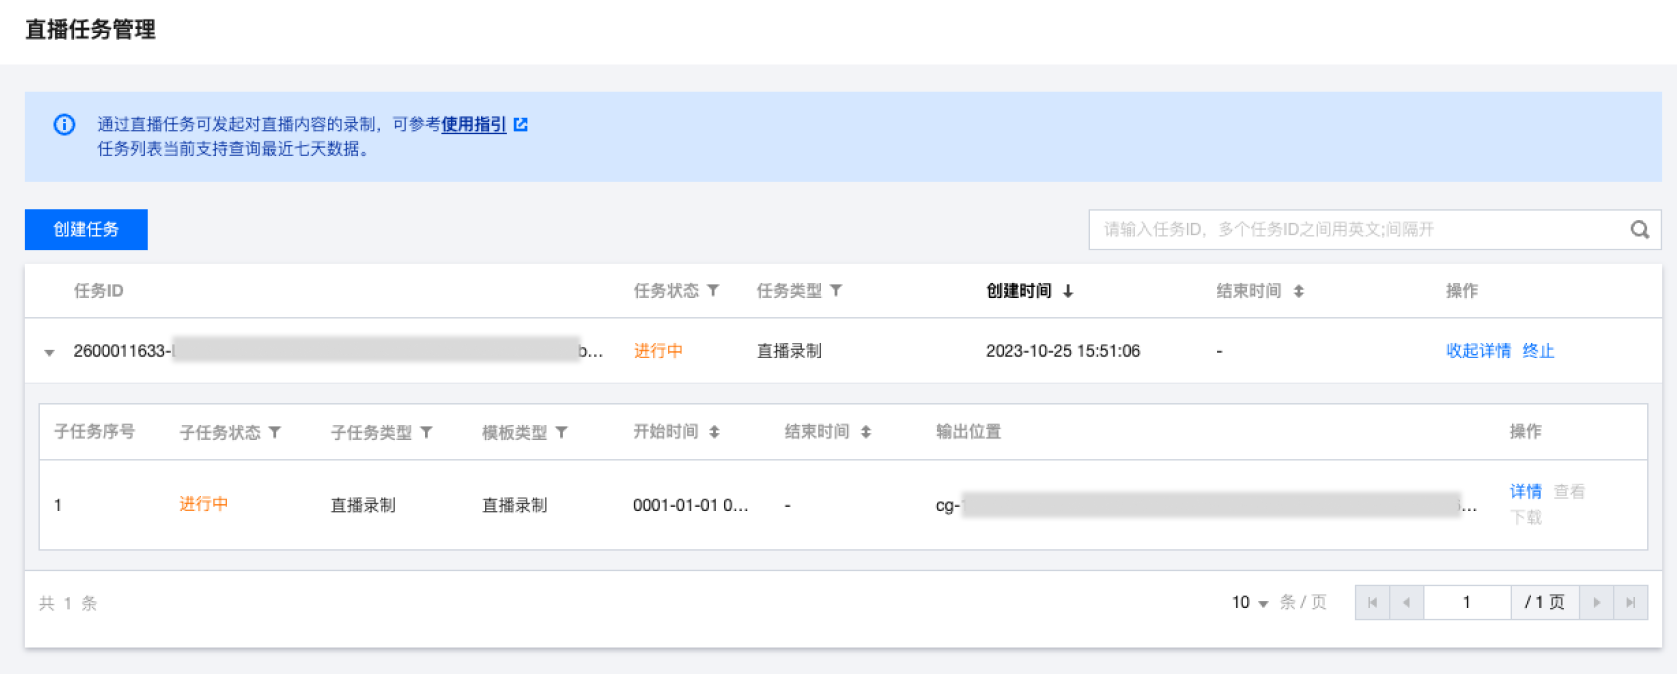
1. 进入 离线任务管理 页面,可以看到您所发起的全部任务的列表。
2. 可以通过任务状态、任务 ID 等筛选需要处理的任务,单击展开详情可以查看子任务信息、同时支持重启排队中的任务、播放源视频等操作。
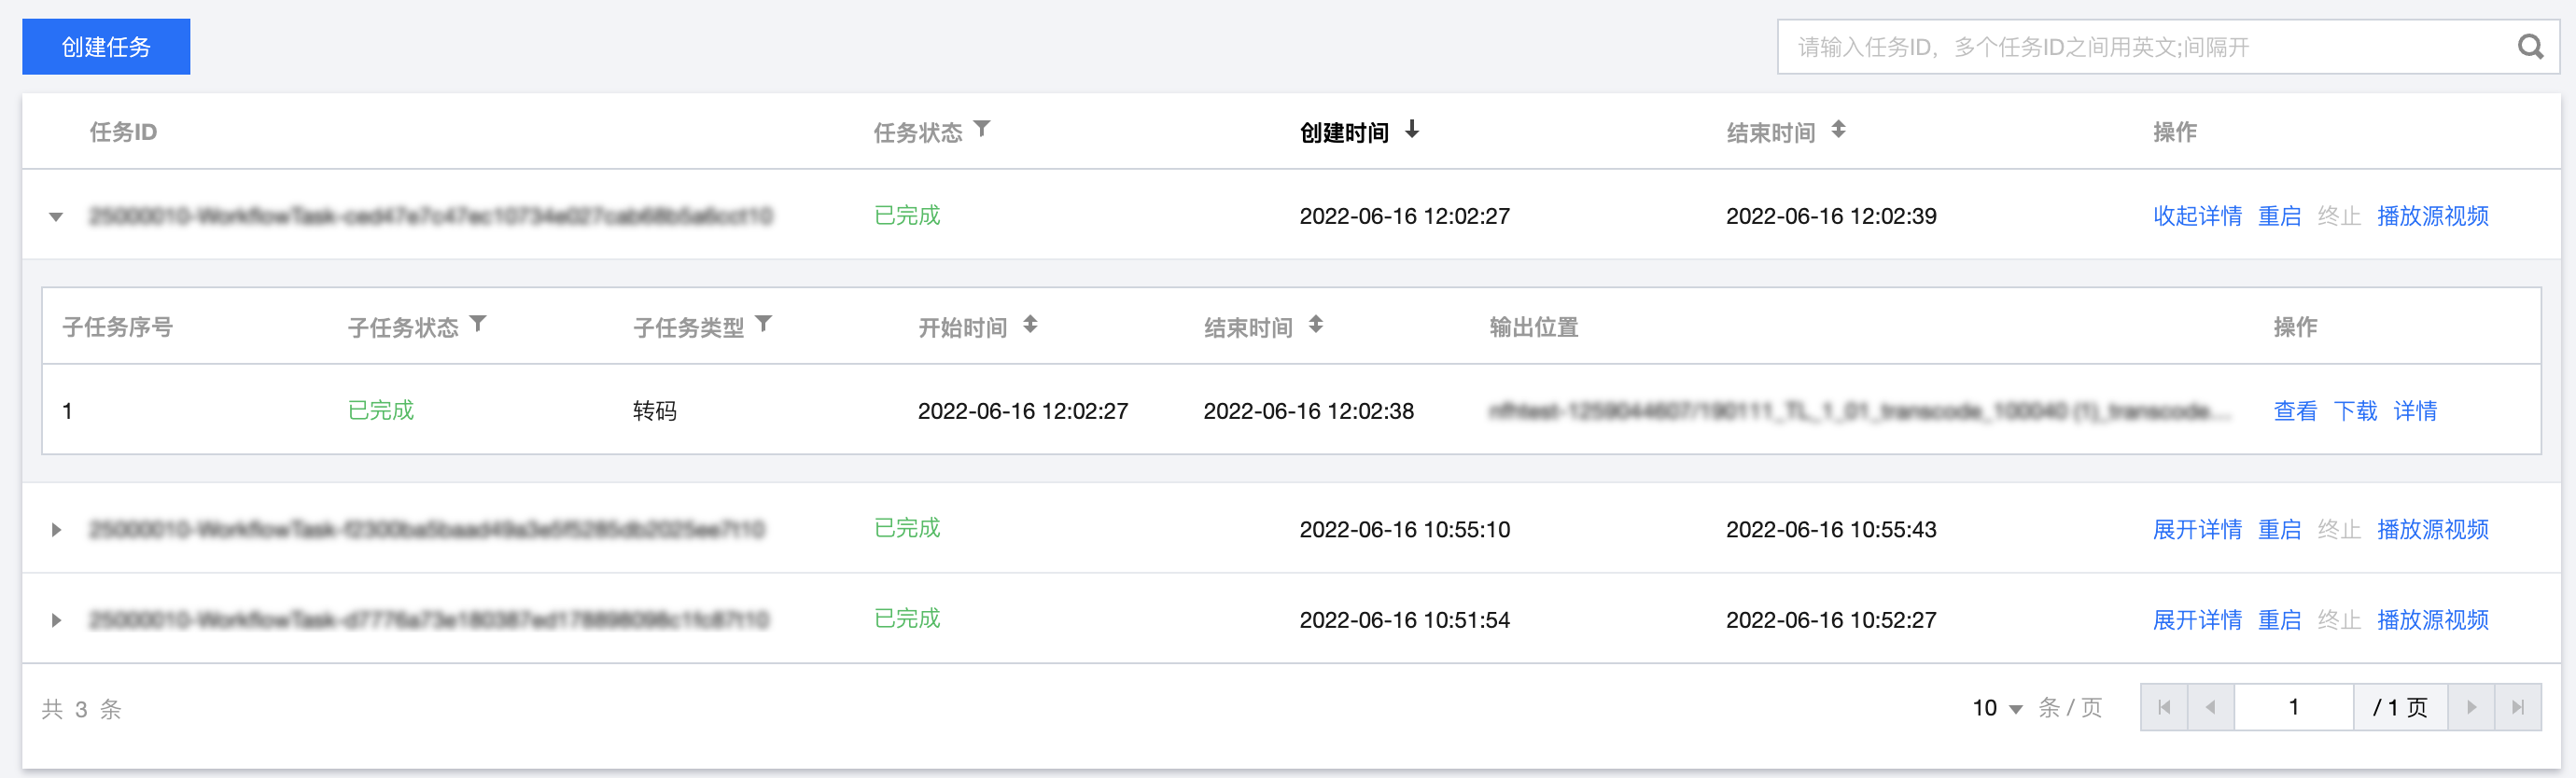
3. 展开子任务列表,可以查看子任务相关信息,支持播放/查看子任务文件、下载子任务输出文件、查看子任务详细信息等操作。
直播媒体处理
步骤一:发起任务
目前支持发起直播媒体处理任务的方式:
控制台快速创建任务:手动在控制台配置并发起处理任务。
API 发起任务:调用 API 接口发起任务。
方式一:控制台快速创建任务
1. 进入控制台创建任务页面,单击快速创建直播处理任务。
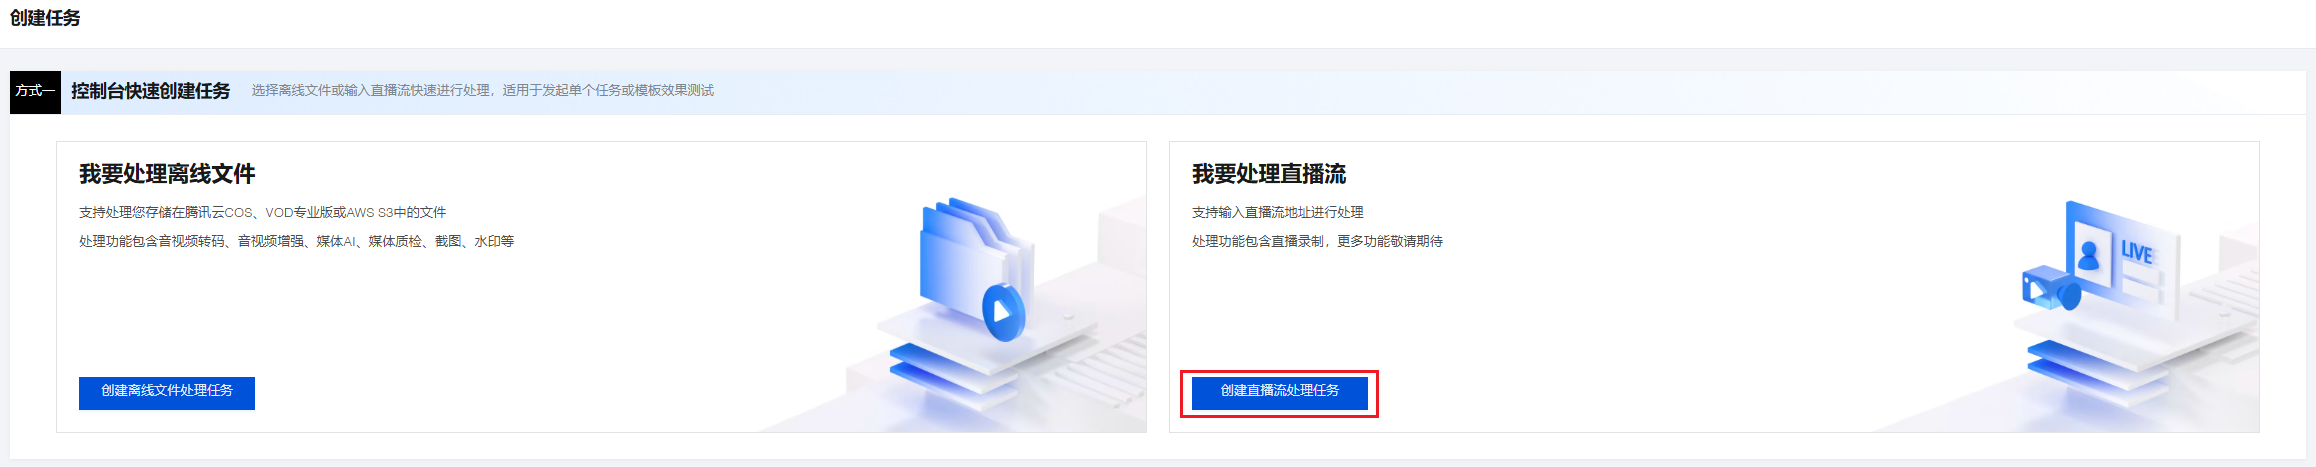
2. 按照页面说明,完成直播流地址、编排、输出保存路径等配置。当前控制台支持对直播流进行实时录制,详细模板配置请参见 直播录制模板 。
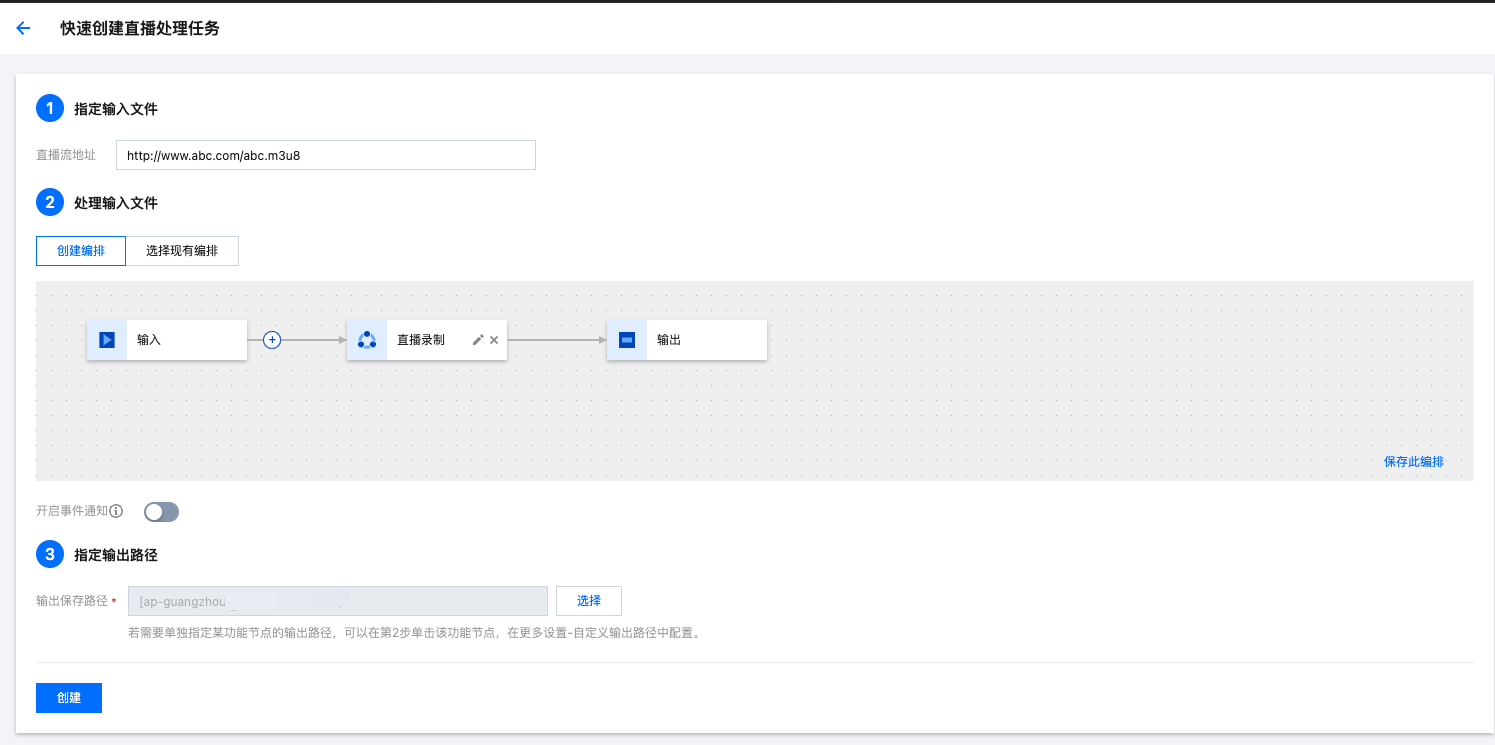
注意:
在创建直播录制任务时,请保证直播流地址填写正确。拉取直播流失败后,会执行3次重试,如仍无法获取直播流,录制任务将会返回失败。
方式二:API 发起任务
智能审核:支持画面鉴黄、敏感信息检测、声音鉴黄。
智能识别:支持识别人脸、物体、文本、语音。语音识别还支持智能翻译、实时转换成字幕。支持游戏打点等功能。
智能分析:支持新闻实时拆条等功能。
媒体质检:支持直播流格式诊断、音画内容检测(抖动、模糊、低光照、过曝、黑白边、黑白屏、花屏、噪点、马赛克、二维码等)、无参考打分等功能。
直播录制。
步骤二:管理任务
各功能接入教程
上文介绍了如何使用 MPS 控制台发起离线媒体处理和直播媒体处理,转码、增强、媒体 AI 等功能均可通过上述步骤体验和使用。为便于接入,各功能的详细接入指引可参见下表:
处理类型 | 支持功能 | 接入教程 | |
离线媒体处理(处理离线音视频文件) | 音视频转码 | | |
音视频增强 | | ||
媒体 AI | 智能字幕 | ||
| 智能擦除 | ||
| 大模型视频摘要 | ||
| 精彩集锦 | ||
| 智能拆条 | ||
| 智能横转竖 | ||
媒体质检 | | ||
直播媒体处理(处理直播流) | 媒体质检 | | |
直播流录制 | | ||
媒体AI | 智能字幕 | ||
| 精彩集锦 | ||
| 智能审核 | ||
| 智能识别 | ||
| 智能分析 | ||
文档反馈