To quickly familiarize you with Tencent Cloud Infrastructure as Code (TIC), this document describes the basic features of TIC:
- Authorizing TIC: you can authorize TIC to orchestrate cloud resources such as CVM, COS, and MySQL.
- Creating a Stack: you can compile stack code and perform operations such as plan and apply to create cloud resources and build the cloud infrastructure.
- Querying Cloud Resources: you can query cloud resources created using TIC.
- Destroying Cloud Resources: you can release cloud resources to return to the initial status.
Note:
TIC is free of charge and you will only be billed for cloud resources (such as CVM and MySQL) created using TIC. You can modify the configuration file based on business requirements to avoid unexpected costs.
Authorizing TIC
When using TIC for the first time, you must authorize the service to orchestrate cloud resources under your Tencent Cloud account. Otherwise, the operations cannot be performed.
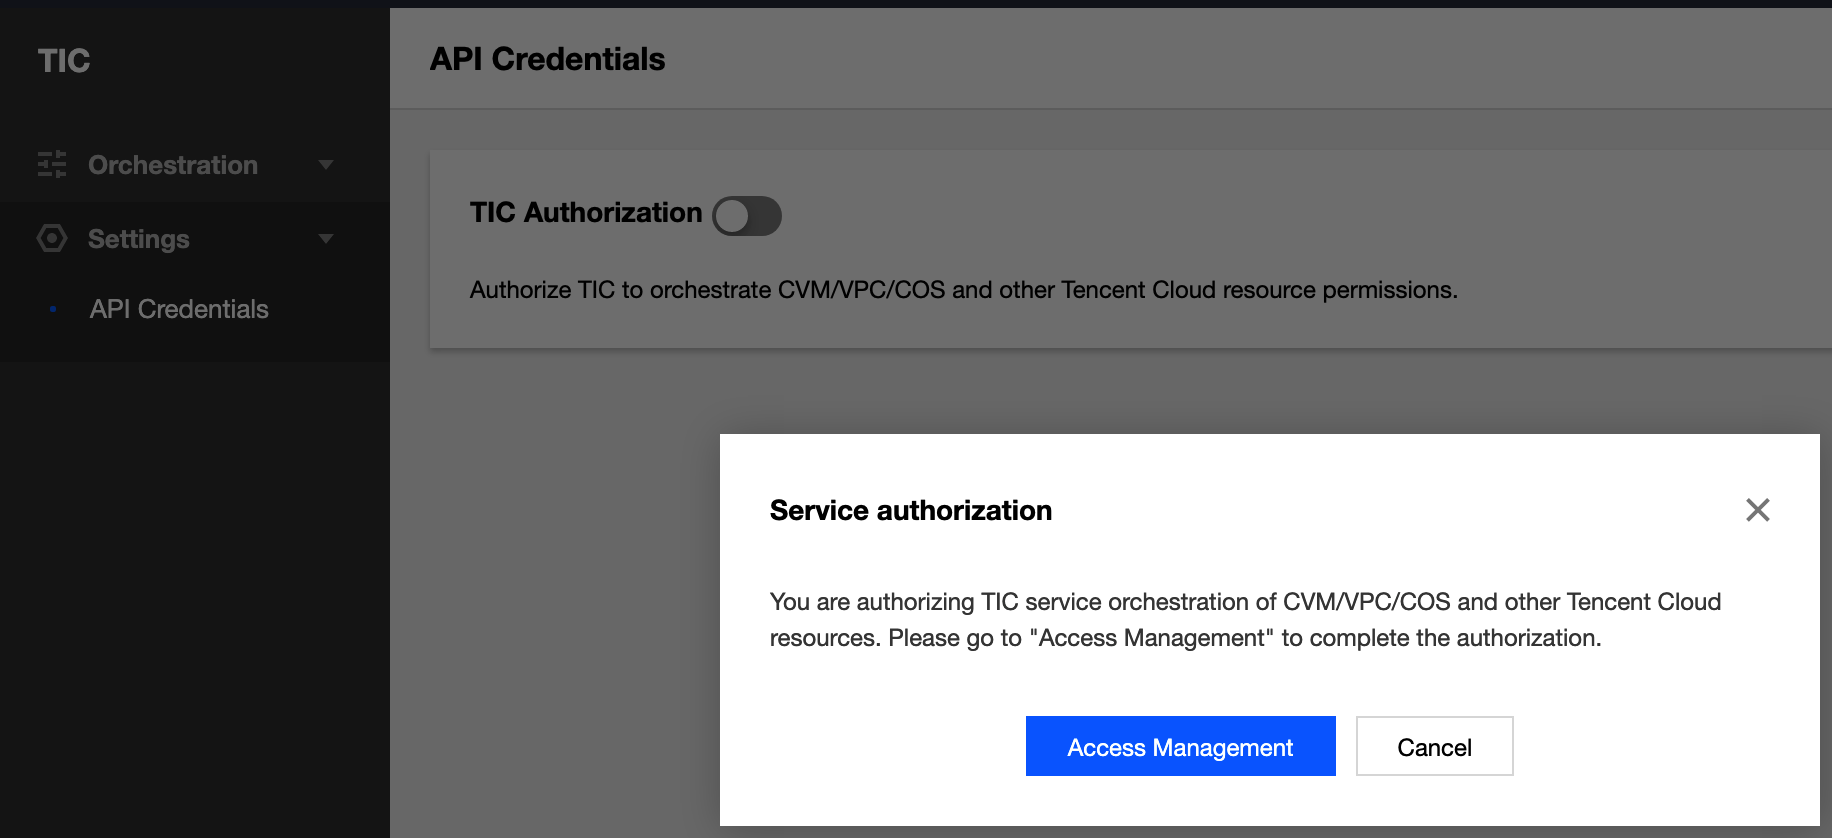
- Log in to the TIC console.
- In the left sidebar, choose Settings -> API Credentials to go to the API Credentials page.
- Click the TIC Authorization switch. In the pop-up dialog box, click Access Management to go to the CAM page.
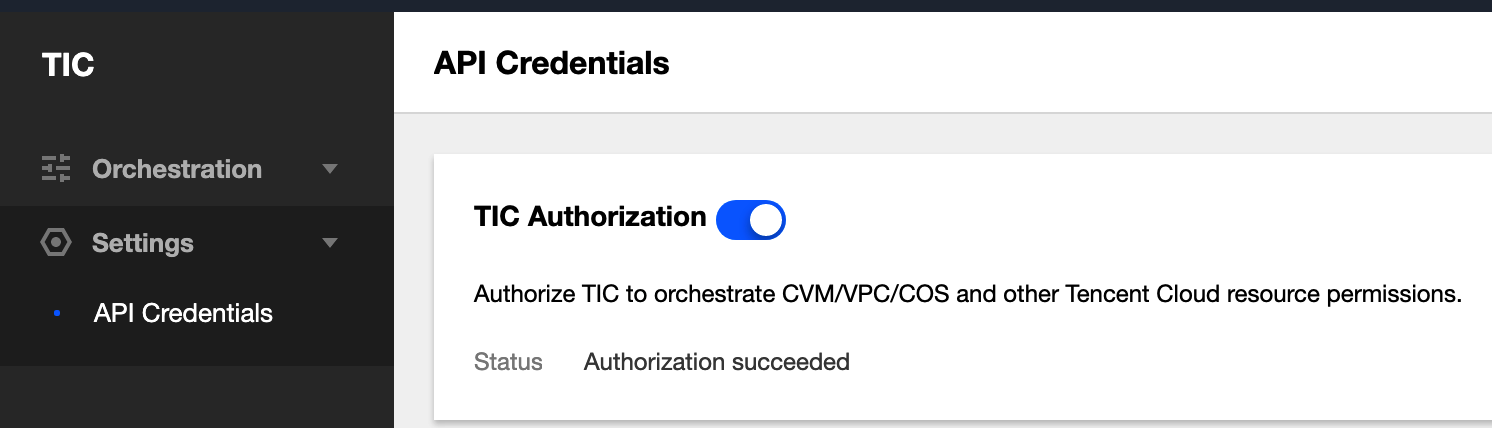
- On the CAM page, click Grant to complete the authorization.
- Go back to the API Credentials page. TIC authorization has now been enabled.
Creating a Stack
Step 1: Select Mode
- In the left sidebar, choose Orchestration -> Stacks to go to the Stacks page.
- Click New stack. On the New Stack page, configure parameters as follows:
- Provider: the default value is Tencent Cloud. Currently, only Tencent Cloud is supported.
- Region: select a region where all resources in the stack will reside. To facilitate testing, select Chengdu. You can also select another region for testing.
- In Specify Template, specify how you want to create the stack.
- URL: only Tencent Cloud COS and GitHub are supported. Only one file can be obtained at a time.
- Private templates: select a private template. For more information, see Template Management
- Public templates: select a public template. For more information, see Template Management.
- Enter template content: enter the infrastructure code. Multi-file compiling is supported.
In this example, Enter template content is selected to configure a new stack from scratch.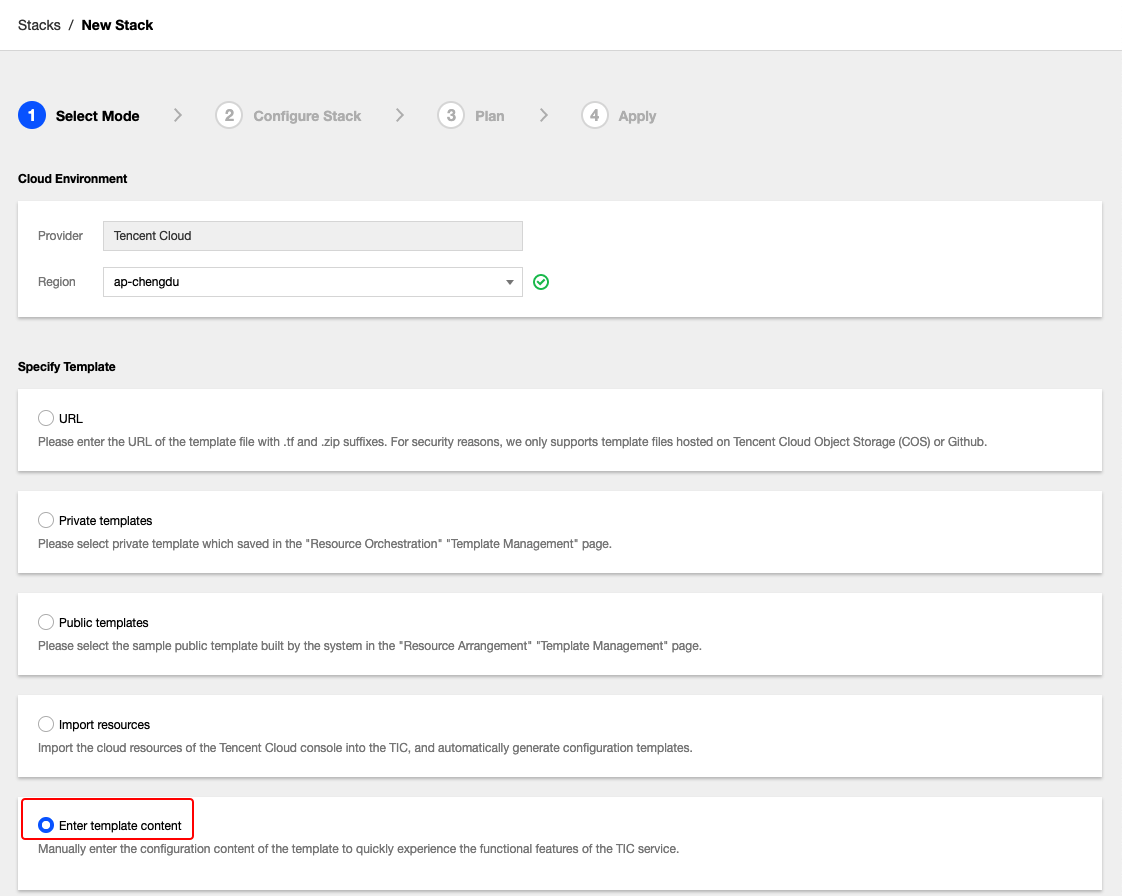
- Click Next to go to Step 2.
Step 2: Configure Stack
TIC parameter configuration is compatible with Terraform's HCL syntax. For more information about HCL syntax, see Terraform Configuration Language.
Create resource parameter configuration files. To be consistent with the current network environment, we created two CVMs, one VPC, one subnet, one route table, one security group, and one TencentDB for MySQL instance. The corresponding configuration files are
cvm.tf,vpc.tf,subnet.tf,route_table.tf,security_group.tf, andmysql.tf. The file structure is as follows: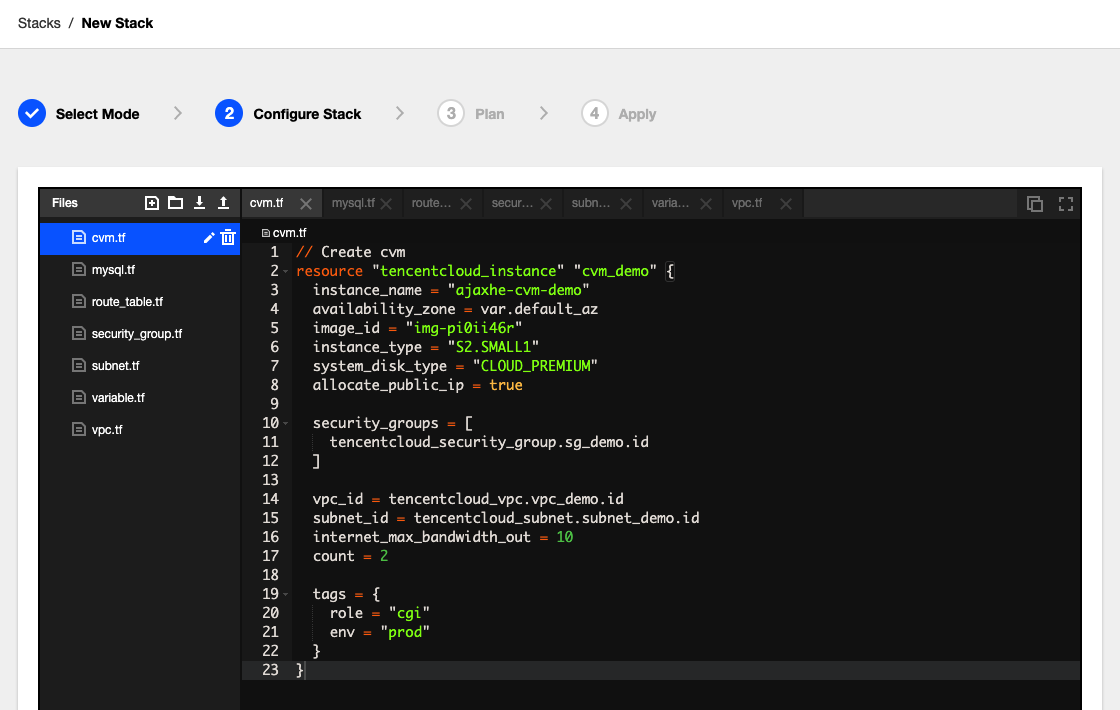
For the template to be used universally, we created
variable.tfthat defines two variables: the default regionap-chengduand the default availability zoneap-chengdu-1. Note that the region name must be the same as that selected in Step 1.// variable.tf variable "default_region" { type = string default = "ap-chengdu" } variable "default_az" { type = string default = "ap-chengdu-1" }The variables defined in
variable.tfwill be referenced by other.tffiles. Thecvm.tffile is used as an example to describe the syntax. To obtain the complete content of the.tfconfiguration file, download tic-demo-config.zip.// Create cvm resource "tencentcloud_instance" "cvm_demo" { instance_name = "ajaxhe-cvm-demo" availability_zone = var.default_az image_id = "img-pi0ii46r" instance_type = "S2.SMALL1" system_disk_type = "CLOUD_PREMIUM" allocate_public_ip = true security_groups = [ tencentcloud_security_group.sg_demo.id ] vpc_id = tencentcloud_vpc.vpc_demo.id subnet_id = tencentcloud_subnet.subnet_demo.id count = 2 tags = { role = "cgi" env = "prod" } }
resource "tencentcloud_instance": cloud resources currently created are CVM instances. For more information about cloud resources, see Resource Types.
- cvm_demo: local resource name, which is used for cross-cloud referencing.
- instance_name: name of the CVM instance.
- availability_zone: availability zone of the CVM instance. The default_az variable defined in the variable.tf file is referenced.
- image_id: ID of the CVM image. The value "img-pi0ii46r" indicates Ubuntu Server 18.04.1 LTS (64-bit). You can obtain the image ID from the Image page in the Tencent Cloud Console.
- instance_type: instance type.
system_disk_type: system disk type. CLOUD_PREMIUM indicates premium cloud storage. For more information, see the DiskType description in CreateDisks.
- allocate_public_ip: whether to configure a public IP address. To configure a public IP address, configure the value to true.
- security_groups: list of security groups associated with the CVM instance. The tencentcloud_security_group.sg_demo.id indicates that the CVM instance is associated with the security group defined in security_group.tf.
- vpc_id: VPC associated with the CVM instance. The tencentcloud_vpc.vpc_demo.id indicates that the CVM is associated with the VPC defined in vpc.tf.
- count: reserved field. The value 2 indicates two CVM instances with above configurations will be created.
- tags: used to classify CVM instances.
Step 3: Plan
After compiling configuration files, click Next to go to the Plan step. In this step, TIC verifies the configuration syntax and preprocesses resource change operations.
According to the result of the plan operation as shown in the following figure, 8 cloud resources will be created, and no resource will be changed or destroyed.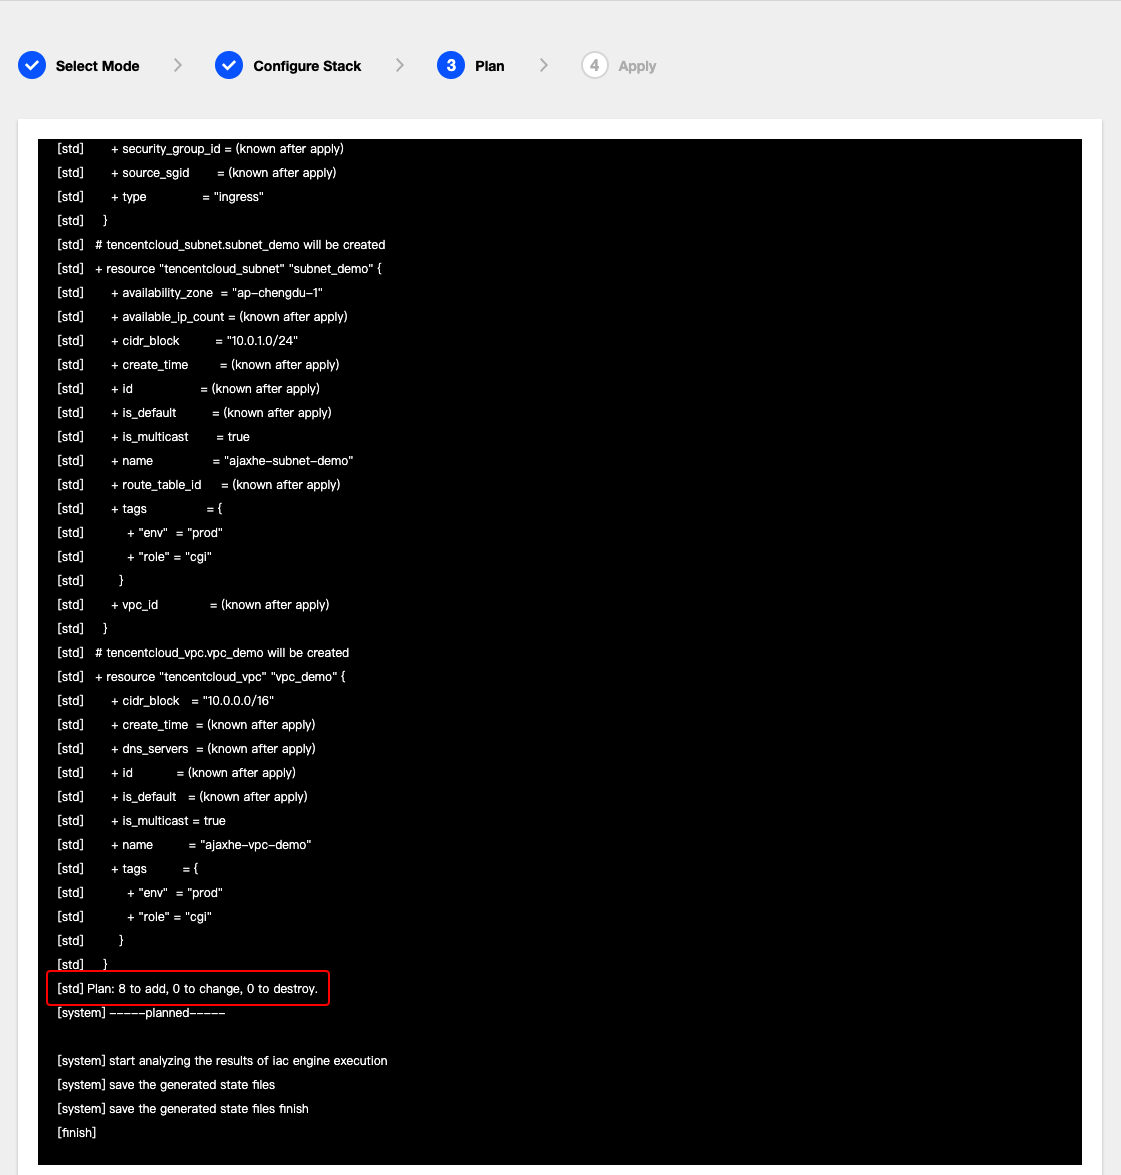
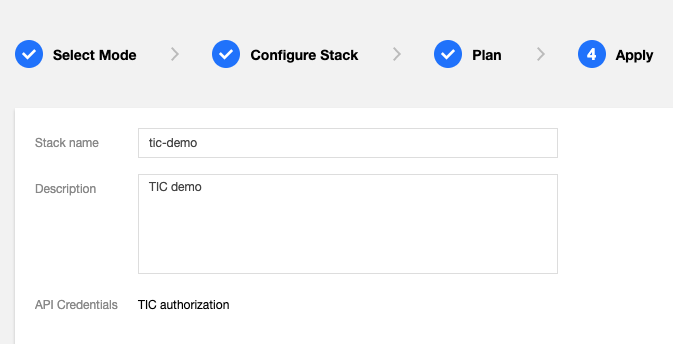
Step 4: Apply
If the result meets your requirements, perform the following operations:
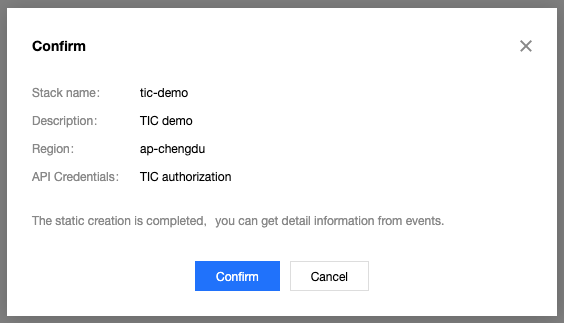
- Click Next, enter the stack name and description, and click Confirm.
- In the pop-up confirmation box, click Confirm.
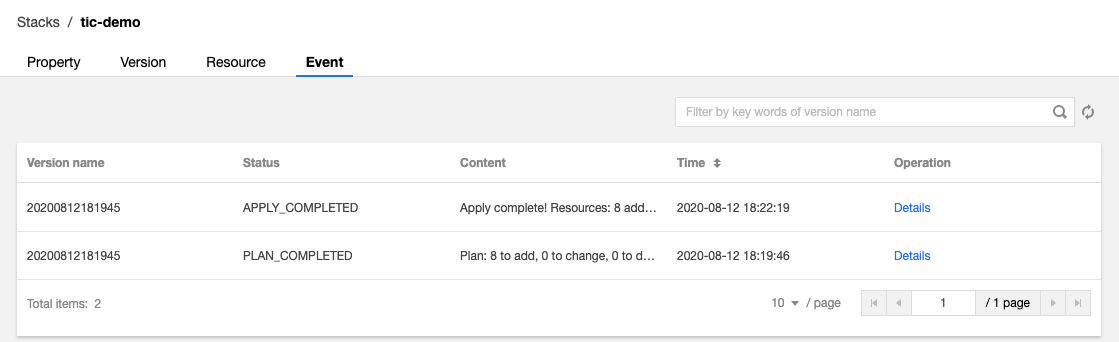
- TIC will perform the apply operation to create cloud resources. You will be redirected to the Stacks -> Event page. The APPLY_IN_PROGRESS status indicates cloud resources are being created. The creation process takes several minutes.
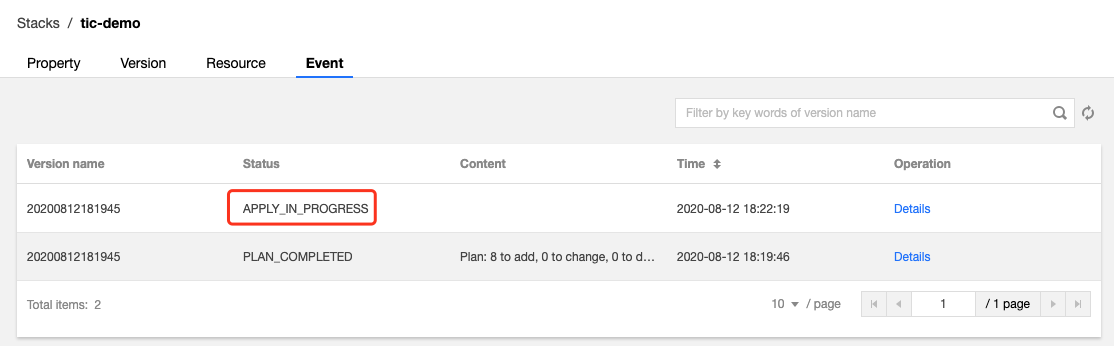
- Click the refresh icon in the upper-right corner of the Event page. When the status becomes APPLY_COMPLETED, cloud resources are created successfully.
Viewing Cloud Resources
- On the Stacks page, locate the newly created stack and click on its ID/Name to go to the details page.
- Click the Resource tab to view cloud resources managed by TIC.
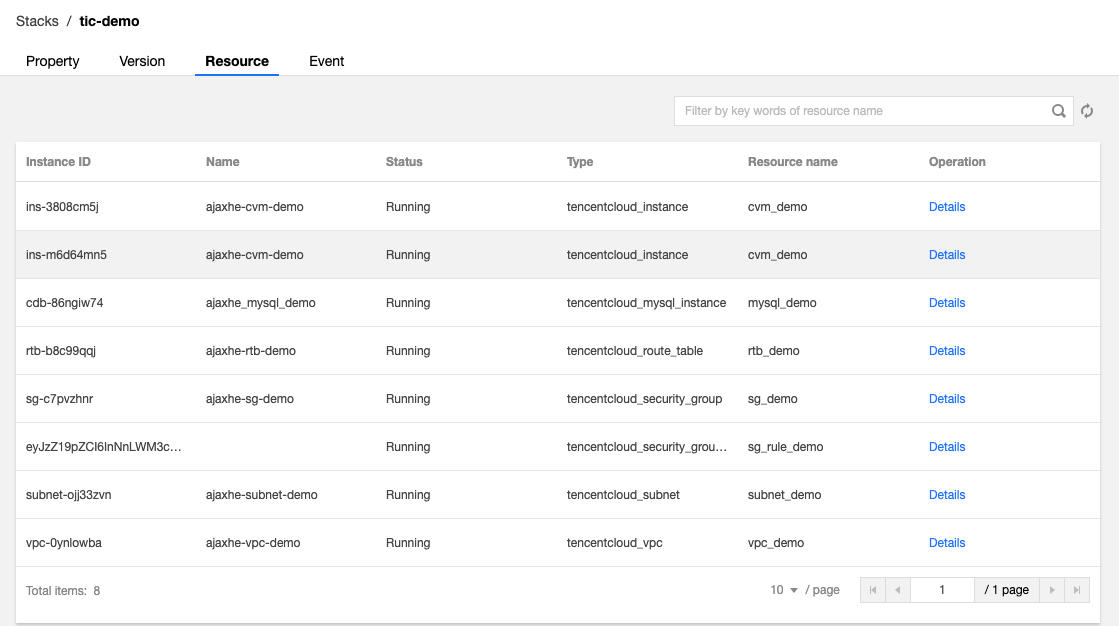
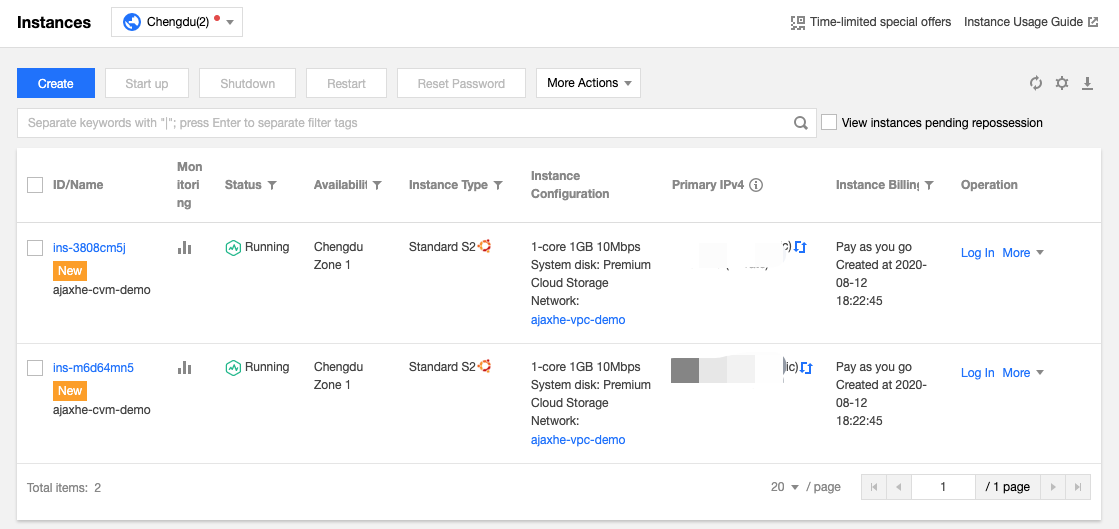
- The Resource page only displays key fields of cloud resources. To query resource details, go to the corresponding Tencent Cloud service console. For example, you can log in to the CVM console to view the two CVM instances created using TIC.
Destroying Cloud Resources
TIC is free of charge but you will be billed for cloud resources created using TIC. To avoid costs incurred by idle resources, promptly destroy resources used only for testing purposes.
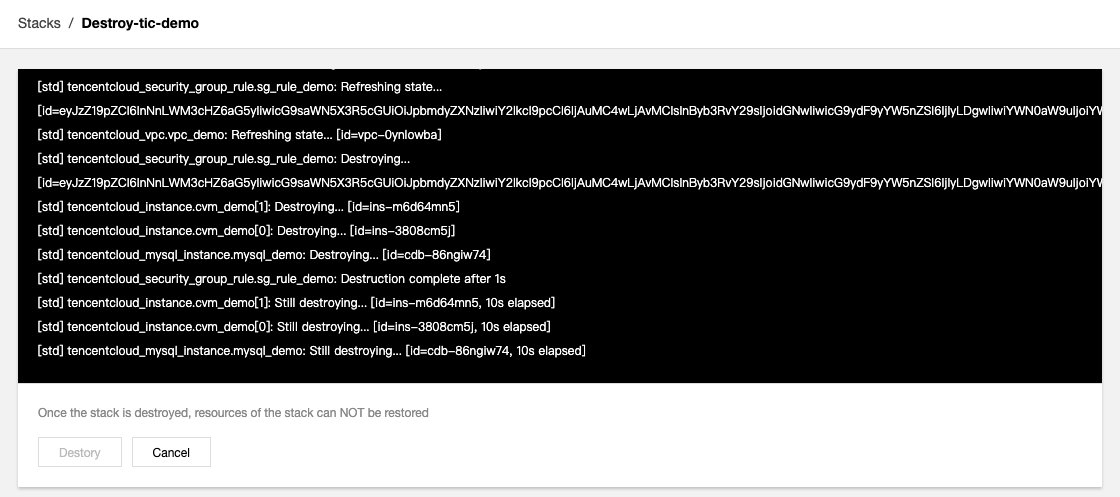
- Go to the Stacks page, locate the stack to be destroyed and click Destroy.

- Before the stack is destroyed, information about cloud resources to be destroyed is displayed. Once the stack is destroyed, cloud resources in the stack cannot be recovered.
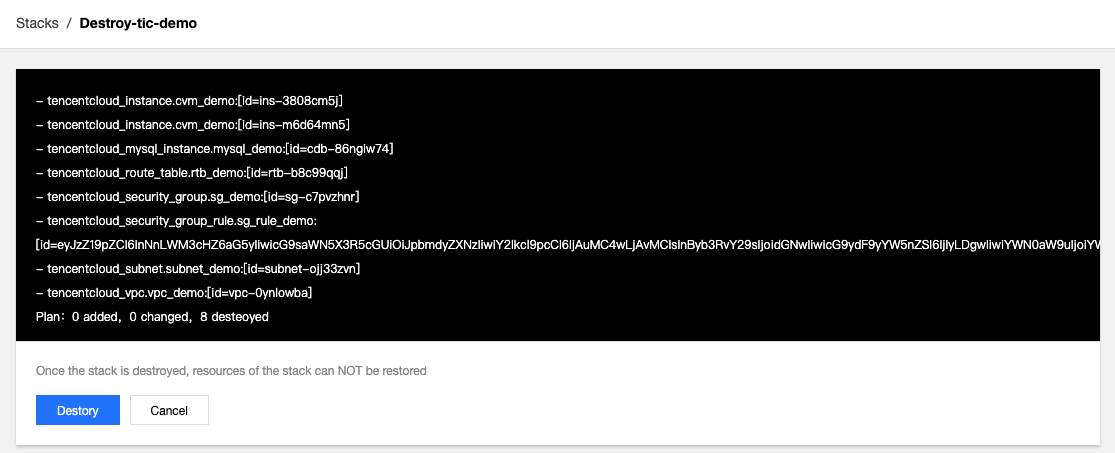
- Click Destroy. In the pop-up confirmation box, click Confirm. TIC will then destroy cloud resources. The process is as shown in the following figure:
- Wait several minutes until all cloud resources are destroyed.
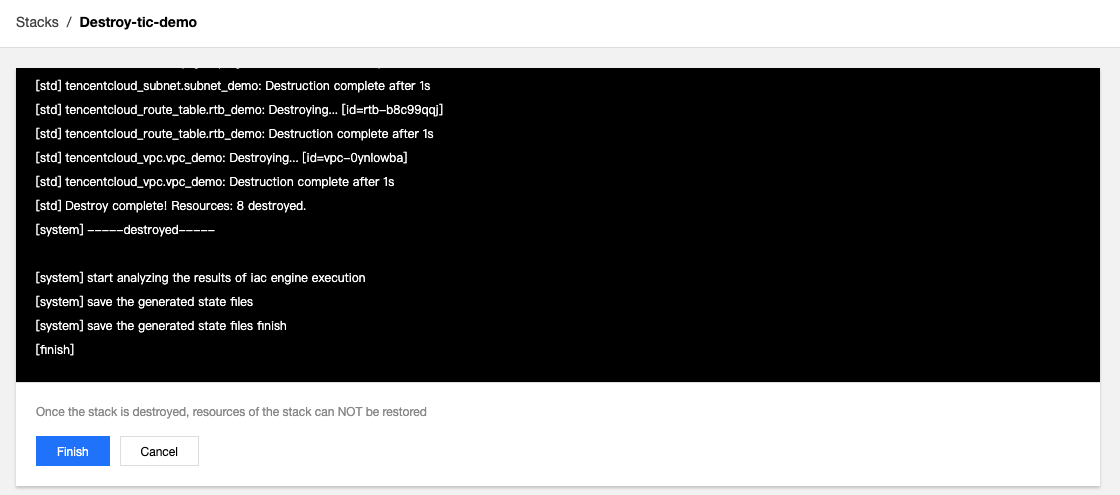
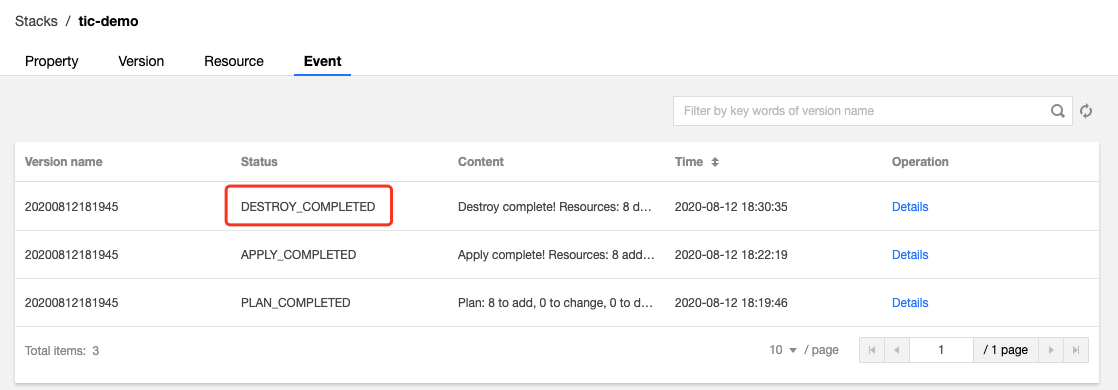
- Click Finish to return to the stack list page. The status of the stack has become DESTROY_COMPLETED.

 Yes
Yes
 No
No
Was this page helpful?