Images stored in a bucket can be processed and recognized by CI and downloaded through the CI domain name.
You can access the images stored in a bucket at the following addresses:
System-assigned domain name
CDN acceleration domain name
Custom domain name
Note:
Some users' CI domain names have been merged with COS domain names. If this is the case for your account, you can directly use the COS domain name to process images, and the Domain Management configuration page will not be present in the CI Console. In this case, you can log in to the COS Console, find the target bucket, and configure the domain name for it. For more information, please see Overview.
System-Assigned Domain Name
This domain name is defined by Tencent Cloud and cannot be changed. If you use it in a Tencent Cloud service to access an image resource, the request will be sent and received over the private network; if you use it for access over the public network, the request will be sent to CI for the file over the public network. After a bucket is created, Tencent Cloud will automatically generate a system-assigned domain name in the following format:
[BucketName-APPID].pic[area].myqcloud.com
Example: test-1250000000.picgz.myqcloud.com
Note:
This domain name cannot be changed.
To get the URL of a resource in a bucket, add the relative path after the domain name of the bucket as follows:
If the resource is private, you need to add the signature suffix after the above URL.
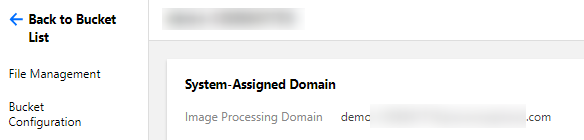
Viewing system-assigned domain name
1. Log in to the CI Console and click Bucket Management to enter the bucket page.
2. Select the target bucket to enter the bucket management page.
3. Click Domain Management to view the system-assigned domain name.
System-assigned domain name - cross-region access over private network: a system-assigned domain name can be used for access between different Tencent Cloud services in the same region. If you want to implement cross-region access over the private network, for example, a CVM instance in the Guangzhou region needs to use data in a CI bucket in the Singapore region, then you need to use a VPC to deploy a dedicated network tunnel for fast access. For more information, please see Virtual Private Cloud.
CDN Acceleration Domain Name
A CDN acceleration domain name is initialized by Tencent Cloud and can be changed (with a CNAME record required). It can be used to get higher bandwidth and lower wait latency. After a bucket is created, Tencent Cloud will generate a CDN acceleration domain name in the following format by default:
[BucketName-APPID].image.myqcloud.com
You can enable CDN acceleration when creating a bucket or in Domain Management after creating it. For more information, please see Configuring CDN acceleration domain name. Once enabled, the CDN acceleration domain name can be directly accessed over the public network as follows:
In this way, the CDN acceleration domain name will be also added in the CDN Console.
Note:
Up to 100 CDN acceleration domain names can be created under one APPID.
Configuring CDN acceleration domain name
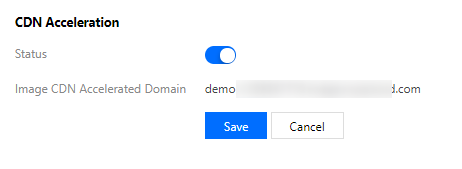
1. Log in to the CI Console, click Bucket Management on the left sidebar, and click the target bucket (such as imagetest) to enter the bucket.
2. Click Domain Management to enter the domain name management page and click Edit next to "CDN Acceleration" to enter the configurable page.
3. Modify the current status and click Save.
Custom Domain Name
You may not want to display the domain name such as qcloud.com for your website or business based on your actual needs. For example, if your website is hosted in Tencent Cloud, you may choose http://myblog.net/ preferably instead of http://myblog-1250000000.image.myqcloud.com. To satisfy this need, you can use a custom domain name by creating a CNAME record in the CDN Console to map http://myblog.net/ to http://myblog-1250000000.image.myqcloud.com.
You can add a custom domain name to directly point to the bucket. After being bound, the custom domain name can be used to directly access the contents in the bucket. After adding a custom domain name, you can enable CDN acceleration for faster access. To avoid security problems involved in the business, we recommend you use a custom domain name to access image files in CI.
Note:
After adding a custom domain name, to ensure that CI can be accessed normally through it, you need to modify the CNAME record of the DNS first for it to take effect.
The bound custom domain name needs to have an ICP filing from MIIT; otherwise, it cannot be accessed.
Custom domain names do not support configuration of HTTPS certificates. If you need to use such a certificate, please enable CDN acceleration and bind a CDN domain name.
Configuring custom domain name
Binding
1. Log in to the CI Console, click Bucket Management on the left sidebar, and click the target bucket (such as imagetest) to enter the bucket.
2. Click Domain Management to enter the domain name management page. In the Custom Domain configuration item, click Add Custom Domain to add your existing domain name.
3. Copy the CNAME address.
4. Enter the DNSPod Console and click the bound custom domain name.
Note:
Please configure at your corresponding DNS service provider. Here, Tencent Cloud DNS is used as an example.
5. Click Add Record to add a CNAME record.
Note:
The record value is the copied CNAME address. Once added, it will take effect in about 15 minutes. Please wait patiently.
Verifying result
After the custom domain name is bound, you can use its addresses to download files in the bucket. Suppose an index.htm file is in your testnew bucket, and the bound custom domain name is www.srcostest.com:
Before binding:
You can use the public network access address of the system-assigned domain name plus the file path for access, such as testnew-1250000000.image.myqcloud.com/index.htm.
After binding:*
You can use the custom domain name address plus the file path for access, such as www.srcostest.com/index.htm
Note:
You can enable the static website feature to directly open files in the browser through the custom domain name. For more information on how to enable it, please see Setting Static Website.
Hotlink Protection Setting
Malicious websites may use your image links without authorization and misappropriate the image traffic, causing you economic losses. To prevent this, CI provides a hotlink protection feature, which can recognize and manage sources with the referer mechanism supported by the HTTP protocol.
1. Log in to the CI Console, click Bucket Management on the left sidebar, and click the target bucket (such as imagetest) to enter the bucket.
2. Click Domain Management, scroll down and find Hotlink Protection Setting to configure hotlink protection.
Note:
For some users, the Hotlink Protection Setting configuration page will no longer be displayed in the CI Console. If this is the case for your account, you can go to the COS Console for configuration. For more information, please see Setting Hotlink Protection.
You can add websites to the referer blocklist/allowlist. You can add multiple domain names separated by line breaks (one entry per line) and use wildcards.
After hotlink protection is enabled, service source can be limited according to policy.


 Yes
Yes
 No
No
Was this page helpful?