Android
Download
聚焦模式
字号
本文主要介绍如何快速将 Chat SDK 集成到您的 Android 项目中。
开发环境要求
JDK 1.6。
Android 4.1(SDK API 16)及以上系统。
集成 SDK(aar)
您可以选择使用 Gradle 自动加载的方式,或者手动下载 aar 再将其导入到您当前的工程项目中。
方法一:自动加载(aar)
您可以通过配置 gradle 自动下载更新已经发布到 Maven Central 库的 Chat SDK。
只需要用 Android Studio 打开需要集成 SDK 的工程,然后通过如下三个步骤修改 app/build.gradle 文件,就可以完成 SDK 集成:
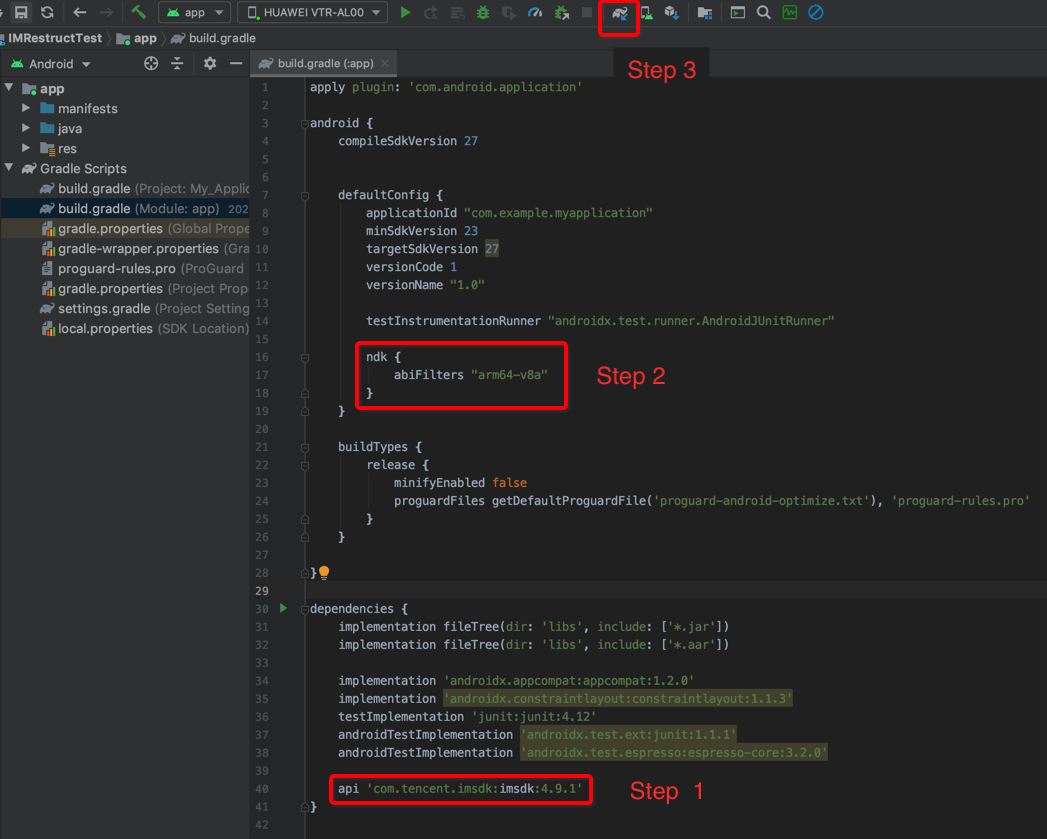
步骤1:添加 SDK 依赖
1. 找到 app 的 build.gradle,首先在 repositories 中添加 mavenCentral() 的依赖:
repositories {google()jcenter()// 增加 mavenCentral 仓库mavenCentral()}
2. 然后在 dependencies 中添加 Chat SDK 的依赖:
dependencies {// 添加 Chat SDK,推荐填写最新的版本号api 'com.tencent.imsdk:imsdk-plus:版本号'// 如果您需要添加 Quic 插件,请取消下一行的注释(注意:要求插件版本号和 Chat SDK 版本号相同)// api "com.tencent.imsdk:timquic-plugin:版本号"}
dependencies {api 'com.tencent.imsdk:imsdk-plus:5.4.666'}
说明:
Quic 插件,提供 axp-quic 多路传输协议,弱网抗性更优,网络丢包率达到 70% 的条件下,仍然可以提供服务。仅对专业版、专业版plus和企业版用户开放,请 购买专业版 、专业版plus或企业版后可使用。为确保功能正常使用,请将 Chat SDK 更新至 7.7.5282 及其以上的版本。
步骤2:指定 App 使用架构
在 defaultConfig 中,指定 App 使用的 CPU 架构(从 Chat SDK 4.3.118 版本开始支持 armeabi-v7a,arm64-v8a,x86,x86_64):
defaultConfig {ndk {abiFilters "arm64-v8a"}}
步骤3:同步 SDK
单击 Sync 按钮,如果您的网络连接 jcenter 没有问题,SDK 就会自动下载集成到工程里。
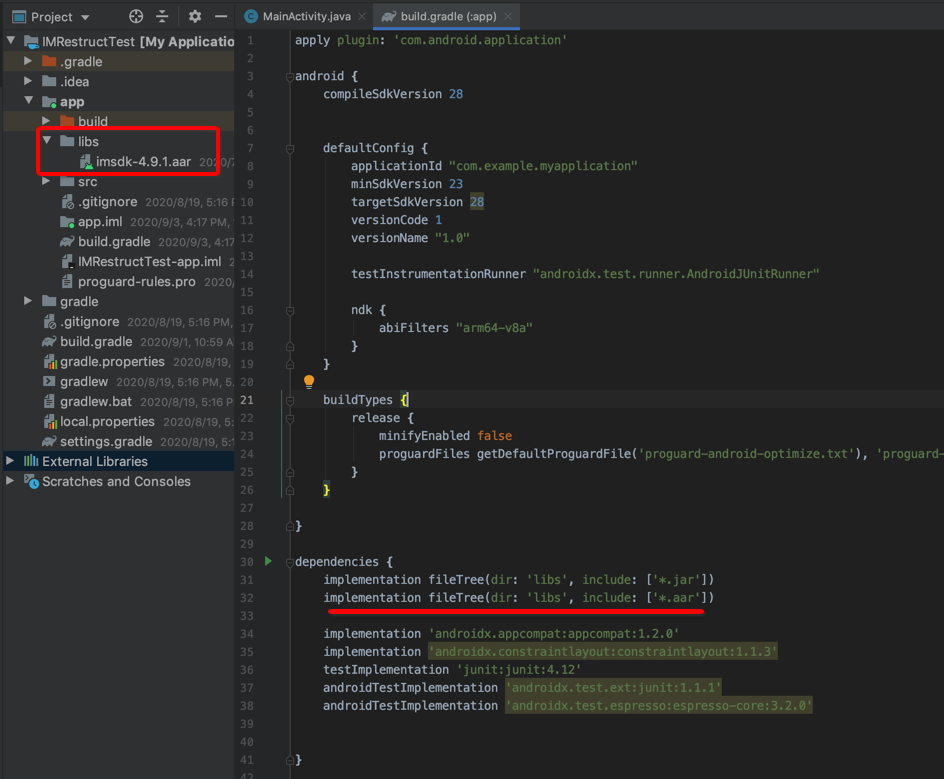
方法二:手动下载(aar)
如果您的网络连接 jcenter 有问题,也可以手动下载 SDK 集成到工程里:
步骤1:下载 Chat SDK
步骤2:拷贝 Chat SDK 到工程目录
步骤3:指定 App 使用架构并编译运行
在 app/build.gradle 的 defaultConfig 中,指定 App 使用的 CPU 架构(从 Chat SDK 4.3.118 版本开始支持 armeabi-v7a,arm64-v8a,x86,x86_64):
defaultConfig {ndk {abiFilters "arm64-v8a"}}
说明:
如果您需要添加 Quic 插件,请参考前面的步骤,手动下载集成 Quic 插件。
集成 SDK
如果您不想集成 aar 库,也可以通过导入 jar 和 so 库的方式集成 Chat SDK:
步骤1:下载解压 SDK
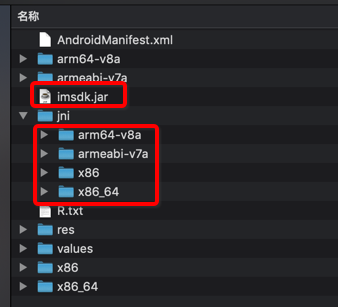
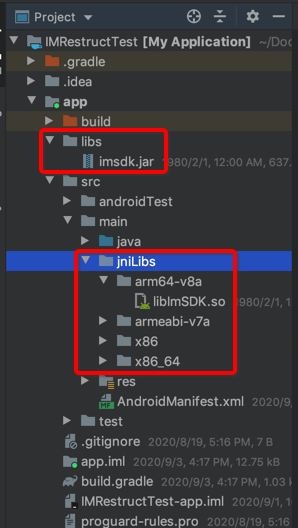
步骤2:拷贝 SDK 文件到工程目录
将重命名后的 jar 文件和各个架构的 so 文件分别拷贝到 Android Studio 默认加载的目录下:
步骤3:指定 App 使用架构并编译运行
在 app/build.gradle 的 defaultConfig 中,指定 App 使用的 CPU 架构(从 Chat SDK 4.3.118 版本开始支持 armeabi-v7a,arm64-v8a,x86,x86_64):
defaultConfig {ndk {abiFilters "arm64-v8a"}}
配置 App 权限
在 AndroidManifest.xml 中配置 App 的权限,Chat SDK 需要以下权限:
<uses-permission android:name="android.permission.INTERNET" /><uses-permission android:name="android.permission.ACCESS_NETWORK_STATE" /><uses-permission android:name="android.permission.ACCESS_WIFI_STATE" />
设置混淆规则
在 proguard-rules.pro 文件,将 Chat SDK 相关类加入不混淆名单:
-keep class com.tencent.imsdk.** { *; }
文档反馈