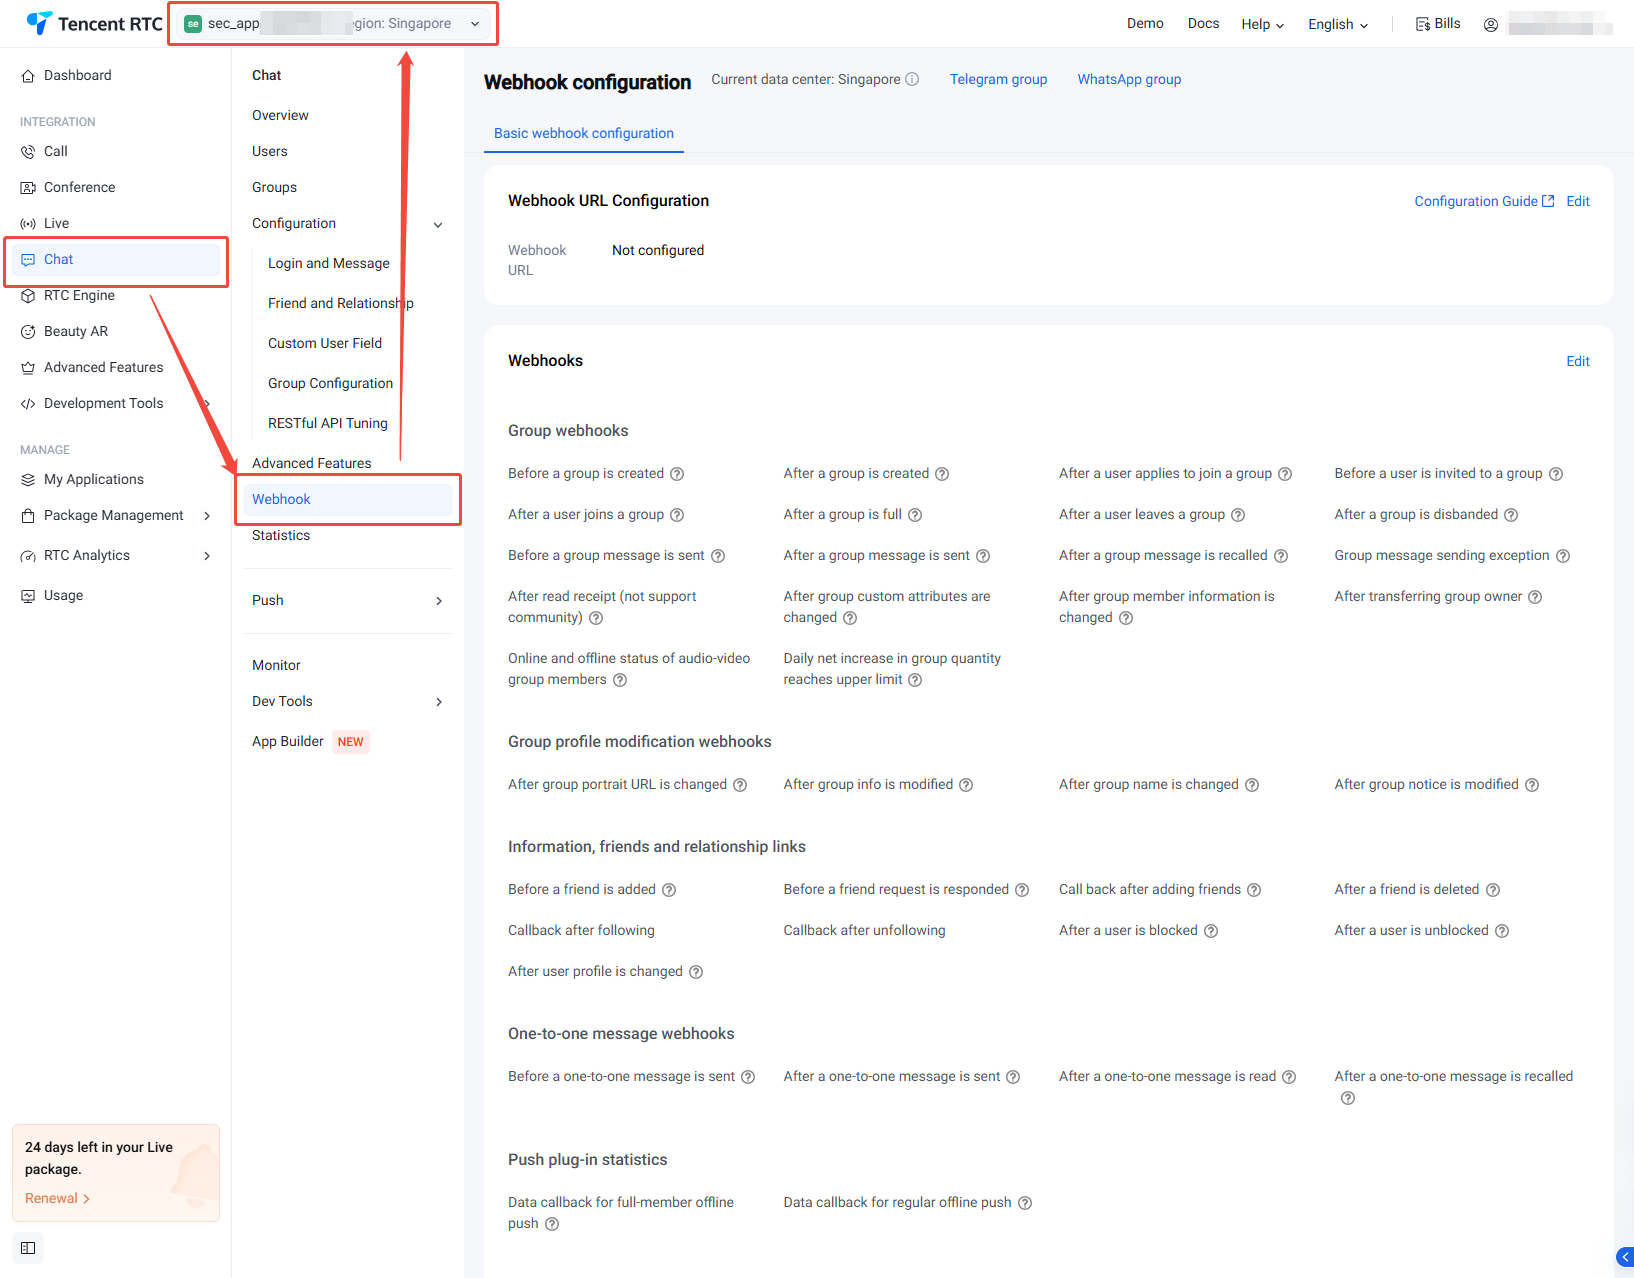
Log in to the Chat console, select Chat > Webhook in the left sidebar, and select target application at the top. You can configure the callback URL and enable which callbacks based on actual business needs.
Configuring Webhook URLs
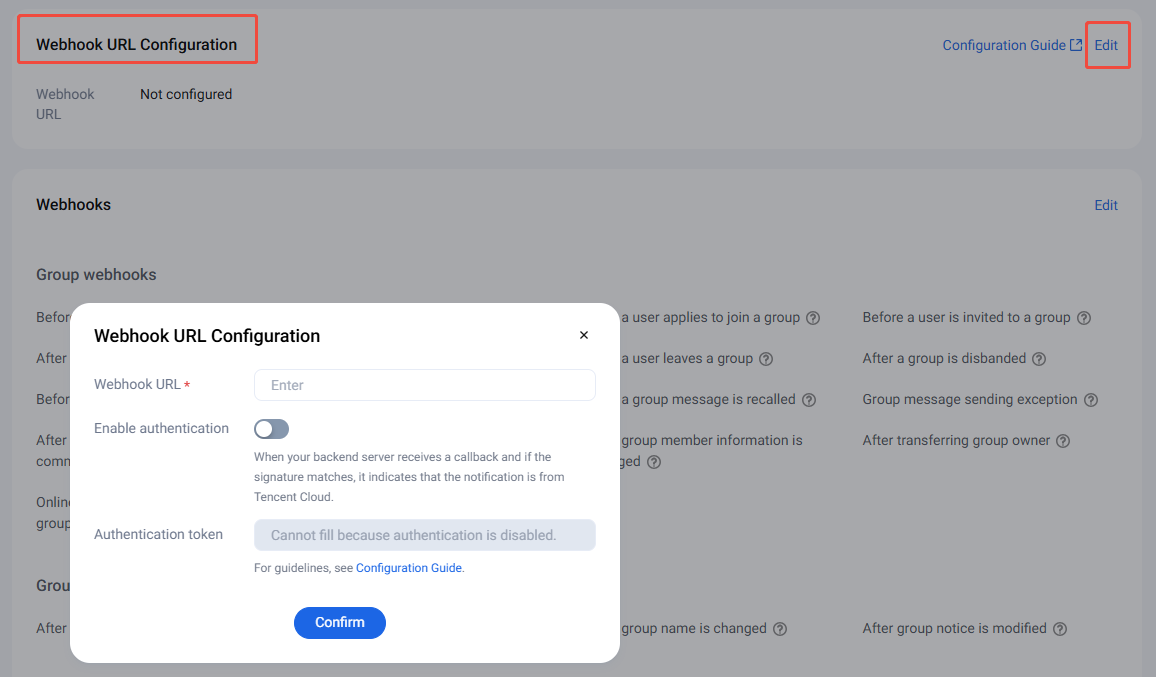
1. On the Webhook Configuration page, click Edit in the webhook URL configuration area.
2. In the webhook URL configuration dialog box that pops up, enter the webhook URL.
Note:
The webhook URL must start with http:// or https://.
If you have not yet applied for a domain name, you can directly configure an IP address, for example, http://123.123.123.123/imcallback.
Only letters (a–z, case-insensitive), numbers (0–9) and hyphens (-) can be used. Spaces and the following characters are not supported: !$&?.
The hyphen (-) cannot appear consecutively, be registered independently, or be placed at the beginning or end.
The length of the domain name cannot exceed 63 characters.
The webhook URL of Chat uses ports 80/443 by default. When the webhook URL is replaced, port changes are involved. Please avoid the situation where the ports before and after the replacement are mutually prefixed; for example, avoid changing https://xxx:443 to https://xxx:4433 or changing https://xxx to https://xxx:4433.
3. Click OK to save the configuration.
Configuring Event Webhooks
1. On the Webhook Configuration page, click Edit in the webhook configuration area. In the pop-up window for edit, select the feature to configure.
2. In the webhook configuration dialog box that pops up, check the desired webhooks.
Note:
Certain Webhook features require enabling the corresponding function in the console before they can be triggered. For details, please refer to the Webhook Event Activation Guide.
3. Click Confirm to save the configuration.
Subsequent Operations
After configuring webhook URLs and enabling the corresponding event webhooks, you can refer to Webhooks to use the corresponding webhooks in order to obtain user and operation information in real time.
Webhook Event Activation Guide
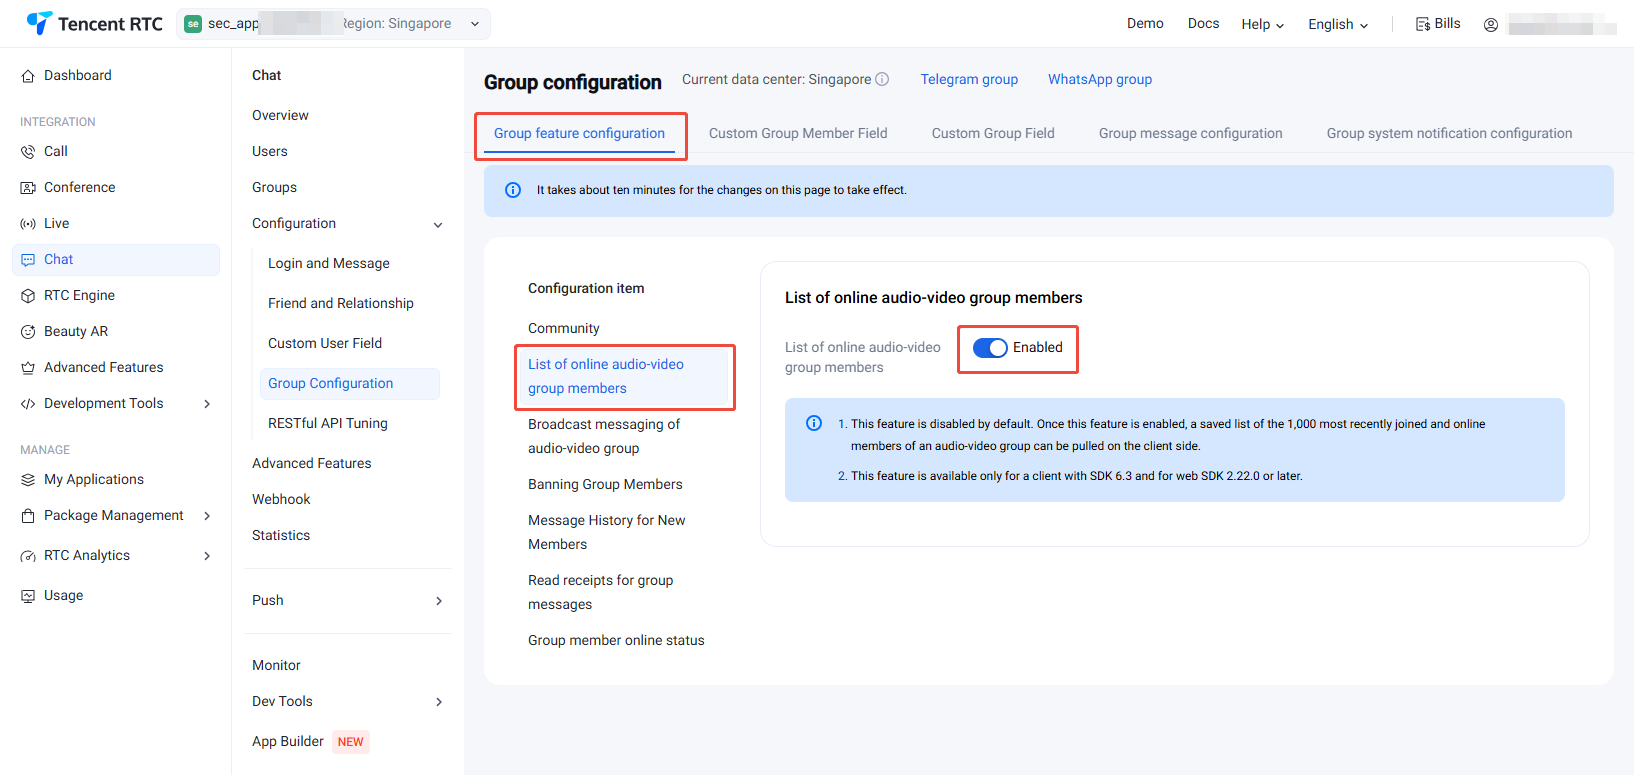
Live Group Member Online Status Webhook
To enable the online status callback for AVChatRoom members, first toggle on the group member online status switch in Chat > Configuration > Custom User Field.
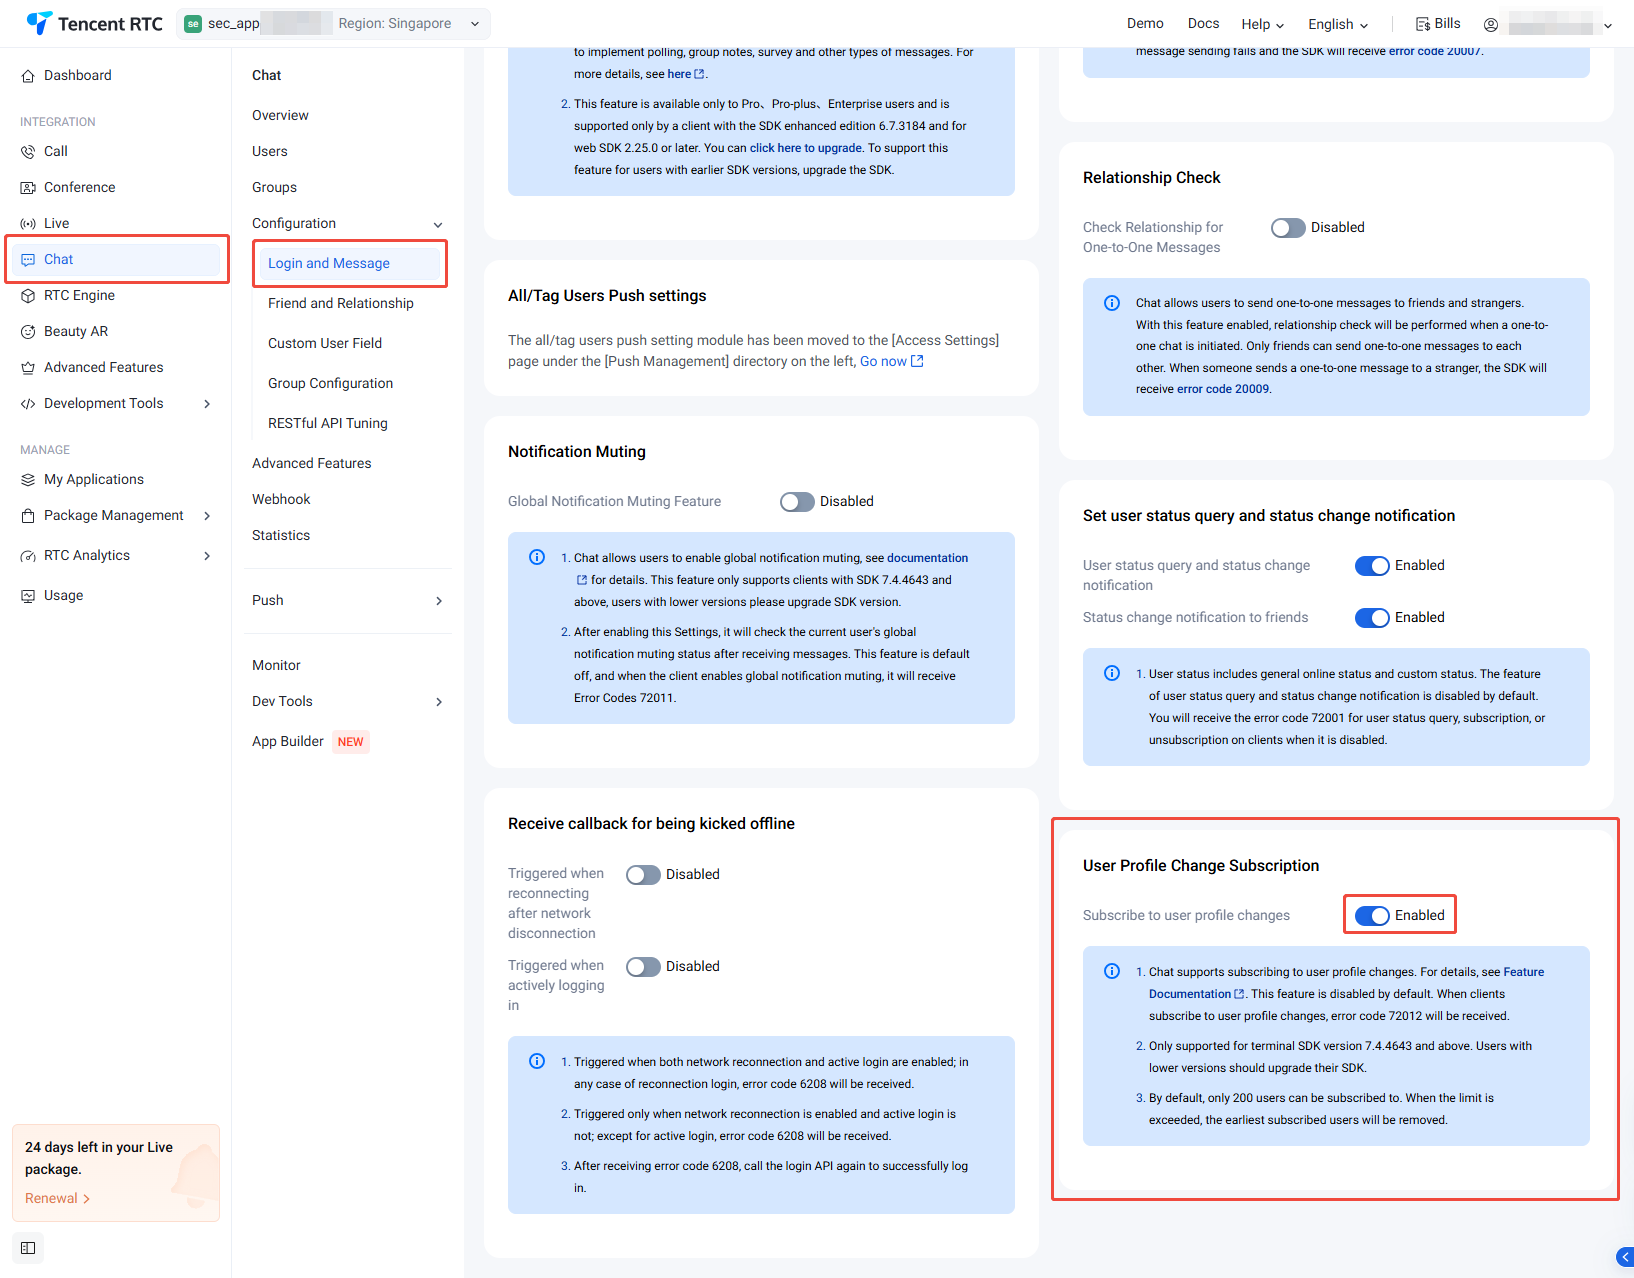
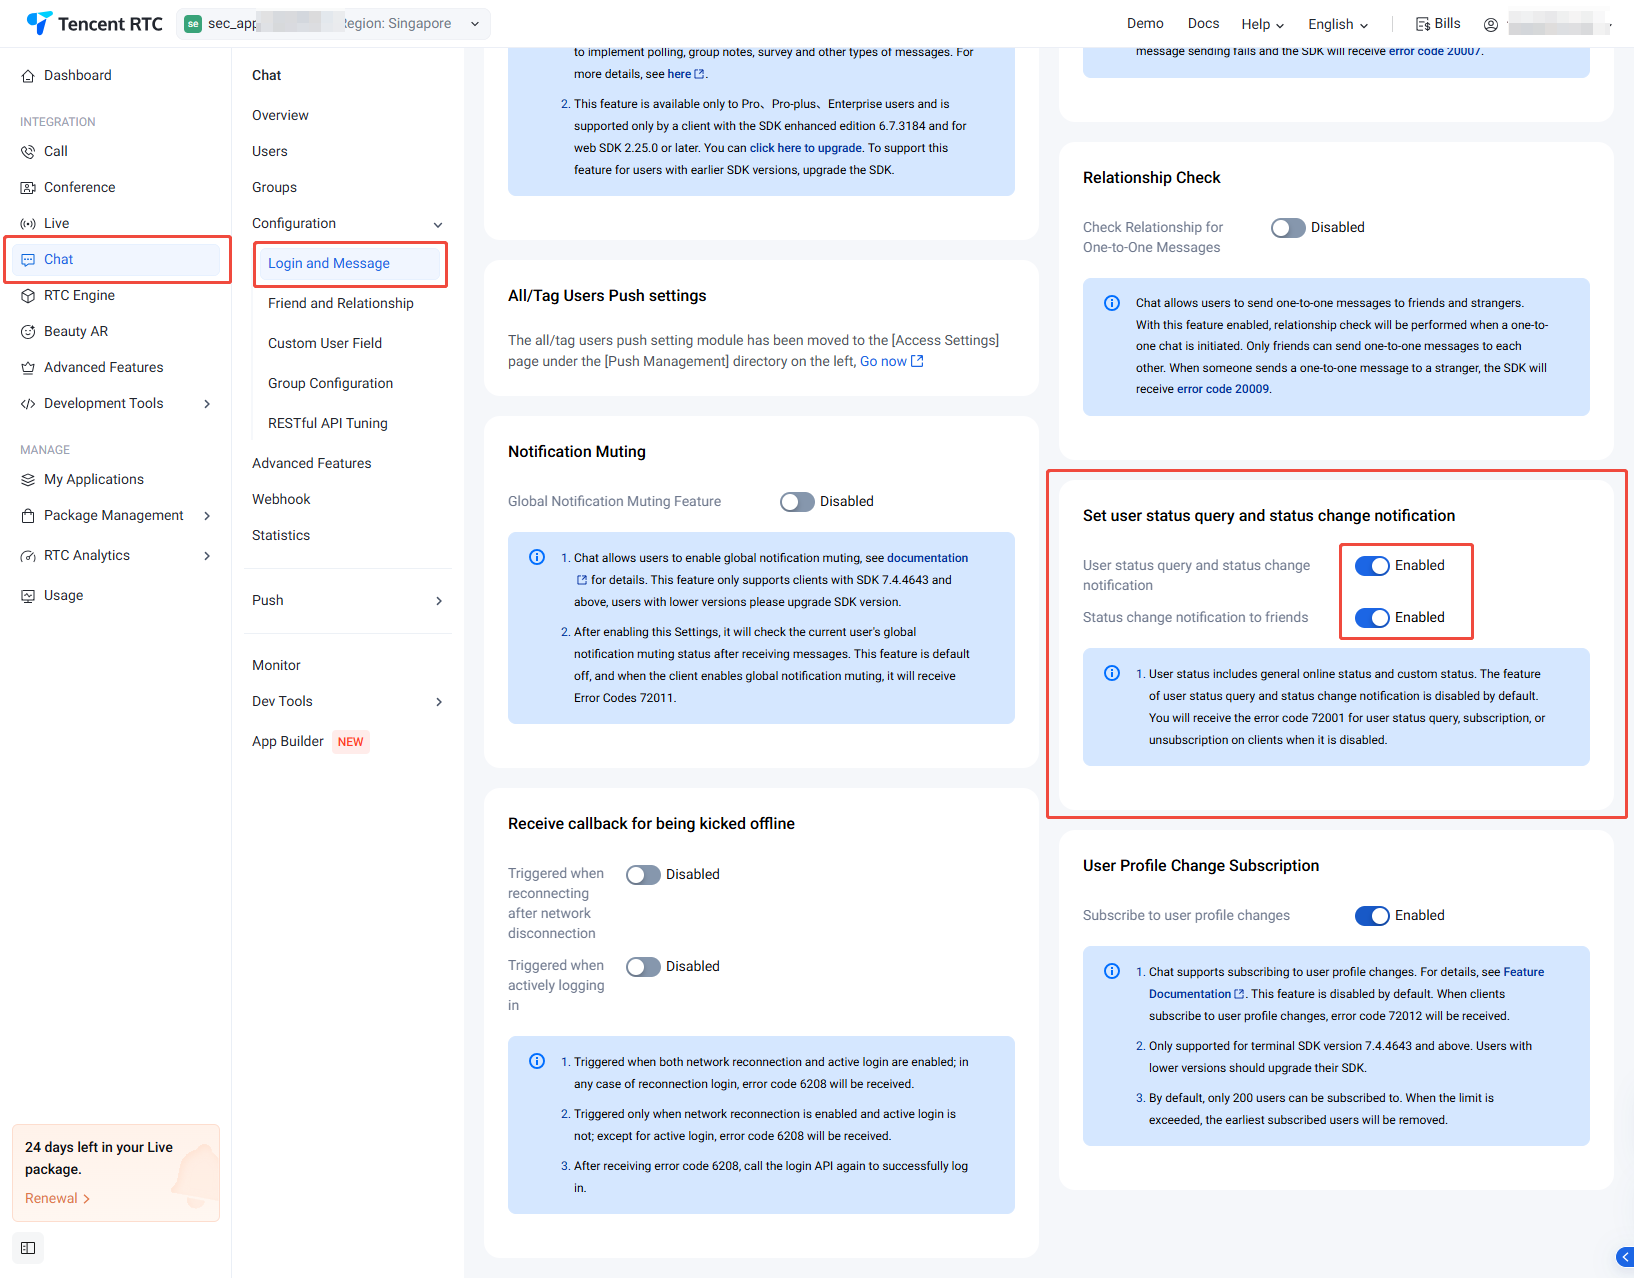
User Profile Change Webhook
To enable the User Profile Change Webhook, first toggle on the user profile change subscription switch in Chat > Configuration >Login and Message.
Online Status Callback
To enable the Online Status Callback, first toggle on the User Status Inquiry and Status Change Notification configuration switch in Chat > Configuration >Login and Message.