tencent cloud

Chat

News and Announcements
Release Notes
Announcements
Product Introduction
Overview
Basic Concepts
Scenarios
Features
Account System
User Profile and Relationship Chain
Message Management
Group Related
Official Account
Audio/Video Call
Use Limits
Purchase Guide
Billing Overview
Pricing
Purchase Instructions
Renewal Guide
Service Suspension Explanation
Refund Policy
Development Guidelines
Demo Zone
Activate Service
Free Demos
Quick Run
Download
SDK and Demo Source Code
Update Log
Chat Interaction (UI Included)
TUIKit Introduction
Getting Started
Full-feature Integration
Single-function Integration
Build with AI
Build Basic Interfaces
More Features
Customizing Appearance
Internationalization
Push Service
Overview
Noun explanation
Activate the Service
Quick Start
Manufacturer Channel
Statistics
Troubleshooting Tool
Client APIs
REST API
Push Callback
Advanced Features
Release Notes
Error Codes
FAQS
Desk
Overview
Quick Start
Integration Guide
Admin Operation Manual
Agent Manual
More Practices
Live Streaming Setup Guide
AI Chatbot
Super Large Entertainment and Collaboration Community
Discord Implementation Guide
How to Integrate Chat into Games
WhatsApp Channel-style Official Account Integration Solution
Send Red Packet
Firewall Restrictions
No UI Integration
Quick Start
SDK Integration
Initialization
Login and Logout
Message
Conversation
Group
Community Topic
User Profile and Relationship Chain
Offline Push
Cloud Search
Local Search
Official Channel Management
Client APIs
JavaScript
Android
iOS & macOS
Swift
Flutter
Electron
Unity
React Native
C APIs
C++
Server APIs
Secure authentication with UserSig
RESTful APIs
Webhooks
Console Guide
New Console Introduction
Creating and Upgrading an Application
Basic Configuration
Feature Configuration
Account Management
Group Management
Official Channel Management
Webhook Configuration
Usage
Viewing Guide for Resource Packages
Real-Time Monitor
Auxiliary Development Tools
Access Management
Advanced Features
FAQs
uni-app FAQs
Purchase
SDK
Account Authentication
User Profile and Relationship Chain
Message
Group
Audio-Video Group
Nickname and Profile Photo
Security Compliance Certification
Service Level Agreement
Security Compliance Certification
Chat Policies
Privacy Policy
Data Privacy and Security Agreement
Migration
Migration Solutions
Migration Solutions Lite
Error Codes
Contact Us

Sample Effect

PDF
Focus Mode
Font Size
Last updated: 2025-01-23 11:45:15

Initiating a Vote

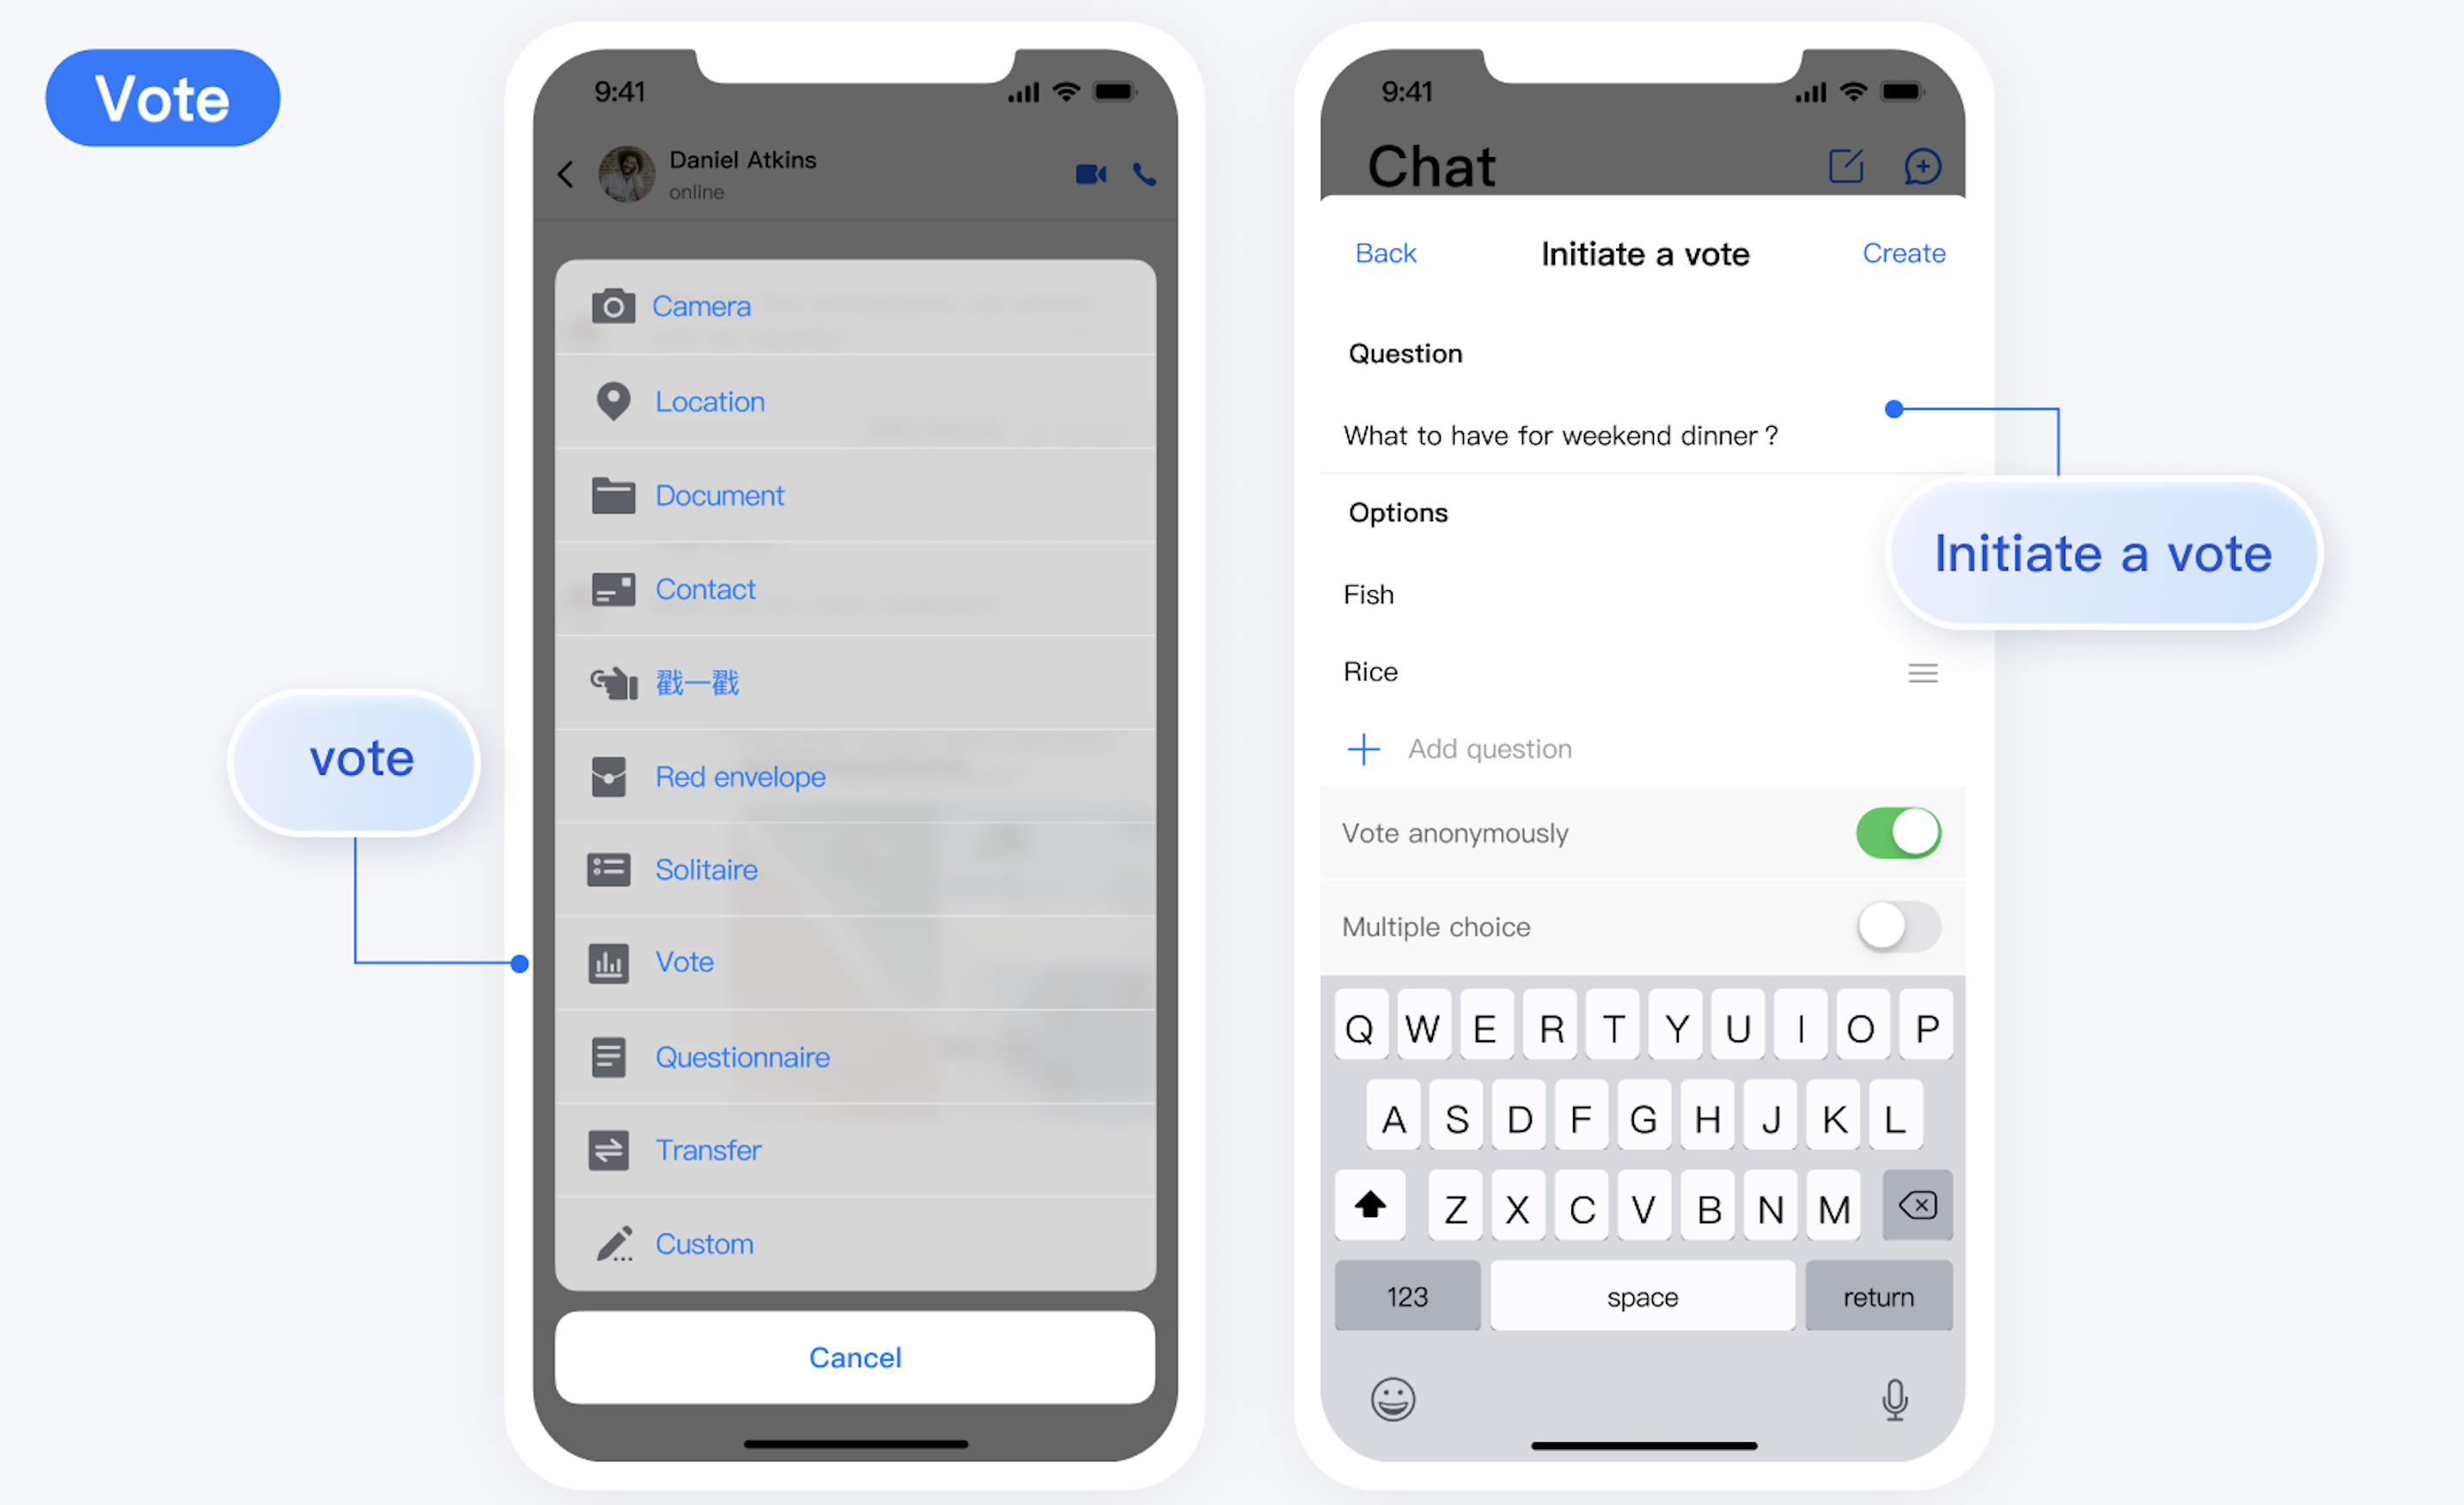
After the TUIPollPlugin is integrated, the vote plugin entry will automatically appear in the + menu of the TUIChat input bar. After initiators click vote, they can set the vote topic, options, and make relevant settings in the subsequent vote initiating interface, as shown below:


Vote of Participants

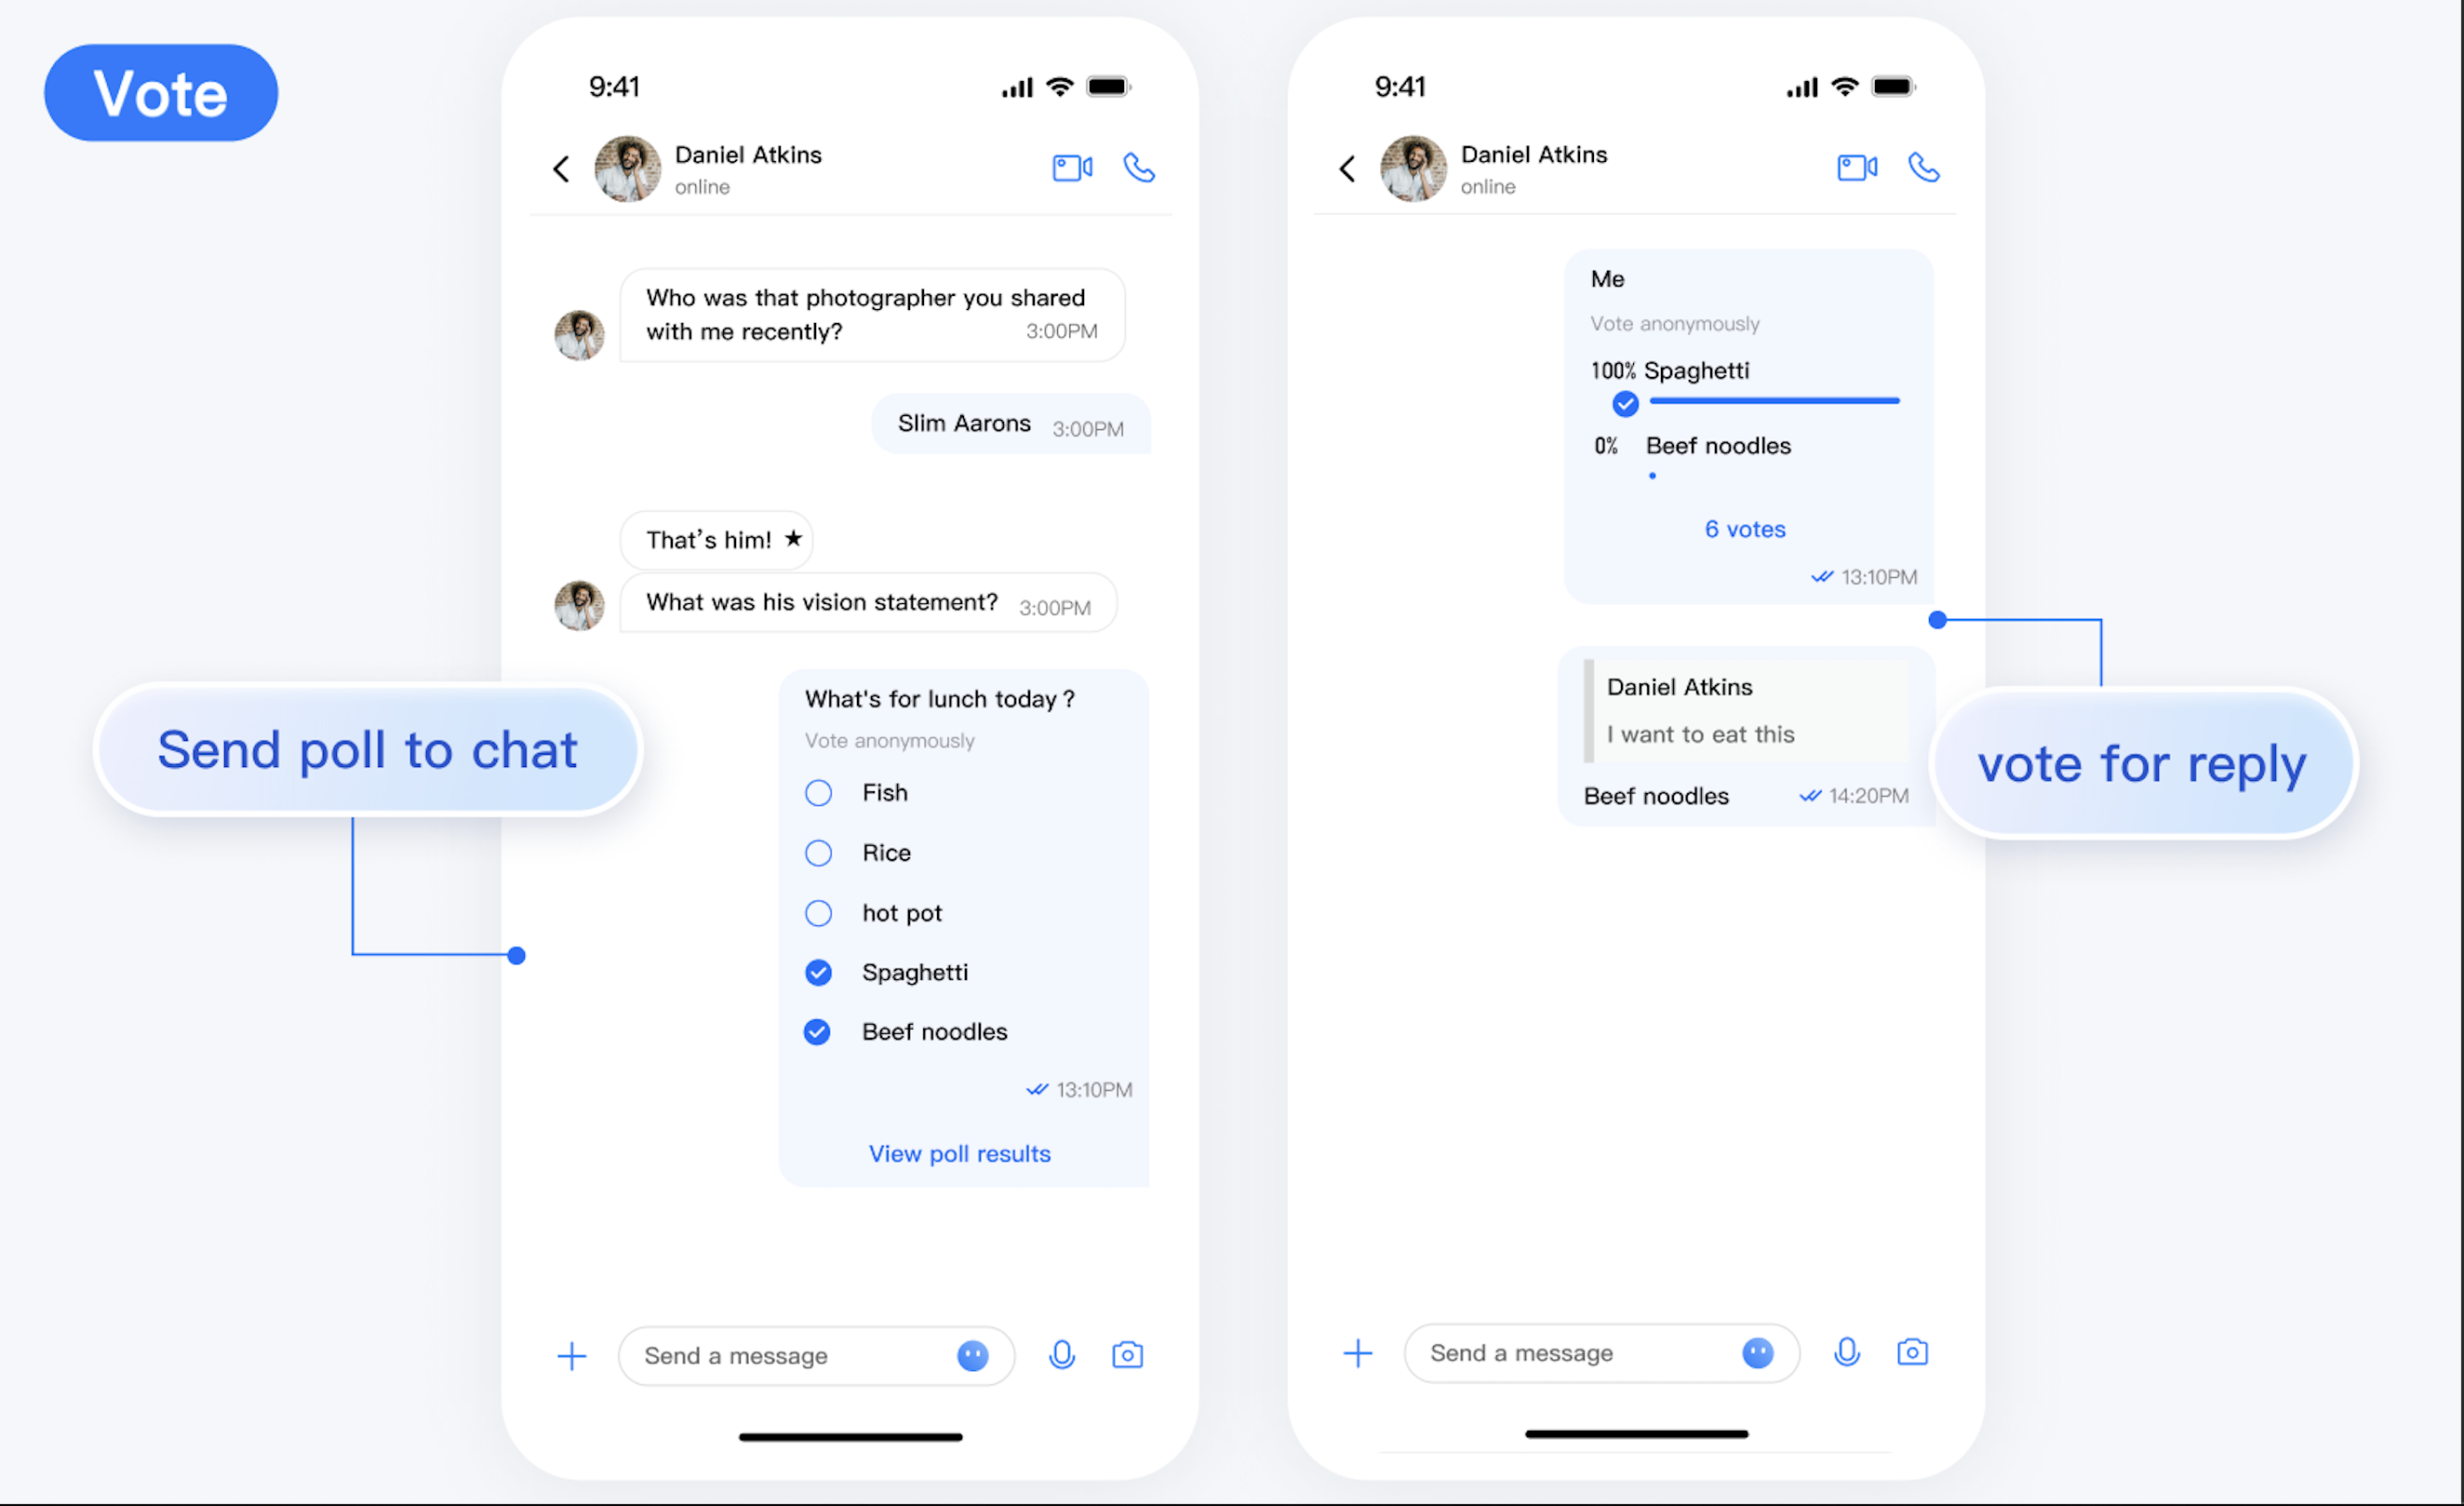
After the initiator successfully creates a vote, the vote message will automatically appear in the TUIChat message list. Other members in the group can participate in the vote after receiving the vote message.

Vote of Initiators

The initiator can also participate in the vote.

Vote Data Statistics

When a vote ends or a participant completes a vote, the statistics of the vote is displayed. Click on an option to see the detailed list of vote members.


Vote Settings

To meet different vote needs, TUIPollPlugin offers several vote settings. Different combinations of settings will produce different effects. For example:
Support for Multiple Items. If it is enabled, a participant can vote for multiple options.
Anonymous Voting. If it is enabled, the vote initiator cannot view the specific information of voters, but can only see the vote count statistics.
Publicize Results. If it is disabled, the vote data statistics will only be visible to the initiator and will be invisible to participants.
Note:
The initiator cannot modify the vote settings after initiating the vote.

Help and Support

Was this page helpful?

Help us improve! Rate your documentation experience in 5 mins.

Feedback