This document describes how to purchase a Tencent Container Registry (TCR) Enterprise Edition instance, configure a network access policy, and push and pull container images. To use TCR Individual, see TCR Individual Getting Started.
Log in to the Tencent Cloud console and choose Tencent Cloud services > Tencent Container Registry to go to the TCR console. Then, activate and authorize TCR as prompted. If you have already authorized TCR, skip this step.
Step 3: Purchasing an Enterprise Edition Instance
1. Log in to the TCR console and go to the Instance management page.
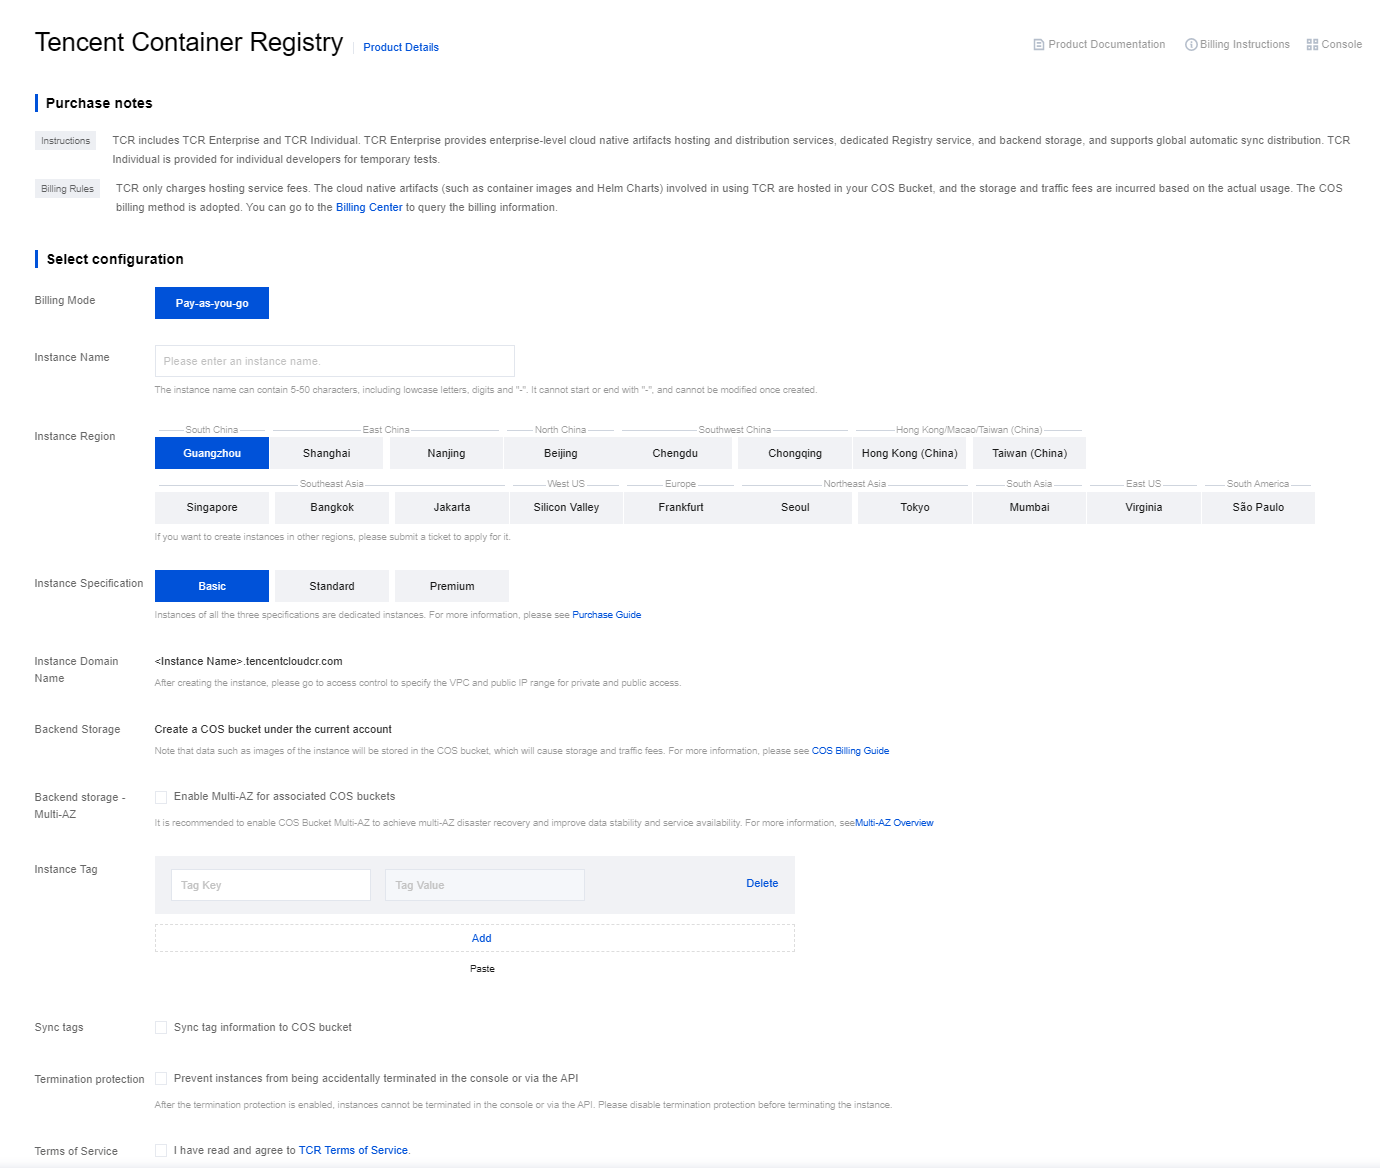
2. Click Create. On the TCR Purchase page, purchase an instance. You can use the following information for reference:
Billing Mode: TCR is billed in pay-as-you-go mode. For more information, see Billing Overview.
Instance Name: Enter a custom instance name. The name must be globally unique and cannot be identical with an existing instance name of your own or another user. This name is used as the access domain name of this TCR instance. The name cannot be modified after the instance is created. We recommend that you use an abbreviation that combines the company name and instance region or project as the instance name.
Instance Region: Select a region where you want to deploy the instance. The region cannot be modified after the instance is created. Select the region based on the location of the container cluster resources.
Instance Specification: Select the instance specifications that you want to purchase. Different instance specifications have different instance performance levels and quotas. For more information, see Purchase Guide.
Instance Domain Name: The instance domain name that is automatically generated. Its prefix is the same as the instance name. The instance domain name cannot be modified after the instance is created. This domain name is used when you run the docker login command to log in to the instance.
Backend Storage: when an instance is created, a Tencent Cloud COS bucket will be automatically created and associated under the current account. Images and other data in the instance will be stored in the bucket, and storage and traffic costs will be generated. For more information, see COS Billing Guide. After instance creation, you can go to the COS console to view the bucket. Avoid mistakenly deleting the bucket because data such as images hosted in the instance cannot be recovered.
COS multi-AZ: Optional. COS provides the multi-AZ storage architecture. We recommend that you enable the COS multi-AZ feature to achieve multi-AZ disaster recovery for higher data reliability and service availability. This feature incurs higher storage costs. For more information, see MAZ Feature Overview.
Instance Tag: Bind the newly created instance to a Tencent Cloud tag. You can also bind and edit tags on the instance details page after instance creation.
3. Read and agree to the TCR Service Agreement.
Enterprise Edition instances are billed differently based on their region and specifications. Confirm the selected specifications and configuration fees after configuring the basic information.
4. After checking the selected option, click Buy Now to purchase the enterprise edition instance you have selected and configured.
5. You can check the instance purchase progress on the Instance List page. When the instance status changes to Running, the instance has been successfully purchased and is available. You can complete the following steps to configure the access control policy of the instance and log in to the instance to push and pull images.
Step 4: Configuring the Network Access Policy
To protect your data security, all public and private network access requests are denied by default after the instance is created. Before you log in to the instance, push, and pull images, you must configure the network access policy.
In the console, select Access Control in the left sidebar, select Private Network Access or Public Network Access as needed, and configure the corresponding access policy.
Private network access (recommended)
Public network access
Note:
Both TCR Individual and TCR Enterprise do not support classic network access. If you need to use this service, we recommend that you switch to VPC as soon as possible and access the service over the private network.
For more information about how to use this service in TKE, see Using a Container Image in a TCR Enterprise Edition Instance to Create a Workload.
We recommend that you push and pull container images through private network access because it can significantly accelerate the push and pull speeds and reduce public network traffic costs. In addition, you can manage private network access linkages to specify the VPCs that are allowed to access your image data and improve data security.
Follow the steps below:
1. In the upper part of the Private Network Access page, select the created instance.
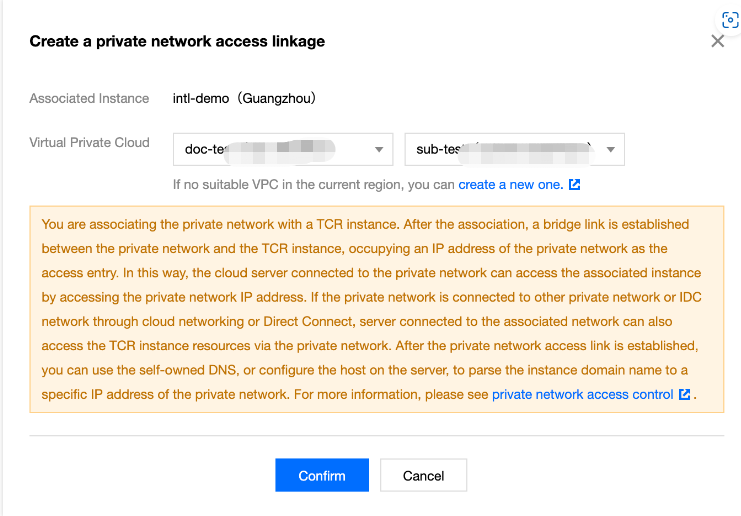
2. Click Create. In the Create a private network access linkage pop-up window, configure the VPC and subnet information. See the figure below:
Select the VPC where the container cluster that need to access the image repository is located and select any subnet in this VPC that has usable private IP addresses.
3. After the private network access linkage is successfully established, the parsing of the instance domain name is not configured in the connected VPC by default. Click Manage Auto-parsing to enable the parsing for private network domain names. This feature is based on Tencent Cloud Private DNS. Activate this service before proceeding. For more information, see Private Network Access Control.
Note:
Enabling the Internet access entry opens your dedicated instance in the public network environment. We recommend that you disable the Internet access entry as soon as possible after completing private network access configuration.
Follow the steps below:
1. In the upper part of the Public Network Access page, select the created instance.
2. Click Open internet access entry in the upper left corner. The button status changes to Enabling, as shown in the figure below:
After Internet access is enabled, the Docker client can access the image repositories through the Internet.
3. When the button status changes from Enabling to Close Internet Access Entry, Internet access is enabled. Then, click Add a public IP to allowlist in the upper left of the list to add the public IP addresses that are allowed to access the image repositories.
4. In the Create Public Network Access Allowlist pop-up window, add the public IP addresses or IP ranges that are allowed to access the image repositories, or import the configurations of the existing security groups, and add remarks for this rule (optional), as shown in the figure below.
We recommend that you do not add 0.0.0.0/0, which allows all Internet access. Alternatively, delete this rule before formally activating the instance.
Step 5: Creating a Namespace
1. Select Namespace in the left sidebar. On the Namespace page, click Create.
Note:
Namespaces are used to manage image repositories in the instance. They do not directly store container images, but can map to teams, product projects, or other custom layers in an enterprise.
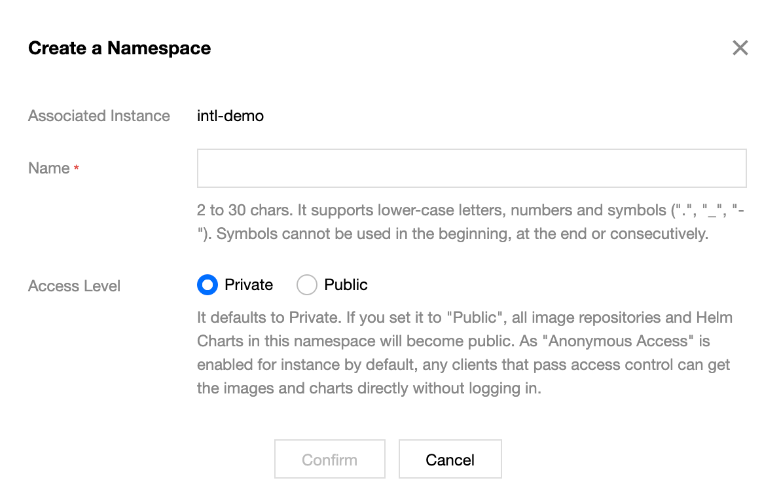
2. In the Create a Namespace pop-up window, configure the namespace information and click Confirm, as shown in the figure below.
Name: We recommend that you set this parameter to the name of an enterprise team or product project. Namespace names must be unique in an instance.
Access Level: you can select either Private or Public. Image repositories and Helm chart repositories in the namespace will inherit this attribute. You can modify this attribute after creating the namespace.
Step 6: (Optional) Creating an Image Repository
Note:
After creating a namespace, you can use the Docker client to push images to the namespace, and the corresponding image repository will be automatically created.
1. Click Image Repository in the left sidebar to go to the Image Repository list page.
2. Click Create. In the Create an Image Repository pop-up window, configure the image repository information and click Confirm, as shown in the figure below.
From the Namespace drop-down list, you can select a created namespace. The name cannot be a multi-level path, and the Markdown syntax is supported in the description.
Step 7: Pushing and Pulling an Image
After completing the preceding steps, you have created an instance and image repository. Next, you can perform the following operations to push an image to or pull an image from the image repository.
Note:
In this step, you need to use a CVM or CPM instance with Docker installed and ensure that the target client is in the public or private network access allowlist defined in Configuring the Network Access Policy.
Logging in to the TCR instance
1. Click Access Credential in the left sidebar to go to the Access Credential list page. Select the newly created instance, and click Generate Temp Login Token.
If Login Succeeded is displayed in the command line tool, you have logged in to the instance successfully.
Pushing a container image
You can create a container image on the local server or obtain a public image from Docker Hub for testing.
This document uses the official and latest Nginx image on Docker Hub as an example. In the command line tool, run the following commands sequentially to push this image. Replace demo-tcr, project-a, and nginx with the actual instance, namespace, and image repository names you have created.
sudodocker tag nginx:latest demo-tcr.tencentcloudcr.com/project-a/nginx:latest
TCR Enterprise Edition provides advanced features such as Helm chart hosting, cross-region instance synchronization, and image security scanning. To use them, refer to the following documents:
If you encounter a problem while using TCR, locate and solve the problem by referring to the FAQs. Alternatively, you can submit a ticket, and we will solve the problem for you as soon as possible.