- Updates and Announcements
- User Tutorial
- Product Introduction
- Purchase Guide
- Quick Start
- Operation Guide
- Purchasing Instances
- Creating an Enterprise Edition Instance
- Access Configuration
- Manage Image Repository
- Image Distribution
- Image Security
- Synchronization and Replication
- Configuring Image Tag Retention
- Image Cleanup
- DevOps
- OCI Artifacts Management
- Operation Guide for TCR Individual
- Terminating/Returning Instances
- Best Practices
- TCR Personal migration
- Using the Delivery Assembly Line to Implement Container DevOps
- TKE Clusters Use the TCR Addon to Enable Secret-free Pulling of Container Images via Private Network
- Synchronizing Images to TCR Enterprise Edition from External Harbor
- TKE Serverless Clusters Pull TCR Container Images
- Image Data Synchronization and Replication Between Multiple Platforms in Hybrid Cloud
- Nearby Access Through Image Synchronization Between Multiple Global Regions
- Using Custom Domain Name and CCN to Implement Cross-Region Private Network Access
- API Documentation
- History
- Introduction
- API Category
- Making API Requests
- Instance Management APIs
- DescribeInstances
- DescribeInstanceStatus
- CreateInstanceToken
- CreateInstance
- ModifyInstanceToken
- DescribeInstanceToken
- DeleteInstanceToken
- DeleteInstance
- RenewInstance
- CheckInstanceName
- CheckInstance
- ModifyInstance
- DescribeRegions
- DescribeInstanceCustomizedDomain
- DescribeImageAccelerateService
- DeleteInstanceCustomizedDomain
- DeleteImageAccelerateService
- CreateInstanceCustomizedDomain
- CreateImageAccelerationService
- Namespace APIs
- Image Repository APIs
- Custom Account APIs
- Trigger APIs
- Instance Synchronization APIs
- Access Control APIs
- Helm Chart APIs
- Tag Retention APIs
- Data Types
- Error Codes
- FAQs
- Service Level Agreement
- Contact Us
- Glossary
Overview
Before using a Git repository to build container images, you need to authorize TKE to access the code source. Currently, TKE supports GitHub repository and GitLab repository.
Prerequisites
You have logged in to the TKE console.
Directions
Selecting a code source
- Choose Image Repository > My Images in the left sidebar.
- On the My Images page, click Source Authorization, as shown in the following figure.
Note:
”Source Authorization” is only available in China mainland, namely the “Default Region” on the console.

3. In the Code Source Authorization window that appears, select an option as needed, as shown in the following figure.
Note:
A user can authorize both GitHub and GitLab accounts at the same time, but only one account of each type. To change your bound GitHub or GitLab account, you need to unbind the original account.
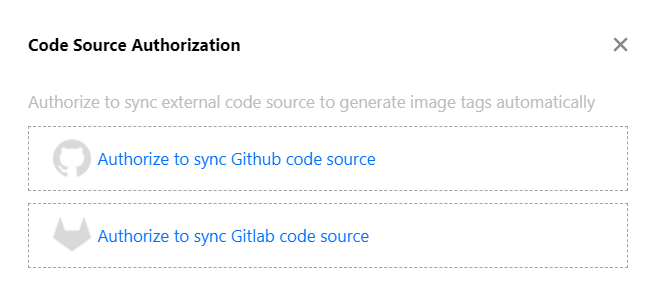
- If your repository is on GitHub, see Authorizing GitHub to complete the authorization.
- If your repository is on an on-premises GitLab server or a GitLab managed server, see Authorizing GitLab to complete the authorization.
Github authorization
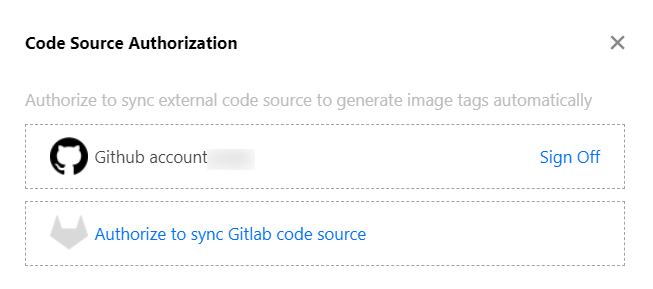
- In the Code Source Authorization window, click Authorize to sync Github code source.
- For the first time of authorization, you will be directed to the GitHub website and see a prompt stating that the app needs to access your repositories and personal data, as shown in the following figure.
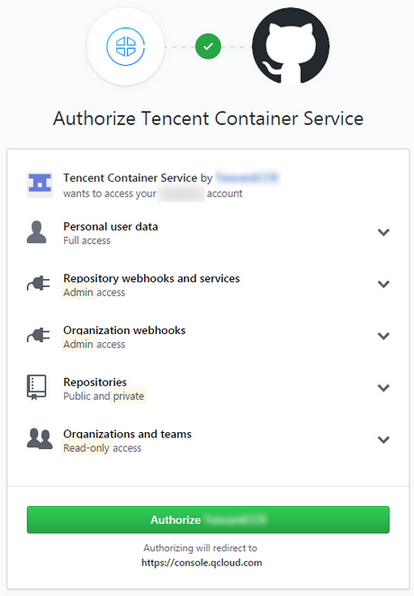
- Click Authorize to finish authorizing a GitHub repository, as shown in the following figure.
Gitlab authorization
Obtaining the Access Token of GitLab
- Log in to the GitLab website and go to the Create Access Token page, as shown in the following figure.
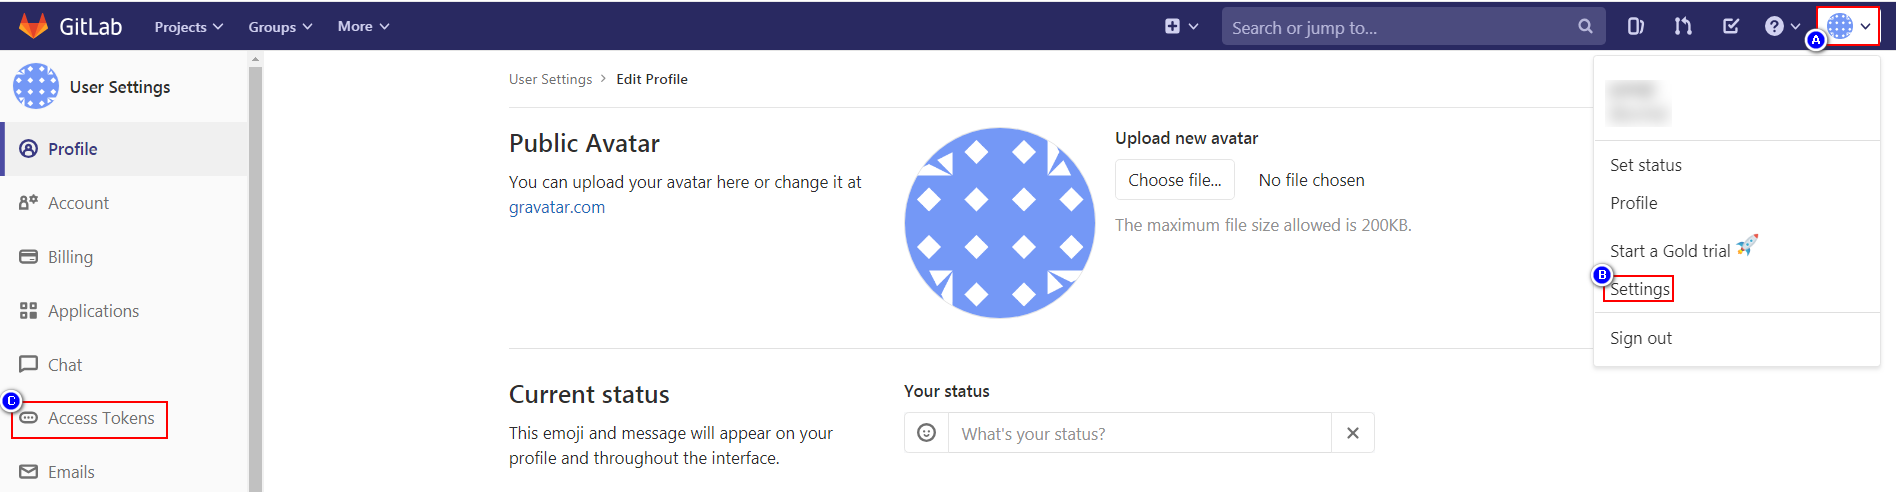
- Click your profile photo. In the drop-down menu, select Settings.
- In the left pane of the "User Settings" page, click Access Tokens to go to the Create Access Token page.
On the “Create Access Token" page, set the following information as needed: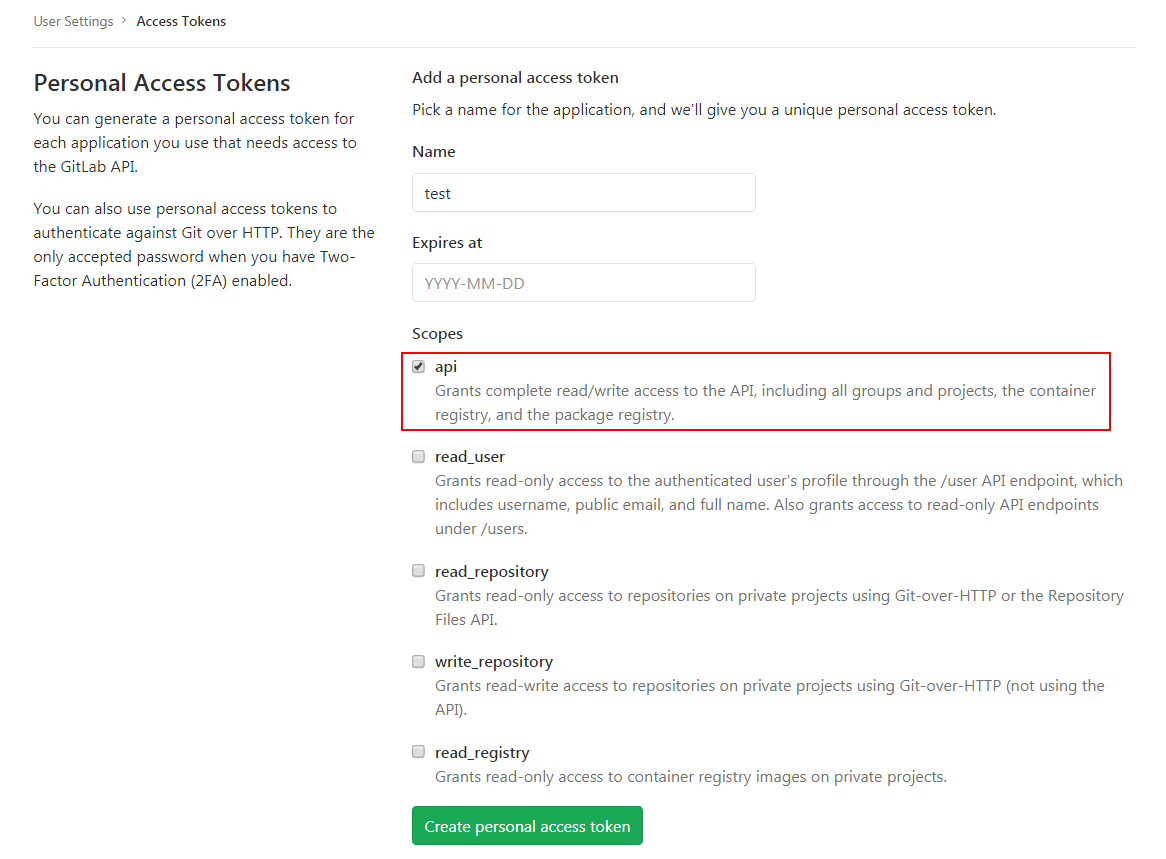
- Name: enter a name for the new access token.
- Expires at: set the expiration date of the new access token.
- Scopes: set the access scope of the new access token. The API option is required.
Note:
- The API option is required for Scopes. Otherwise, you will not be able to obtain source repository information or set callback hooks for auto building.
- Set a reasonable expiration date for the token to ensure that it is always valid during usage.
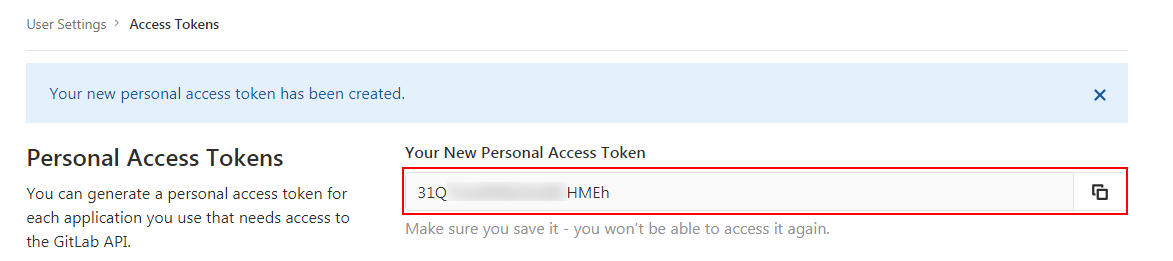
- Click Create and save the created access token, as shown in the following figure.
Authorizing GitLab code source synchronization
- In the Code Source Authorization window, click Authorize to sync GitLab code source and enter the following information:
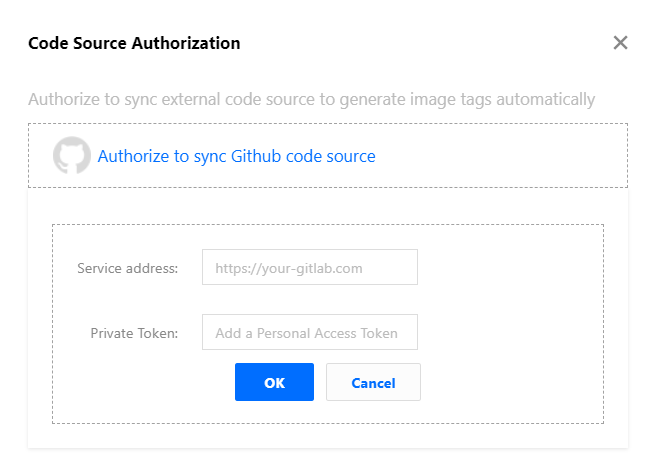
- Service address: indicates the URL of the GitLab server, which must use the HTTP or HTTPS protocol and can be accessed over the public network. For example,
https://you-gitlab.com. Do not enter the URL of a specific project or repository. - Private token: must be the Access Token. If you do not have the Access Token yet, see Obtaining a GitLab access token and create one.
- Service address: indicates the URL of the GitLab server, which must use the HTTP or HTTPS protocol and can be accessed over the public network. For example,
- Click OK to finish the authorization, as shown in the following figure.


 Yes
Yes
 No
No
Was this page helpful?