This document describes how to grant sub-accounts the product-/device-level access control permissions.
The product-level access control permissions allow sub-accounts to access and control the products created by themselves or created for them by the root account.
The device-level access control permissions allow the sub-accounts to access and control only the devices created for them by the root account.
Authorization by Creating Policy by Policy Syntax
Creating policy
1. Log in to the CAM console and click Policies on the left sidebar.
2. Go to the policy management page and click Create Custom Policy.
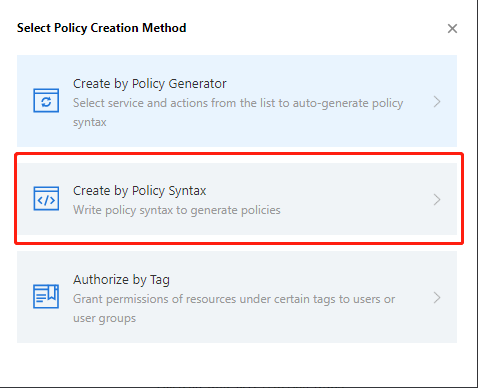
3. On the Select Policy Creation Method page that pops up, select Create by Policy Syntax.
4. Select Blank Template and click Next.
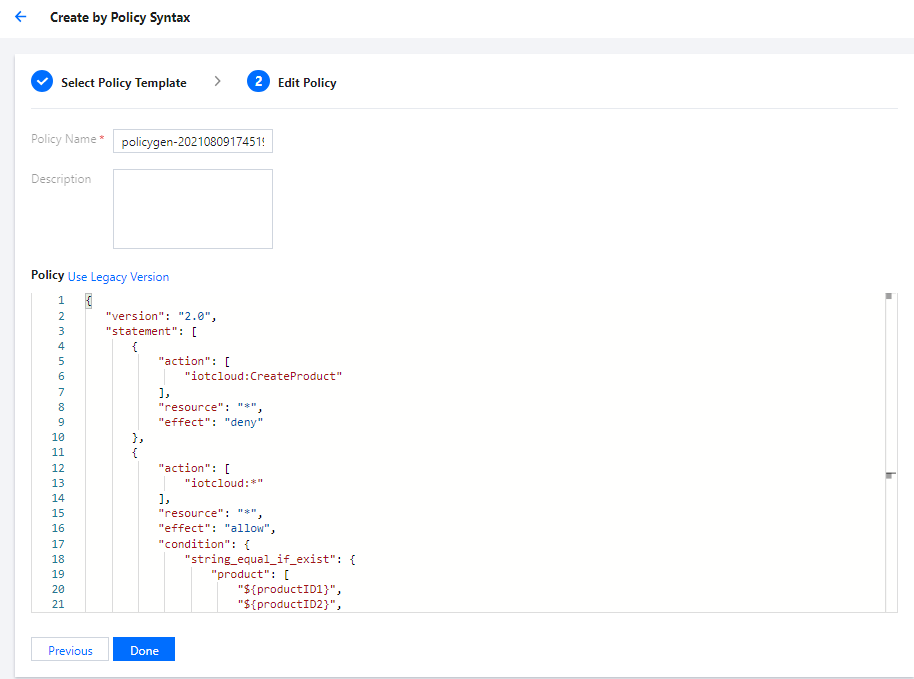
5. Enter the custom policy name and edit the policy content based on the policy template. Below is the sample code:
{
"version":"2.0",
"statement":[
{
"action":[
"iotcloud:CreateProduct"
],
"resource":"*",
"effect":"deny"
},
{
"action":[
"iotcloud:*"
],
"resource":"*",
"effect":"allow",
"condition":{
"string_equal_if_exist":{
"product":[
"${productID1}",
"${productID2}",
"${productID3}"
]
}
}
}
]
}
Associating policy
1. After the custom policy is created, go to the User List page.
2. Select the sub-account to which to grant the permissions and click Associate Policy in the Permissions column.
3. Search for the name of the policy just created, select it, and click OK to grant the permissions defined in it.
Policy description
The policy template below indicates that the sub-account is not allowed to create products. To disable other permissions for the sub-account, you can write the permission API names in action. For example, writing iotcloud::DeleteDevice there prohibits the deletion of devices by the sub-account.
{
"action":[
"iotcloud:CreateProduct"
],
"resource":"*",
"effect":"deny"
}
The policy template below indicates that other permissions (such as device creation and deletion) are granted. However, these operations can only be performed under the specified product, subject to the PID entered in the product list (you can replace ${productID\\*} with the productID of the product in IoT Hub for authorization).
{
"action":[
"iotcloud:*"
],
"resource":"*",
"effect":"allow",
"condition":{
"string_equal_if_exist":{
"product":[
"${productID1}",
"${productID2}",
"${productID3}"
]
}
}
}
At this point, you can get the basic product information in the IoT Hub console.
Authorization by Tag
Creating device tag
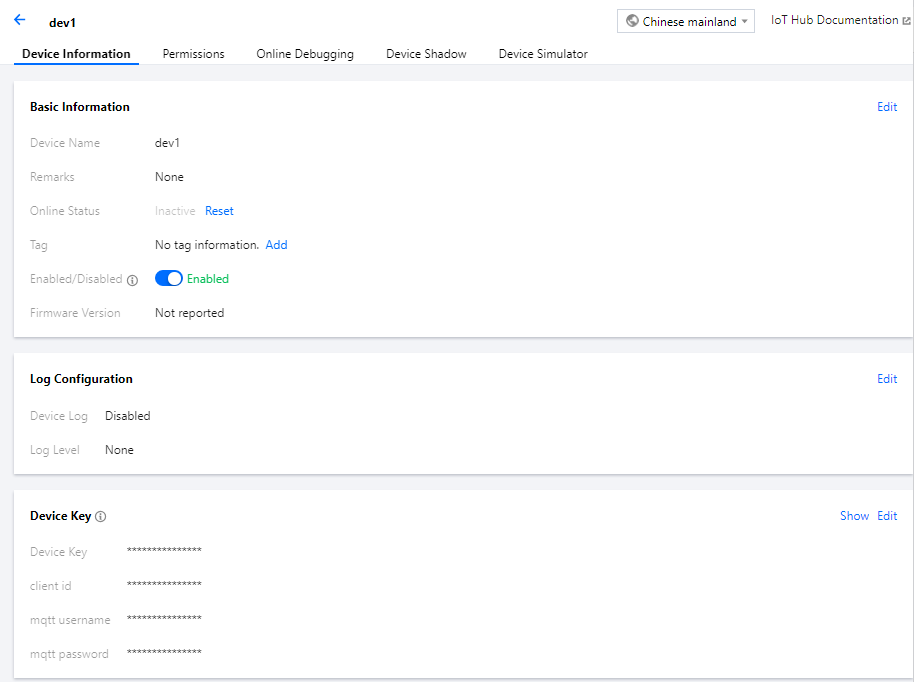
1. Log in to the IoT Hub console and go to the product information page. If no products and devices are added, you need to add a product and device first. For detailed directions, please see Device Connection Preparations.
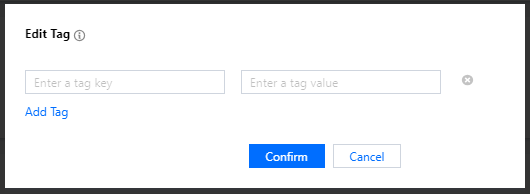
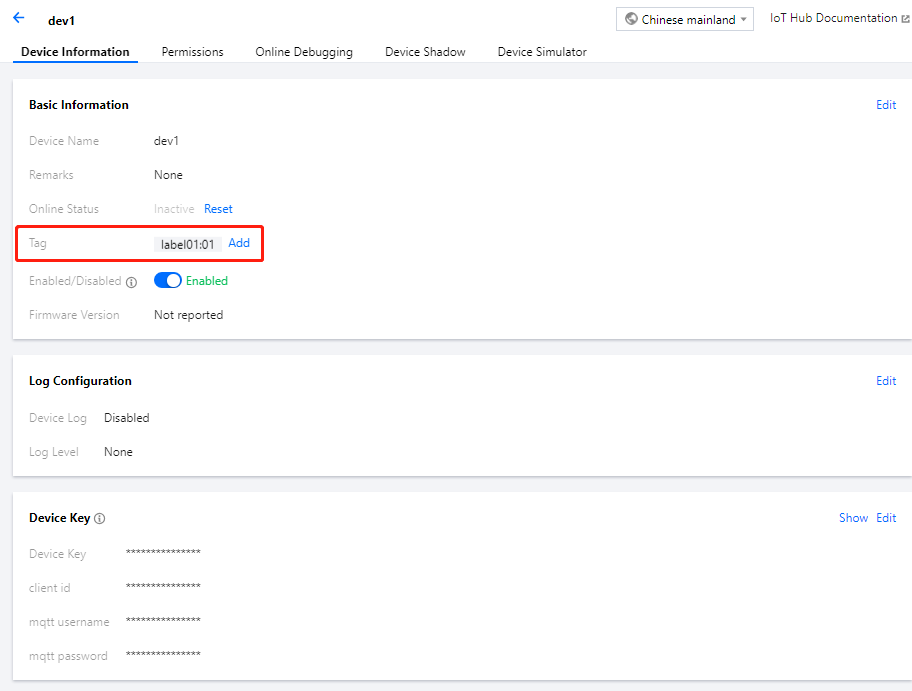
2. Click Tag on the Device Information page, click Add, and enter information such as key and value to add a device tag.
Tag key: it can contain up to 16 letters, digits, and underscores.
Tag value: it can contain up to 16 letters, digits, and underscores.
3. After editing, click Confirm to add the tag information, and the corresponding tag content will be displayed in the device information.
Creating and associating policy
1. Log in to the CAM console and click Policy on the left sidebar.
2. Go to the policy management page and click Create Custom Policy.
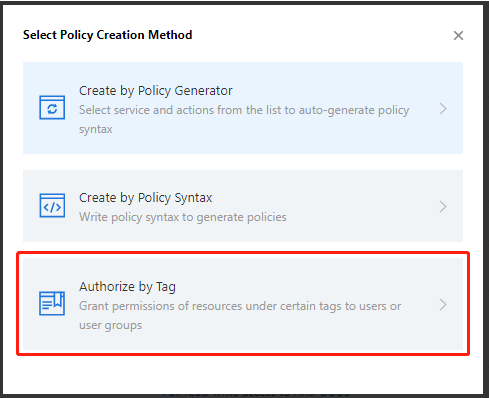
3. On the Select Policy Creation Method page that pops up, select Authorize by Tag.
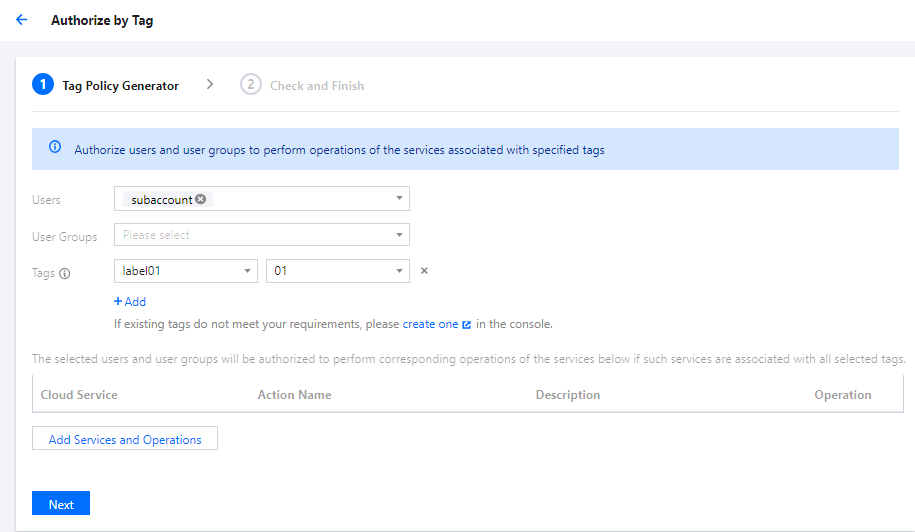
4. Select a user or user group and tag key and value.
Note:
you can enter multiple tags for one single device, and the tag keys and values can be duplicate if they are on different devices. You can select multiple tag keys and values when selecting resources. You can also select a group of tag keys and values to assign resources. Such a group can assign one or multiple device resources to a sub-account.
5. After selection, click Next to enter the check page.
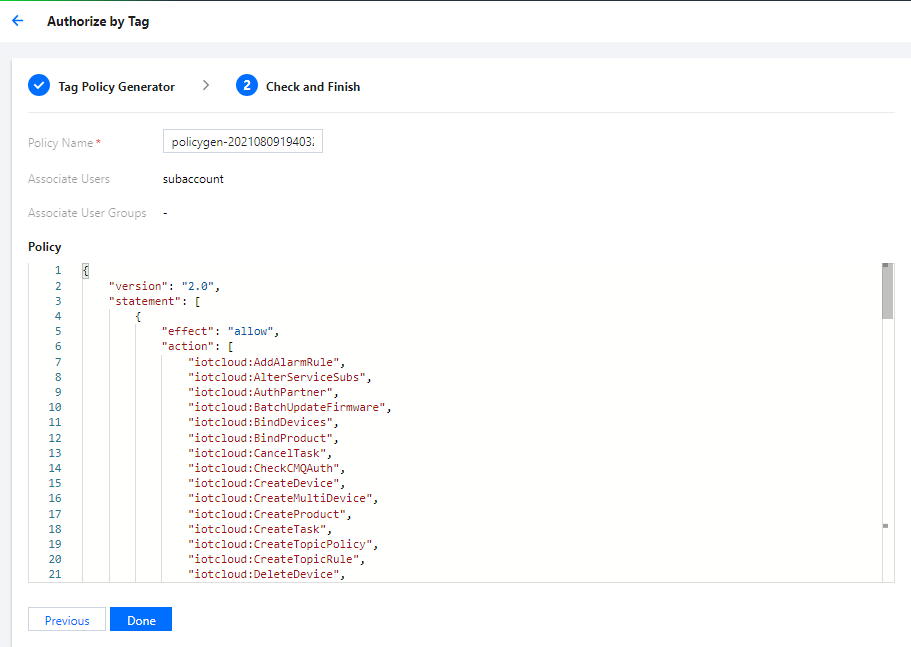
6. Here, the policy name and policy information can be modified. After confirming that everything is correct, click Done to create and associate the policy.
Due to the limit in the IoT Hub console, after device resources are assigned to a sub-user, the sub-user can enter the device information page and view authorized device resources only after getting the product and device list information. Therefore, you also need to authorize the product and device lists by creating a policy by policy syntax. The authorization code is as follows:
{
"version":"2.0",
"statement":[
{
"action":[
"iotcloud:DescribeProducts",
"iotcloud:DescribeDevices"
],
"resource":"qcs::iotcloud:::ProductId/*",
"effect":"allow"
}
]
}
7. After completing the operation, the authorized sub-user can manage the corresponding device resources in the console.