Scenarios
You can use the policy feature in the Cloud Access Management (CAM) console to grant sub-accounts access permissions for the TDMQ for Apache Pulsar resources owned by the root account. The sub-accounts that are granted these permissions can use the resources. This document describes how to grant permissions for the resources of a cluster to a sub-account. The operation steps for other resource types are similar.
Prerequisites
Sub-accounts have been created for employees by using the Tencent Cloud root account. For detailed operations, see Creating a Sub-account. At least one TDMQ for Apache Pulsar cluster has been created.
Operation Steps
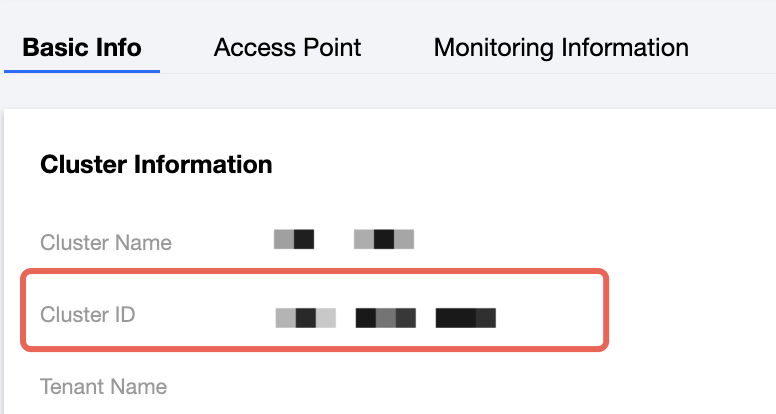
Step 1: Obtaining the ID of a TDMQ for Apache Pulsar Cluster
2. On the Basic Info tab, the ID field is the ID of the current TDMQ for Apache Pulsar cluster.
Step 2: Creating an Authorization Policy
2. In the left sidebar, choose Policies, click Create a custom policy, and then select Create by policy bulider for the policy creation method.
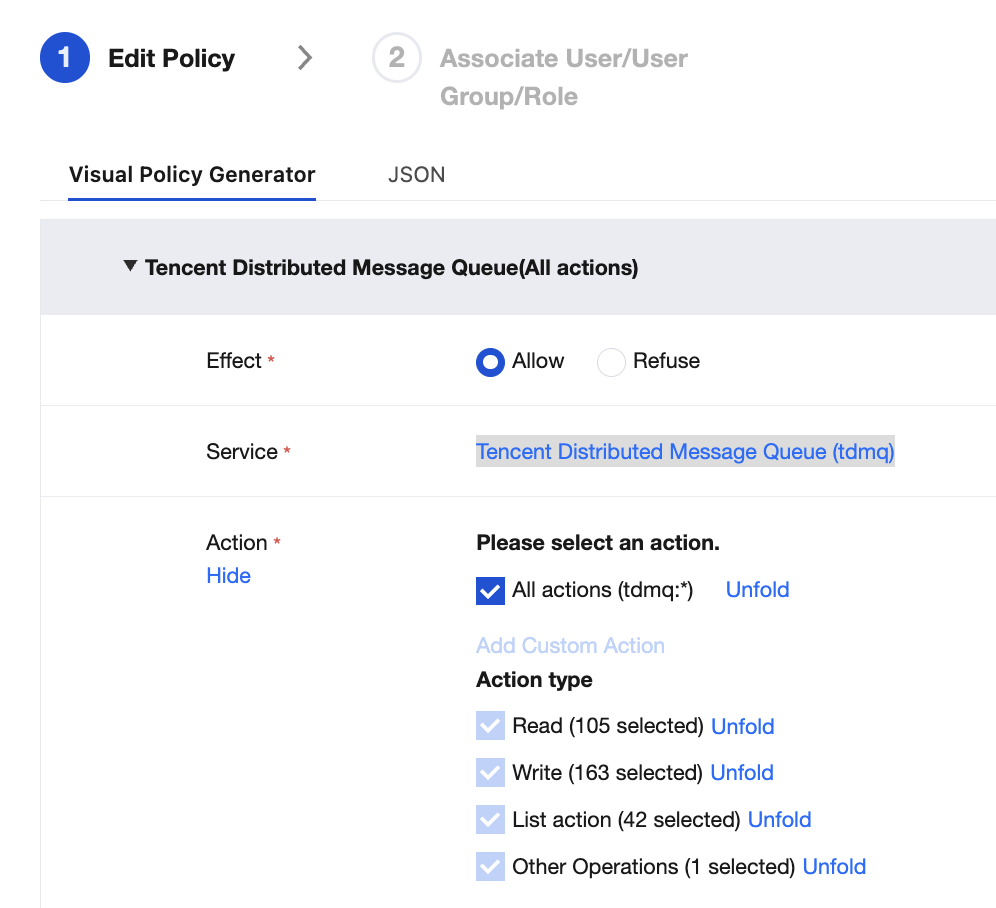
3. In the visual policy generator, retain Allow for Effect, enter TDMQ in the Service field for filtering, and then select Tencent Distributed Message Queue (tdmq) from the results.
4. Select All actions for Actions. You can also select appropriate operation types based on your actual business requirements.
Note:
Currently, some APIs do not support resource-level authorization. The APIs supporting resource-level authorization are subject to those displayed in the console.
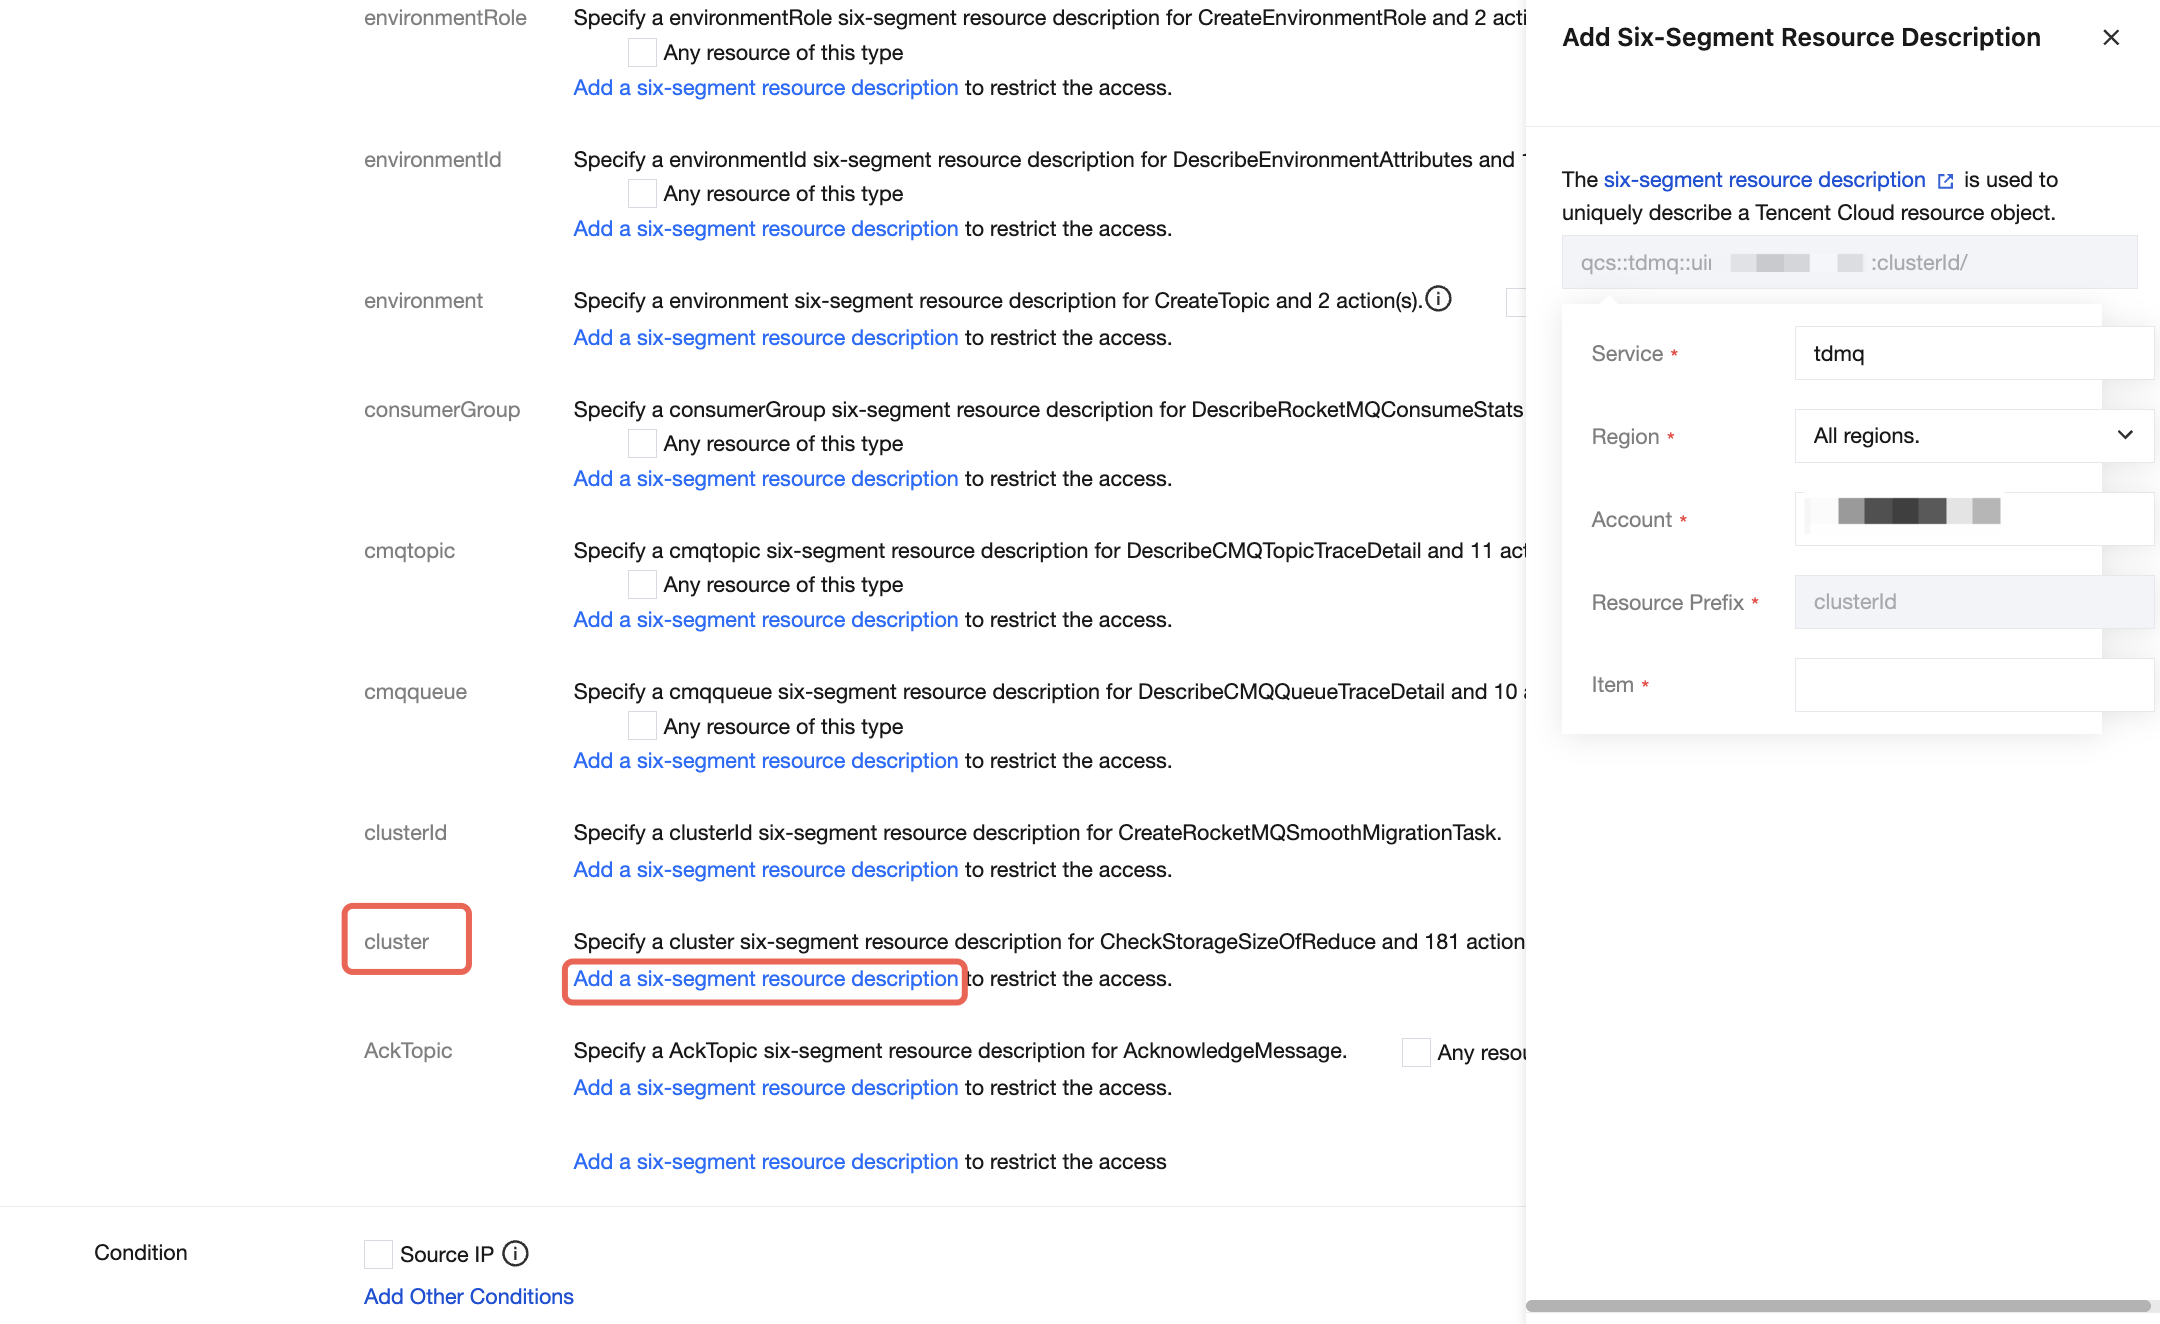
5. In the Resource section, select Specific resources, find the cluster resource type. You can select Any resource of this type (authorize all cluster resources) on the right of the cluster resource type, or click Add a six-segment resource description (authorize specific cluster resources) for the cluster resource type. In the pop-up dialog box on the right, enter the cluster ID in the Resource Prefix field.
6. In the Condition section, determine whether to specify the source IP address based on actual business requirements. If it is specified, access to the specified operation is allowed only when the request comes from the specified IP address range.
Click Next and set the policy name. The policy name is automatically generated by the console. By default, the policy name is policygen, with a suffix number generated based on the creation date. You can customize the policy name.
7. Click Select User or Select User Group to select the users or user groups to which resource permissions need to be granted.
8. Click completed. The sub-account granted resource permissions can access the relevant resources.