Spring Boot Starter Integration
Download
Focus Mode
Font Size
Scenarios
This document introduces how to use an open-source SDK (taking the Spring Boot Starter SDK as an example) to send and receive messages, so as to help you better understand the complete process of sending and receiving messages.
Prerequisites
You have obtained the related client connection parameters as instructed in SDK Overview.
Operation Steps
Step 1: Adding Dependencies
Add dependencies to pom.xml.
<!--rabbitmq--><dependency><groupId>org.springframework.boot</groupId><artifactId>spring-boot-starter-amqp</artifactId></dependency>
Step 2: Preparing Configurations
1. Add RabbitMQ configuration information to the configuration file (taking the YAML configuration as an example).
spring:rabbitmq:# The host address can be obtained in the console, or use the RabbitMQ service address.host: 1.14.235.155port: 5672# The name of the role to be used can be obtained from the role management console.username: admin# Role token.password: eyJrZXlJZ....# The full name of the vhost can be obtained from the vhost tab in the cluster console.virtual-host: test_vhost
Parameter | Description |
host | Cluster access address, which can be obtained from the Client Access module on the basic cluster information page. |
port | Cluster access address port, which can be obtained from the Client Access module on the basic cluster information page. |
username | Username. Enter the username created in the console. |
password | User password. Enter the password specified during user creation in the console. |
virtual-host | Vhost name, which can be obtained from the vhost list in the console. |
2. Create a configuration file loading program (taking the
fanout exchange as an example).Note:
/*** Fanout exchange configuration.*/@Configurationpublic class FanoutRabbitConfig {/*** Exchange.*/@Beanpublic FanoutExchange fanoutExchange() {return new FanoutExchange("fanout-logs", true, false);}/*** Message queue.*/@Beanpublic Queue fanoutQueueA() {return new Queue("ps_queue", true);}@Beanpublic Queue fanoutQueueB() {// The dead letter queue can be bound in this way.Map<String, Object> requestParam = new HashMap<>();requestParam.put("x-dead-letter-exchange", "my-deadLetter-exchange");// Set the message expiration period.requestParam.put("x-message-ttl", 60000);return new Queue("ps_queue1", true, false,true, requestParam);}/*** Bind the message queue to the exchange.*/@Beanpublic Binding bindingFanoutA() {return BindingBuilder.bind(fanoutQueueA()).to(fanoutExchange());}@Beanpublic Binding bindingFanoutB() {return BindingBuilder.bind(fanoutQueueB()).to(fanoutExchange());}}
Parameter | Description |
fanout-logs | Name of the bound exchange, which can be obtained from the exchange list in the console. |
ps_queue | Name of the first queue bound to the exchange, which can be obtained from the queue list in the console. |
my-deadLetter-exchange | Dead letter exchange name, which can be obtained from the exchange list in the console. |
ps_queue1 | Name of the second queue bound to the exchange, which can be obtained from the queue list in the console. |
Step 3: Sending Messages
Create and compile the message sending program DemoApplication.java, and use RabbitTemplate to send messages.
@Autowiredprivate RabbitTemplate rabbitTemplate;public String send() {String msg = "This is a new message.";// Send a message.// Parameter description: Parameter 1 (exchange name, which can be obtained from the exchange list in the console); parameter 2 (Routing Key); parameter 3 (message content).rabbitTemplate.convertAndSend("direct_logs", "", msg);return "success";}
Step 4: Consuming Messages
Create and compile the message receiving program FanoutReceiver.java (taking the
fanout exchange as an example).@Componentpublic class FanoutReceiver {// Register a listener to listen to the specified message queue.@RabbitHandler@RabbitListener(queues = "test_queue") //Name of the queue bound to the exchange, which can be obtained from the queue list in the console.public void listenerPsQueue(String msg) {// Business processing...System.out.println("(ps_queue) receiver message. [" + msg + "]");}}
Step 5: Viewing Messages
If you want to confirm whether the message is successfully sent to TDMQ for RabbitMQ, you can log in to the console and choose Cluster > Queue to go to the basic information page to view the details of consumers accessing the cluster.
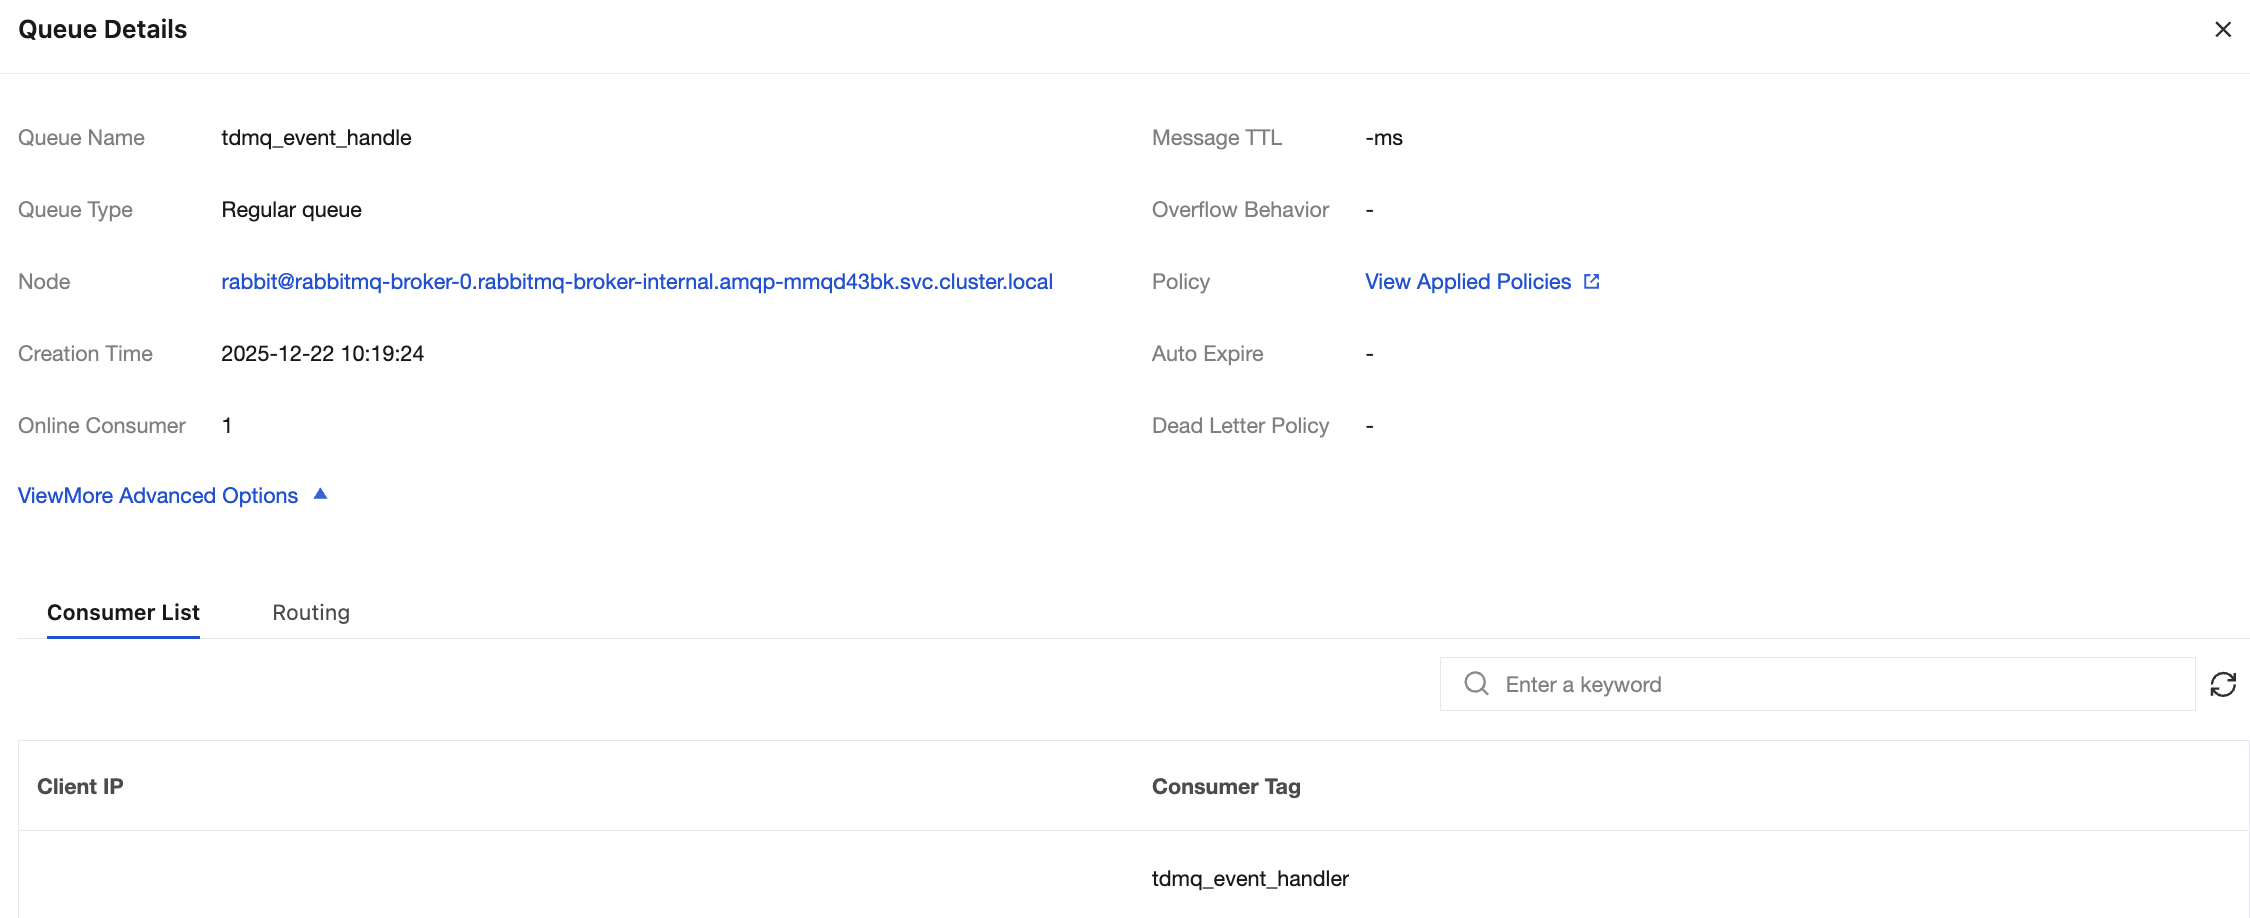
Note:
Help and Support
Was this page helpful?
You can also Contact sales or Submit a Ticket for help.
Help us improve! Rate your documentation experience in 5 mins.
Feedback