Overview
A tag is a key-value pair provided by Tencent Cloud for identifying cloud resources. Tags help you easily classify and manage the TDMQ for RabbitMQ resources in various dimensions, such as business, purpose, and owner.
Note:
Tencent Cloud will not use the tags you set. Tags are only used for you to manage TDMQ for RabbitMQ resources.
Use Limits
Quantity Limit
A resource can be bound with a maximum of 50 tags.
Naming Restrictions
|
Tag keys that start with qcs:, project:, or project are system-reserved tag keys, which cannot be created. | - |
In UTF-8, a tag key must contain 1 to 127 Unicode characters. | In UTF-8, a tag value must contain 1 to 255 Unicode characters. |
A tag key can contain characters, spaces, digits, and special characters in UTF-8 format, but cannot start or end with a space. Supported characters in English: + - = . _ : / @ ( ) [ ] , ; > < Supported characters in Chinese: + - = / @ ( ) 【 】 : |
|
It is case-sensitive. |
|
Usage Examples
Case Description
Case: A company has 6 TDMQ for RabbitMQ clusters on Tencent Cloud. The following table describes the departments, business scopes, and owners of these clusters.
Taking amqp-78383dp8p8w1 as an example, we can add the following three sets of tags to this instance.
|
dept | ecommerce |
business | mkt |
owner | tom |
Similarly, you can also set appropriate tags for other queue resources based on their department, business scope, and owner.
Setting Tags in the TDMQ for RabbitMQ Console
With the preceding case as an example, you can log in to the TDMQ for RabbitMQ console to set tags after you design tag keys and tag values.
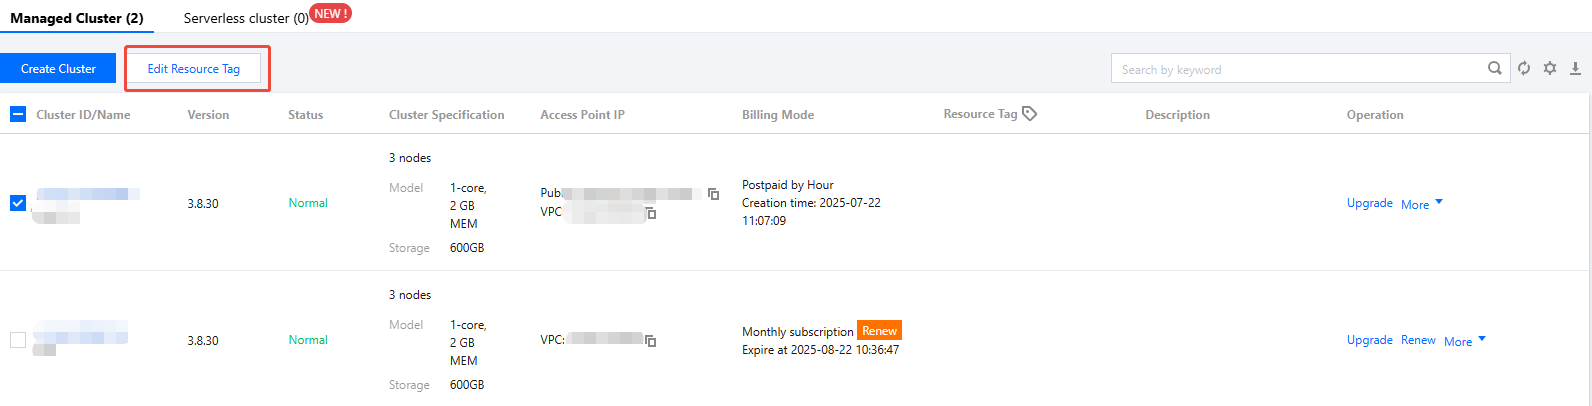
2. On the cluster management list page, select a region, select the clusters for which you want to edit tags, and then click Edit Resource Tag at the top of the page.
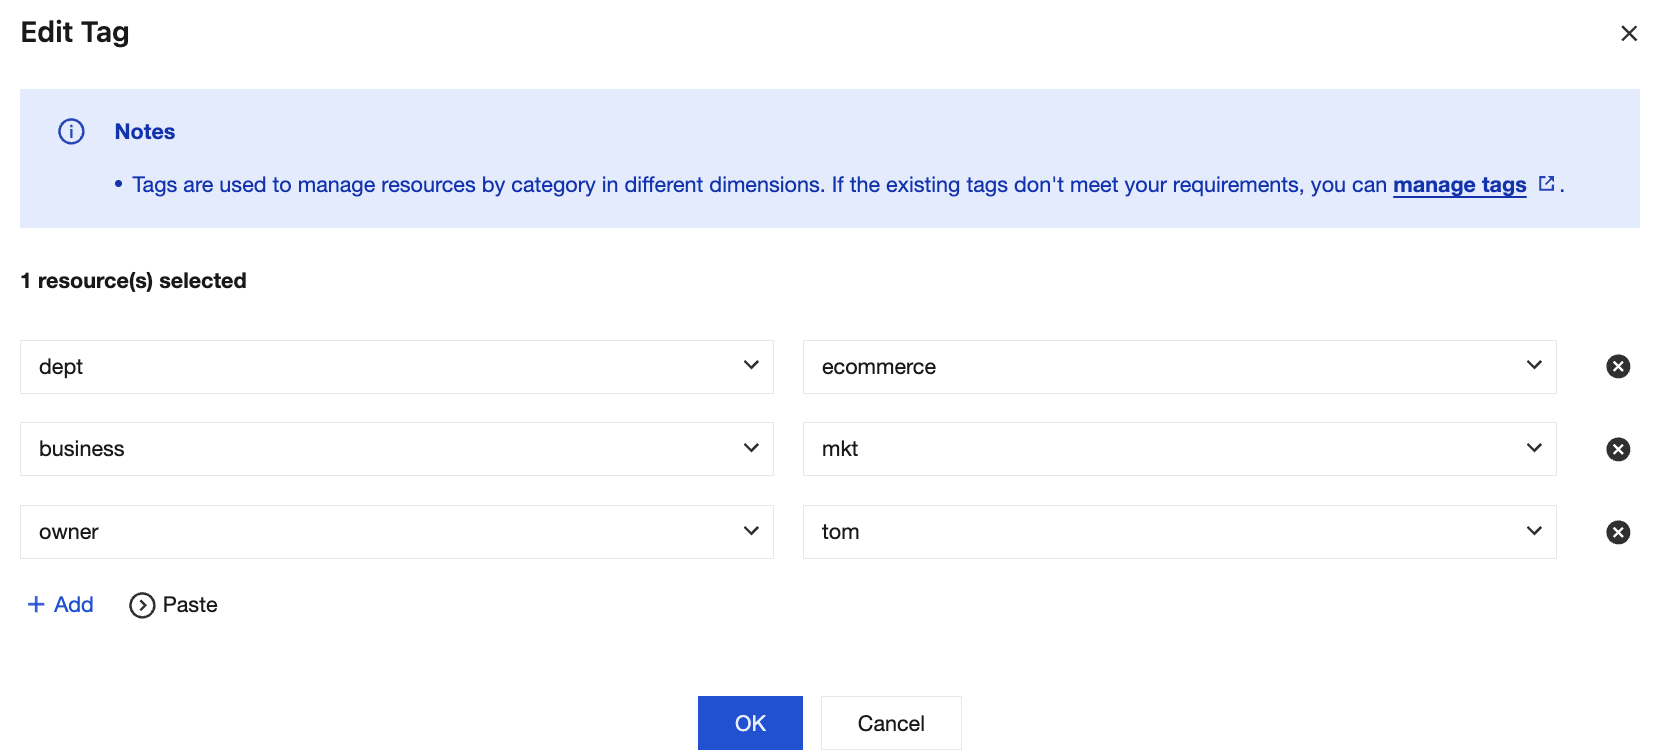
3. In the Edit Tag pop-up window, set tags.
For example: add three sets of tags to the amqp-78383dp8p8w1 cluster.
Note:
If the existing tags do not meet your requirements, go to the Tag Management page to create tags. 4. Click OK. The system displays a message, indicating that the modification is successful. You can view the tags bound to the cluster in the Resource Tag column of the cluster.
Filtering Resources by Tag Key
To obtain the clusters bound to a specific tag, perform the following steps to filter clusters:
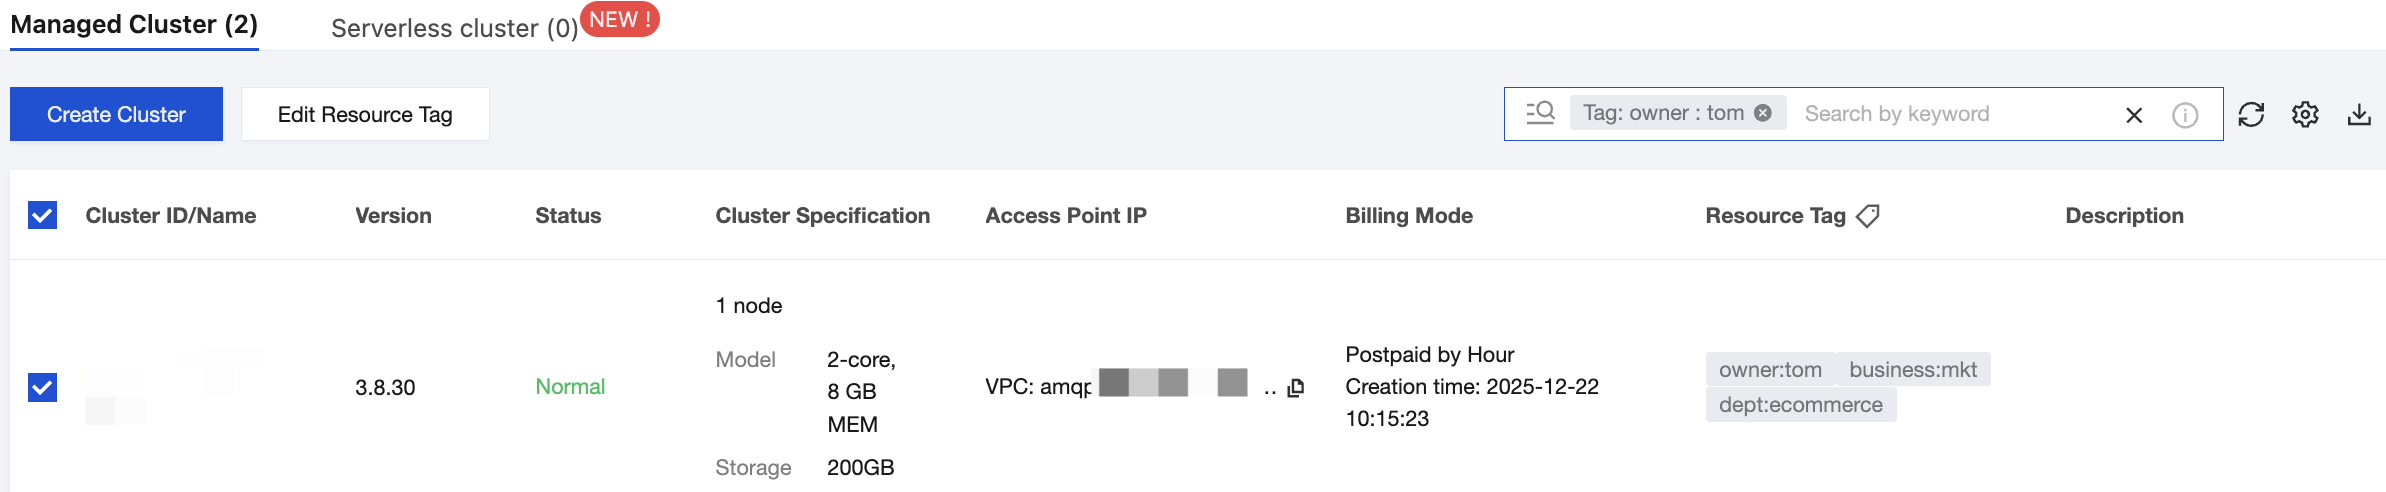
1. Select Tag in the search box in the upper-right corner of the page.
2. In the window that pops up after Tag:, select the tag you want to search for and click OK to search.
For example, if you select Tag: owner:tom, you can obtain the clusters bound to the tag key owner:tom.
Editing Tags
1. On the cluster management list page, select a region, select the clusters for which you want to edit tags, and then click Edit Resource Tag at the top of the page.
Note:
You can edit tags for a maximum of 20 resources in batches.
2. In the Edit Tag pop-up window, add, modify, or delete tags based on actual needs.
Managing Resource Tags in a Unified Manner
You can also manage resource tags in a unified manner in the Tag Management console. The detailed operations are as follows:
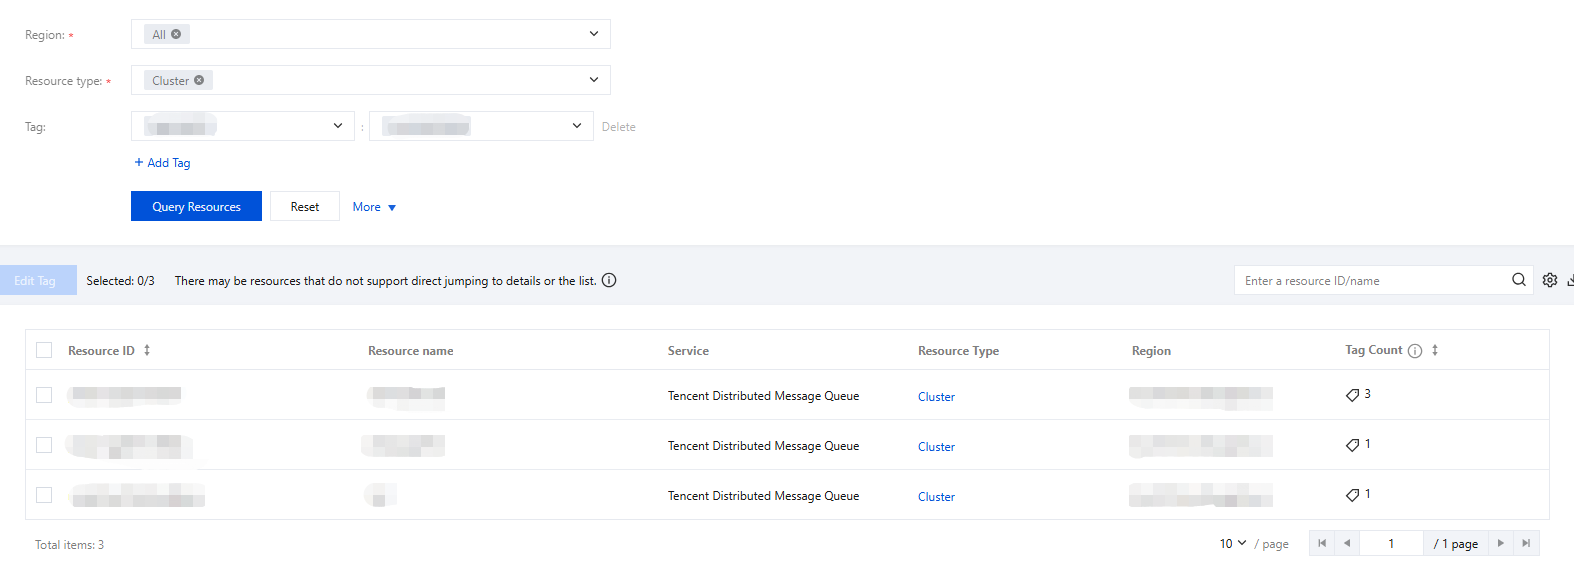
2. In the left sidebar, select Resource Tag, select query conditions as needed, and select specific content in Resource Type: For Serverless Edition, choose RabbitMQ Serverless > trabbit.
Note:
Managed Edition clusters can only be viewed in the RabbitMQ console, and the unified management of resource tags in the Tag Management console is not currently supported.
3. Click Query Resources.
4. Select the required resources in the query result, and click Edit Tag to bind or unbind tags in batches.