When using TDMQ for RocketMQ, customers often face the challenge of migrating the existing business, for example, migrating business from self-built RocketMQ clusters or managed RocketMQ clusters on other platforms to TDMQ for RocketMQ.
This guide walks you through migrating metadata from a self-built open-source RocketMQ cluster to Tencent Cloud TDMQ for RocketMQ.
Note:
Both exclusive clusters and virtual clusters support metadata migration, and the migration steps are the same.
Prerequisites
You have created a cloud-based cluster and namespace in advance in the console.
Operation Steps
Step 1: Exporting the Metadata File
If you are using a self-built open-source edition of RocketMQ, we provide three methods to help you export metadata.
Method 1: Online Export Using Scripts
If your environment can access the public network, run the following script directly on your server (if your RocketMQ cluster consists of multiple machines, it can be run on any machine provided there is network connectivity within the cluster).
2. Upload the downloaded tool to your self-built RocketMQ cluster. (If your RocketMQ cluster consists of multiple machines, it can be run on any machine provided there is network connectivity between the machines within the cluster.)
3. Decompress the package and enter the tool's directory.
unzip rocketmq-migration.zip
cd rocketmq-migration
4. Run the following commands to perform the migration.
// Run this command primarily to use the file from the export tool as the executable file.
ROCKETMQ_HOME=`pwd`
// Start export execution.
./bin/export.sh
// Enter the address of the open-source RocketMQ cluster that you want to export, such as localhost:9876.
Enter name server address list:localhost:9876
// Enter the name of the cluster that you want to export, such as DefaultCluster.
Choose a cluster to export:DefaultCluster
// Enter the metadata export directory. By default, the final metadata is stored in /tmp/rocketmq/config/rocketmq-metadata-export.json.
Enter file path to export[default /tmp/rocketmq/export]:
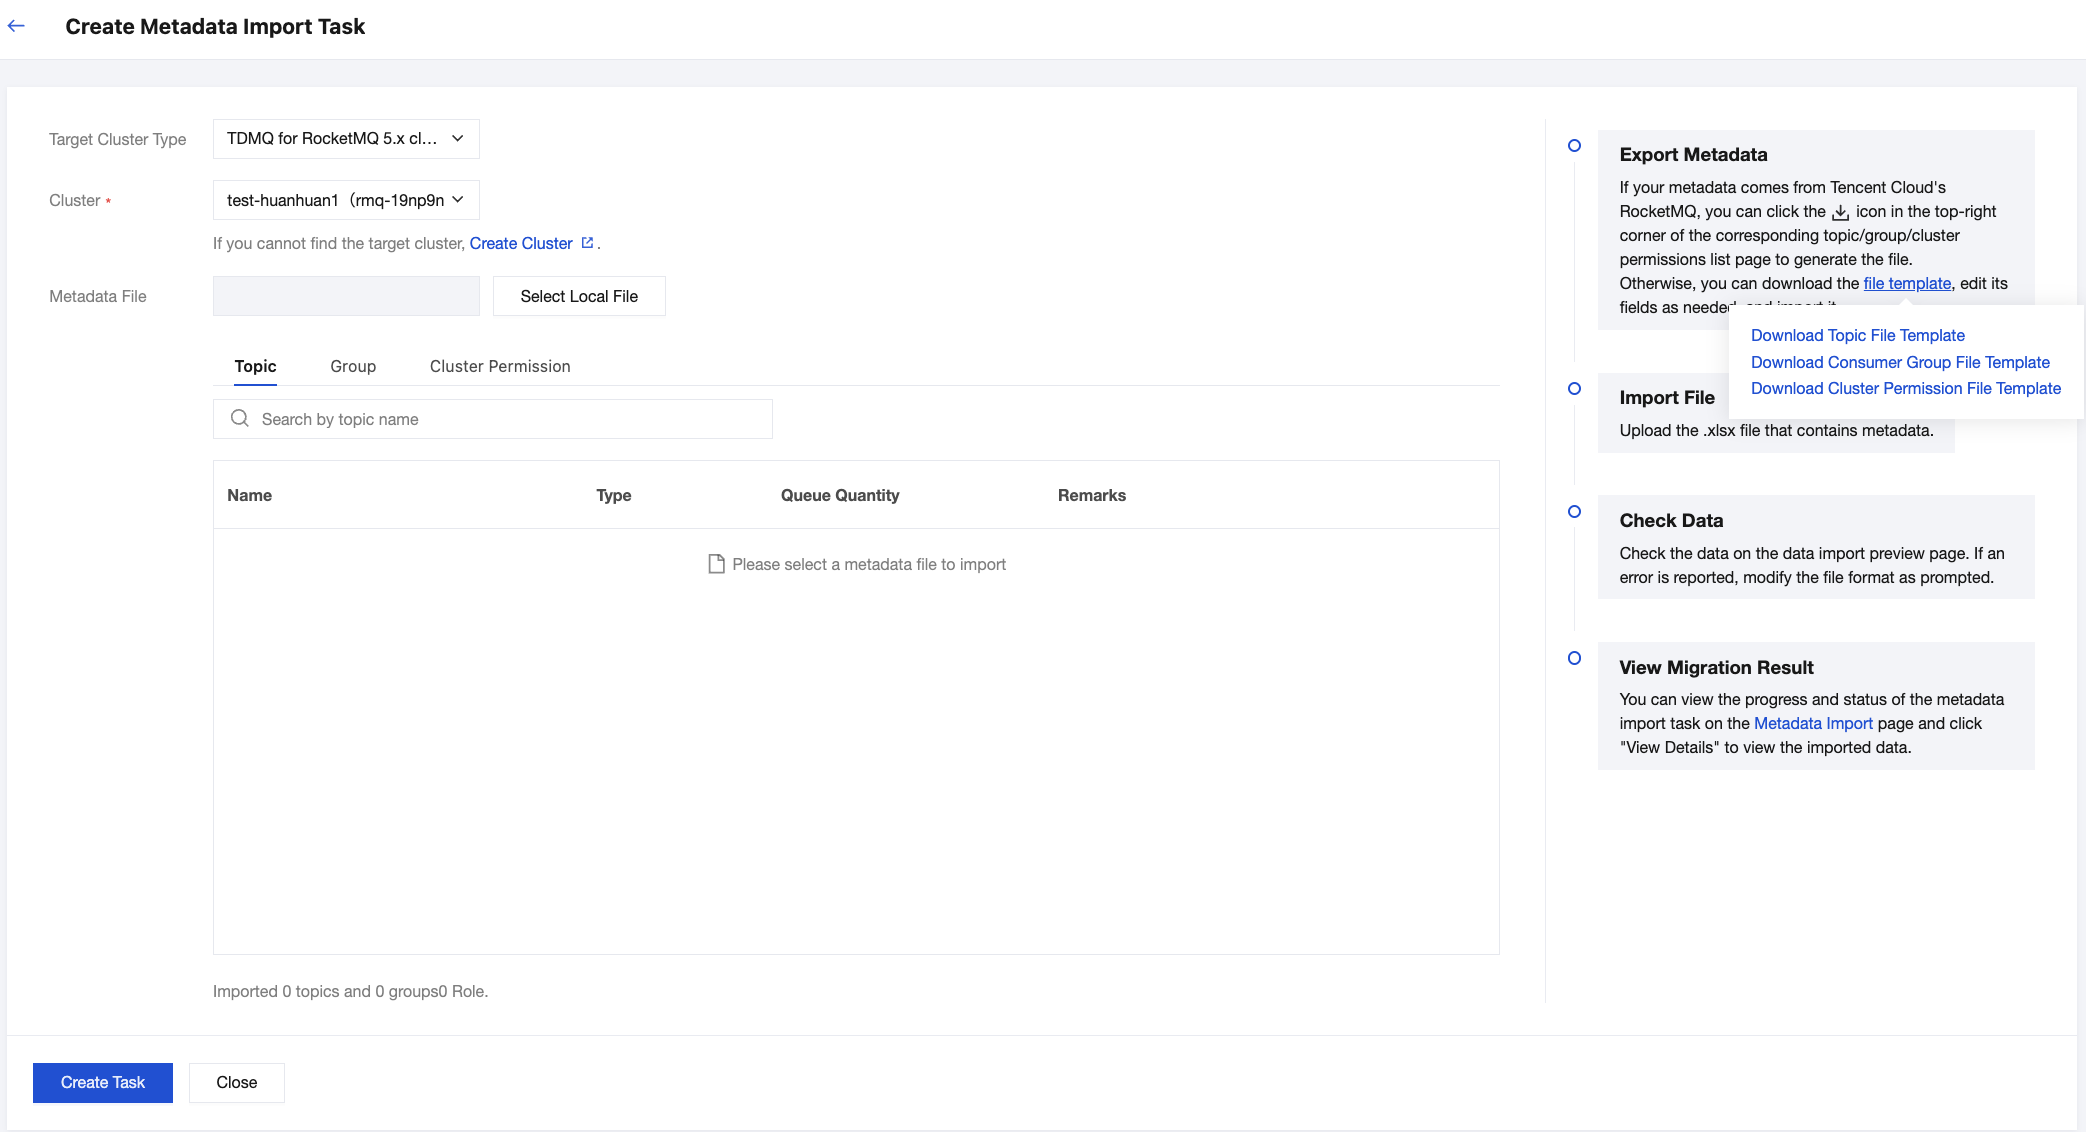
Method 3: Exporting and Importing an .xlsx File
If your metadata originates from another TDMQ for RocketMQ cluster on Tencent Cloud, you can directly upload topic and group data by using a .xlsx template.
Export metadata directly by clicking
in the upper-right corner of the Topic/Group list page. The exported metadata is in .xlsx format. Then, click
in the upper-right corner of the Topic/Group list page for the new cluster to import the data into the specified namespace of a 4.x cluster or under a 5.x cluster.
For newly created clusters, you can also edit the metadata in the spreadsheet according to the aforementioned .xlsx metadata template format and then upload it. Choose Migration to Cloud > Metadata Import, and you can obtain the template from the instructions on the right side. When obtaining the template, differentiate between metadata templates for 4.x clusters and 5.x clusters by selecting different types of target clusters.
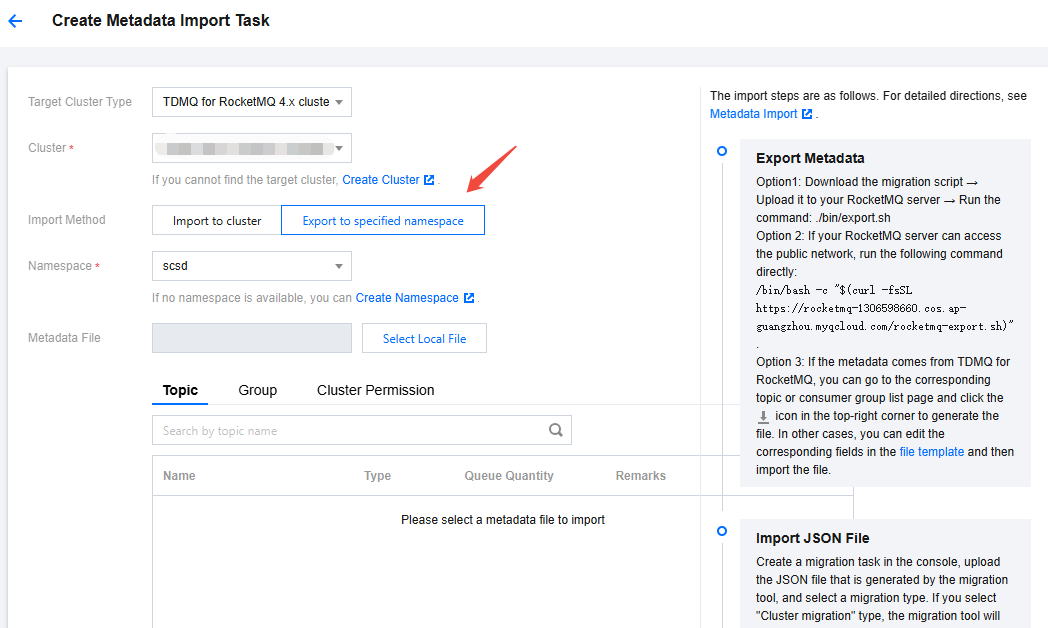
Step 2: Creating a Migration Task
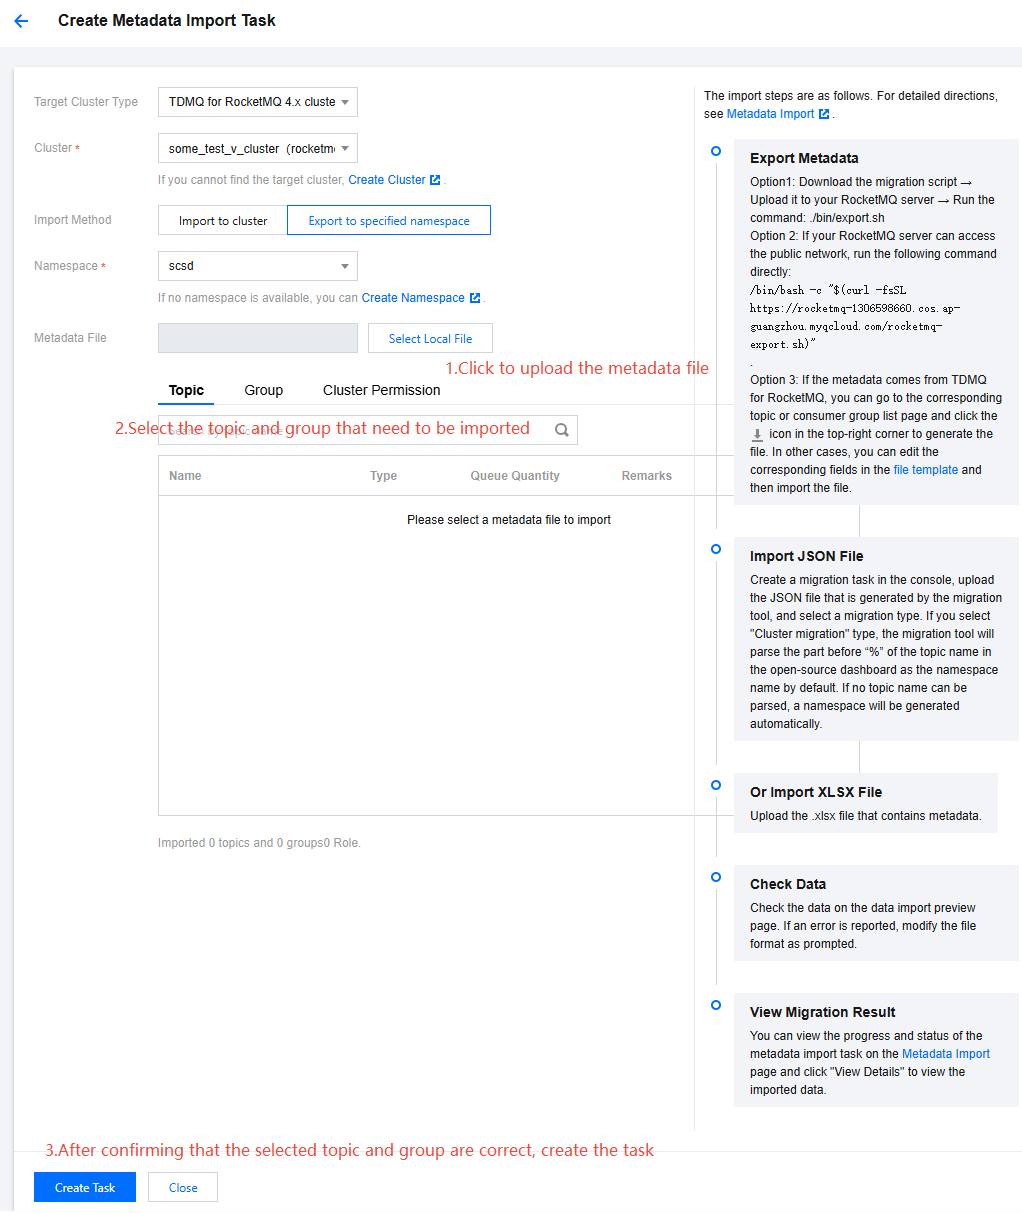
1. Log in to the TDMQ for RocketMQ console and go to the Migration to Cloud page. Go to the migration task list page. Click Create Task to create the corresponding migration task.
2. Select the migration task type:
Import to cluster: Migrate metadata from the original self-built cluster to the created cluster. When performing a cluster migration task, the migration tool by default parses the part before the percent sign (%) in the topic name from the open-source RocketMQ dashboard as the namespace name, thereby creating multiple logically isolated namespaces for you. If namespaces were not differentiated in the original self-built cluster, the system will generate a default namespace named default for you (applicable only to 4.x exclusive clusters and existing 4.x virtual clusters).
Import to specified namespace: supported only by 4.x exclusive clusters and existing 4.x virtual clusters. Migrate metadata from the original self-built cluster to the specified namespace. If topics were not previously differentiated by namespace or categorized by business, you can leverage the cloud migration opportunity. During the subsequent import process, select specific topics and groups and assign them to enter different namespaces to distinguish between businesses or environments.
Note:
5.x clusters and 4.x general clusters support importing roles and the access control list (ACL) information.
5.x clusters and 4.x general clusters do not have namespaces. Therefore, they only support importing to the cluster level, and there is no Import to Namespace option.
3. Upload the metadata file obtained in Step 1 according to the figure, and select the topics and groups to be imported.
Note:
A single task can import at most 1,000 topics and 1,000 groups. Any data beyond these limits will fail to be imported.
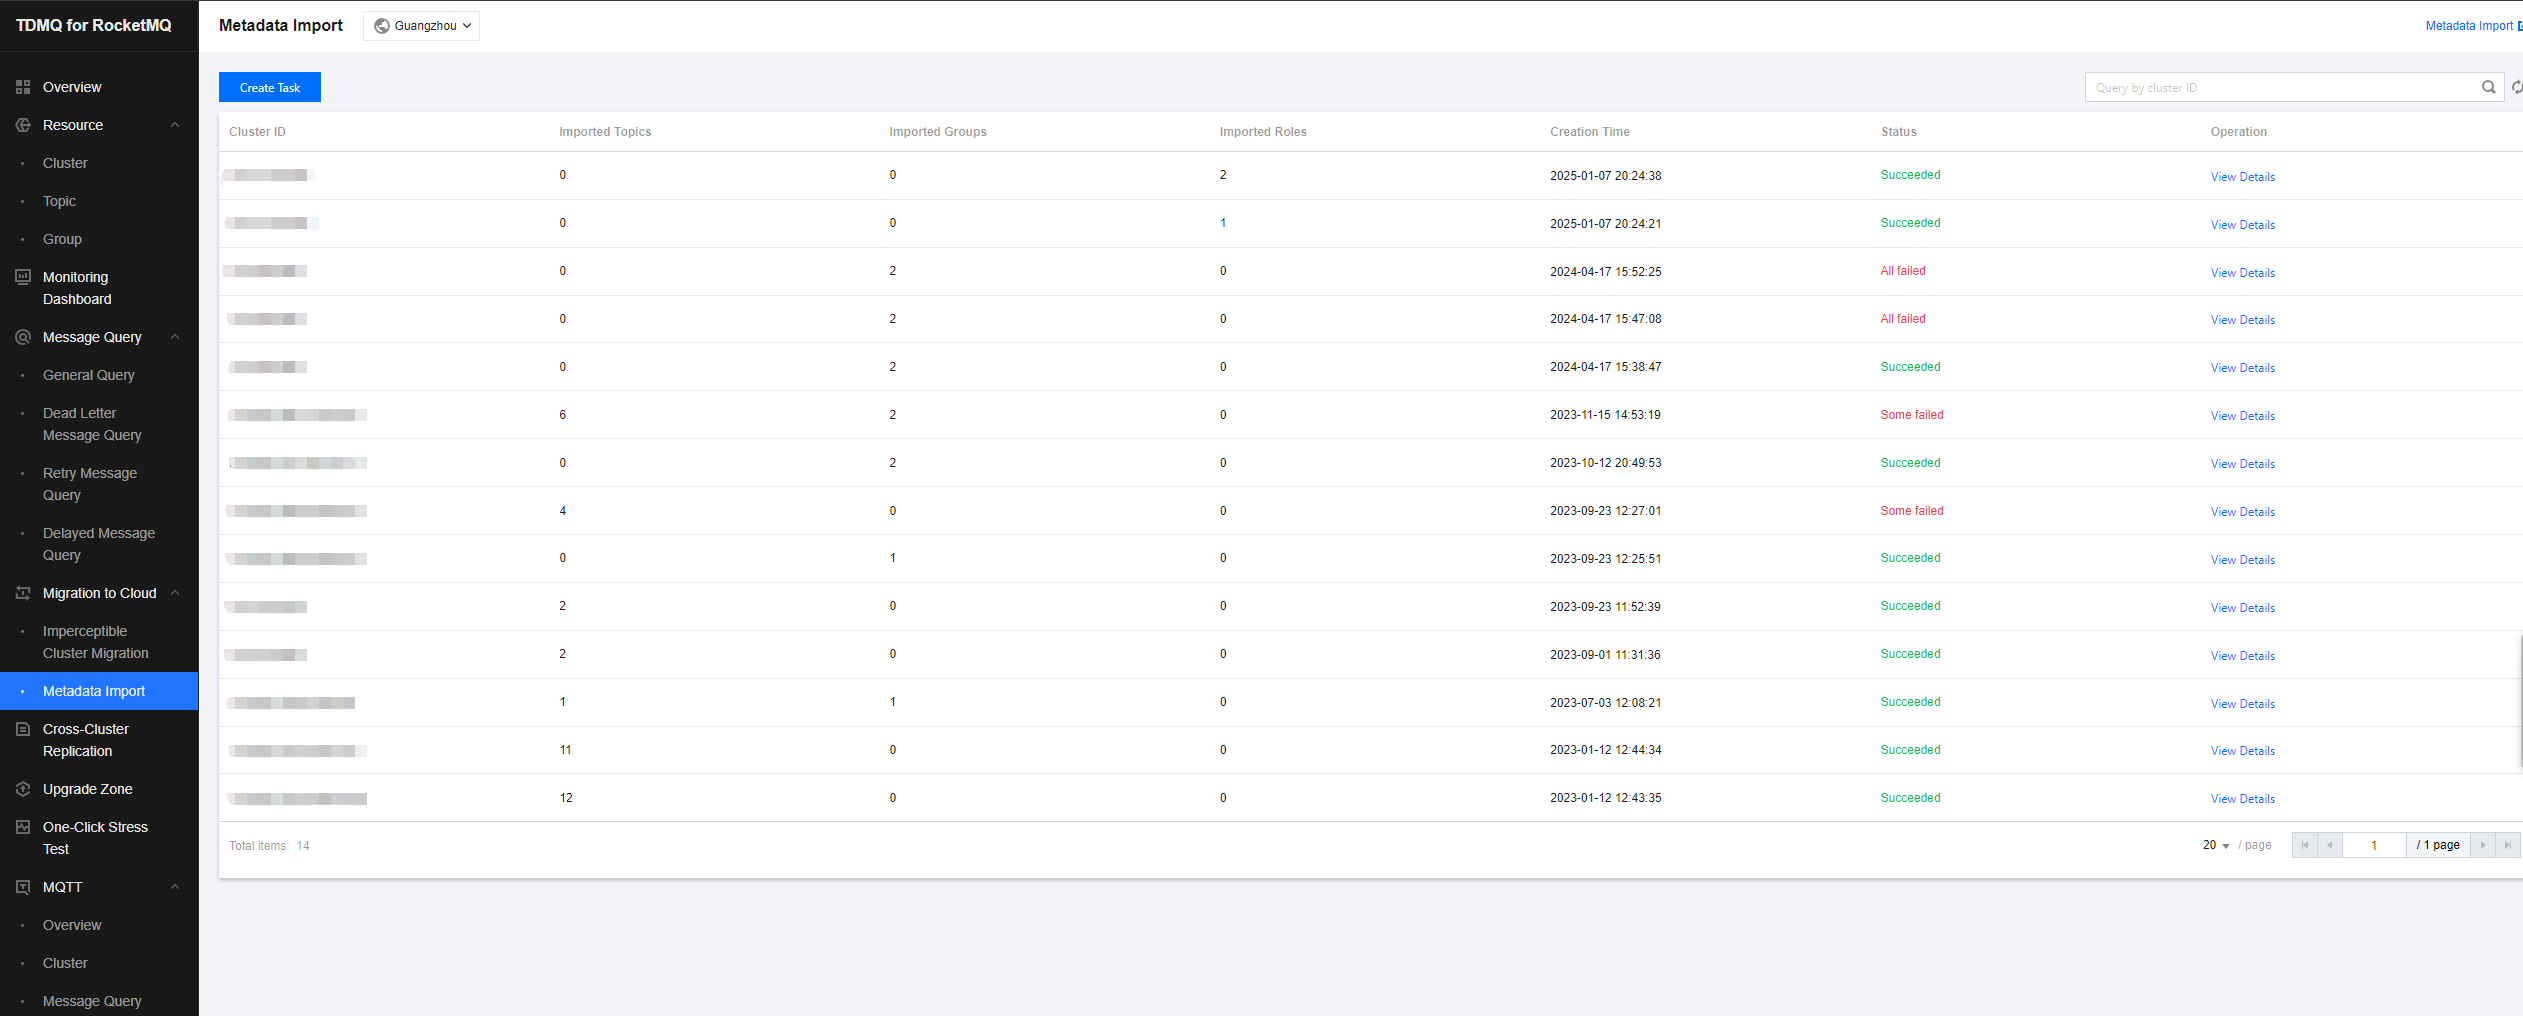
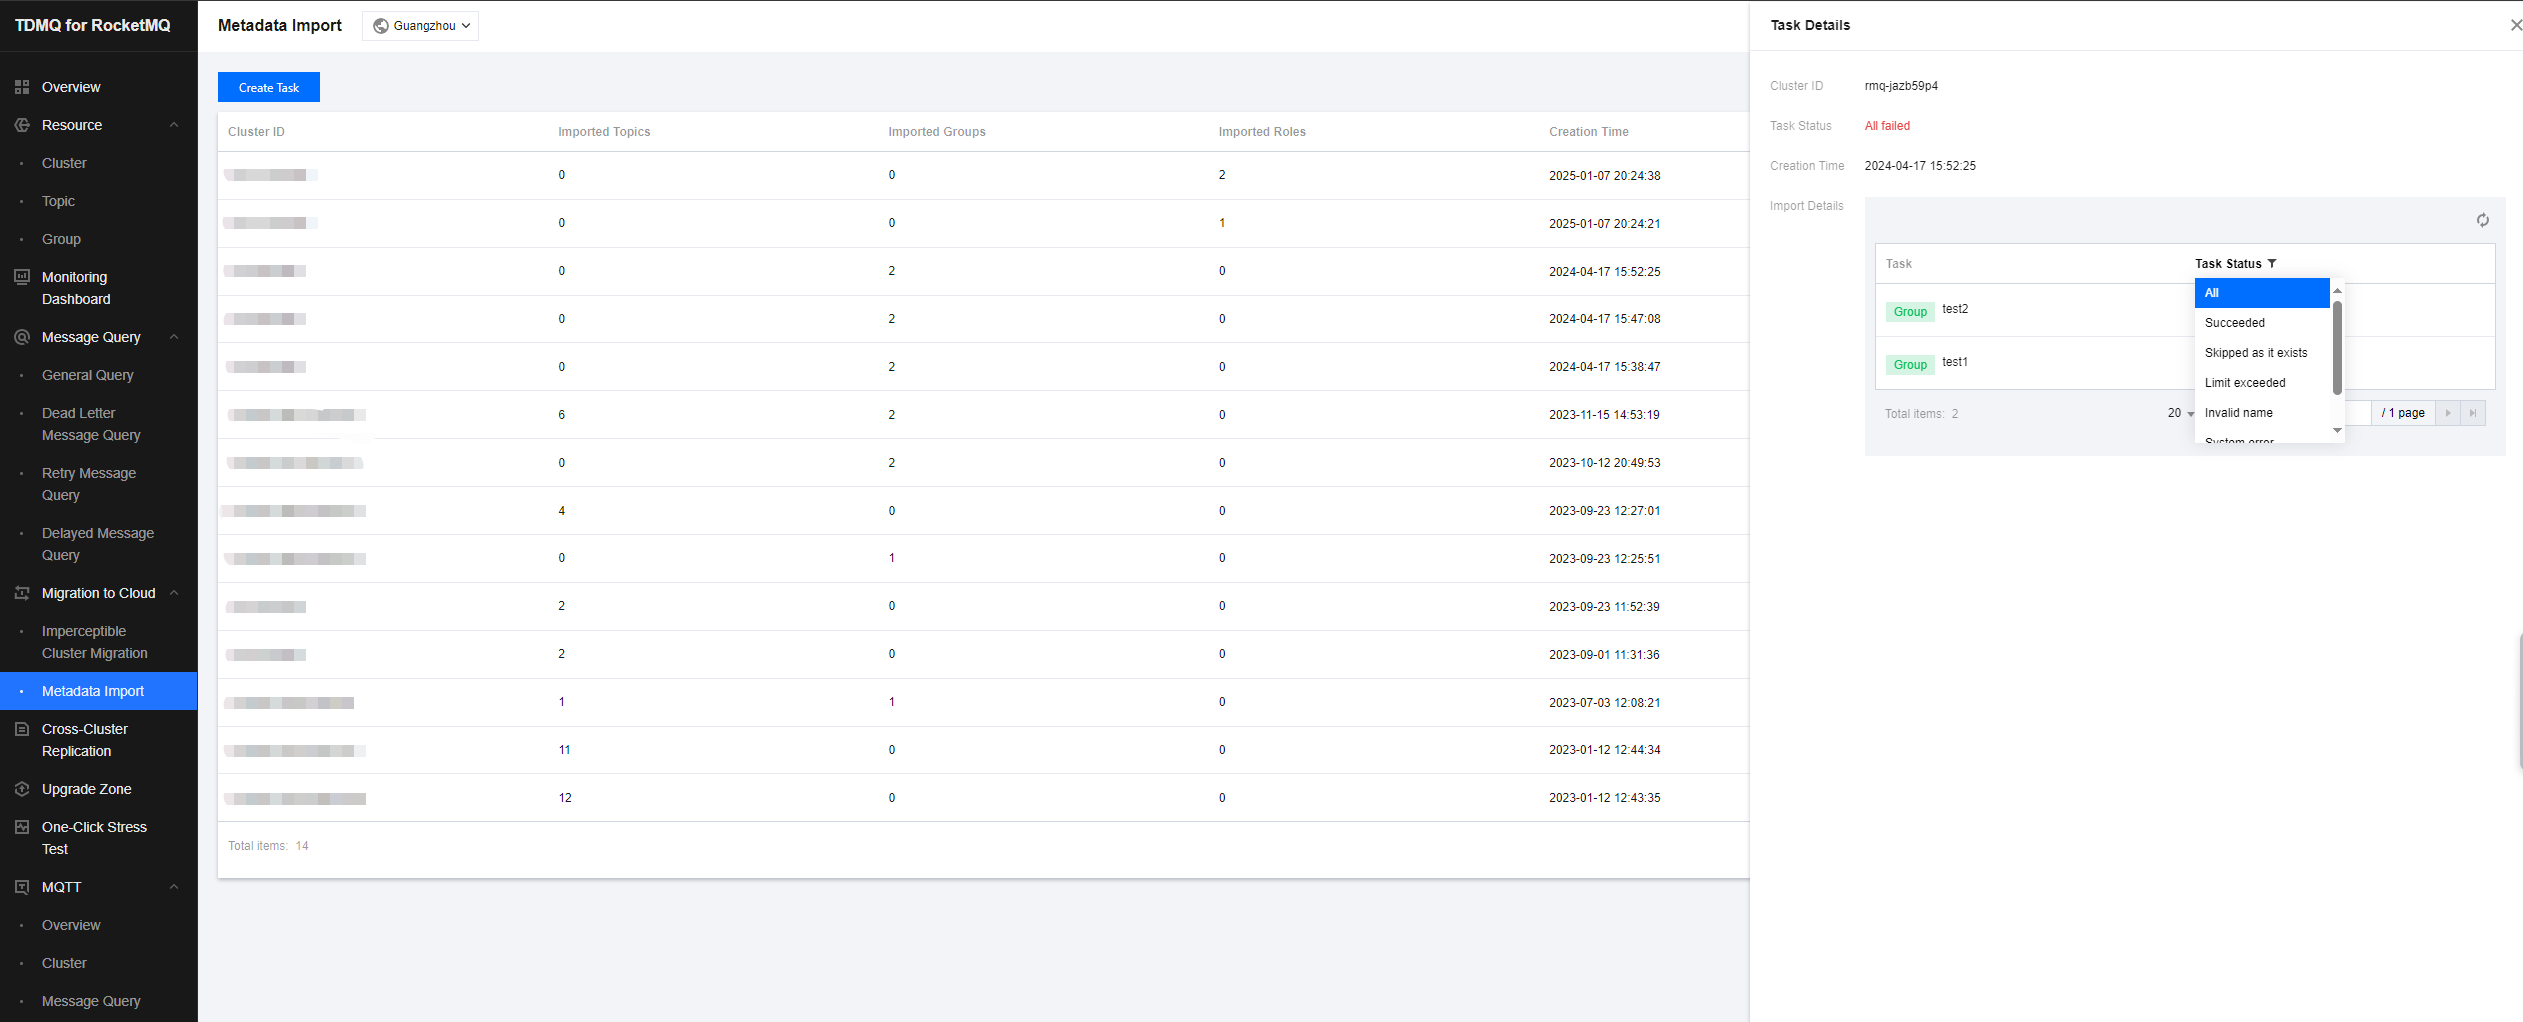
Step 3: Viewing the Task Status
After the task is created successfully, go to the task list to view the task progress. If there is too much data, the task may take some time to load. Click View Details to view the detailed running status of the task.
If the task status is Partially Failed or Completely Failed, you can filter to view the reasons for the failure.