Step 2: Running the TDMQ for RocketMQ Client (Optional)
Download
Focus Mode
Font Size
Scenarios
This task guides you to use the RocketMQ API after purchasing the TDMQ for RocketMQ service. You can set up the RocketMQ environment on Tencent Cloud Cloud Virtual Machine (CVM), locally download and extract the RocketMQ toolkit, and then perform a test on the RocketMQ API.
Operation Steps
Step 1: Installing the JDK Environment
1. Check whether Java is installed.
Open the terminal and run the following command:
java -version
If the Java version number is displayed in the command output, it means that Java is installed successfully. If Java is not installed, download and install the Java Software Development Kit (JDK).
2. Set up the Java environment.
Set the
JAVA_HOME environment variable and point it to the Java installation directory on your machine.
Taking Java JDK version 1.8.0_20 as an example, the output of the operating system is as follows:Operating System | Output |
Windows | Set the environment variable JAVA_HOME to C:\\Program Files\\Java\\jdk1.8.0_20 |
Linux | export JAVA_HOME=/usr/local/java-current |
Mac OSX | export JAVA_HOME=/Library/Java/Home |
Add the Java compiler address to the system path:
Operating System | Output |
Windows | Add the string ";C:\\Program Files\\Java\\jdk1.8.0_20\\bin" to the end of the system variable PATH. |
Linux | export PATH=$PATH:$JAVA_HOME/bin/ |
Mac OSX | not required |
Use the
java -version command mentioned above to verify that Java is installed.Step 2: Downloading the RocketMQ Toolkit
Download and extract the RocketMQ installation package. (Official download address for RocketMQ installation package)
Step 3: Performing a Test on the RocketMQ API
Run command-line interface (CLI) commands to produce and consume messages and go to the
./benchmark directory. For sending a single message, you can use the message sending feature in the TDMQ for RocketMQ console.1. Open the terminal and start the consumer.
sh consumer.sh -t "Topic name" -n "RocketMQ access address" -g "Group name" -a true -ak xxx -sk yyy
Note:
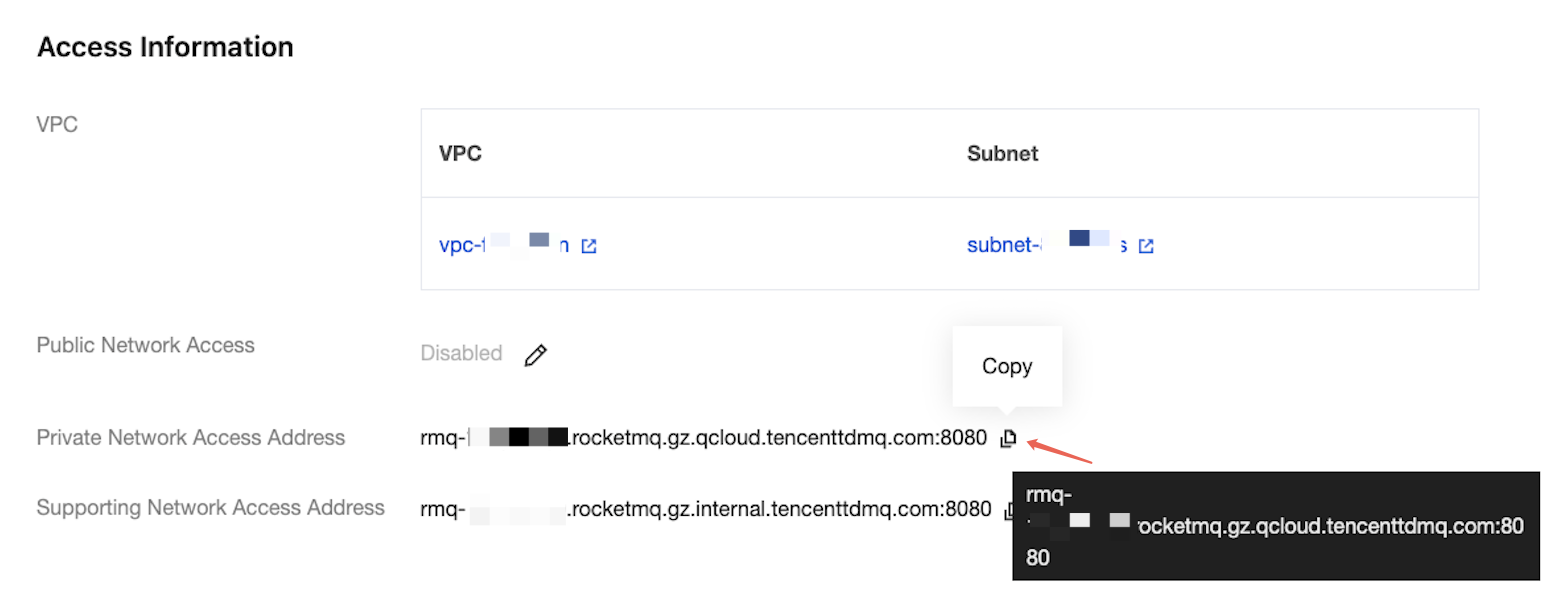
Replace the RocketMQ access address with the domain name and port for accessing the Virtual Private Cloud (VPC) network. If you perform the test locally and you are unable to connect to the VPC, you can specify a public network access address instead (the corresponding security group rules should be enabled). You can obtain the public network access address from the Access Information section of the Instance Details page in the console.
topic: the name of the topic obtained from the Topic page in the console.
group: the name of the group obtained from the Group page in the console.
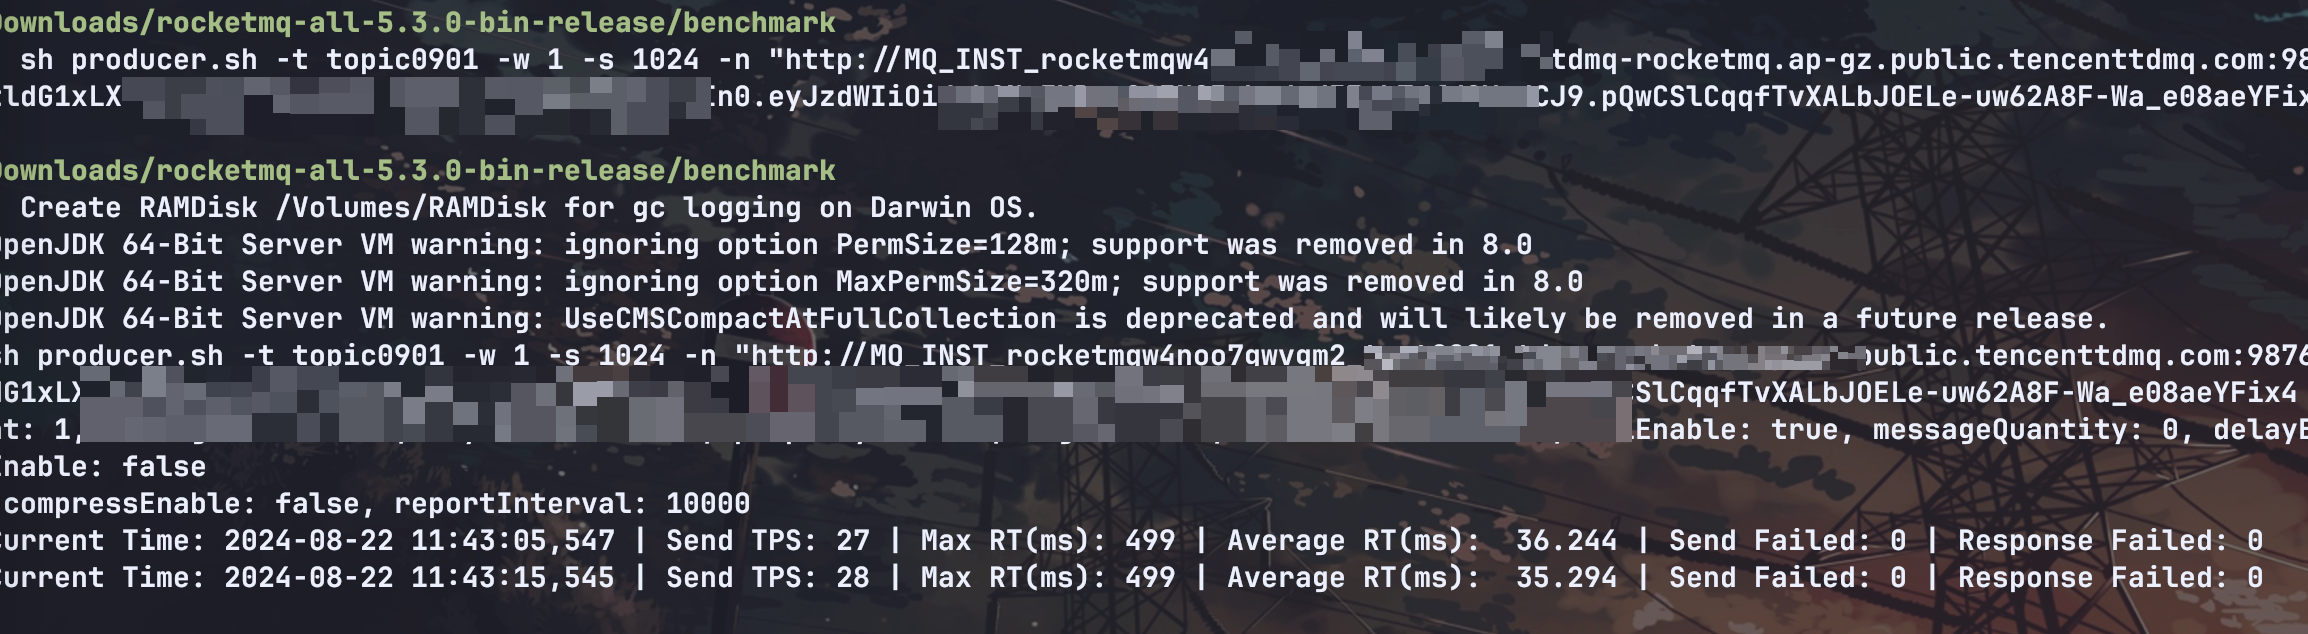
2. Open another terminal window and start the producer.
sh producer.sh -t "Topic name" -w 1 -s 1024 -n "RocketMQ access address" -a true -ak xxx -sk yyy -m true
Note:
Replace the RocketMQ access address with the domain name and port for accessing the Virtual Private Cloud (VPC) network. If you perform the test locally and you are unable to connect to the VPC, you can specify a public network access address instead (the corresponding security group rules should be enabled). You can obtain the public network access address from the Access Information section of the Instance Details page in the console.

topic: Replace XXXX with the topic name. You can obtain it from the Topic Management page in the console.
After the producer is started, you can see that message production and consumption are proceeding normally:

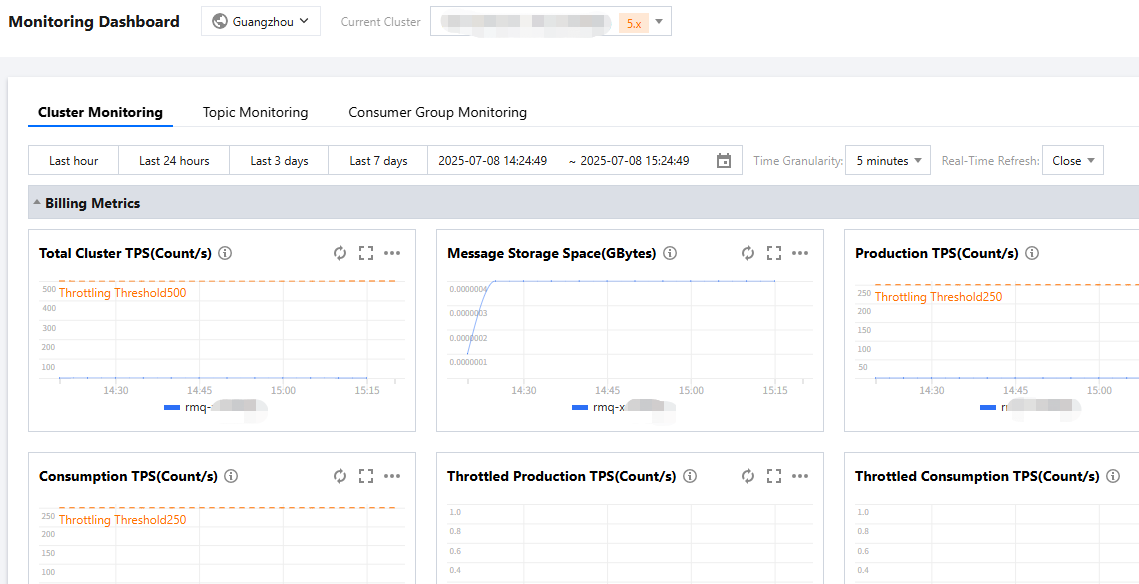
You can also view monitoring metrics on the dashboard:
Help and Support
Was this page helpful?
You can also Contact sales or Submit a Ticket for help.
Help us improve! Rate your documentation experience in 5 mins.
Feedback