DMC User Permission Settings
다운로드
포커스 모드
폰트 크기
This document introduces how to create a Tencent Cloud root account, administrator user, and sub-account, as well as how to configure Database Management Center (DMC) access permissions.
Prerequisites
Read Cloud Access Management first to understand the authorization policy syntax and the types of resources that can be authorized.
DMC Preset Policies
QcloudDMCDeveloper DMC developer policy permissions: Grants full permissions for all operations on the SQL window and quick login pages.
QcloudDMCDba DMC DBA policy permissions: Grants full operational permissions for all feature pages.
Account Types and Menu Feature Permissions Description
Classification | Page Feature | Tencent Cloud Root Account | Tencent Cloud Sub-Account | Description | |||
| | | Tencent Cloud administrator user | DBA user with preset DMC DBA policy permissions | Developer user with preset DMC developer policy permissions | User with custom DMC permissions configured in CAM | |
Basic Development | SQL Window | Operation permissions allowed | Operation permissions allowed | Operation permissions allowed | Operation permissions allowed | Subject to the actual configured policy. | For a specified resource account, operations are limited to the corresponding resources. For accounts requested via submitting tickets, to be restricted from accessing the database through the DMC console, all access is prohibited. |
| Quick log-in | Operation permissions allowed | Operation permissions allowed | Operation permissions allowed | Operation permissions allowed | | |
| Marker management | Operation permissions allowed | Operation permissions allowed | Operation permissions allowed | View permissions | | No |
Advanced Development | Data Source | Operation permissions allowed | Operation permissions allowed | Operation permissions allowed | View permissions allowed | | No |
| Structure comparison | Operation permissions allowed | Operation permissions allowed | Operation permissions allowed | View permissions allowed | | No |
Secure Release | Controlled instances | Operation permissions allowed | Operation permissions allowed | Operation permissions allowed | View, login, and request permissions allowed | | No |
| Rule templates | Operation permissions allowed | Operation permissions allowed | Operation permissions allowed | View permissions allowed | | No |
| SQL change (ticket) | Operation permissions allowed | Operation permissions allowed | Operation permissions allowed | Operation permissions allowed | | An instance can have tickets created and managed only if permission has been granted. Termination of execution is restricted to the creator only. |
| Import/export (ticket) | Operation permissions allowed | Operation permissions allowed | Operation permissions allowed | Operation permissions allowed | | |
| Permission request (ticket) | Operation permissions allowed | Operation permissions allowed | Operation permissions allowed | Operation permissions allowed | | |
| Ticket List | Operation permissions allowed | Operation permissions allowed | Operation permissions allowed | Operation permissions allowed | | |
| Execution list | Operation permissions allowed | Operation permissions allowed | Operation permissions allowed | Operation permissions allowed | | |
| Operation history | Operation permissions allowed | Operation permissions allowed | Operation permissions allowed | Operation permissions allowed | | No |
Preparing a Tencent Cloud Root Account
The Tencent Cloud root account has access to all DMC pages by default. Below is an introduction to creating a Tencent Cloud root account and enabling authorization for the DMC Secure Release feature.
2. Verify a Tencent Cloud account through real-name authentication. For detailed steps, see Basic Introduction to Real-Name Authentication and related documents.
3. Grant the root account advanced development and secure release permissions.
Note:
If only the basic development capabilities of DMC are needed, this step can be skipped.
If advanced development capabilities are required in addition to basic features, this step should be completed.
3.1 Grant the root account permission for the DMC Secure Release feature. For detailed steps, see Authorizing Security Release Feature for Users.
Note:
The root account and its sub-accounts only need to be authorized once. Other sub-accounts under the same root account do not require separate authorization.
3.2 (Optional) Customize rule templates and assign approvers. For detailed steps, see Create Rule Template.
Note:
If a predefined rule template is used and the subsequent ticket approver is the Tencent Cloud root account, this step can be skipped.
If custom rule templates and approvers are required, this step should be completed.
3.3 Add the instances for SQL changes and import/export execution to the data sources page. For detailed steps, see Create Data Source.
3.4 Enable instance control for the instances executing SQL changes and import/export operations. For detailed steps, see Enabling Instance Control.
Note:
When enabling control, select a predefined rule template, where the default ticket approver is the Tencent Cloud root account.
3.5 On the permission application page, apply for permissions for SQL window, SQL change tickets, and import/export tickets. For detailed steps, see Permission Application.
3.6 On the ticket list page, approve tickets. For detailed steps, see Approve Ticket.
At this point, you have full operation permissions for the DMC page.
Preparing a Tencent Cloud Administrator User
This administrator account can manage all users and their permissions within your Tencent Cloud account, as well as financial information and cloud service assets. This means that the administrator user also has full operation permissions for DMC.
2. Grant the administrator account advanced development and secure release permissions.
2.1 Grant permission for the DMC secure release feature. For detailed steps, see Authorizing Security Release Feature for Users.
Note:
The root account and its sub-accounts only need to be authorized once. Other sub-accounts under the same root account do not require separate authorization.
2.2 (Optional) Customize rule templates and assign approvers. For detailed steps, see Create Rule Template.
Note:
If a predefined rule template is used and the subsequent ticket approver is the Tencent Cloud root account, this step can be skipped.
If custom rule templates and approvers are required, this step should be completed.
2.3 Add the instances for SQL changes and import/export execution to the data sources page. For detailed steps, see Create Data Source.
2.4 Enable instance control for the instances executing SQL changes and import/export operations. For detailed steps, see Enabling Instance Control.
Note:
When enabling control, select a predefined rule template, where the default ticket approver is the Tencent Cloud root account.
2.5 On the permission application page, apply for permissions for SQL window, SQL change tickets, and import/export tickets. For detailed steps, see Permission Application.
If you set yourself as the ticket approver when customizing the rule template, approve tickets on the ticket list page. For detailed steps, see Approve Ticket. Otherwise, check the ticket progress on Ticket List > My Request. Once approval is complete, you will have full operational permissions for DMC.
Preparing a DMC DBA User
A DMC DBA user can be created using either the Tencent Cloud root account or an administrator user under the root account.
Step 1: Creating a User with DMC DBA Operation Permissions on the Cloud Access Management Page
1. Log in to the CAM console, and in the left sidebar, select User > User List to enter the user list management page.
2. On the User List Management page, click Create User to enter the Create User page.
3. On the Create User page, select a creation method. The following steps use custom creation as an example.
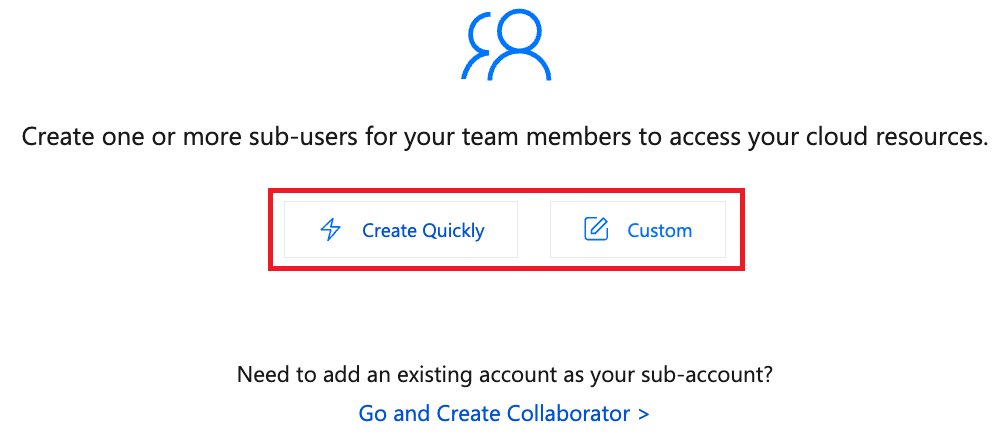
4. On the Select User Type page, click Accessible Resources and Message Reception, and then click Next to fill in the user information.
5. On the User Information Entry page, configure the user details, access method, and other relevant information. After completion, click Next to set user permissions.
6. On the Set User Permissions page, bind the sub-user to QcloudDMCDba. After completion, click Next to set user tags.
7. On the Set User Tags page, select the tag information associated with the sub-user, and then click Next to review the information and permissions.
8. On the Review Information and Permissions page, verify that the configuration details are correct, and then click Completed.
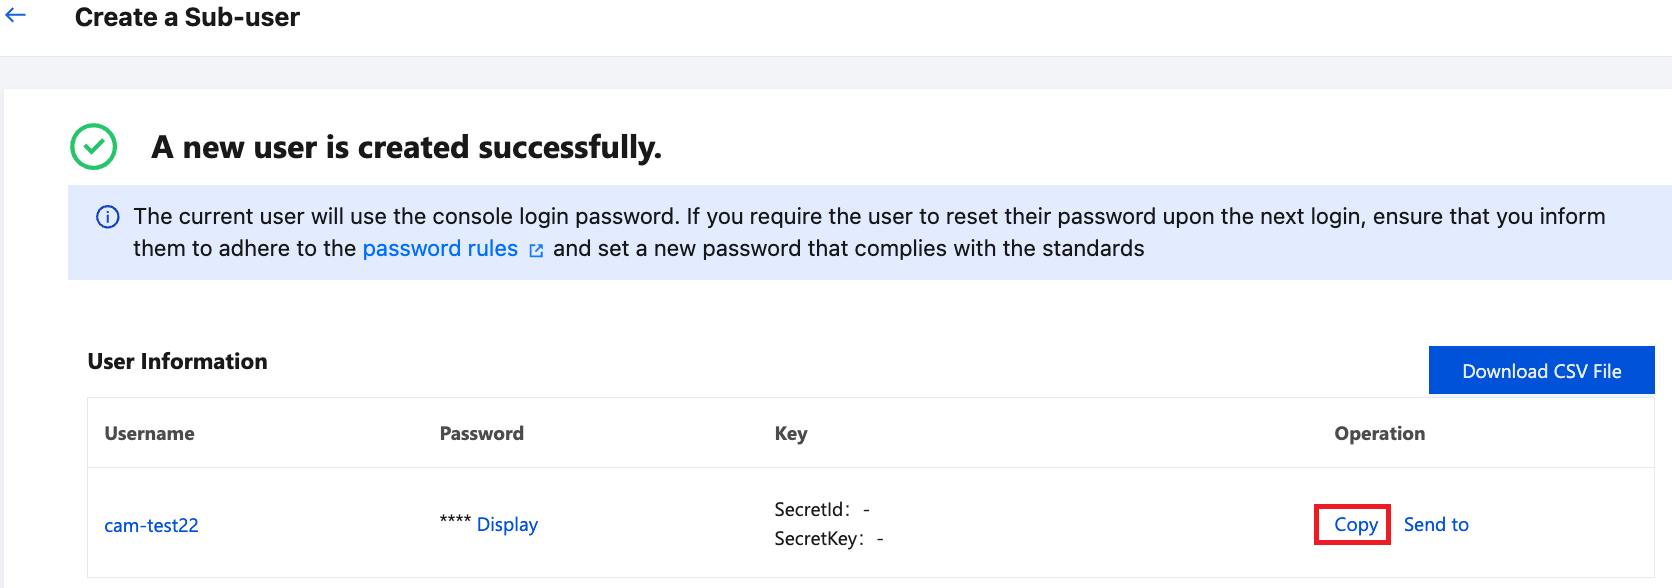
9. On the successfully created user page, you can obtain sub-user information using the following two methods.
Click Copy to directly obtain and copy the sub-user login information.
Click Send to, enter the email information, and the system will send the complete sub-user details to the specified email.
Step 2: Adding Resource Management Permissions for the DBA User on the Cloud Access Management Page
1. Log in to the CAM console, then click Policies in the left sidebar to enter the policy page.
2. At the top of the page, click Create Custom Policy, and then select Create by policy builder in the pop-up dialog box.
3. Select the JSON tab and enter the policy syntax.
The APIs to be entered vary depending on the database type being added. Details are as follows:
{"statement": [{"action": ["cdb:DescribeDBInstances"],"effect": "allow","resource": ["*"]},{"action": ["vdb:DescribeInstances"],"effect": "allow","resource": ["*"]},{"action": ["mongodb:DescribeDBInstances"],"effect": "allow","resource": ["*"]}],"version": "2.0"}
{"statement": [{"action": ["cdb:DescribeDBInstances"],"effect": "allow","resource": ["qcs::cdb:ap-guangzhou:uin/1000015**6:instanceId/cdb-**"]},{"action": ["vdb:DescribeInstances"],"effect": "allow","resource": ["qcs::vdb:ap-guangzhou:uin/1000015**6:instance/vdb-**"]},{"action": ["mongodb:DescribeDBInstances"],"effect": "allow","resource": ["qcs::mongodb::uin/1000015**6:instance/cmgo-**"]}],"version": "2.0"}
4. After completing the settings, click Next.
5. Enter the policy name, click Select User, and in the pop-up dialog box, select the user created in Step 1. Then, click OK and Completed.
Step 3: DBA User Requesting SQL Change and Import/Export Ticket Permissions on the DMC Page
1. Log in to the DMC console using the DBA user created in Step 1.
2. Add the instances for SQL changes and import/export execution to the data sources page. For detailed steps, see Create Data Source.
3. Enable instance control for the instances executing SQL changes and import/export operations. For detailed steps, see Enabling Instance Control.
4. On the permission application page, apply for permissions for SQL window, SQL change tickets, and import/export tickets. For detailed steps, see Permission Application.
On the Ticket List > My Request page, check the ticket progress. Once the ticket is approved, you will have full operation permissions for the DMC page.
Preparing a DMC Developer User
A DMC developer user can be created using either the Tencent Cloud root account or an administrator user under the root account.
Step 1: Creating a User with DMC Developer Operation Permissions on the Cloud Access Management Page
1. Log in to the CAM console, and in the left sidebar, select User > User List to enter the user list management page.
2. On the User List Management page, click Create User to enter the Create User page.
3. On the Create User page, select a creation method. The following steps use custom creation as an example:
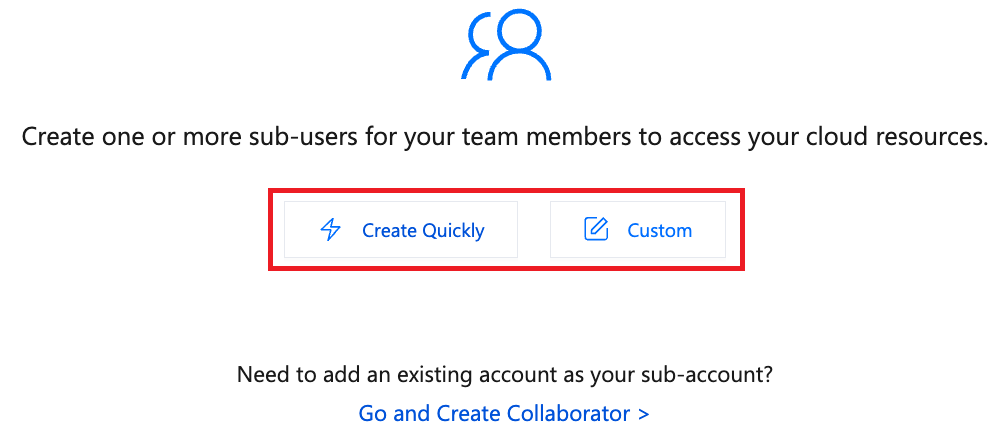
4. On the Select User Type page, click Accessible Resources and Message Reception, and then click Next to fill in the user information.
5. On the User Information Entry page, configure the user details, access method, and other relevant information. After completion, click Next to set user permissions.
6. On the Set User Permissions page, bind the sub-user to QcloudDMCDeveloper. After completion, click Next to set user tags.
7. On the Set User Tags page, select the tag information associated with the sub-user, and then click Next to review the information and permissions.
8. On the Review Information and Permissions page, verify that the configuration details are correct, and then click Completed.
9. On the successfully created user page, you can obtain sub-user information using the following two methods.
Click Copy to directly obtain and copy the sub-user login information.
Click Send to, enter the email information, and the system will send the complete sub-user details to the specified email.
Step 2: Adding Resource Management Permissions for the Developer User on the Cloud Access Management Page
1. Log in to the CAM console, then click Policies in the left sidebar to enter the policy page.
2. At the top of the page, click Create Custom Policy, and then select Create by policy builder in the pop-up dialog box.
3. Select the JSON tab and enter the policy syntax.
The APIs to be entered vary depending on the database type being added. Details are as follows:
{"statement": [{"action": ["cdb:DescribeDBInstances"],"effect": "allow","resource": ["*"]},{"action": ["vdb:DescribeInstances"],"effect": "allow","resource": ["*"]},{"action": ["mongodb:DescribeDBInstances"],"effect": "allow","resource": ["*"]}],"version": "2.0"}
{"statement": [{"action": ["cdb:DescribeDBInstances"],"effect": "allow","resource": ["qcs::cdb:ap-guangzhou:uin/1000015**6:instanceId/cdb-**"]},{"action": ["vdb:DescribeInstances"],"effect": "allow","resource": ["qcs::vdb:ap-guangzhou:uin/1000015**6:instance/vdb-**"]},{"action": ["mongodb:DescribeDBInstances"],"effect": "allow","resource": ["qcs::mongodb::uin/1000015**6:instance/cmgo-**"]}],"version": "2.0"}
4. After completing the settings, click Next.
5. Enter the policy name, click Select User, and in the pop-up dialog box, select the user created in Step 1. Then, click OK and Completed.
피드백