This document describes how to sign commits with GPG.
Open Project
1. Log in to the CODING Console and click the team domain name to go to CODING.
2. Click
in the upper-right corner to open the project list page and click a project icon to open the corresponding project.
CODING allows you to use GPG for Git commit signature verification. Verified commits will be tagged with Verified, which ensures that code is committed from reliable sources and enhances code security.
Step 2: Add a Public Key in Your Personal Account Settings
1. After you have logged in to CODING, click your profile photo in the upper-right corner and select Personal Account Settings.
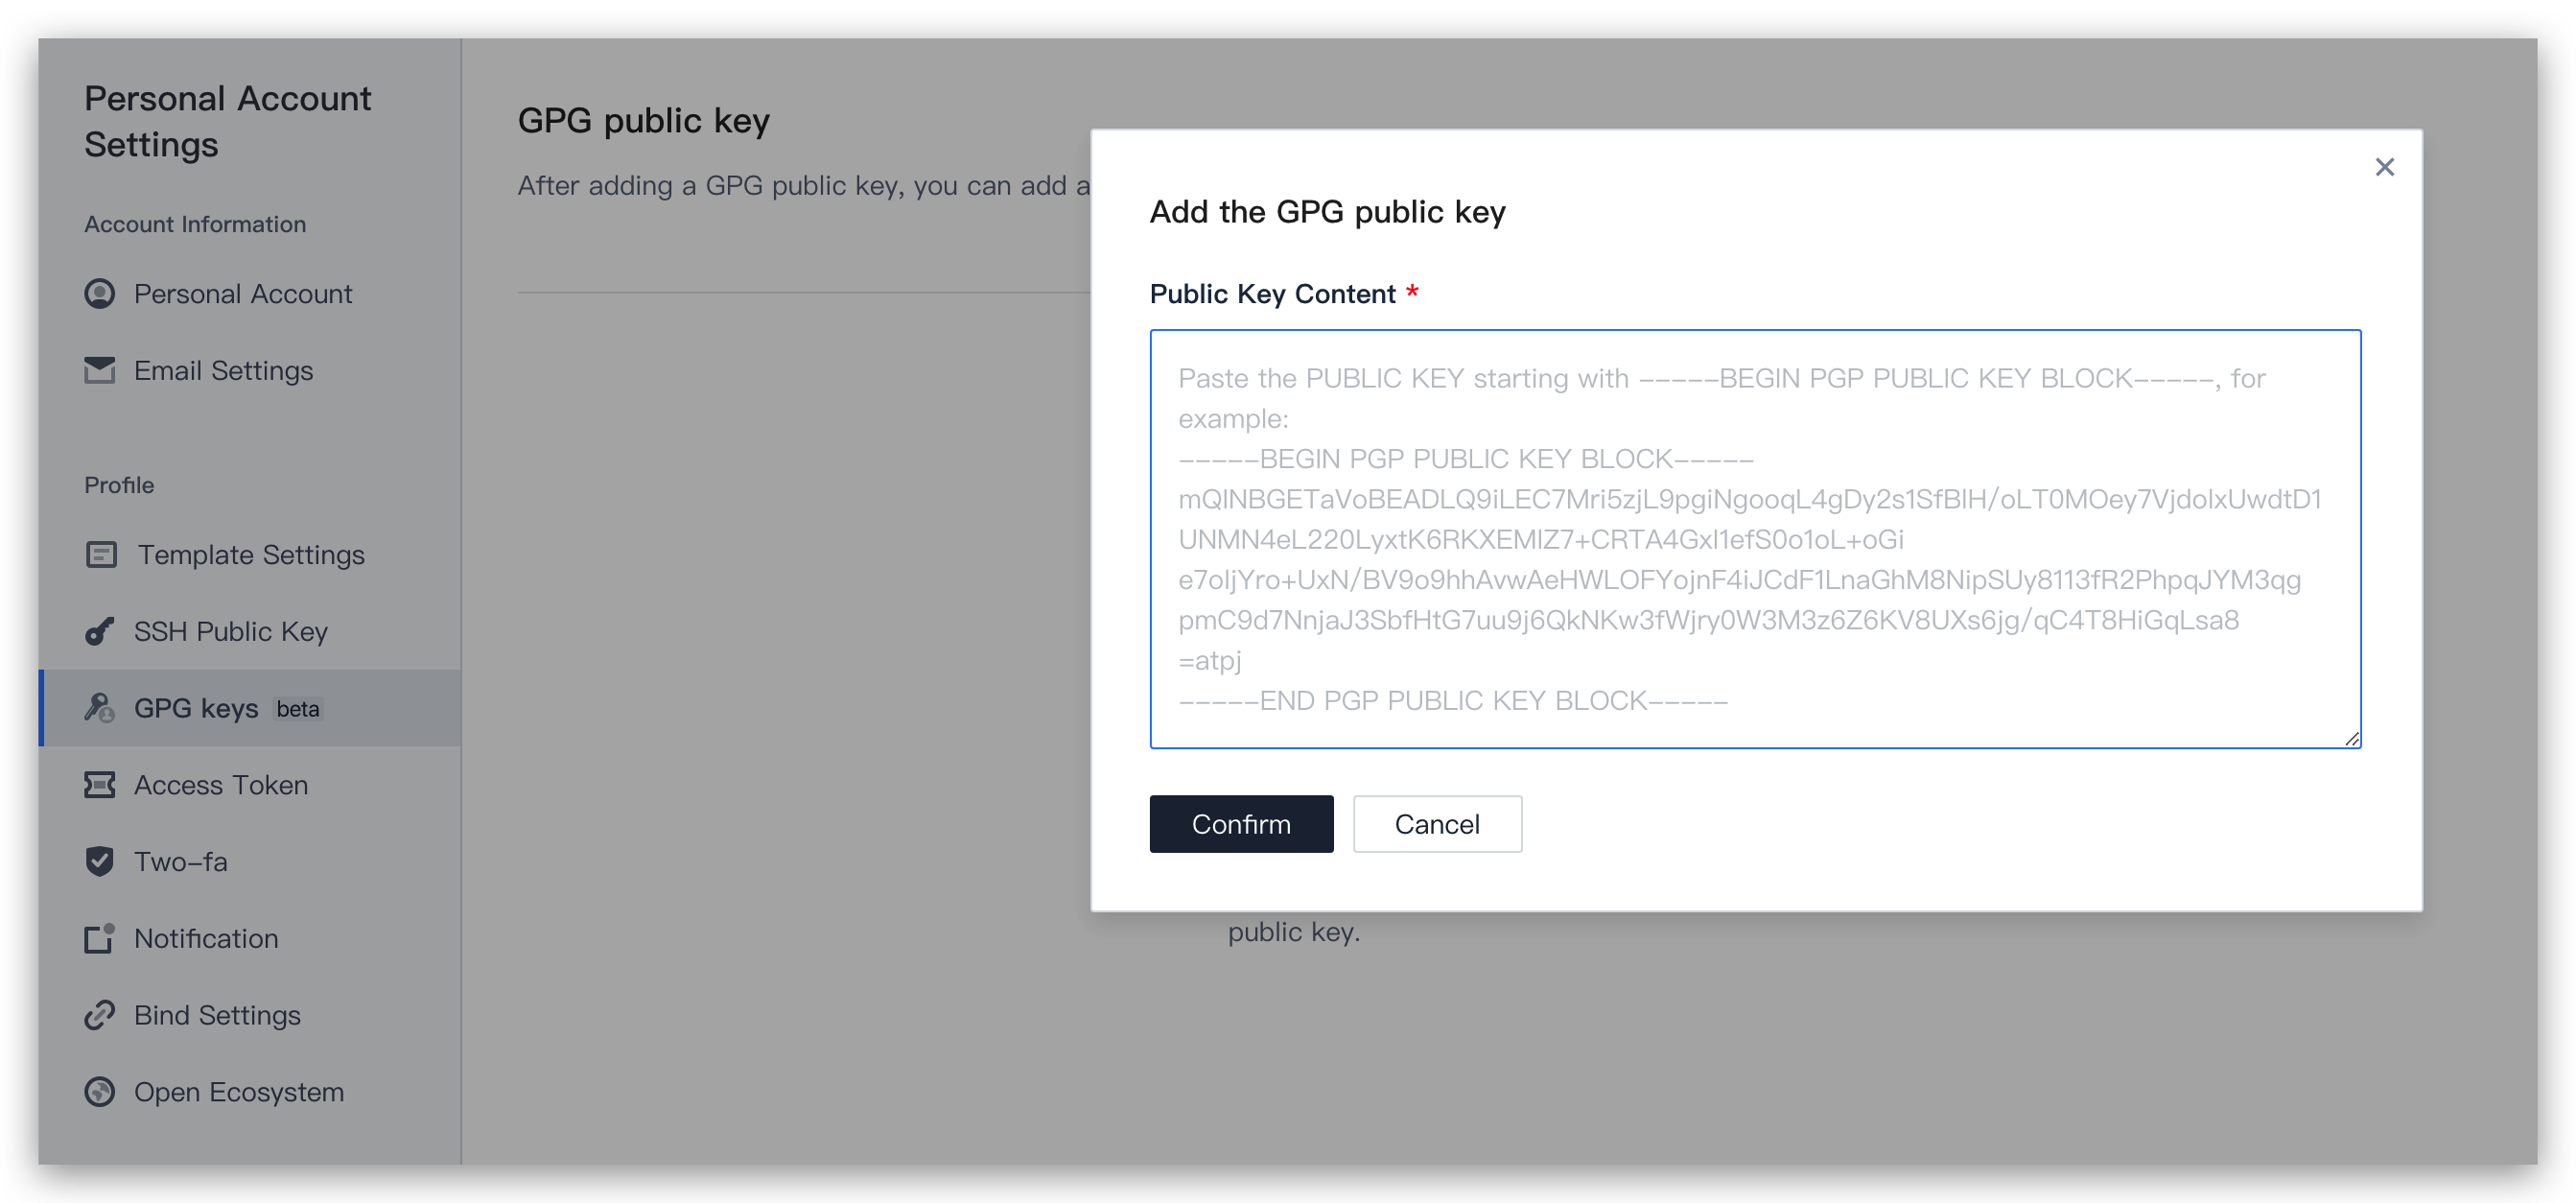
2. In the navigation bar on the left, select GPG Public Key to go to the public key management page.
3. Click Add Public Key and paste the exported GPG public key in the text box, and then click OK.
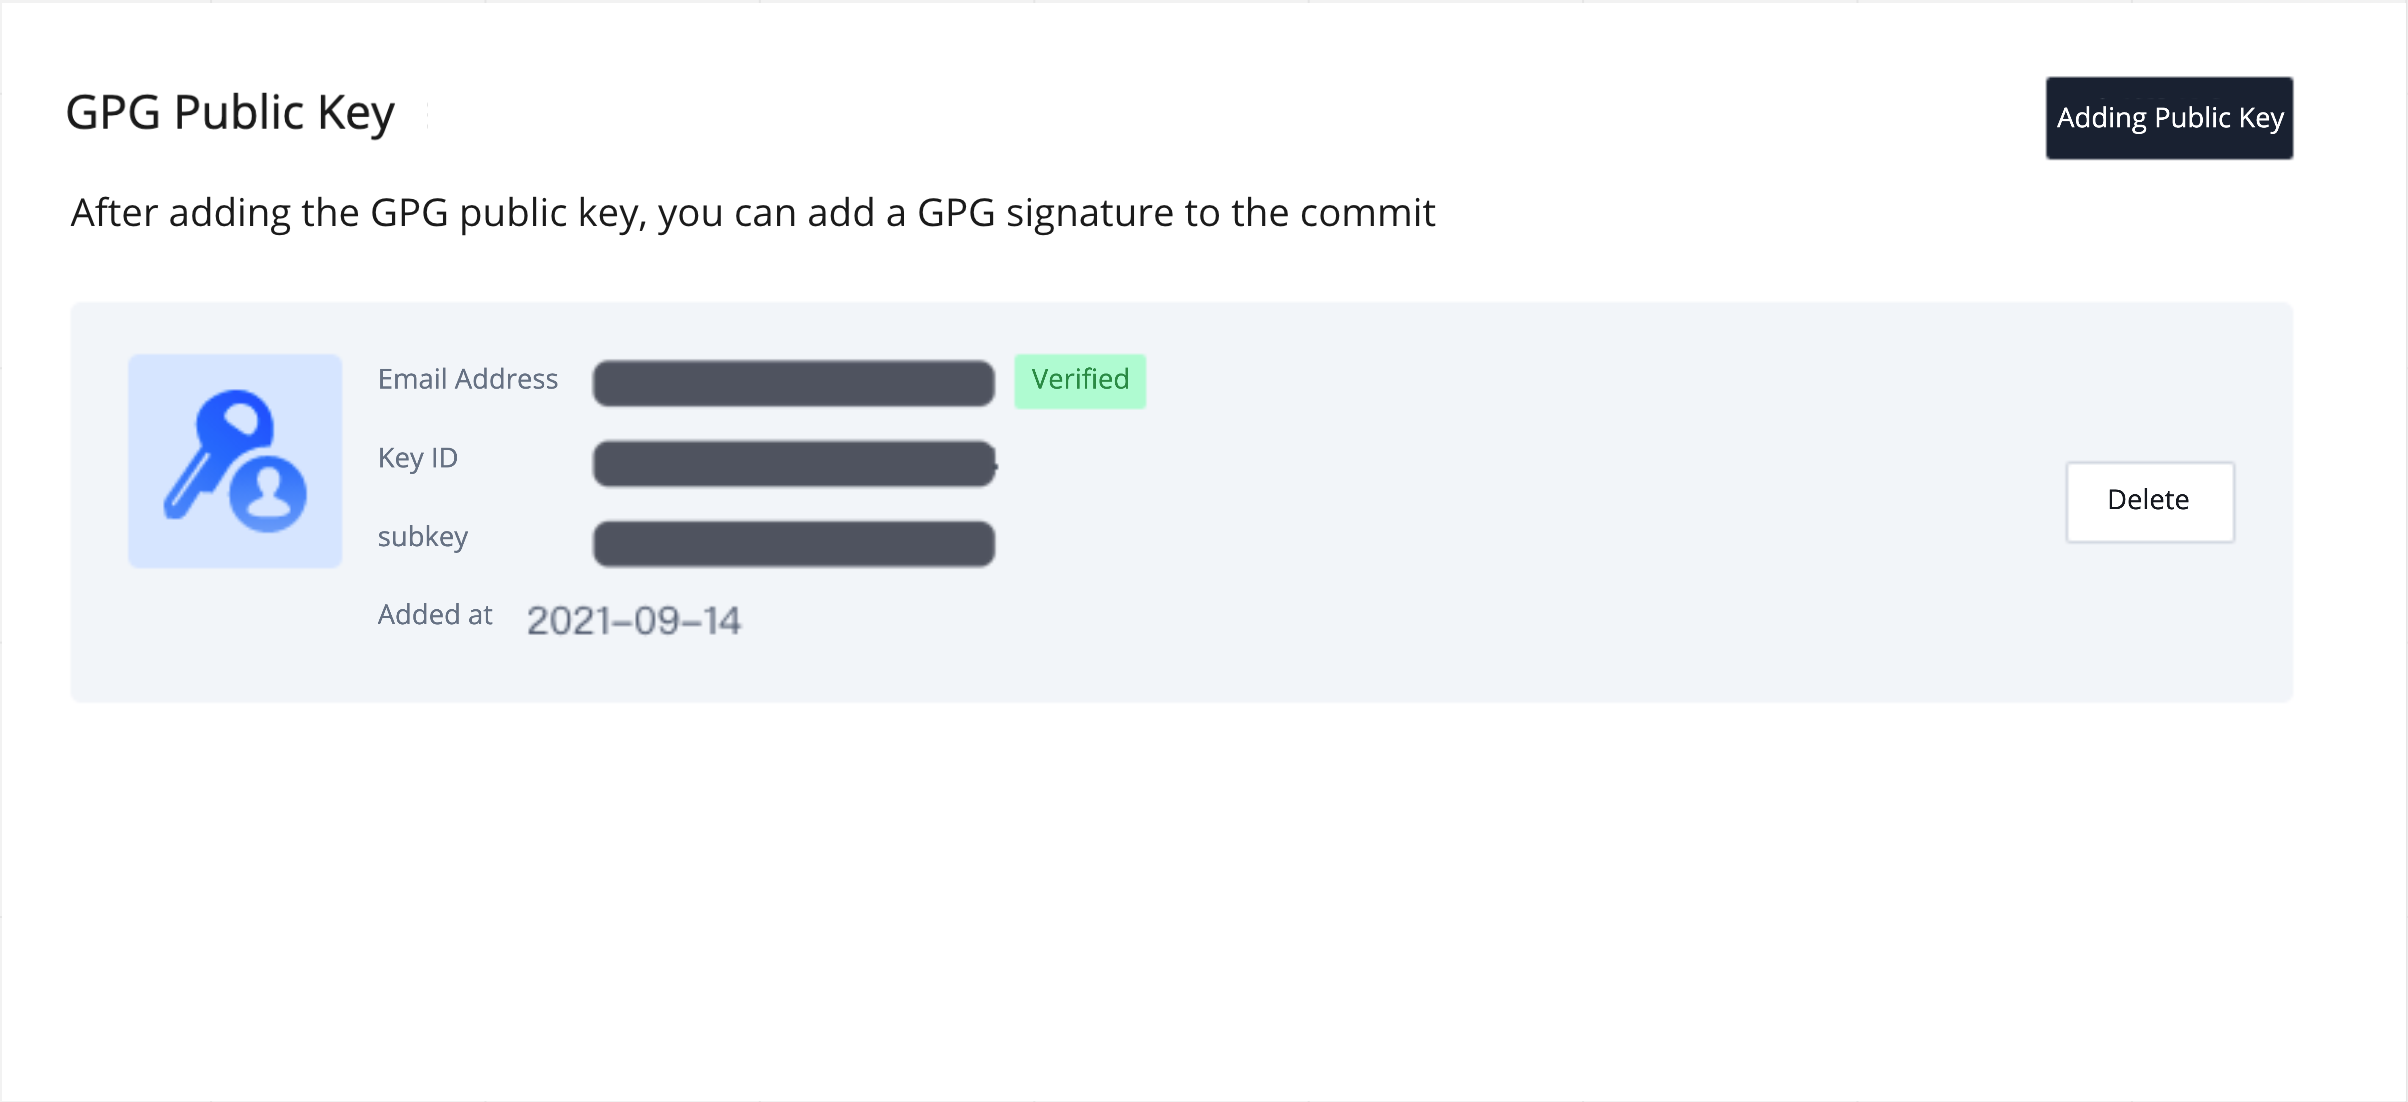
After the public key is added, the verification status of the email address, key ID, and subkey will be shown.
Note:
If the status of the email address is Not Verified, the email address is not configured in the CODING account. Add the email address in Personal Account Settings > Email Settings.
Step 3: Associate with the Local Git Repository
1. Run the following command to list the GPG key you created (replace "your_email" with the email address entered when generating the key):
gpg --list-secret-keys --keyid-format LONG "your_email"
2. Copy the GPG key ID that starts with sec. In the following example, copy 4AEA00A342C24CA3:
sec ed25519/4AEA00A342C24CA3 2021-09-14 [SC]
6DE3507E82DEB6E8828FAAC34AEA00A342C24BD4
uid [ ultimate ] your_name "your_email"
ssb cv25519/812B586FD245B560 2021-09-14 [E]
3. Configure the key in the local Git repository to sign the commits with it:
You have now successfully associated the GPG key with the local Git repository. After modifying code locally, you can sign your Git commits to verify the committer.
Step 4: Sign Git Commits
Use the -S parameter when running a Git commit command.
1. When you need to commit changes after editing code locally, add the -S parameter to the git commit command:
git commit -S -m "your_commit_message"
If you do not wish to enter the -S flag every time, you can use the following command to allow Git to sign commits automatically:
git config --global commit.gpgsign true
2. When asked, enter the password specified when generating the GPG key.
Step 5: Verify Signature
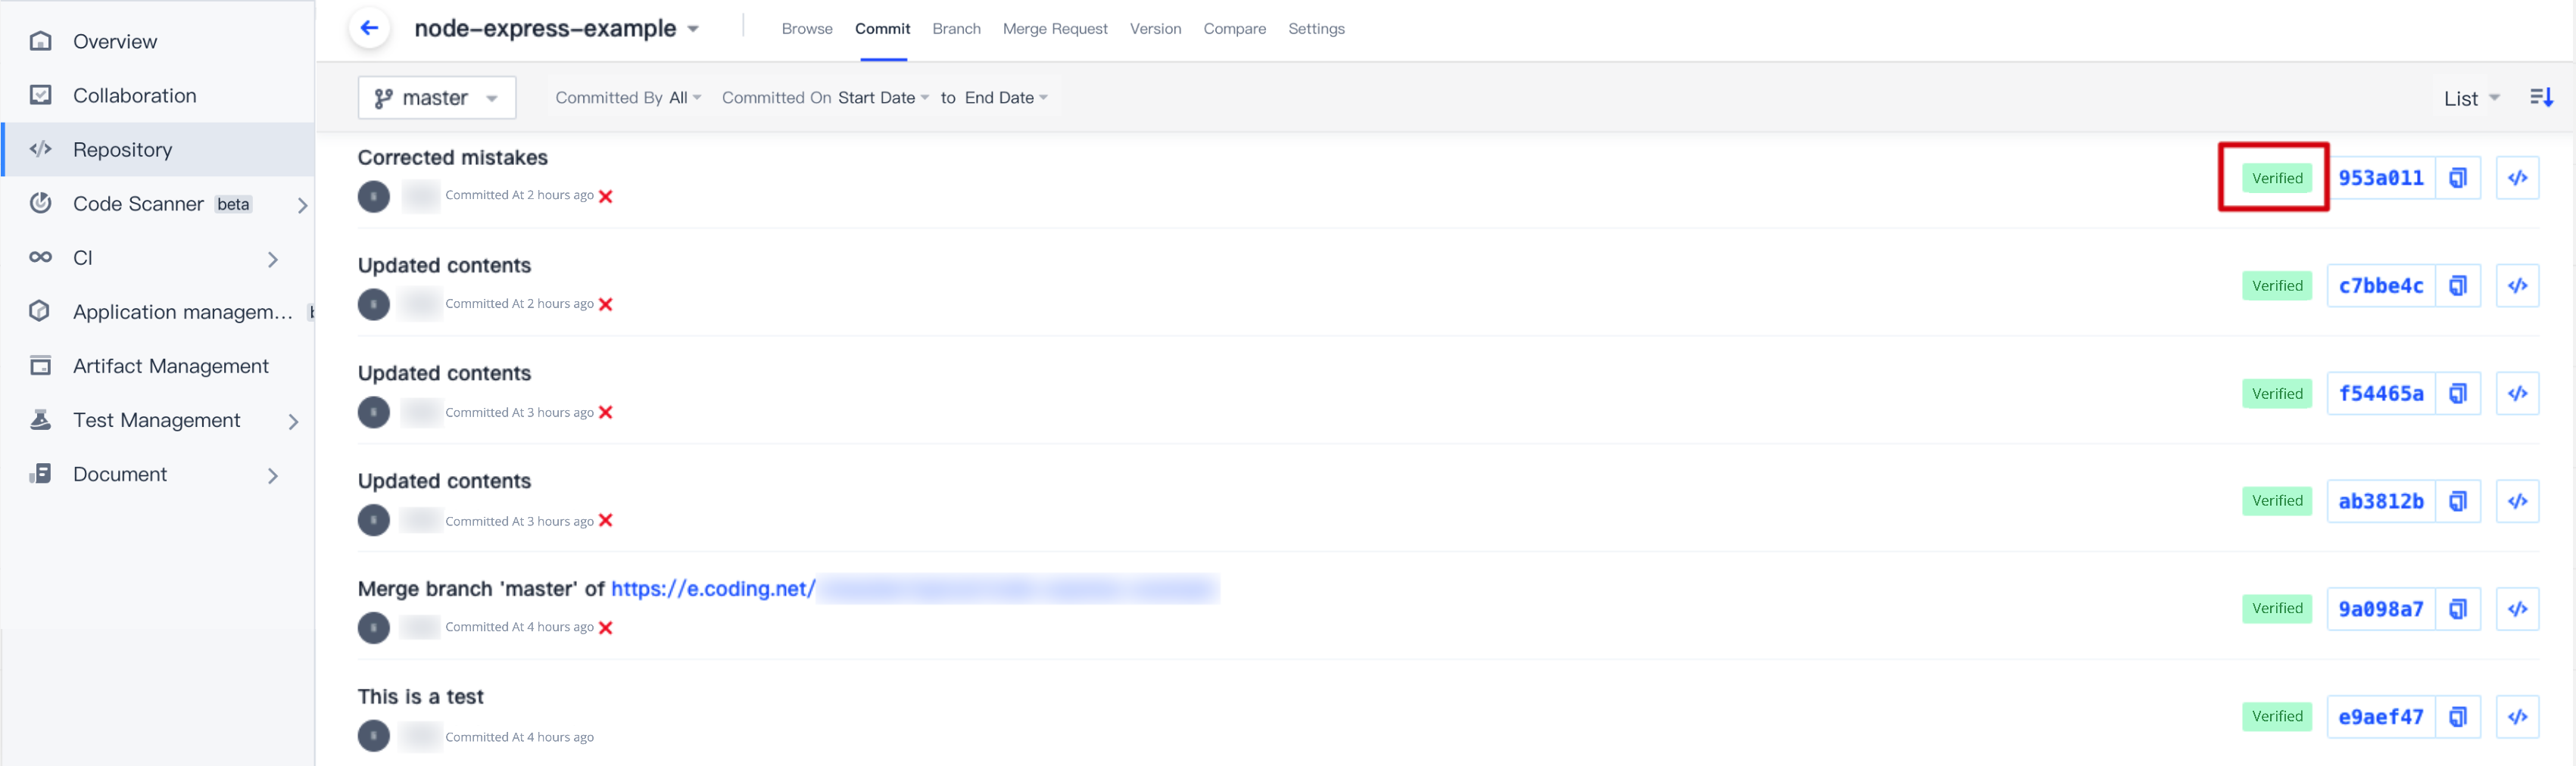
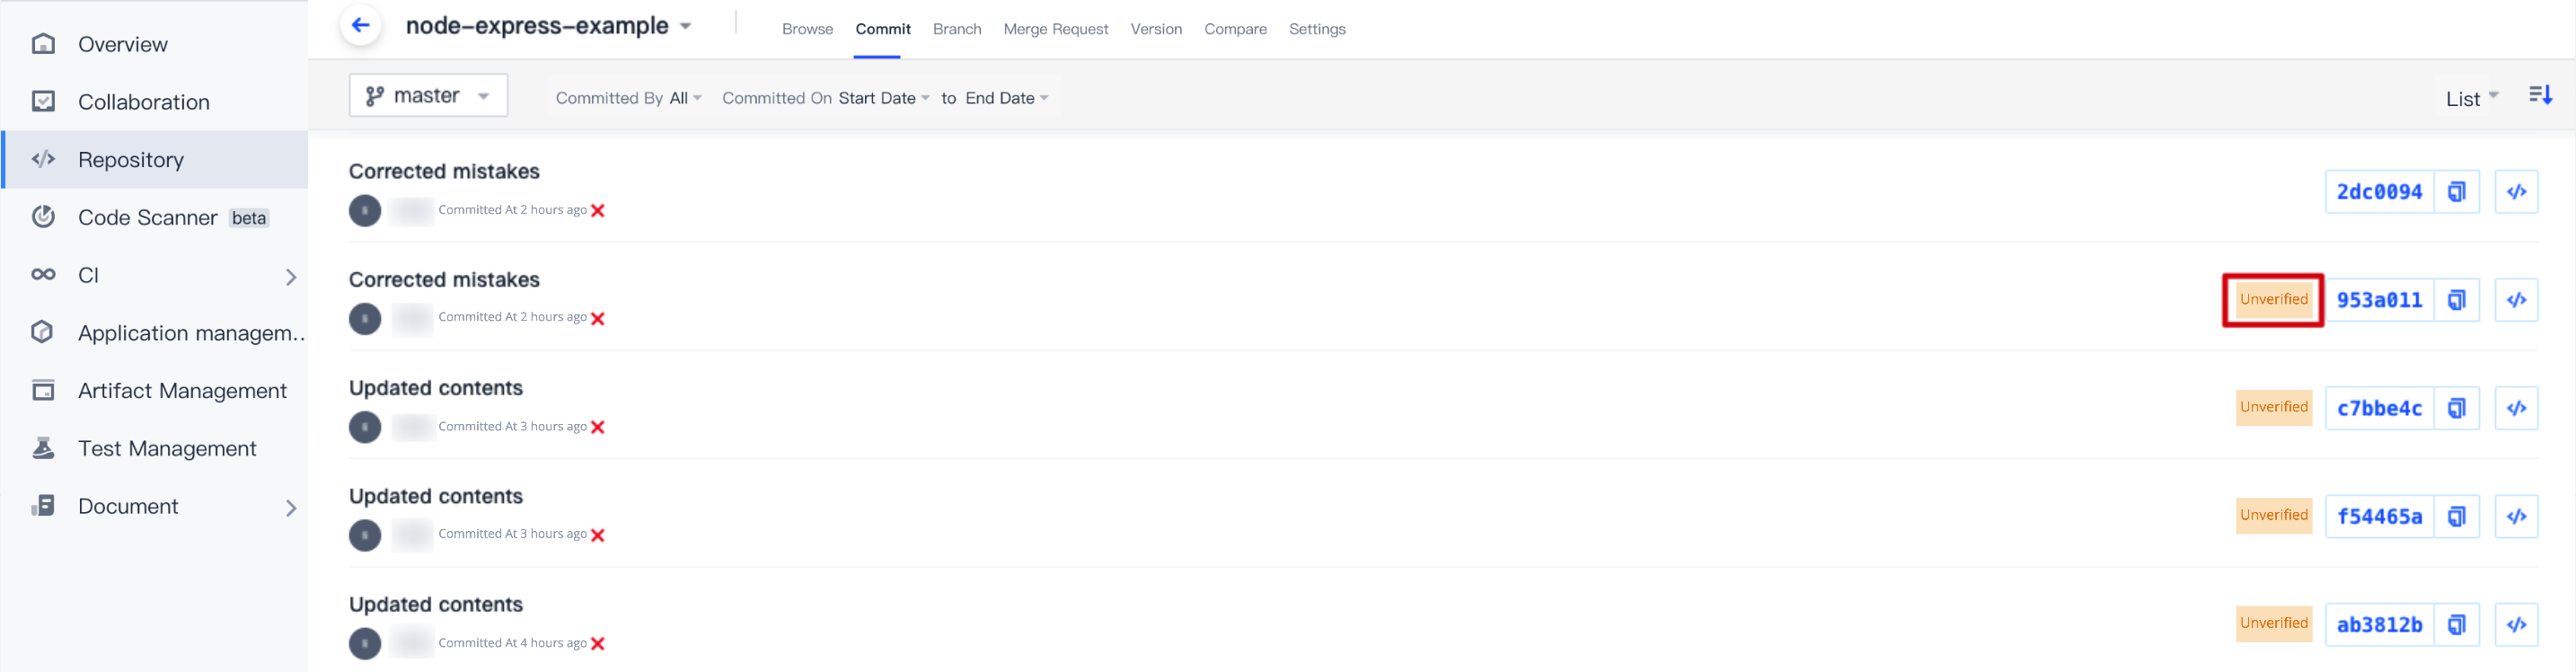
After pushing the signed commit to the CODING code repository, you can check the verification status of the commit on the Commits tab in the code repository.
Commit verification statuses are described below:
Verification Status
Description
Verified
Signed with a GPG private key that corresponds to a public key in a CODING account, and the email address for the public key has been verified.
Not Verified
Signed with a GPG private key that does not correspond to a public key in a CODING account or the email address for the public key has not been verified
(if the email address is Not Verified, go to Personal Account Settings > Email Settings to add the email address).
No verification status tag
Not signed with a GPG private key
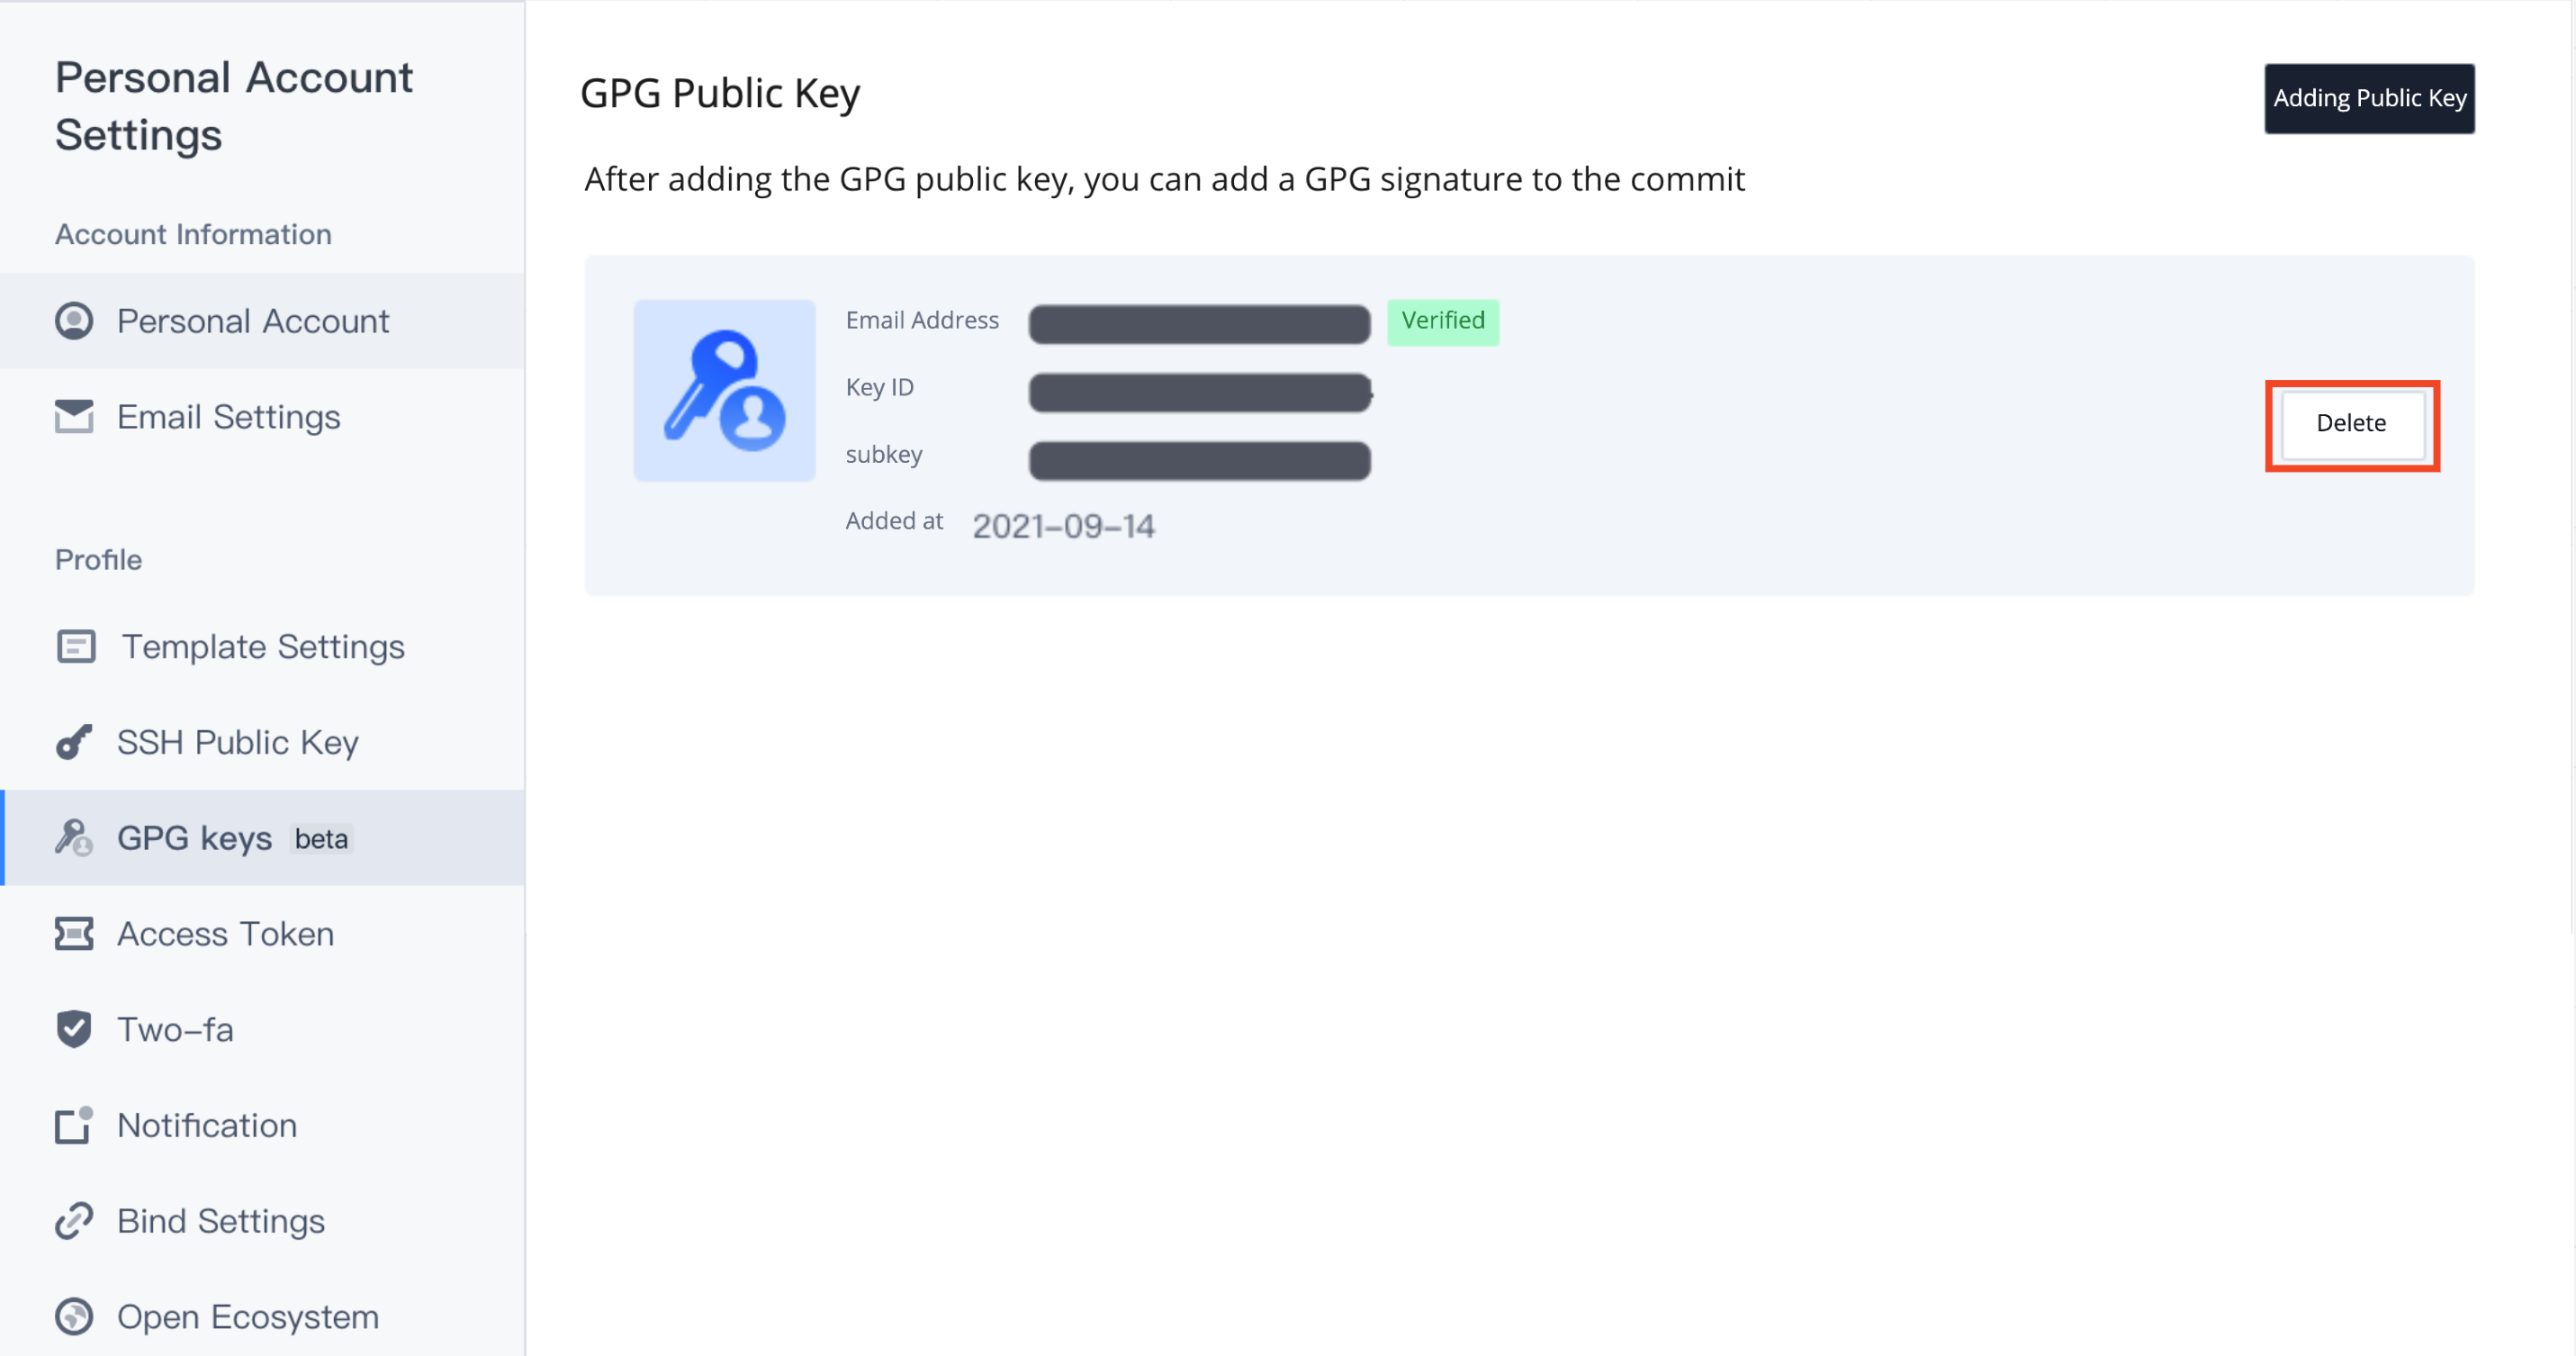
Delete a GPG Public Key
If your GPG public key has been compromised or is no longer used, you can delete the public key in Personal Account Settings > GPG Public Key.
After the public key is deleted:
Verified commits will change to a Not Verified status.
Future commits using this GPG private key (git commit -S -m) will stay unverified.
Unsigned commits (git commit -m) will not be verified and will not have a verification status tag.
Note:
If you have enabled Git automatic signing, run the git config --global commit.gpgsign false command to disable automatic signing. Otherwise, commits pushed to the remote repository will still be Not Verified after the GPG public key is deleted.
Fix GPG Signing Errors
If the following error occurs when using git commit -S -m, see Fix GPG Signing Errors and modify the relevant configurations.


 Yes
Yes
 No
No
Was this page helpful?