A custom workflow can meet unique demands of different teams. You can customize the workflow statuses of all issues (including epics, requirements, tasks, bugs, and sub-issues), and specify a fixed transition mode and unified transition rules. This allows your team to deal with different projects in a consistent way, and ensure efficient collaboration across projects and departments.
This document describes how to customize a workflow for your team through Global Status Settings and Project Workflow Configuration. The steps are as follows:
1. Create global statuses, and then select proper ones for the workflows in the project;
2. When the workflow configuration is complete, you can select a status for each issue (i.e. epic, user story, requirement, task, and bug) in the project.
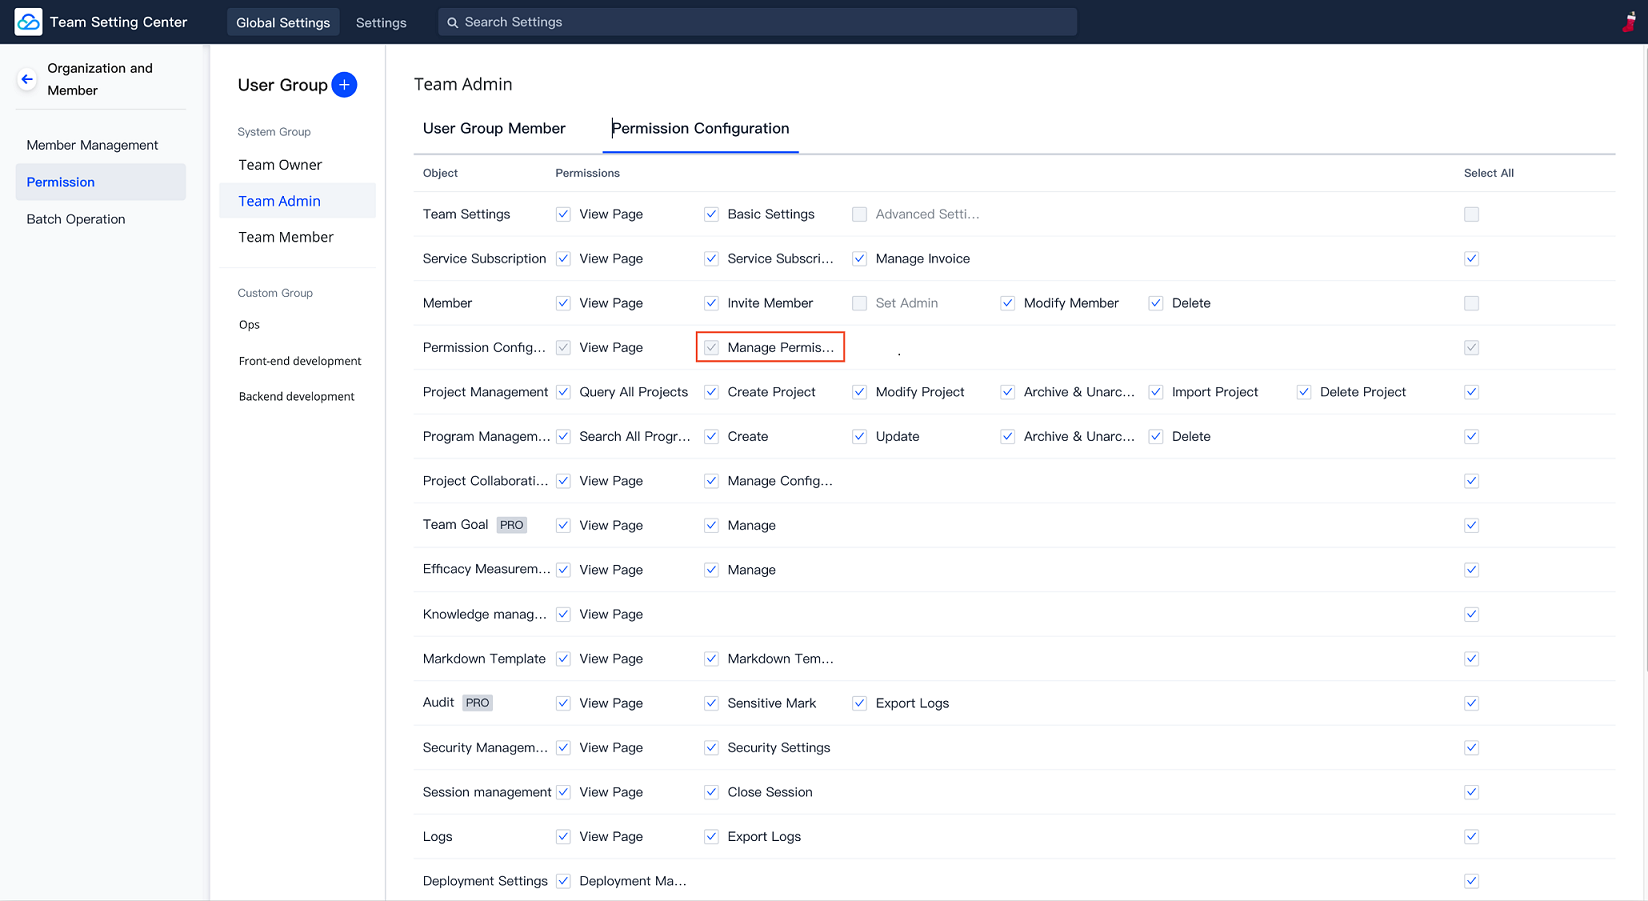
Since all the issue statuses of your team are determined by global status settings, only members who have management permissions in the user group can modify or add custom statuses. Go to Team Management > Permission Configuration > User Group, and then view details on the Permission Configuration page of the user group.
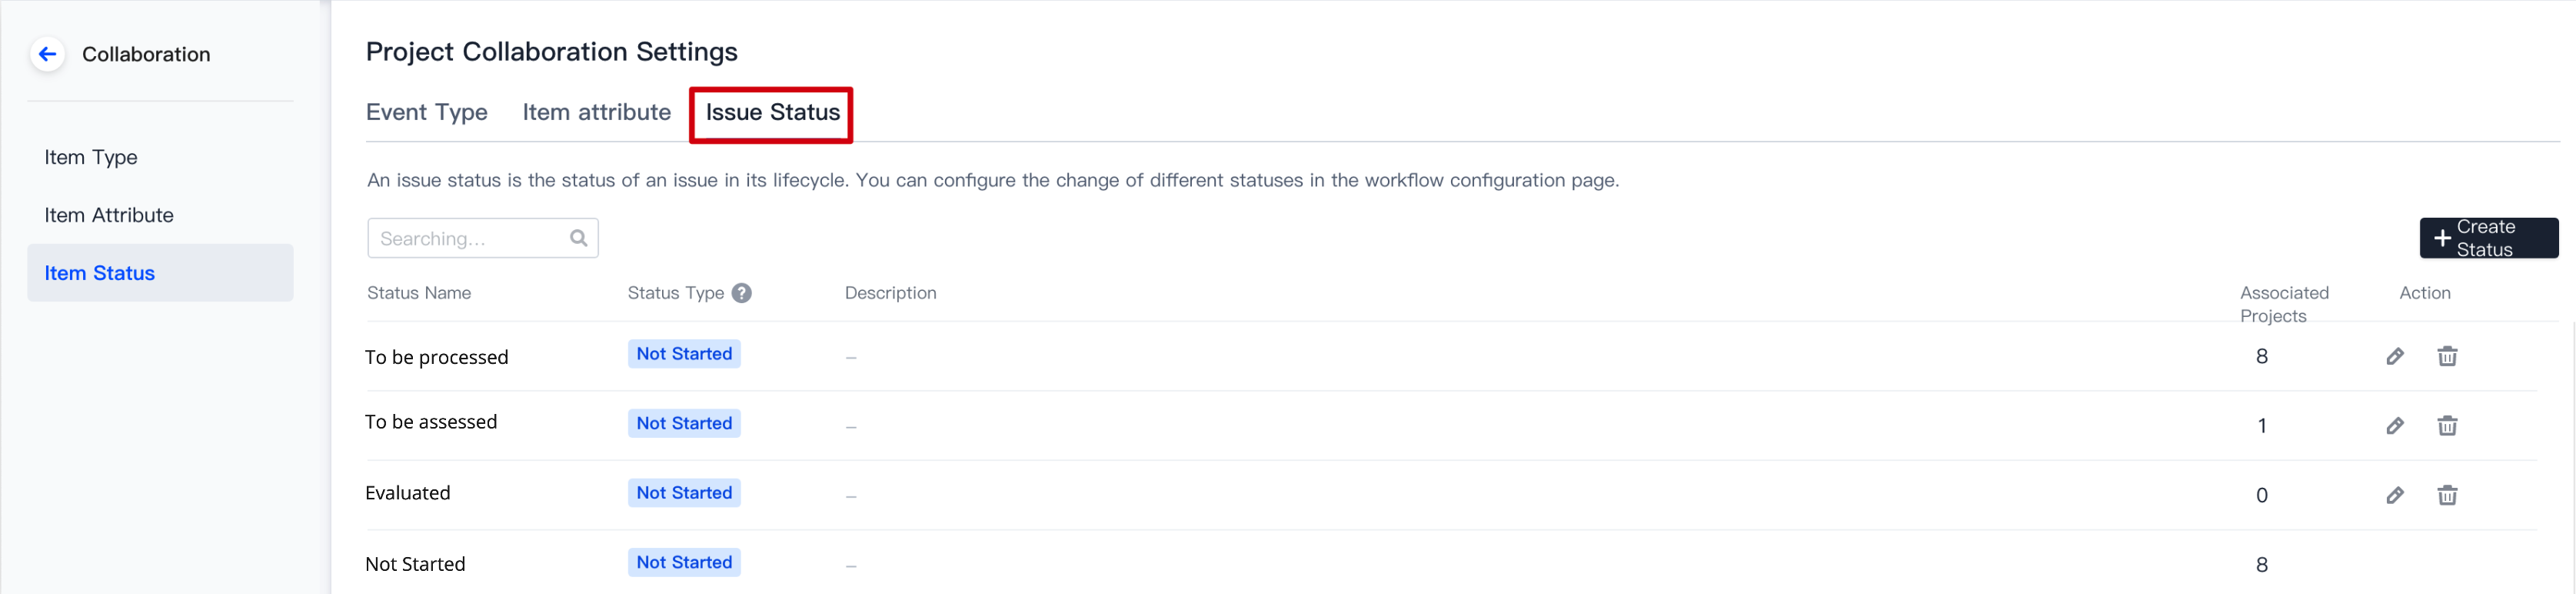
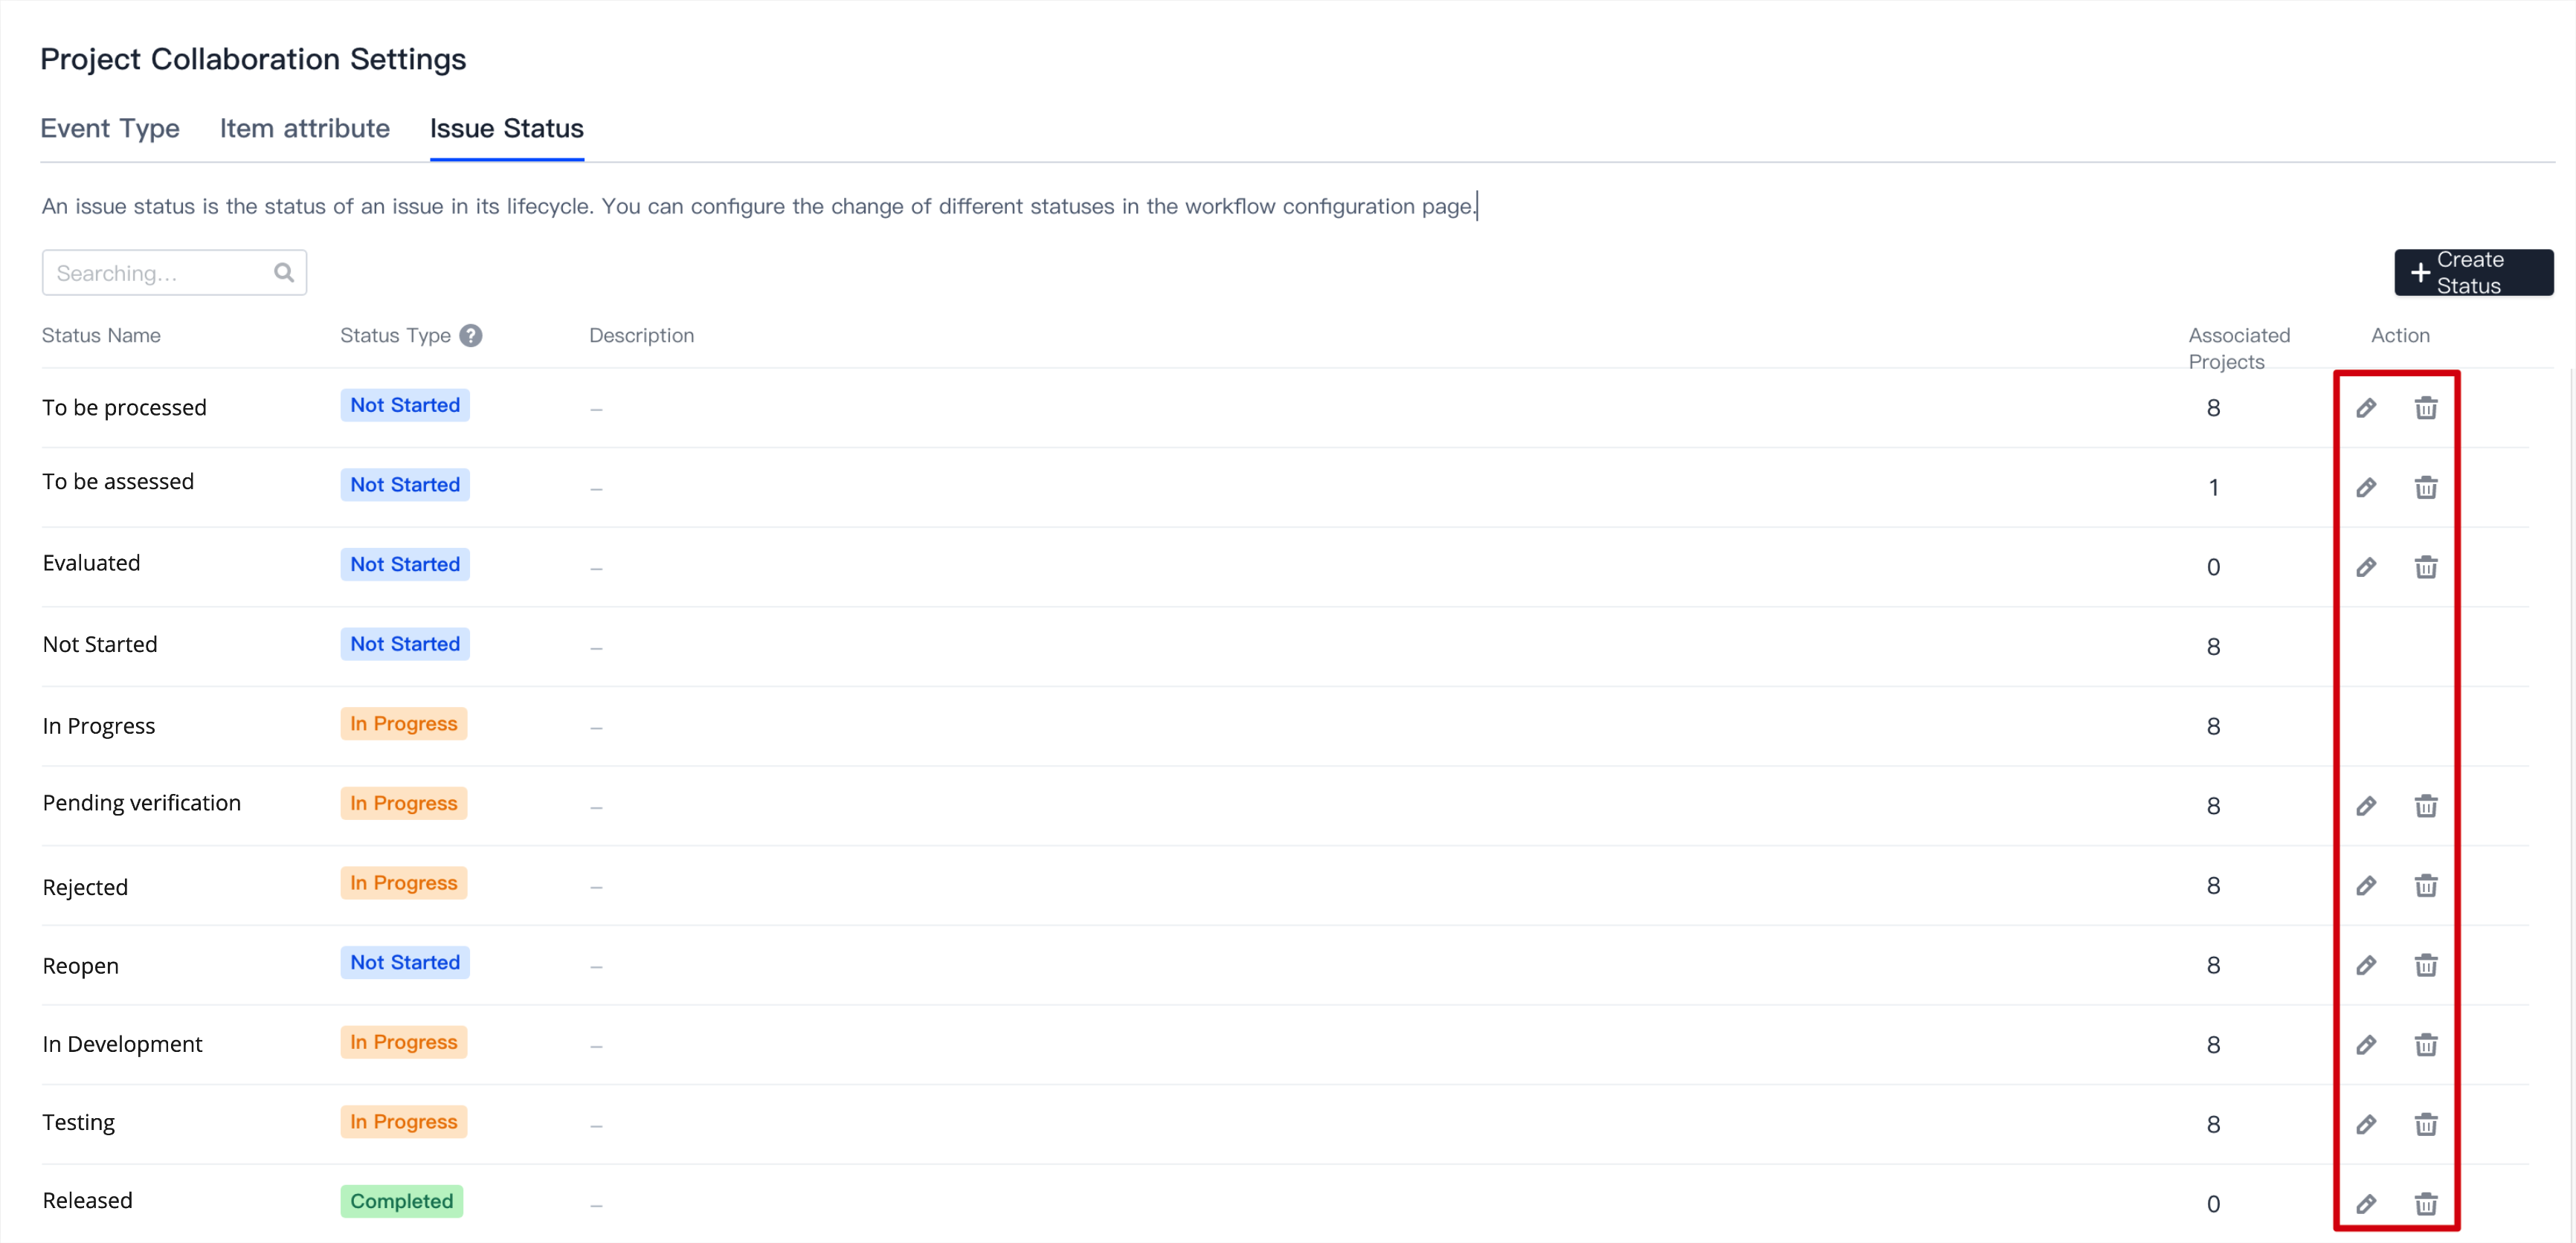
If you have management permissions, go to the homepage of your team, and then select Feature Settings from the menu on the left. Click Project Collaboration > Issue Status to go to the status settings page.
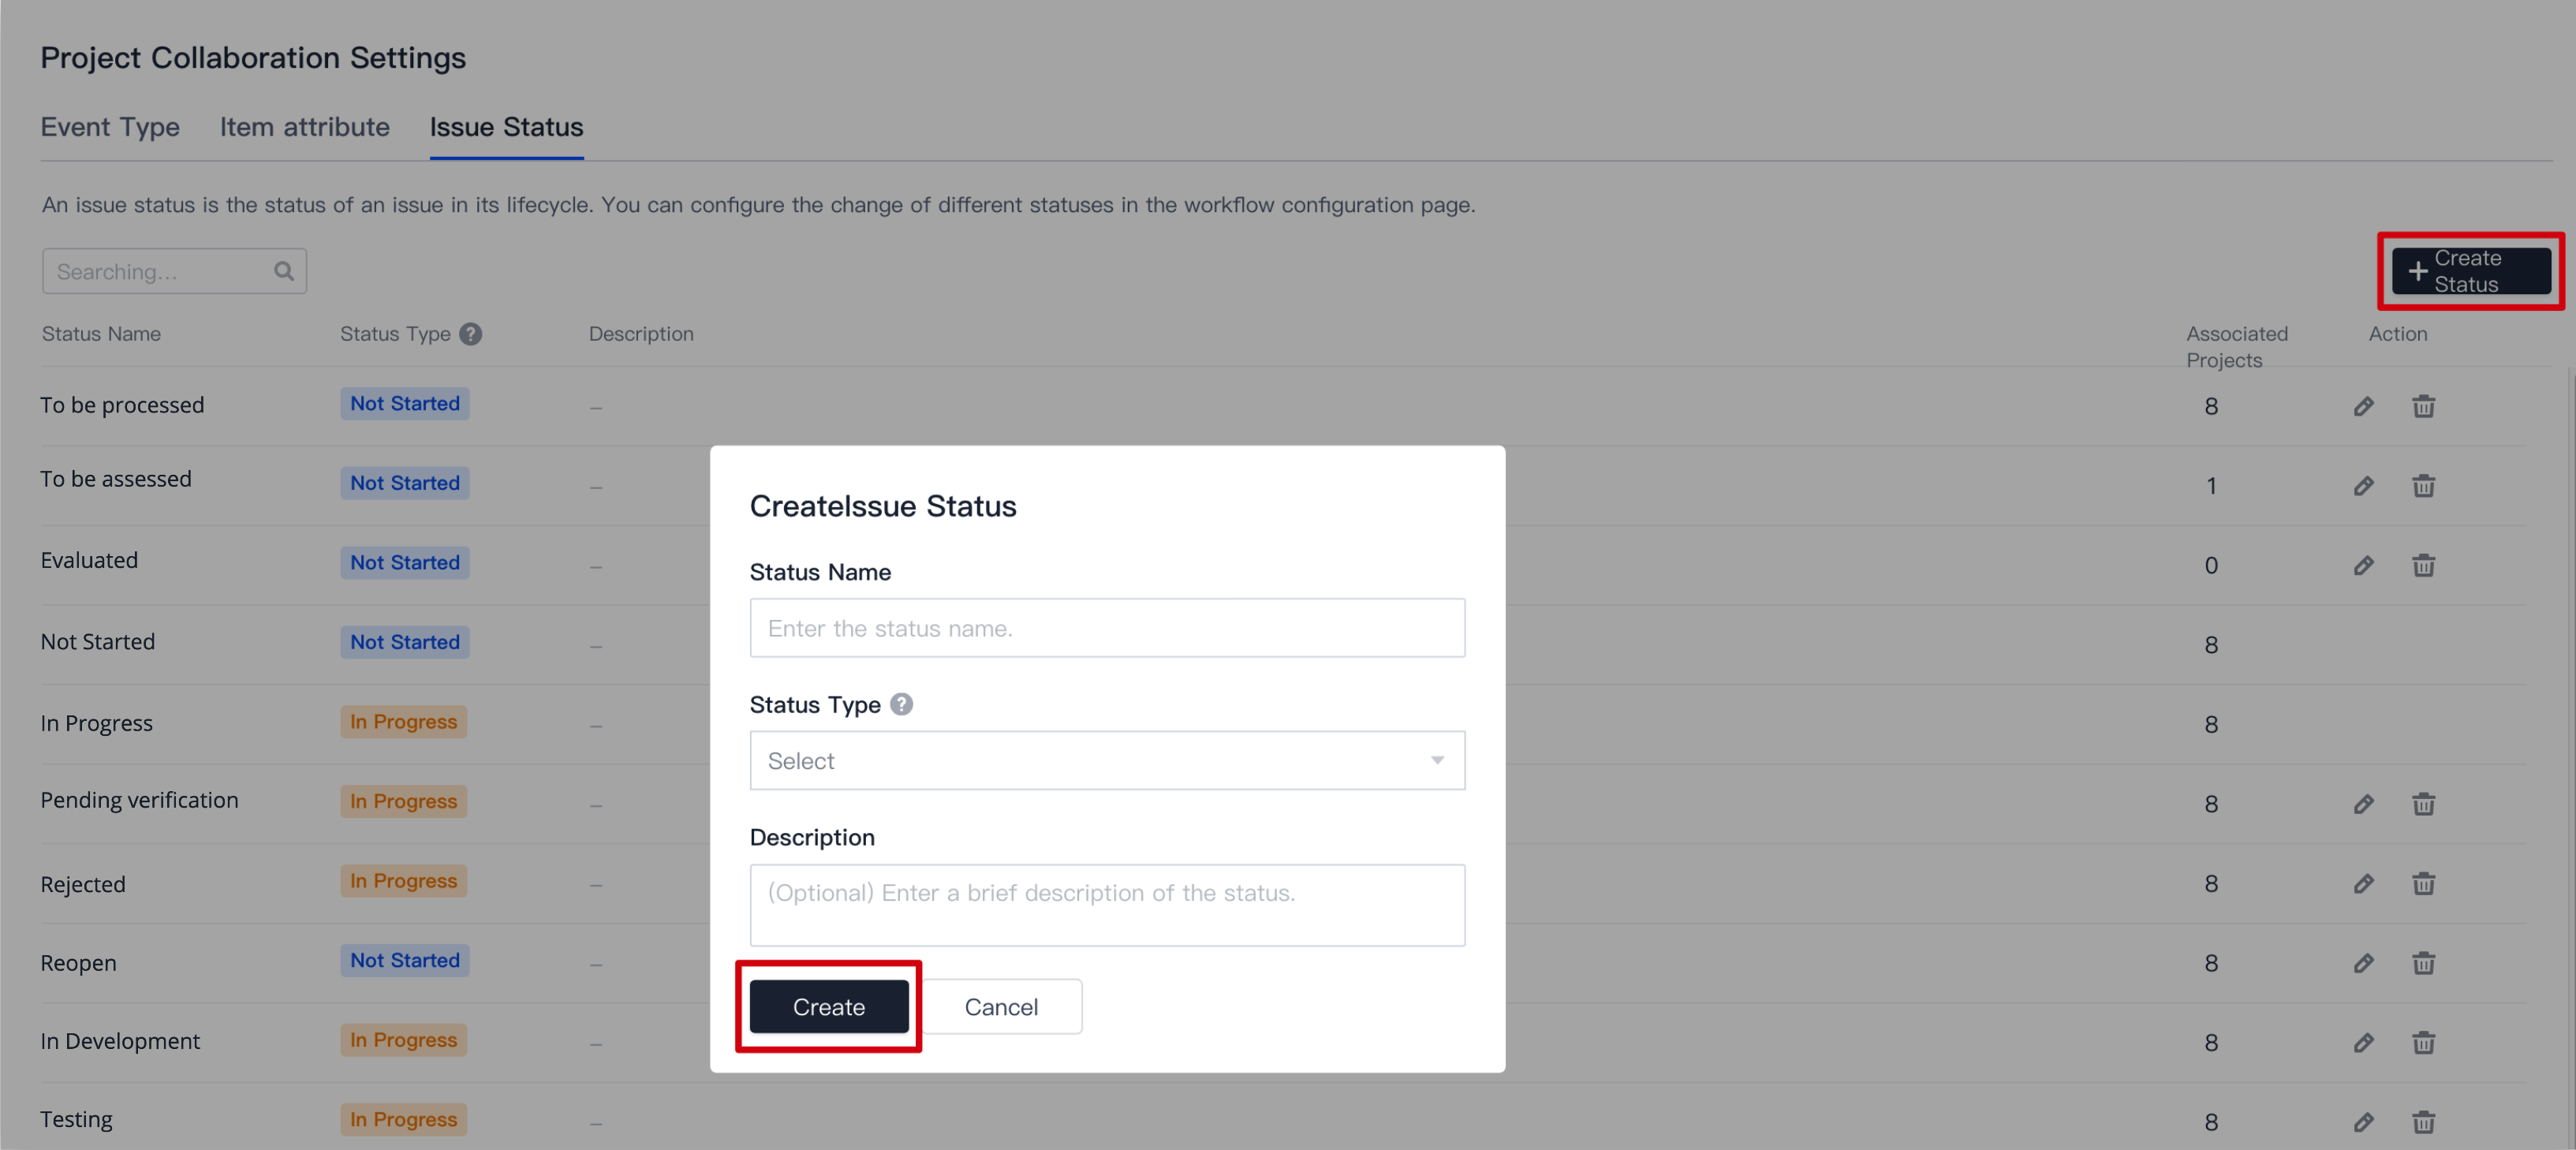
To create a custom status, click Create Status in the upper-right corner, and then enter a name, type, and description (optional) for the new status. Status name must be unique.
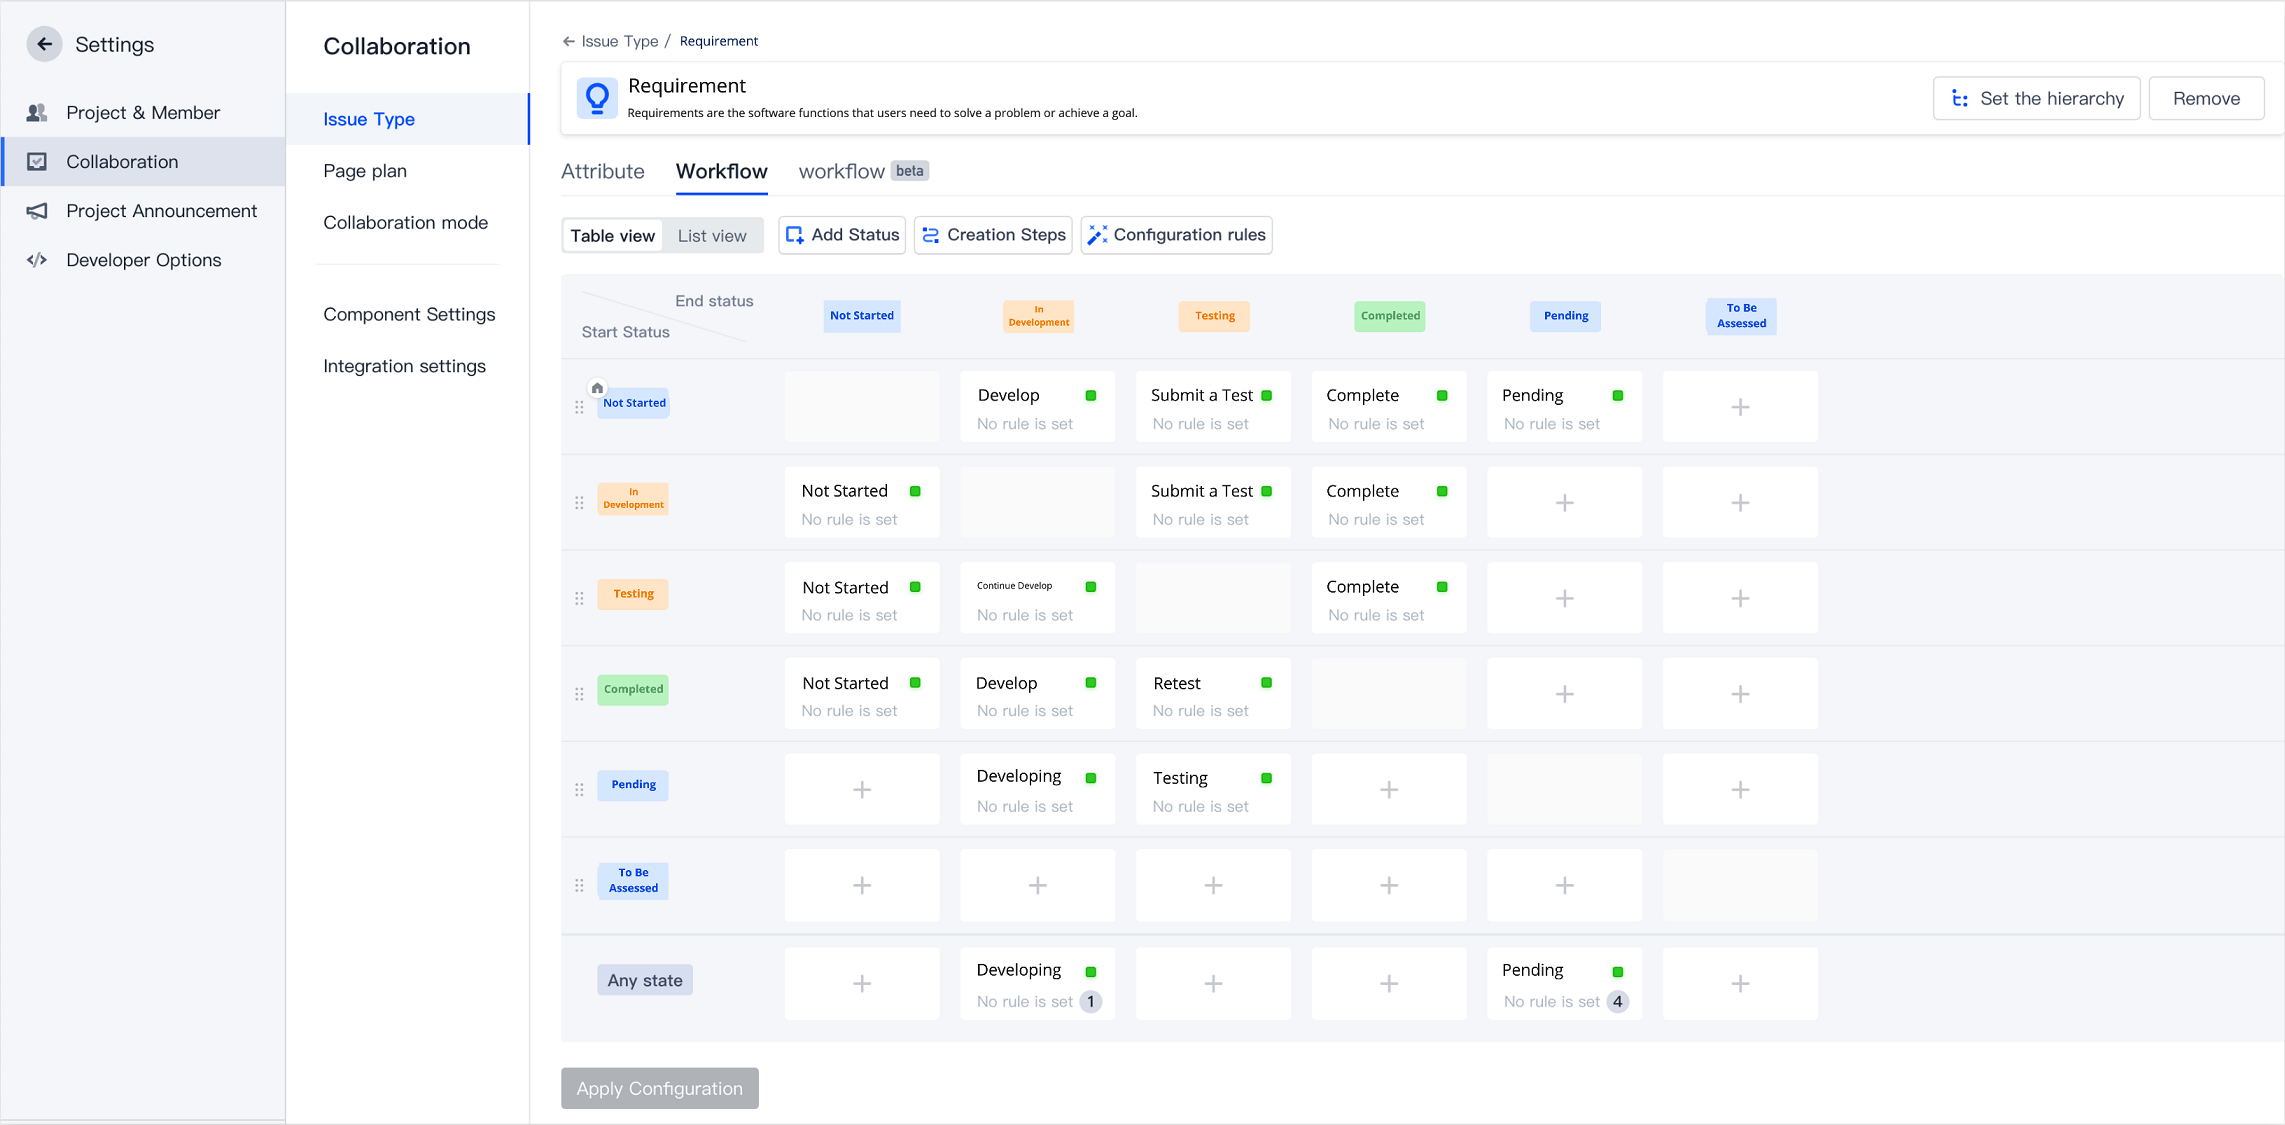
Workflow configuration allows you to specify an issue's statuses and transition, which indicates the transition of an issue from the initial status to target status. In a project, select Project Settings > Project Collaboration > Issue Types in the menu on the left.
You can customize the workflow of an issue in Workflows.
For example, when a requirement is in the under development status, you can click the transition to go to the custom target status.
The following shows how to customize a workflow in Requirements.
Statuses are divided into two types: initial and target, which indicate the current stage of an issue.
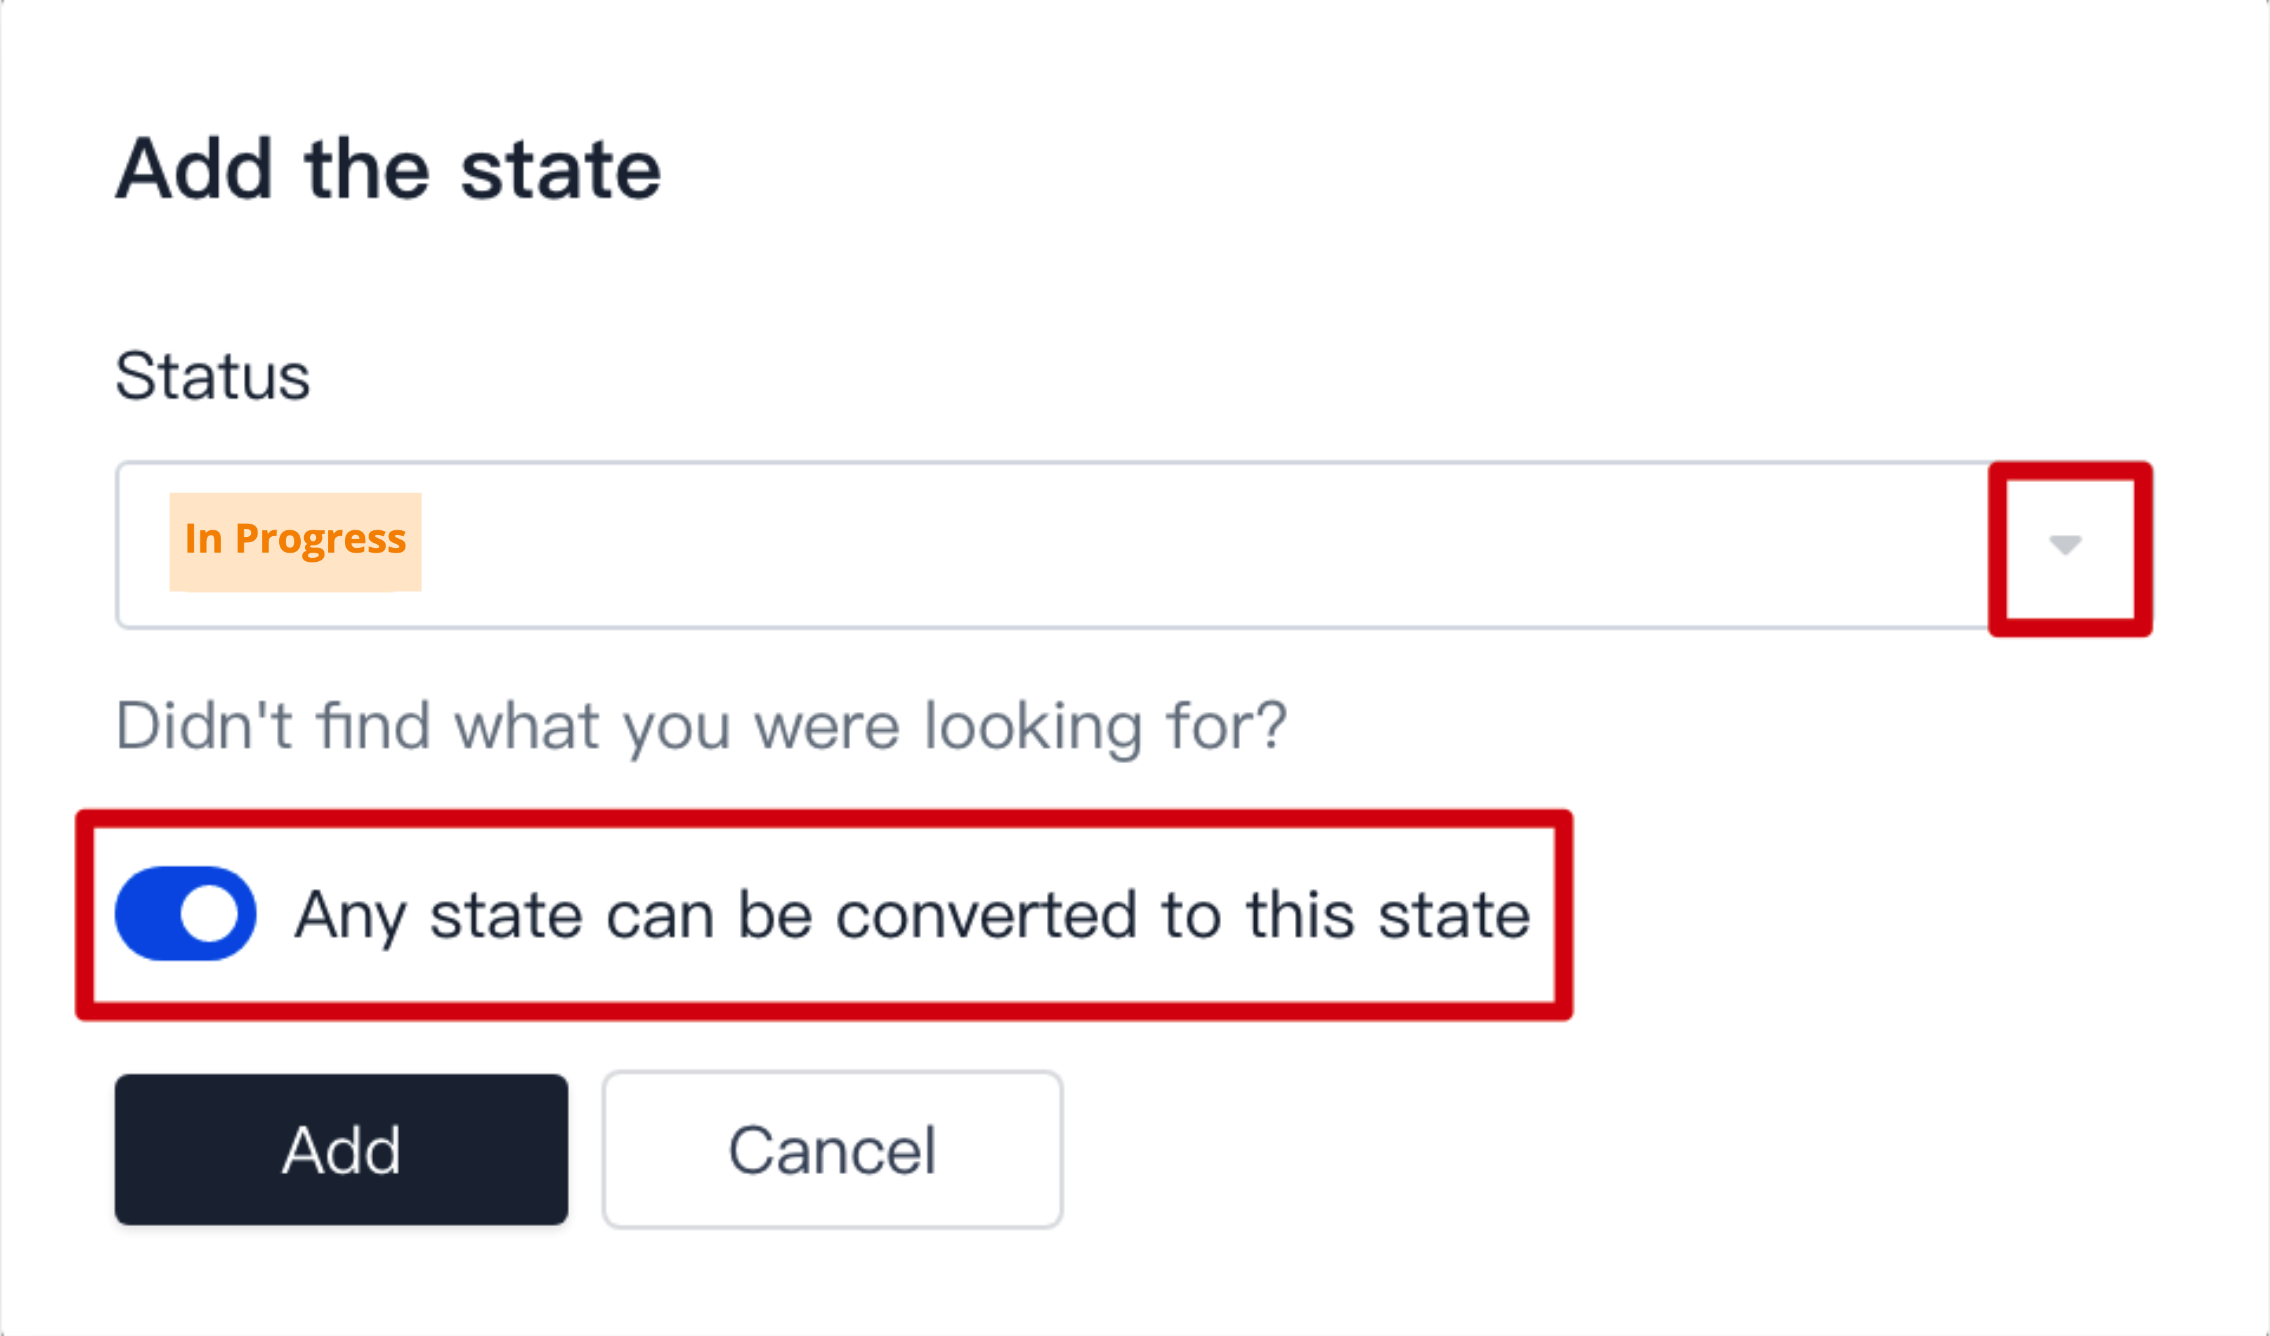
1. Select Add Status in Workflows.
2. You can select the status set in Global Status Settings from the dropdown menu on the right of Status. If Allow Any Status to this Status is enabled when you create a status, all statuses in the project can be switched to this target status.
3. Click Add and the new status will be added in the workflow.
A transition shows the transition process from an initial status to a target status.
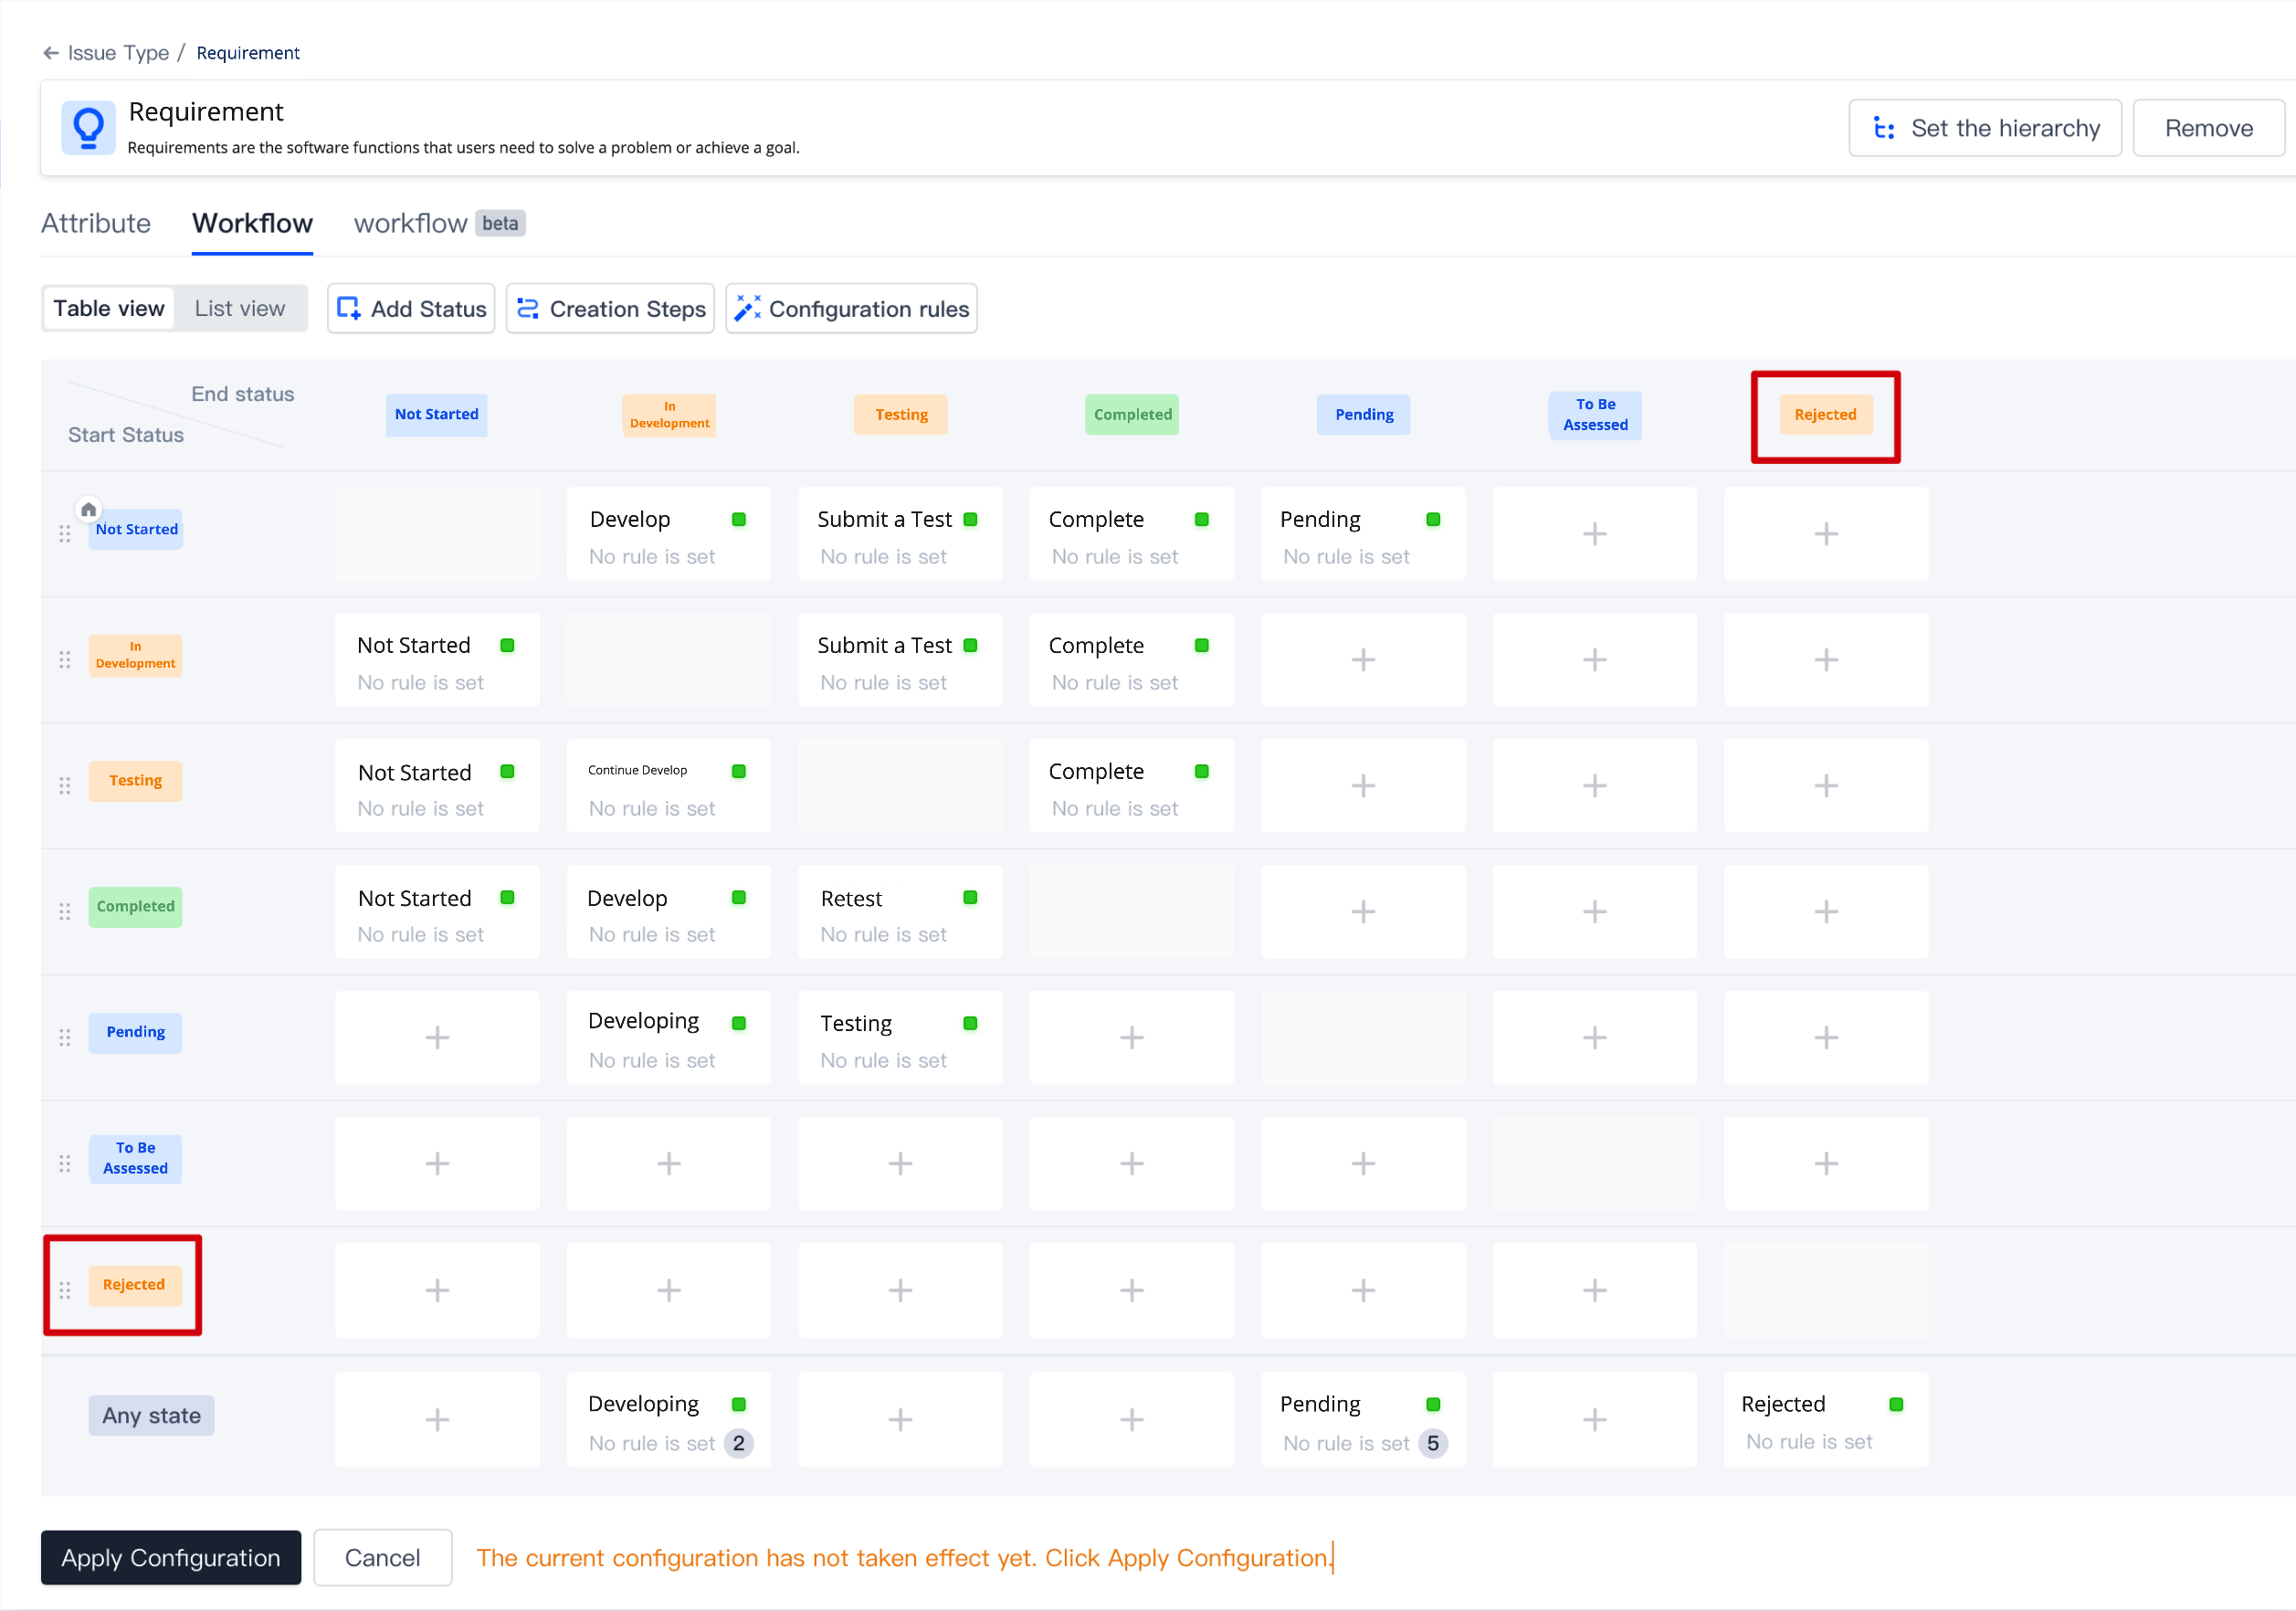
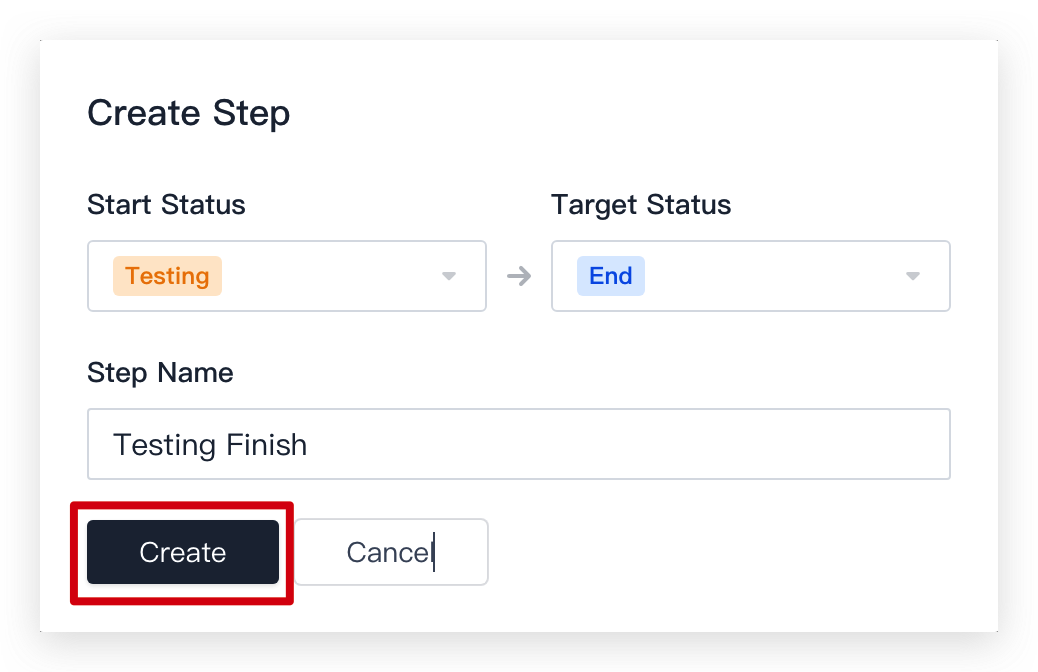
1. Select Create Transition in Workflow.
2. Specify an initial status and a target status for this transition. The transition name defaults to the target status, and can be changed. Then, click Create.
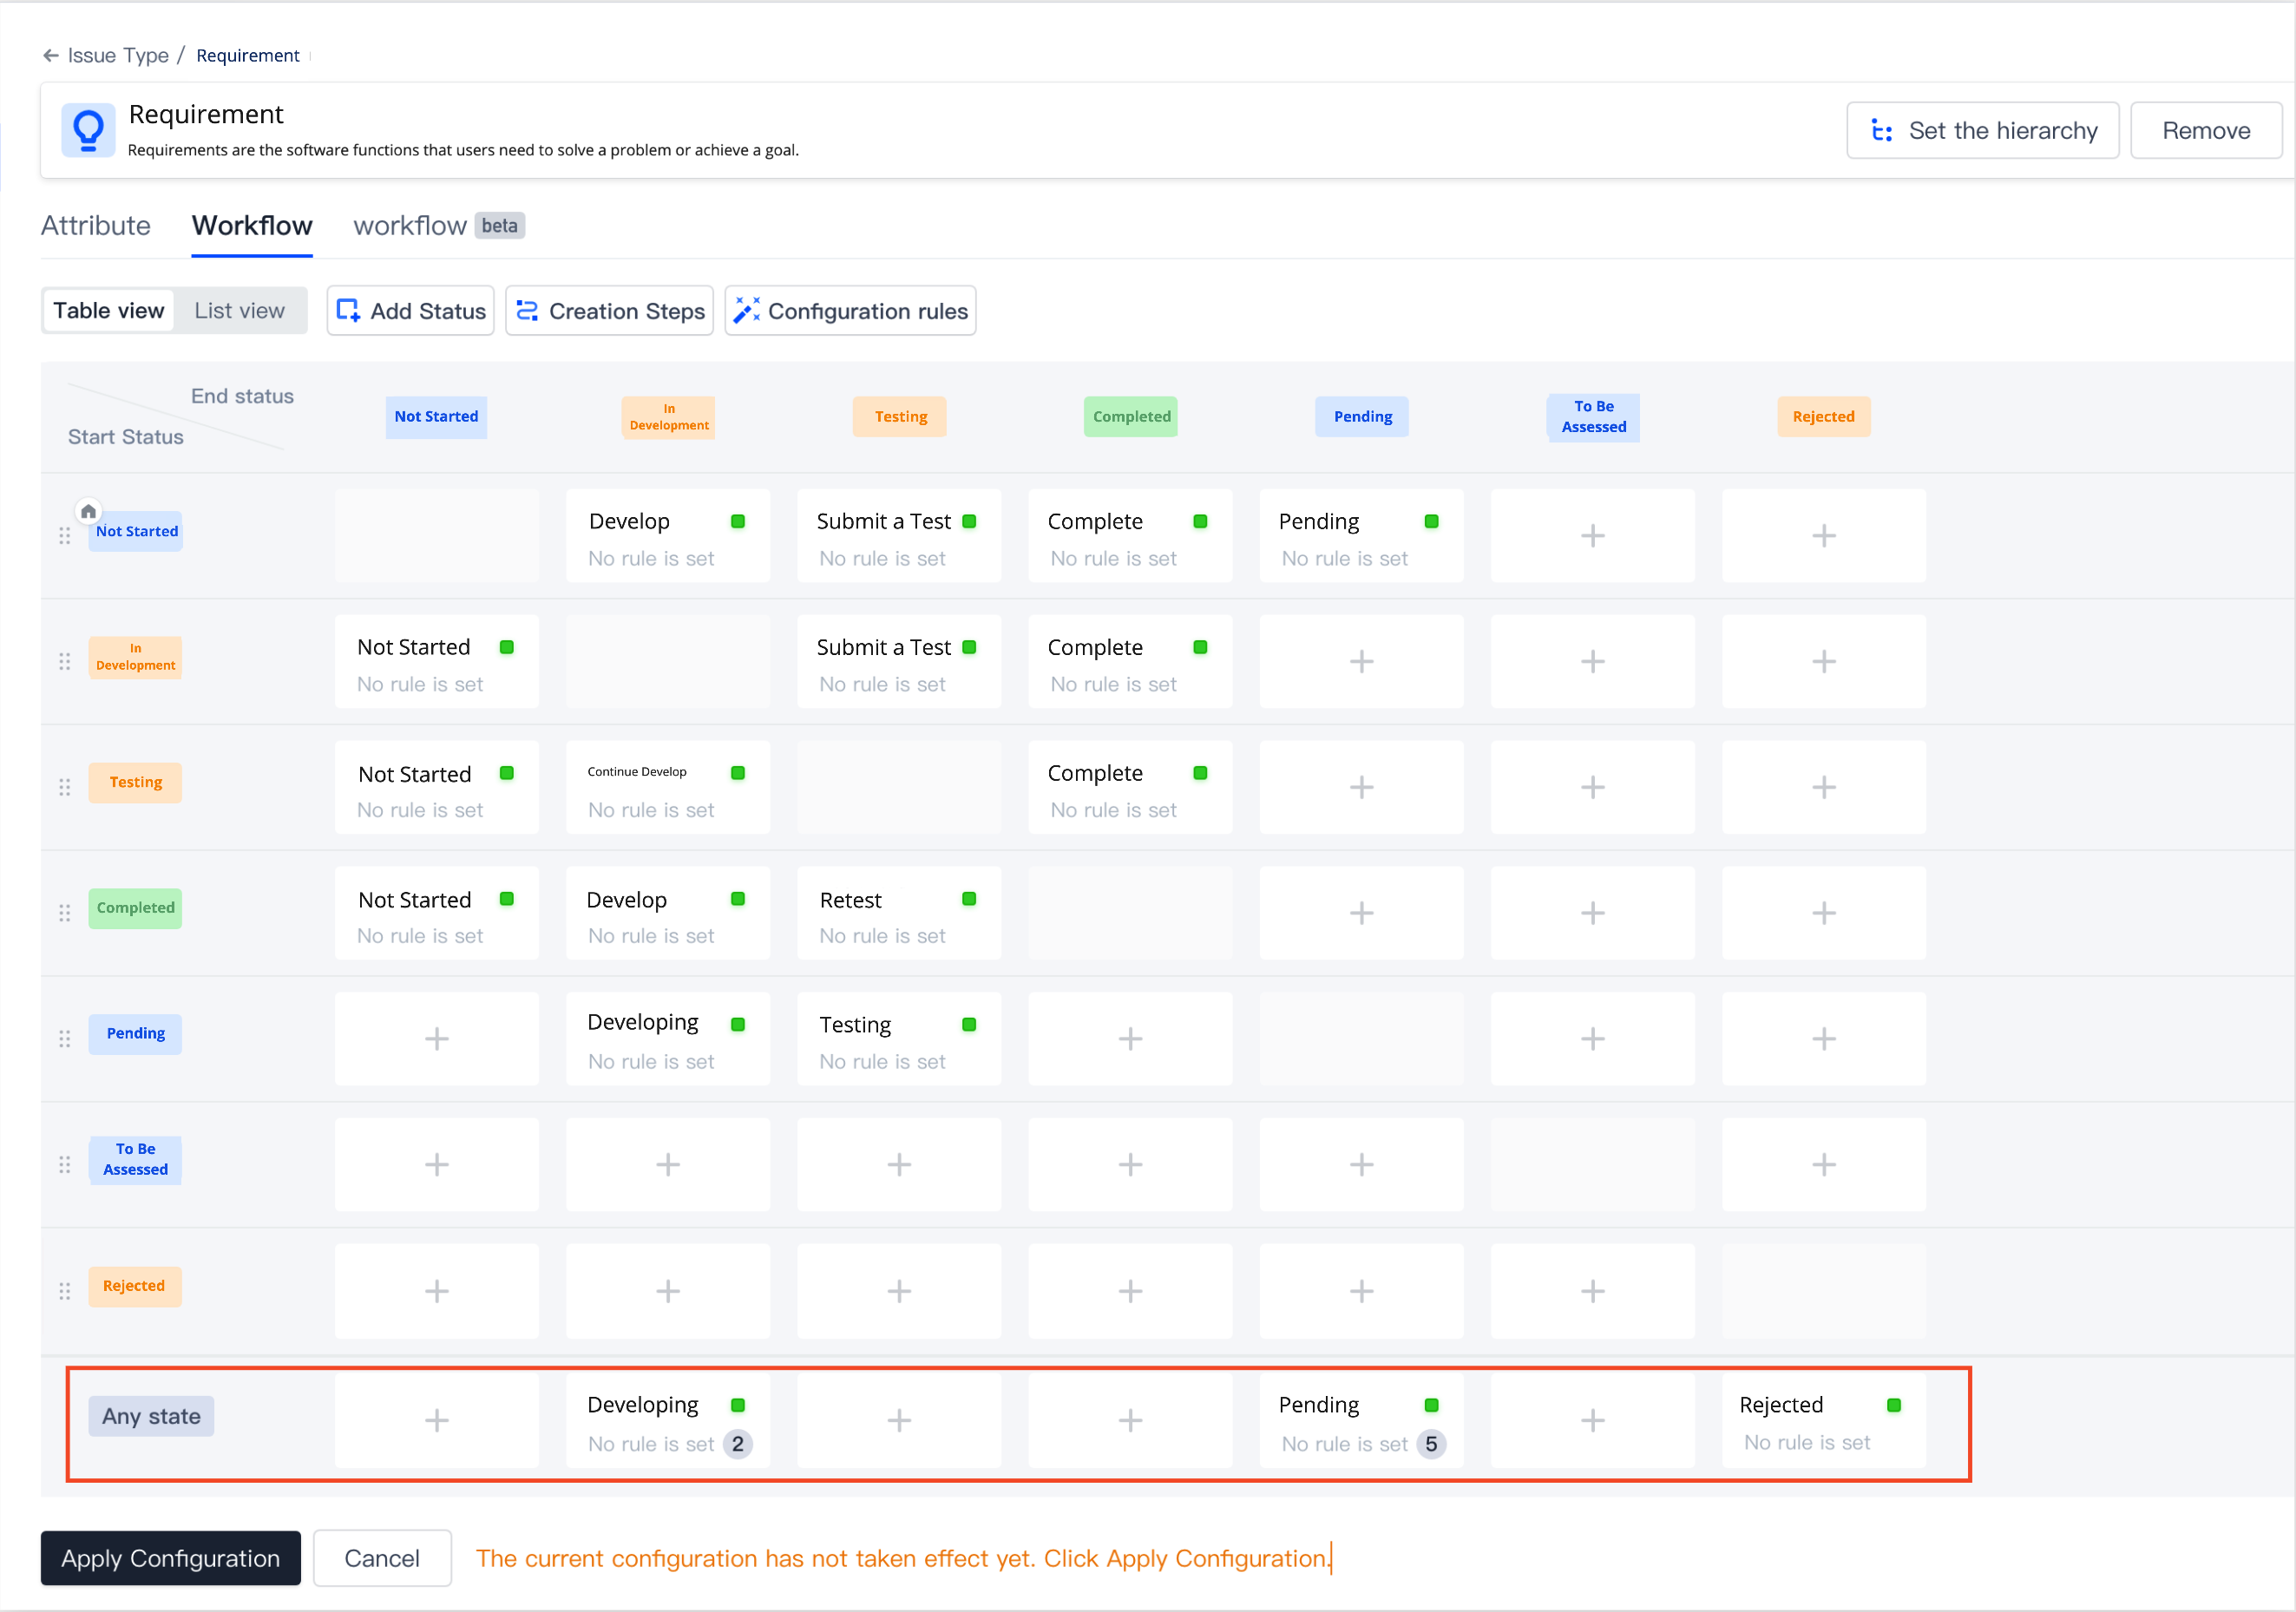
3. You can also create a transition directly in Any Status. In this case, the initial status and target status correspond to the statuses respectively in the row and column of the table. You can only change the transition name. Then, click Create.
4. Avoid conflicts when you set a transition. As shown in the figure below, since Any Status can be switched to the Not Started status, the transition from a specific status to the Not Started status is overwritten and only the transition from Any Status to Not Started.
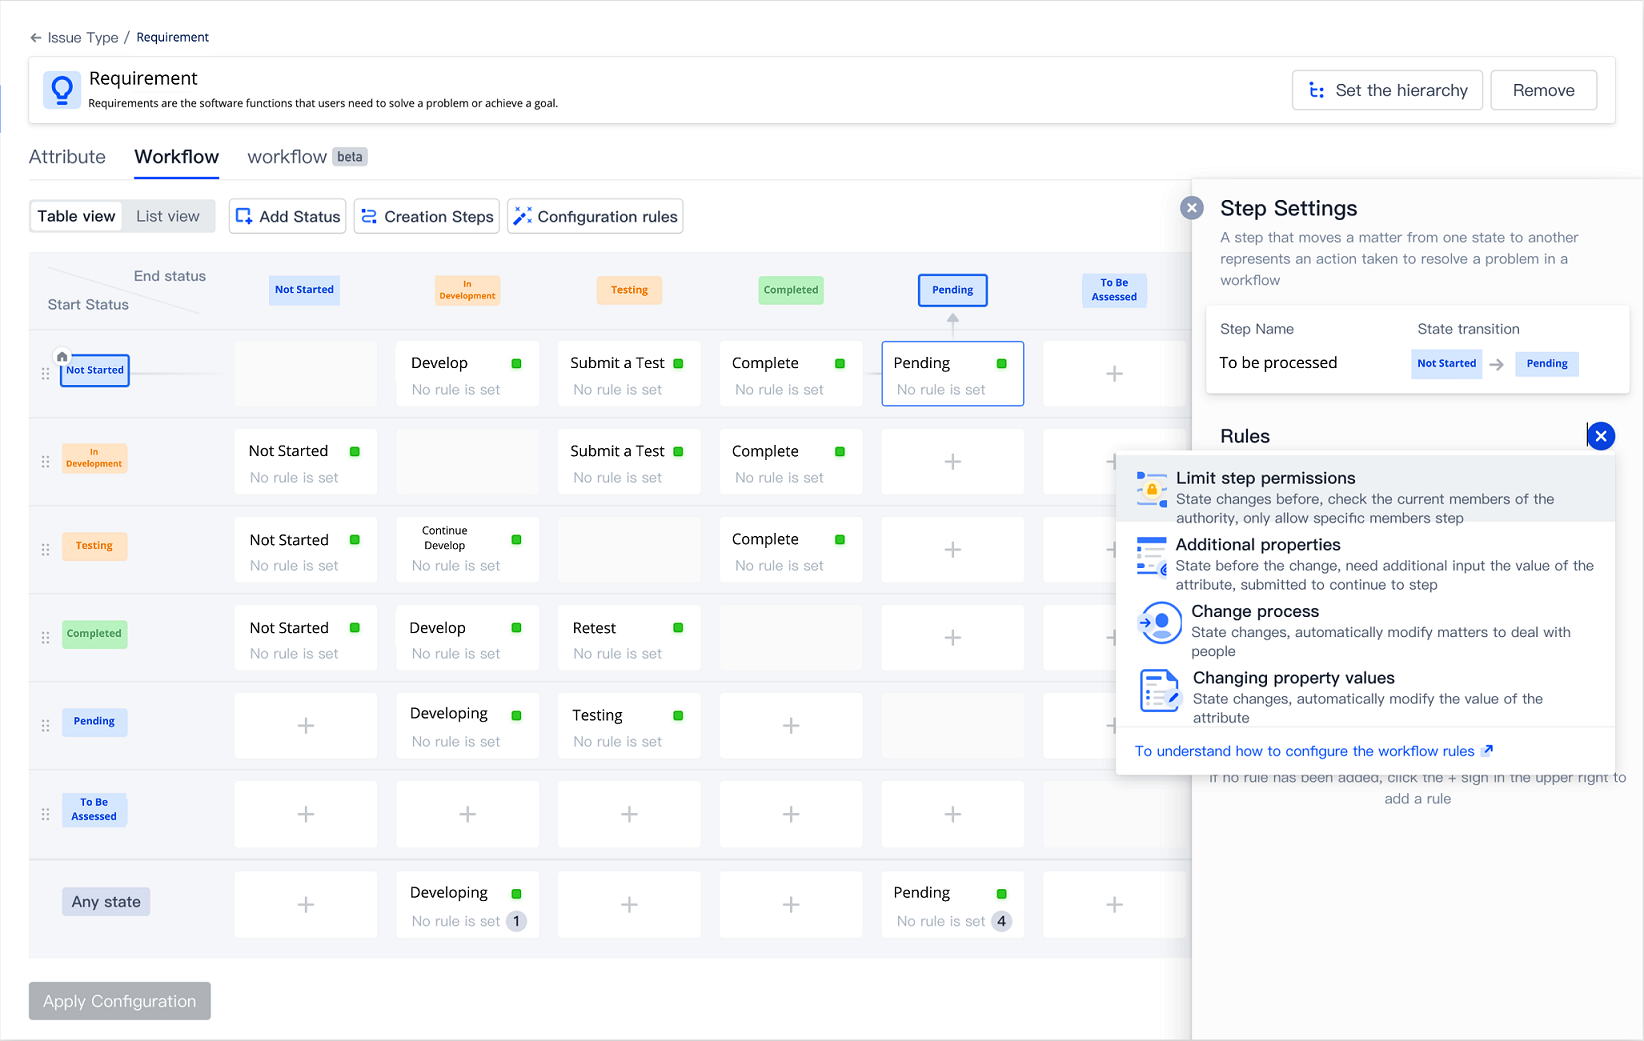
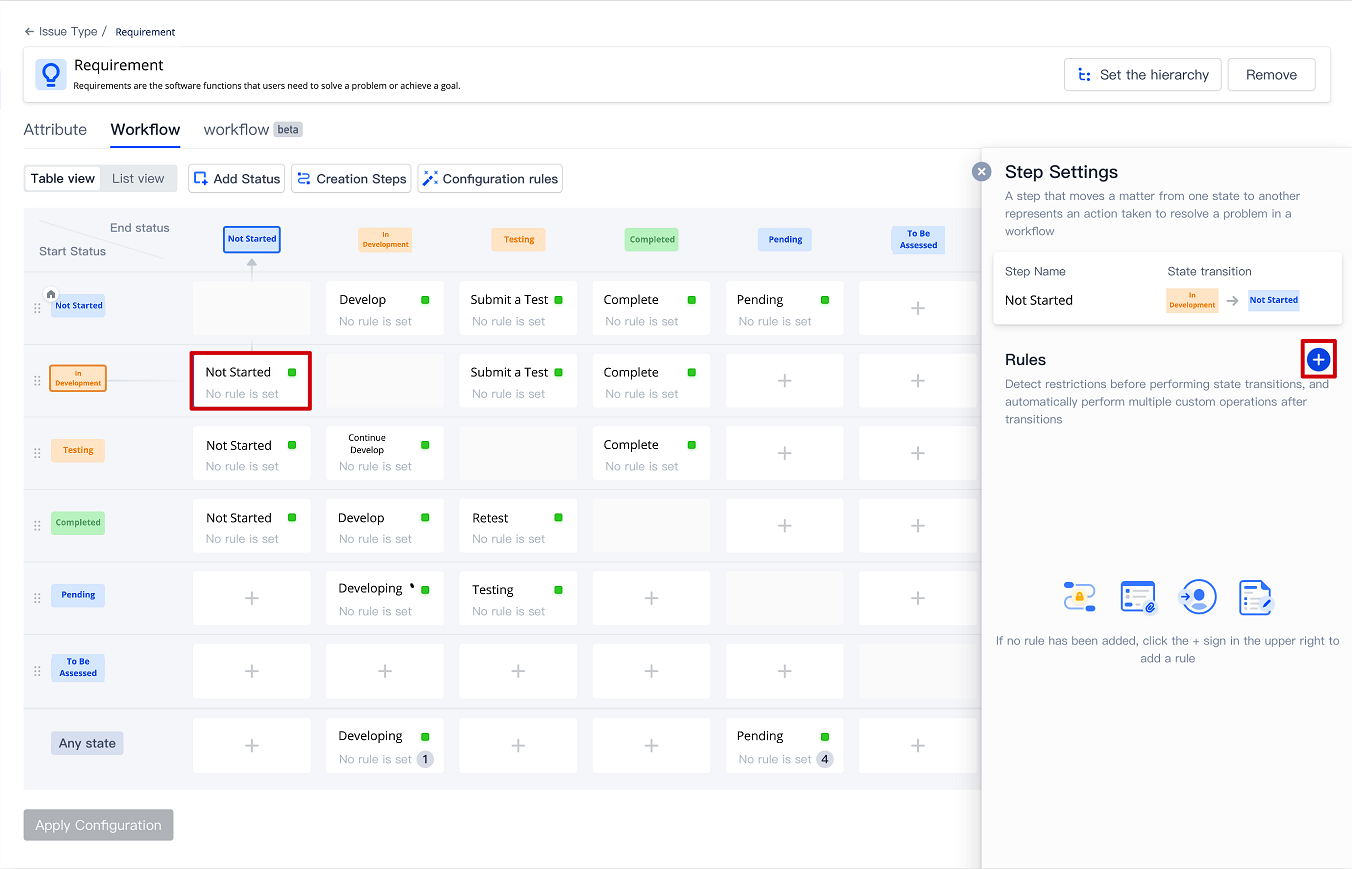
5. Select any transition, and then change the transition name and configure rules in the Transition Settings on the right, or delete this transition by clicking the Delete Transition button below.
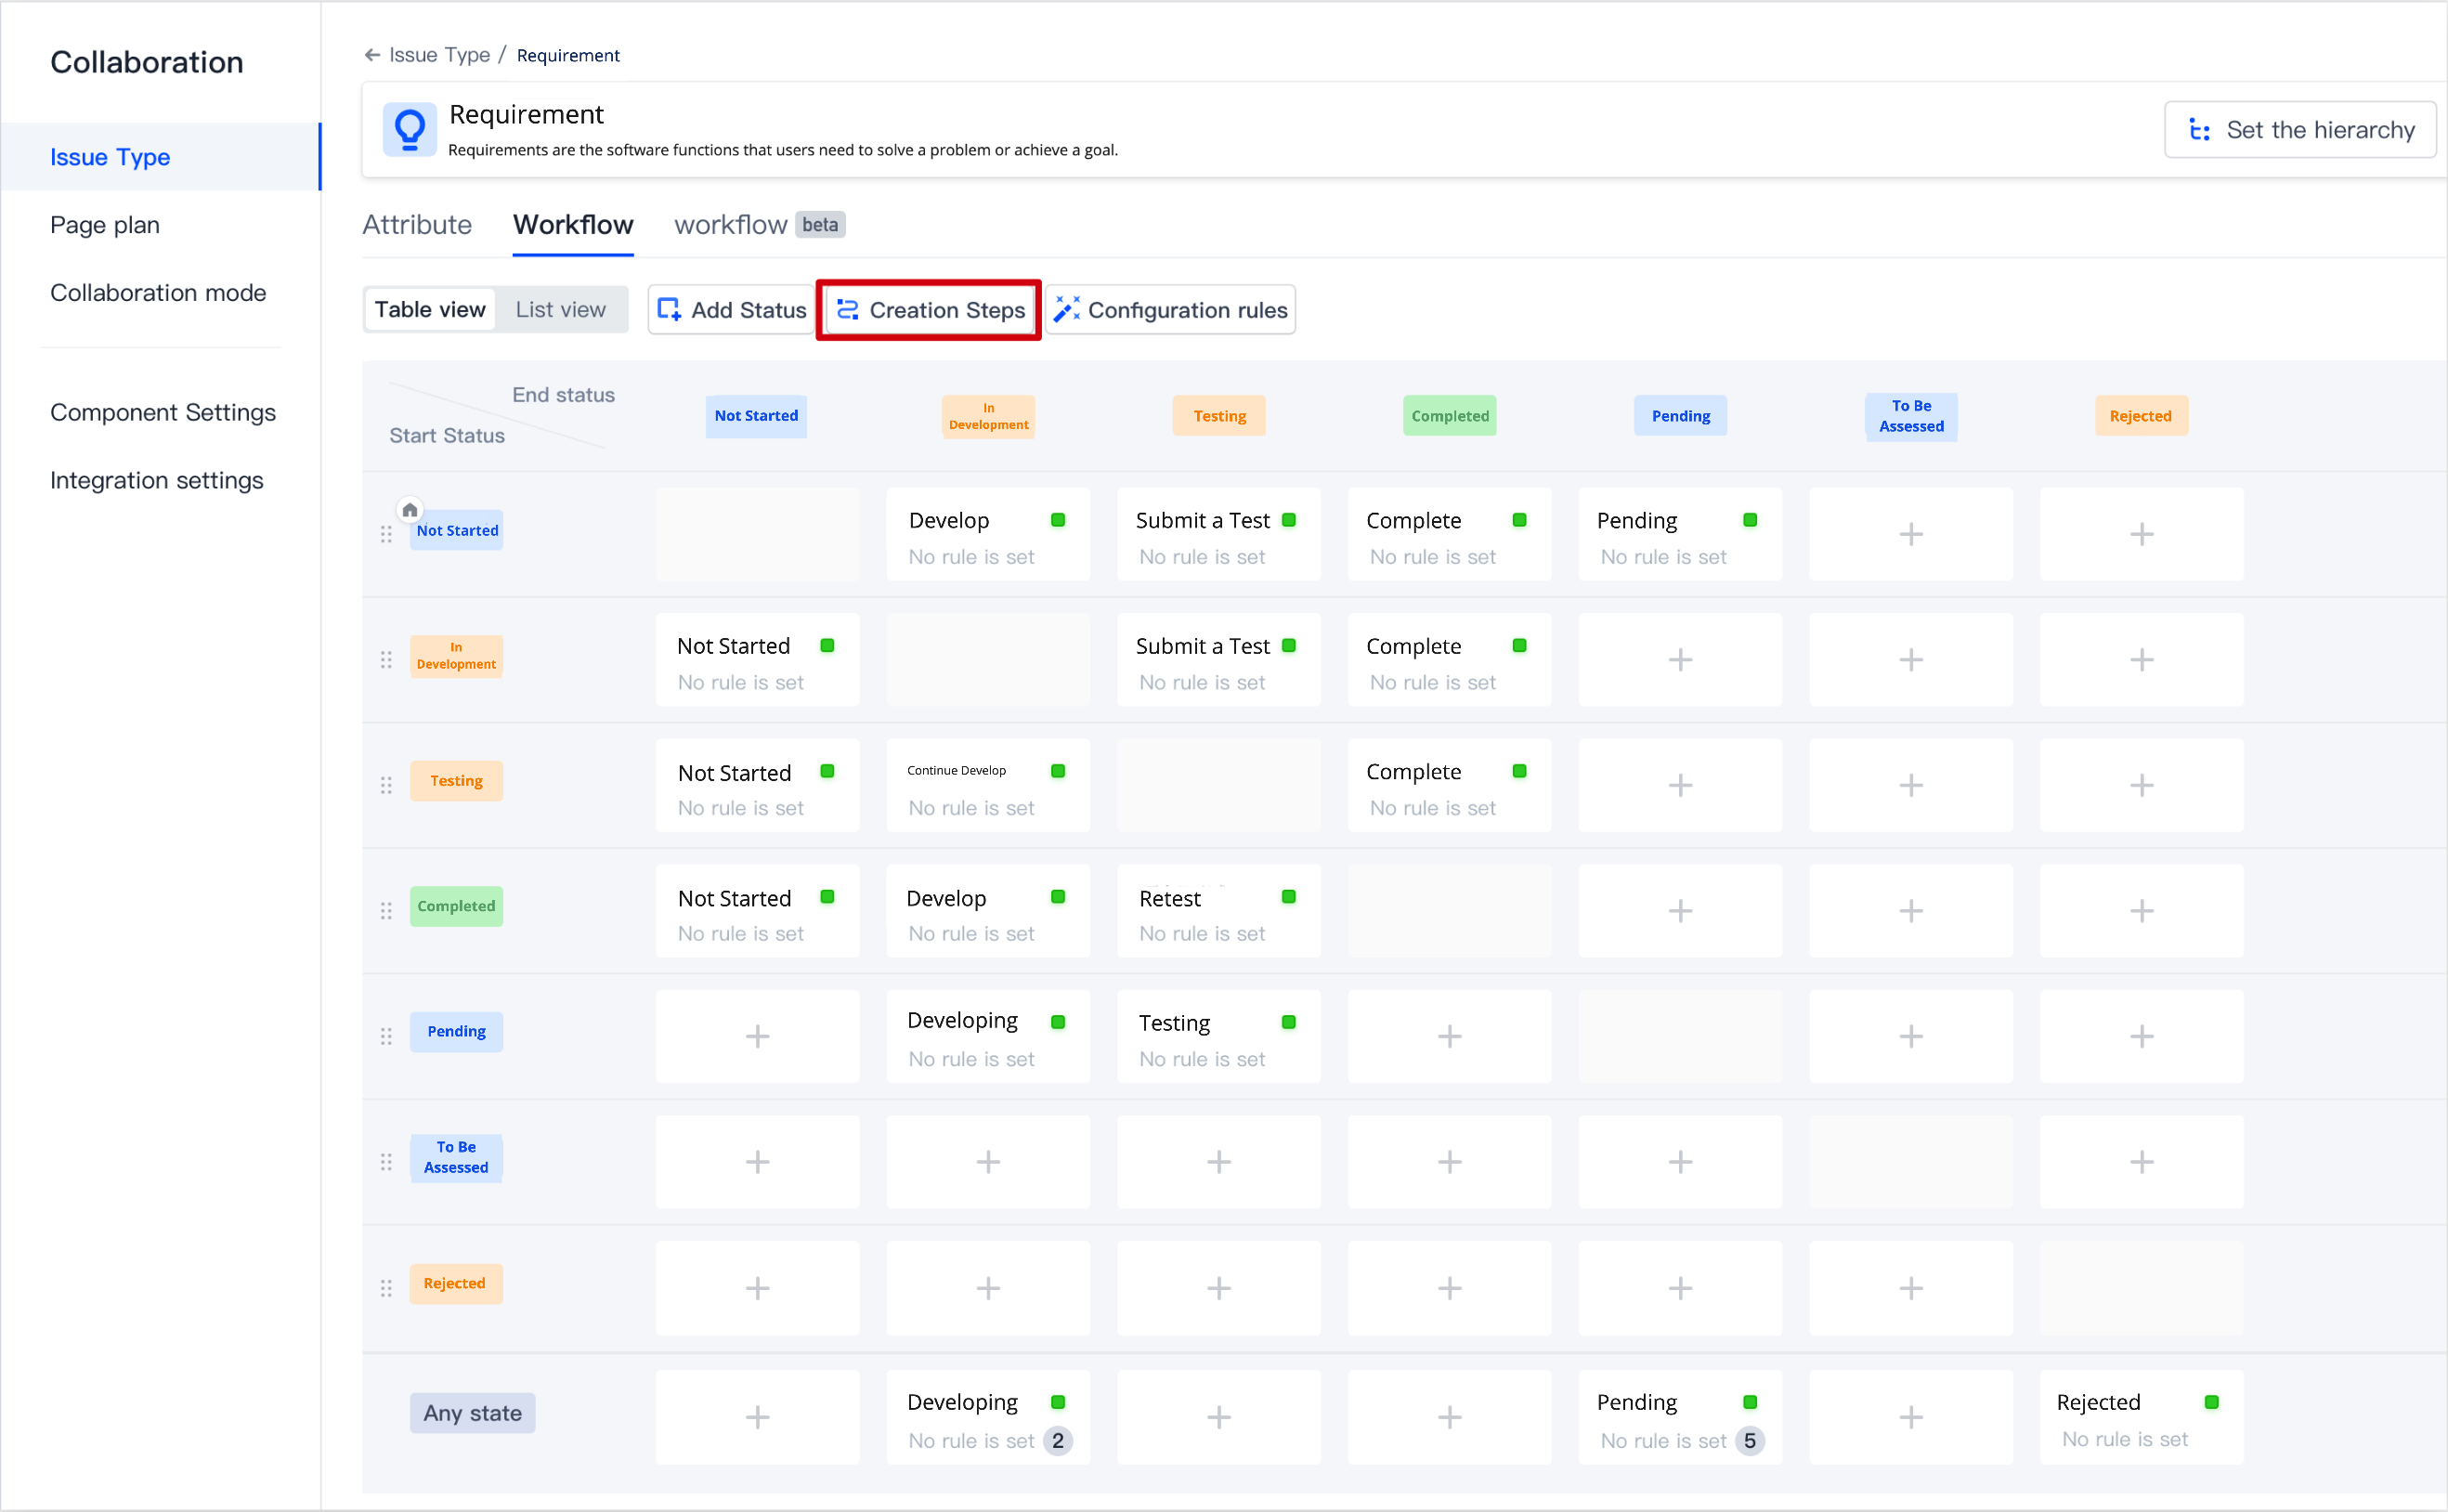
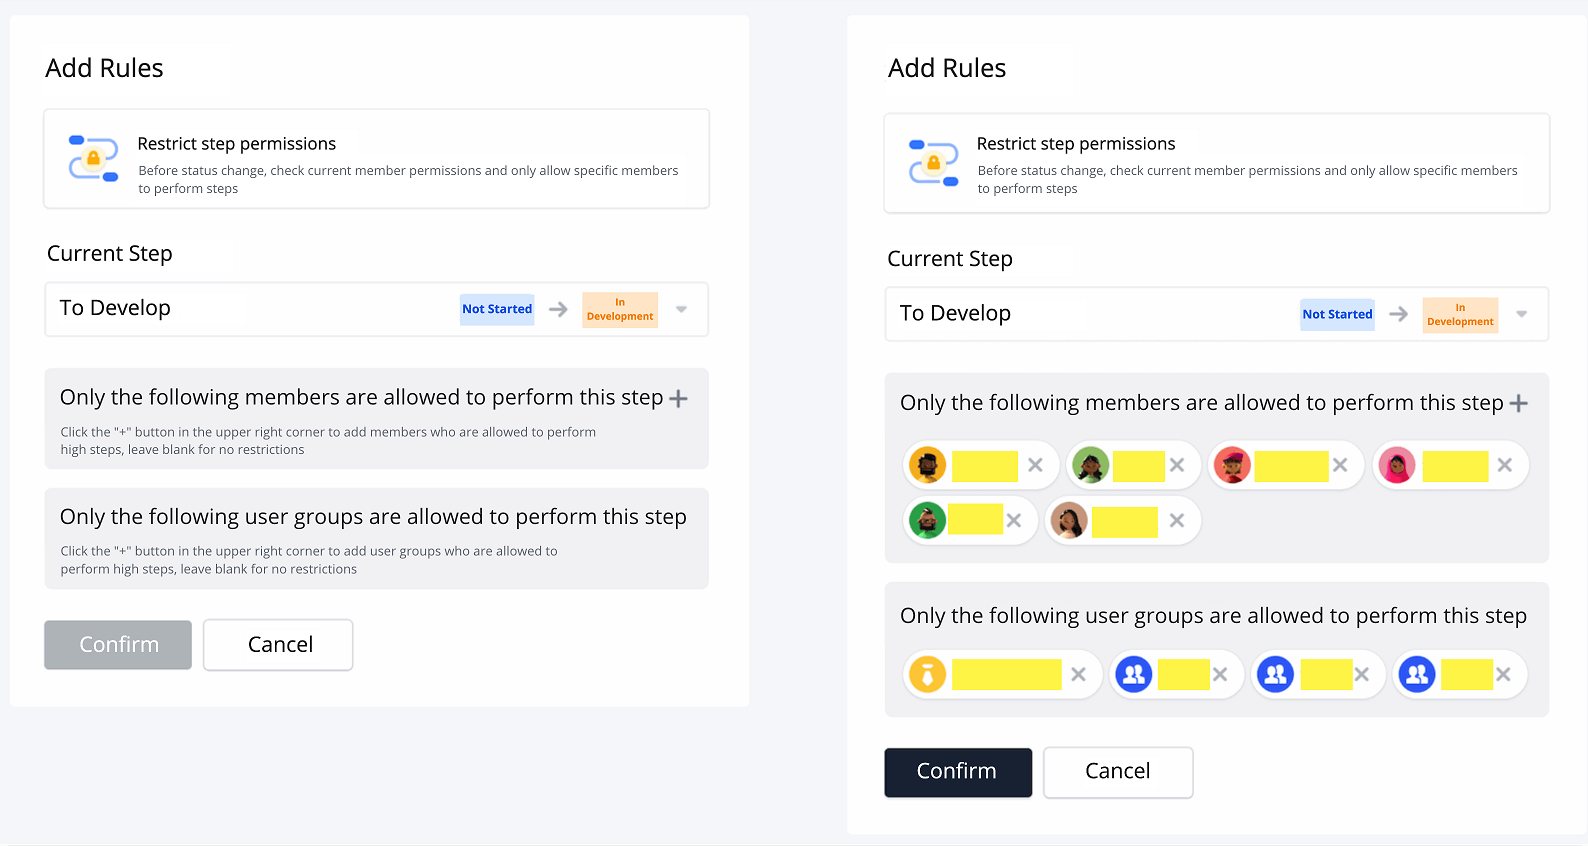
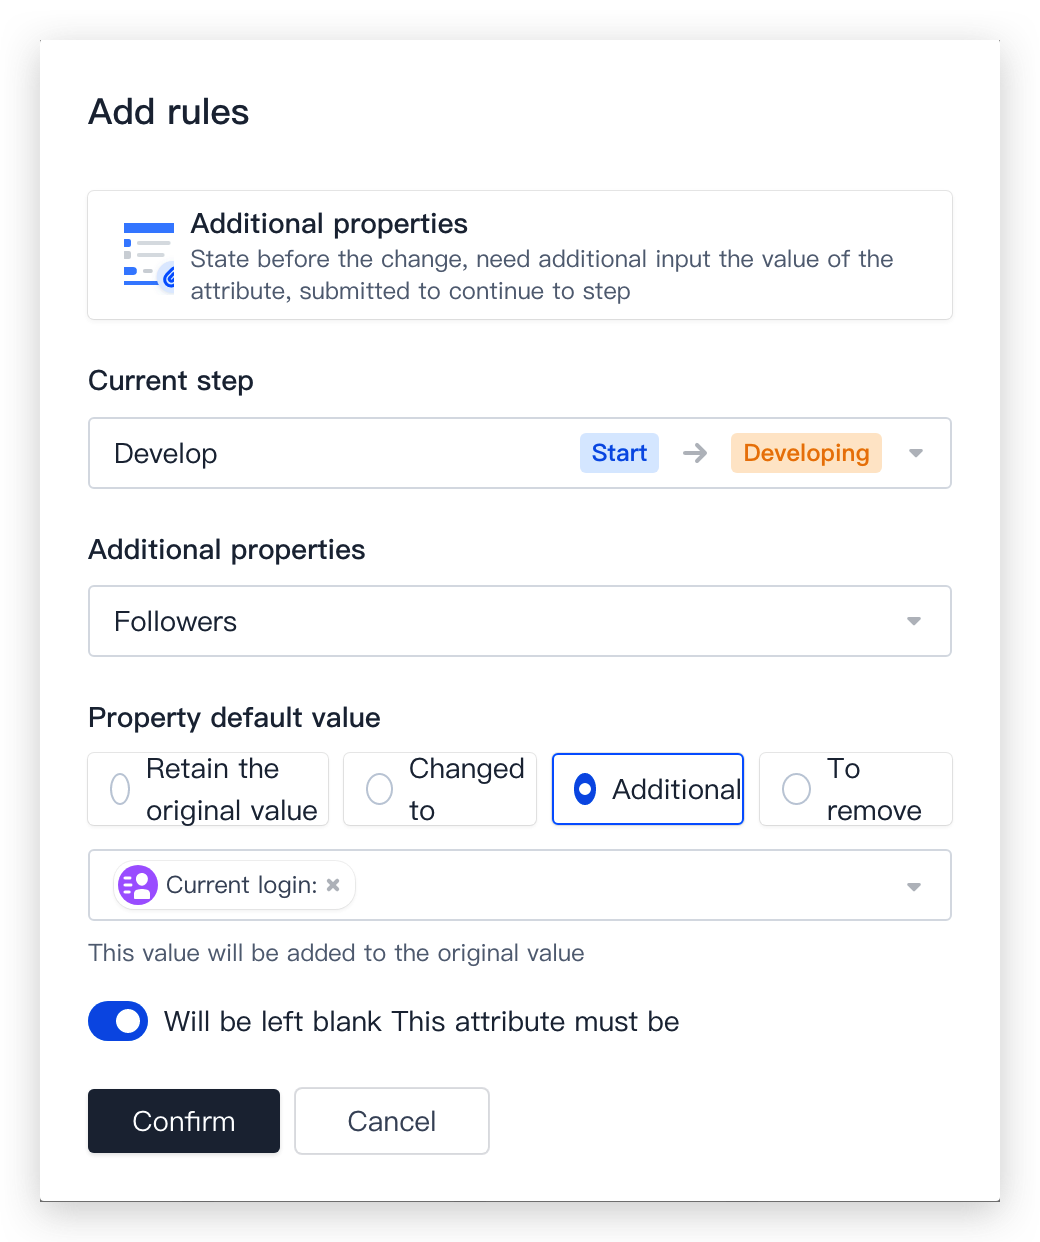
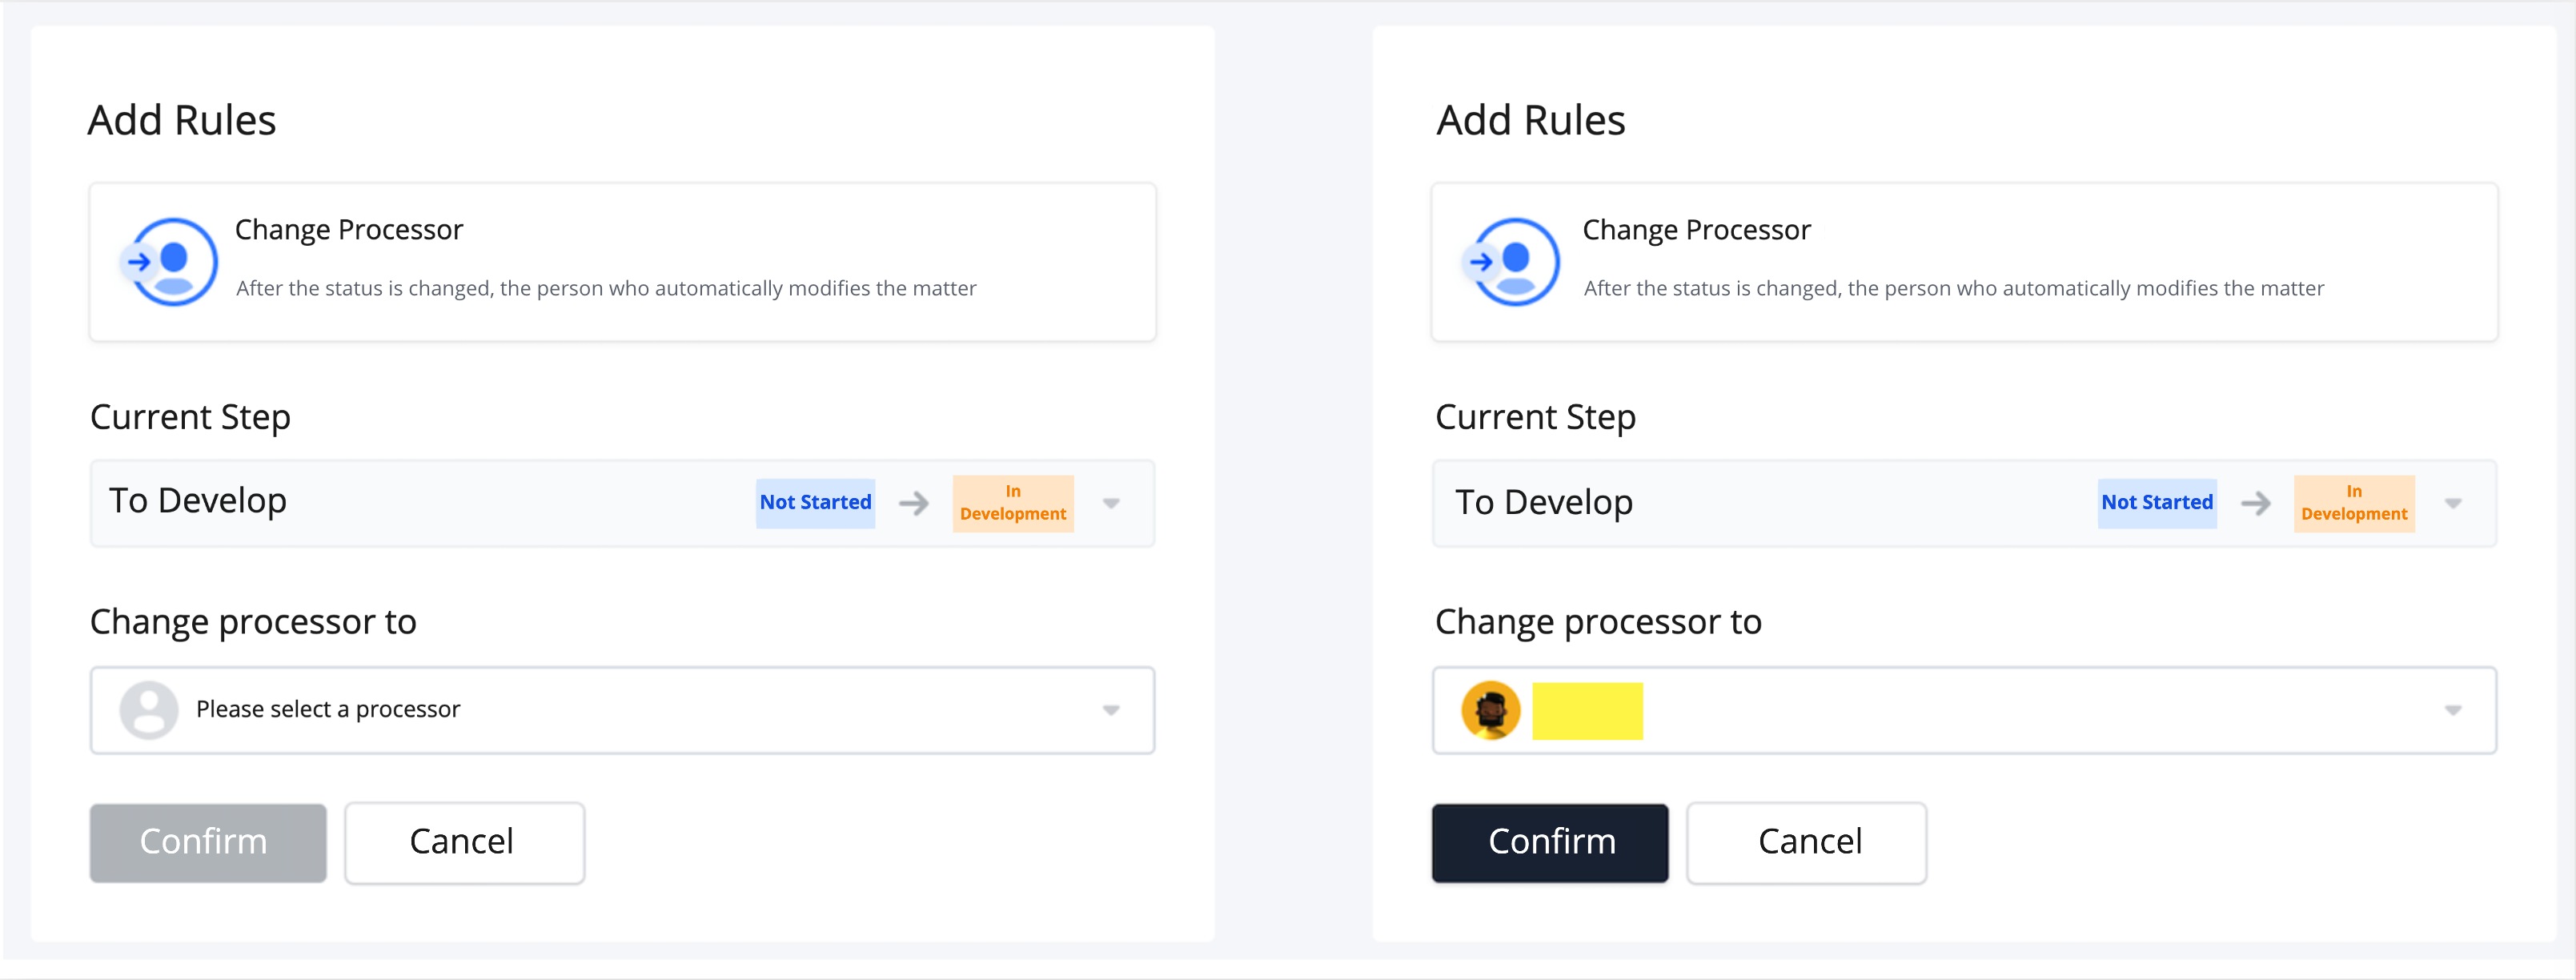
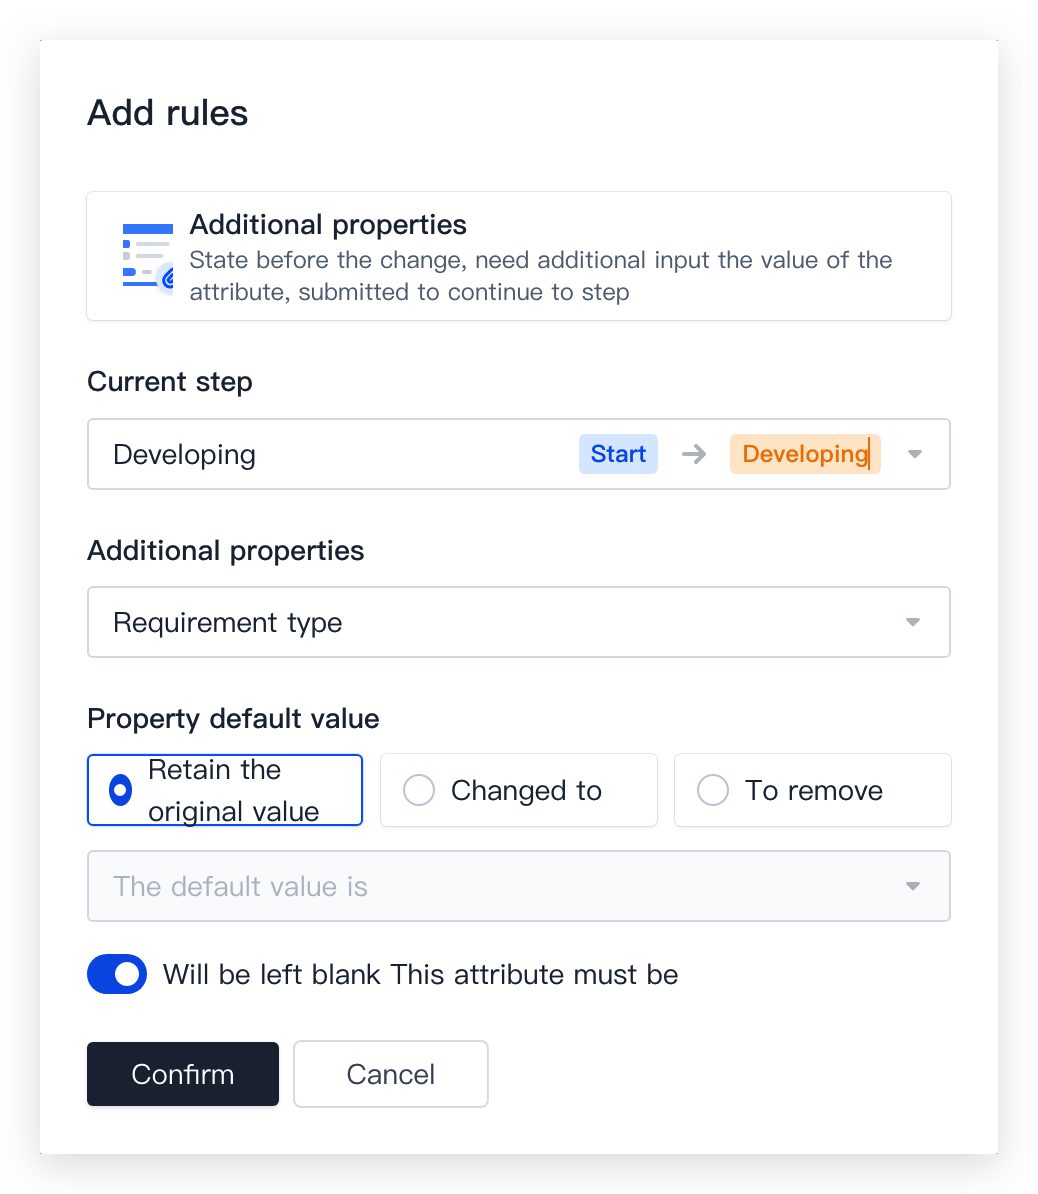
The transition rules can be configured separately for each issue type. Click Configure Rules in Workflow to set transition rules, or select a status, and then click Transition Settings > Rules > + on the right. A total of four types are available: restrict transition permission, add fields, change assignee, and change field values, respectively. You can learn about these types from their descriptions, and configure them as needed.
By default, all team members have access to all transitions. If the transition permission is restricted, only authorized members can execute the transition.
This rule allows the configuration of more than one field as a form. If this rule is configured, a status change occurs only when members set the required field values.
If this rule is configured, the configured field values are automatically changed to the specified values when a status change occurs.
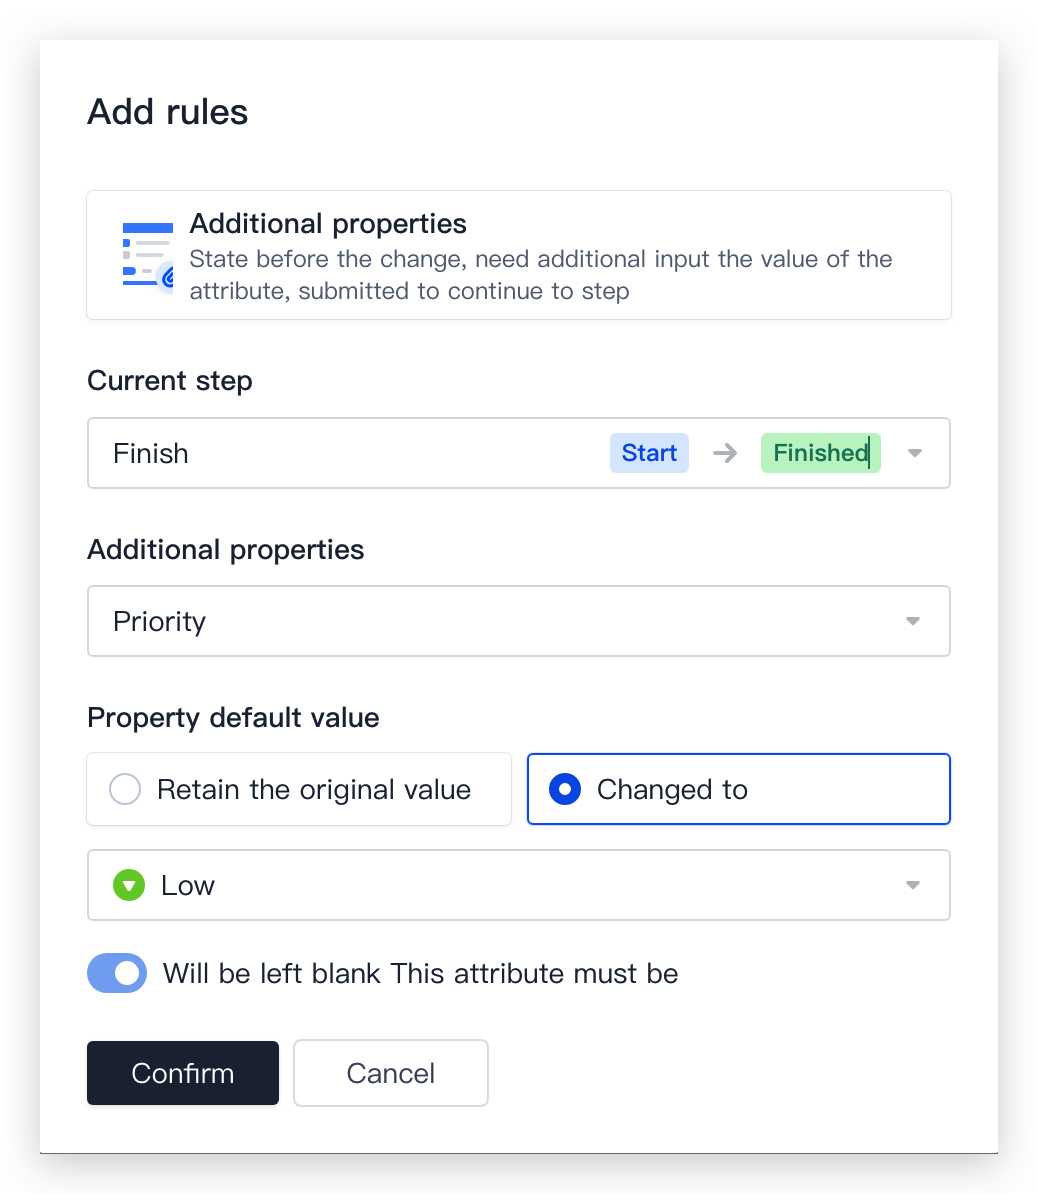
Example 1: You need to change the issue priority to Low when a transition changes to the Completed status.
Take the following steps: Click Configure Rules > Change Field Values. Then, select Any Status > Completed for the Current Transition field, and change the value of the Priority field to Low.
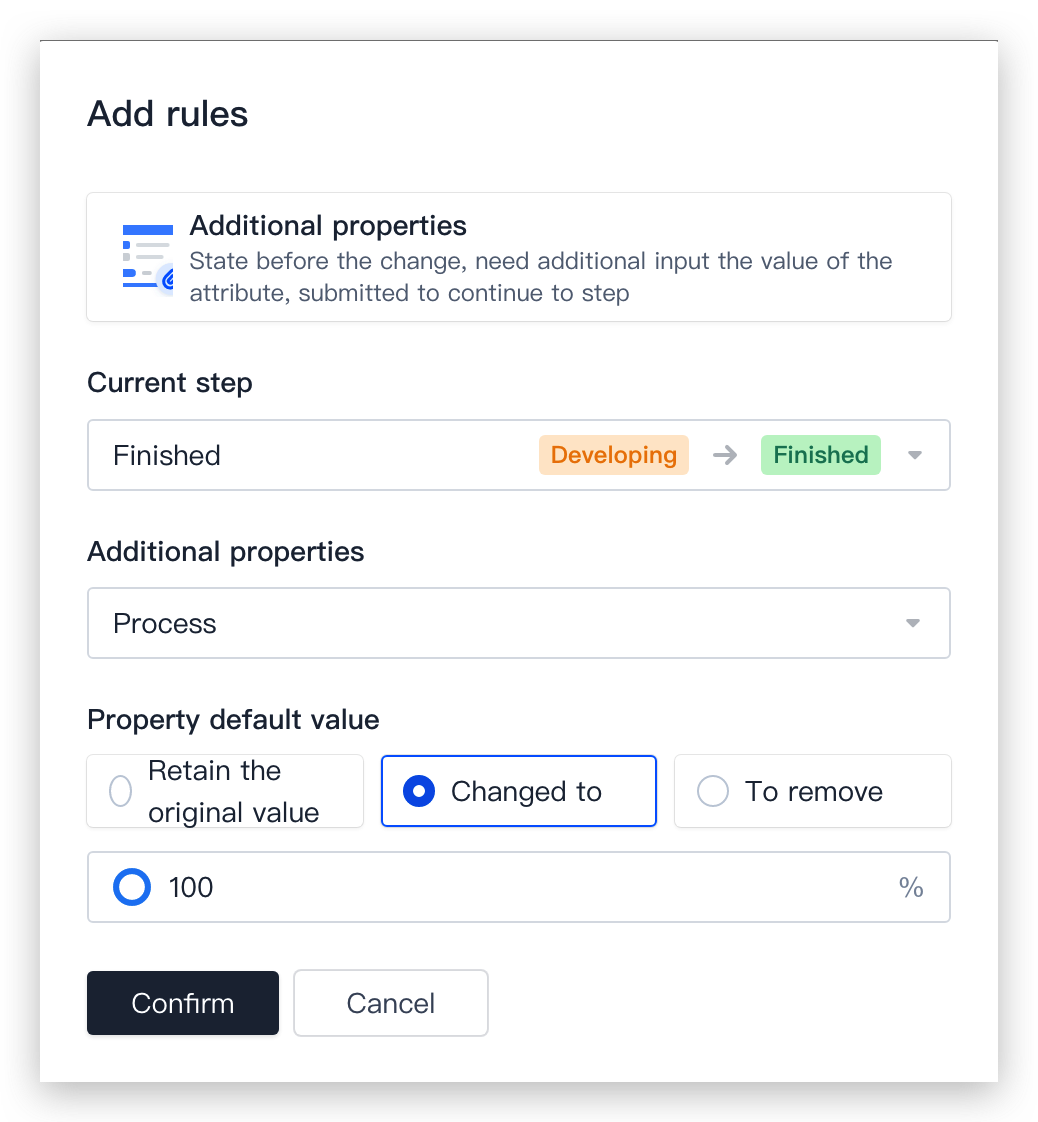
Example 2: You need to auto-update the progress to 100% when an issue transitions to the Completed status.
Take the following steps: Click Change Field Values. Then, select Any Status > Completed for the Current Transition field, and change the value of the Progress field to 100. Note: Both field and task workflow settings require configuration.
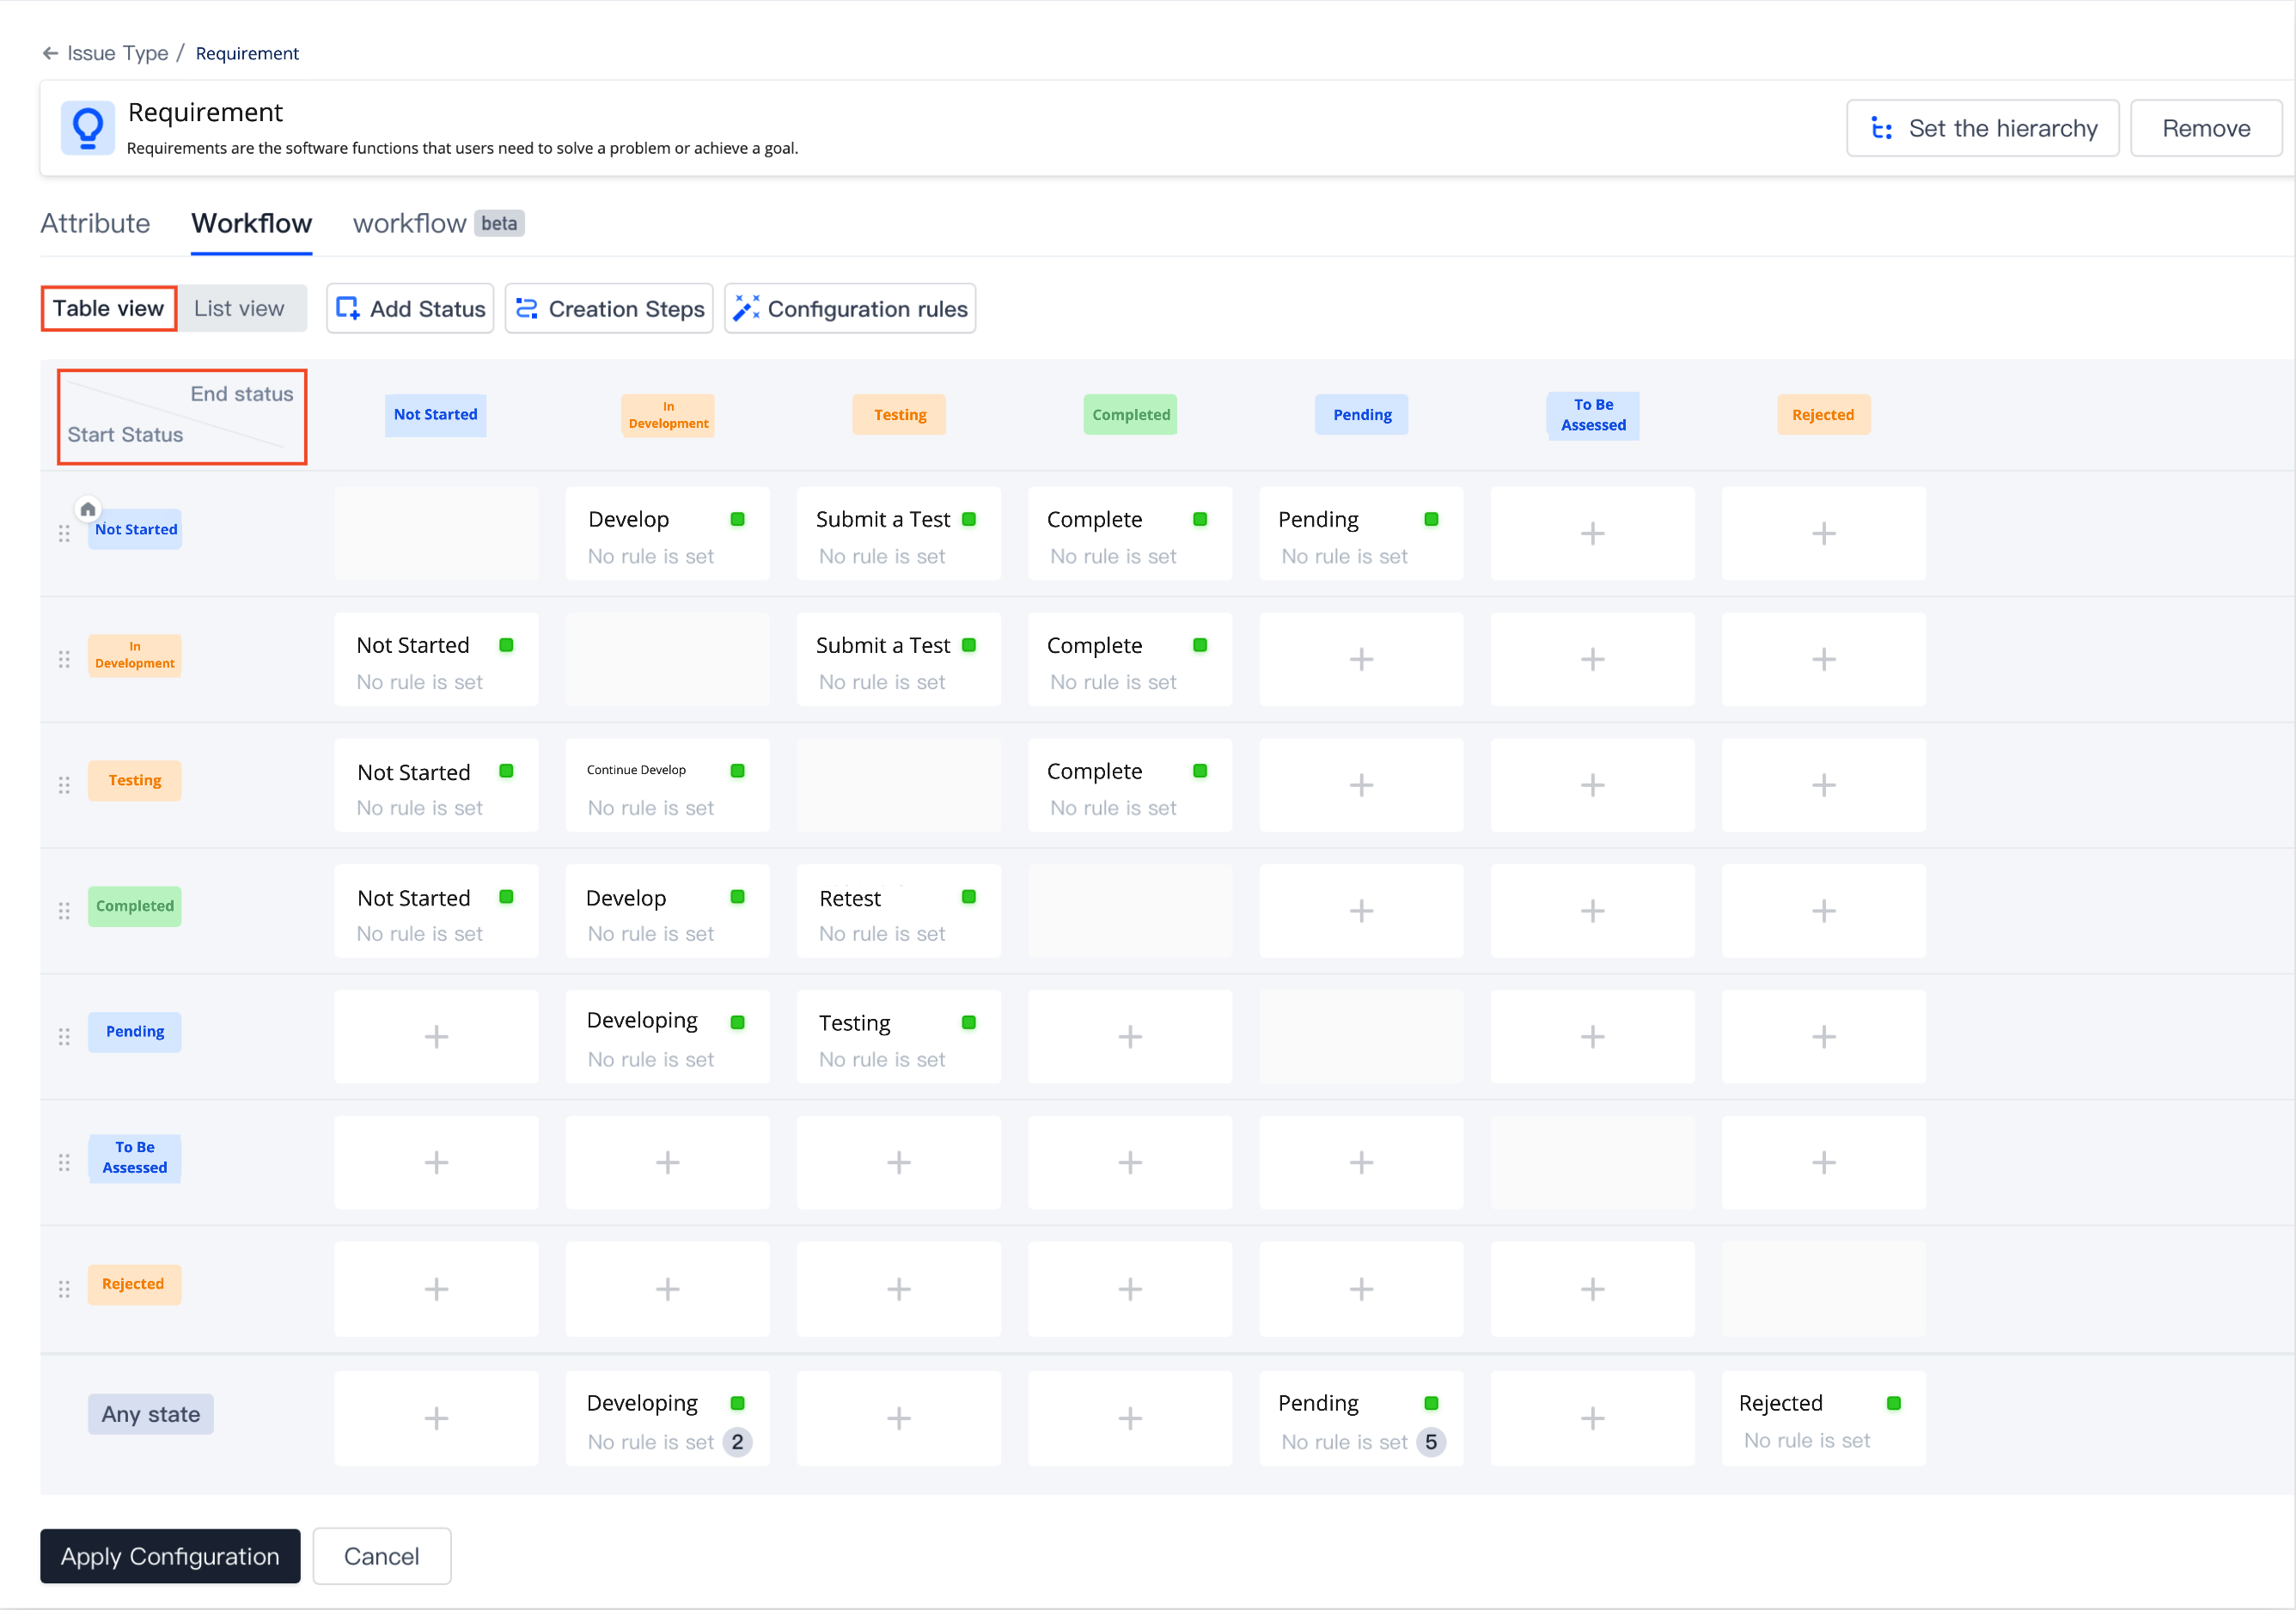
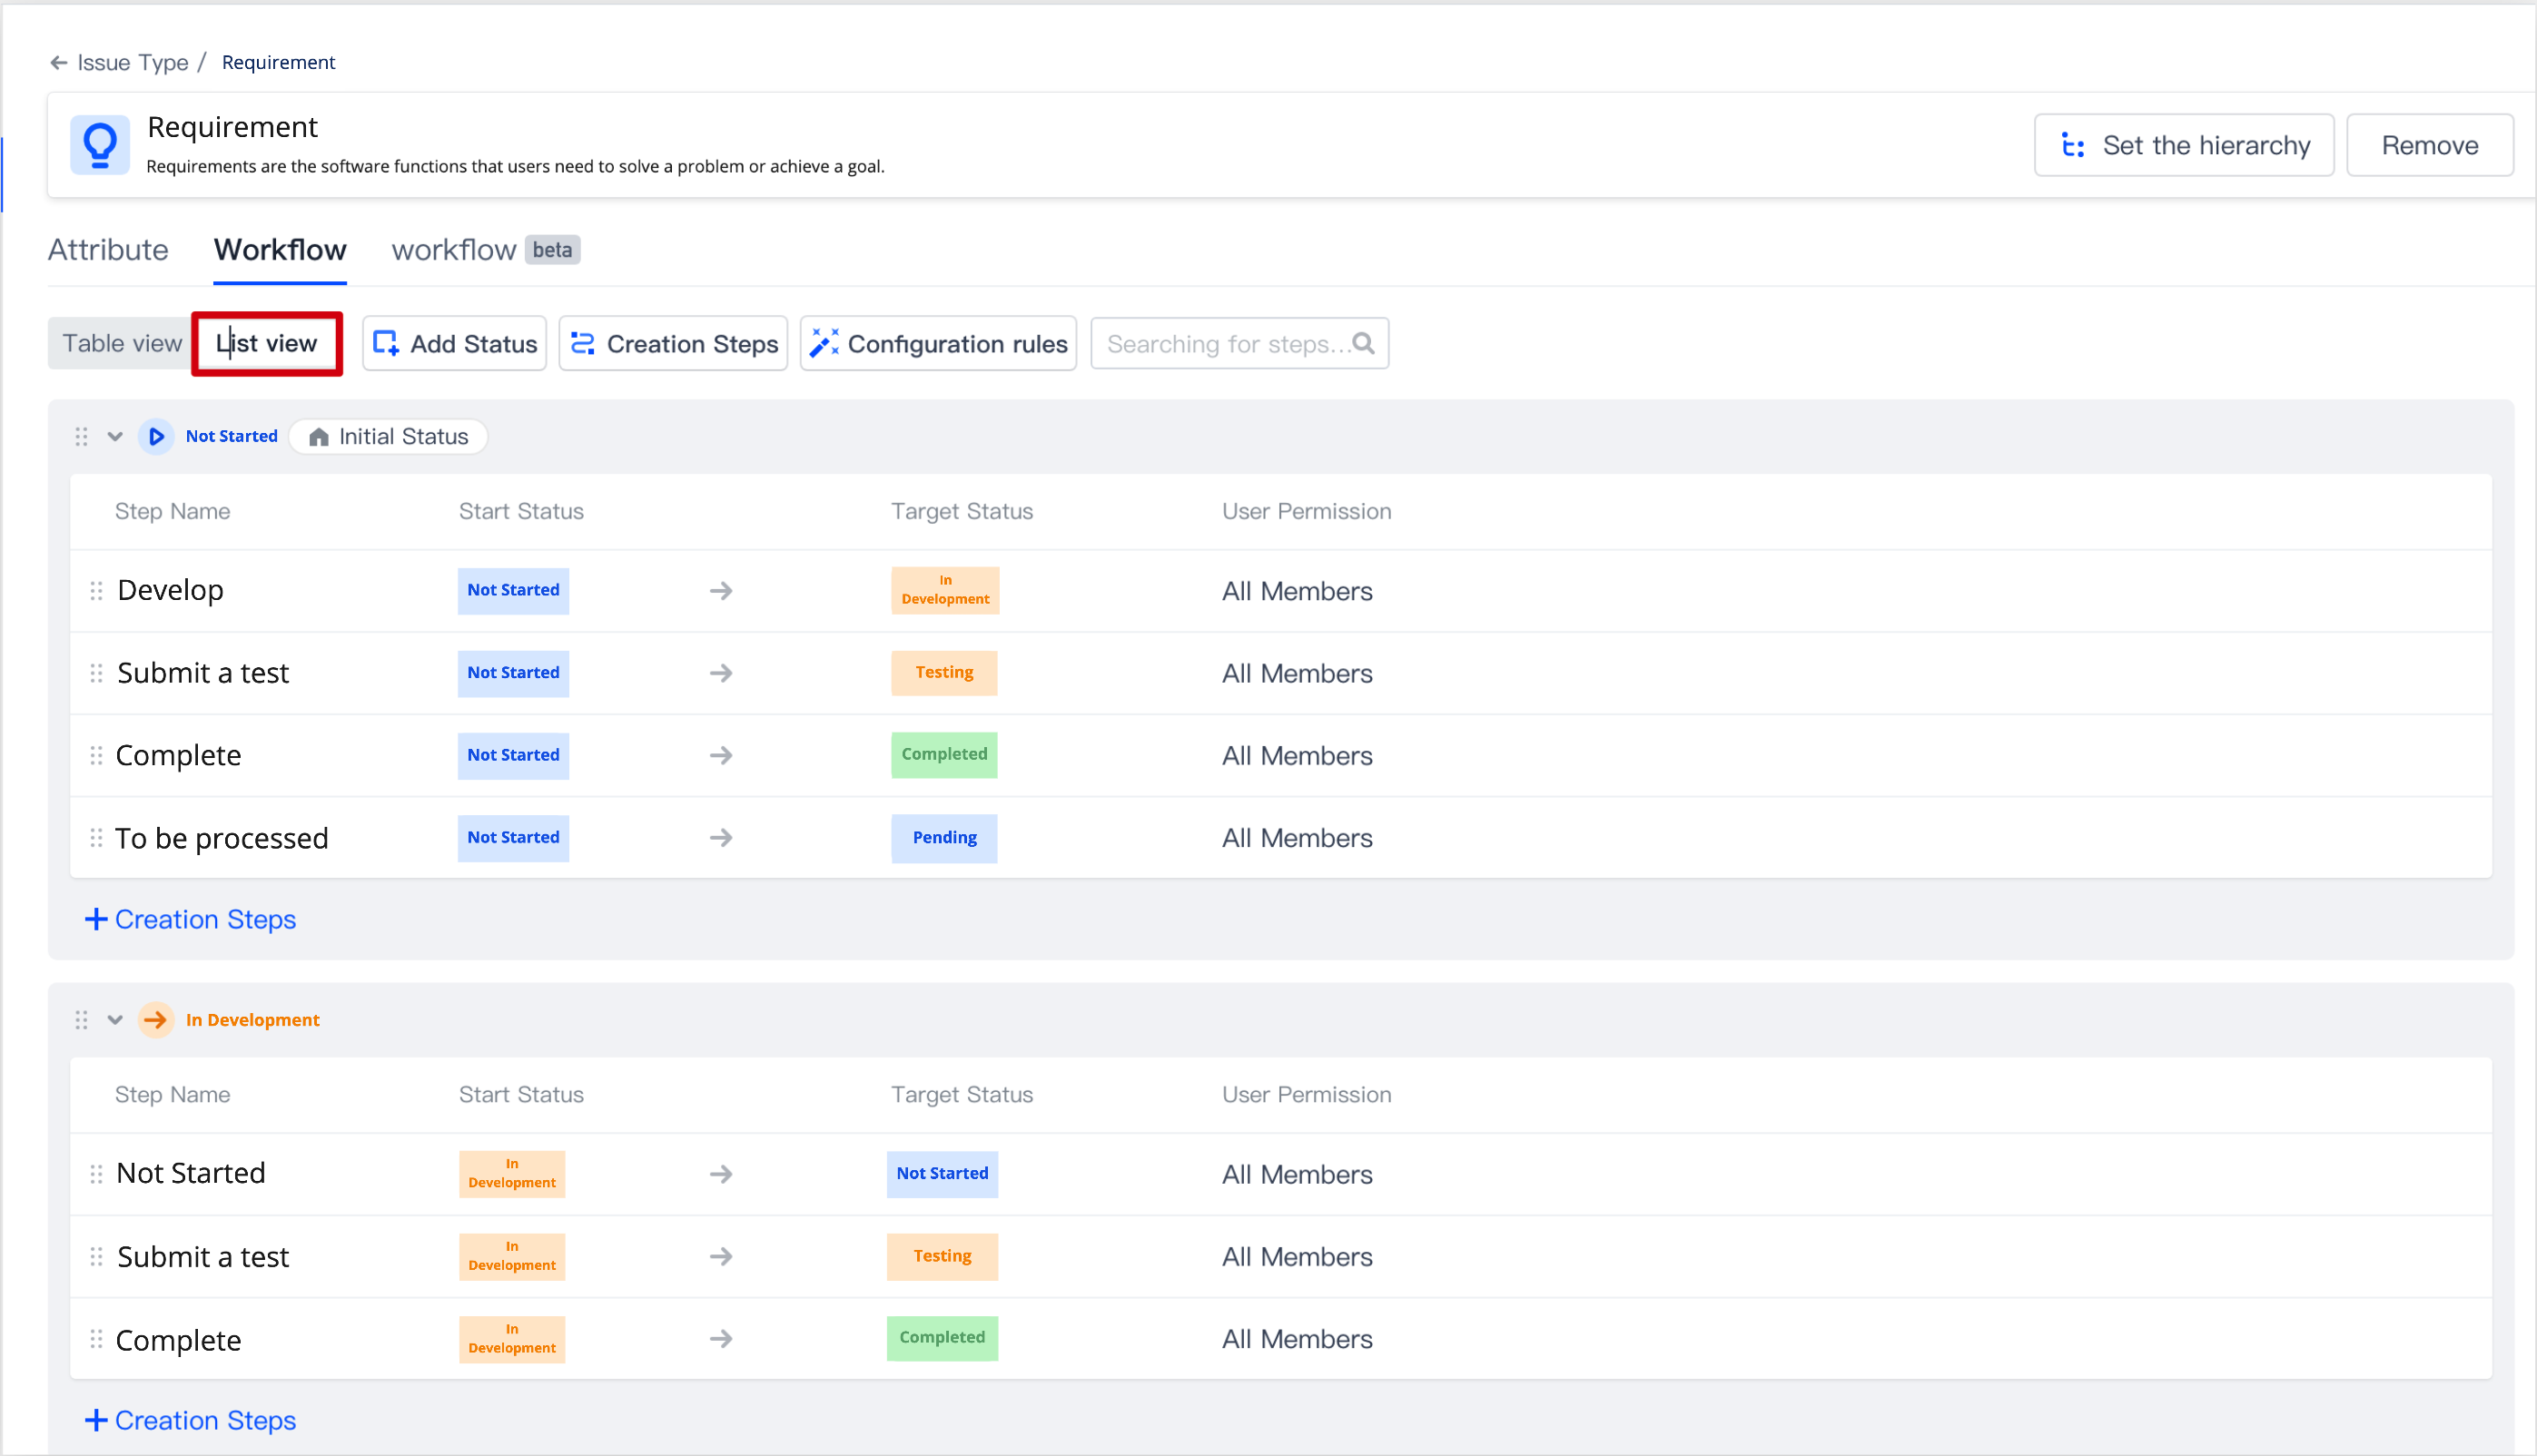
Two view options are available on the workflow configuration page, that is, table view and list view.
Table view: The first column and first row indicate the initial status and target status respectively. Each grid in the table indicates a transition prompted when a status change occurs.
List view: Each status has a table that shows all the transitions and user permissions involved when the status acts as the initial status.
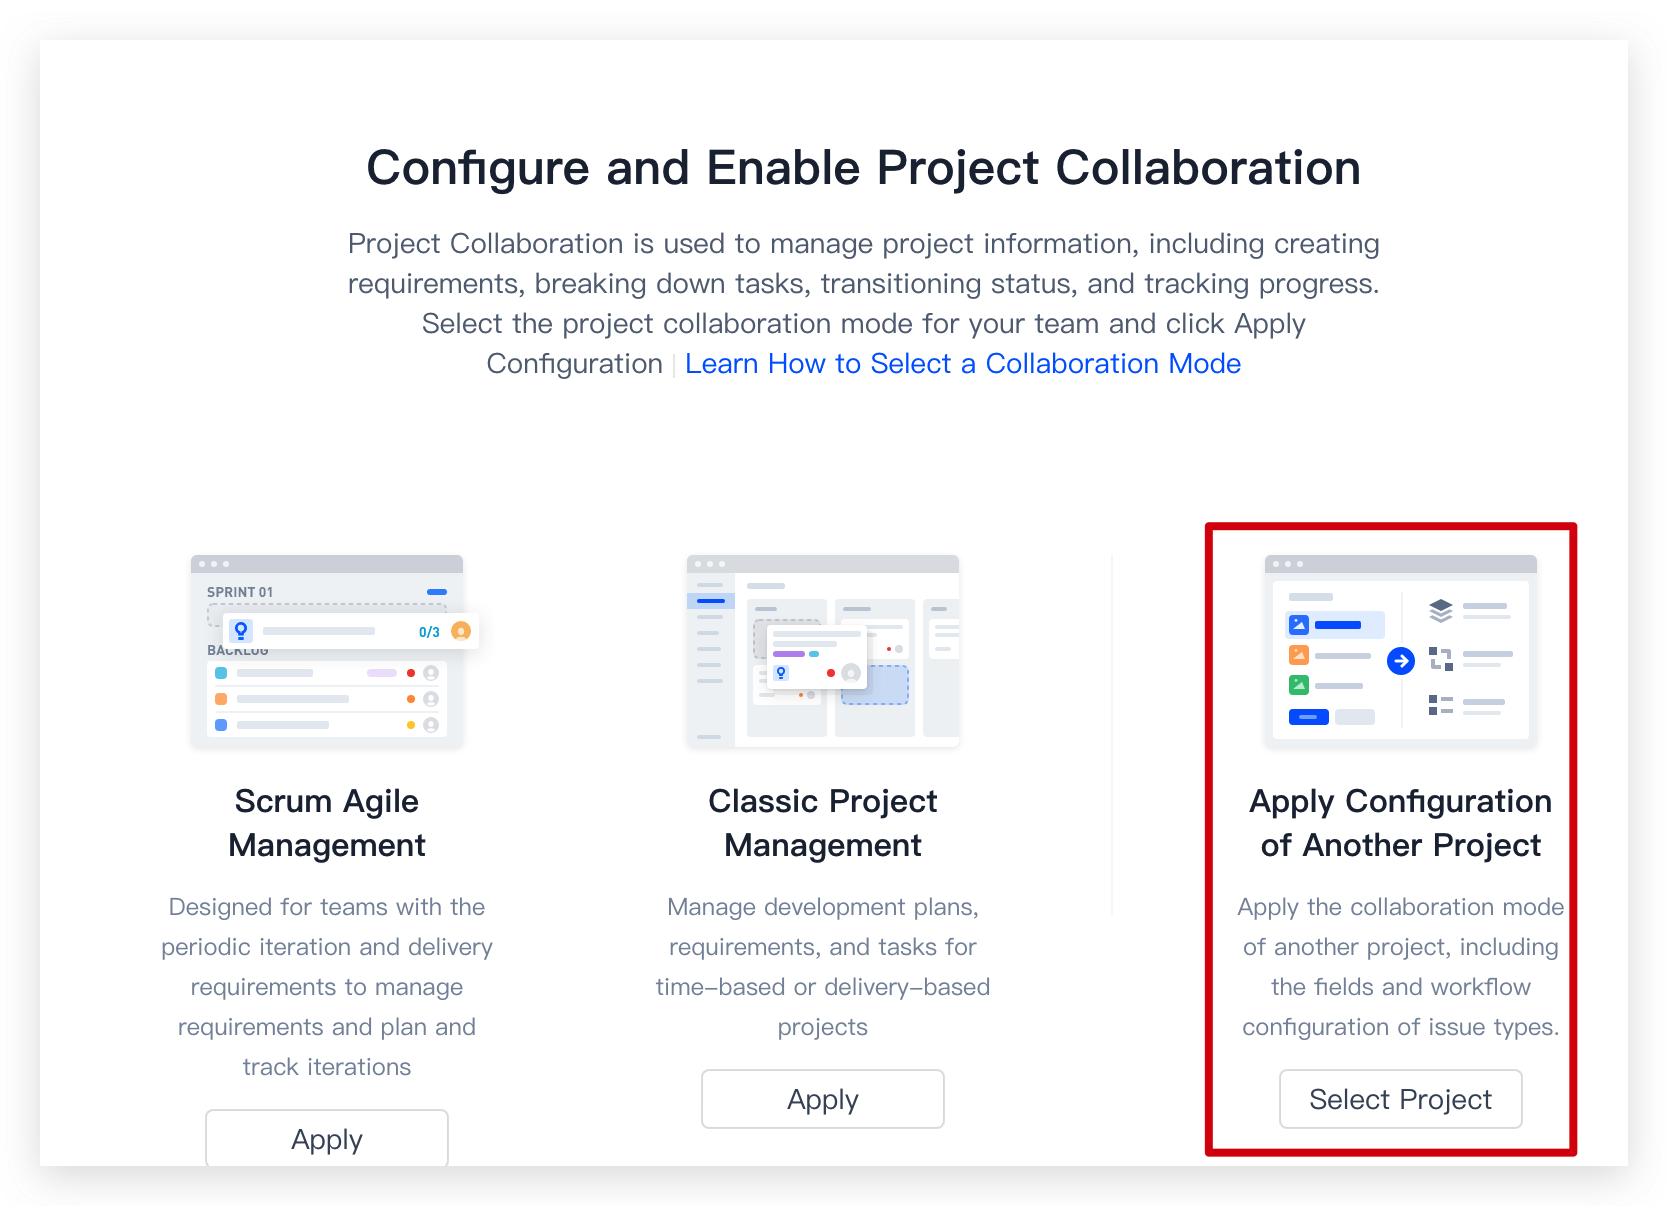
In Project Collaboration, you can copy fields and workflow configuration of other projects. The first time you enable Project Collaboration, select "Apply Configuration of Another Project".


 Yes
Yes
 No
No
Was this page helpful?