In some scenarios, you may have to push code during continuous integration (CI). CODING Continuous Integration (CODING-CI) provides built-in command tools, including Git and SVN. You can refer to the example below.
// The CODING-CI system's preset project token environment variables PROJECT_TOKEN_GK and PROJECT_TOKEN are used to push
// To push to the code repository of another project or a third-party platform, you must manually replace this with valid credential information
sh "git push https://${PROJECT_TOKEN_GK}:${PROJECT_TOKEN}
@e.coding.net/myteam/myrepo.git HEAD:master"
}
}
}
}
How do I call SVN repositories?
In the default CI plan configuration process, the code source is a Git repository by default. To use an SVN repository for continuous integration, follow the instructions below.
Prerequisites
Before starting, create a project token and apply for username + password credentials.
Step 1: Create project token
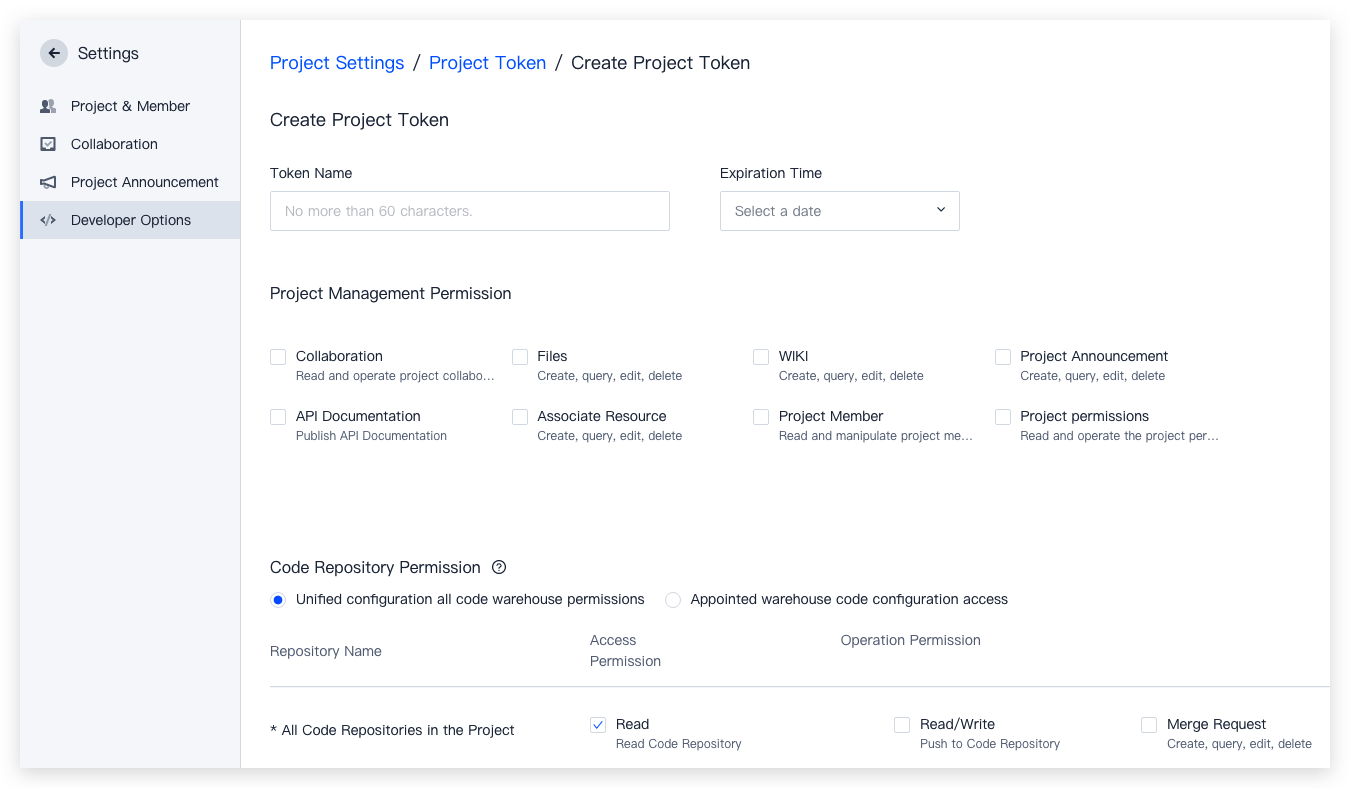
1. Go to Project Settings > Developer Options > Project Token and click *Create Project Token. Set the expiration date and select all CI permissions.
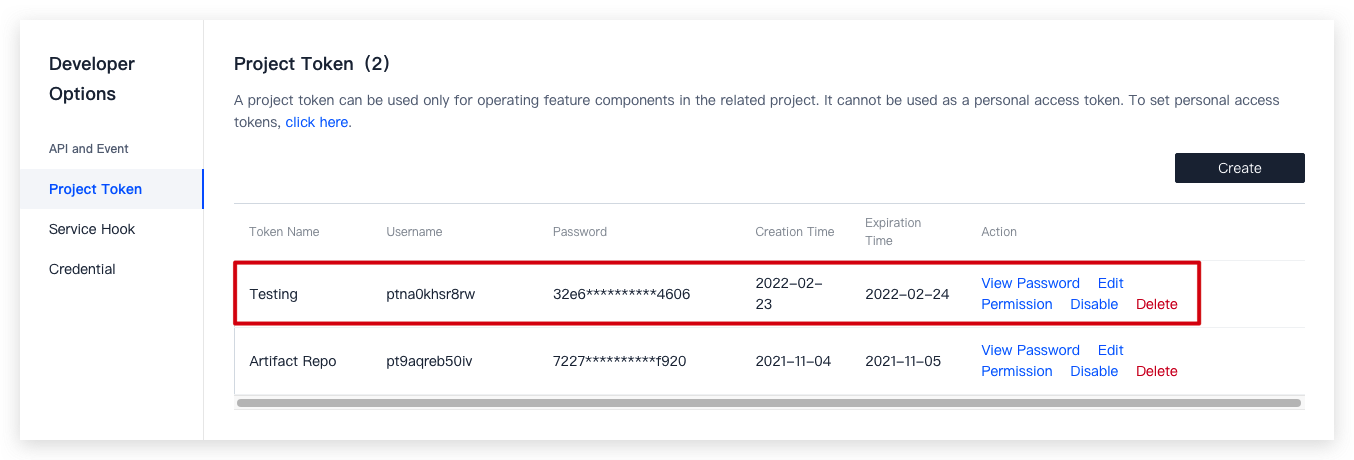
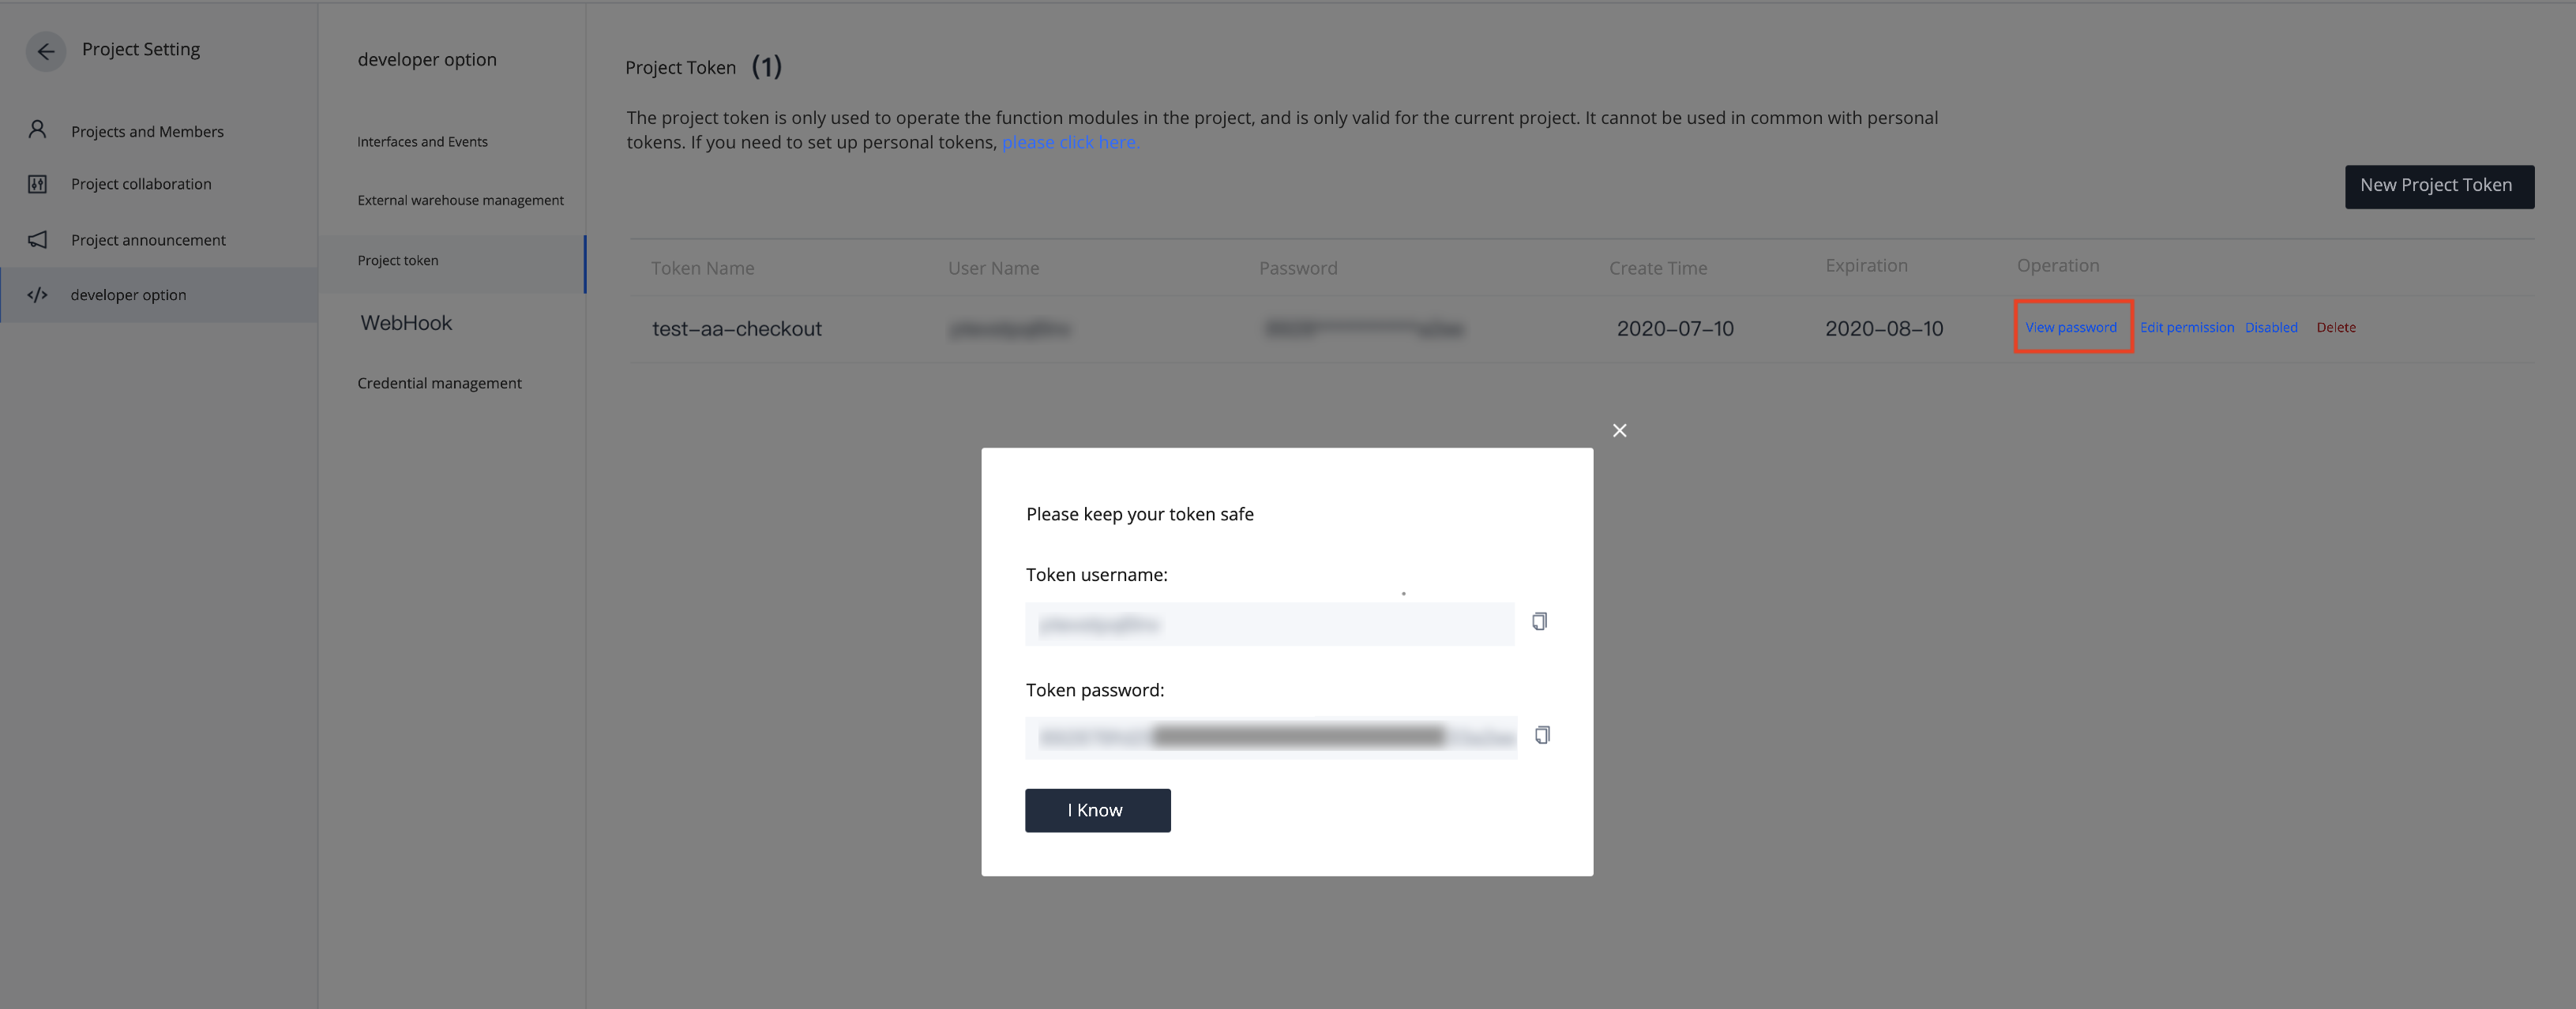
2. Once the token is created, you will receive a username and password.
Step 2: Apply for username and password credentials
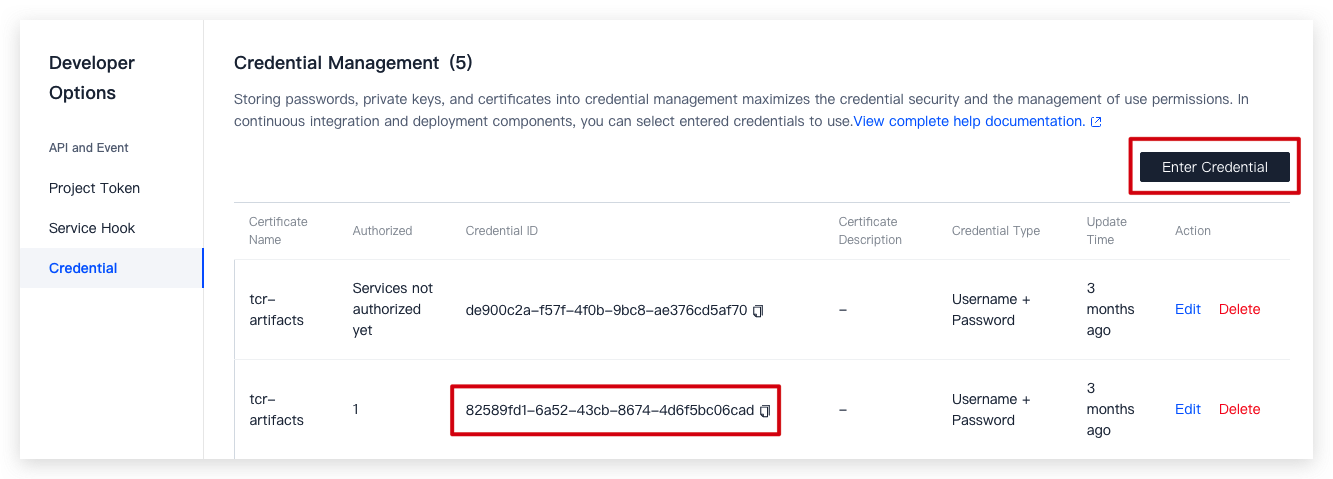
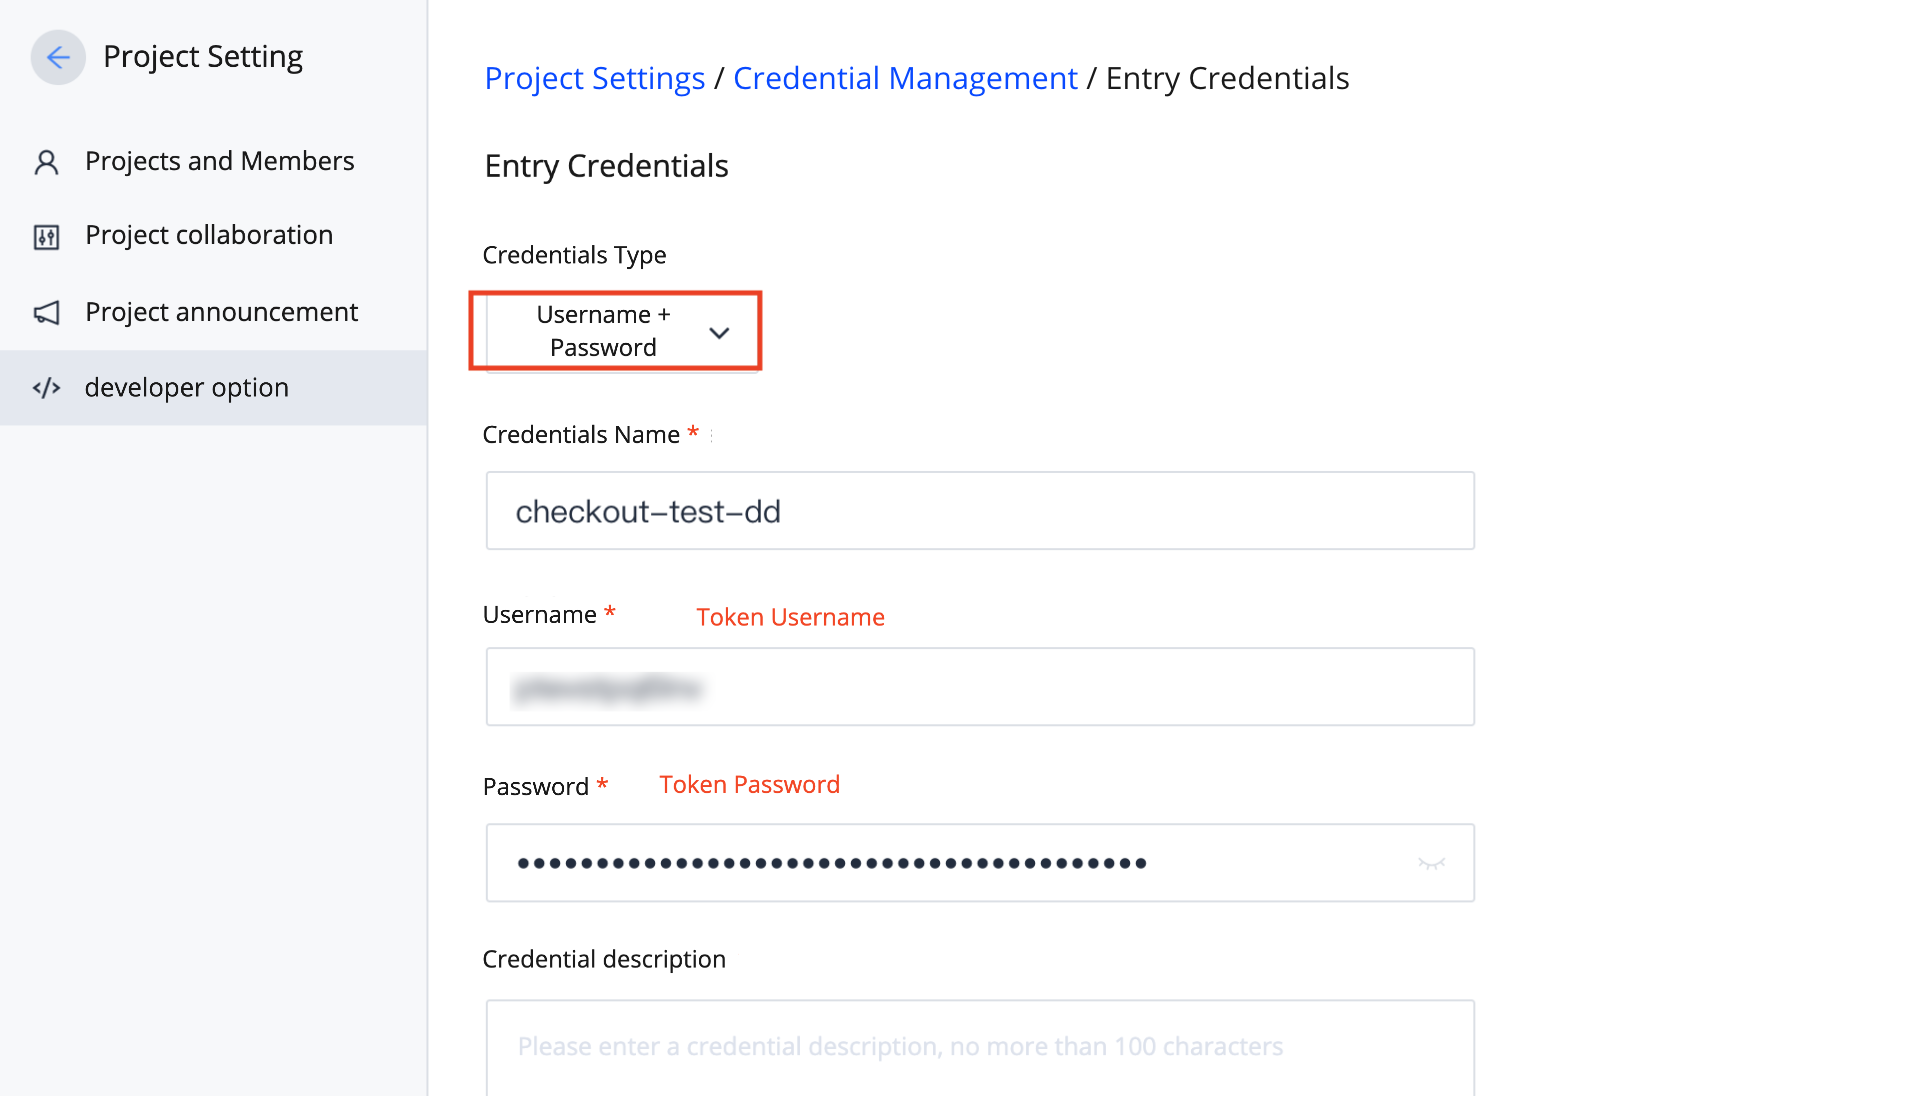
Go to Project Settings > Developer Options > Credential Management, click Enter Credential, and enter your username and password. You must enter the username and password generated upon project token creation.
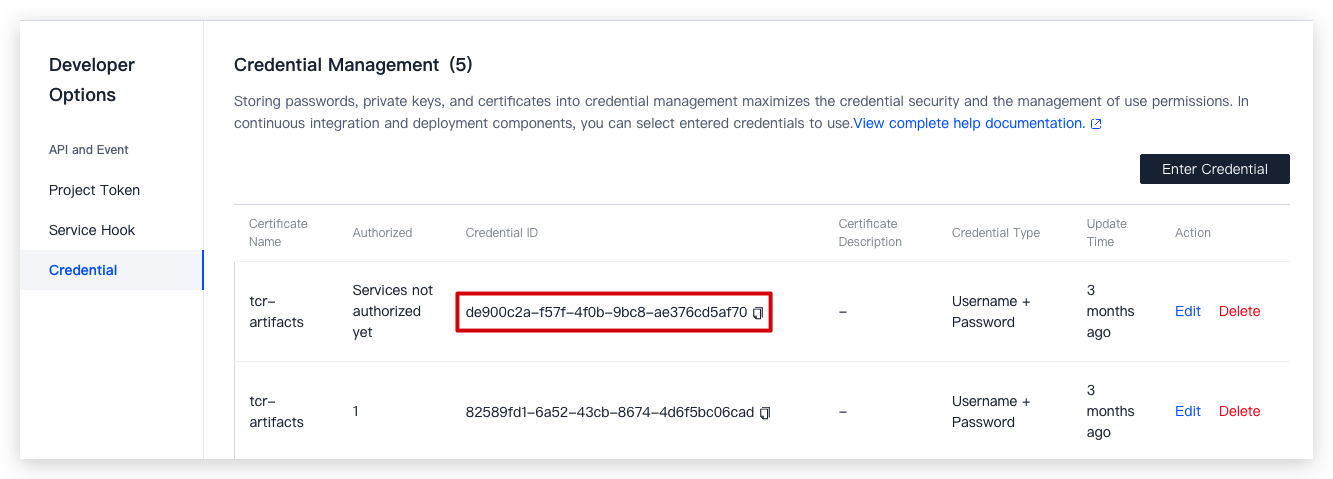
After your credentials are created, you will receive a credential ID. Later, you must input this ID in the build plan process configuration.
Step 3: Configure build plan
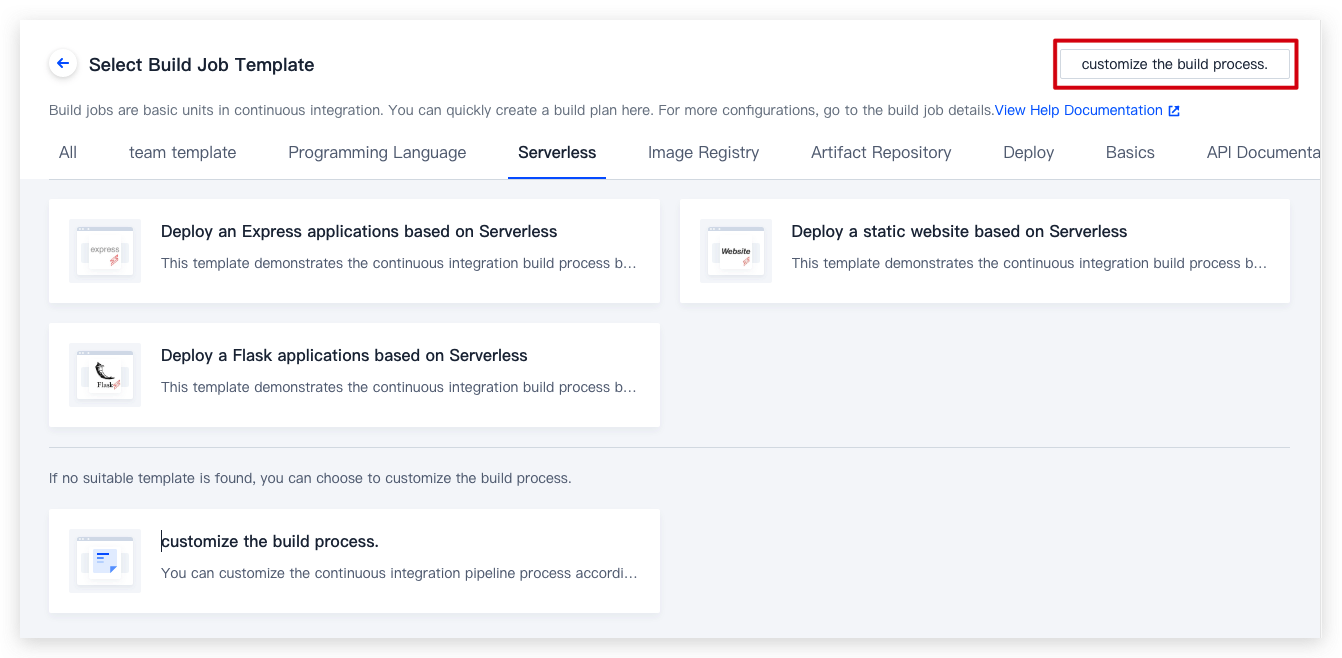
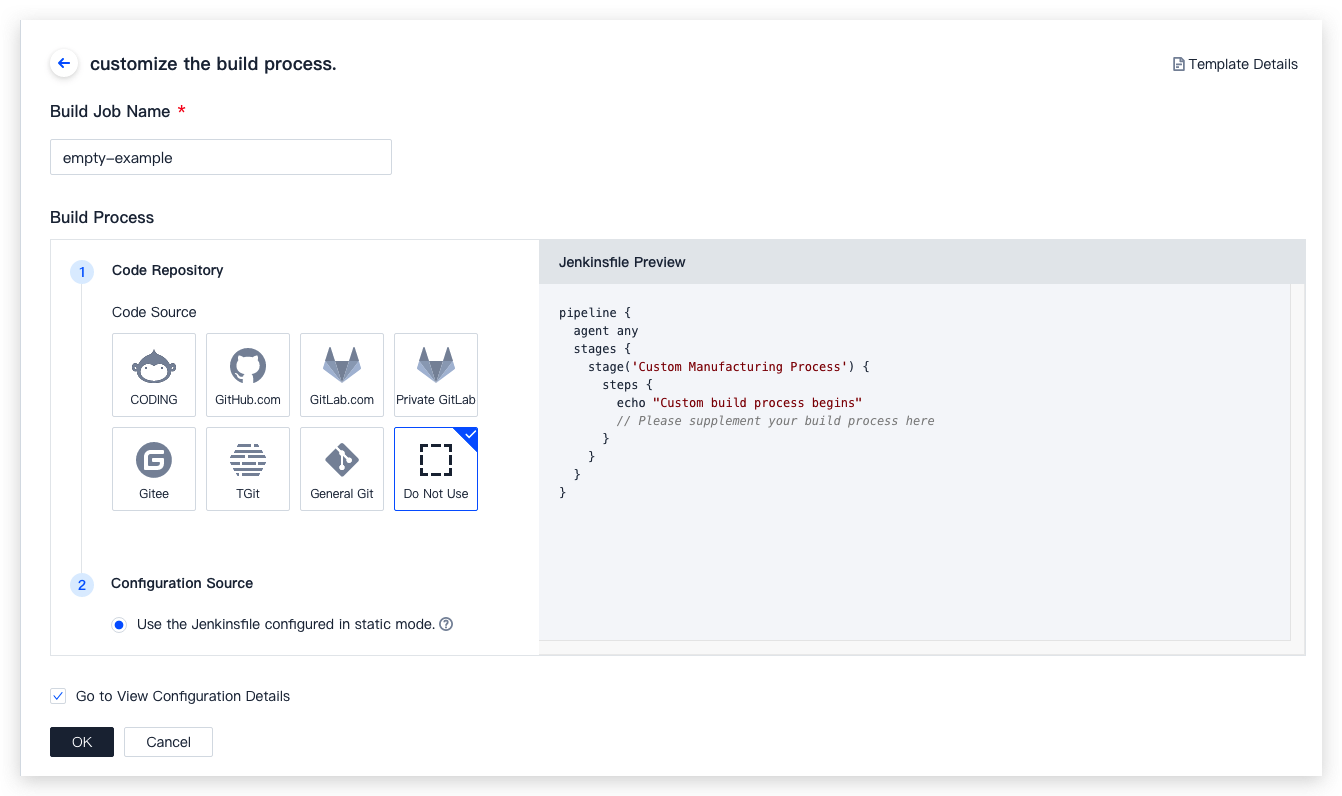
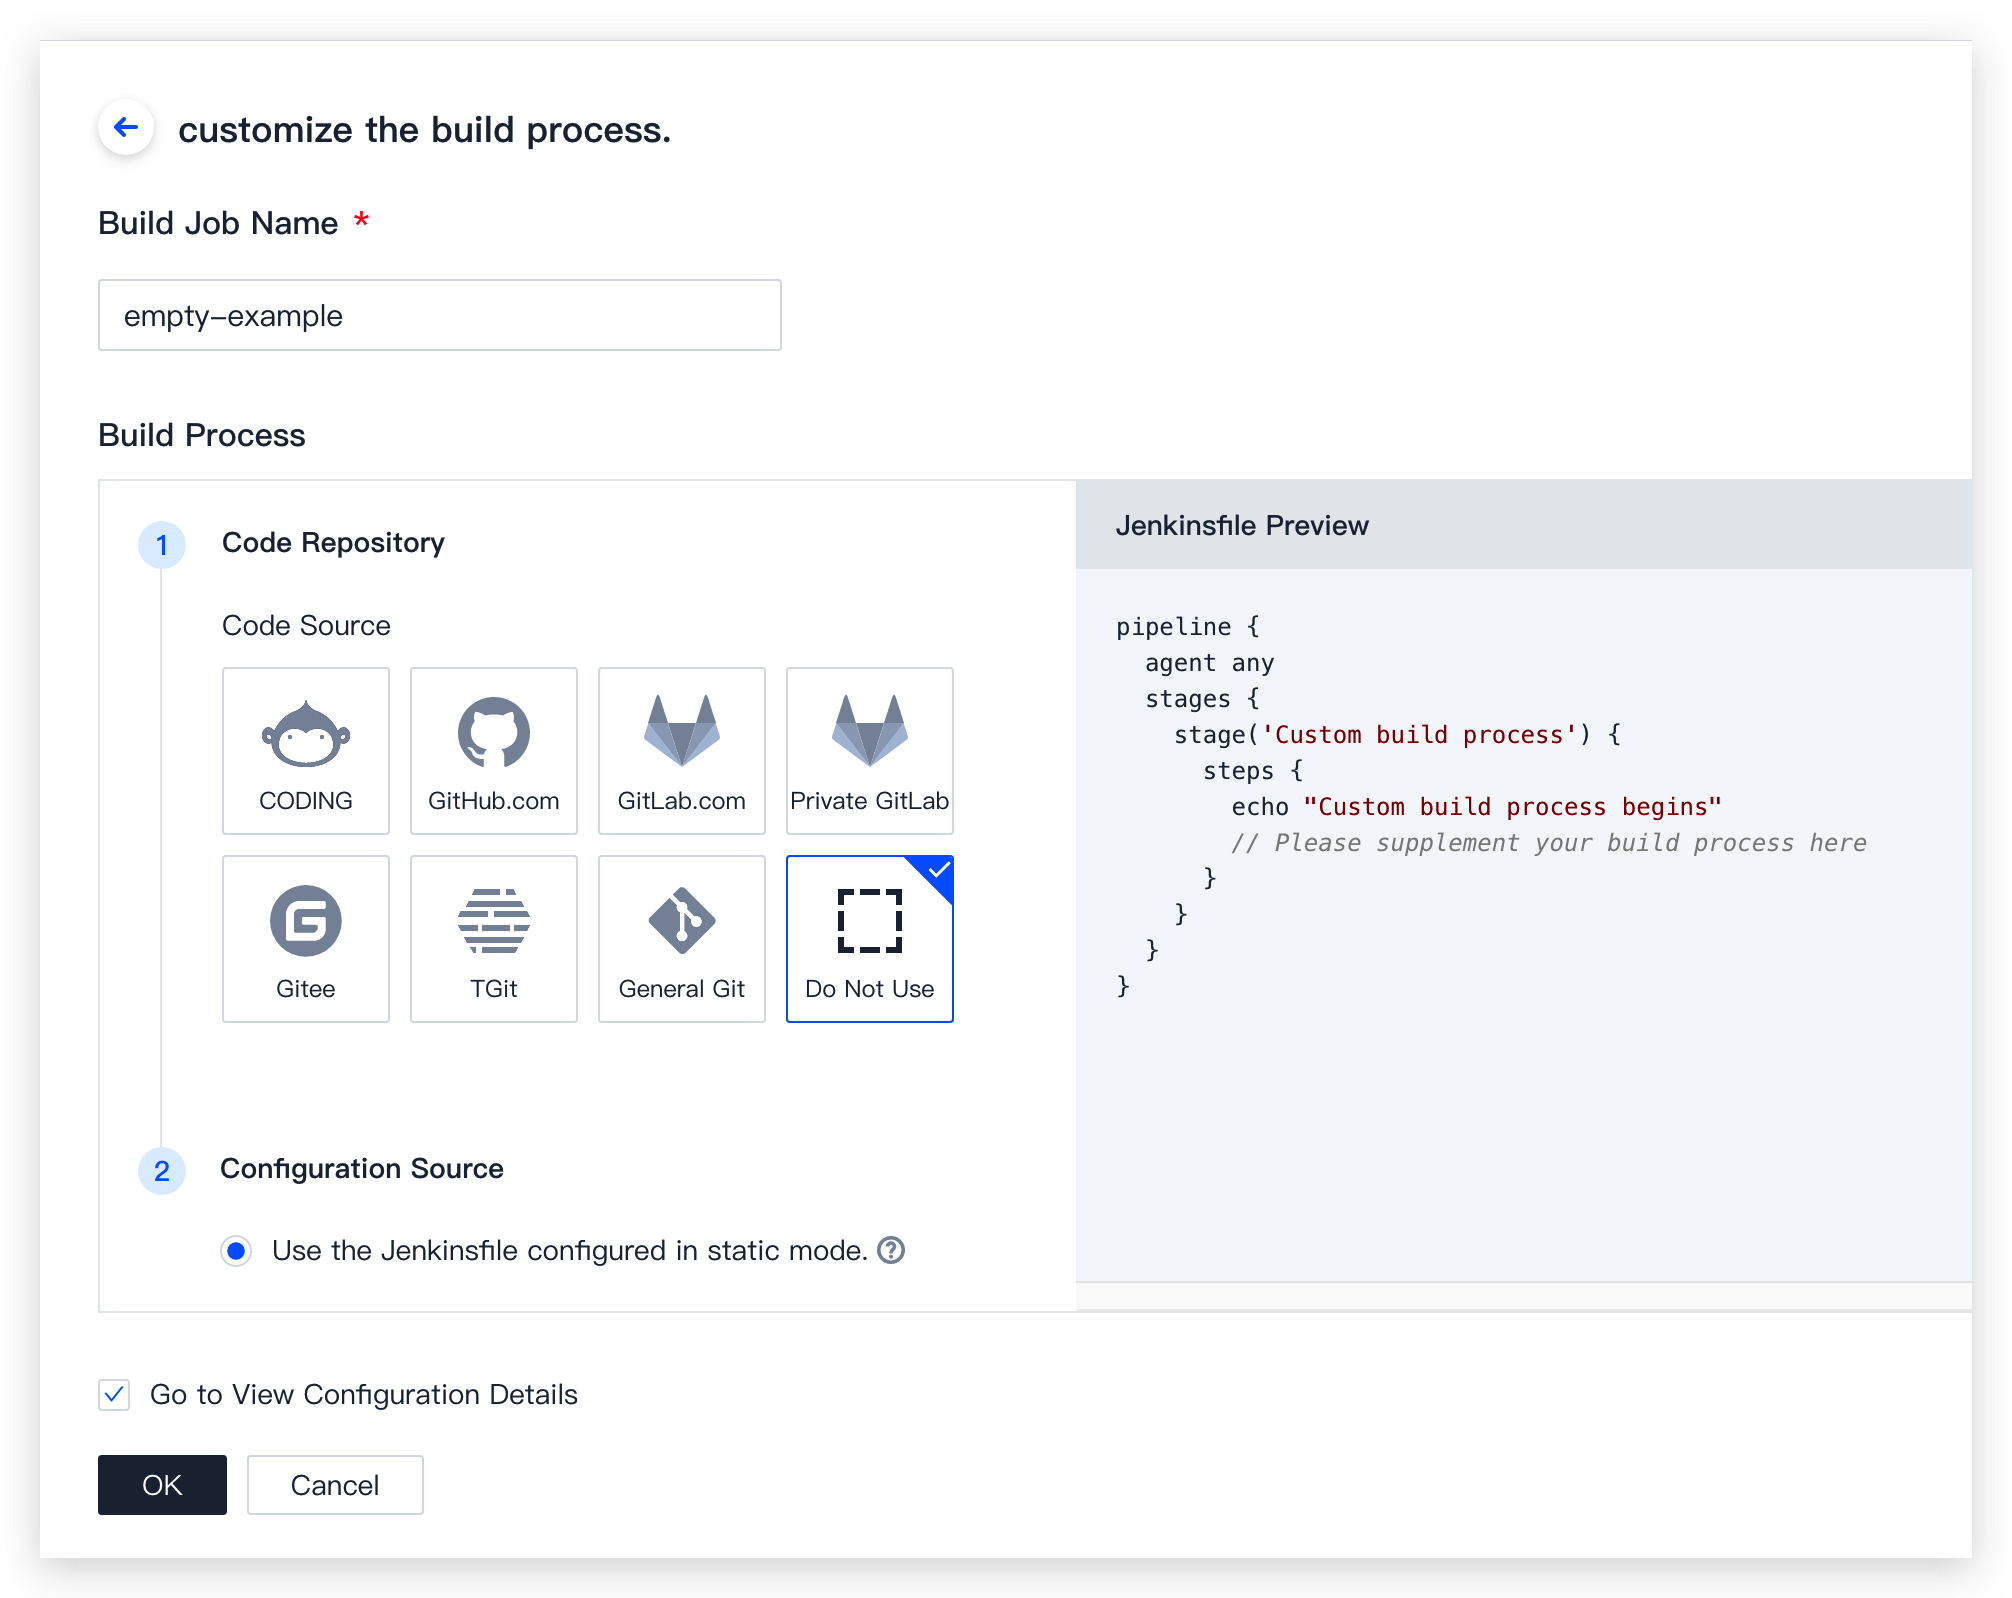
1. Go to Continuous Integration > Build Plans, click New Build Plan Configuration, and go to Select Build Plan Template > Basic. On this page, select Blank Template in the Basic field. This allows you to customize the process configuration.
2. After naming the build plan, select Not use for the code source.
3. Then, enter the relevant settings in the process configuration.
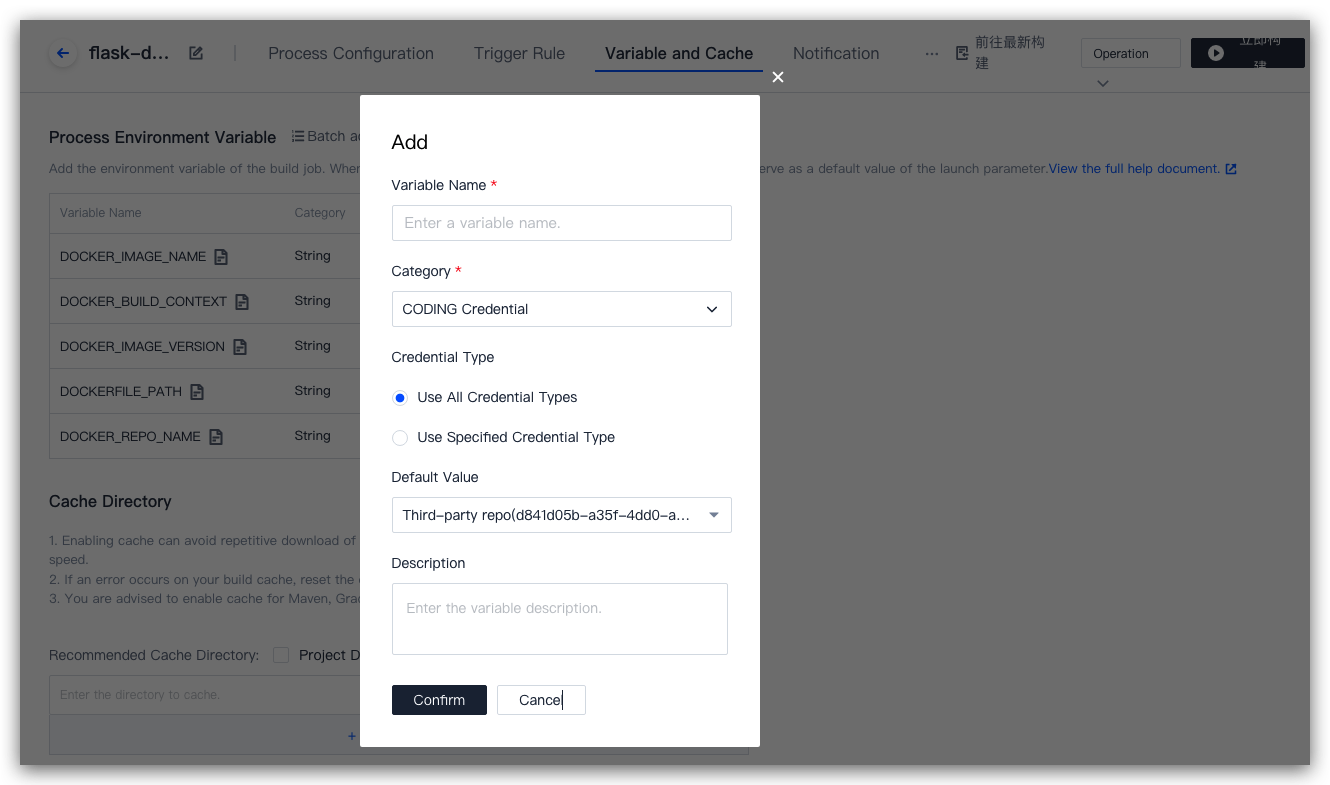
Add an environment variable in Variables and Caches. As the type, select Username + Password in CODING Credential.
Step 5: Trigger build
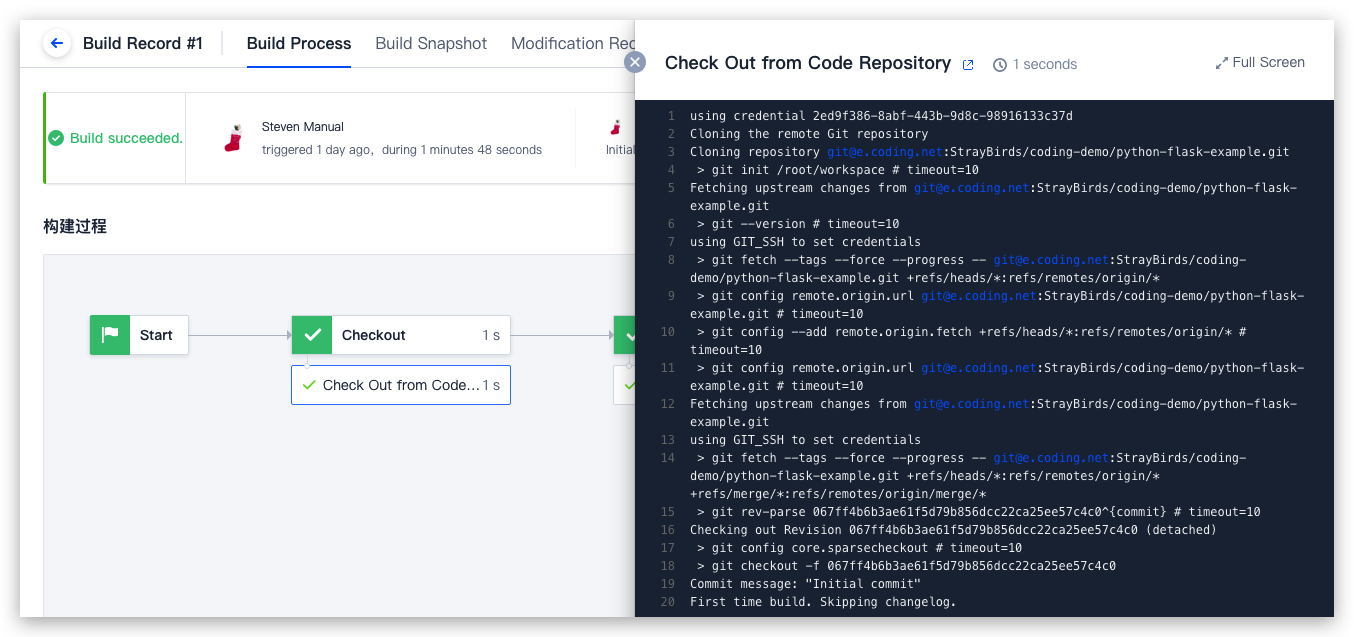
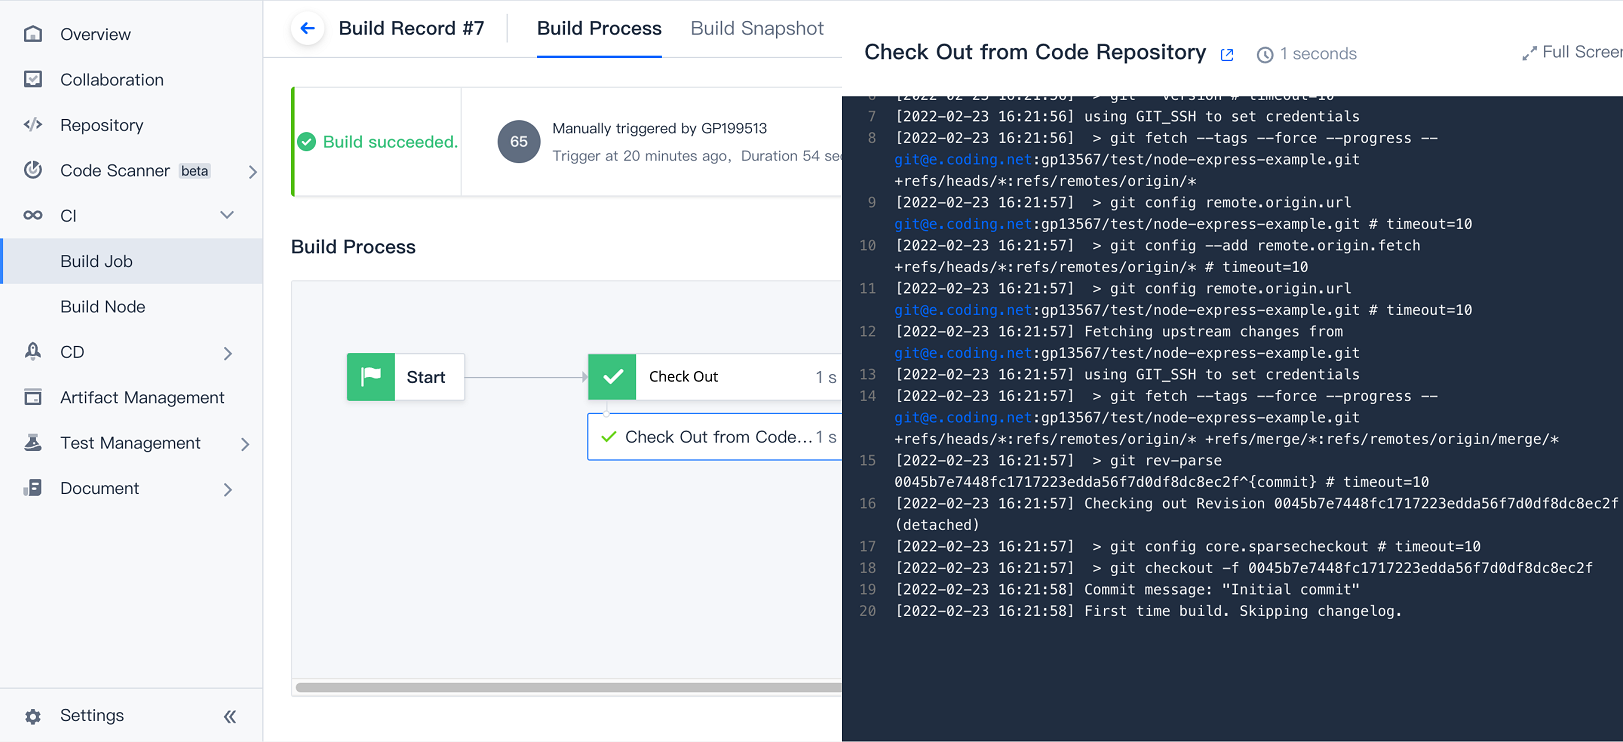
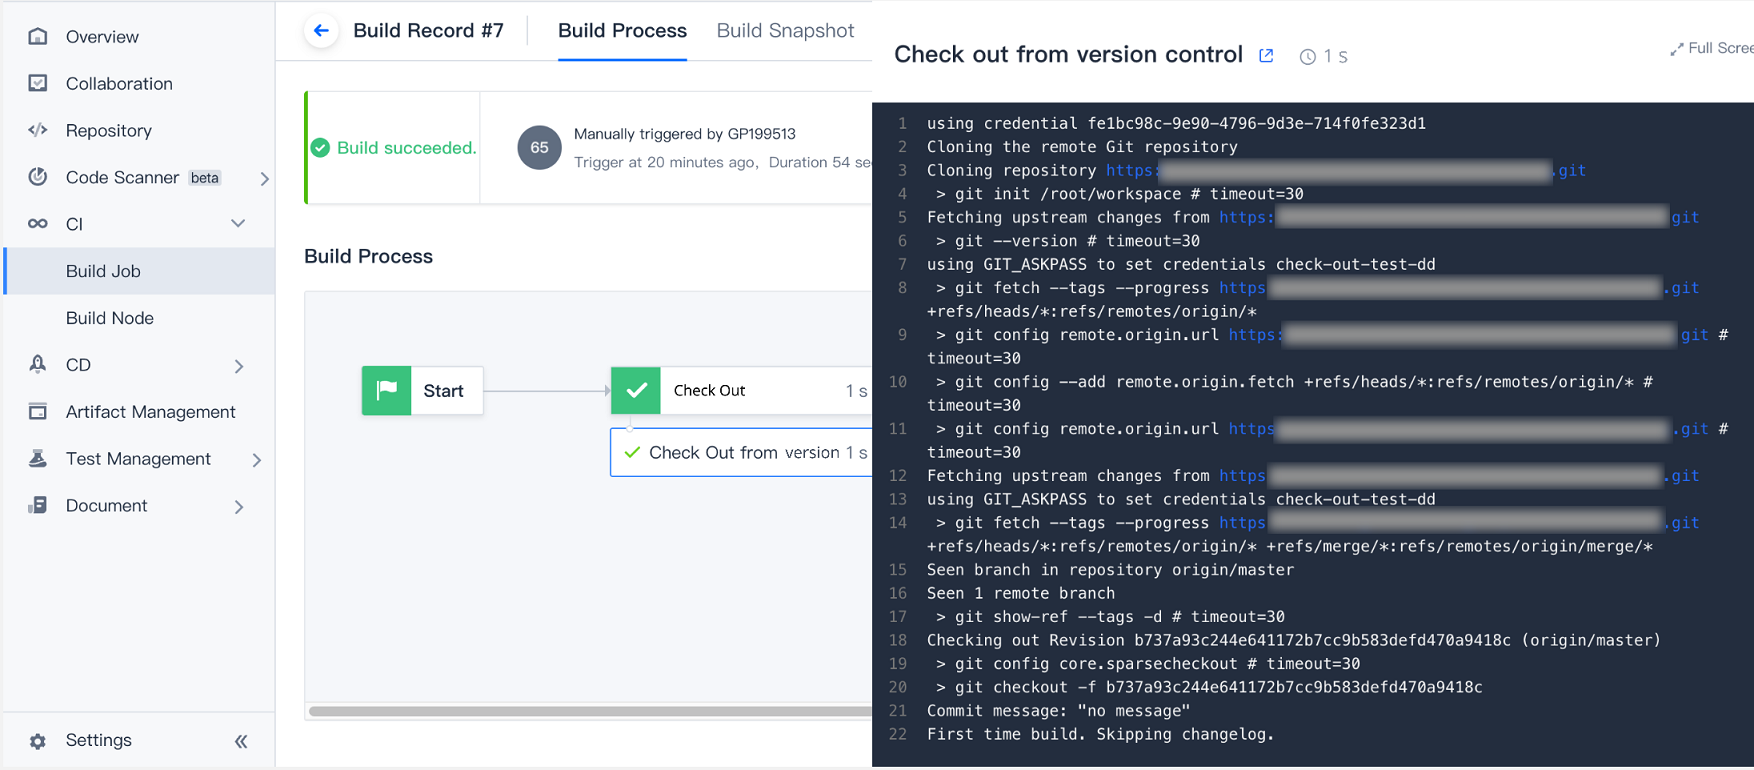
You can choose manual build or configure a trigger method for auto building. After a successful build, you will see the following:
How do I pull multiple repositories?
1. Create a code repository project token
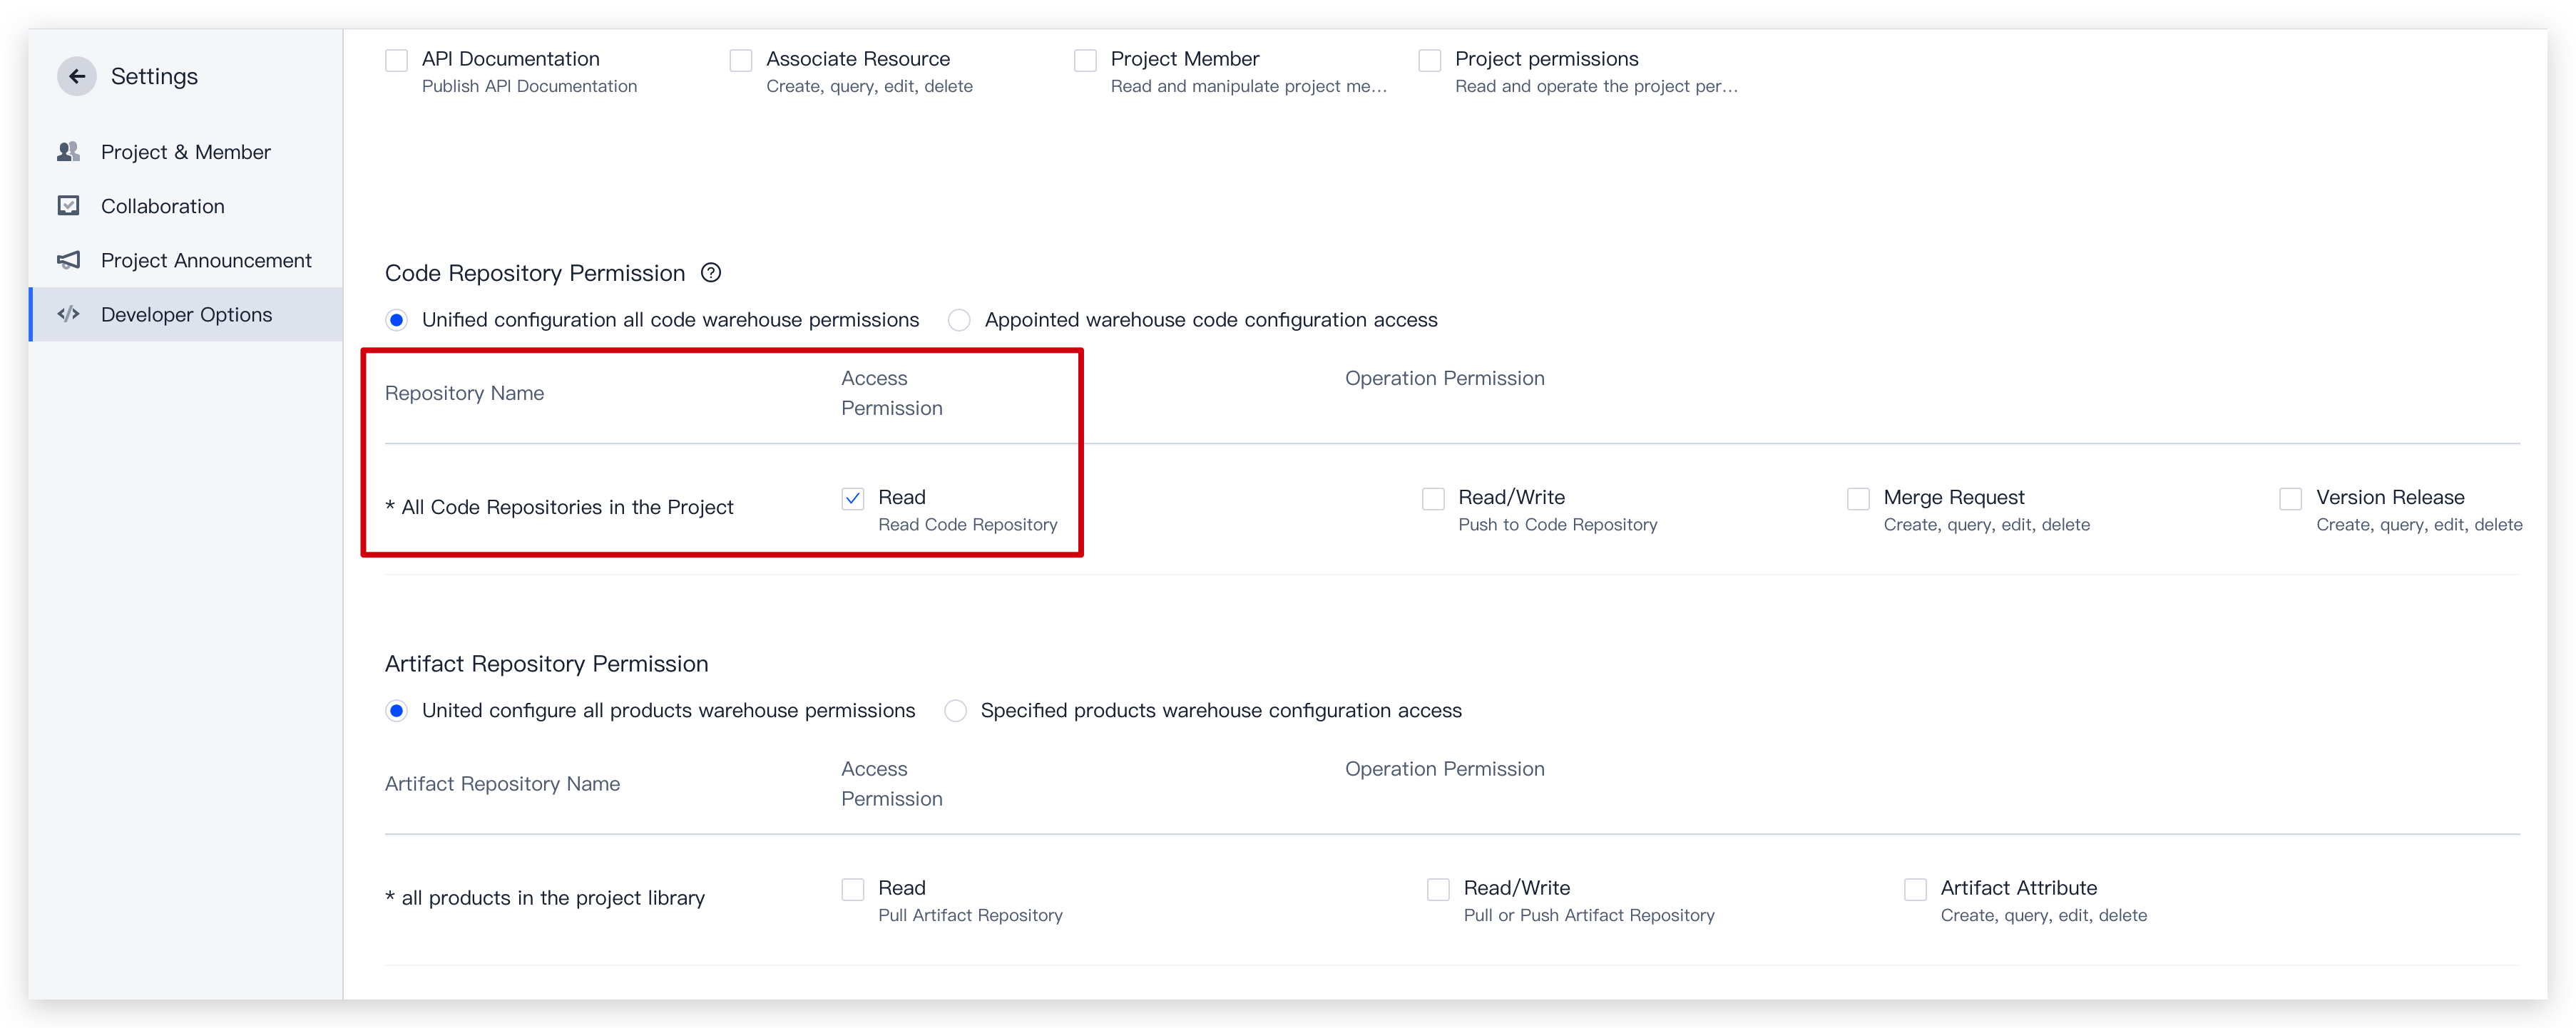
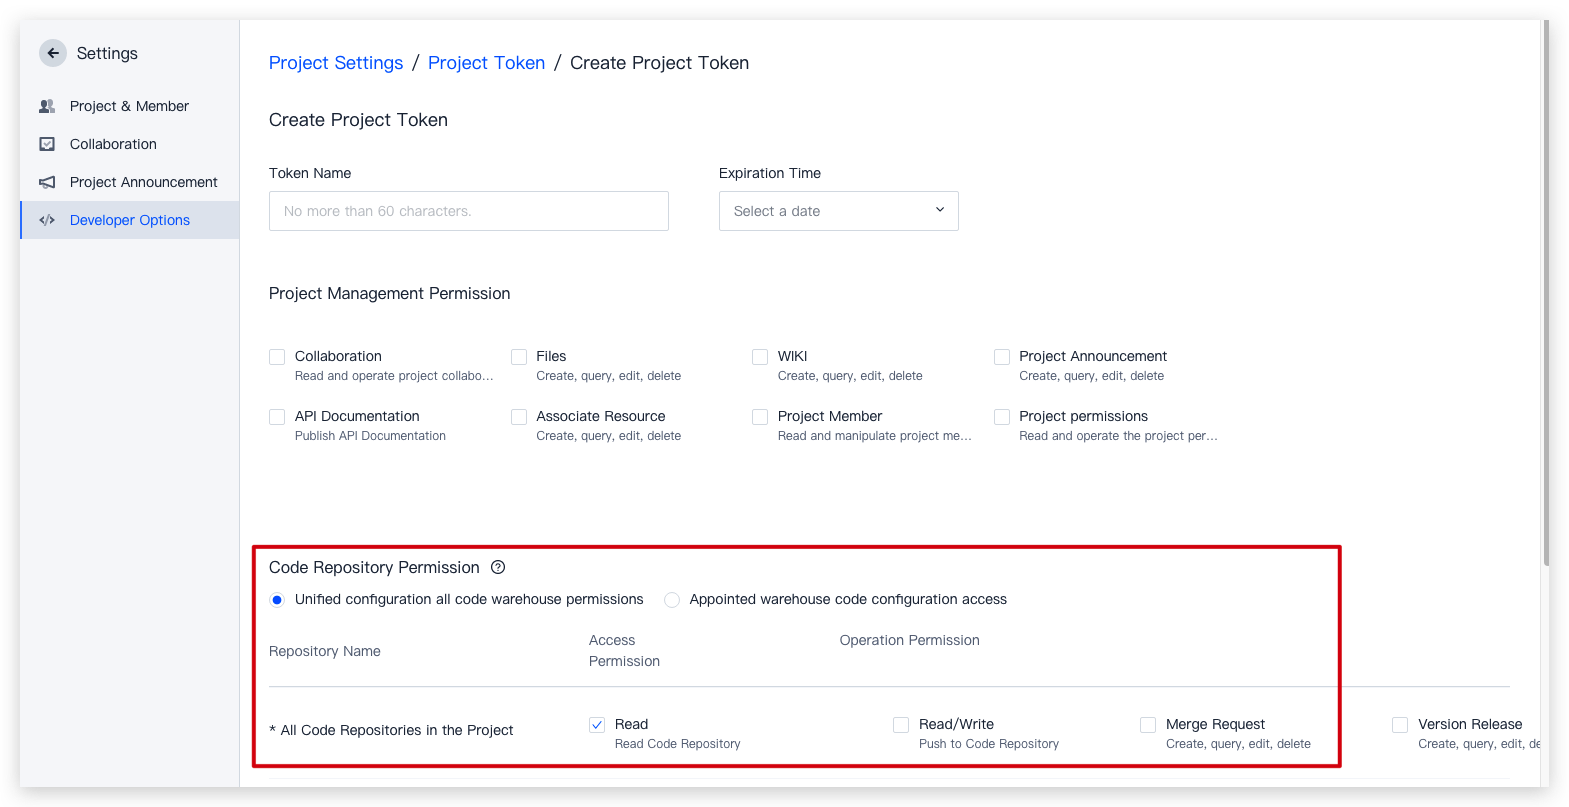
Go to Project Settings > Developer Options > Project Token, click *Create Project Token, and select Read in Code Repository Permissions. As we need to read two code repositories, select Configure all the code repository permissions in Code Repository Permissions. When you create the token, you will receive a username and password.
2. In the CI configuration, select Not use for the code source.
3. Write a Jenkinsfile configuration file and enter the URLs of the code repositories to pull from.
4. Add the username and password generated when you applied for a project token in the CI environment variables.
How do I check out Git submodule code?
To set a submodule of a repository as the code source in a CI build plan, you must use the process configuration to check out the Git submodule repository code.
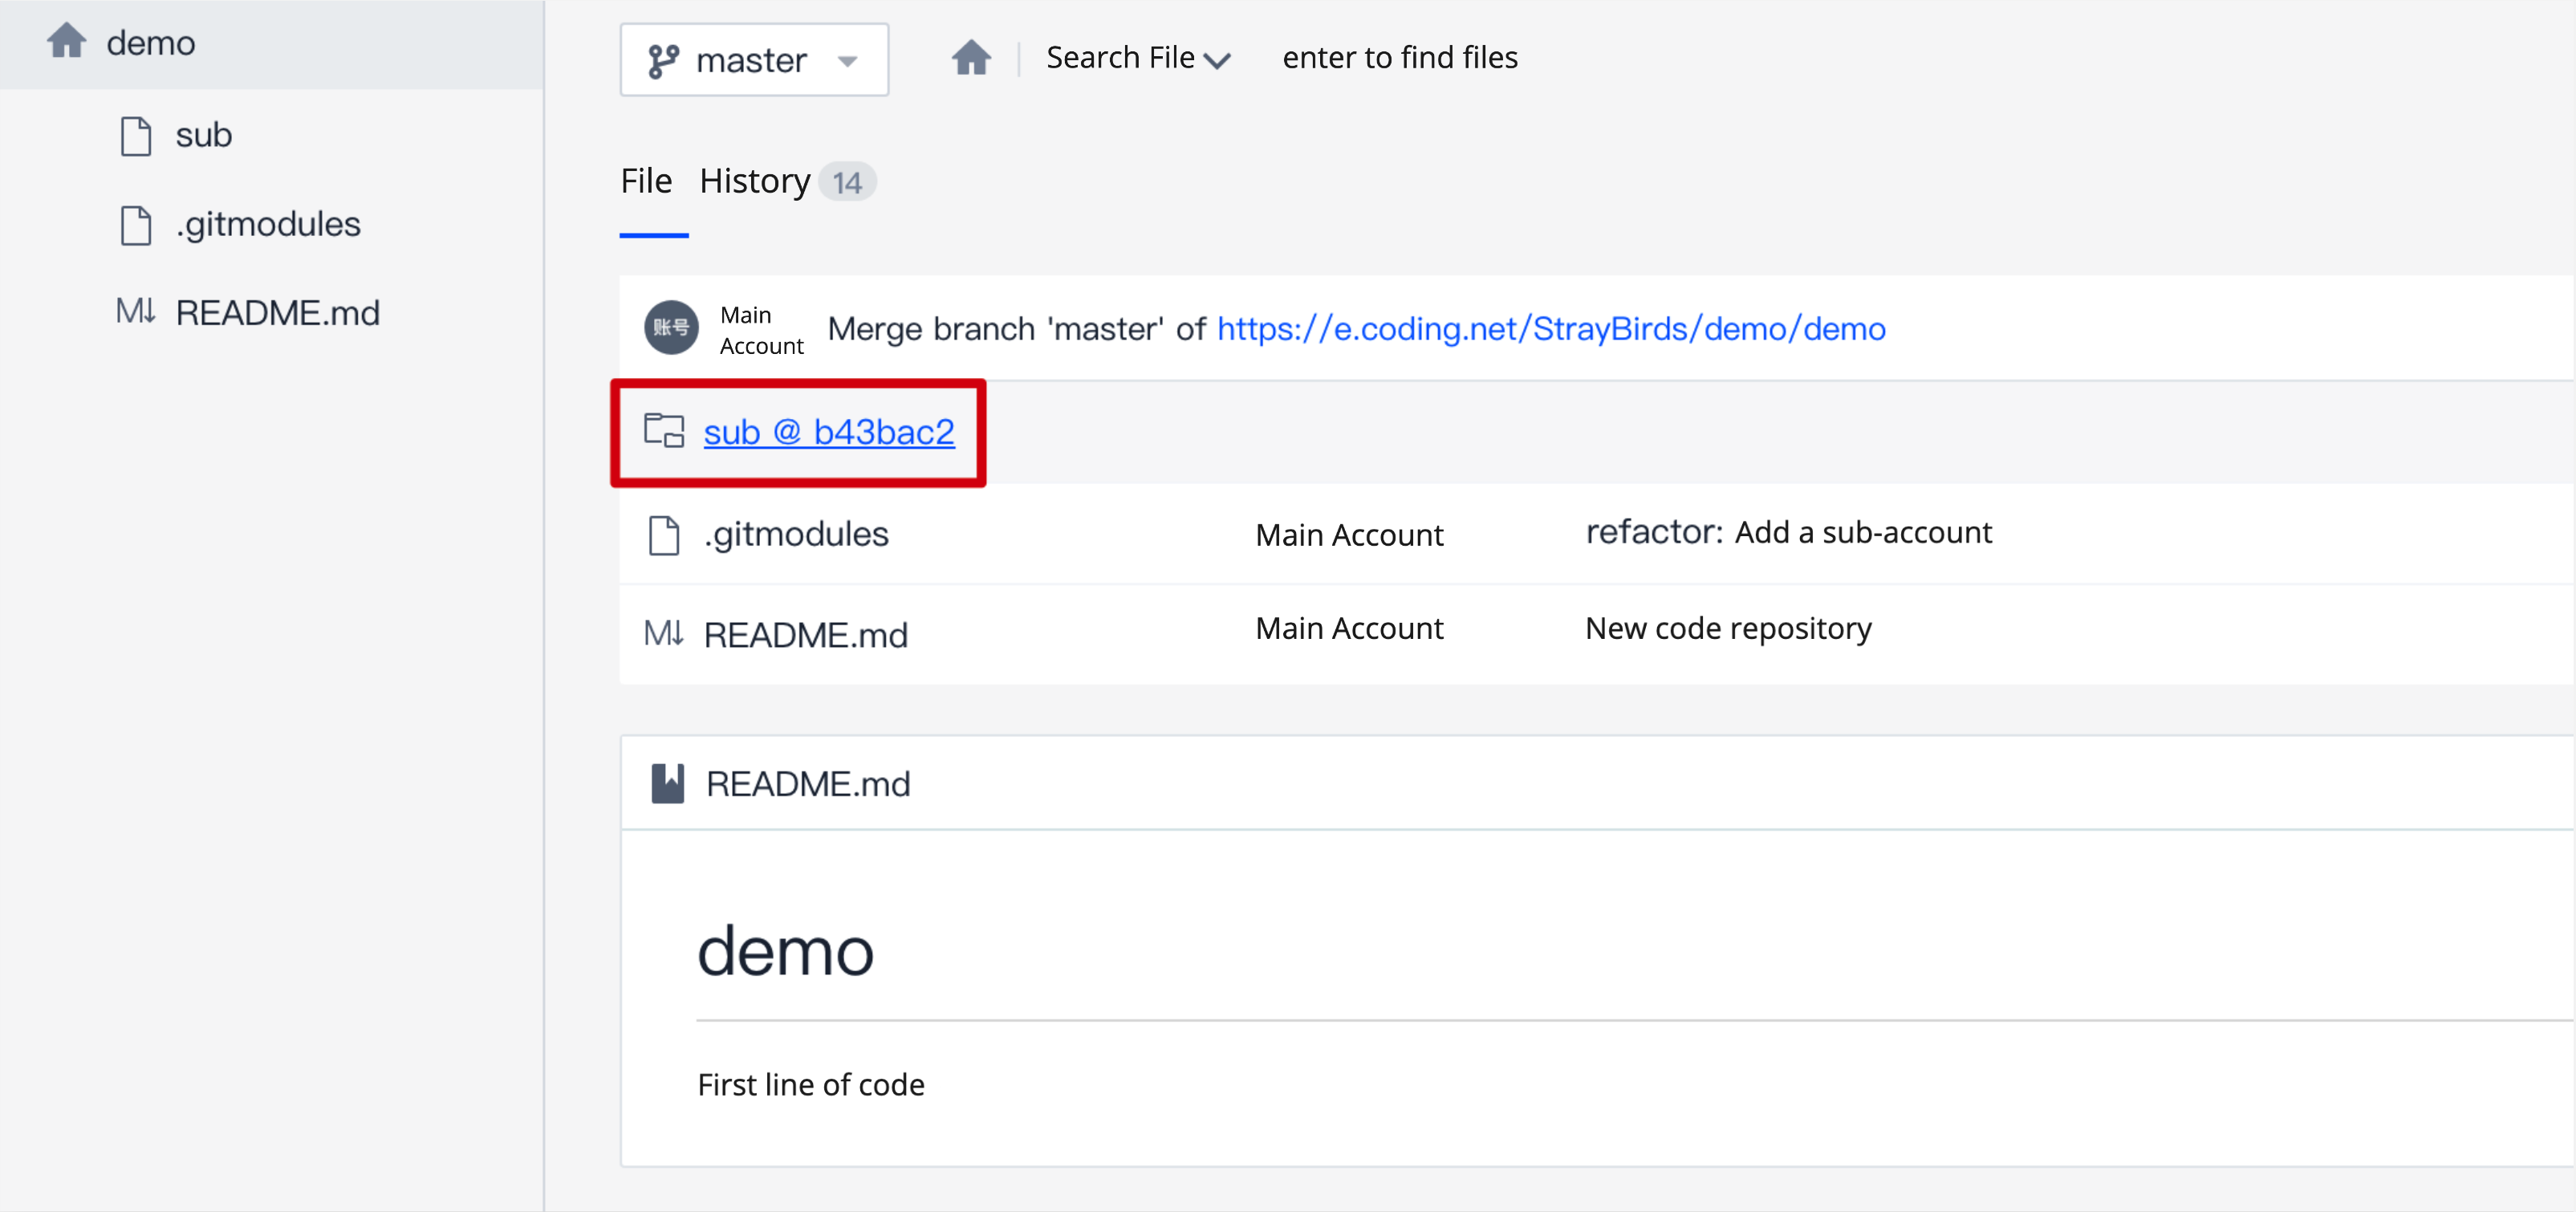
Before configuring the CI process, add the sub-repository to the parent repository. Use the git submodule add command to add the repository URL of the project to be tracked as a sub-repository.
After a successful code commit, you will see this icon on the parent repository page:
Step 1: Enter repository access credentials
Generally, the credentials for accessing a sub-repository are different from those of the parent repository. To avoid exposing sensitive information in CI configurations, you can enter the access credentials of the parent and sub-repositories in the project settings first.
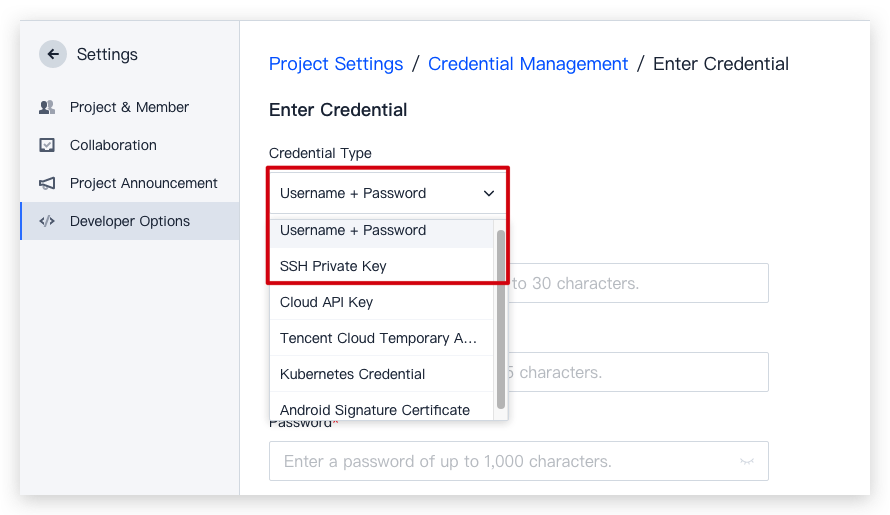
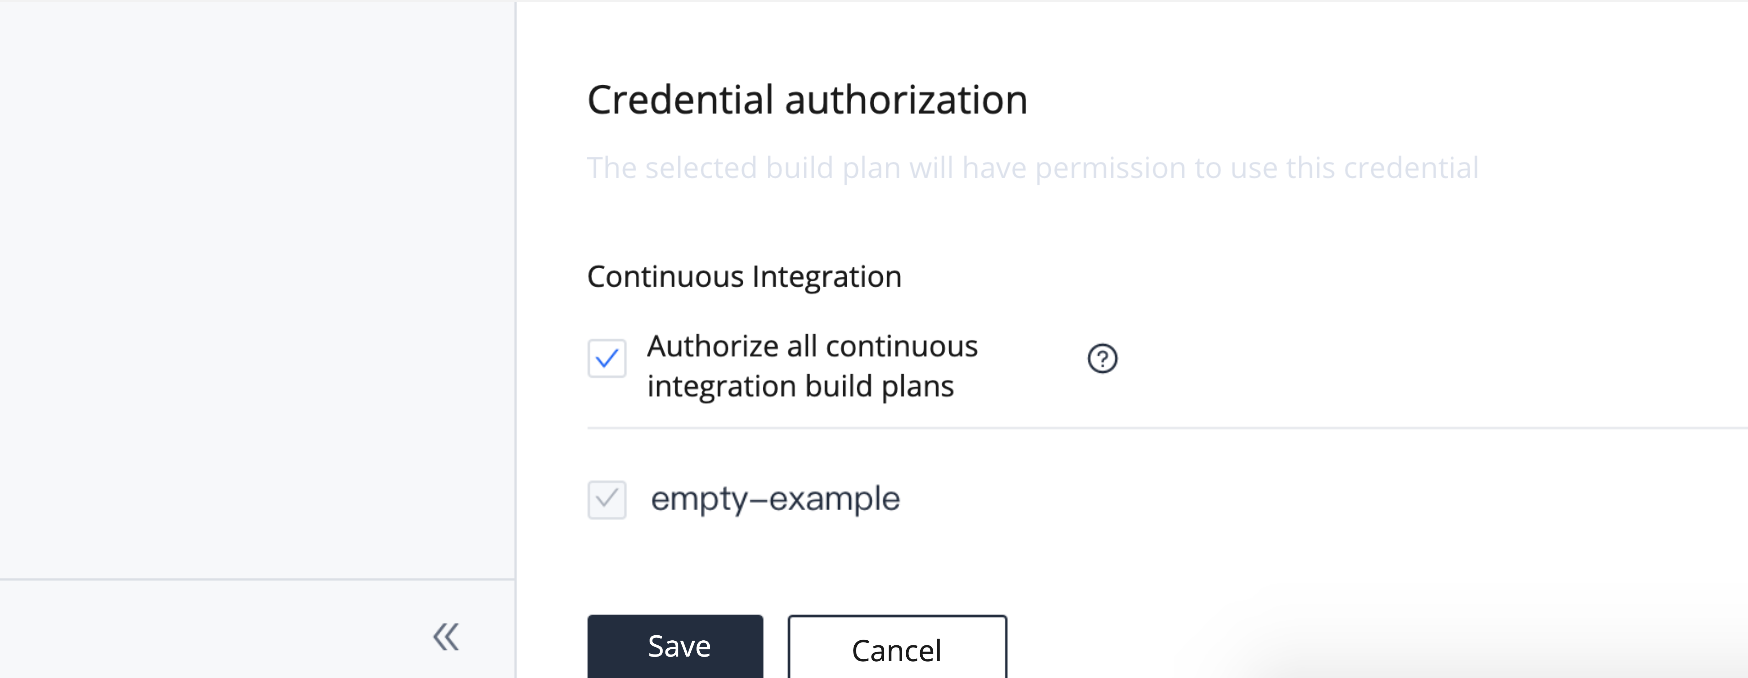
1. Go to Project Settings > Developer Options > Credential Management and click Enter Credential. For the Credential Type select Username + Password or SSH Private Key. Under Credential Authorization, select Authorize all the CI build plans.
2. After entering the necessary information, you will receive two credential IDs.
Step 2: Configure CI process
Refer to the following Jenkinsfile configuration:
pipeline {
agent any
stages {
stage('check out'){
steps {
checkout([
$class:'GitSCM',
branches: [[name: GIT_BUILD_REF]],
doGenerateSubmoduleConfigurations: false,
// Configure submodule checkout rules here
extensions: [[
$class:'SubmoduleOption',
// Whether to prohibit submodule checkout
disableSubmodules: false,
// Whether to allow the use of parent project user credentials for checkout
parentCredentials: false,
// Whether to recursively check out all submodule updates
recursiveSubmodules: true,
// Specify the reference repository path
reference: '',
// Whether to track the latest commits to the branch configured in the .gitmodules file
trackingSubmodules: false
]],
submoduleCfg: [
],
// Configure the remote parent project and submodule checkout information here
userRemoteConfigs: [
[
// Configure the remote parent project repository SSH credentials and URL here
// If there are more submodules, add their configurations here
]
])
}
}
}
}
After successful operation, the log will read as follows:
How do I check out code repositories from other projects?
During CI, you can use project tokens to check out code from CODING repositories in other projects.
In this example, we will use two different projects:
"Project A" is the project that contains the code repository that we will need to check out.
"Project B" is the project that contains the CI checkout task.
Step 1: Create project token in Project A
1. Open Project A, go to Project Settings > Developer Options > Project Token, and click Create Project Token.
2. Select the code repository for checkout and configure the necessary operation permissions.
3. Click OK to create the token.
Step 2: Create credentials in Project B
1. Open Project B, go to Project Settings > Developer Options > Credential Management, and click Enter Credential.
2. Go back to the page of the token created for Project A and click View Password.
3. In the Enter Credential window for Project B, select Username + Password as the Credential Type and paste the corresponding project token information.
4. Select the CI project to authorize and click Save.
Step 3: Configure corresponding environment variables in CI task in Project B
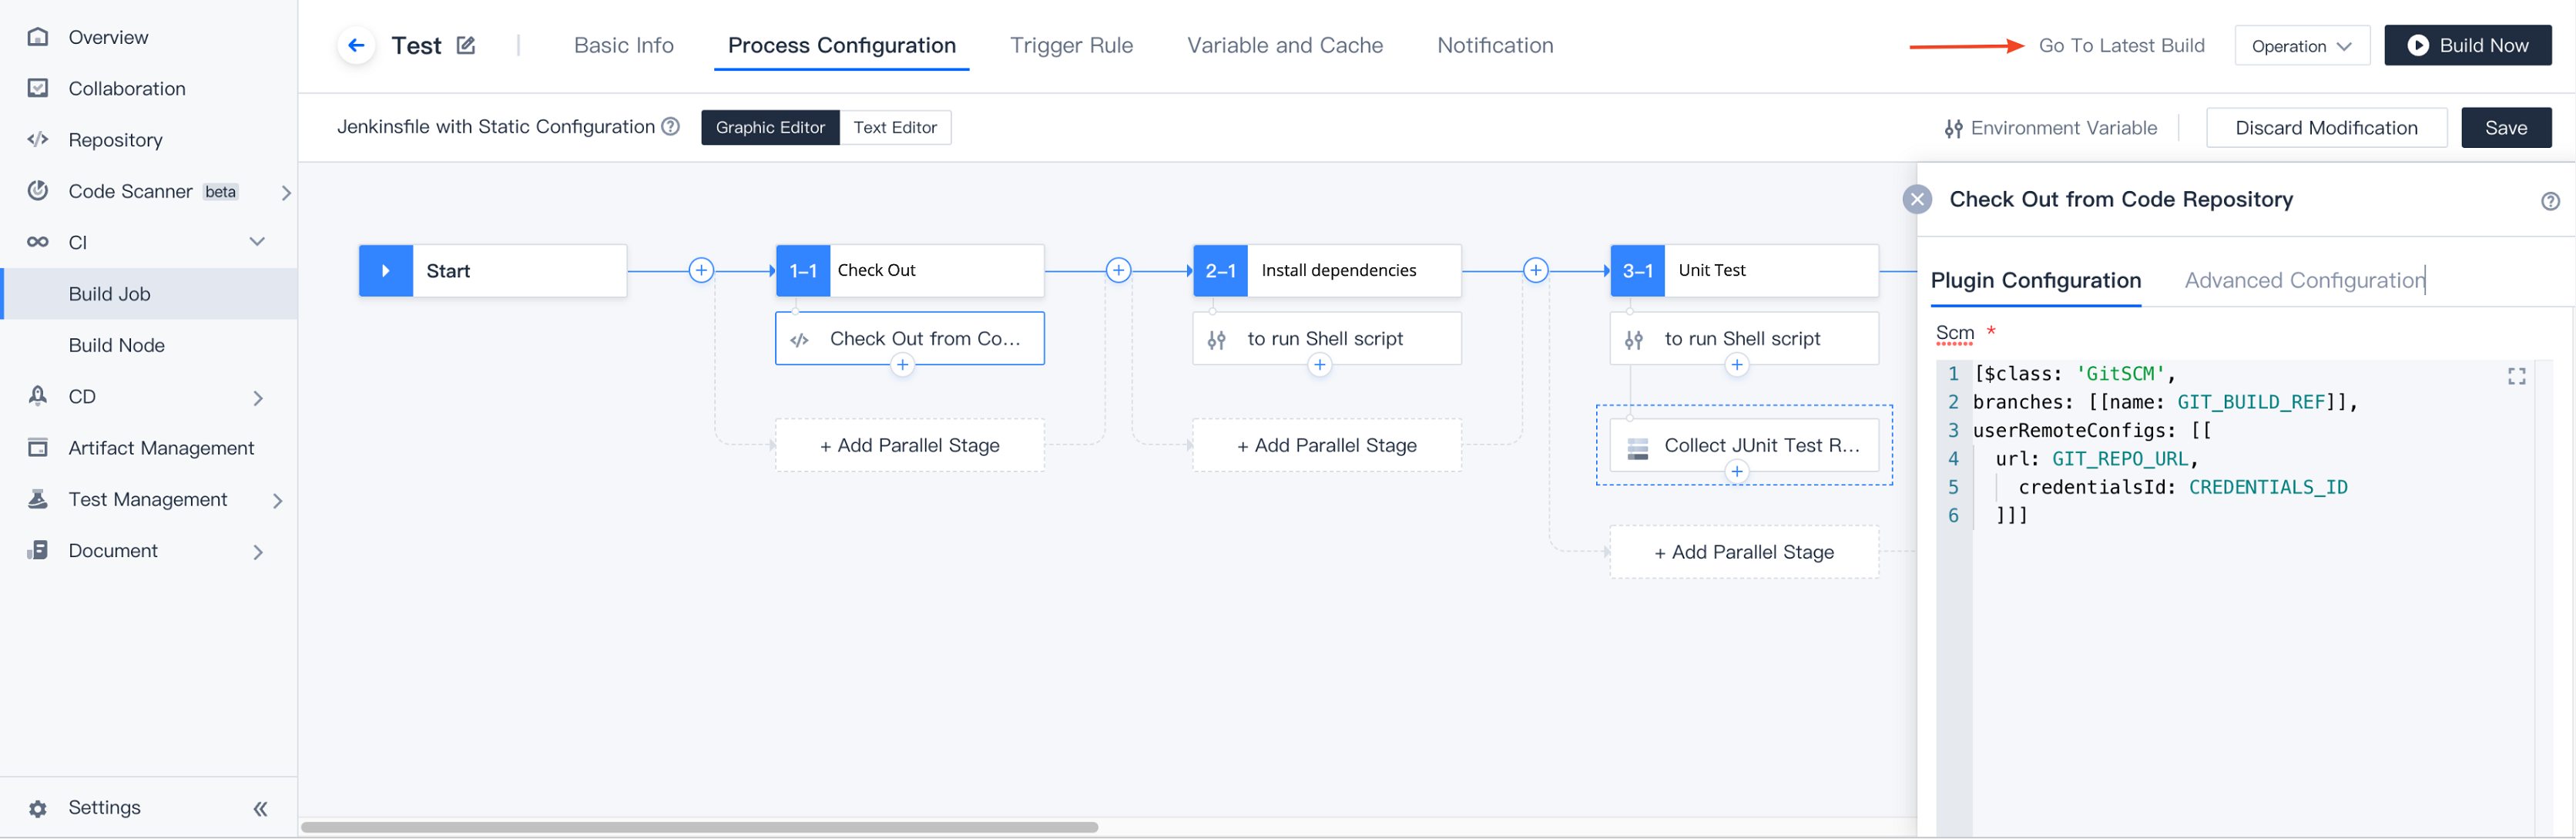
1. Go to CI Settings > Process Configuration, add a Check out from code repository step, and click Environment Variable.
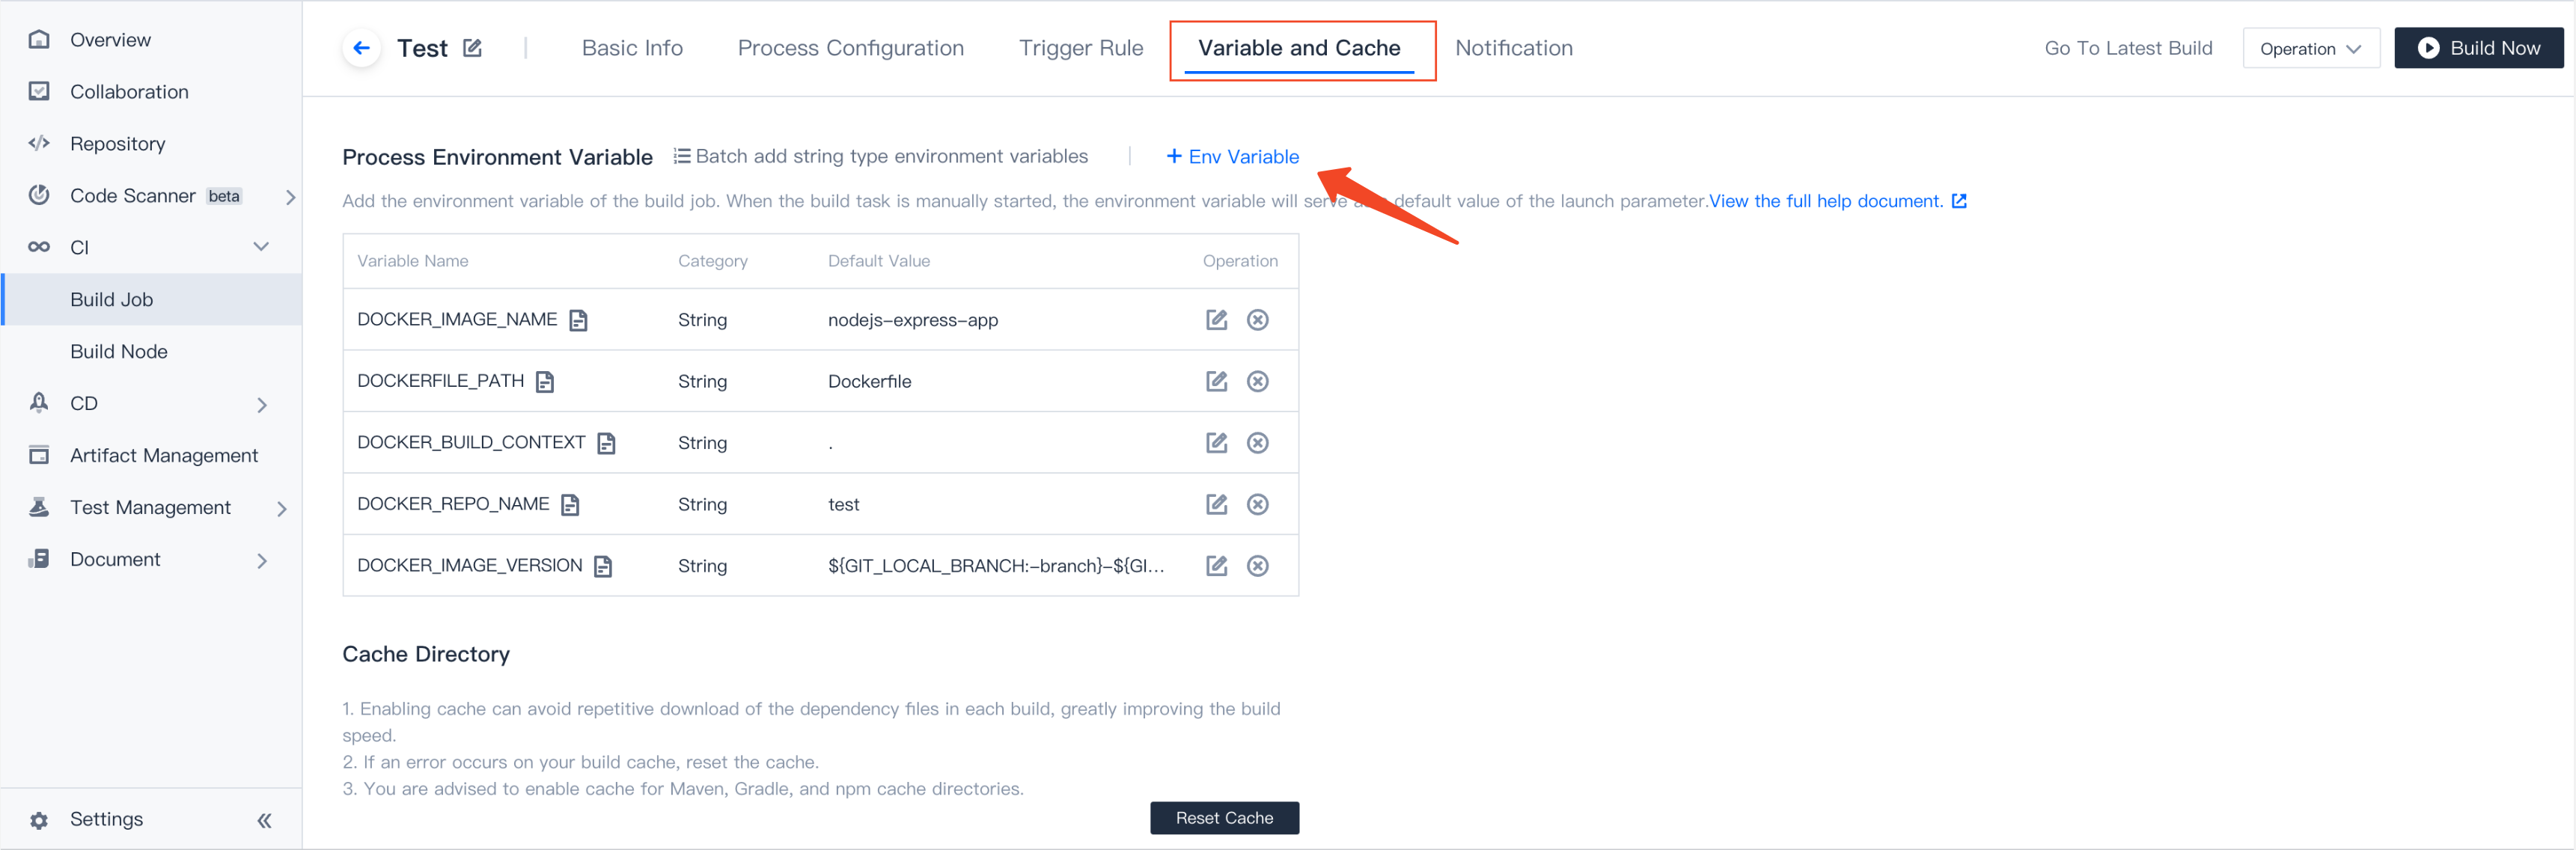
After adding a checkout process, you can also go to CI Settings > Variables and Caches and click Add Environment Variable.
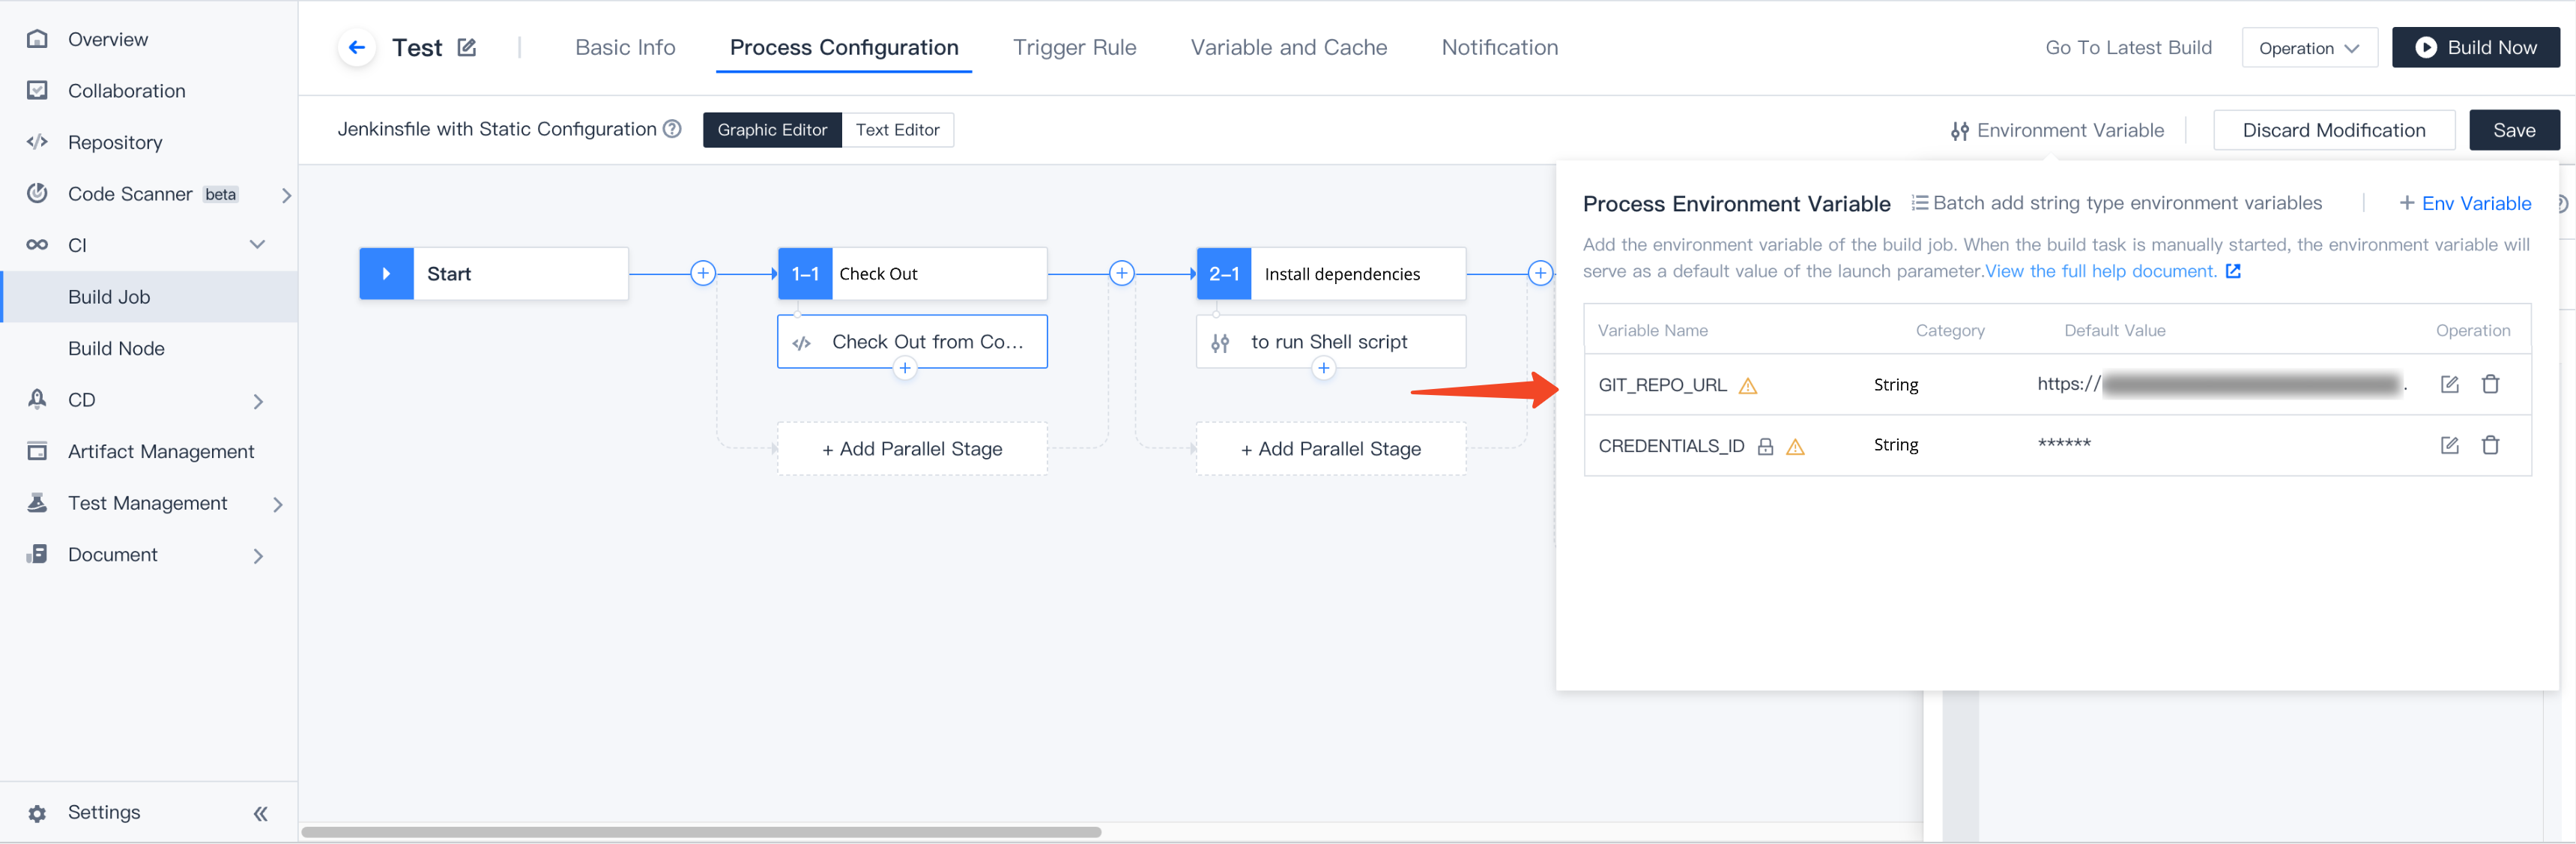
2. Add the following two environment variables:
Variable
Default Value
GIT_REPO_URL
Clone URL of the repository to be checked out (HTTPS)
How do I check out from a repository using Git LFS?
During CI, you can use process configuration to check out code from a repository managed by the Git Large File Storage (LFS) plugin. This allows CI with Git repositories containing large files.
Introduction to Git LFS
The Git LFS plugin accelerates git clone and git fetch operations that involve frequently changed large files (such as images and videos).
Each time you add large files to the repository, the Git LFS plugin will store the files in the local Git LFS cache and replace large file content in the code repository with references to the cache address. When you commit code, all large files involved in the commit are committed to the remote Git LFS cache, which is associated with your remote repository. When you check out commits that reference large files, the plugin will replace the references with the actual file content from the cache.
Therefore, when using the Git LFS plugin, large files are only loaded for git checkout.
How do I check out code from a build plan?
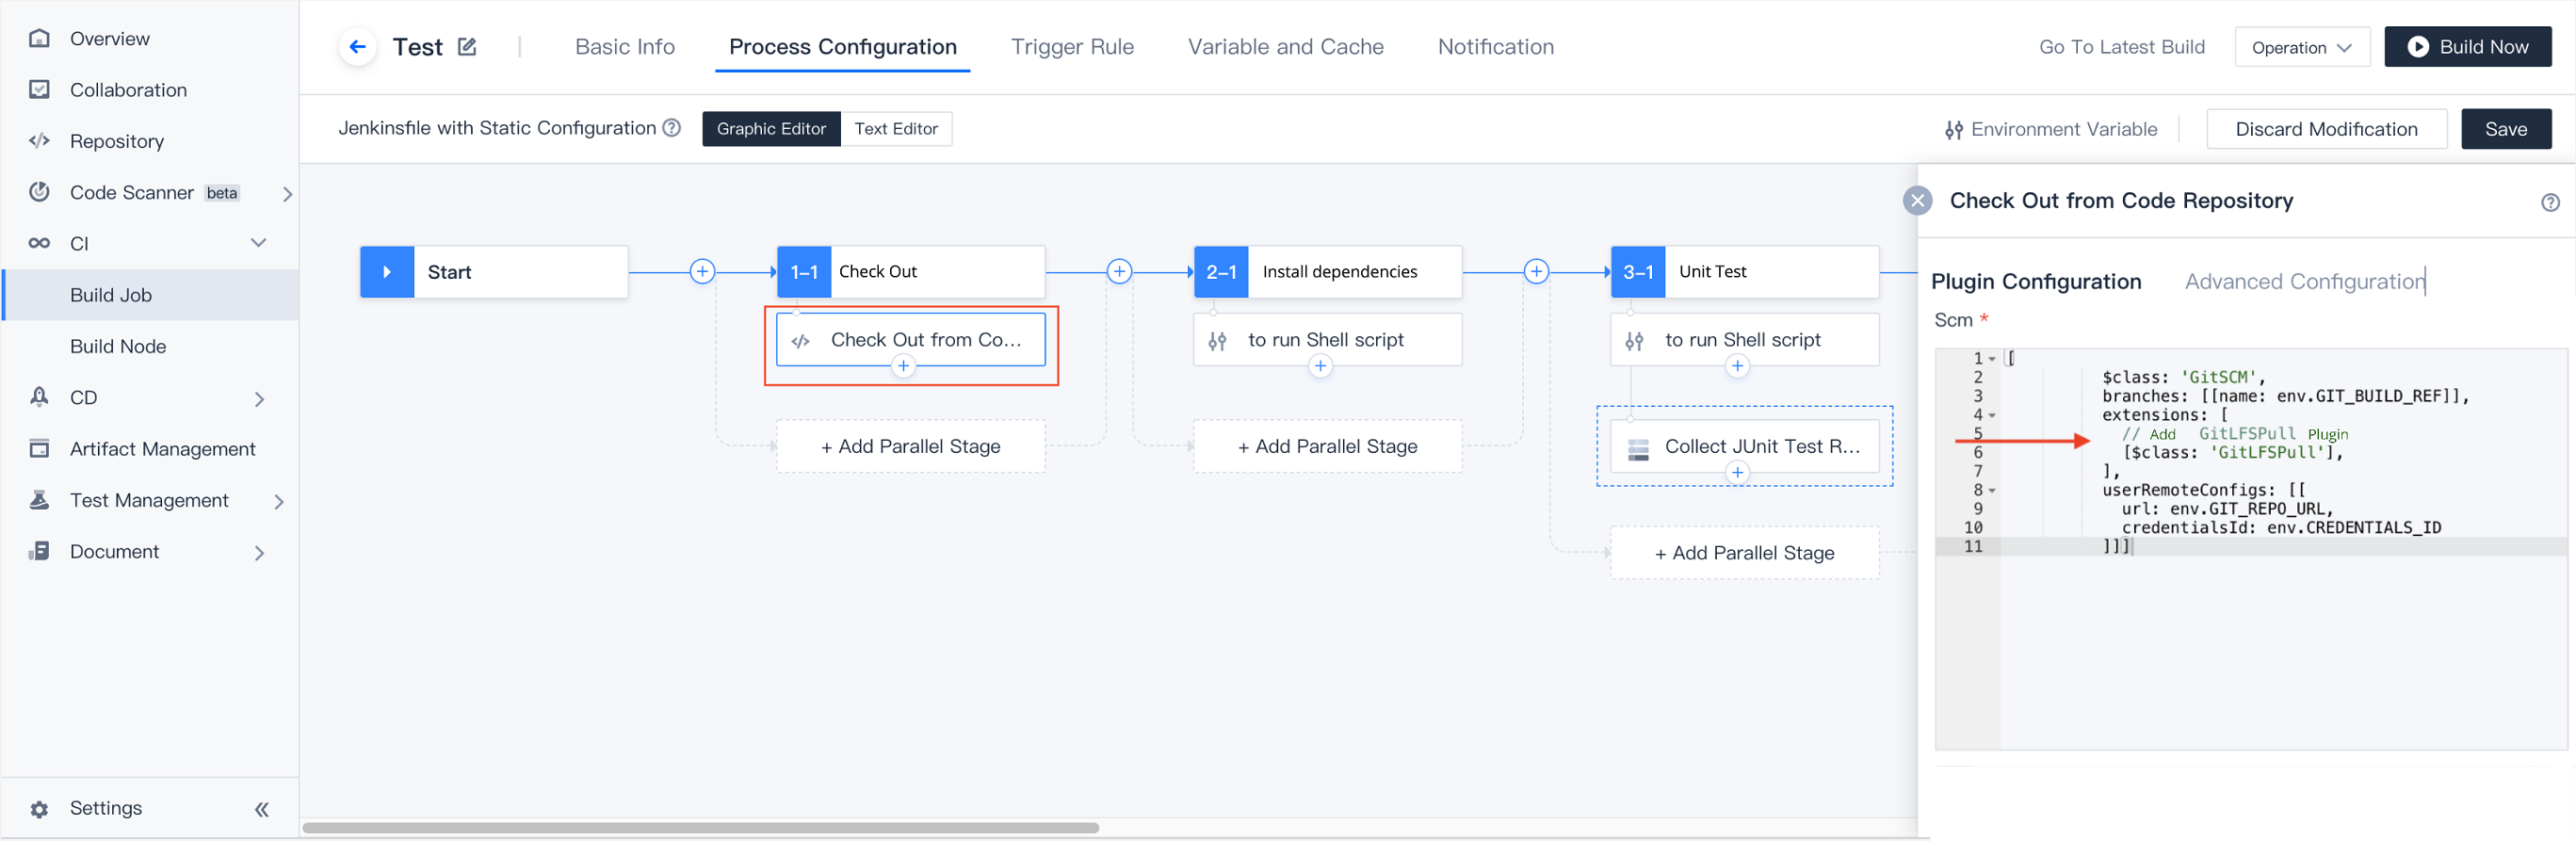
Go to Build Plan Settings > Process Configuration, click Check out from code repository to add this step, and then add the Git-LFS-Pull plugin.
Jenkinsfile
pipeline {
agent any
stages {
stage('check out'){
steps {
checkout([
$class:'GitSCM',
branches: [[name: env.GIT_BUILD_REF]],
extensions: [
// Add GitLFSPull plugin
[$class:'GitLFSPull'],
],
userRemoteConfigs: [[
url: env.GIT_REPO_URL,
credentialsId: env.CREDENTIALS_ID
]]
])
}
}
}
}
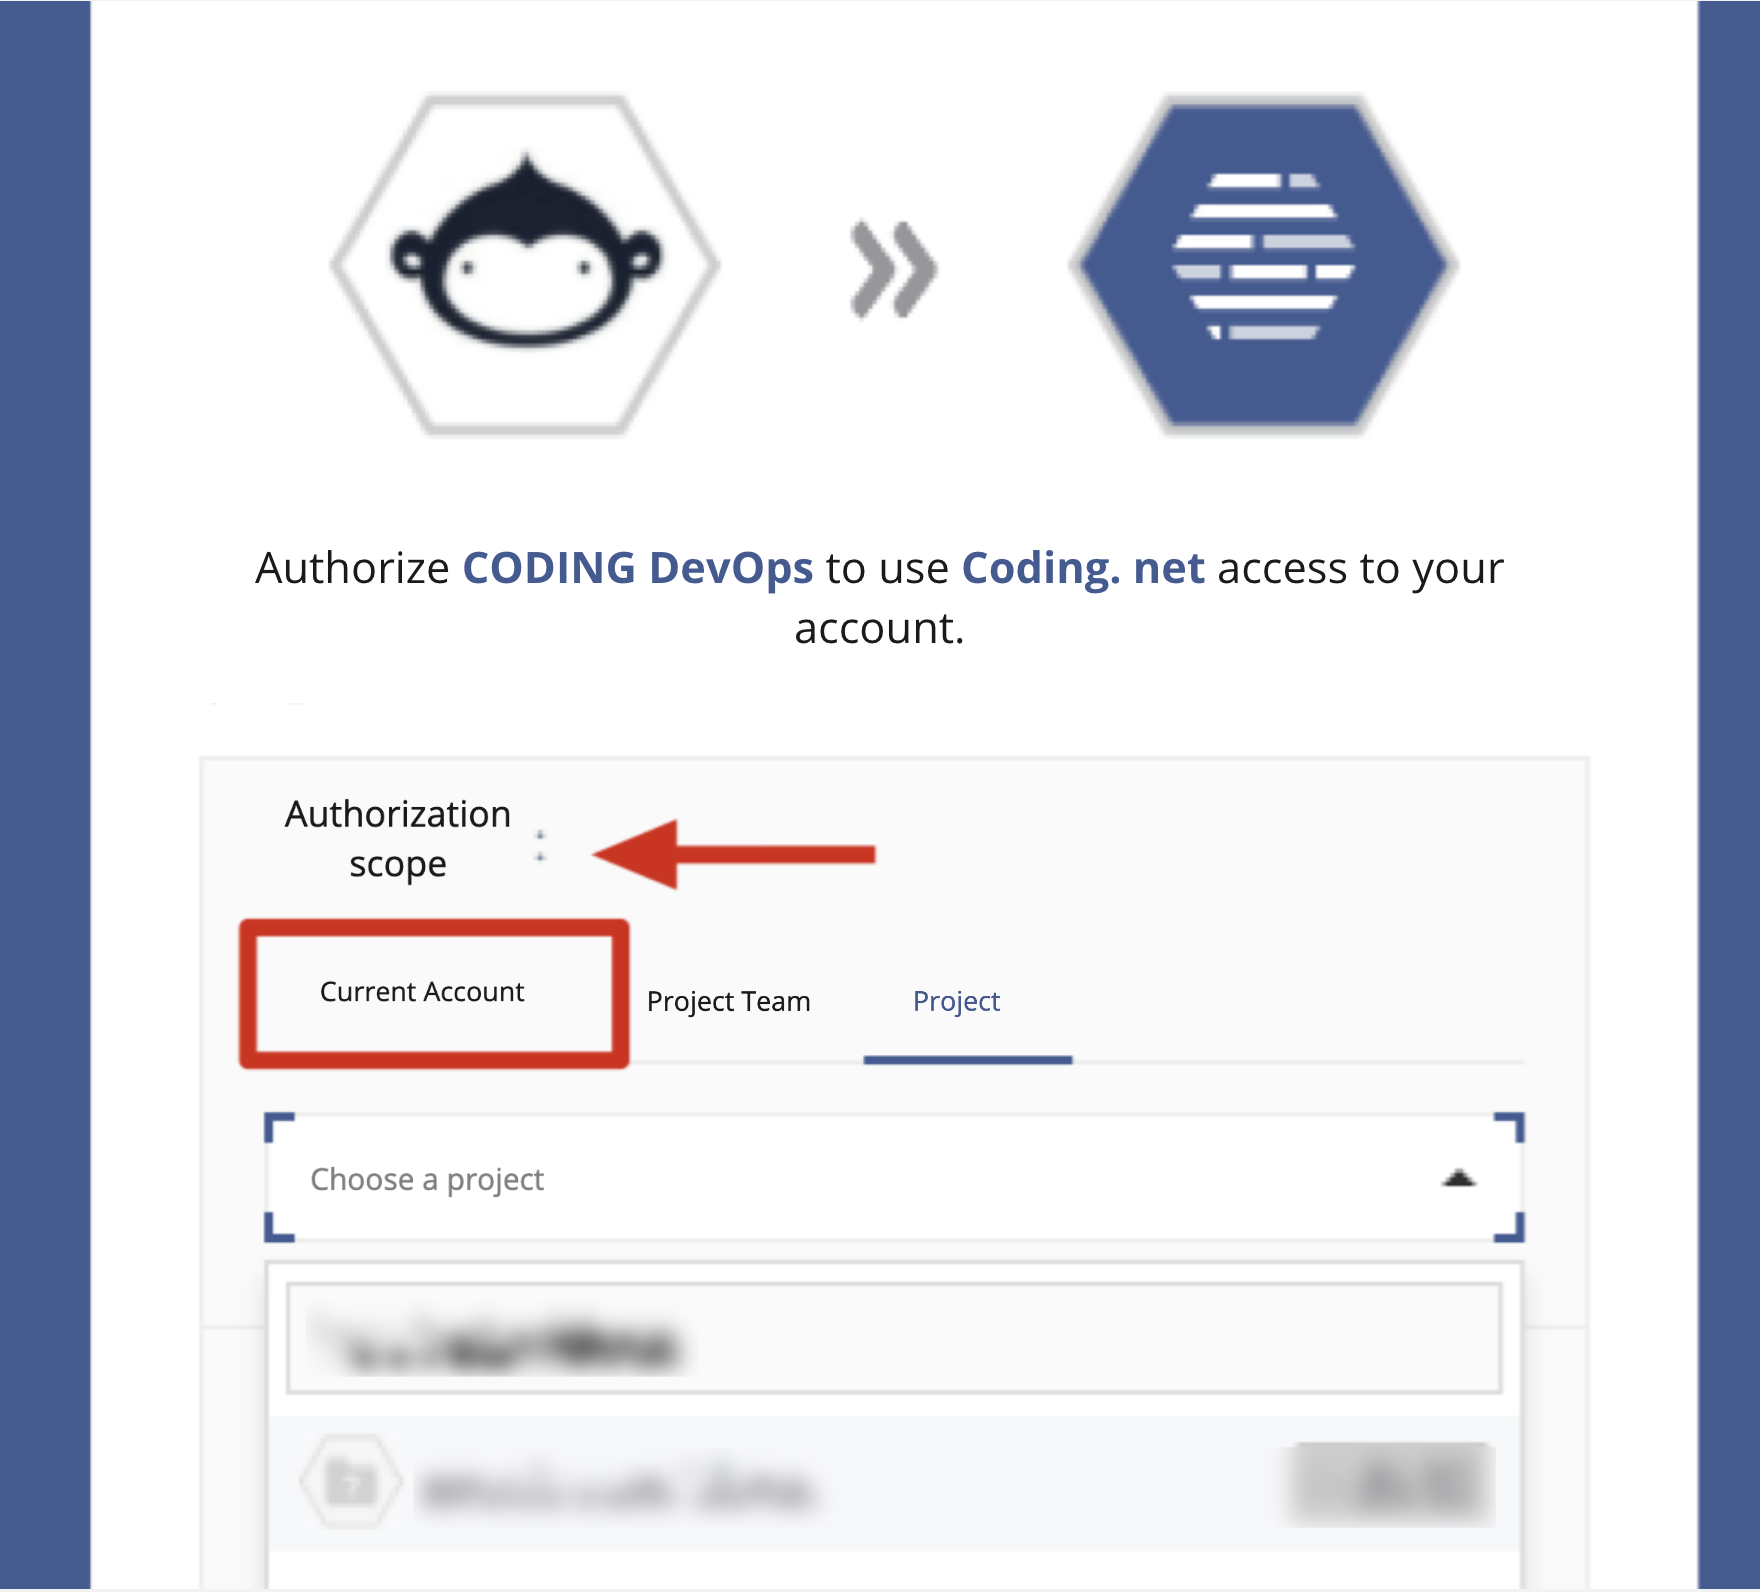
Why can't I sync associated TGit repositories to the external repository list?
Currently, you must select Current Account as the authorization scope during TGit authorization in order to sync these repositories to the external repository list and check them out in a CI build task. Repositories with Project Group or Project authorization scopes cannot be synced.


 Yes
Yes
 No
No
Was this page helpful?