Overview
Download
Focus Mode
Font Size
When you purchase the Enterprise Edition or Exclusive Edition of Super App as a Service (SAS), we will generate the default login link for your console and provide a default style. You can customize your own brand and image through "Branding customization".
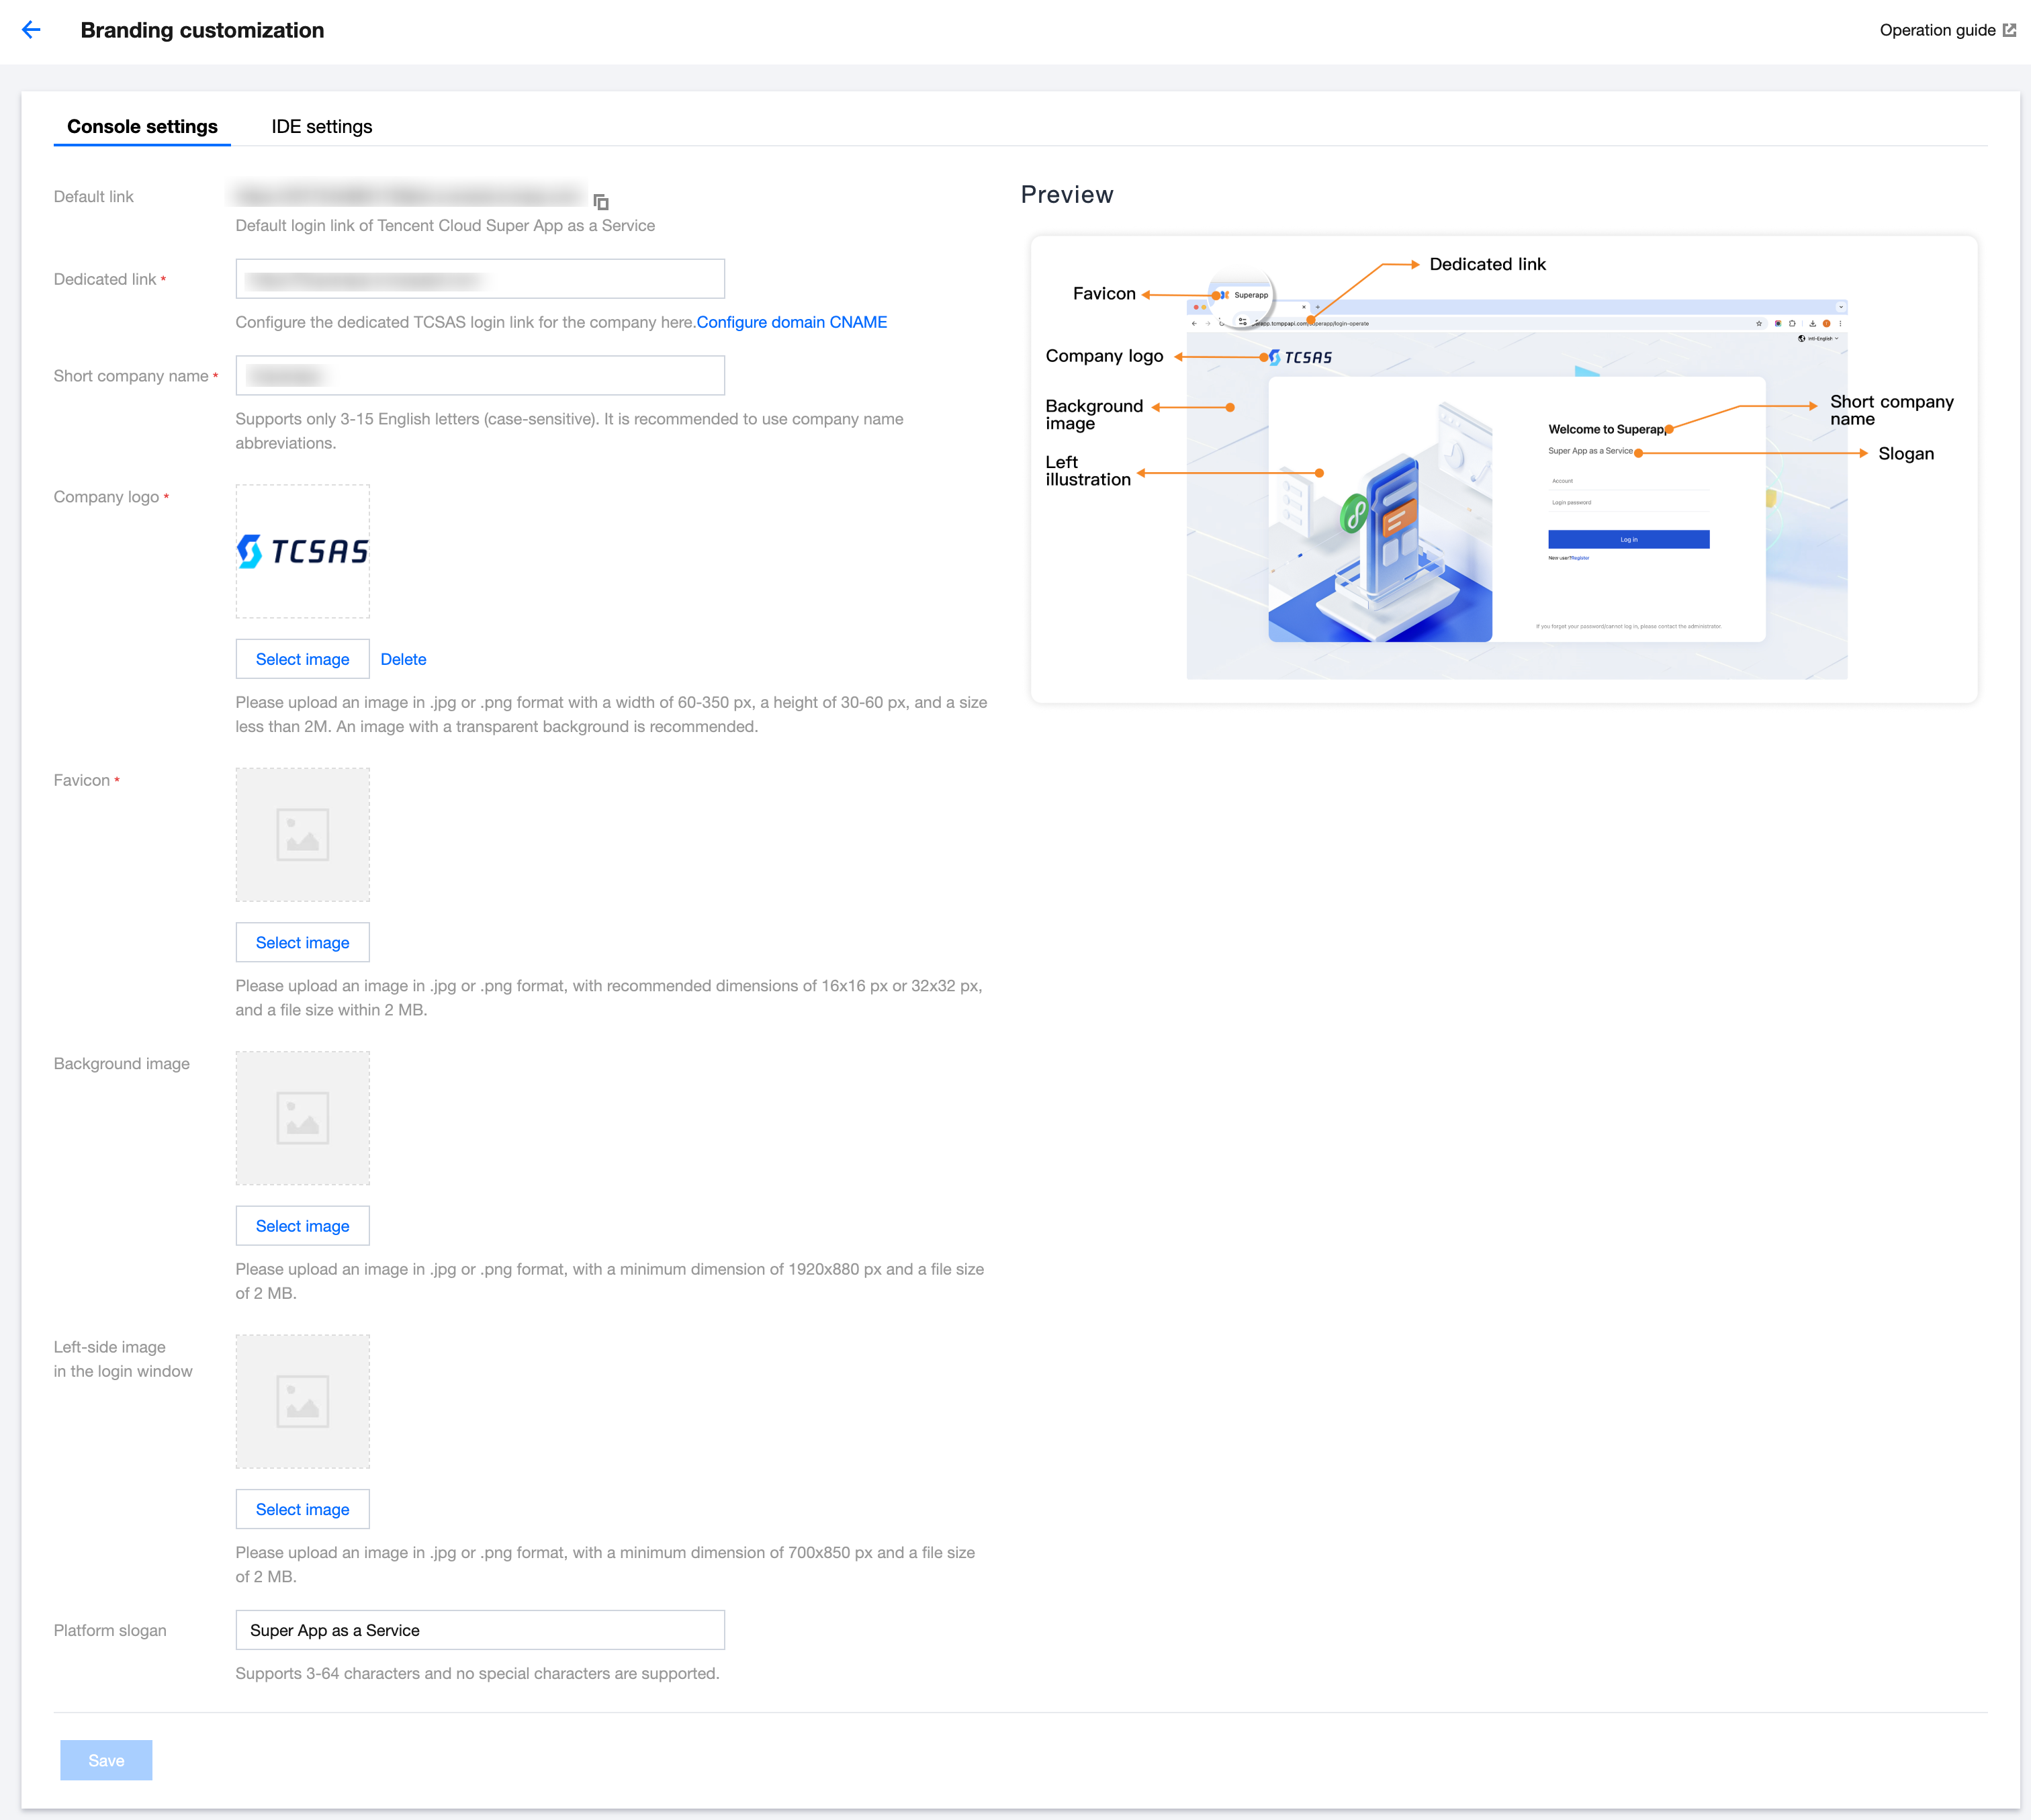
Branding customization - Console settings
1. After you activate the plan, we will generate the default login link for your console.
2. Set up your custom access domain, following the format:
http(s)://a.b.com.3. Enter your company's short name.
This will replace the Super App as a Service's brand name, and you'll see "Welcome to [Short company name]" on the login page.
4. Upload your company logo
You can upload an image to replace the brand logo of Super App as a Service. Supported formats are JPG and PNG, with a width of 60 to 350 px and a height of 30 to 60 px. A transparent background is recommended, and the size should be within 2 MB.
5. Upload a website favicon
You can upload an image to replace the favicon of Super App as a Service. Supported formats are JPG and PNG, with recommended sizes of 16x16 px or 32x32 px, and a size within 2 MB.
6. Background image of the login page
You can upload an image to replace the background image of the Super App as a Service login page. Supported formats are JPG and PNG, with dimensions no less than 1920 x 880 px and a size within 2 MB.
7. Left-side image in the login window
You can upload an image to replace the image on the left side of the Super App Service login window. Supported formats are JPG and PNG, with dimensions no less than 700 x 850 px and a size within 2 MB.
8. Set the product slogan
Enter a clear and concise slogan, which can be your company's vision or mission.
9. Save the configuration. Once configured successfully, the custom link can be opened in a browser to access the console with your branding.
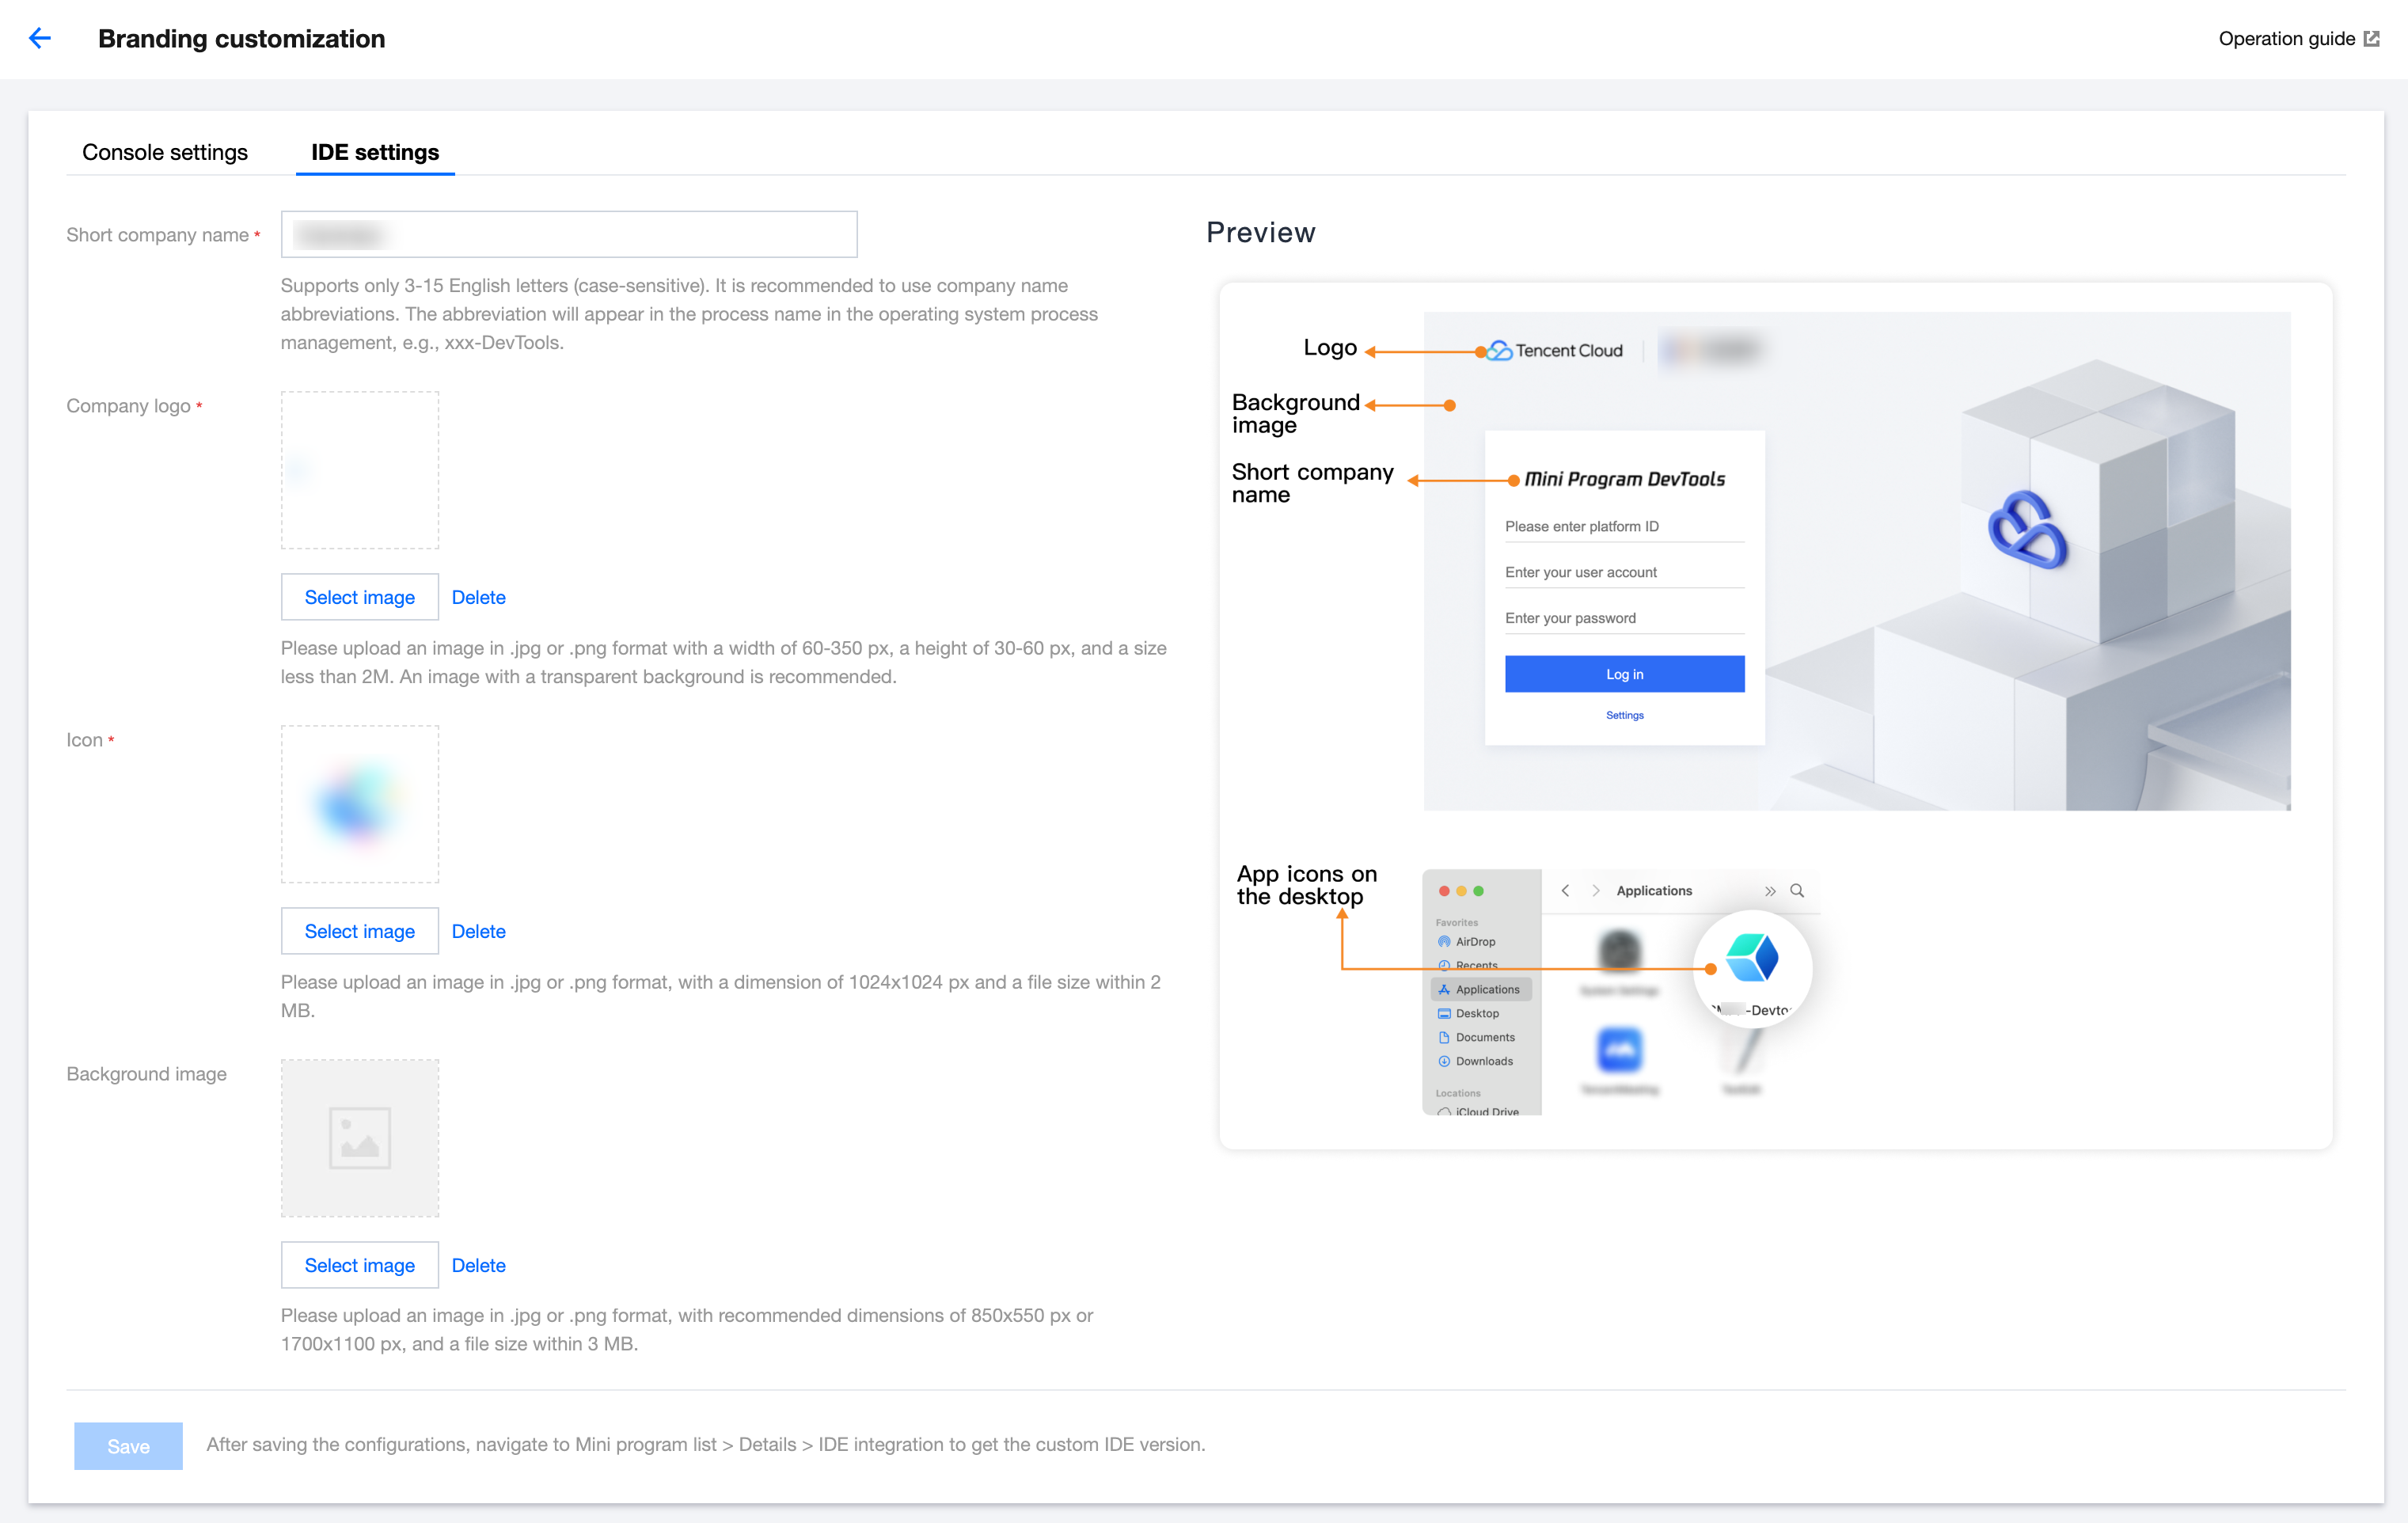
Branding customization - IDE settings
1. Enter your company's short name.
Only supports 3-15 English letters (case-sensitive). It's recommended to use your company's short name. This short name will affect the process name seen in the operating system's process management, such as "xxx-DevTools."
2. Upload your company logo
You can upload an image to replace the brand logo on the IDE.
3. IDE icon image
The icon image is used to generate the IDE's icon on the operating system. Just upload one image to create desktop application icons for both macOS and Windows systems. Supported formats are JPG and PNG, with a size of 1024 x 1024 px and within 2 MB.
4. Background image
You can replace the default background image. Supported formats are JPG and PNG, with recommended sizes of 850 x 550 px or 1700 x 1100 px, and a size not exceeding 3 MB.
5. Save IDE settings. Once saved, the IDE will be repackaged within 24 hours.
Help and Support
Was this page helpful?
You can also Contact sales or Submit a Ticket for help.
Help us improve! Rate your documentation experience in 5 mins.
Feedback