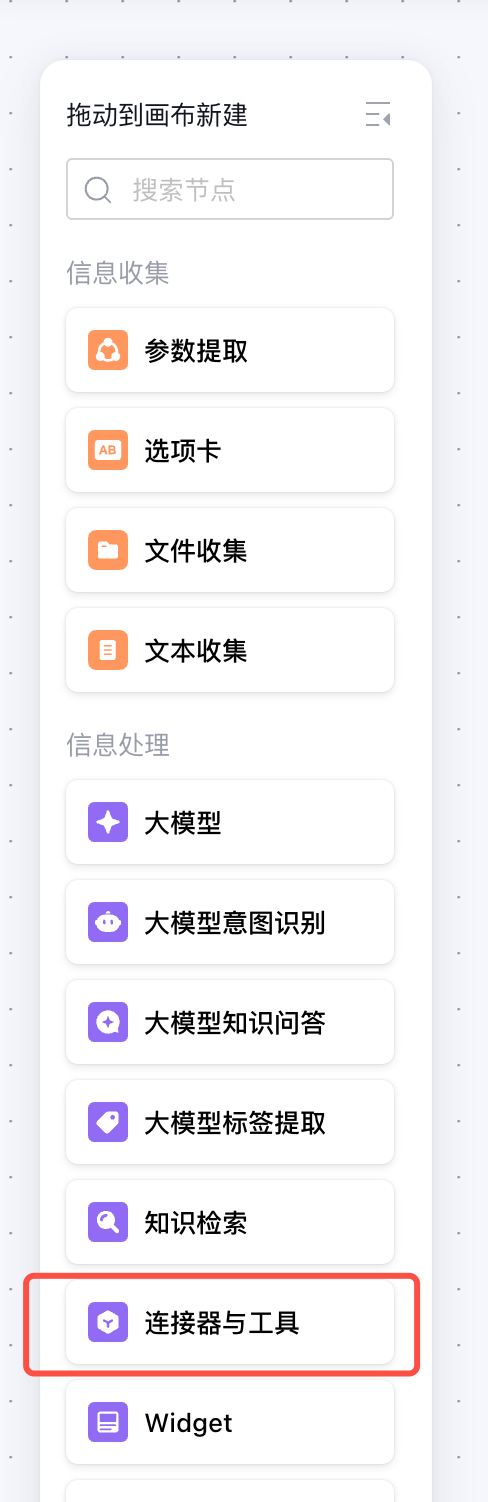
When an agent can no longer rely on the existing capabilities of a large model to complete a task, such as when it needs to call external tools to obtain real-time information (such as weather queries and search engines) or when you want to use external tools to enhance its performance in specific scenarios (such as code generation and mathematical calculations), you can enable tool capabilities for your agent application in the following three ways:
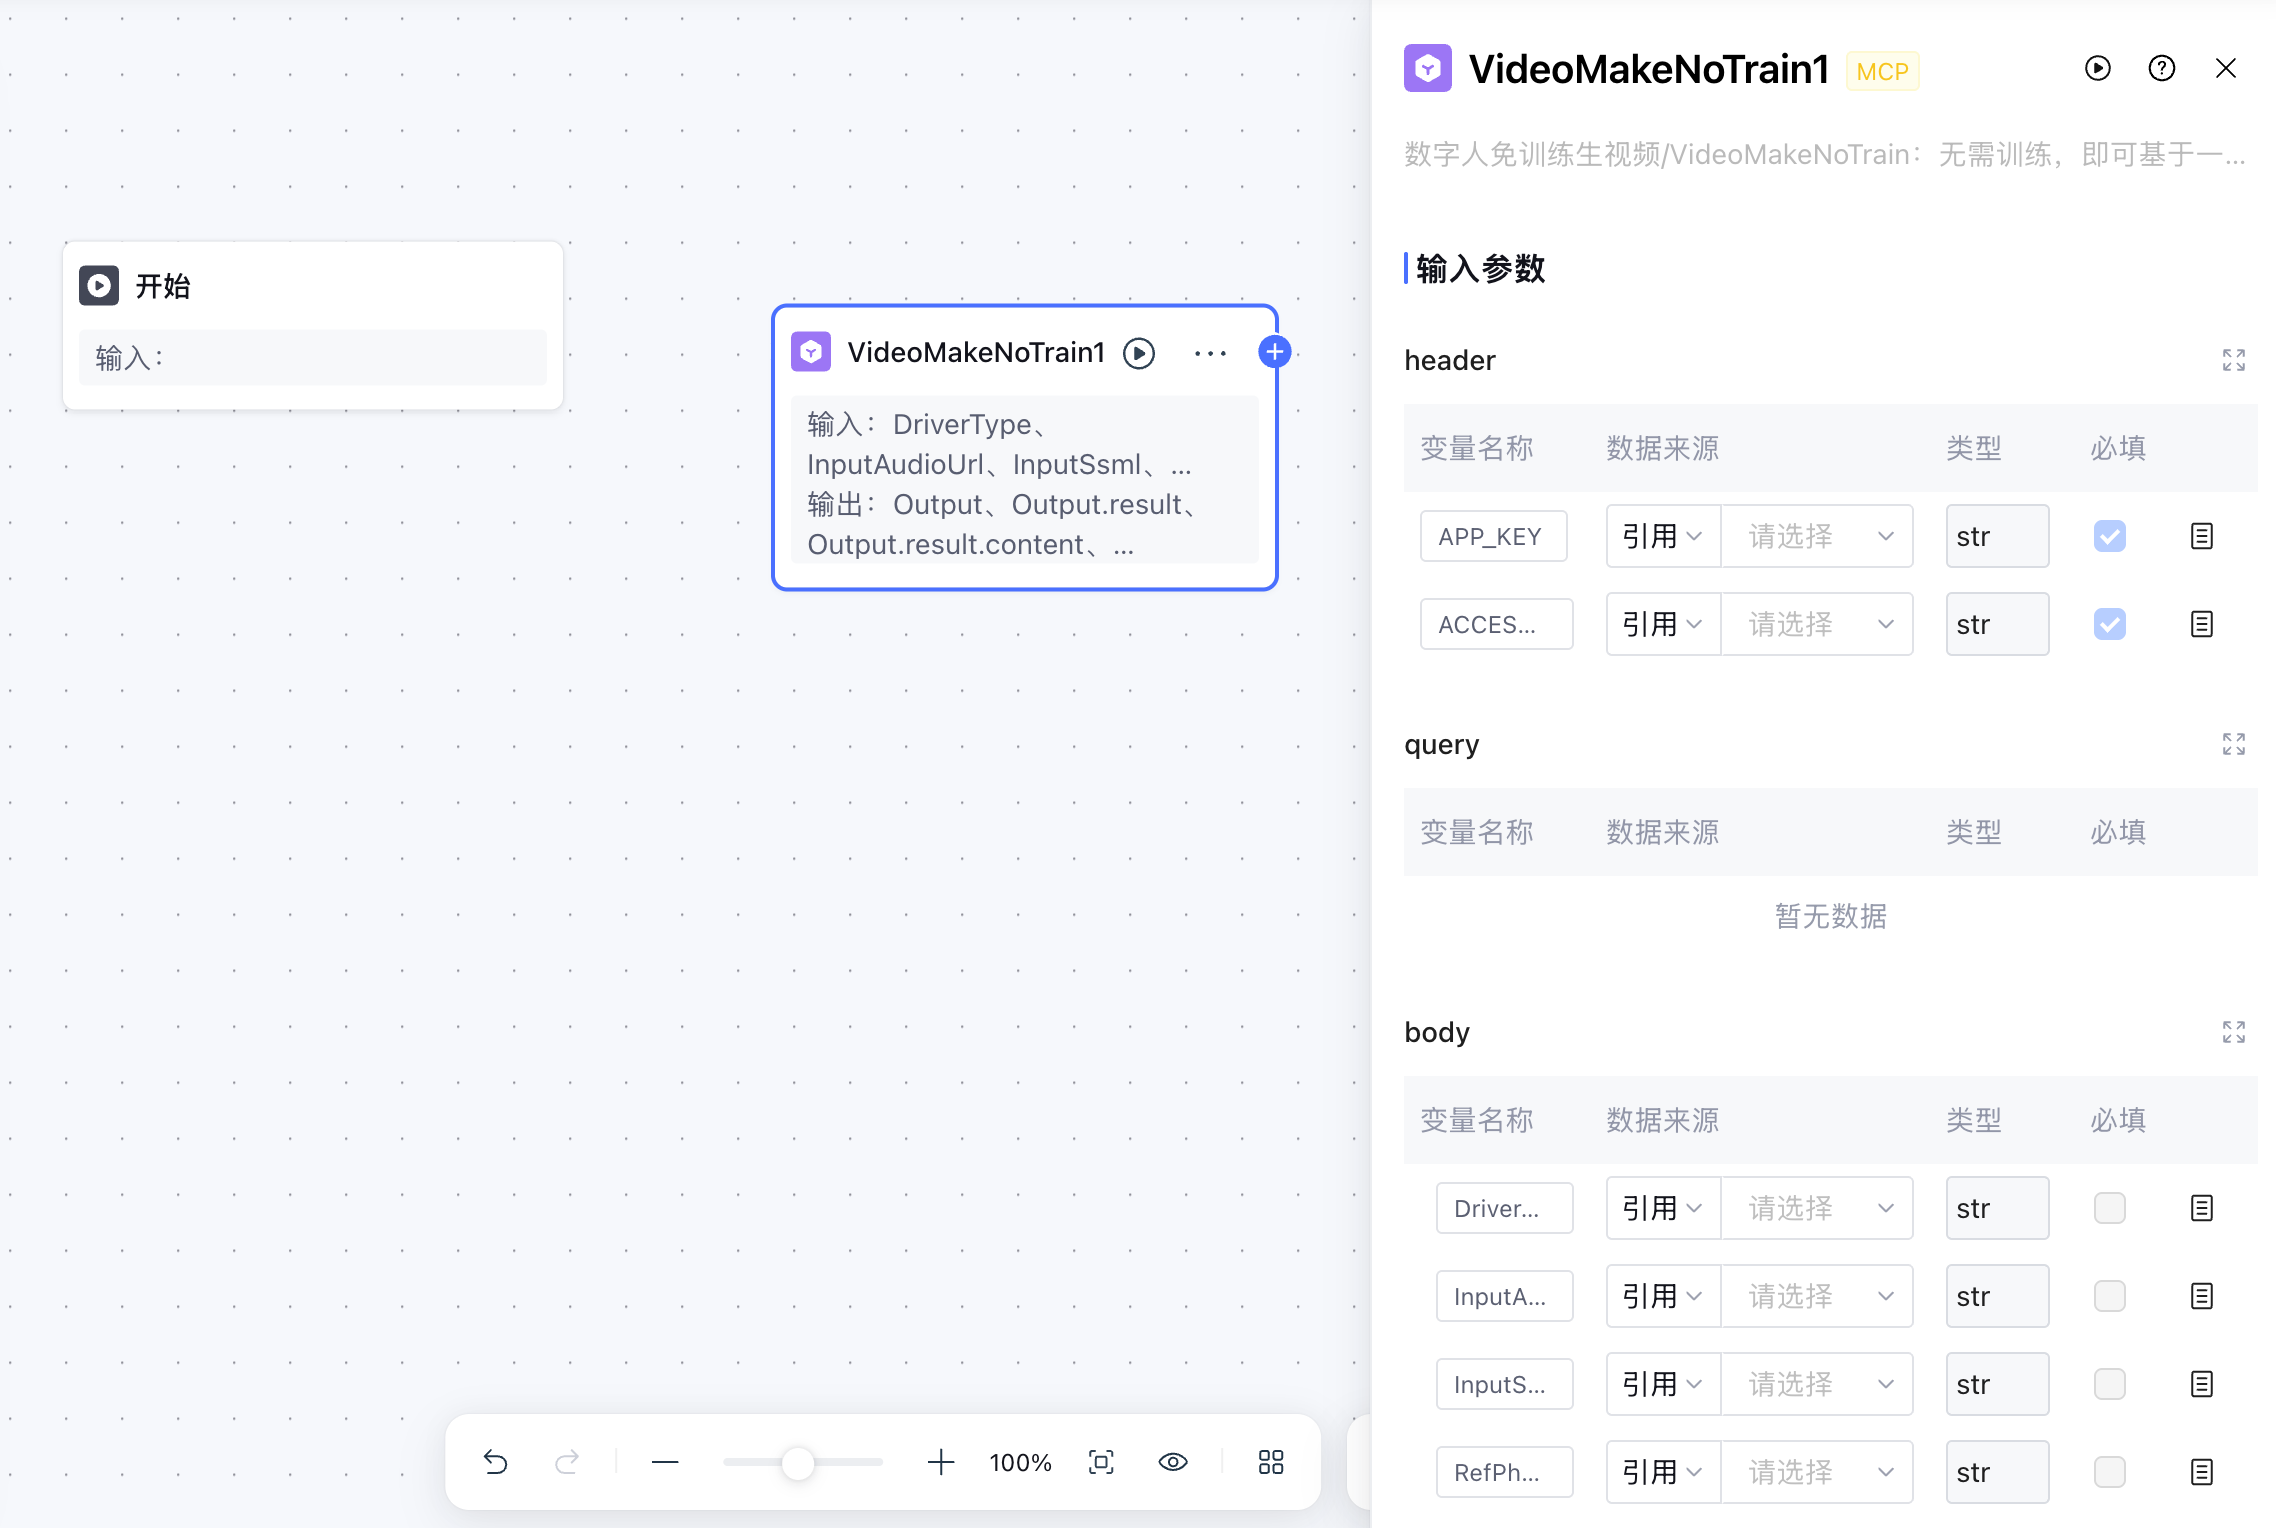
Workflow: Add a tool node to a workflow canvas, then select this workflow in the workflow management of a Standard mode application. Alternatively, run this workflow canvas in single-workflow mode.
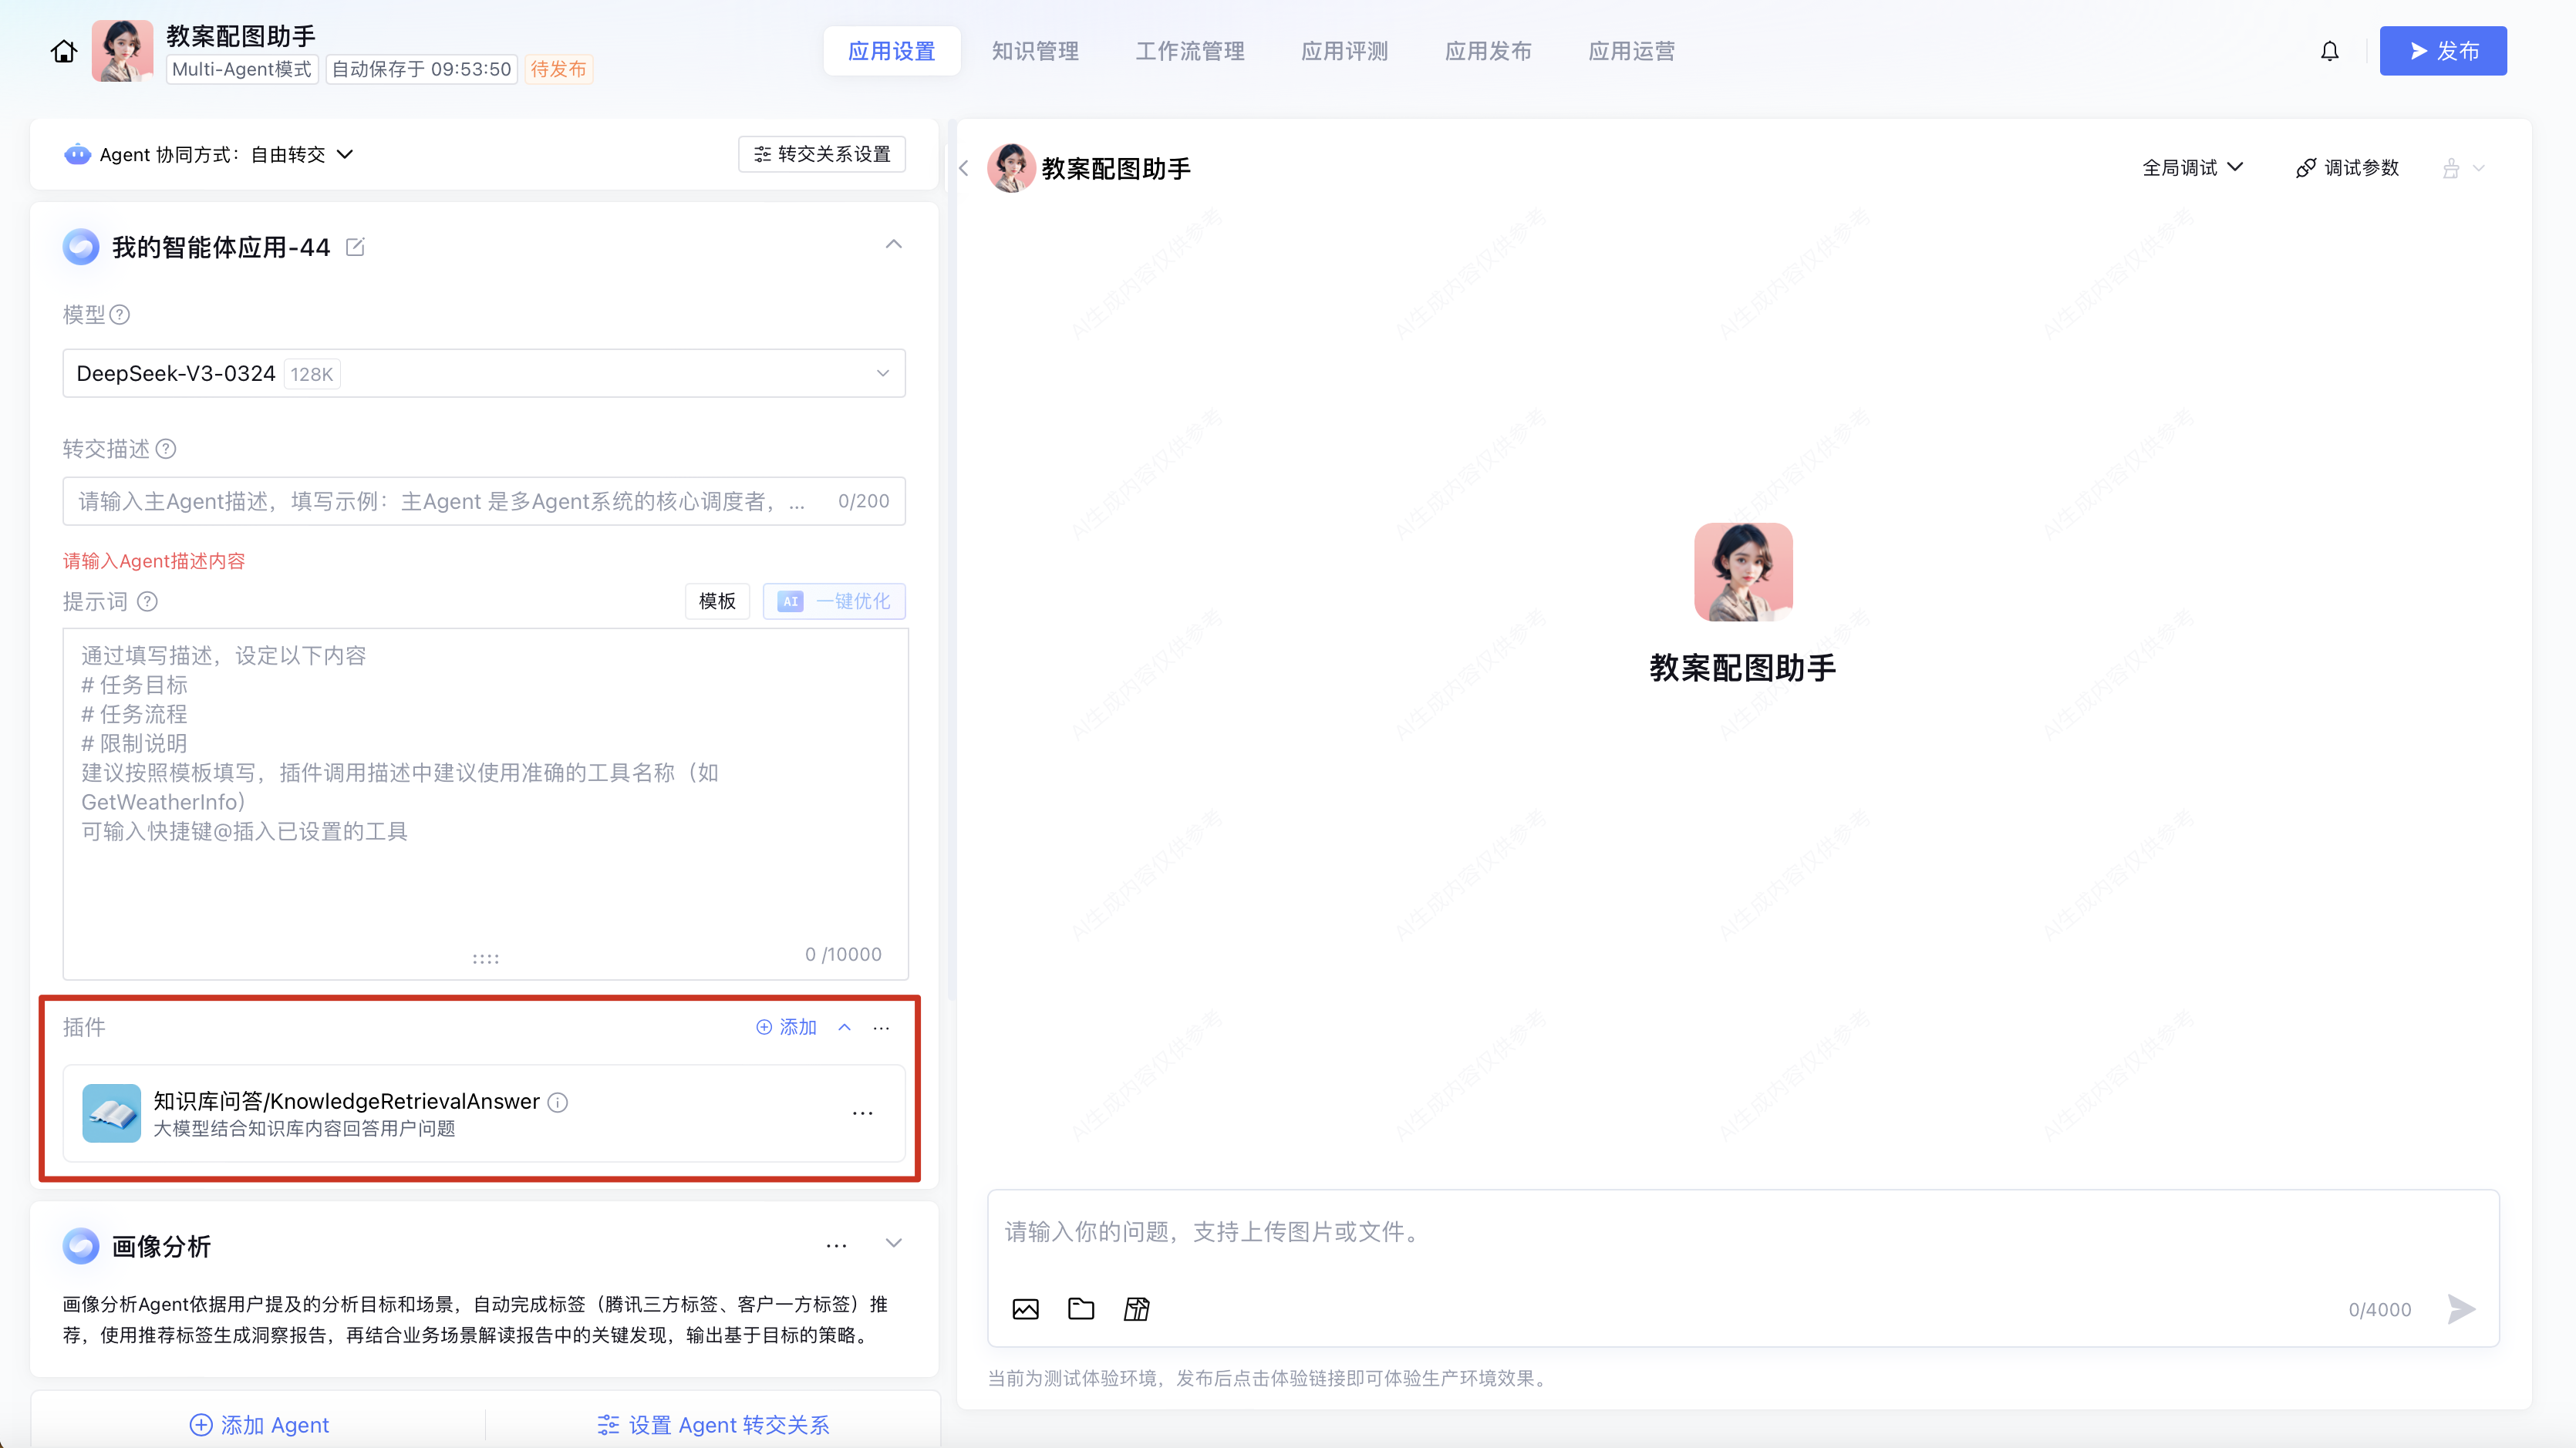
Claw Mode/Multi-Agent Application: Add tools on the settings page within the Claw/Multi-Agent application mode to enable external capabilities for the agent.
Smart Workbench: After tools are added in the Smart Workbench, the model can automatically determine whether to call the corresponding capabilities based on user questions and tool descriptions.
Workflow
You can test a tool individually to ensure its features work properly. For example, fill in the input parameters and click Test to verify the feature works, preventing the entire workflow from failing due to tool service exceptions.
Claw/Multi-Agent Mode Applications
In Claw/Multi-Agent application mode, click Add Tool and select the appropriate tool for your specific scenario (such as code generation and mathematical calculation).
Adding Tool in Prompt Content
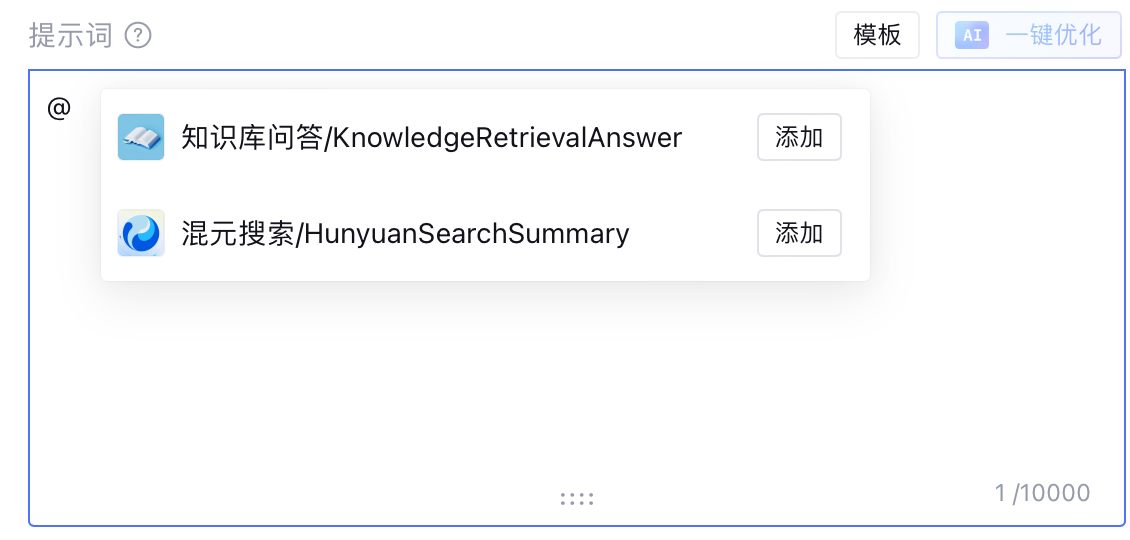
Letting the LLM learn about the introduction and specific function of each plugin in advance helps correctly call plugin tools. In the application prompt, you can quickly insert selected tools using the shortcut key "@". Additionally, you can add descriptions of tool calls, such as when to call the current tool, enhancing the large model's efficiency in tool calls.
Adjusting Tools
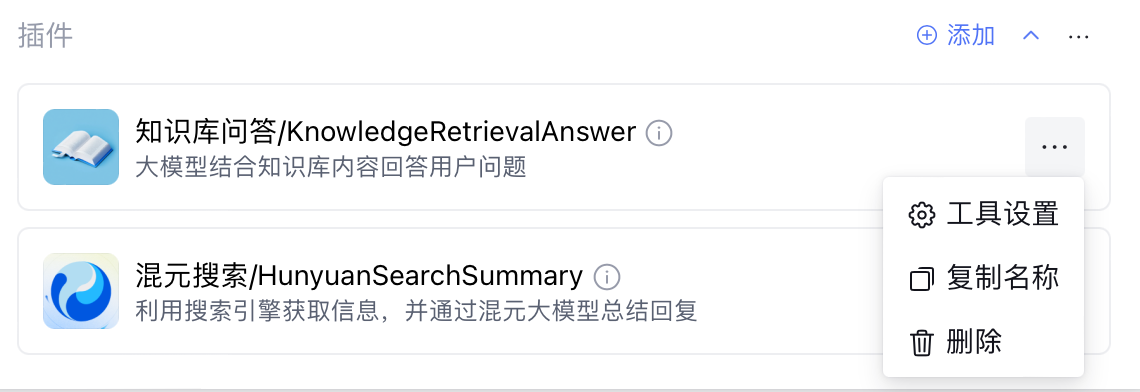
In the tool panel, click the menu button to the right of the selected tool, such as Adjust Tool Settings, Copy ToolName, or Delete Tool.
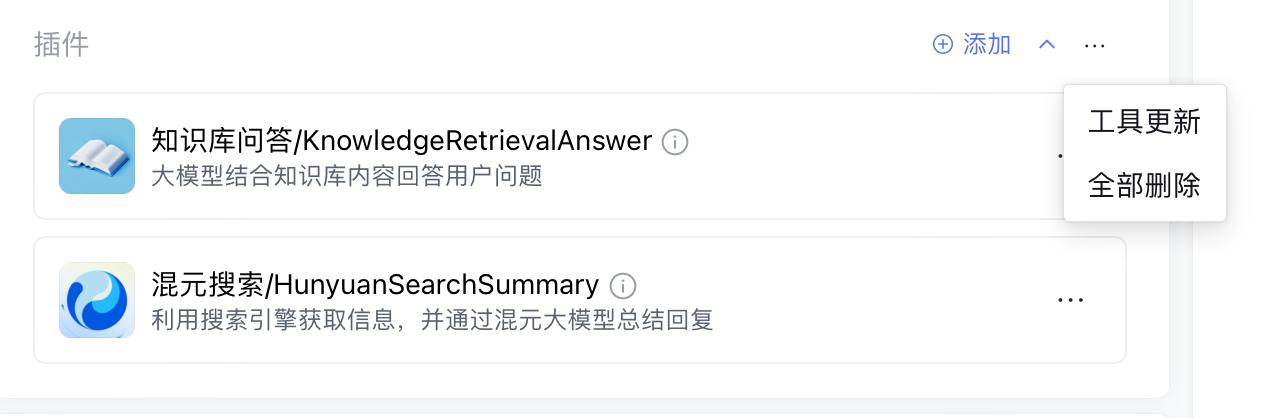
For tools added to the list, support Tool Update and Delete All. Click Tool Update to refresh the latest configuration of all tools in the list.
Configure Tool Parameters
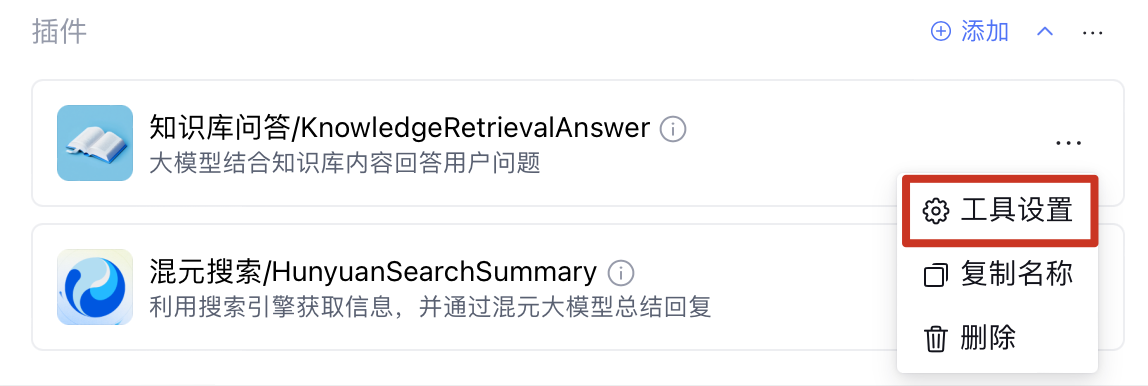
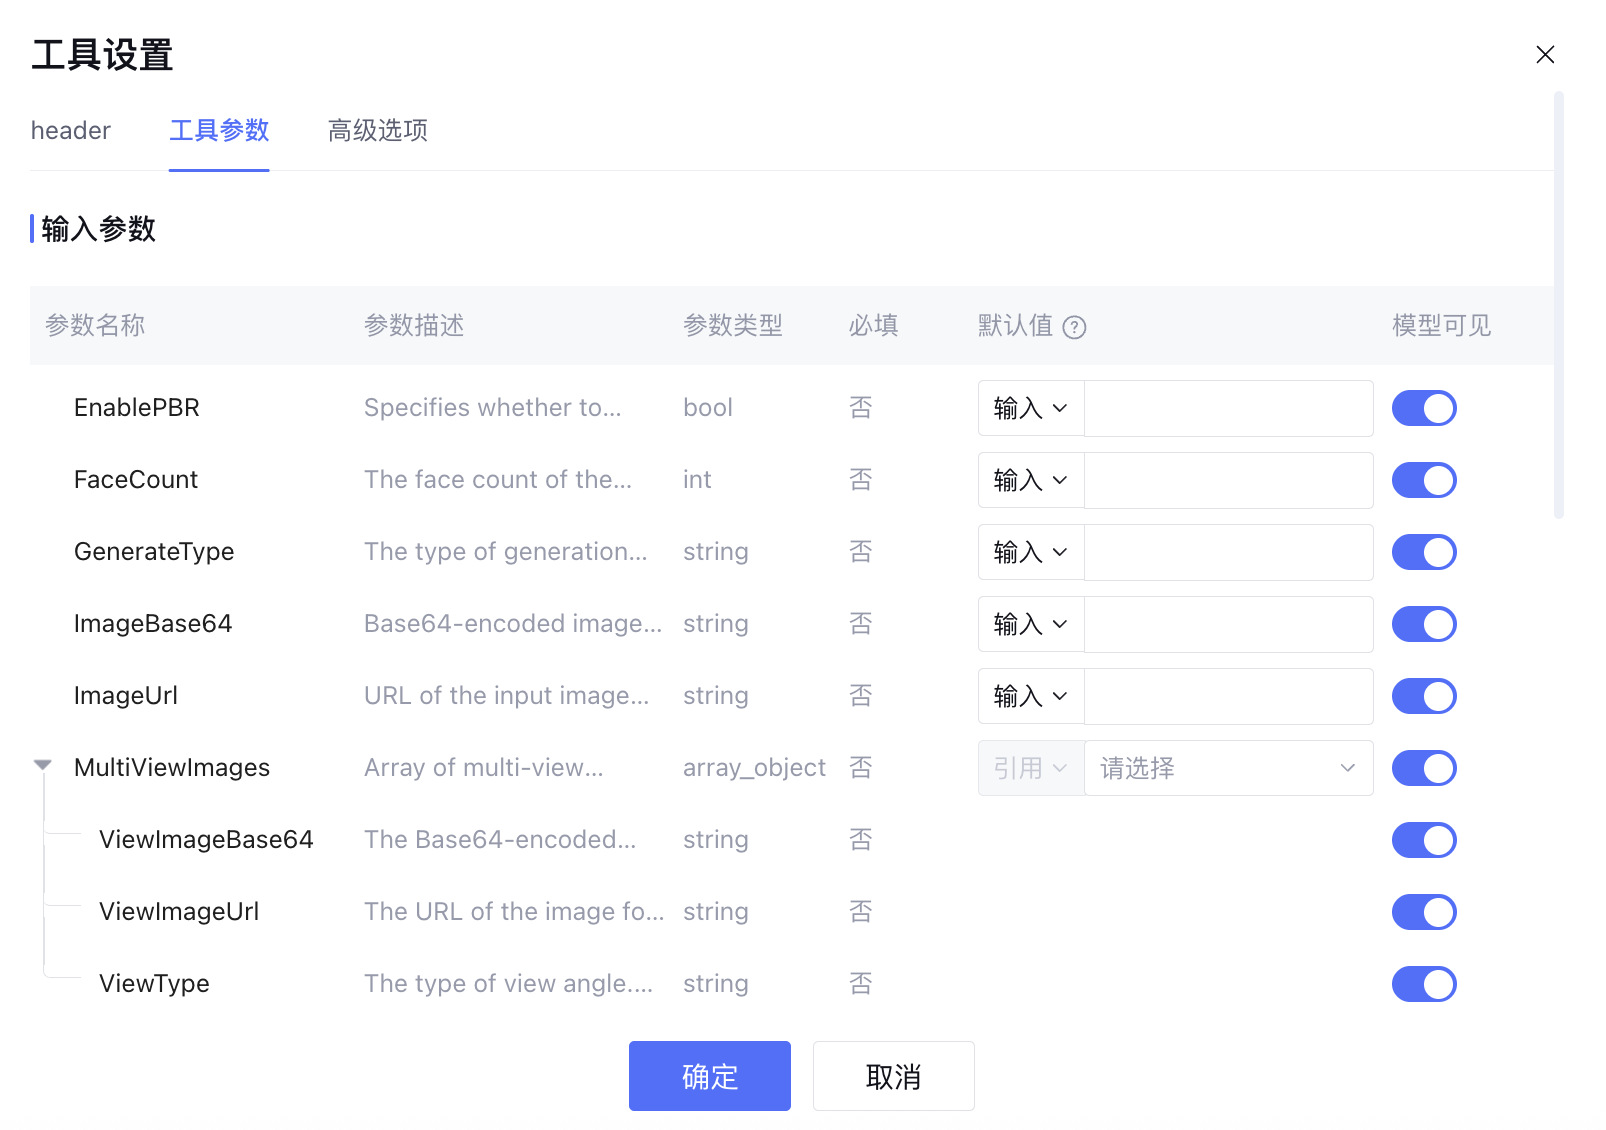
Click Tool Settings to configure tool parameters and related information.
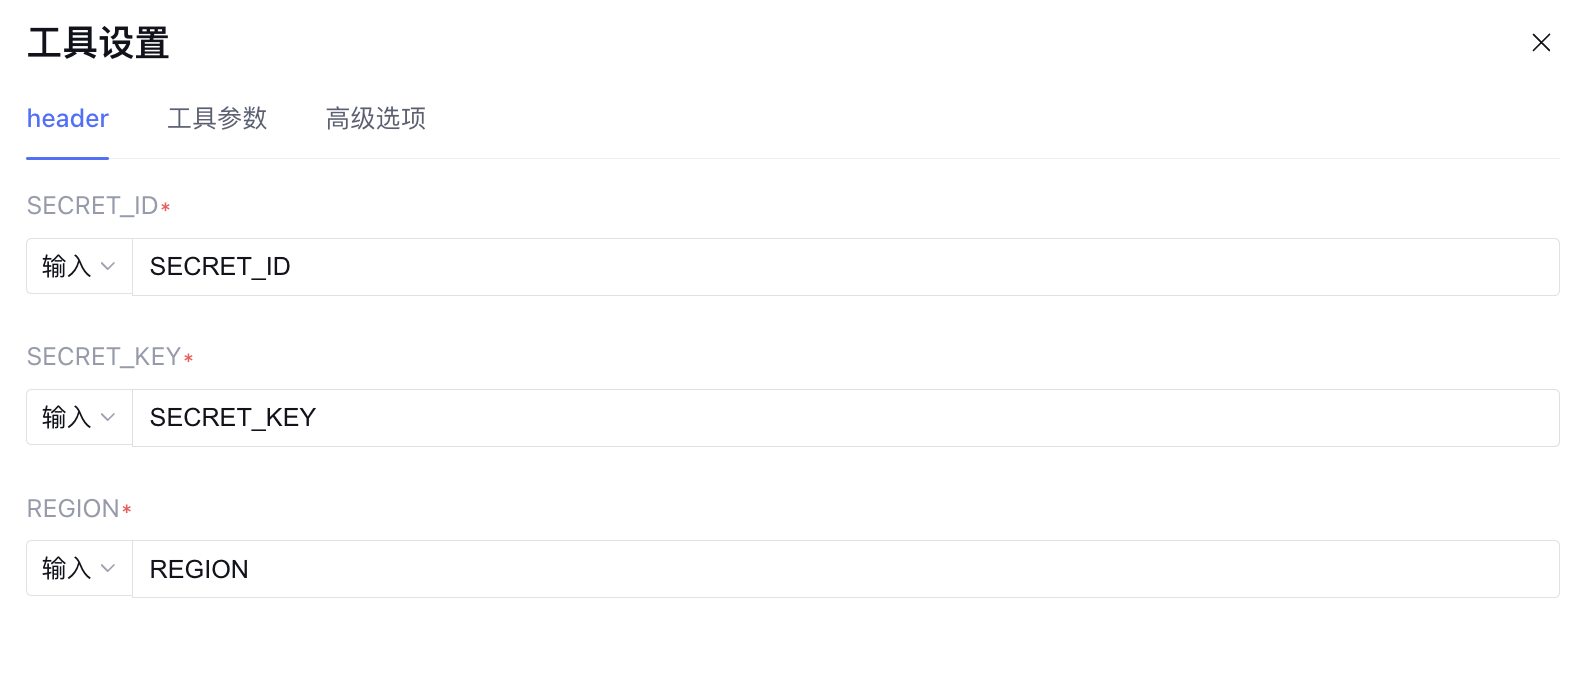
1. header
Some tools require setting SECRET_ID, SECRET_KEY, and REGION when added. You can modify the key information in Tool Settings > header.
2. Tool Parameters
In Tool Settings > Tool Parameters, you can view the input and output parameters of the tool, and support setting whether the large model is visible.
Input parameter setting: supports configuration of default value and choose whether the model is visible. After setting some parameters as model not visible, the tool will call based on the default value to improve call stability. For example, for key parameters, it is advisable to fill in parameters in advance and turn off the model visibility switch, so there is no need to collect key-related fields during the dialogue. The default value can be set in the following two ways:
Manual input: enter the parameter value directly.
Output parameter configuration: support setting the whether visible switch. After closing, this output parameter is not visible to the model, suitable for hiding non-required information to reduce the model's understanding burden.
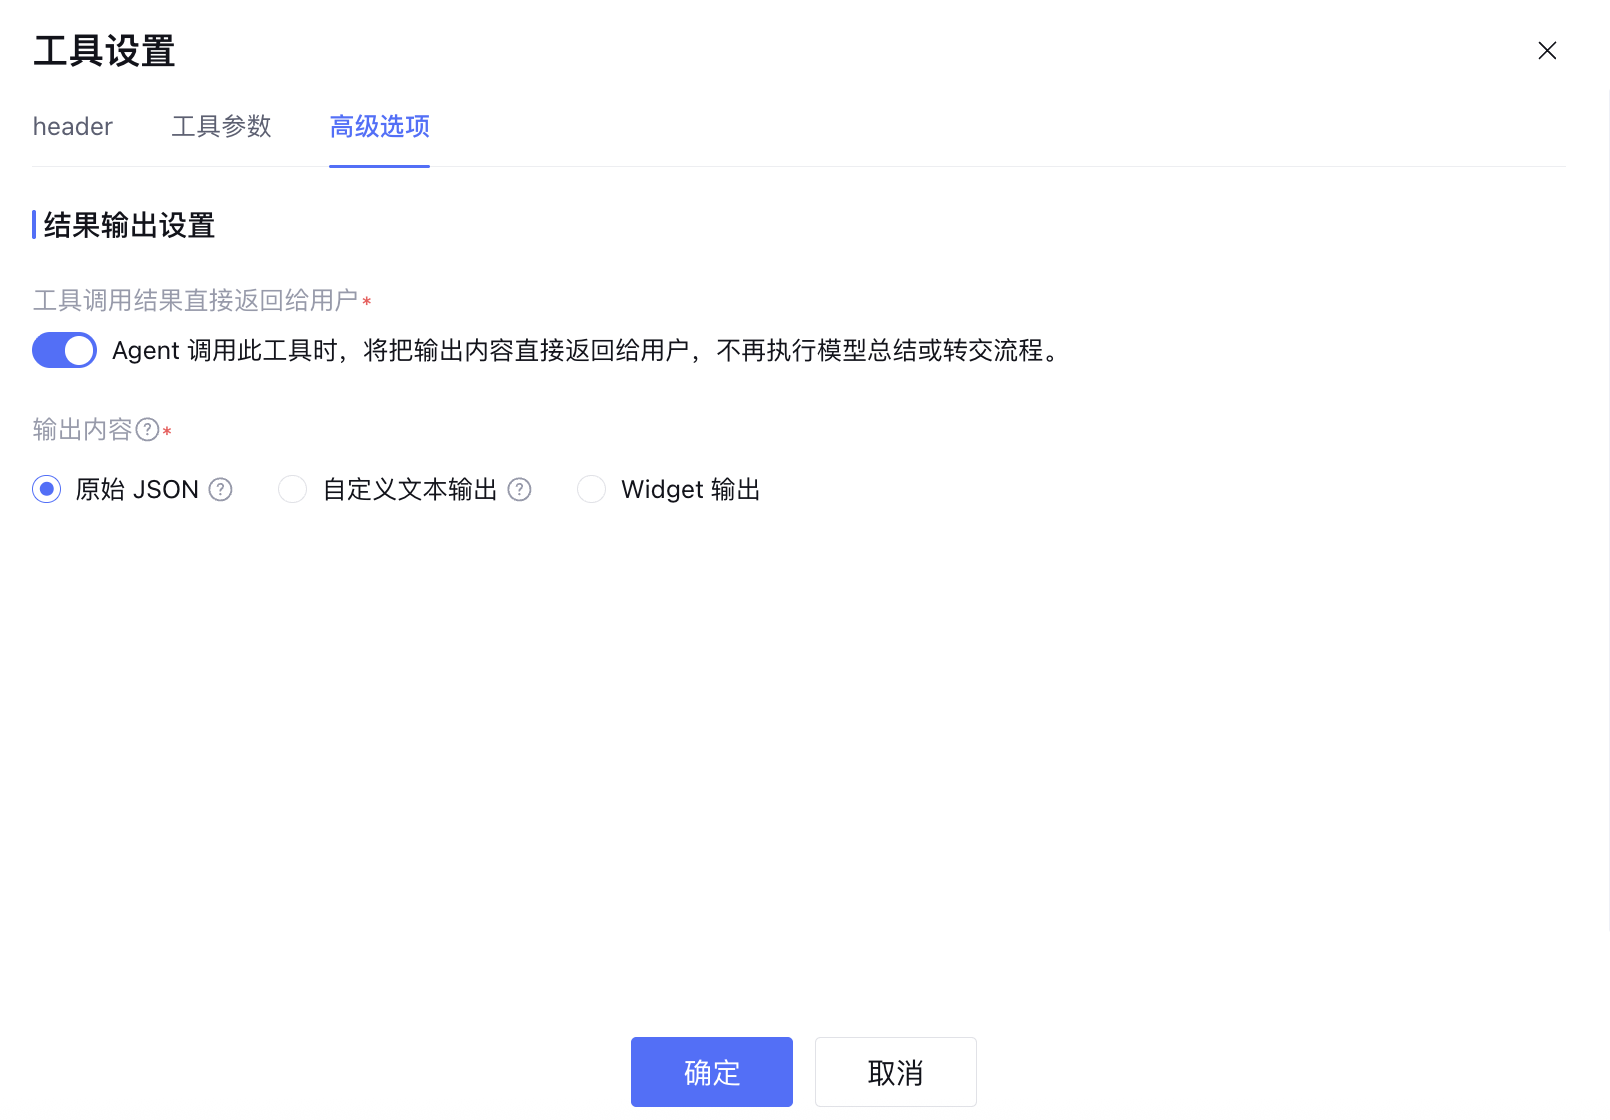
3. Advanced Options
In Tool Settings > Advanced Setting, you can configure Result Output Settings: when enabled, the tool results will be directly returned to the user without re-entering the model summarize, rewrite or transfer process. Support selecting the following output result formats:
Raw JSON: Return the tool output parameter in original JSON format.
Custom text output: Return custom text results, support inserting variables, including tool input/output parameters and application variables.
Once configured, when the user engages in dialogue with the Agent, the LLM will automatically judge when to require the use of a tool to better complete tasks.