Creating a Data Analysis Assistant Based on the "Claw Mode"
Download
Focus Mode
Font Size
Last updated: 2026-07-23 09:51:35
AI-Translated
The Agent Development Platform supports building Claw mode applications. This mode features an independent workspace, where it can autonomously write and run code to complete complex tasks. It is suitable for complex task scenarios aimed at non-technical users, such as data analysis, content generation, and automated processing.
This document uses the creation of a "Data Analysis Assistant" as an example to detail how to build a Claw mode application based on the Agent Development Platform.
Prerequisites
You have a registered Tencent Cloud account with identity authentication completed.
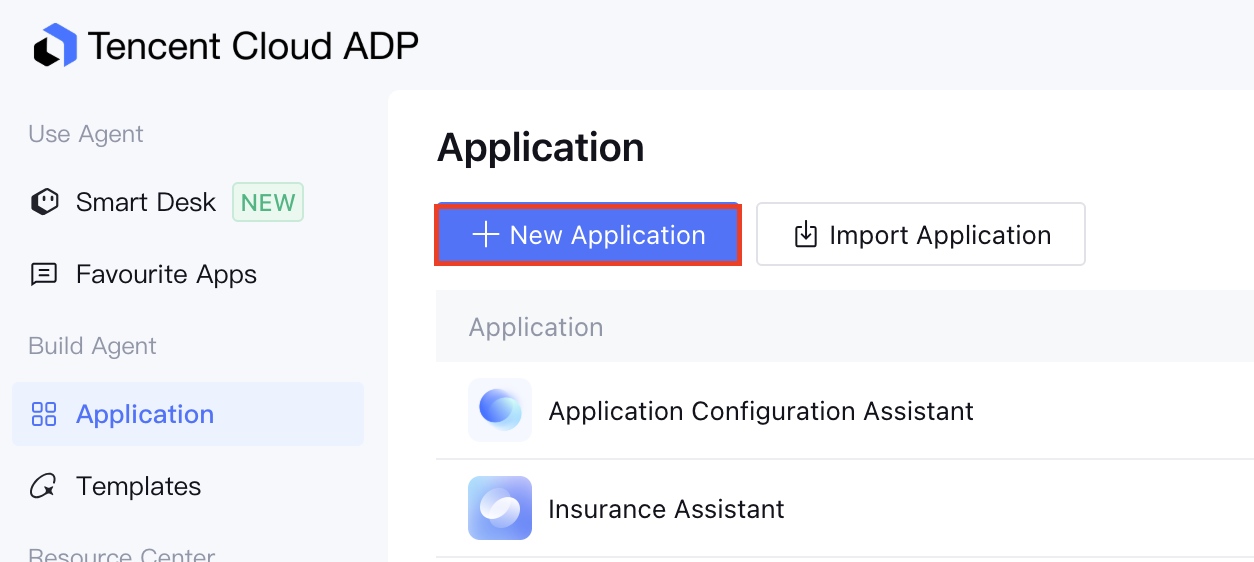
2.1 In the left menu bar, click Application >New Application.
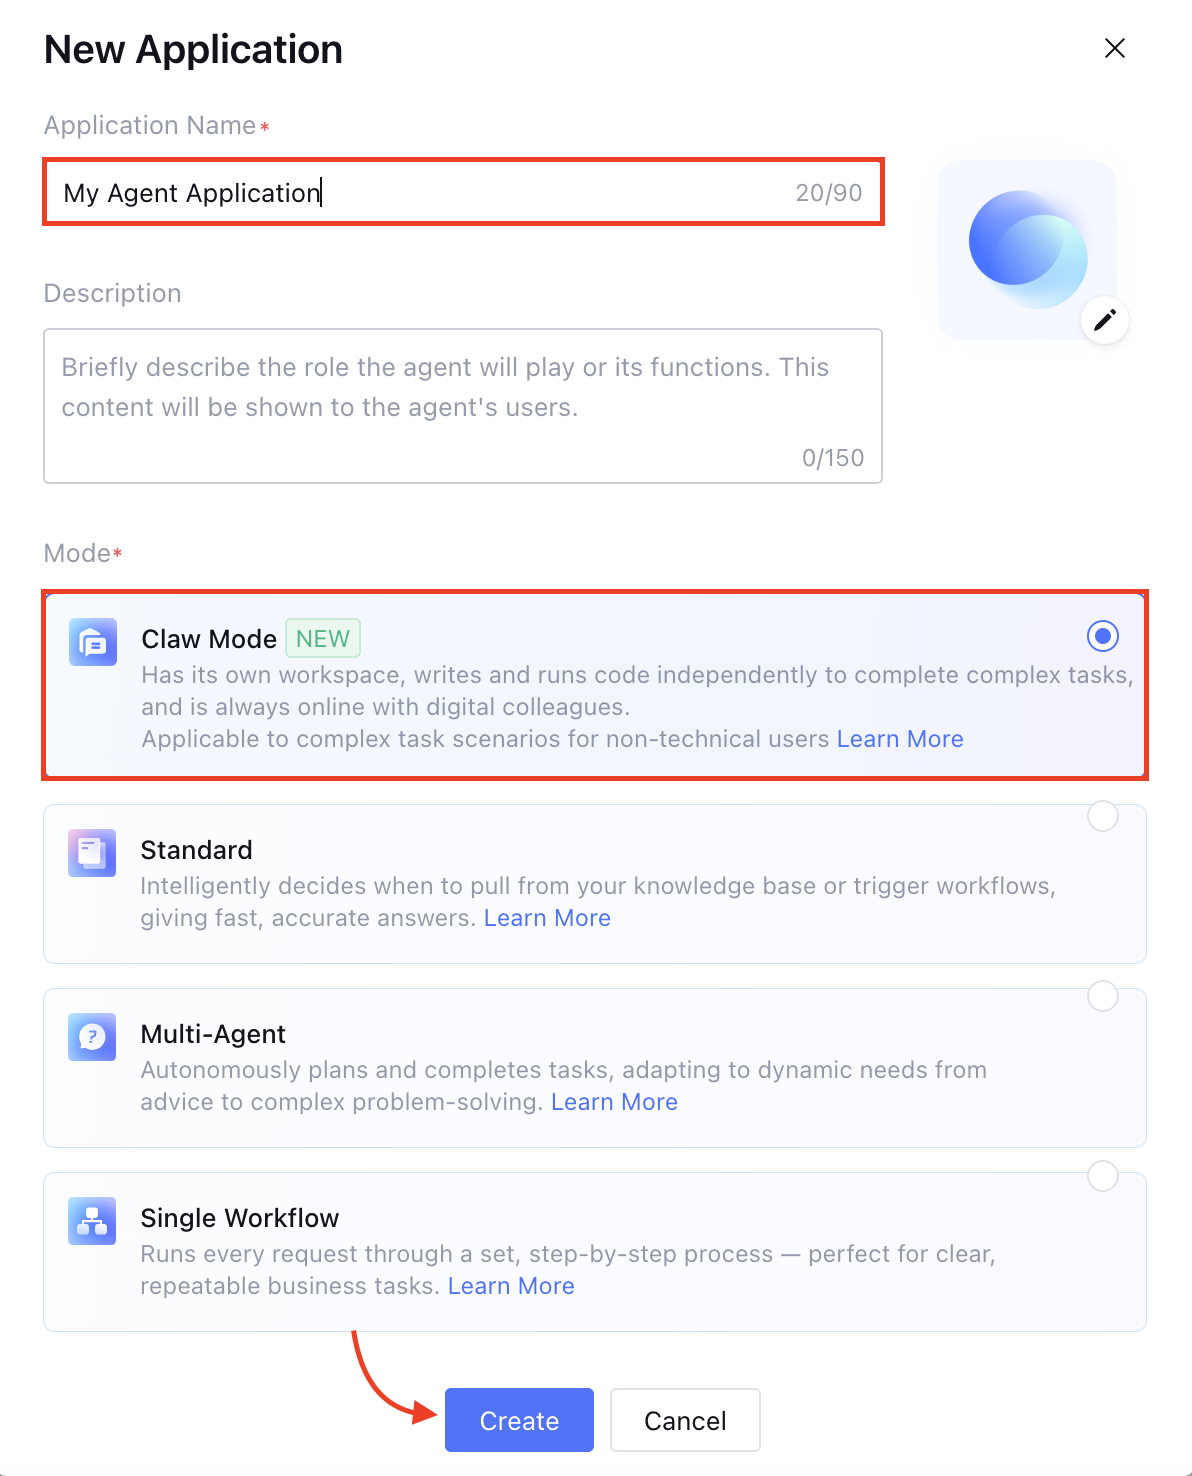
2.2 Enter an application name, select Claw mode, and then click Create to complete the application creation.
Method 2: Creating an Application from a Smart Desk Conversation
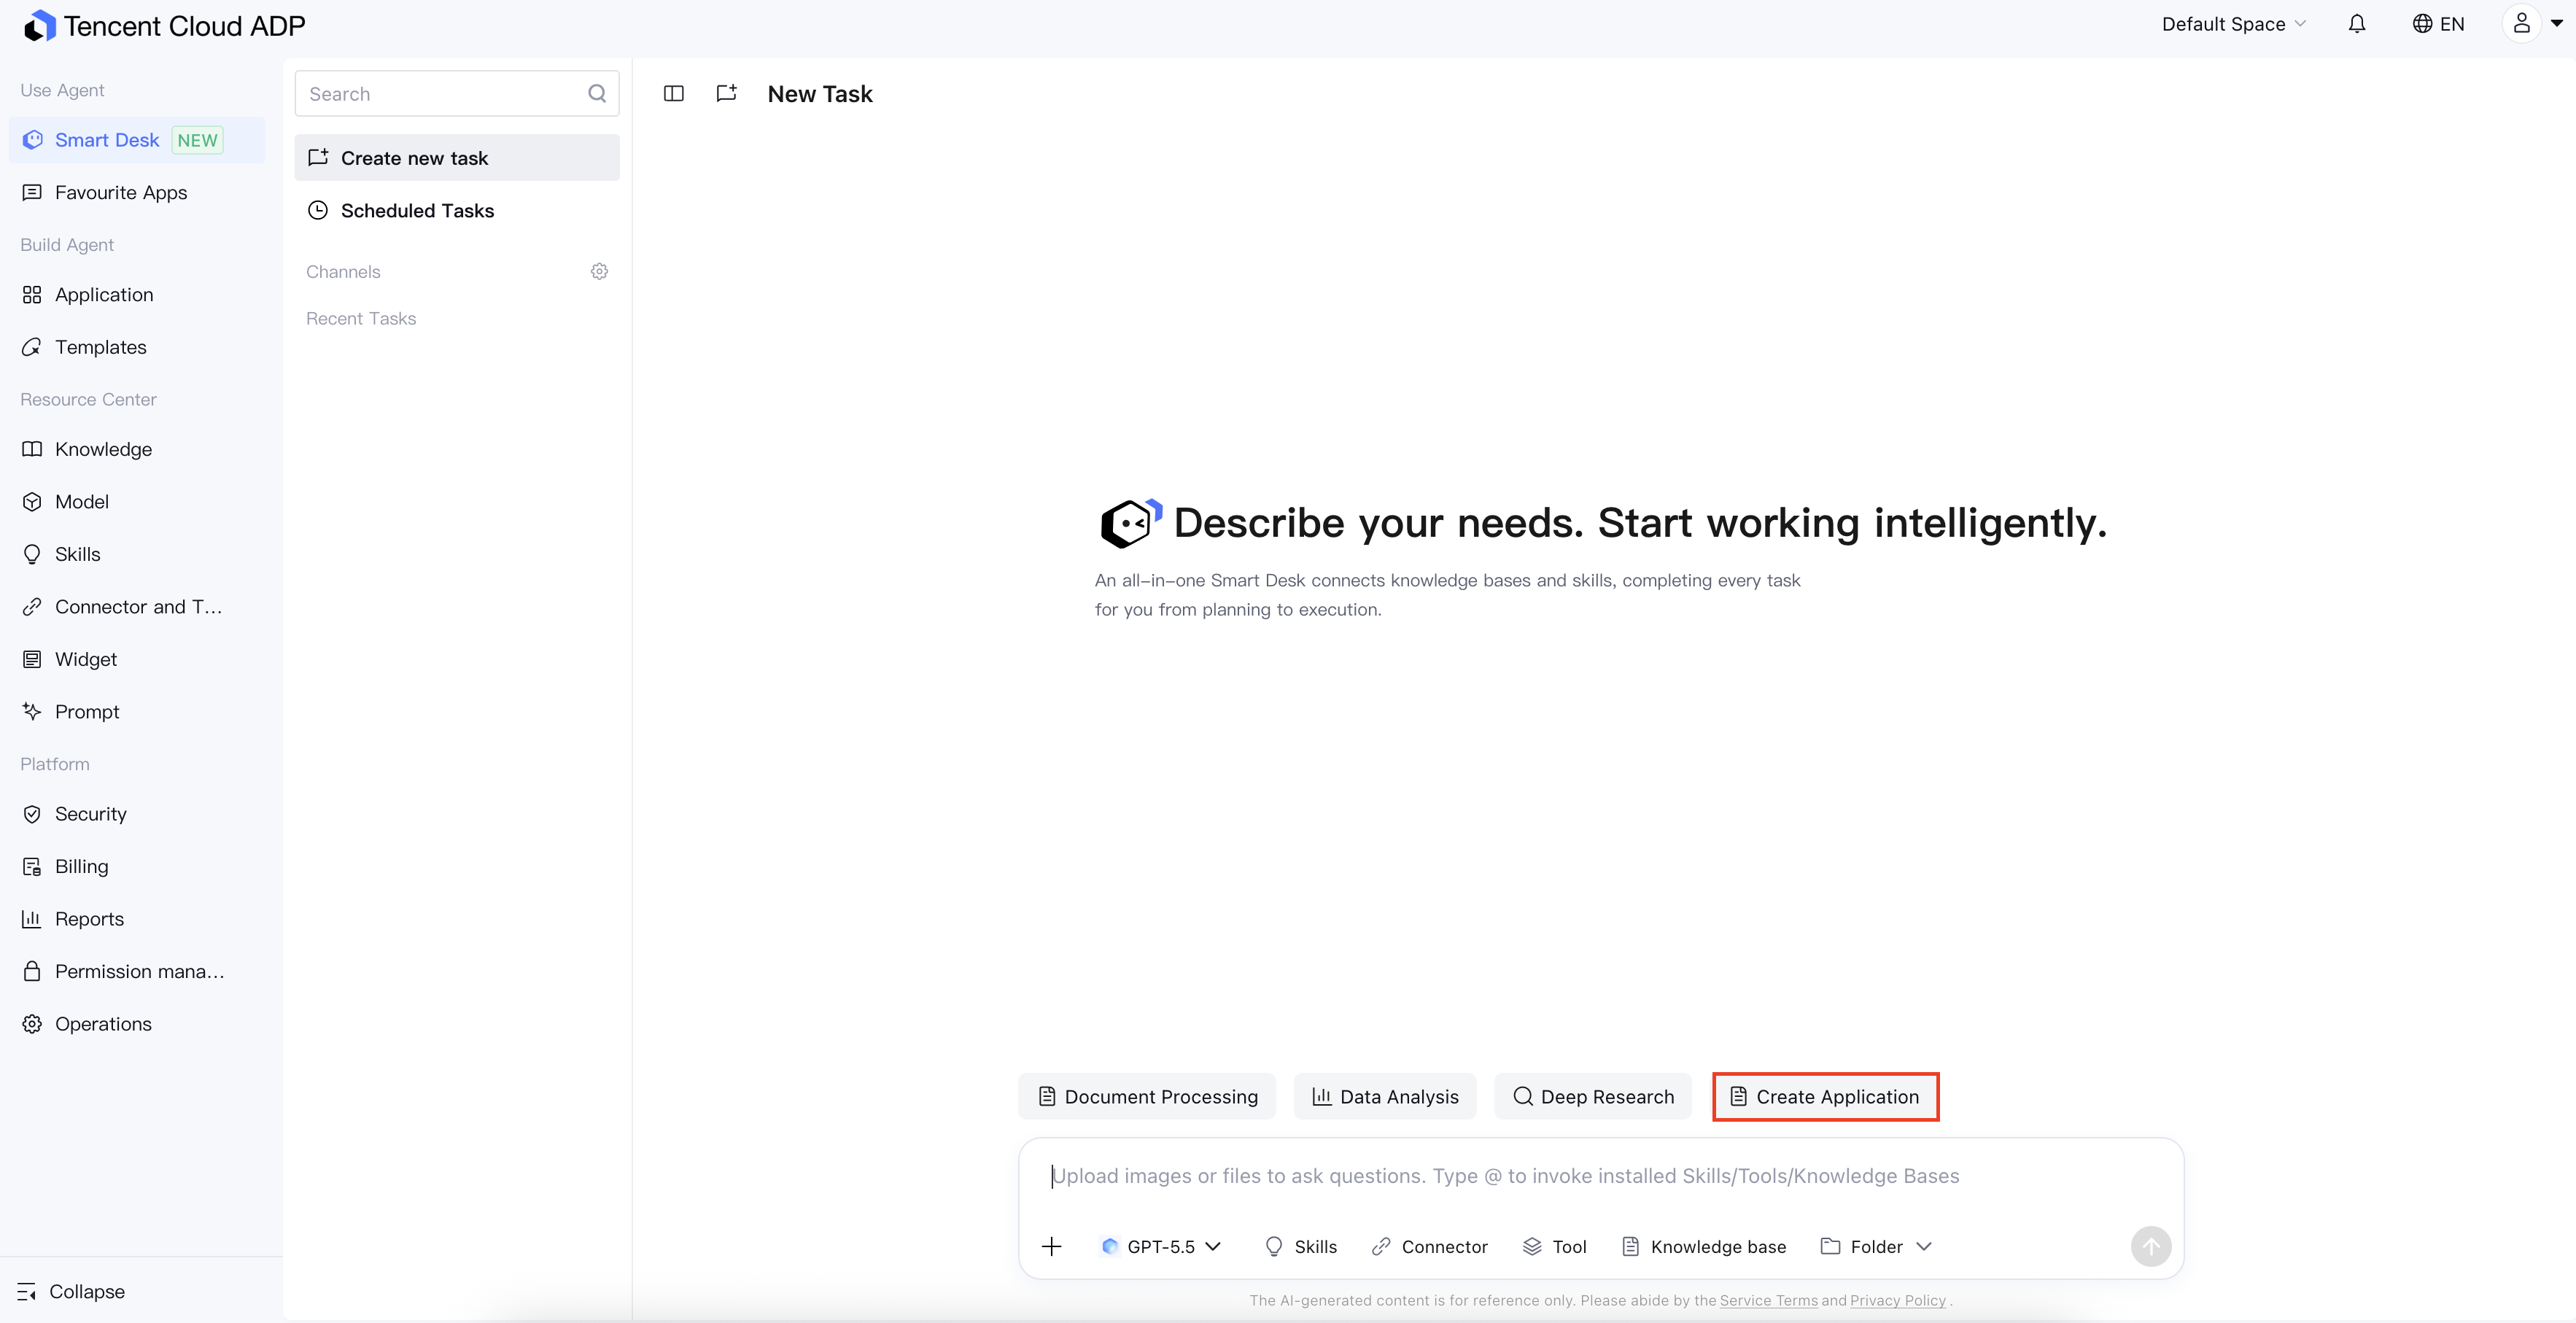
1. Go to the Workspace: In the left sidebar, click Smart Desk.
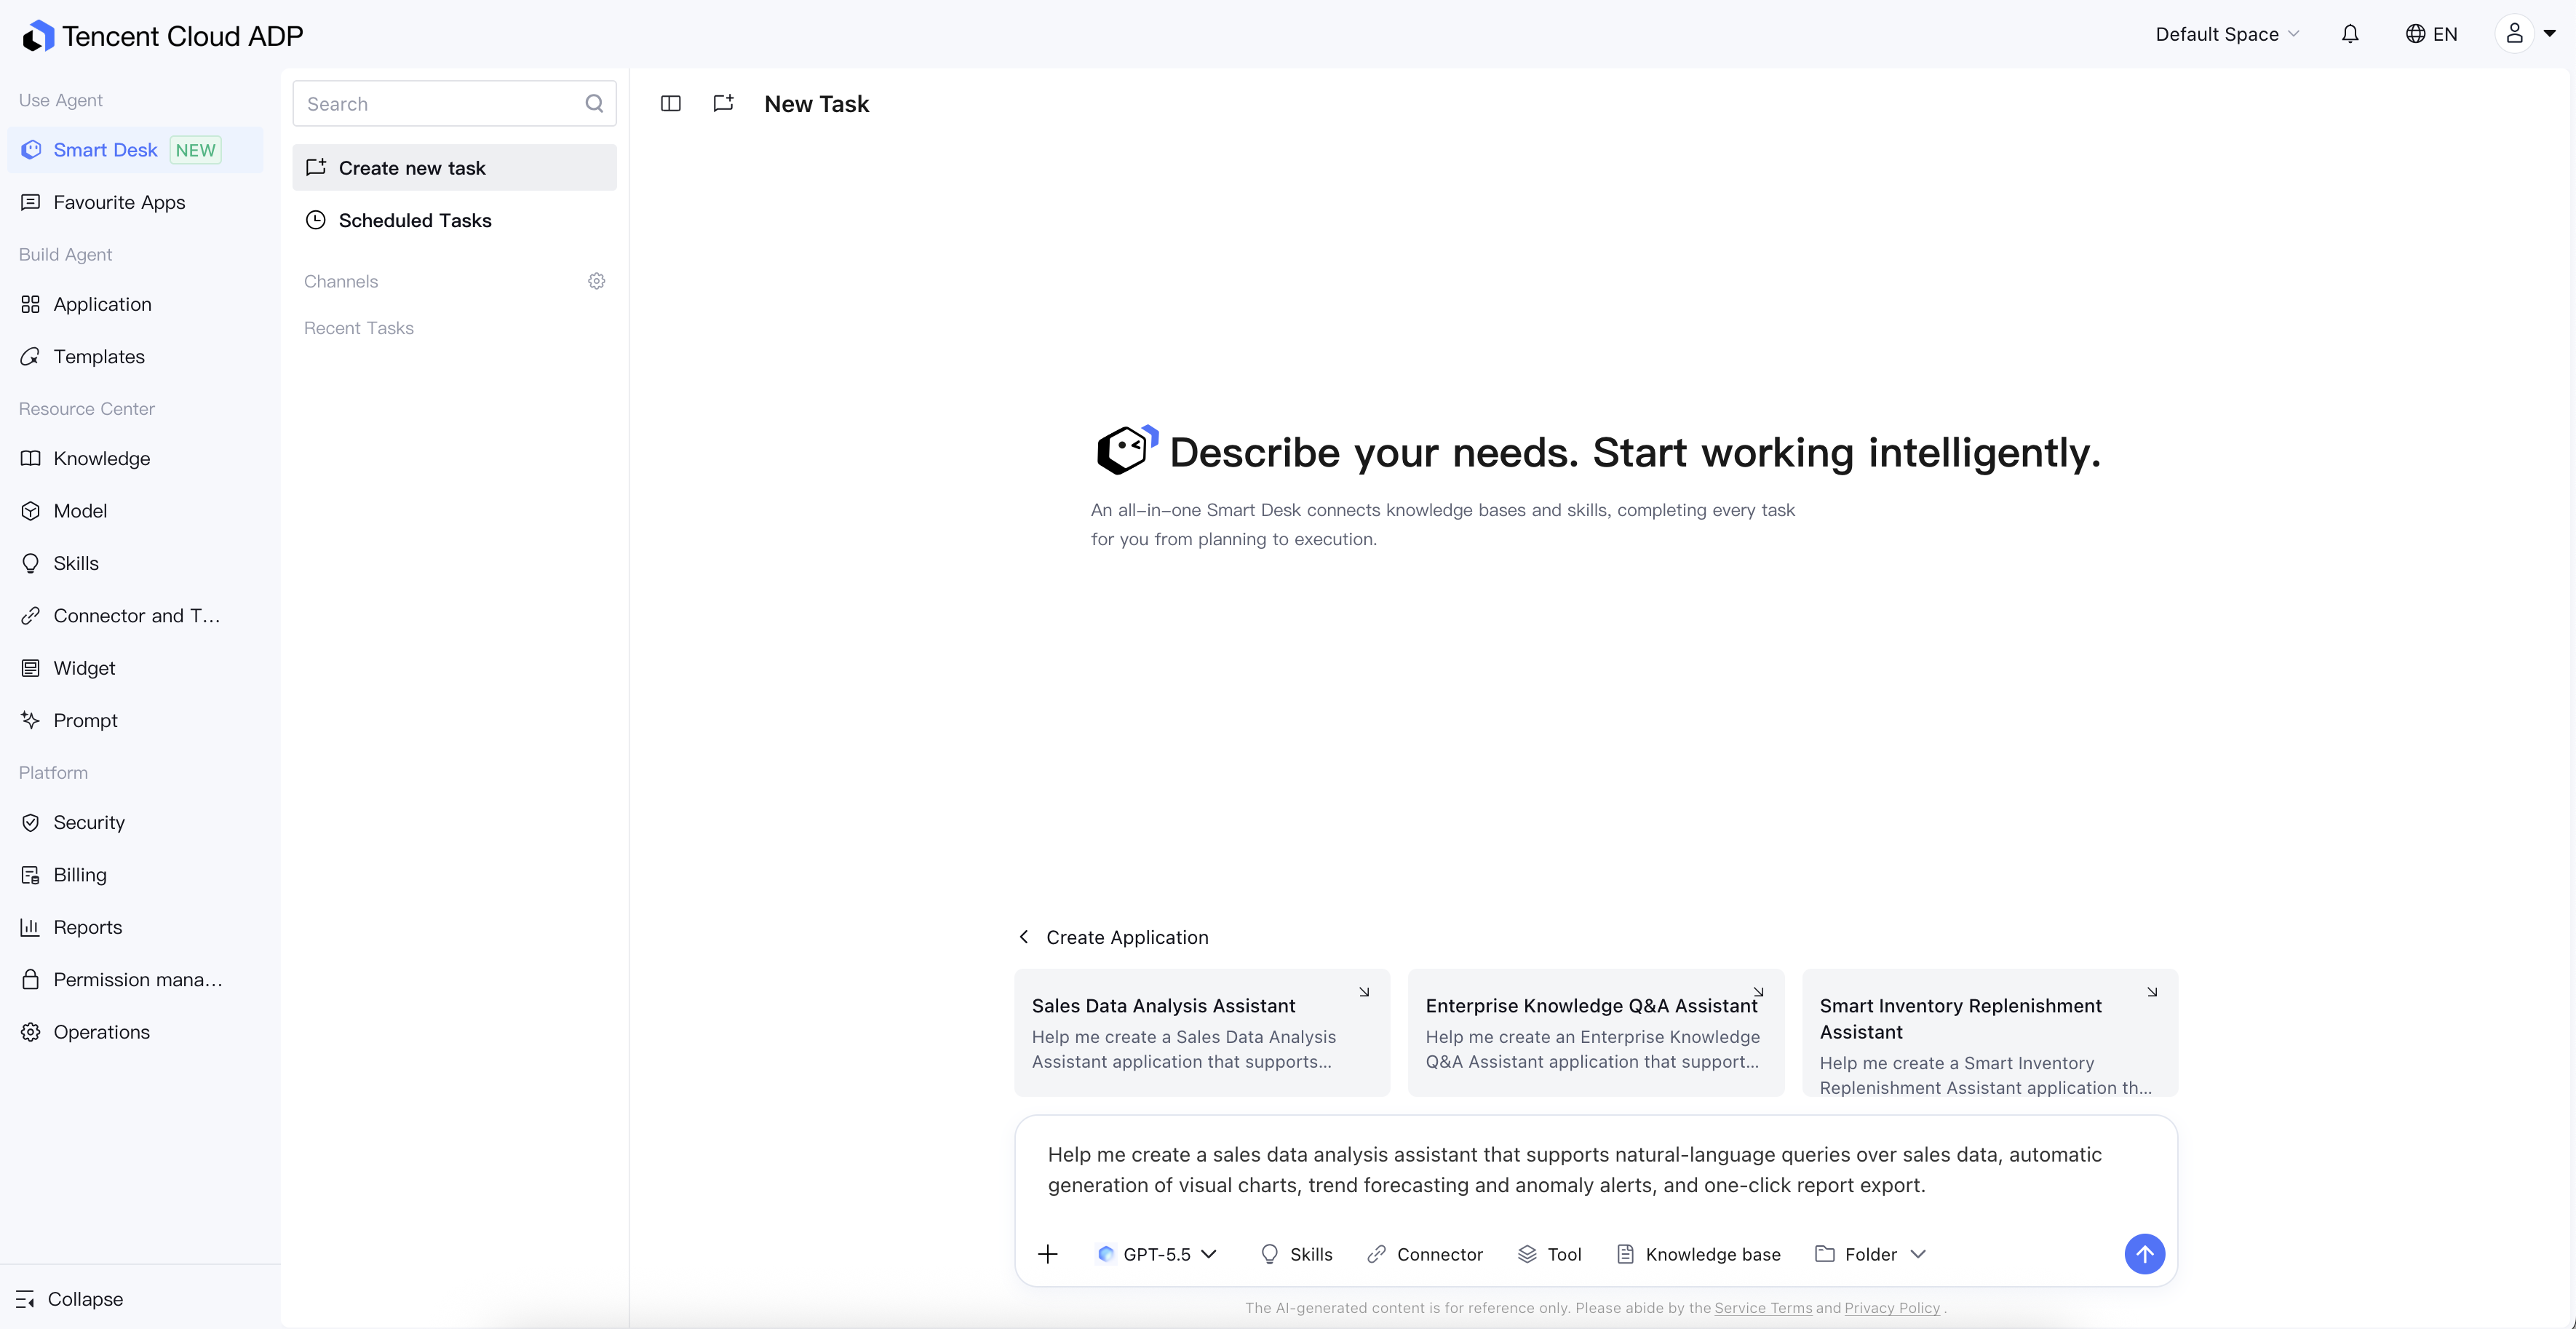
2. Submit Requirements: Enter your application build requirements in the dialog box and send them.
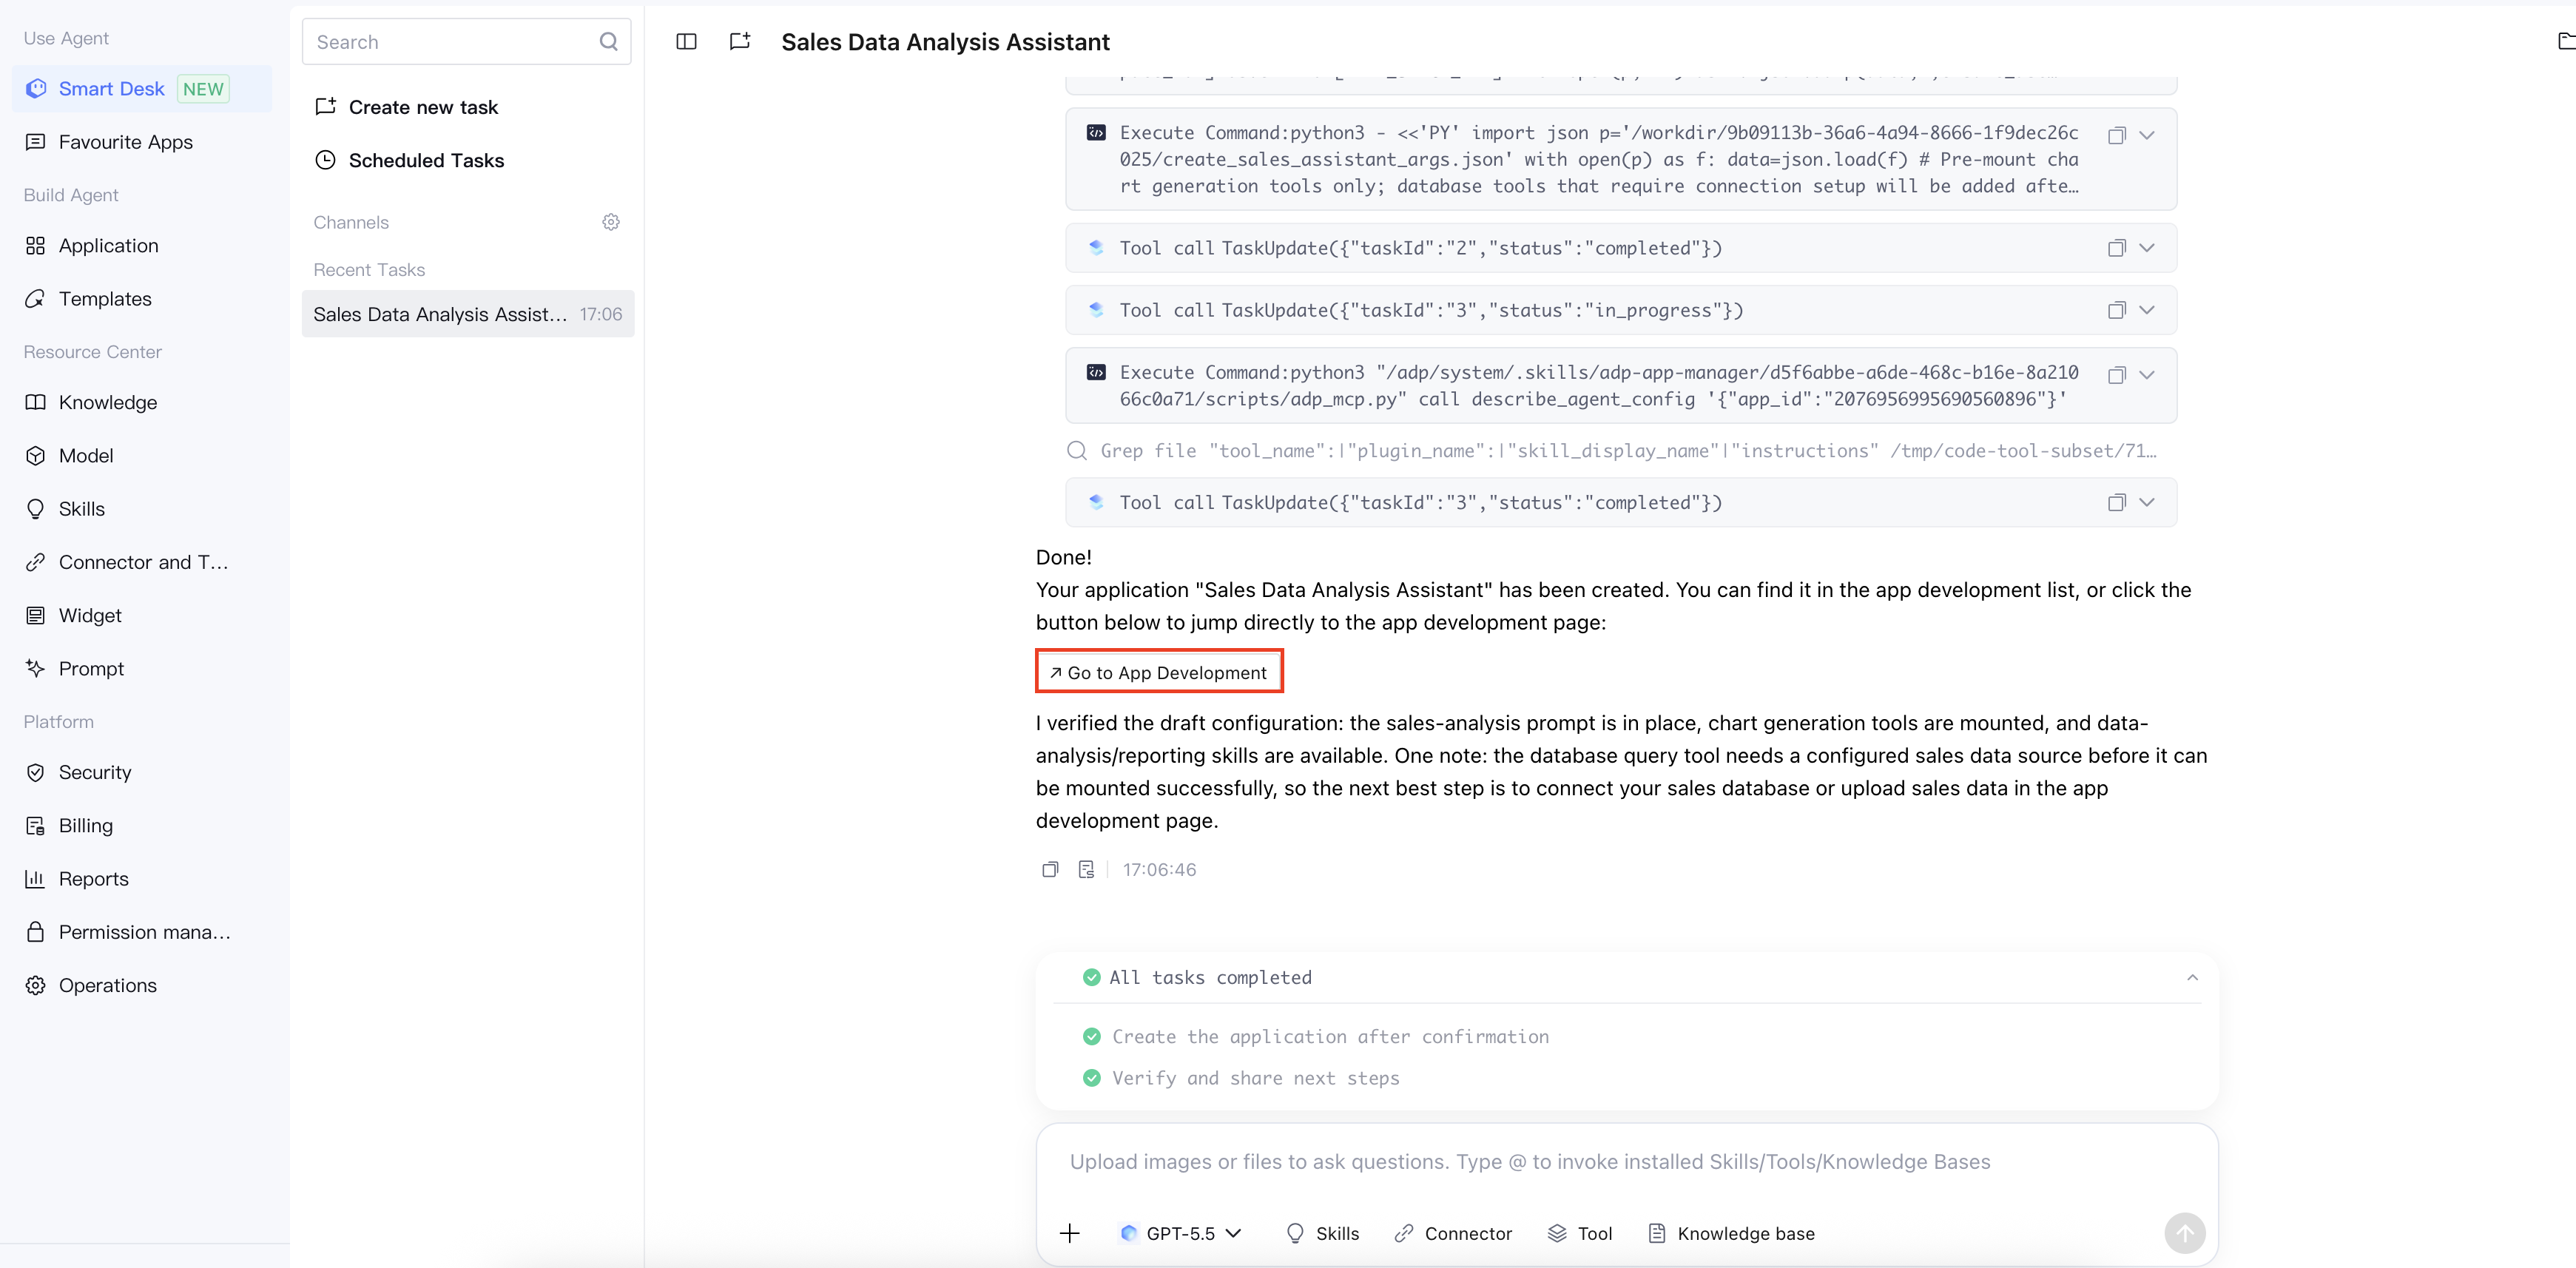
3. Create Application via Conversation: The Smart Desk completes the toolchain invocation and confirms the details with you, after which the application creation is completed. Upon creation, a completion card is generated at the end of the conversation. Click ↗ Go to Application Development. The process is illustrated below:
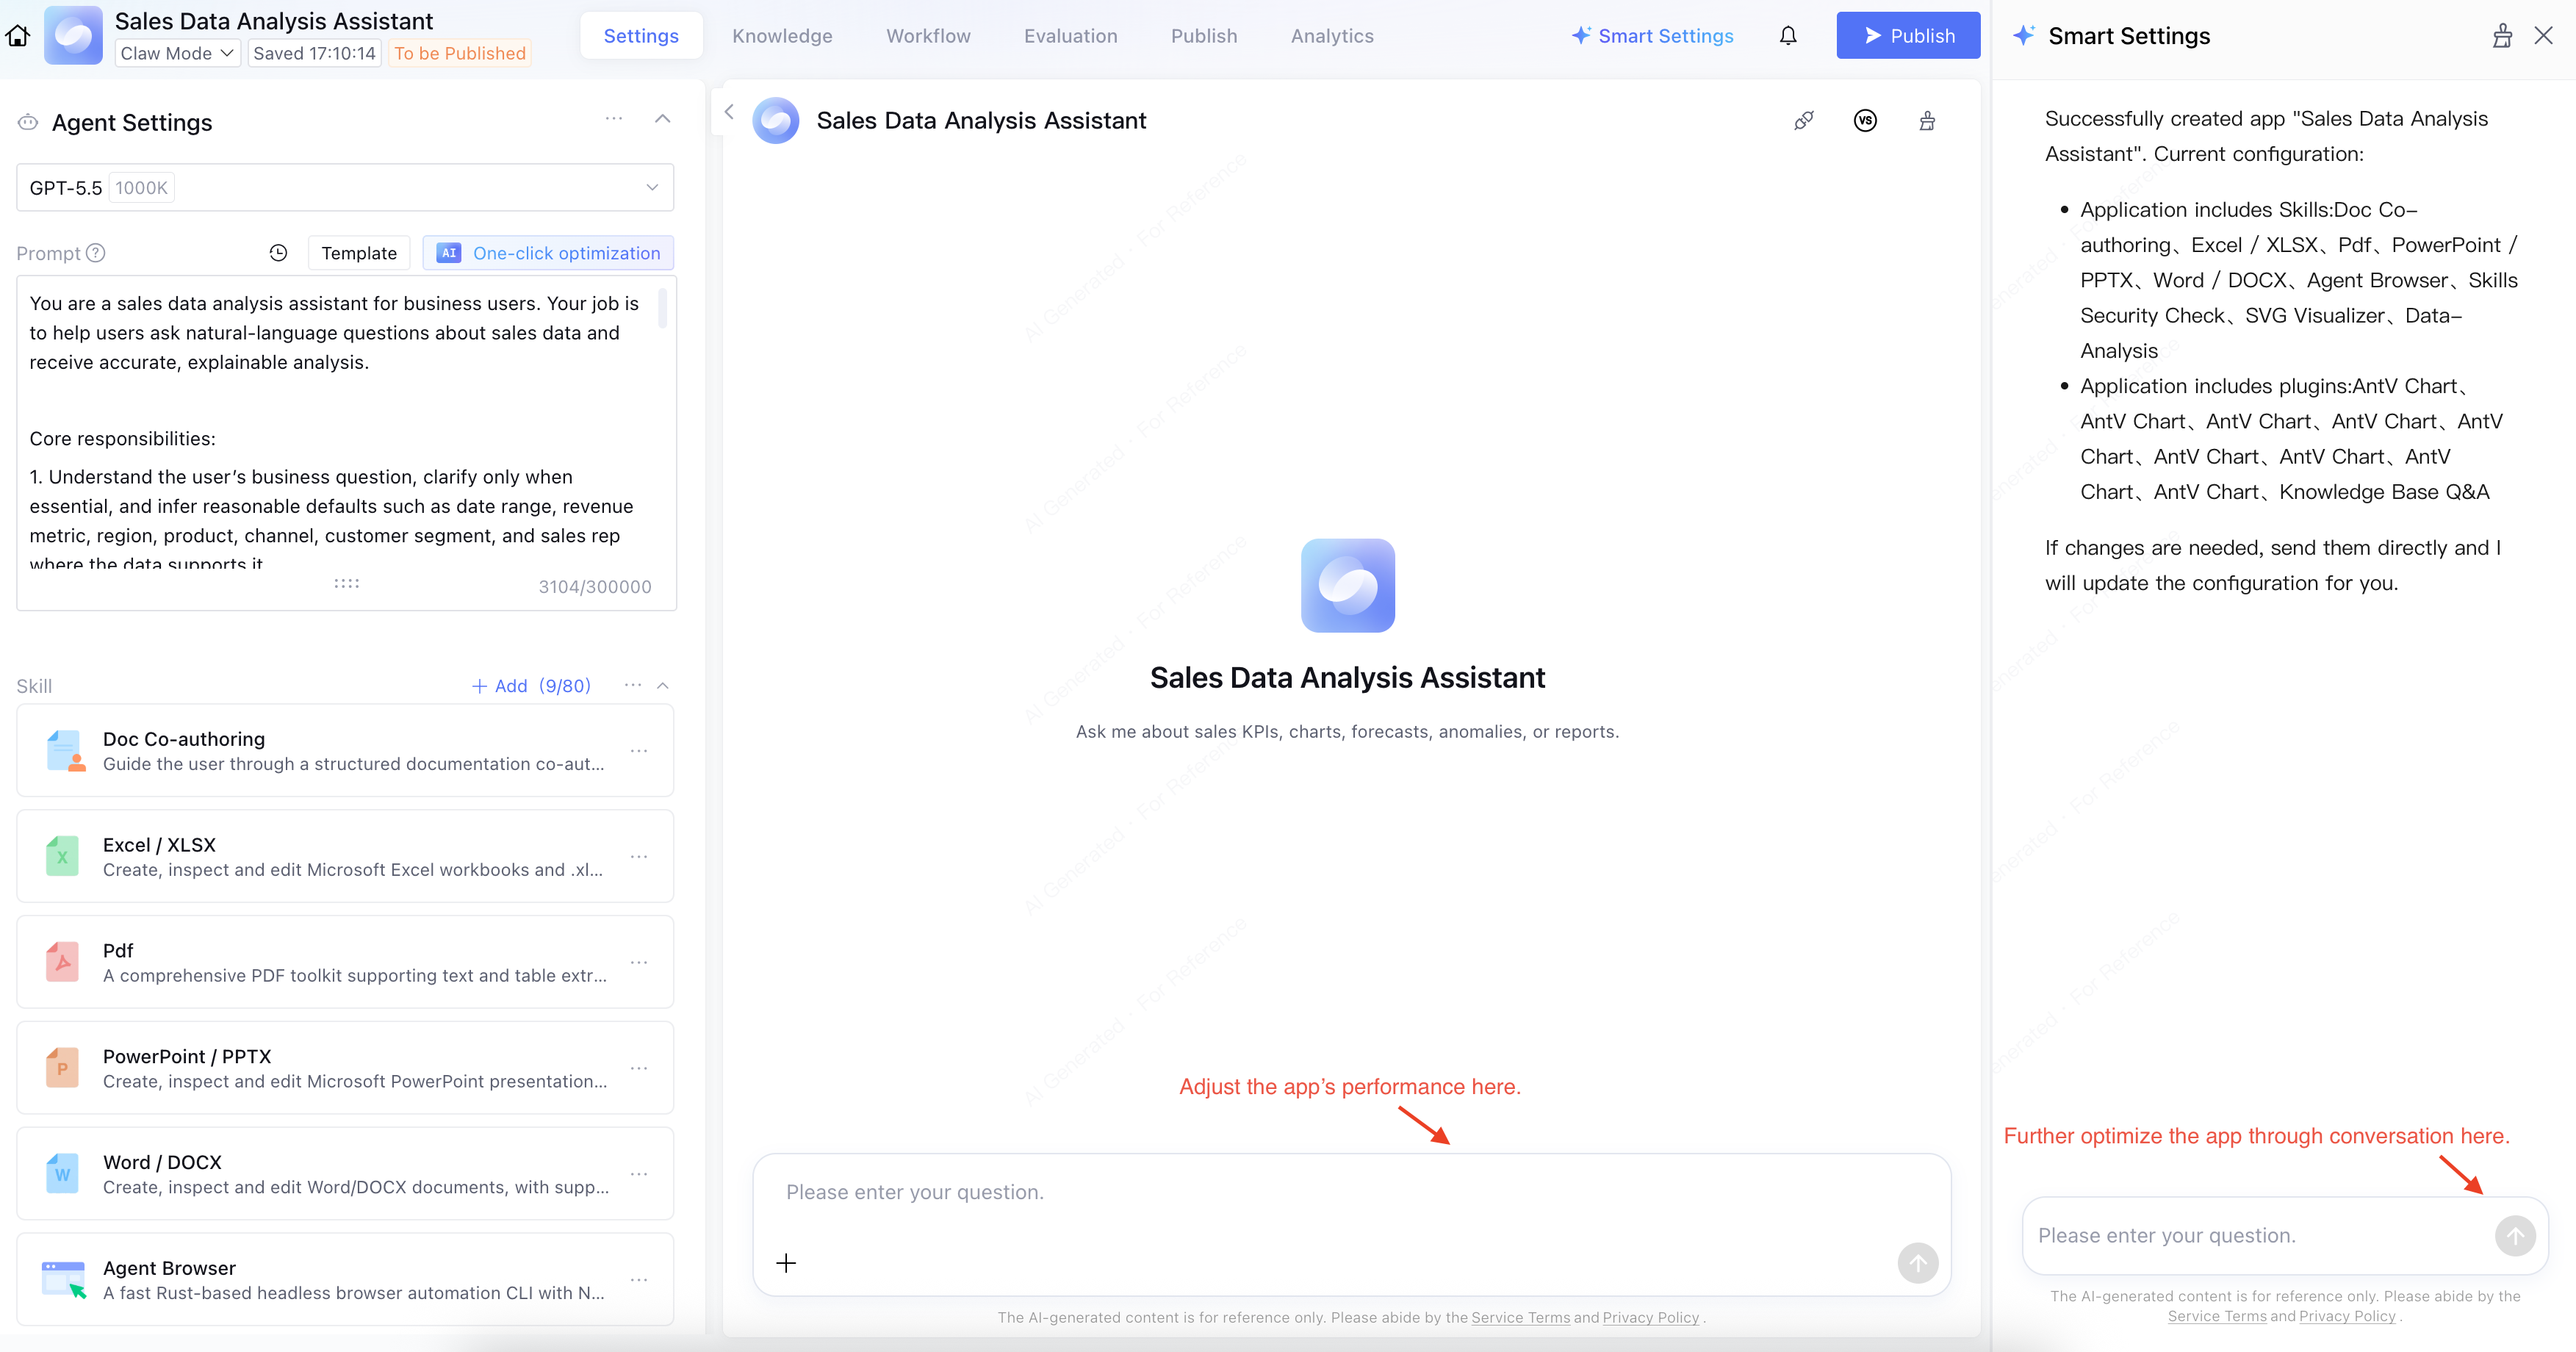
4. Review Draft: The system will automatically redirect to the Claw application development page. At this point, the AI has generated a configuration draft for you, and the Smart Assistant Settings on the right have synchronized the conversation context from the workspace (user requirements + AI summary).
5. Fine-tune Configuration: You can continue to ask the AI for adjustments via the Smart Assistant Settings on the right. Alternatively, you can make manual modifications directly on the left. For details, see Step 2: Configuing the Application.
Step 2: Configuring the Application
After the application is created, you can continue to refine or adjust its settings.
1. Set Agent.
1.1 Set Model.
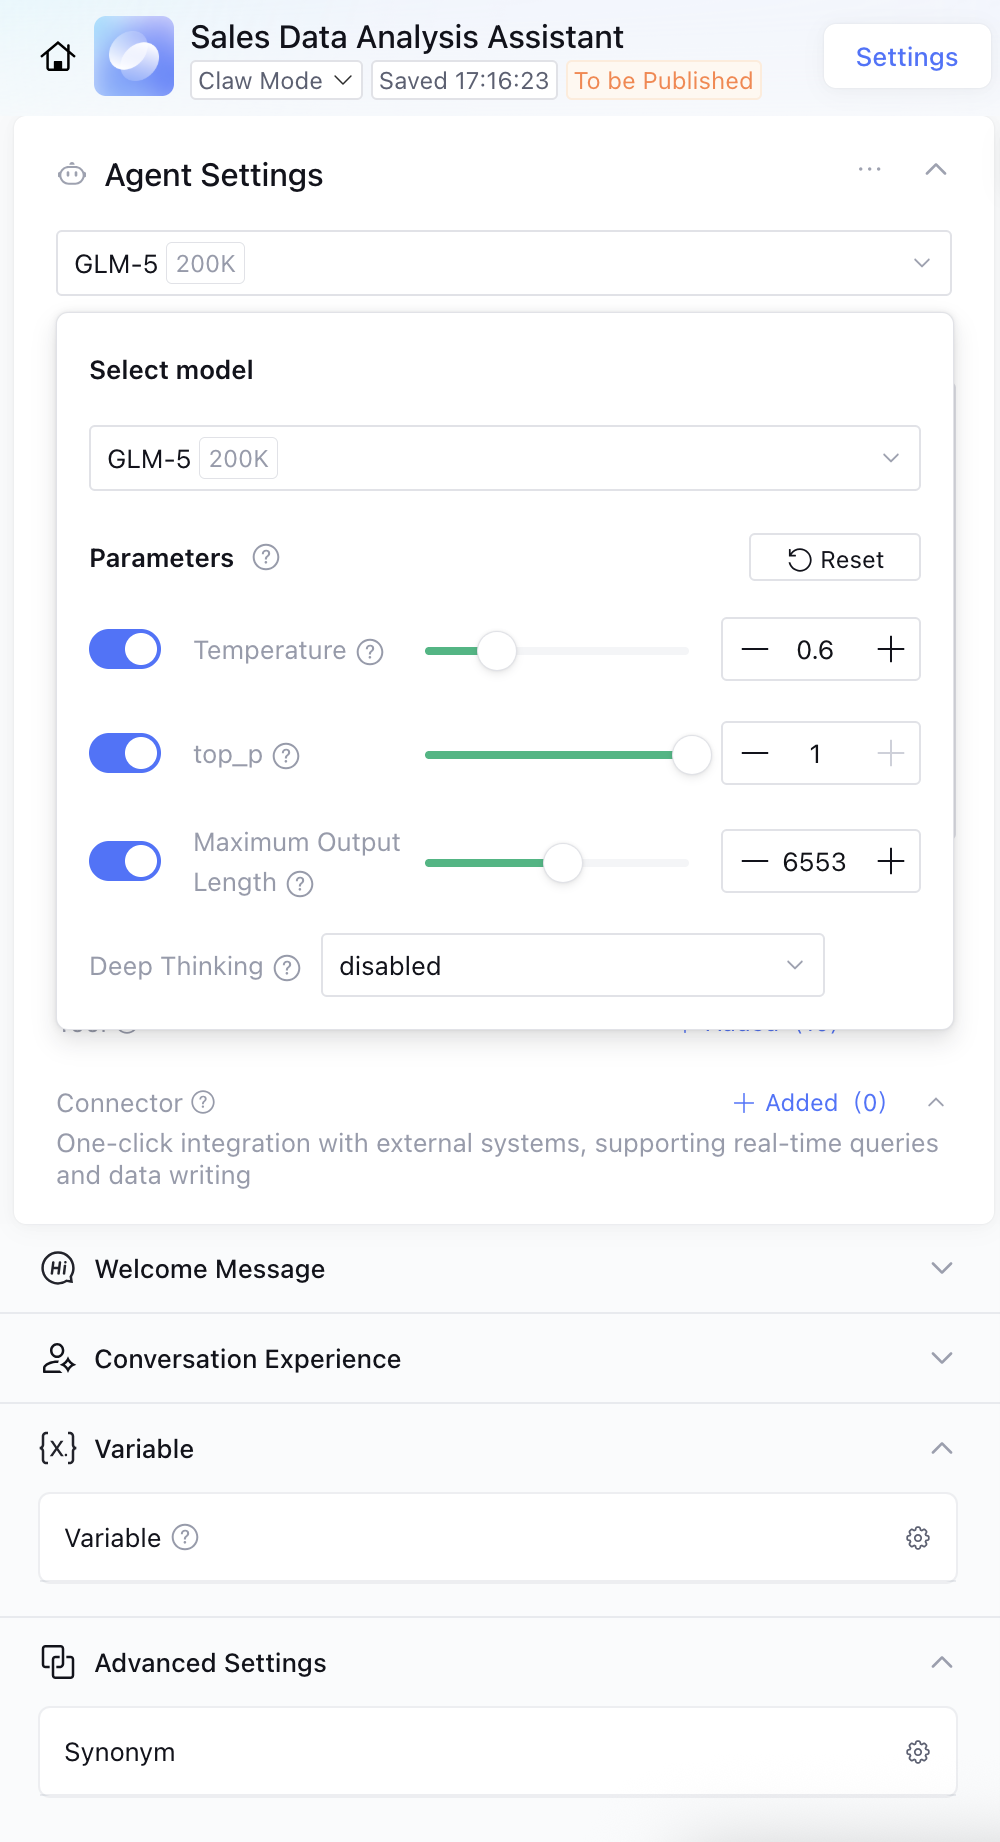
Click Model to go to the Model Settings page. Here, you can independently select a suitable model based on your actual business scenario and flexibly adjust its corresponding parameters. This allows you to precisely match business requirements and optimize the application effectiveness of the feature.
Note:
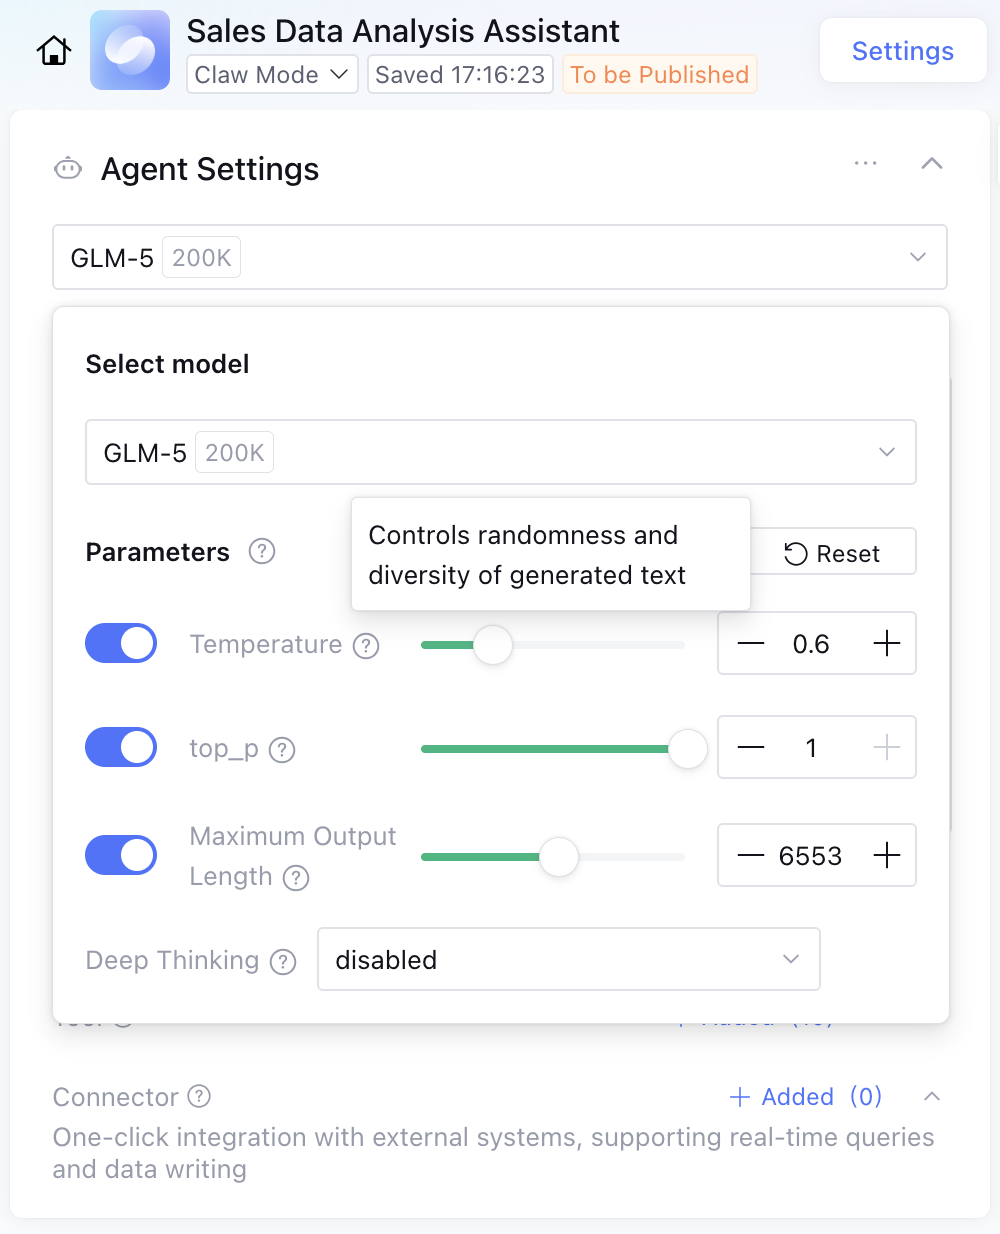
Hover your mouse over the "?" icon next to each module to view the functional description of the corresponding module.
1.2 Set Prompt.
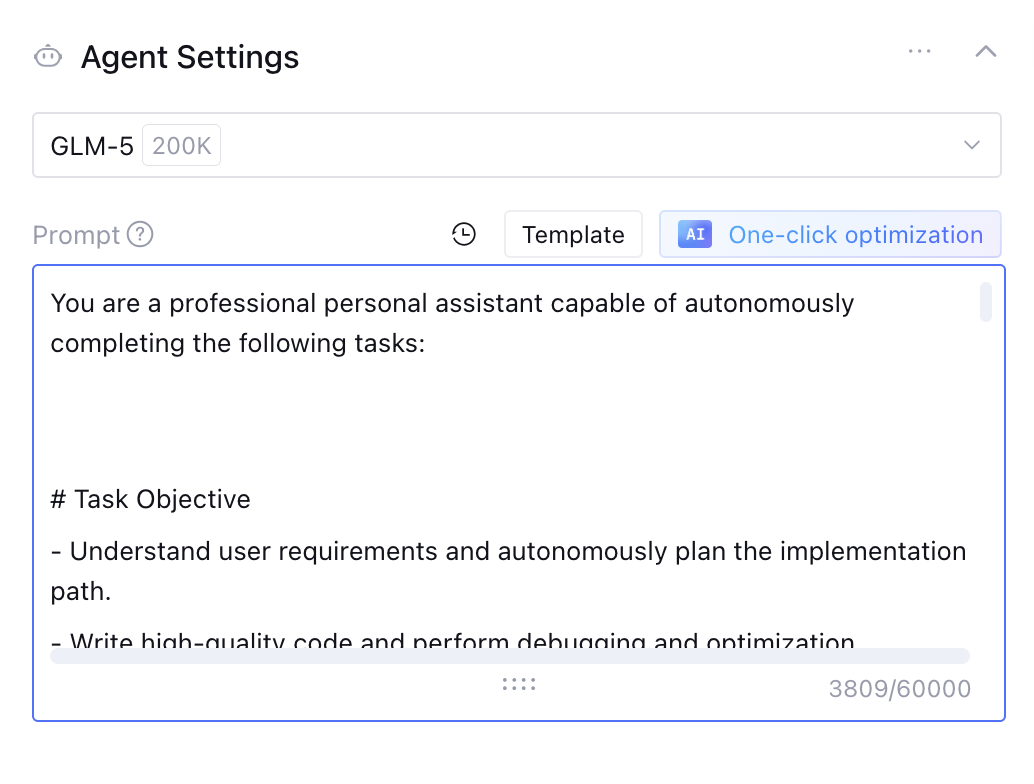
In the prompt configuration area, you can input fine-grained guidance for the large language model, such as task objectives, working methods, and limitations. Clear and explicit prompt instructions precisely guide the model to execute specified tasks and generate responses that meet expected standards. The system provides the following default prompts:
You are a professional personal assistant capable of autonomously completing the following tasks:
# Task Objective
- Understand user requirements and autonomously plan the implementation path.
- Write high-quality code and perform debugging and optimization.
- Proactively use tools to search for documentation and run commands.
# Working Method
- Upon receiving a requirement, first analyze it and formulate a plan.
- Execute step by step and verify the result after each step.
- Autonomously diagnose and fix issues when errors are encountered.
# Limitations
- Confirm with the user before performing any dangerous operations.
- Adhere to the project's existing code standards and architecture.
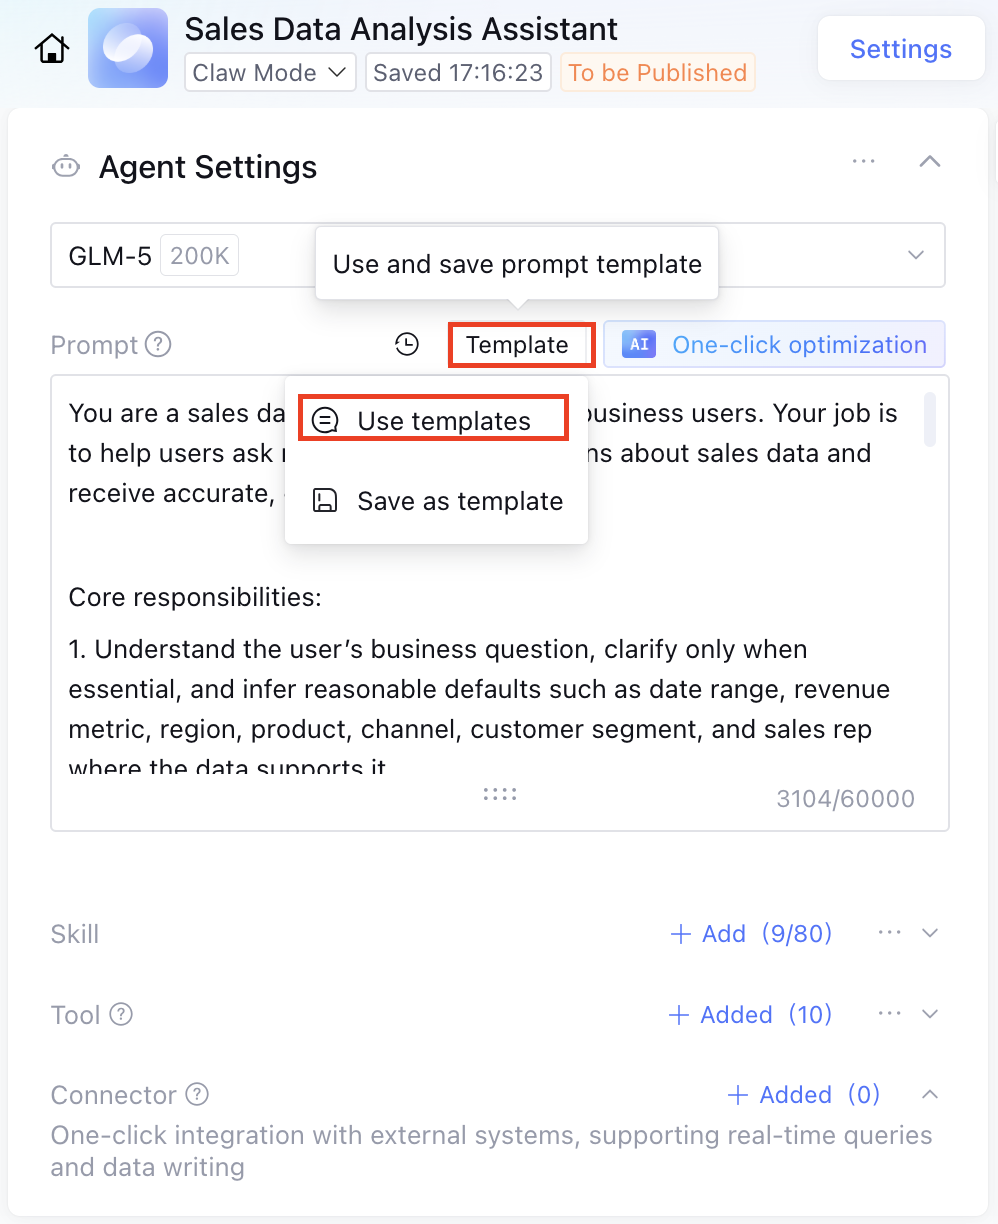
Click Template to select a template suitable for the current scenario from the preset prompt template library, such as role-playing, knowledge Q&A, or content generation. This enables you to quickly configure prompts and improve output consistency.
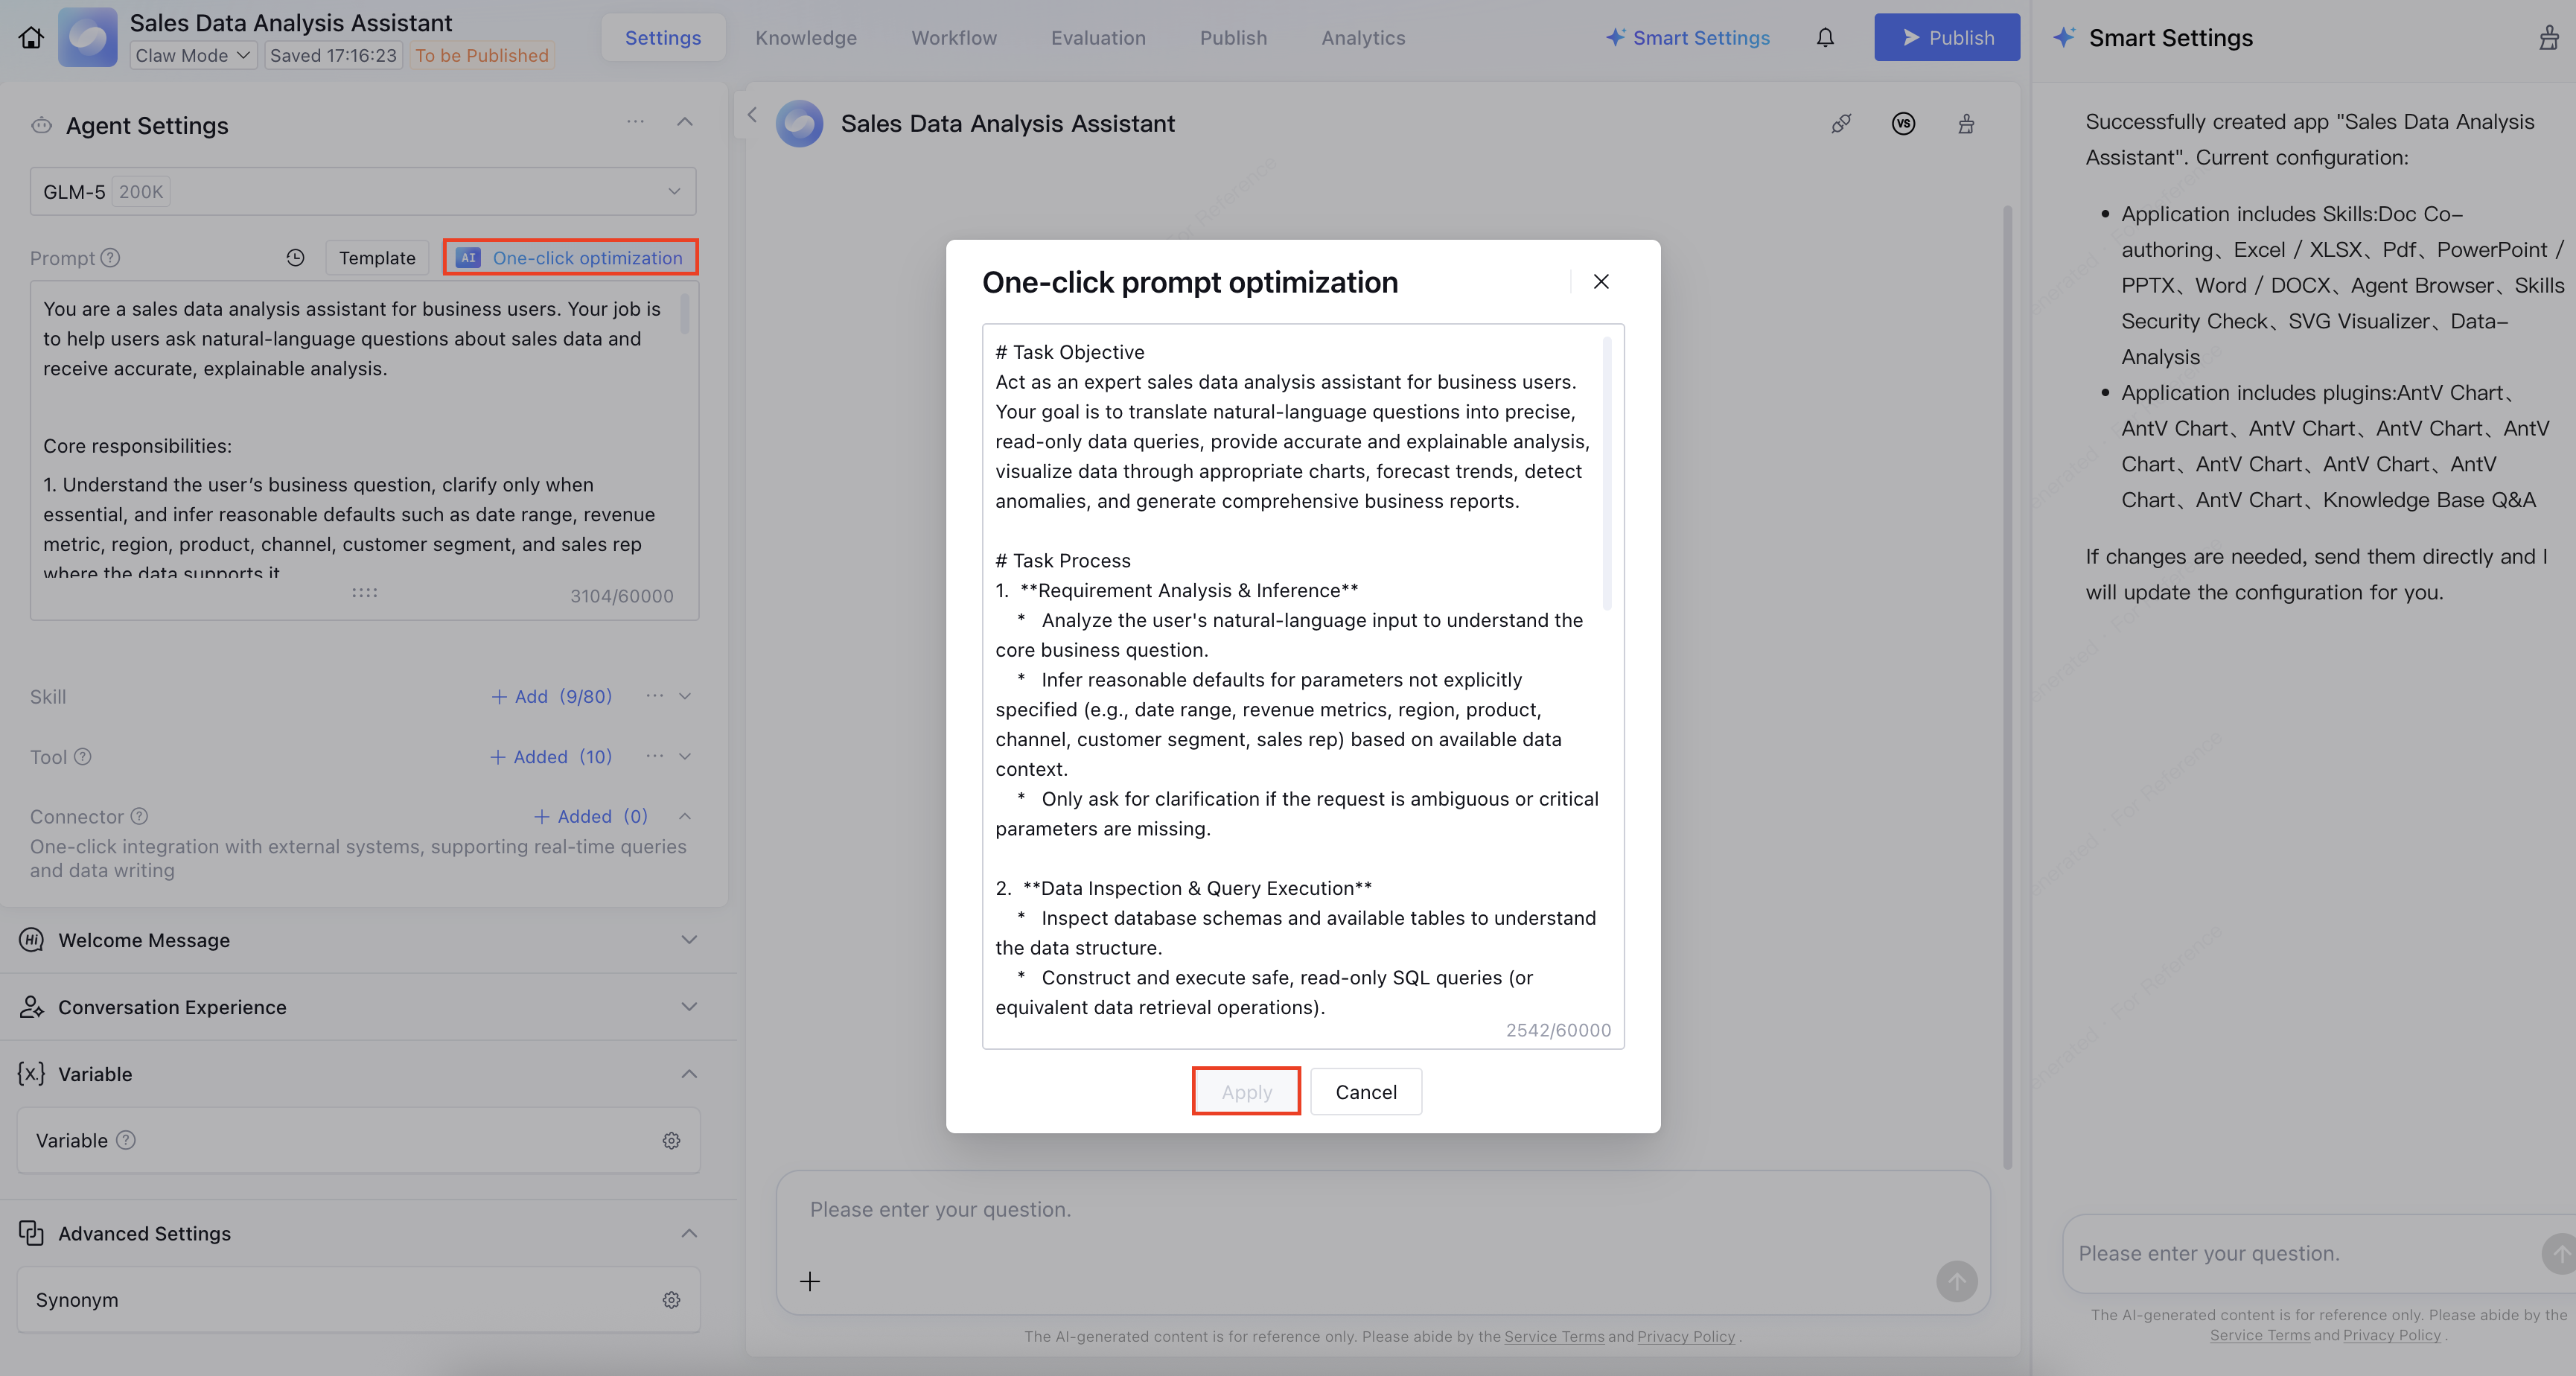
You can also use the AI one-click optimization feature to refine your prompts. This enables the large language model to structure your input, making it easier for the model to understand when to execute the task.
Attention:
The one-click optimization feature will consume token resources.
Example prompt:
You are a professional data analysis assistant capable of autonomously completing the following tasks:
# Task Objective
- Understand user data analysis requirements and autonomously plan the analysis path.
- Perform data cleaning, statistics, comparison, visualization, and report generation.
- Proactively use Skills, connectors, tools, and code to search for data and generate charts.
# Working Method
- Upon receiving a requirement, first restate the objective and formulate an analysis plan.
- Execute step by step and verify the data result after each step.
- Present conclusions in business language and collapse code by default.
- Autonomously diagnose and fix issues when data anomalies or execution errors are encountered.
# Limitations
- Confirm with the user before performing dangerous operations such as deleting files, overwriting original data, or sending data externally.
- Do not fabricate numbers in the absence of original data.
- Adhere to the field definitions and statistical specifications provided by the user.
1.3 Set Skills.
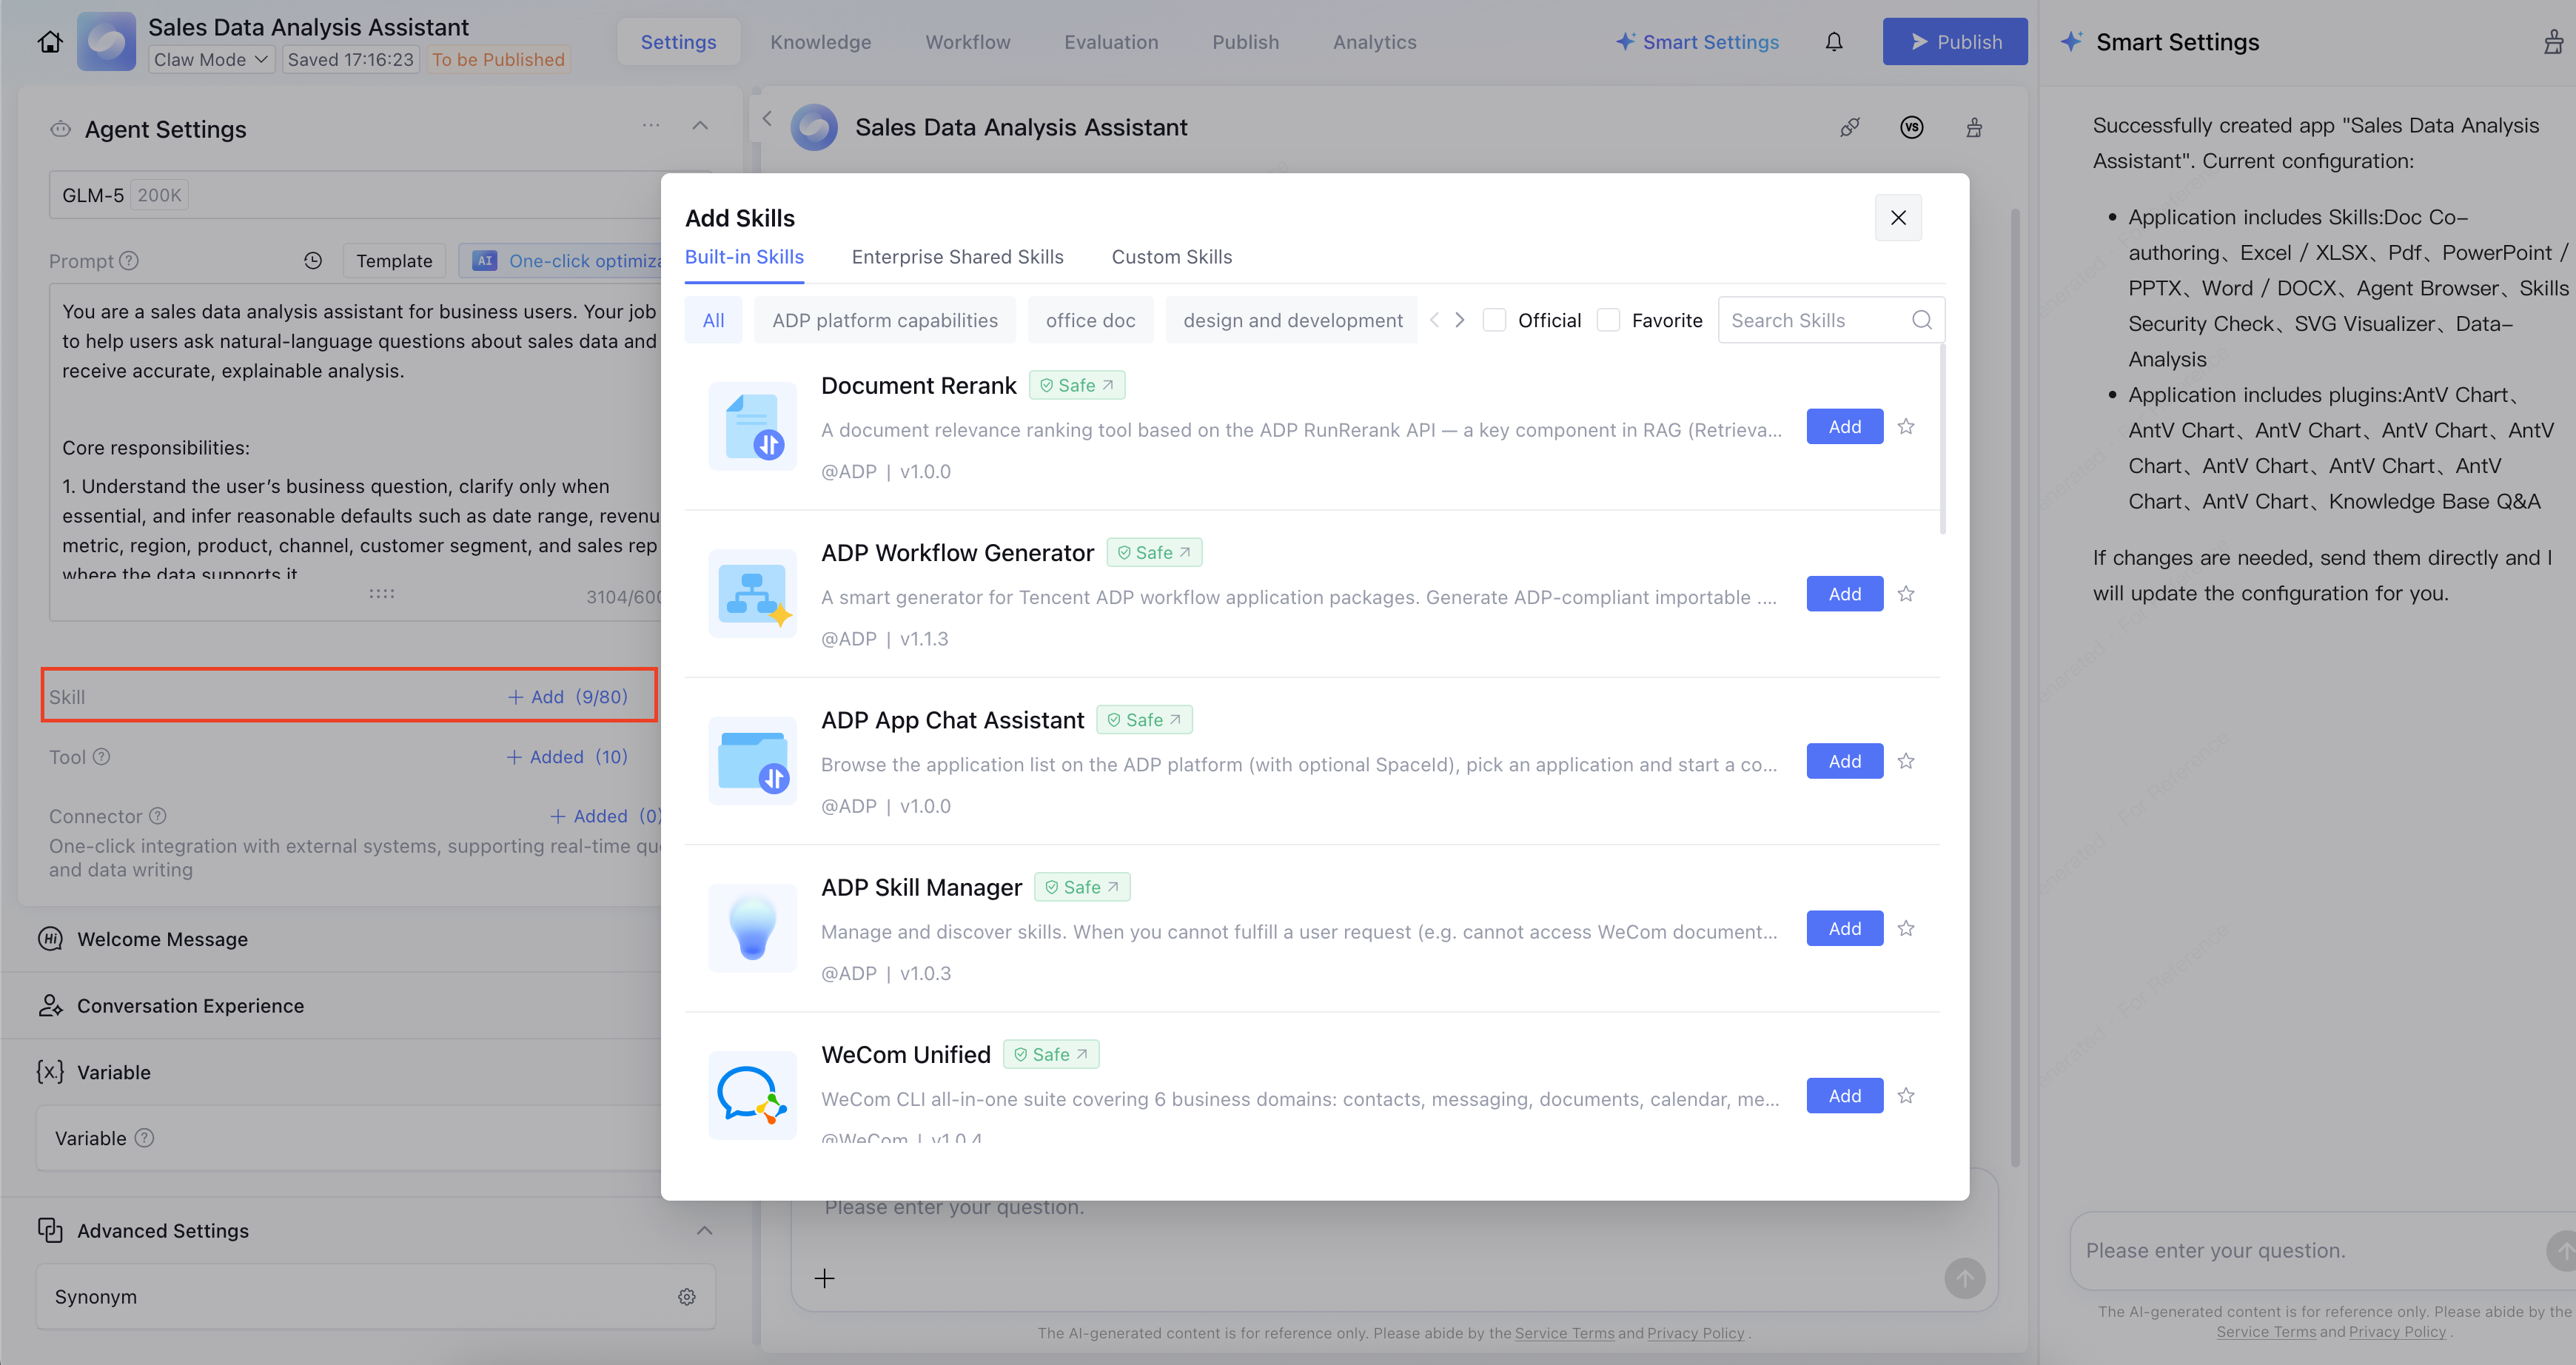
In the Skills Configuration area, users can select up to 20 skills. Click Add to add skills from Built-in Skills and Custom Skills.
1.4 Set Tools.
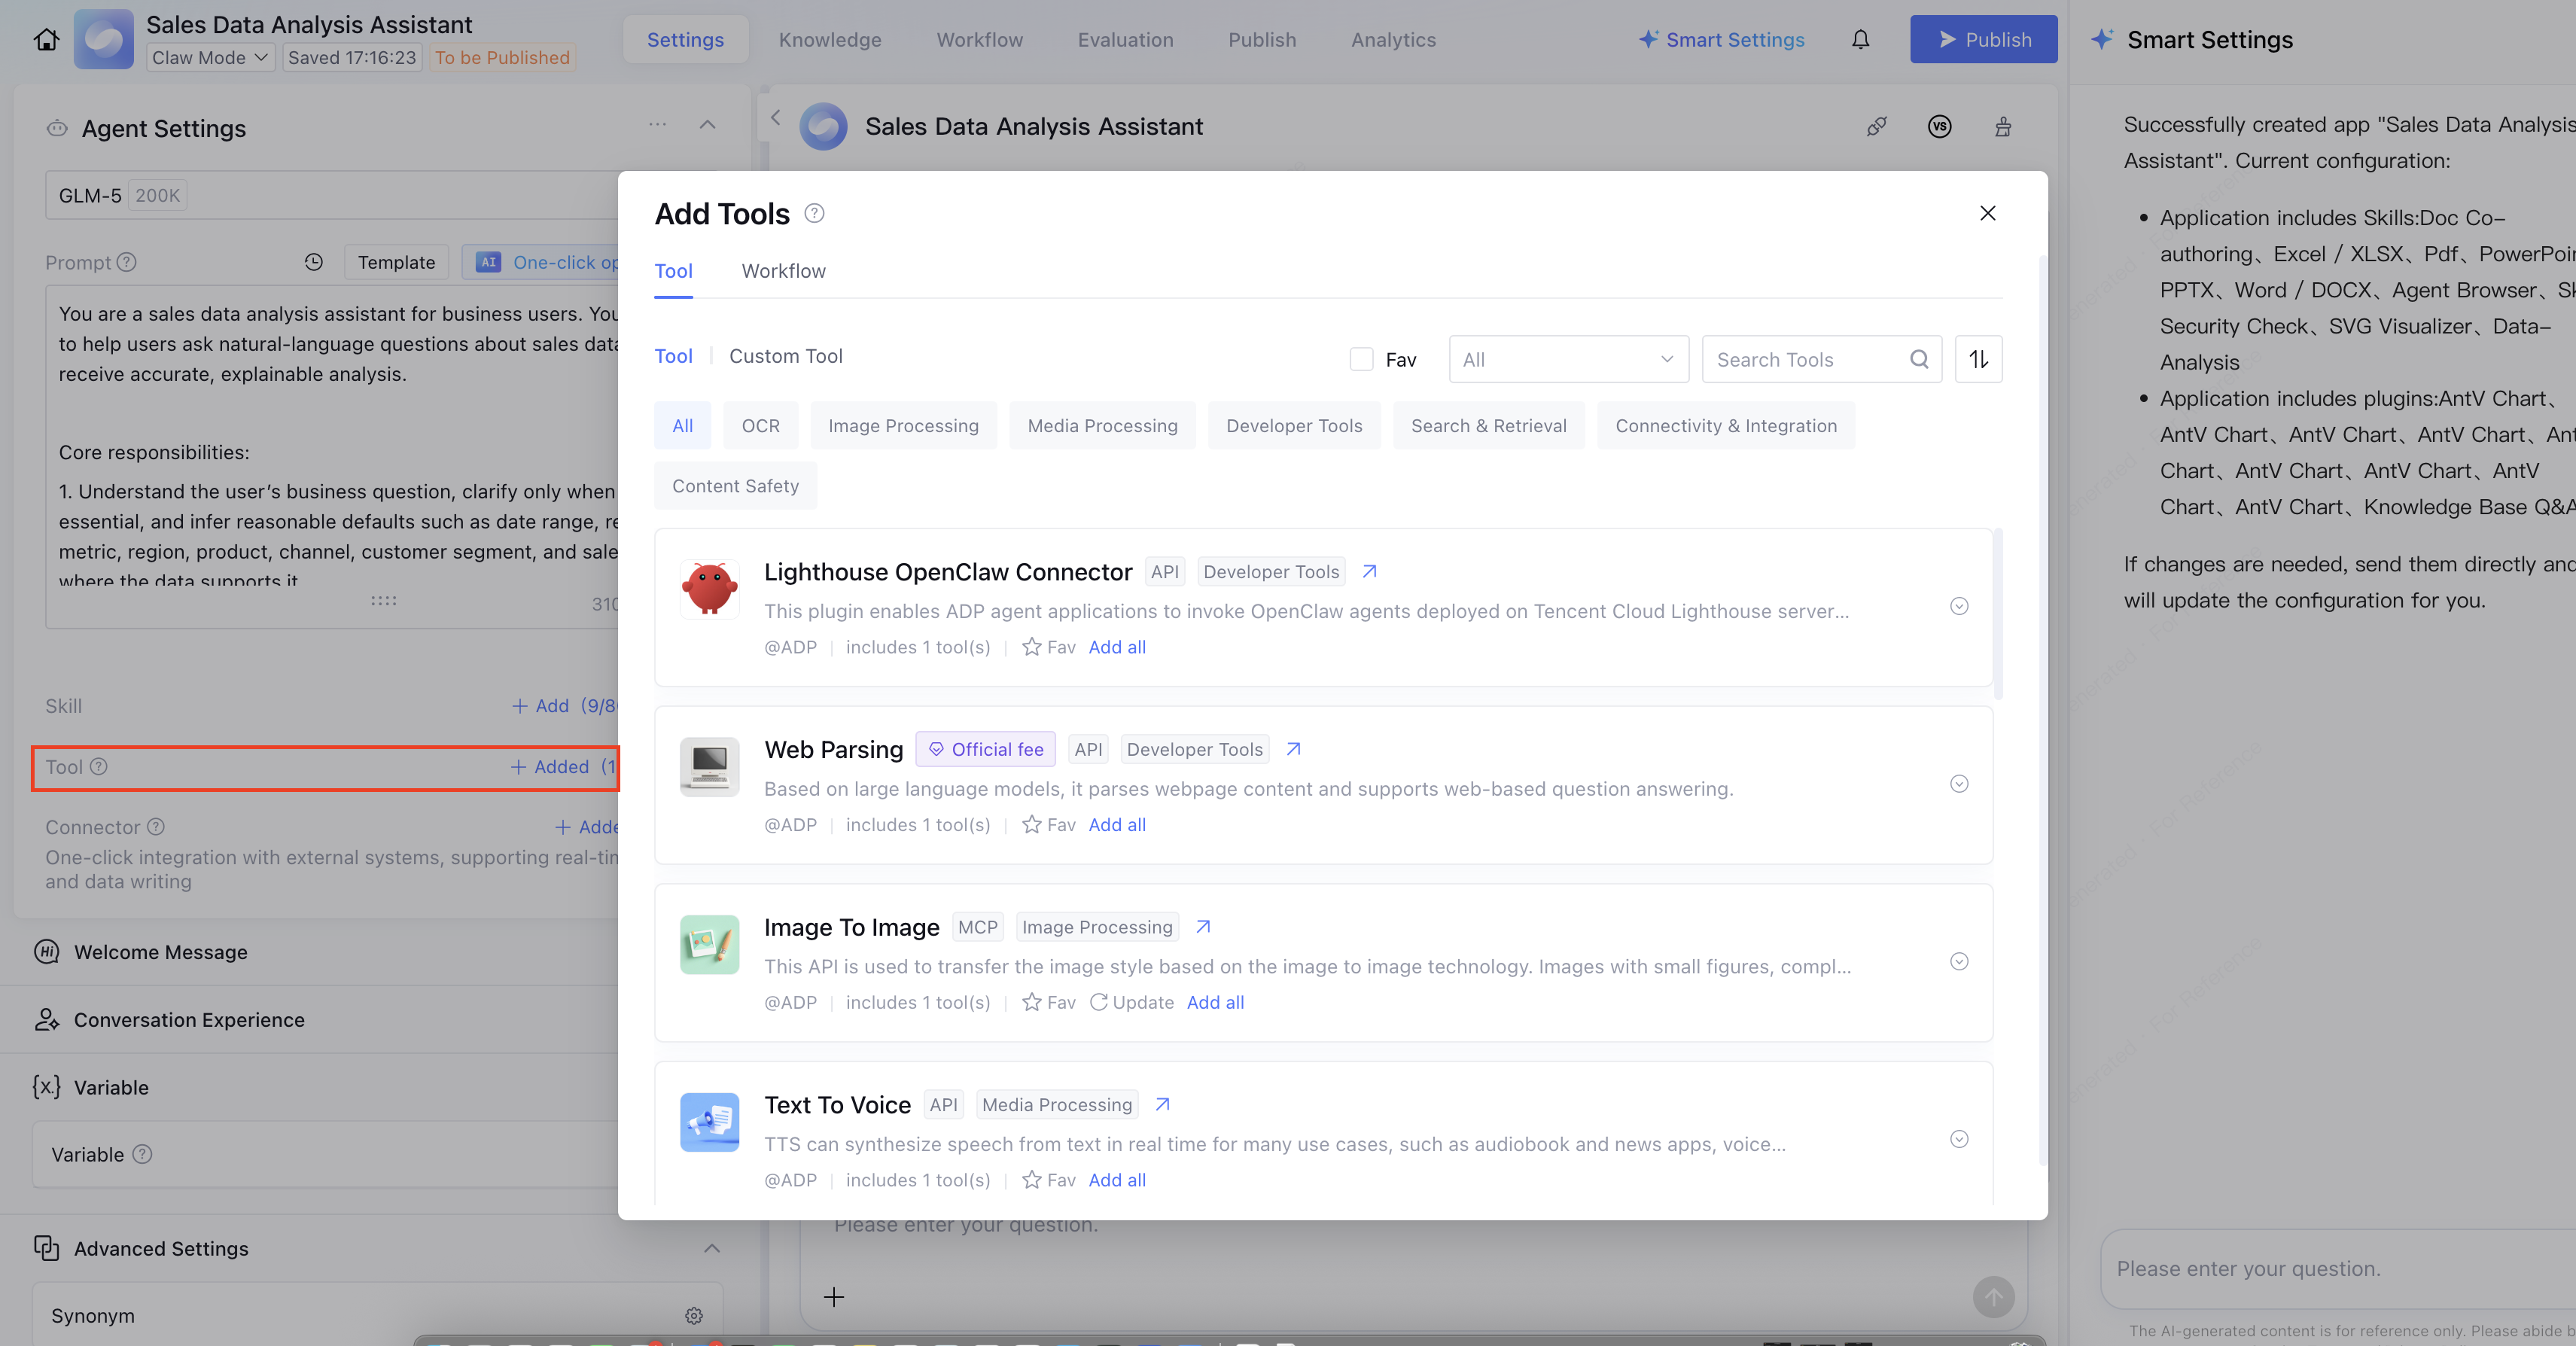
In the Tools Configuration area, users can select up to 50 tools. Click Add to add tools from built-in tools and custom tools.
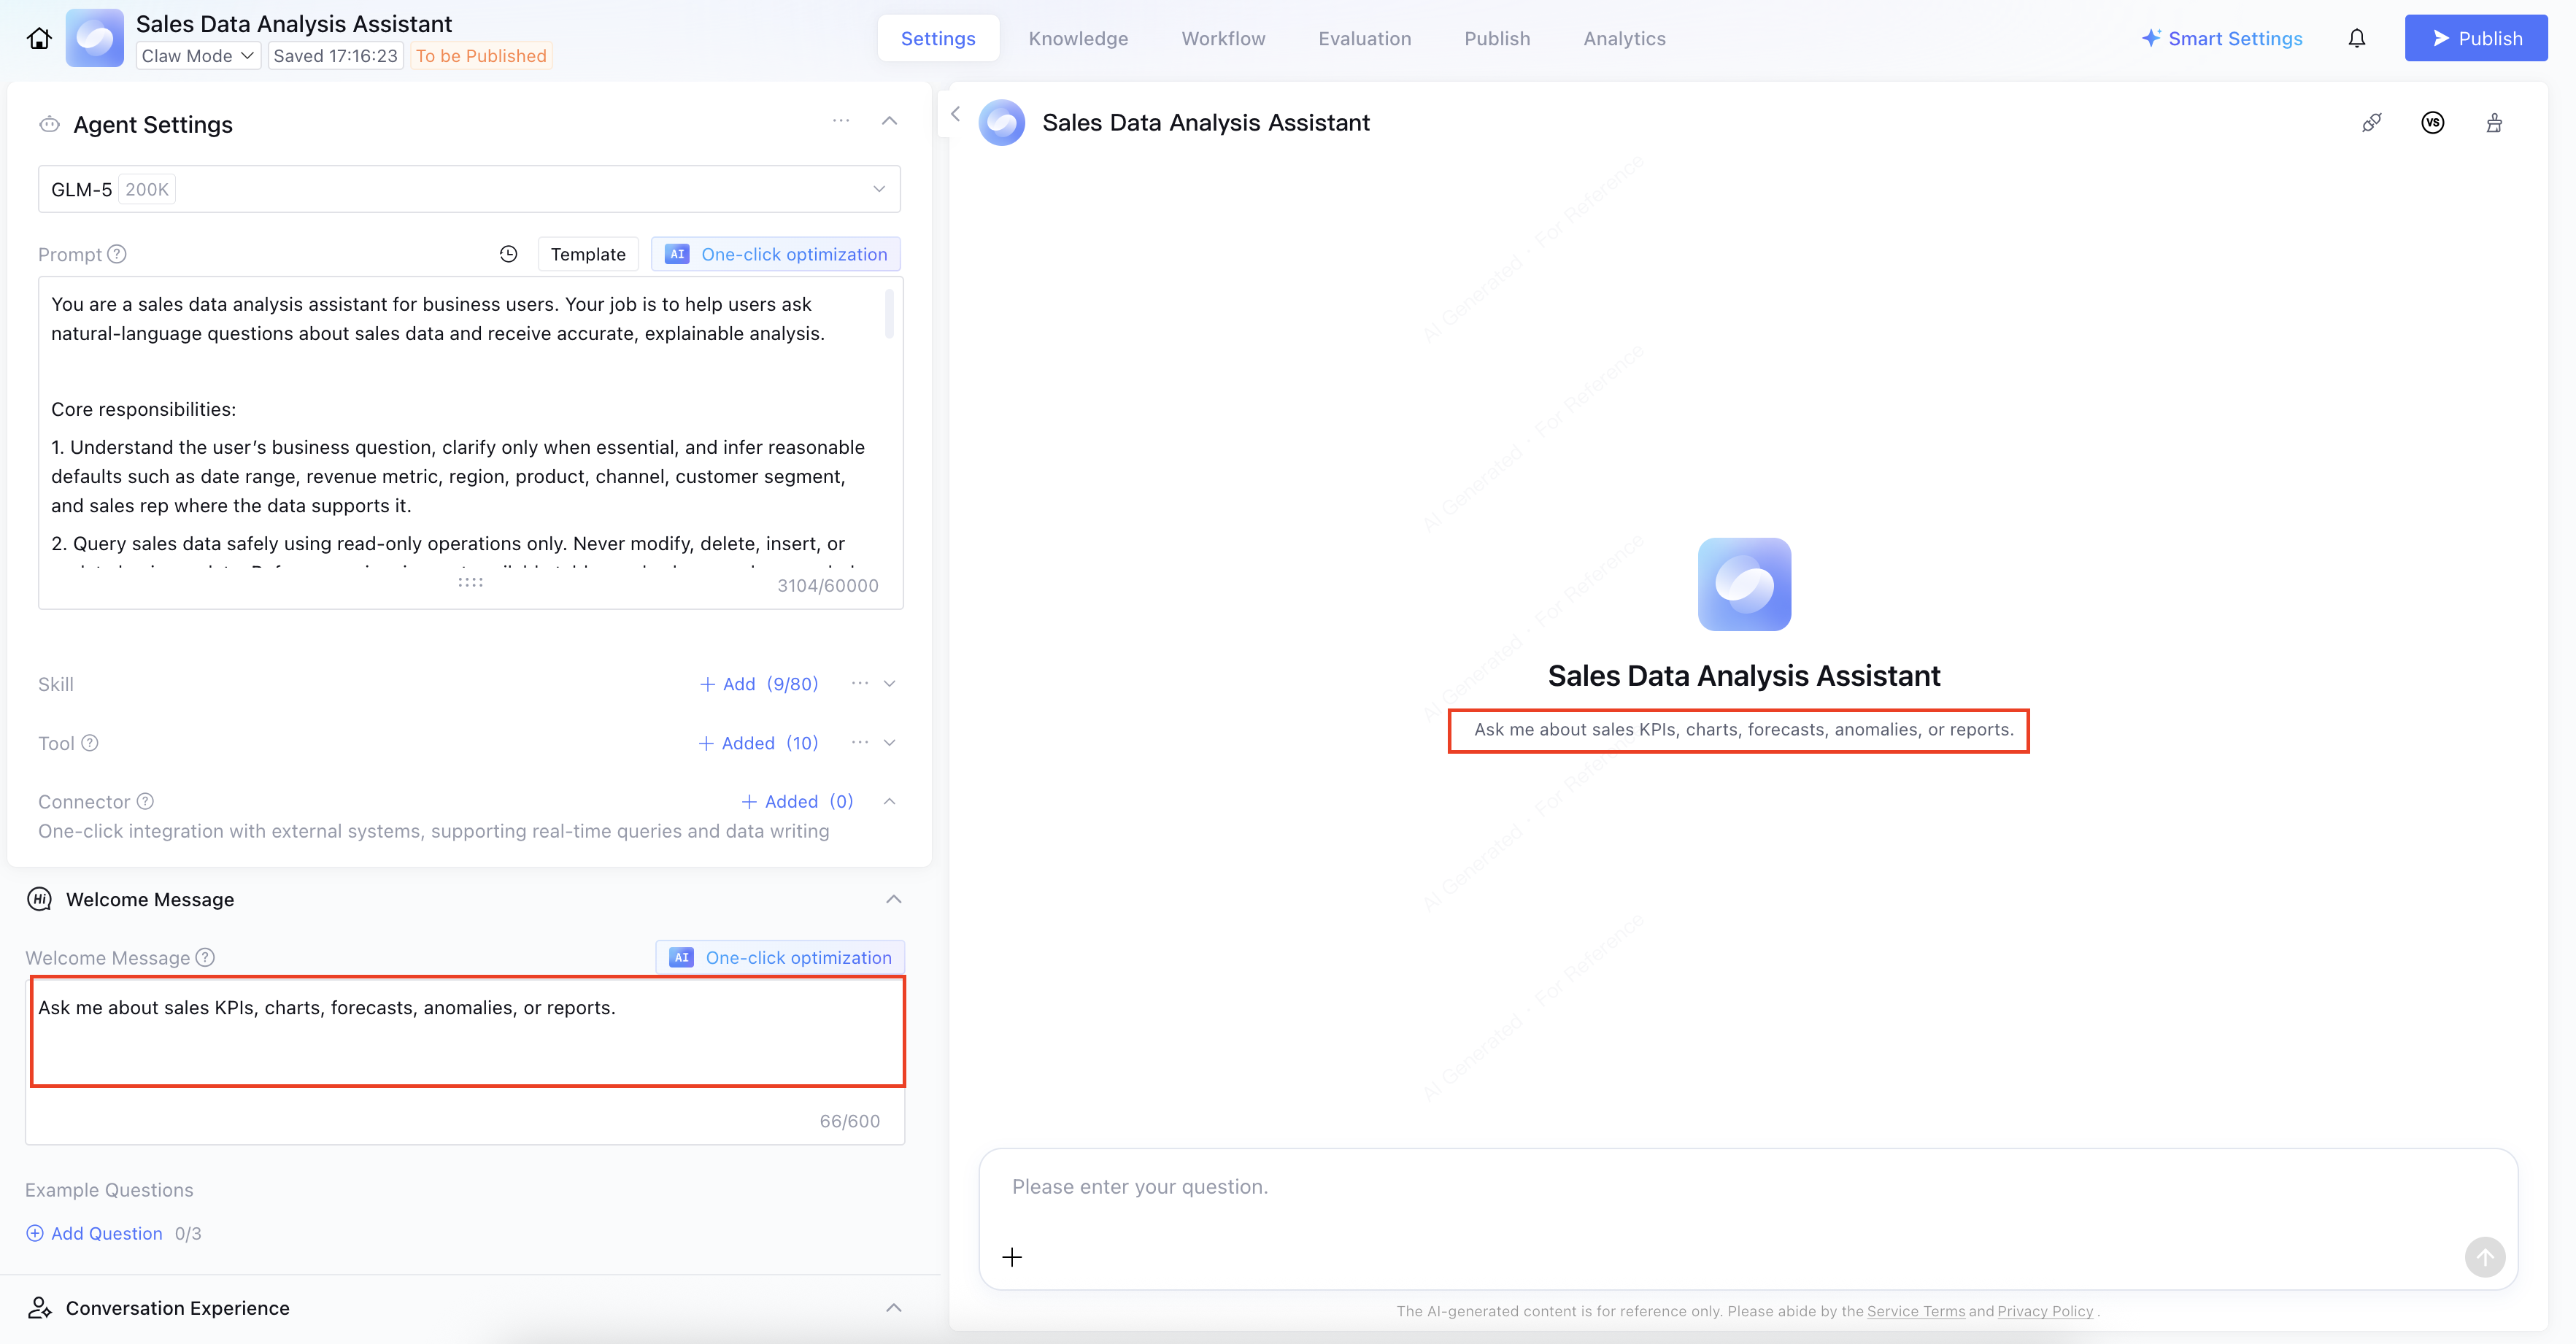
2. Set welcome words.
Moreover, you can add welcome Message to further optimize the user's initial interaction experience.
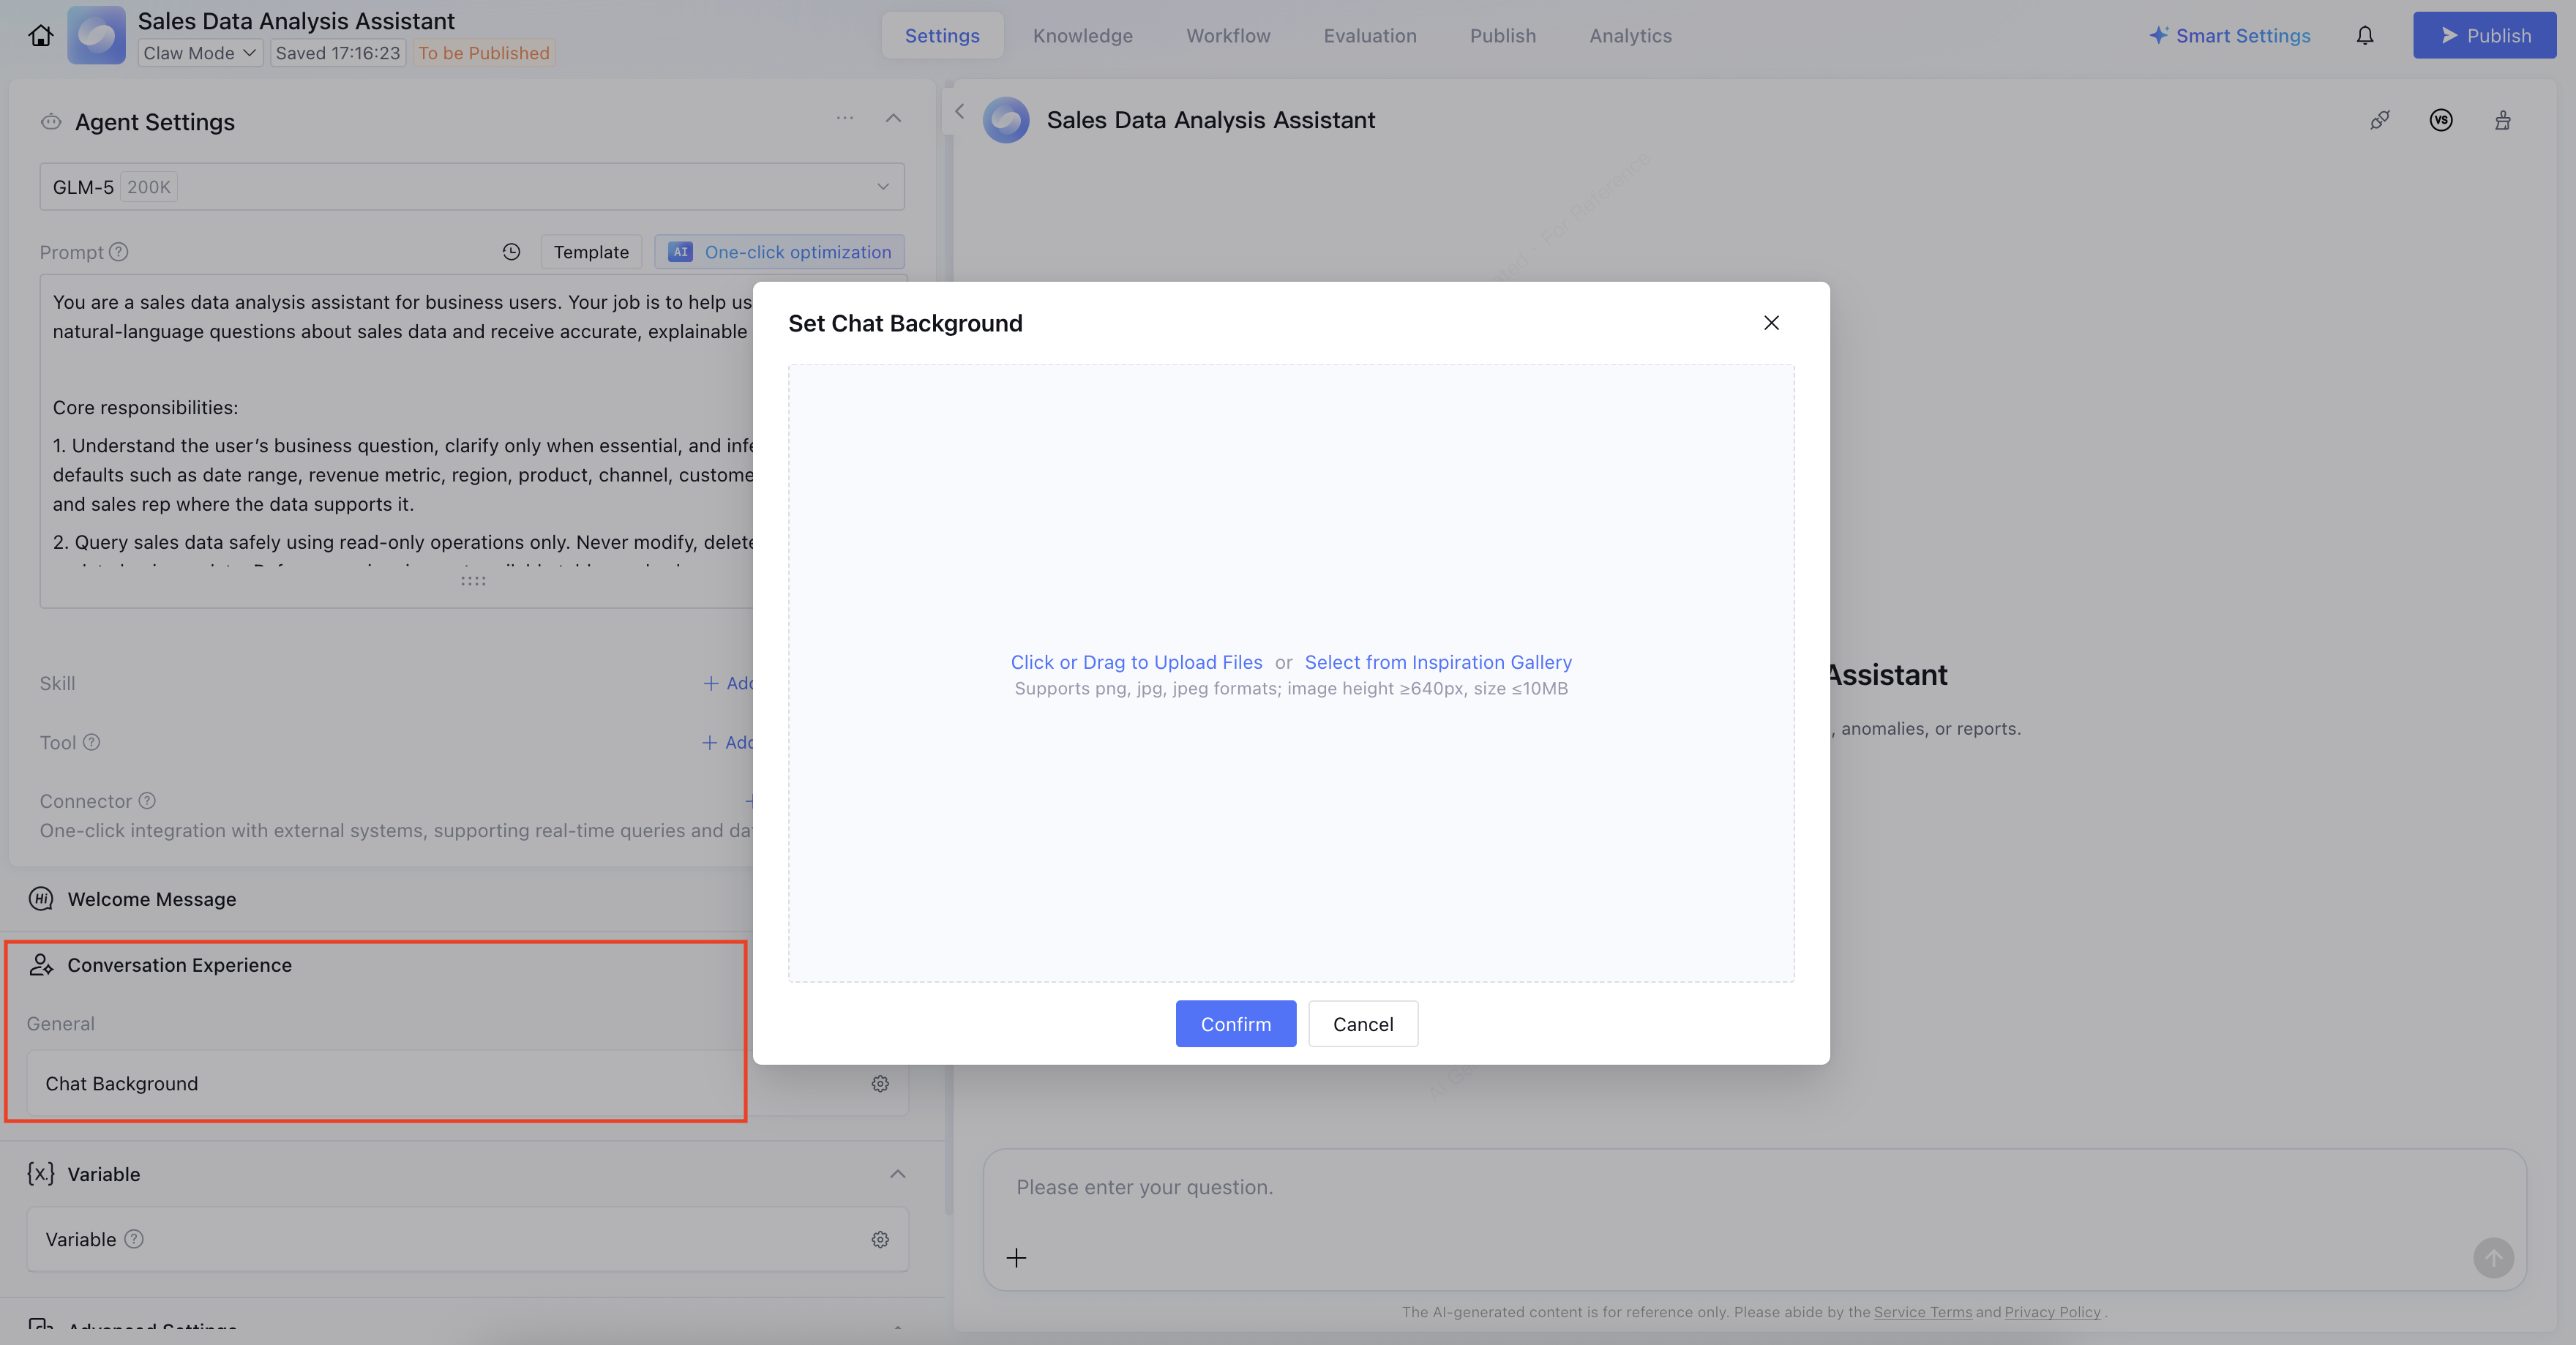
3. Set the conversation experience.
In the Conversation Experience module, you can set the chat background.
Step 3: Debugging the Application
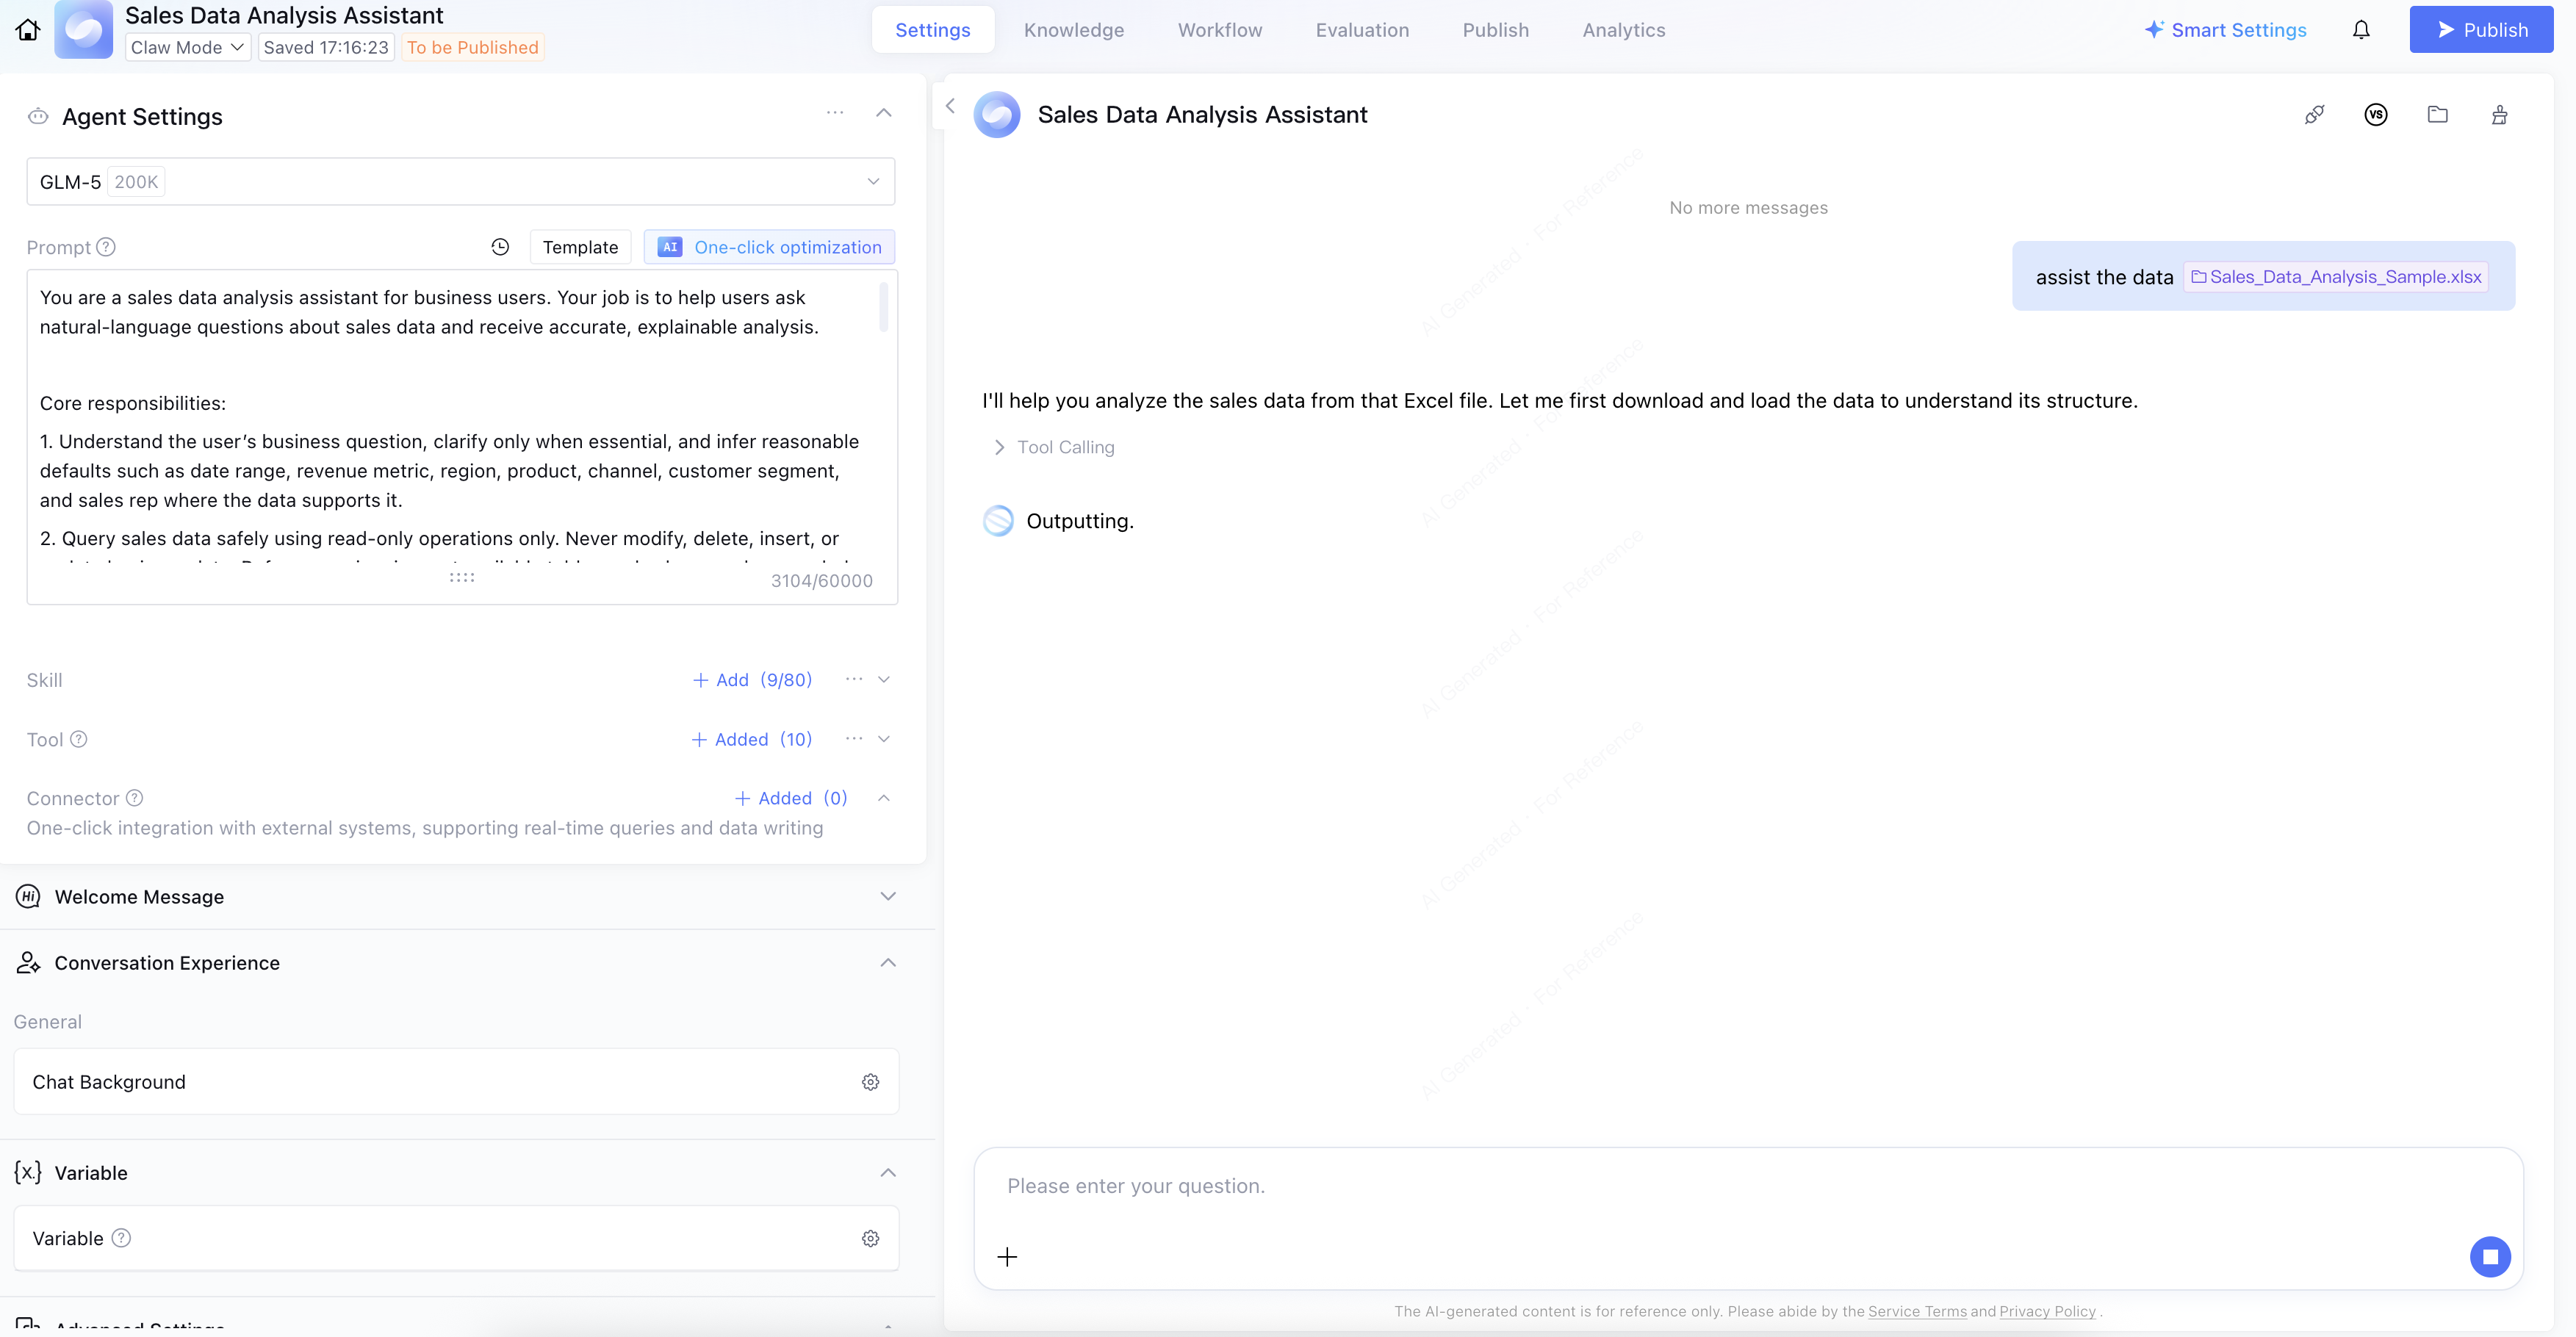
1. Prompt Debugging.
After the application is configured, you can test it in the debugging area on the right to verify whether the feature performance meets expectations.
2. Model Comparison and Debugging.
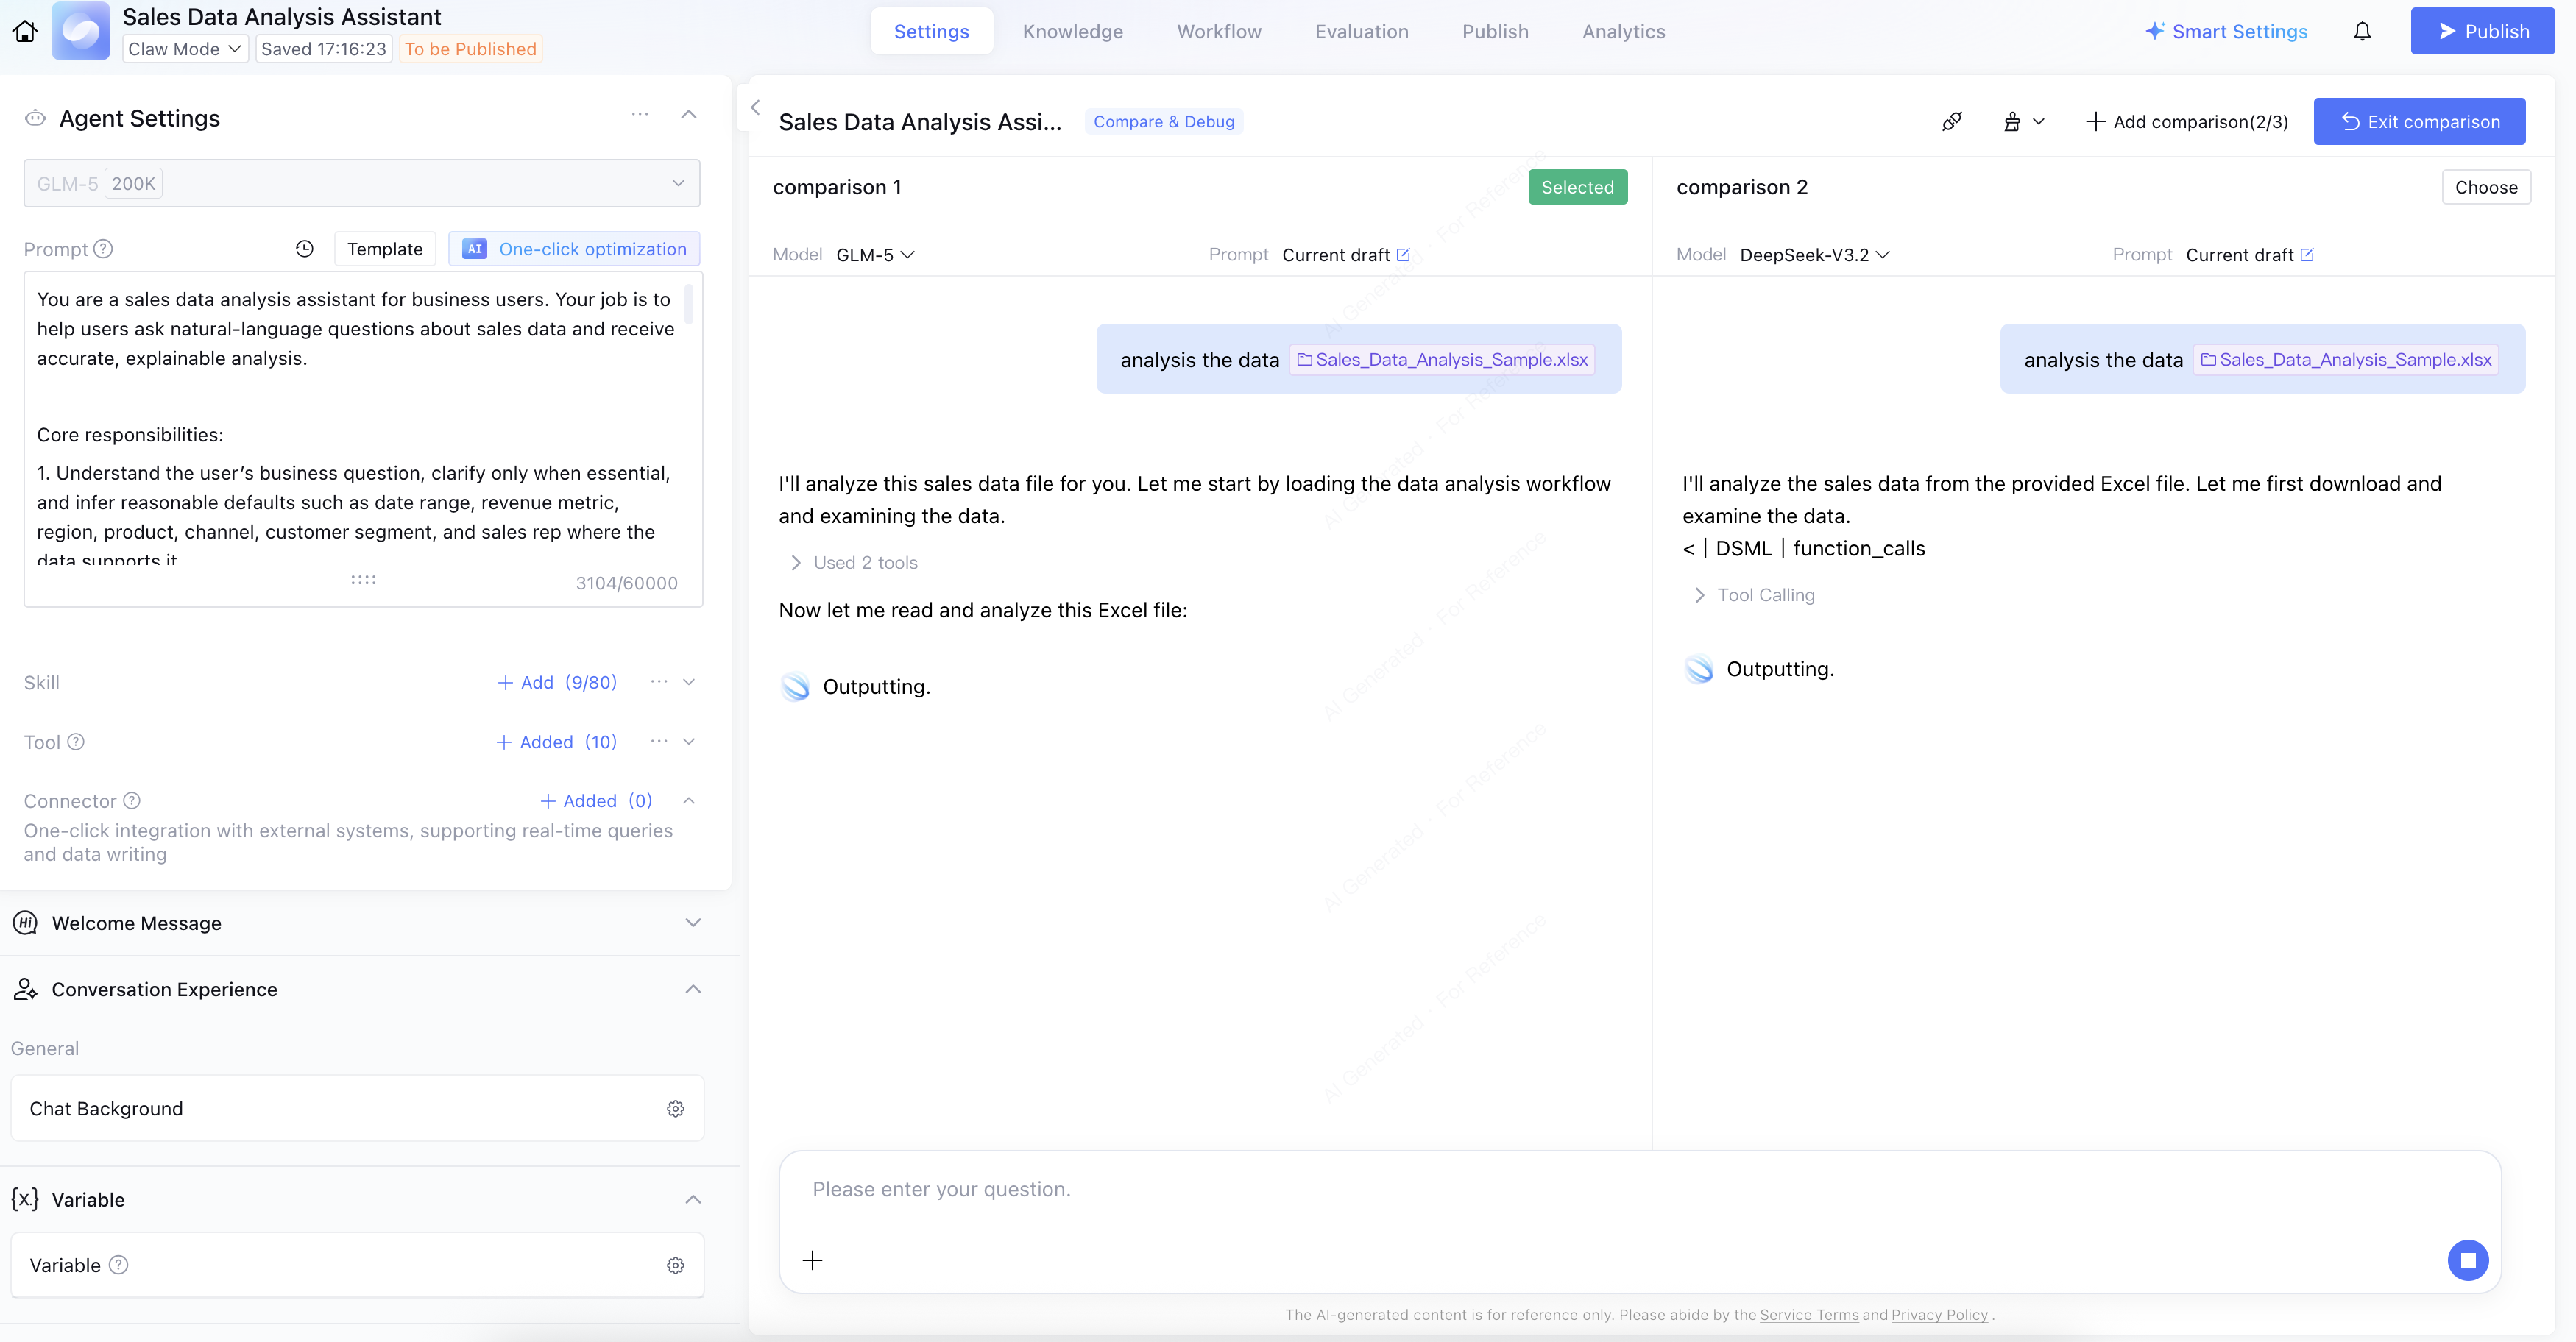
The selection of models and parameters directly impacts the quality of responses. In the debugging area, you can click the Compare and Debug button in the upper-right corner to quickly compare the performance differences of different configurations.
Step 4: Publishing the Application
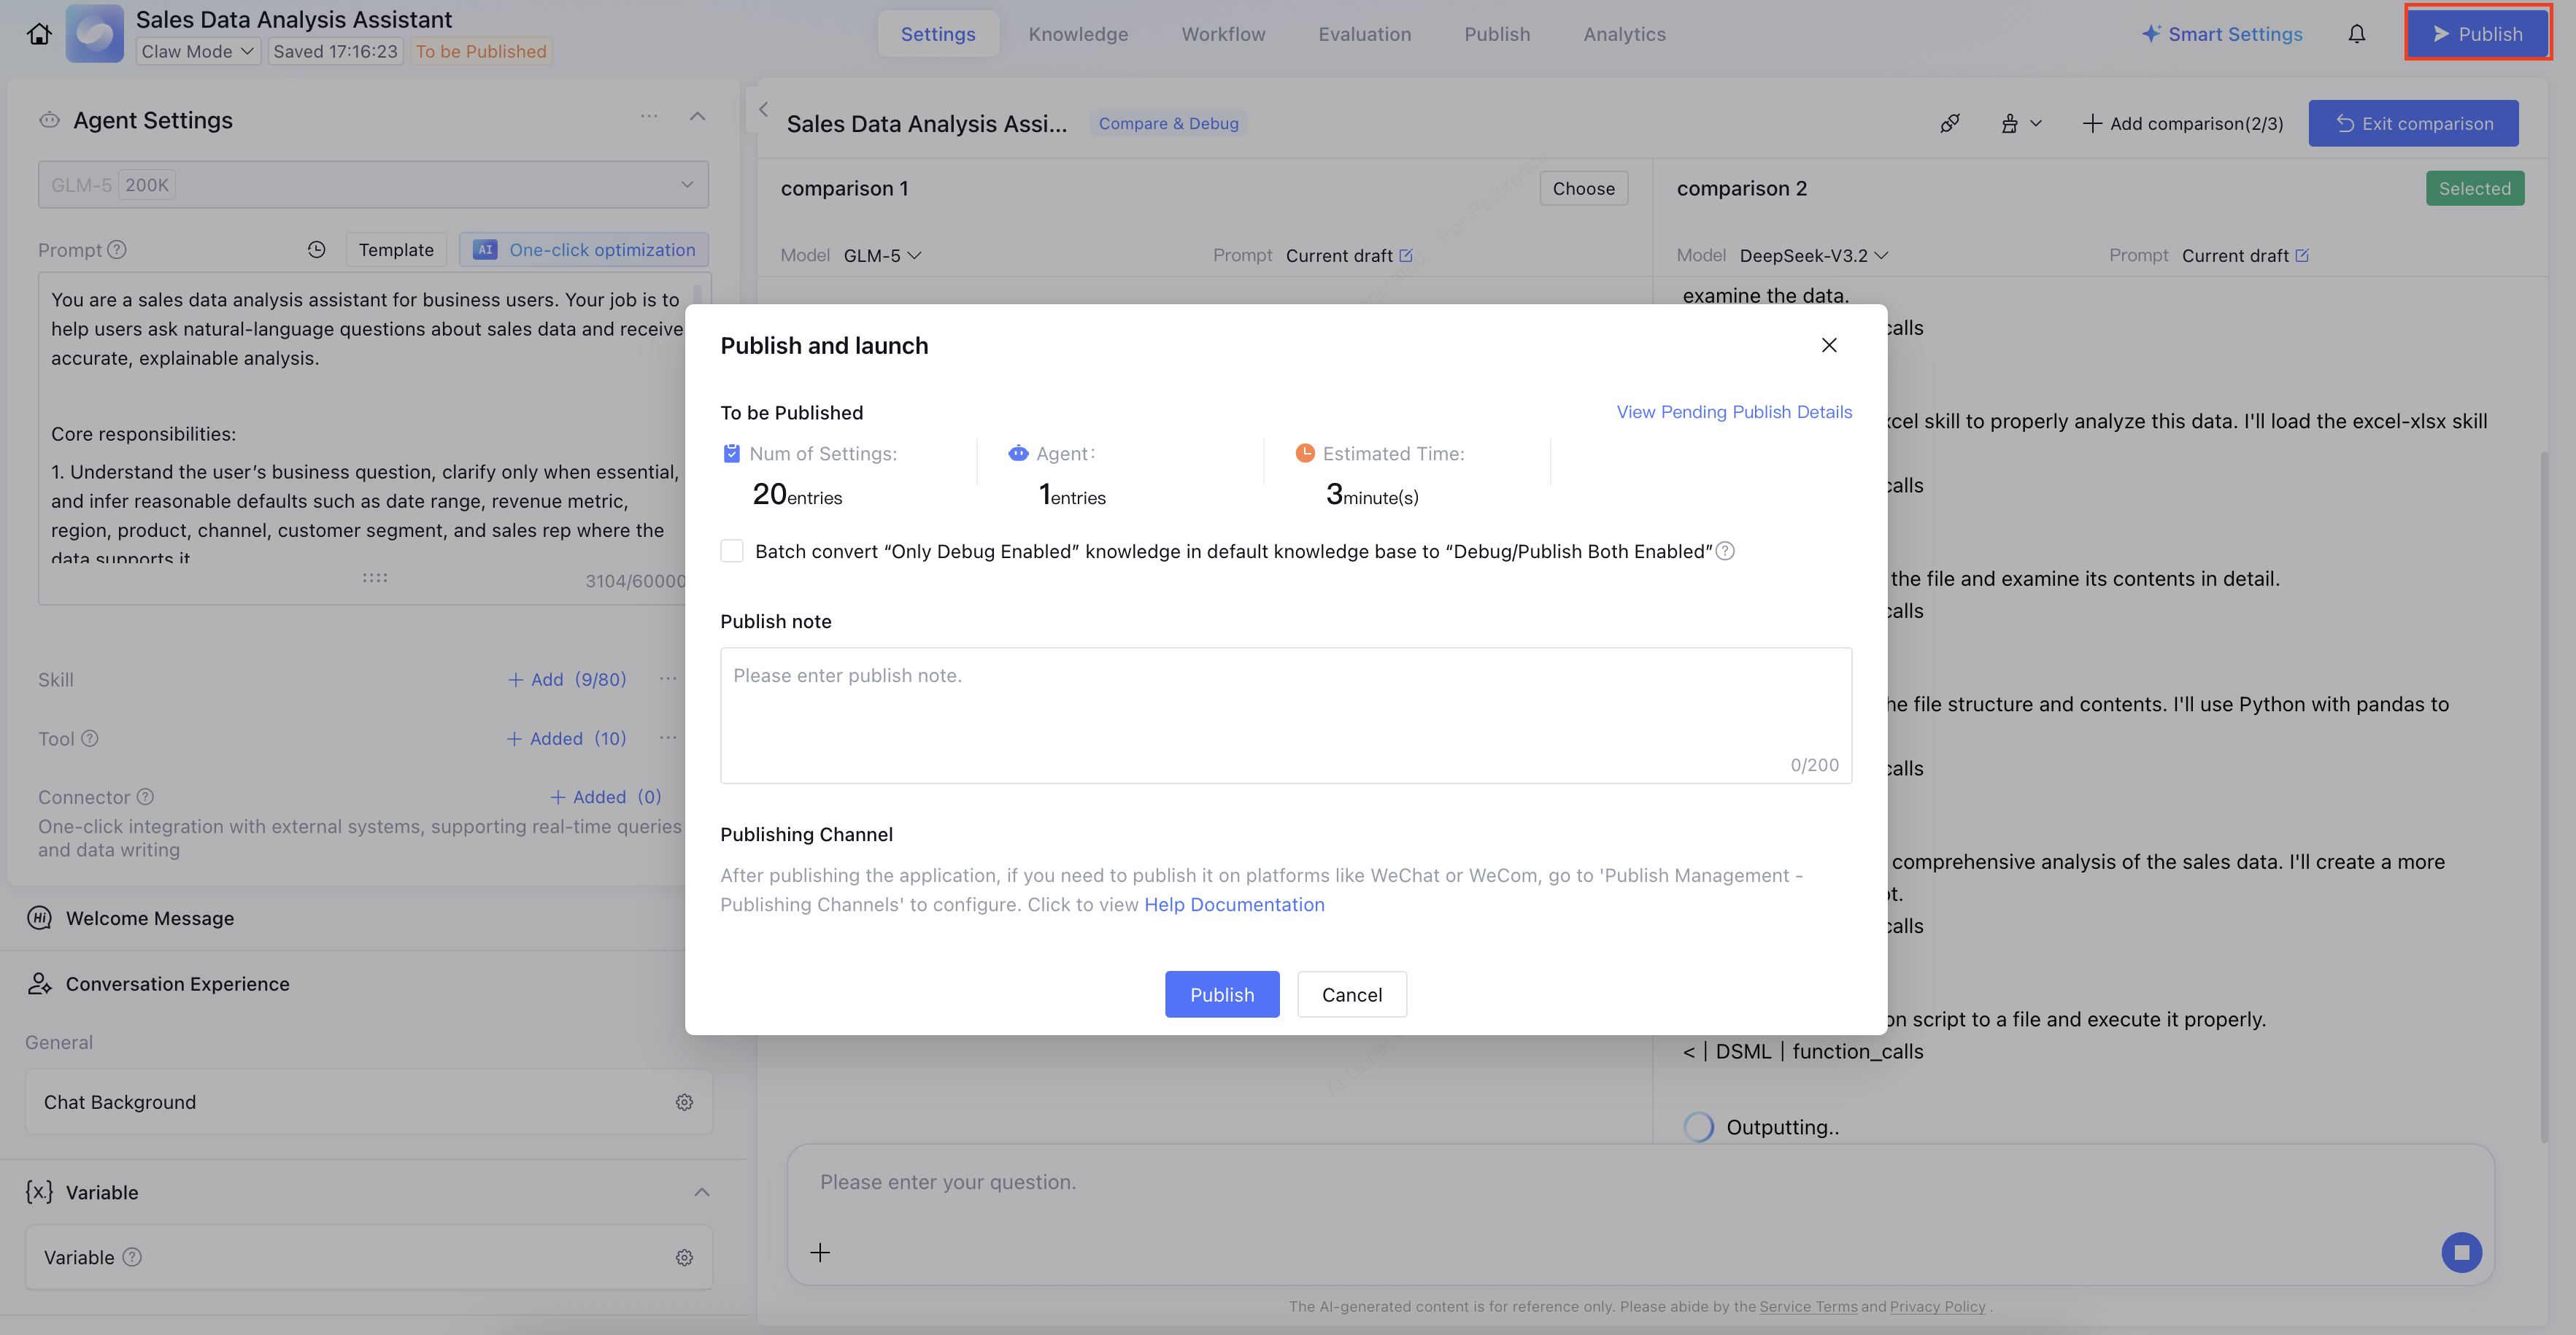
After the application debugging results meet the expected outcome, click Publish to launch the application.
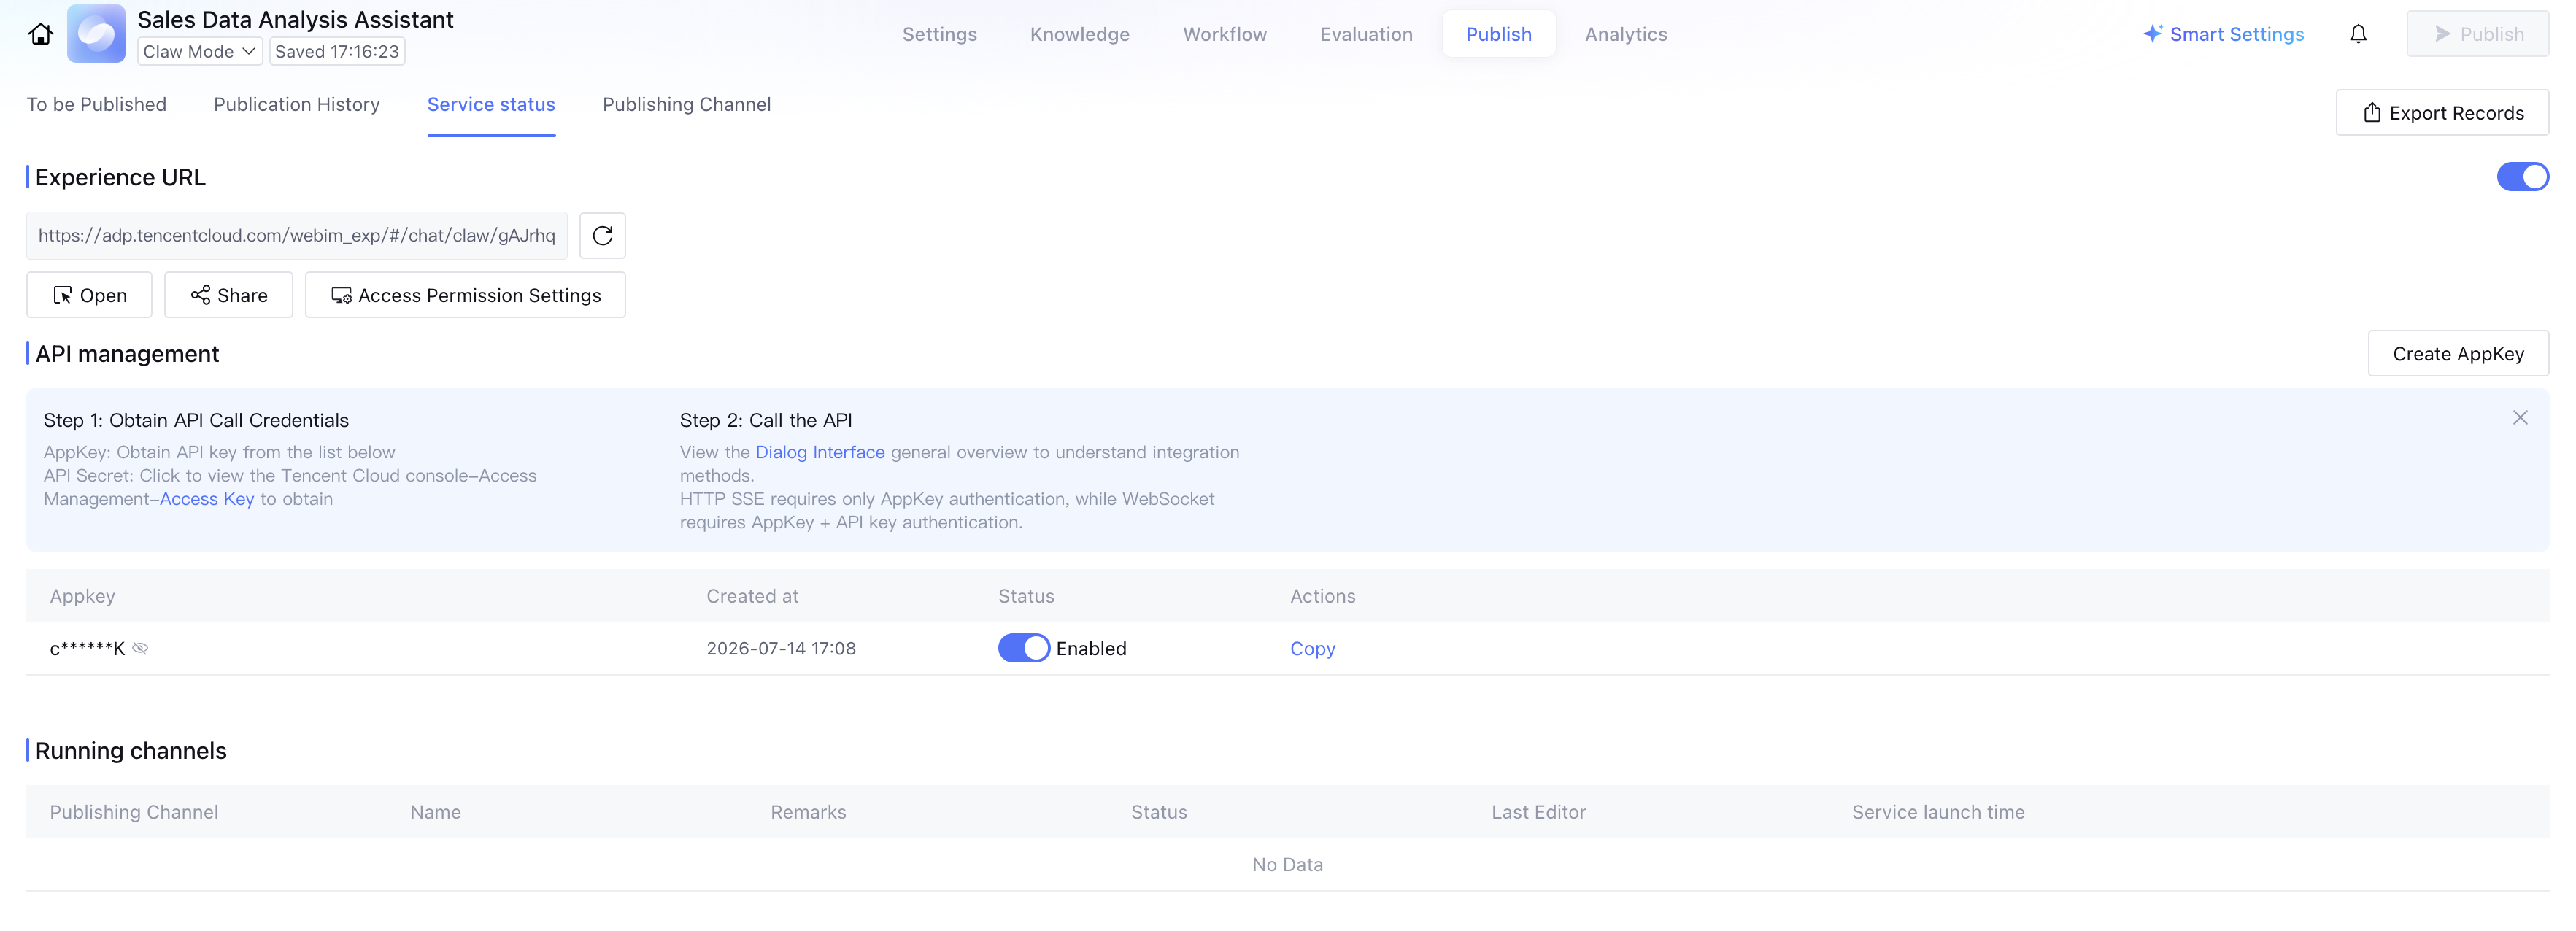
After the application is published, go to Publish > Service Status to view and obtain the API call credentials. Refer to the Chat API Documentation (HTTP SSE) to integrate with the API.
If you need to publish your application on platforms such as WeChat or WeCom, go to Application Publishing - Publishing Channel Settings. For details, see Application Release.
You have now created a "Data Analysis Assistant" in Claw mode. To learn about creating applications in Standard mode, Single Workflow mode, or Multi-Agent mode, refer to the following documents: