Business Intelligence (BI) supports generating data tables through SQL queries using the SQL table creation method. This method meets the table creation requirements for flexible and complex logic scenarios. The specific operation steps and process are shown below.
Creating an SQL Data Table
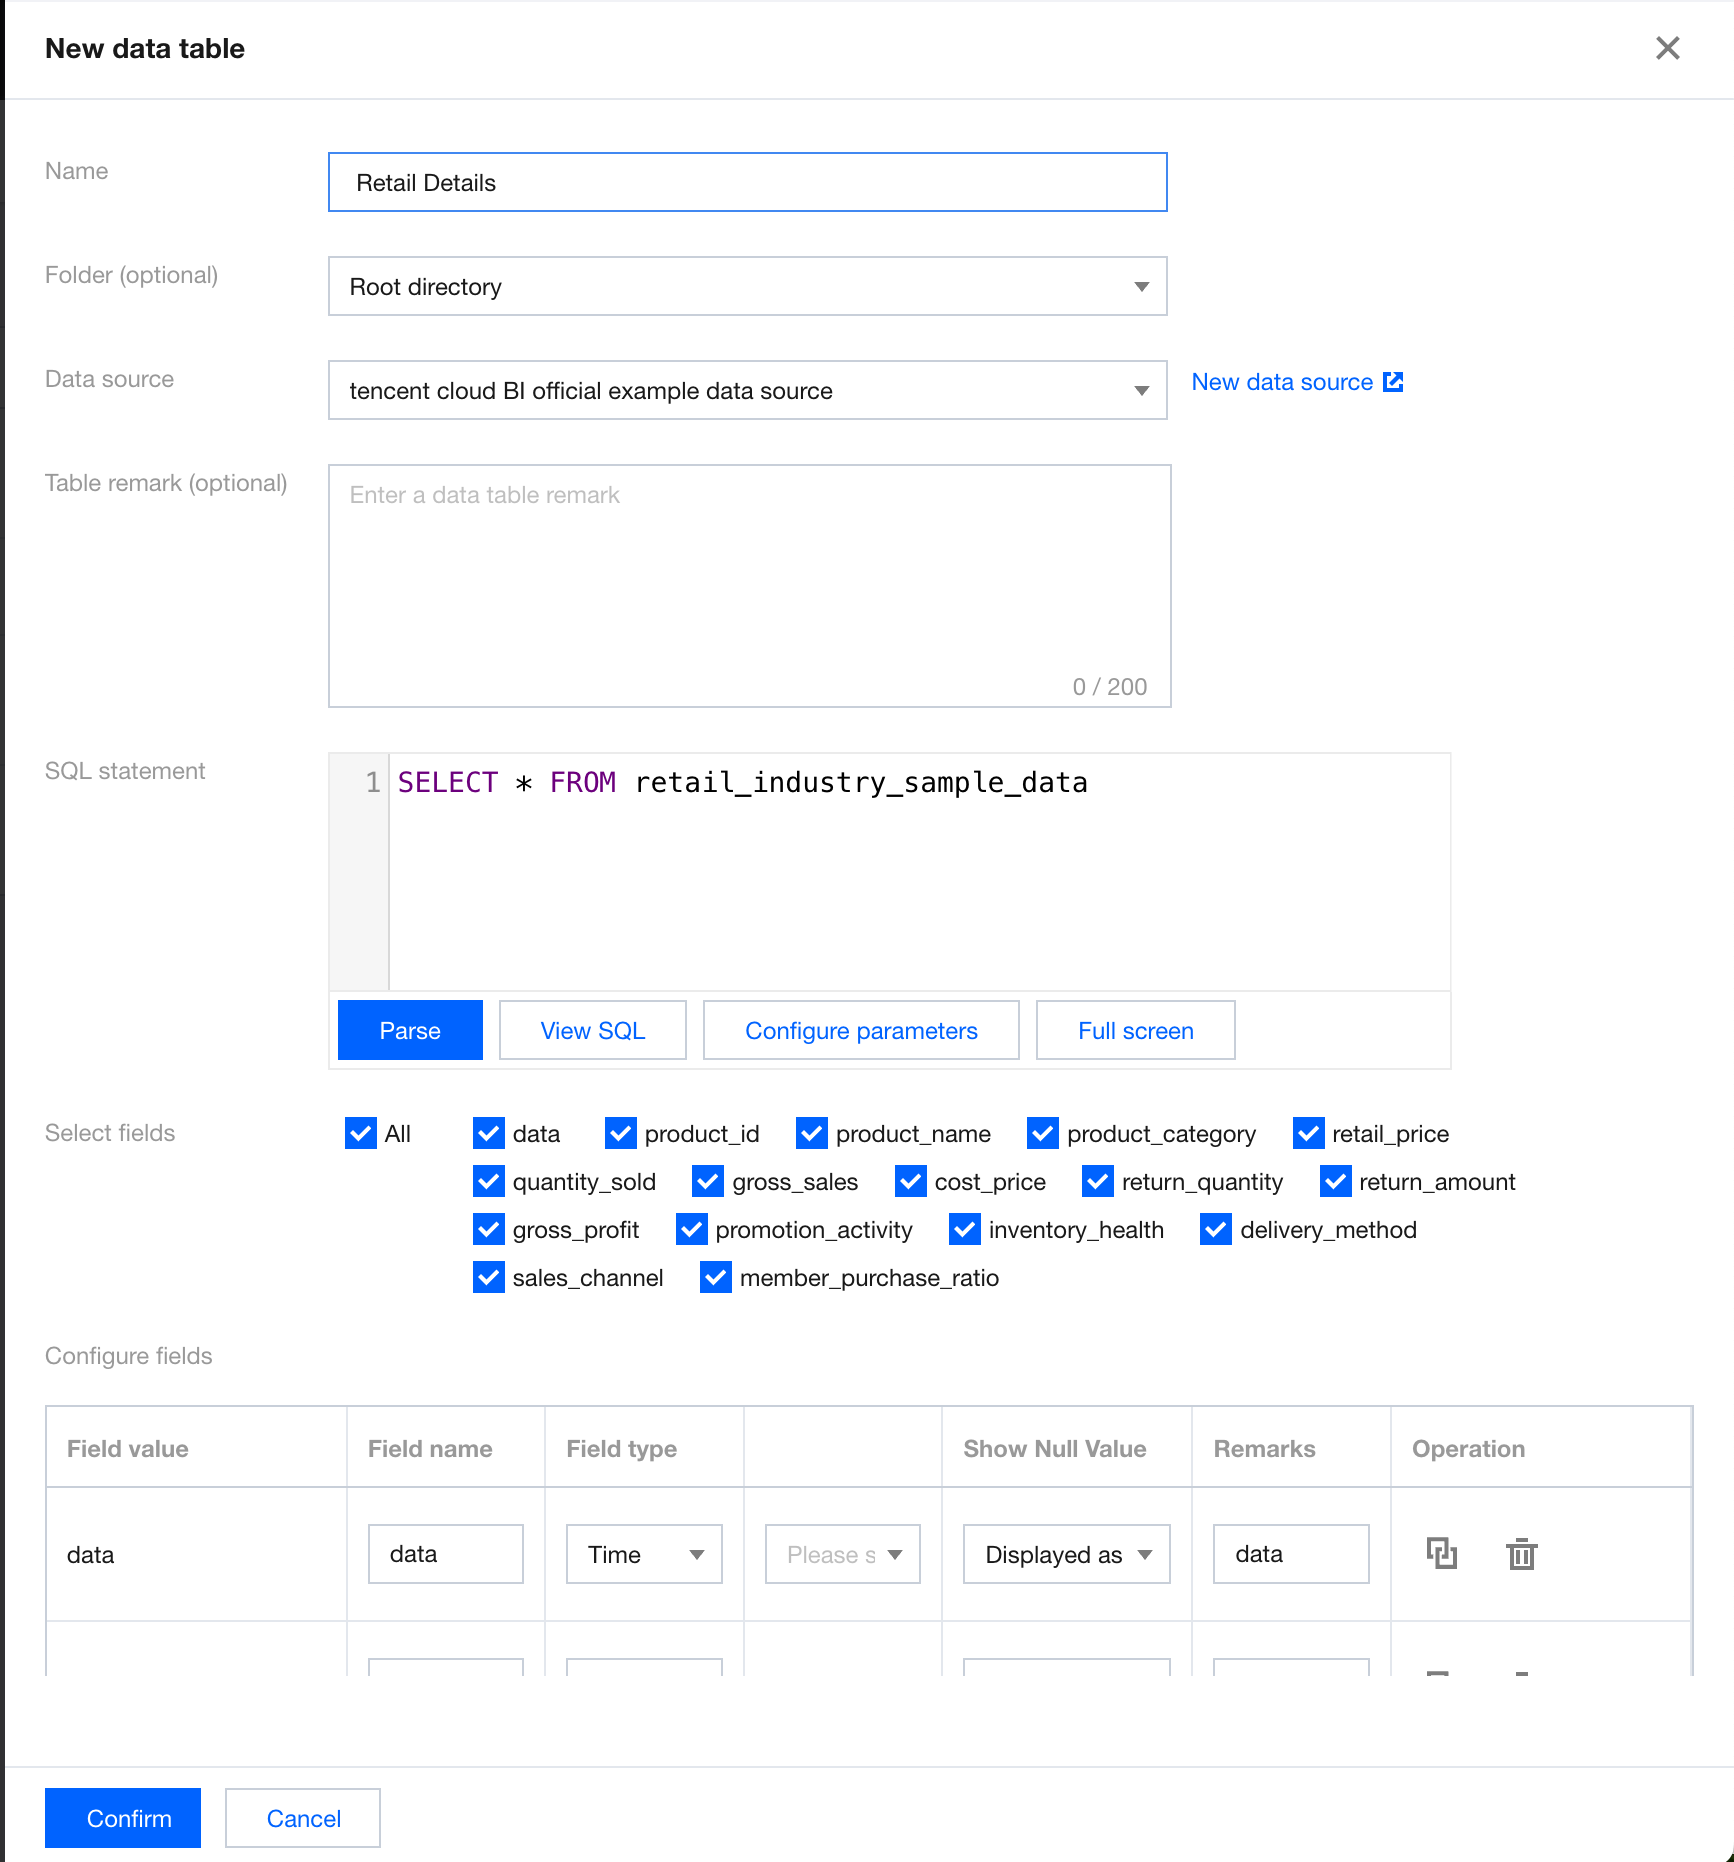
In the Data Table module under Data, click Create Data Table, select SQL Table Creation, and enter the following parameters:
Display name: The display name of the data table in BI.
Folder (optional): Click the drop-down icon to select a created folder.
Select data source: Click the drop-down icon to select a connected data source. Click Create data source to open the data source list page in a new window, and a pop-up window for creating a data source will appear. After creation, click the drop-down list again to load the created data source.
SQL statement: Generate a data table through SQL queries (Only SELECT query statements are supported) Field Selection and Field Configurations
1. After writing the SQL statement, click Parse Now to load all fields of the table. You can select the fields, and the selected fields will be the fields of the data table. Selecting all fields is supported.
2. The meanings of field configuration items are as follows.
Field value: The name of the field in the data source.
Field Chinese name: The display name of the field in BI. The name defaults to the field name and supports editing.
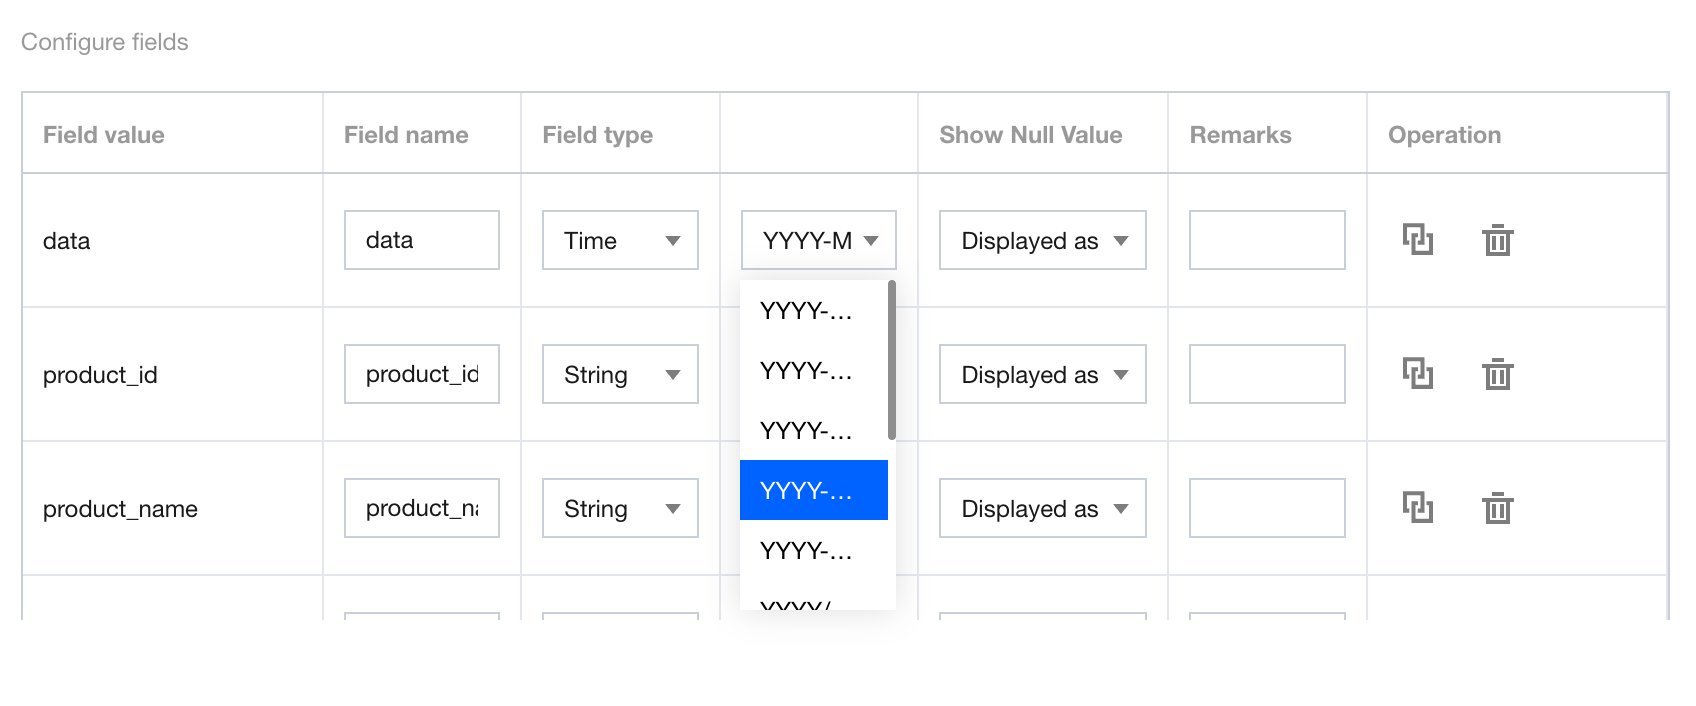
Field type: Available options are "time", "character", "numeric value", and "associated dictionary". By default, the field format needs to be read.
When "time" is selected, you can perform a second-level selection for different granularities of the time format.
Remarks: Used to record the definition of the field. You can use the remarks as the table header definition when configuring a report table component.
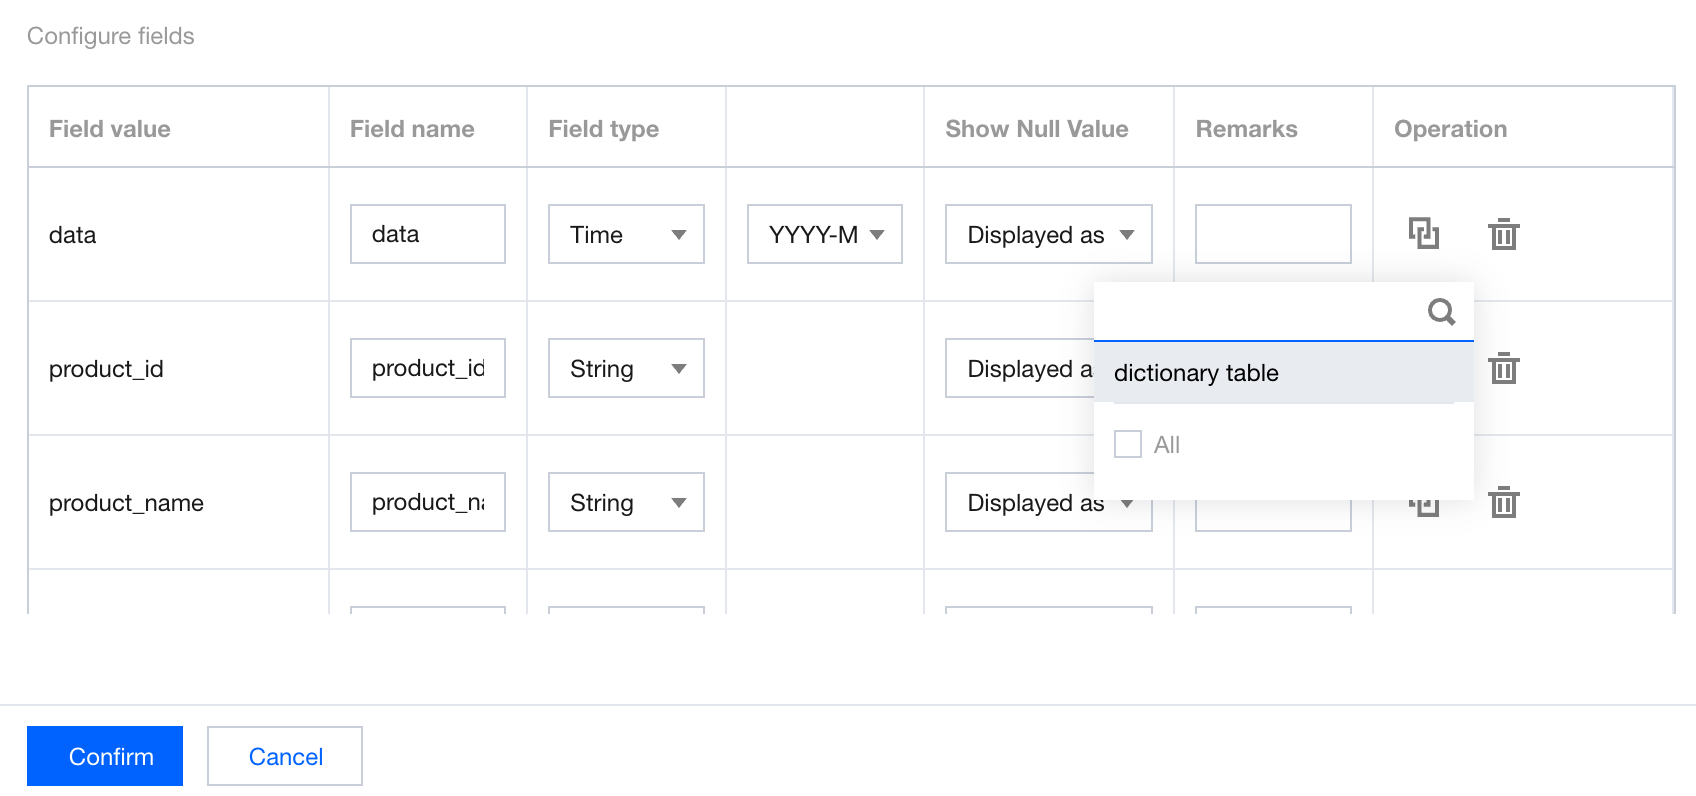
Operations: Dictionary table association and field deletion can be performed.When associated dictionary is selected, you can select the dictionary table to be associated for mapping. Advanced Settings
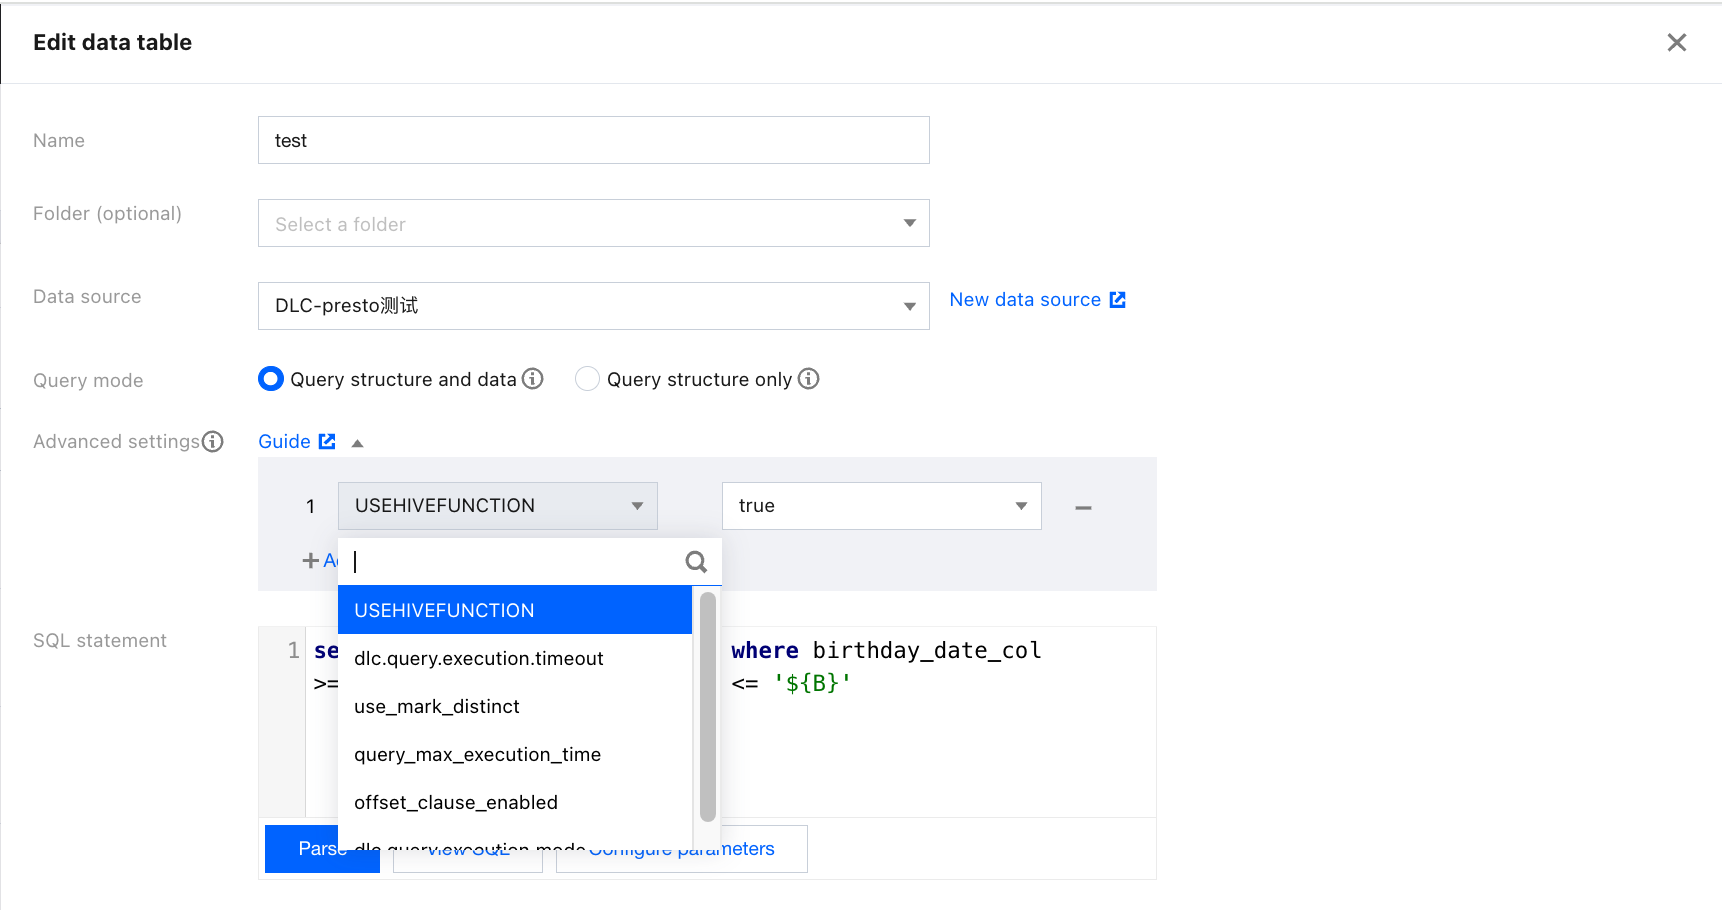
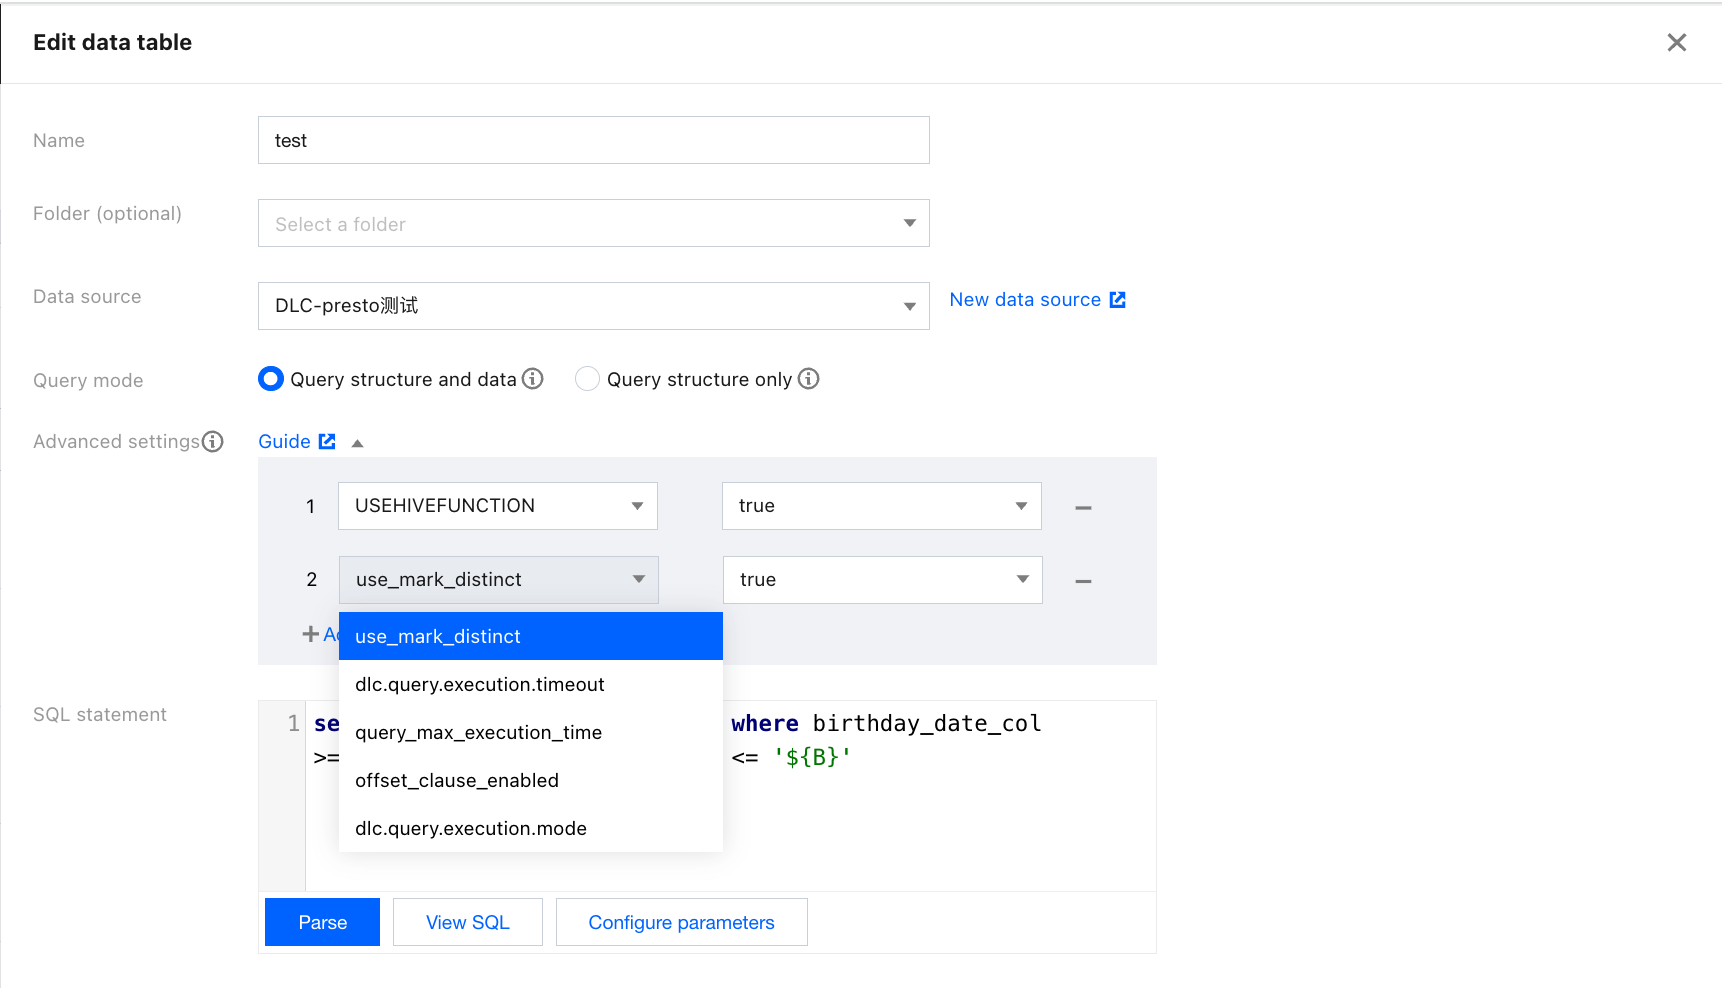
When you create SQL tables for Data Lake Compute (DLC) data sources, advanced settings are supported, allowing you to set parameters for SQL distribution to the DLC engine.
As shown in the figure below, when you create an SQL table for a DLC data source, the "Advanced Setting" field will appear, allowing you to add parameters using a drop-down selector. For example, setting the "USEHIVEFUNCTION" parameter to true will use the Hive function during query execution, while setting it to false will use the Presto native function during query execution.
Multiple parameters can be added. Hover the mouse over each parameter to view its definition. The supported parameters here are the same as those in the DLC console. For the complete parameter list and descriptions, see DLC Documentation.