WorkBuddy
Download
聚焦模式
字号
WorkBuddy 是腾讯云推出的全场景桌面 AI 智能体,适配 QQ / 企微生态,支持本地操作电脑、多模型切换,以 Token 配额套餐模式提供商业化服务,兼顾个人与团队使用。本文以
deepseek-v4-pro 为例介绍如何在 WorkBuddy 中配置使用腾讯云 TokenHub 大模型。安装 WorkBuddy
如果您使用 Mac 系统,请参考 Mac 系统安装指南 进行安装。
如果您使用 Windows 系统,请参考 Windows 系统安装指南 进行安装。
获取 API Key
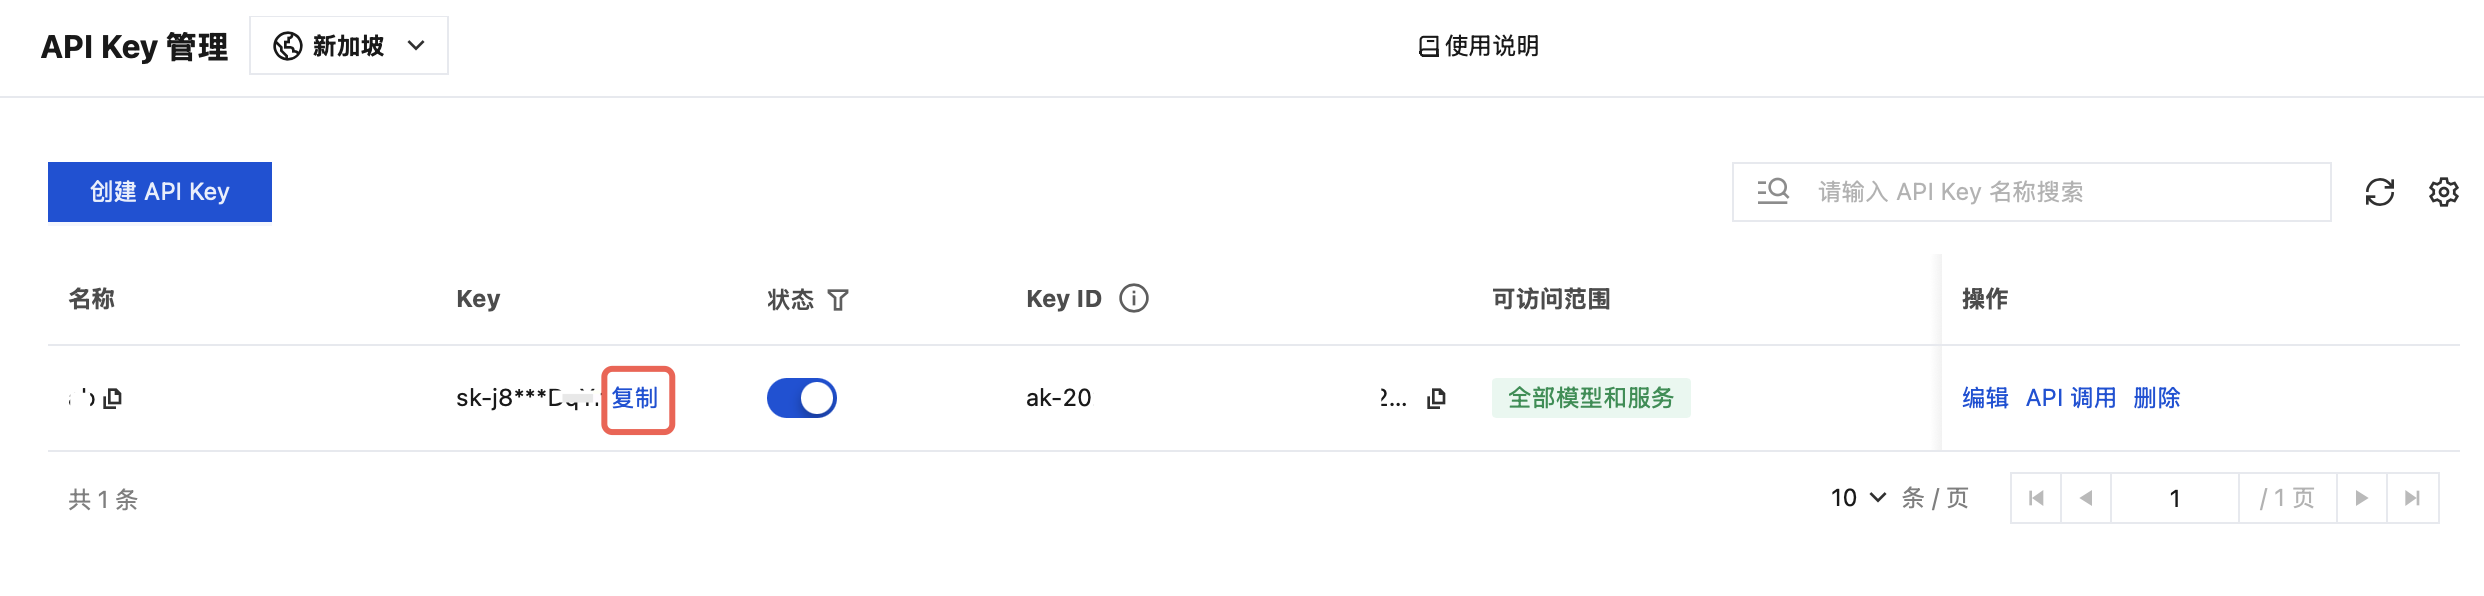
1. 进入 API Key 管理 页面,单击创建 API Key。操作详情请参见 创建 API Key。
注意:
需确认 Key 的可访问范围,如果为“限定范围”,需确保已勾选
deepseek-v4-pro 。2. 创建完成后,请您务必复制并妥善保管 API Key,在后续配置到工具的流程中将会使用该信息。
配置 WorkBuddy
1. 启动 WorkBuddy,单击左下角账户,选择设置。
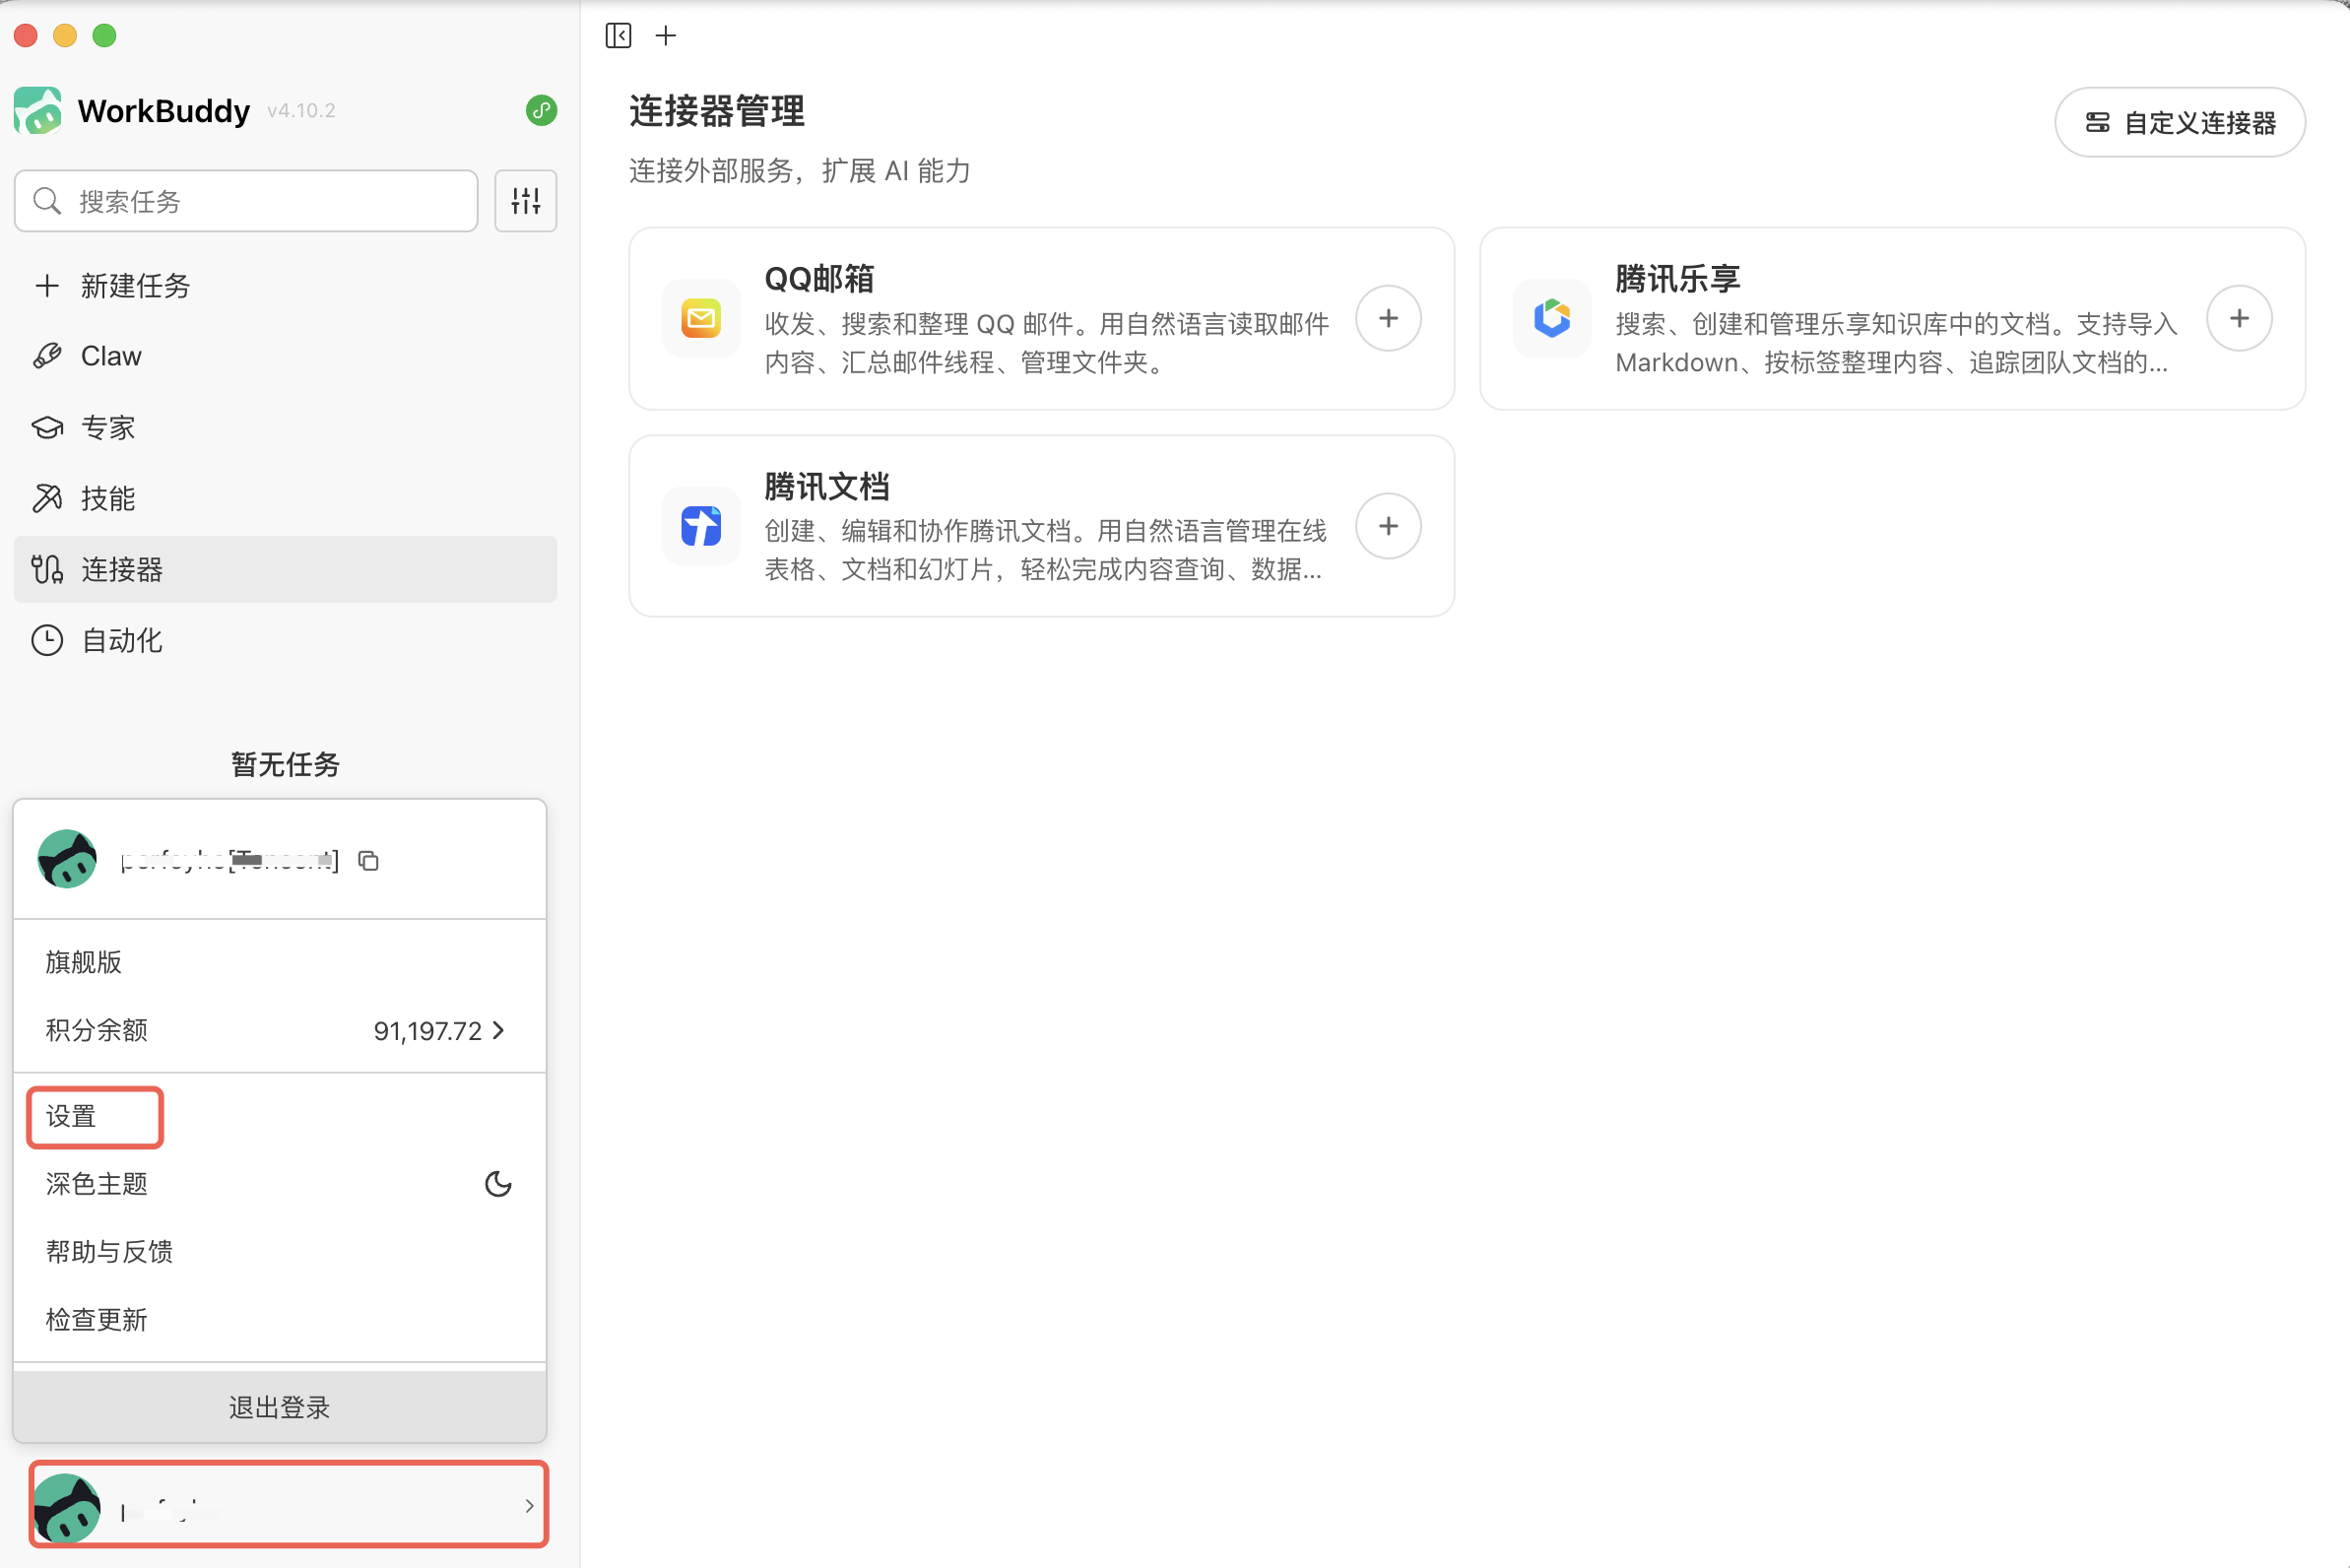
2. 在左侧导航中选择模型,在自定义模型中,单击添加模型。
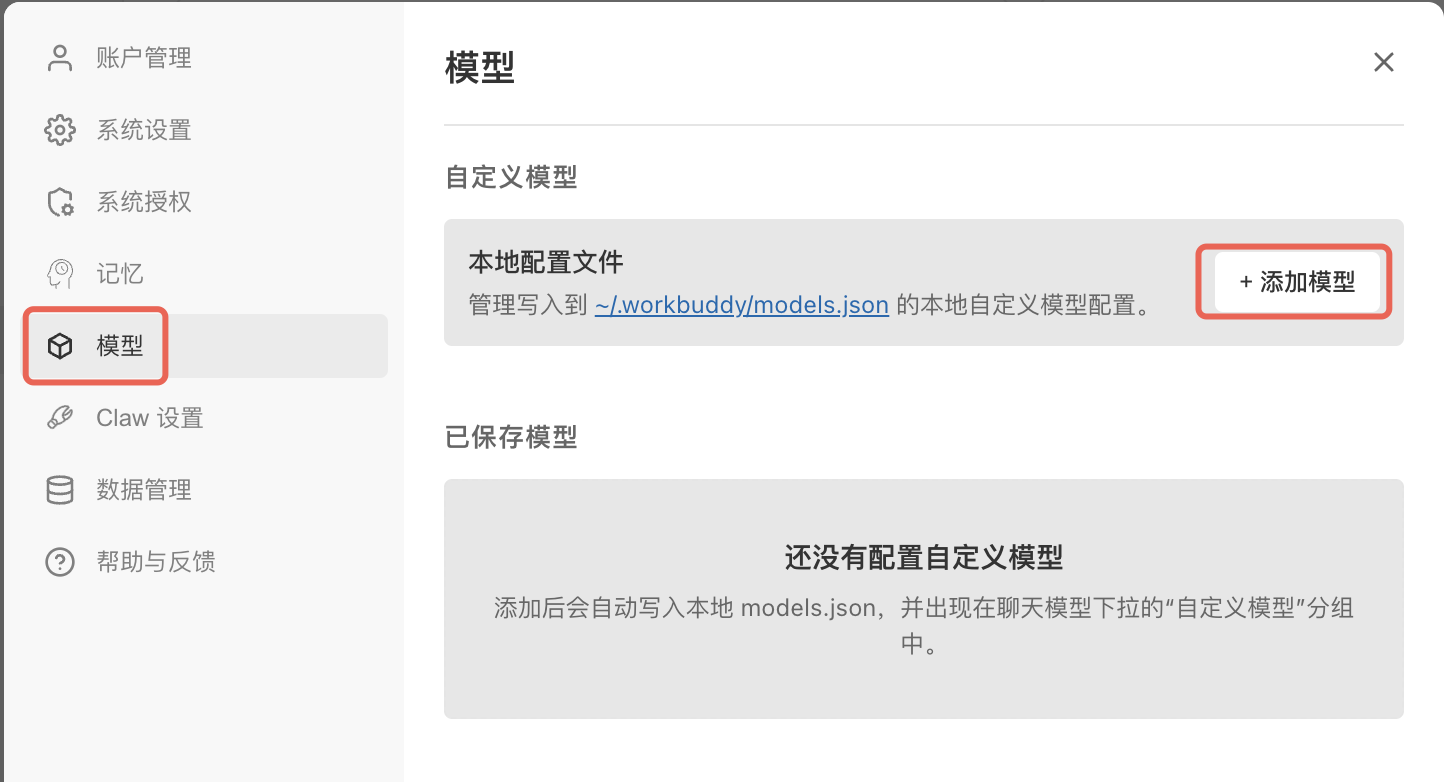
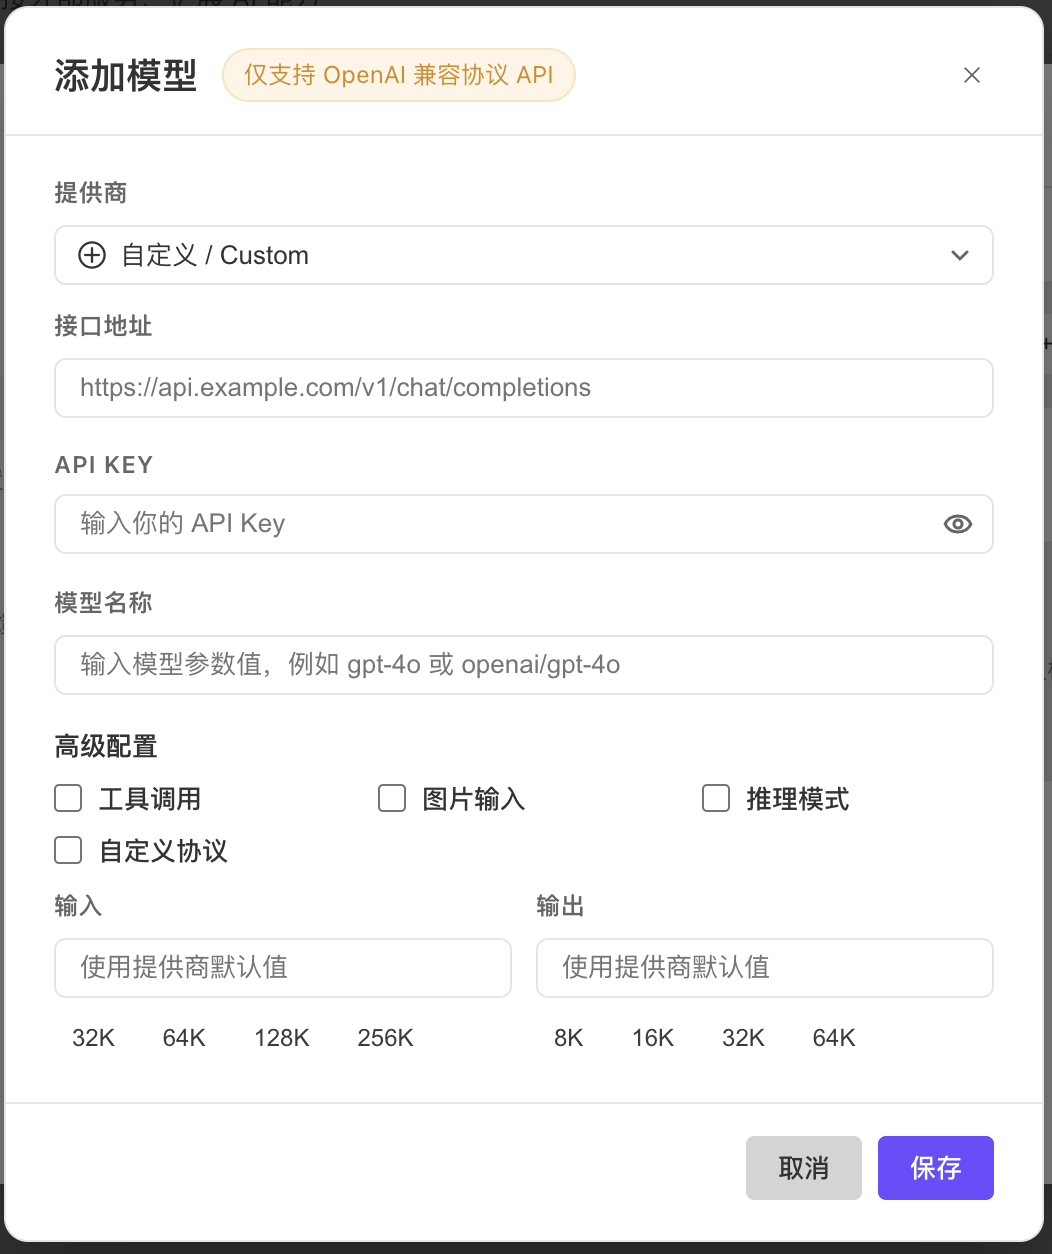
3. 配置以下信息,单击保存:
3.1 在提供商中,选择自定义 / Custom。如下图所示:
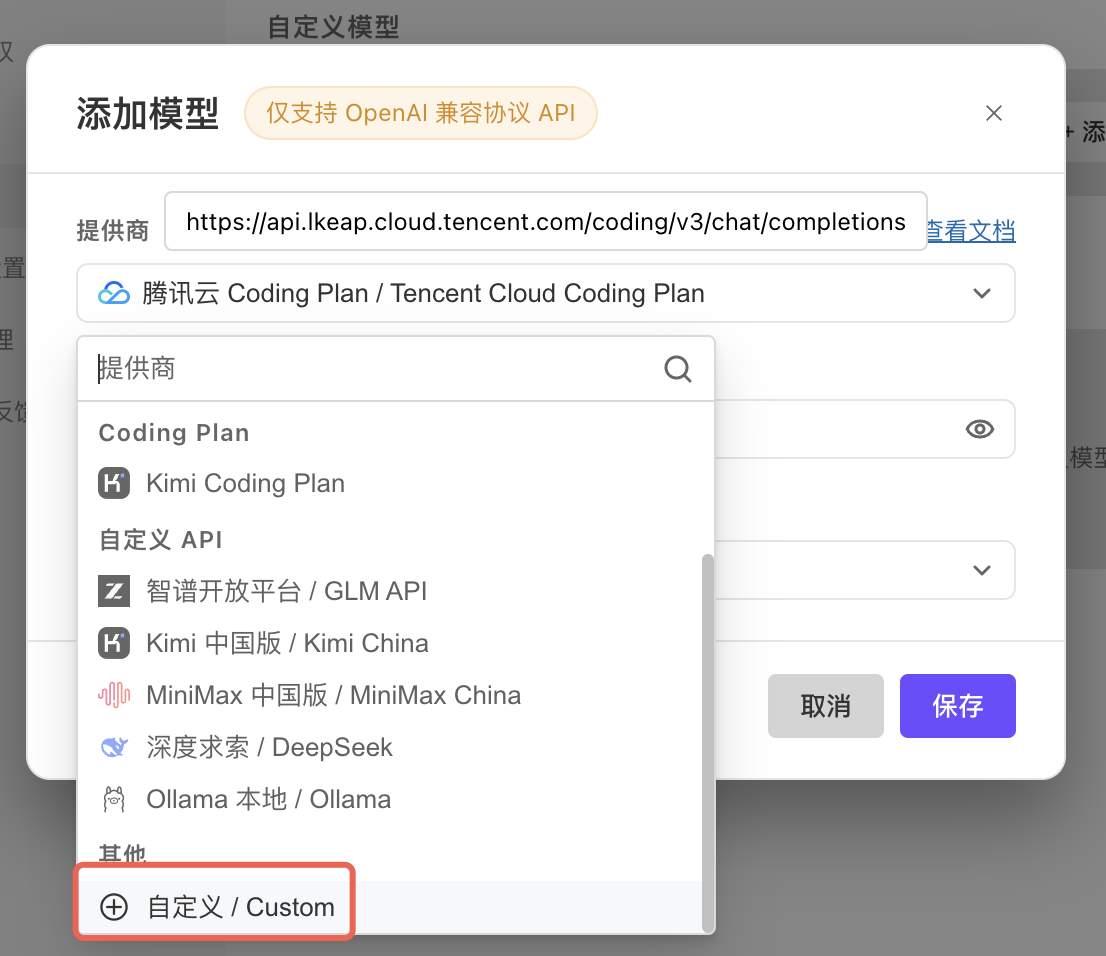
3.2 填写以下字段信息:
接口地址:
https://tokenhub-intl.tencentcloudmaas.com/v1/chat/completionsAPI Key:填入您的 API Key。
模型名称:填写
deepseek-v4-pro。高级工具:非必填,按需使用,建议勾选:工具调用、图片格式、推理模式。
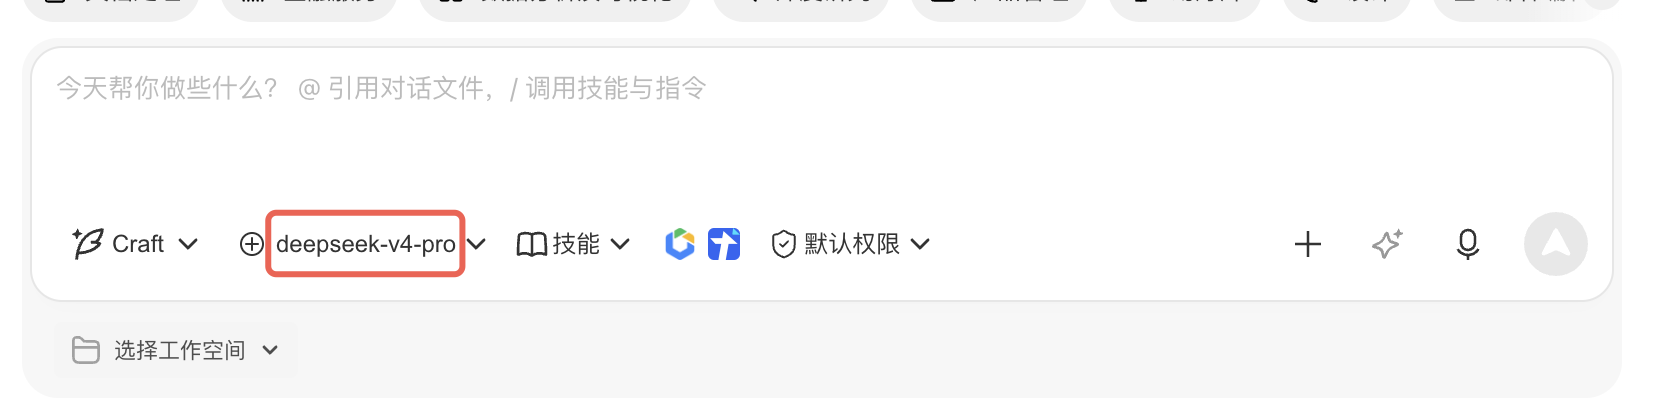
4. 配置完成后,在 WorkBuddy 模型选择框中选择已添加的模型,即可开始对话。
文档反馈