Cluster and Group Management
Download
Focus Mode
Font Size
Scenarios
Cloud Native Gateway cluster groups allow multiple groups to share the same routing configuration, facilitating unified management of multiple groups.
Cluster groups apply to the following scenarios:
1. Allocating resources of different specifications to the same business: Different resources, including the number of nodes and node specifications can be configured for different groups. You can configure fewer nodes and lower node specifications for development groups and more nodes and higher node specifications for production groups to achieve on-demand resource purchase.
2. Providing multiple gateway access entrances: Different groups can use different Cloud Load Balancer (CLB) instances to provide multiple entrances. You can configure different access policies for different CLB instances and bind them to different roles to implement permission control.
Note:
A default group is generated after each gateway instance is created, and you can add custom groups as required.
Prerequisites
Operation Steps
Step 1: Adding a Group
1. Log in to the TSF console.
2. In the left sidebar, click Cloud Native Gateway > Instance List to go to the gateway instance list page.
3. Click the ID or name of the target instance to enter the instance details page.
4. The default group is displayed on the Cluster Groups card at the bottom of the Basic Information page. A default group is generated after each gateway instance is created.
5. Click Add Group and specify information about the newly added group.
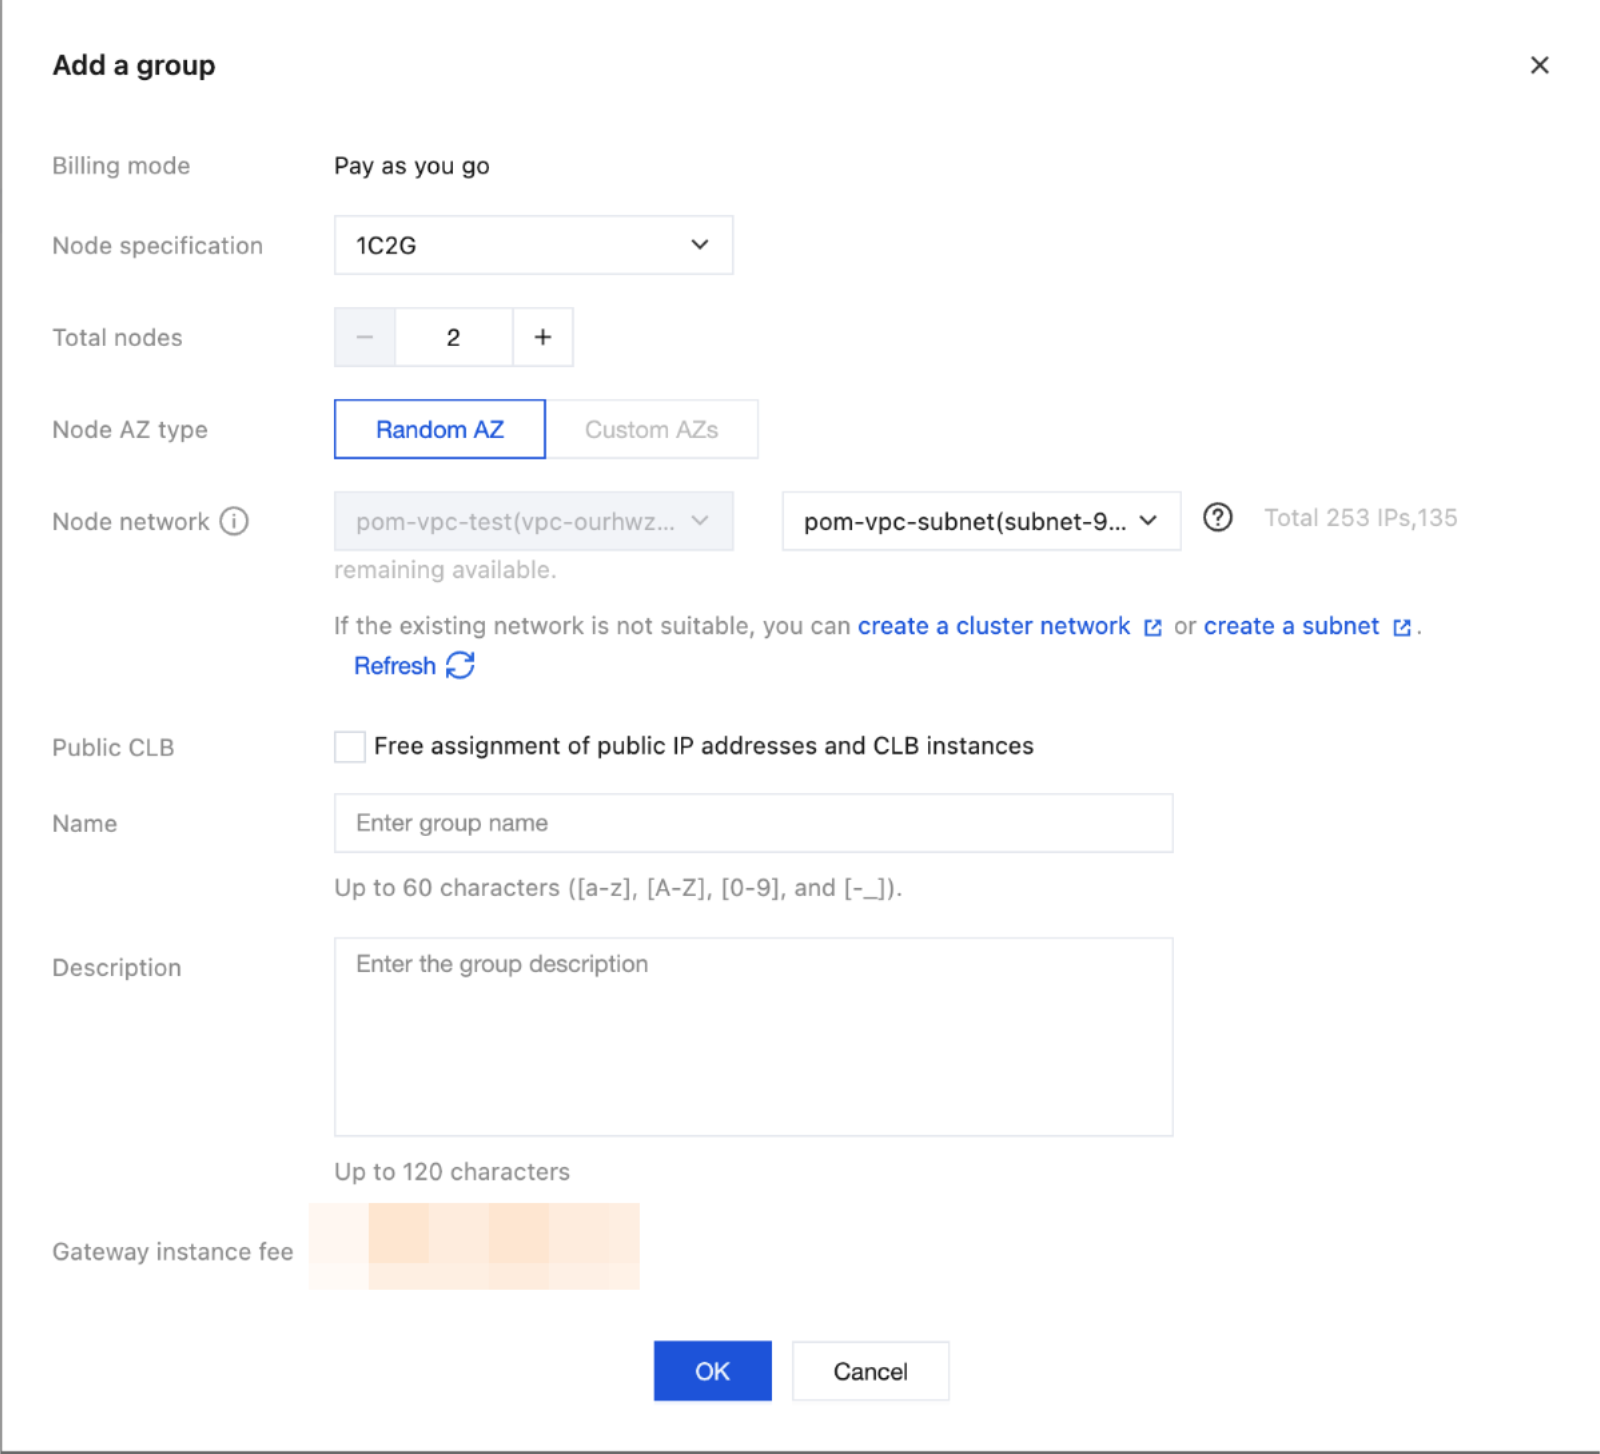
Parameter | Required | Description |
Billing Mode | - | By default, it is consistent with the billing mode of the gateway instance and cannot be modified. |
Node Specifications | Yes | Specification of each node in the cluster group. |
Number of Nodes | Yes | Number of nodes in the cluster group. |
Node AZ Type | Yes | When the number of nodes is 2, only Random AZ can be selected. When the number of nodes is greater than or equal to 3, you can select Random AZ or Specified AZ. (You must select at least two AZs and can select up to three AZs.) The Specified AZ feature is supported only in the Professional Edition. |
Node Network | Yes | Select the Tencent Cloud VPC network and Tencent Cloud subnet where the cluster group is to be deployed. The VPC network is the same as the gateway instance by default, and Tencent Cloud subnet selection is supported. |
Subnet | Yes | Select the Tencent Cloud subnet where the current cloud-native gateway is to be deployed. The subnet belongs to a VPC network. |
Public Network Bandwidth | Yes | Select the public network bandwidth of the cluster group. |
Group name | Yes | Enter the cluster group name. |
Description | No | Enter the description of the cluster group. |
6. Click OK and wait for the group to be created.
Step 2: Modifying Basic Information of a Cluster Group
1. In the upper-right corner of the Basic Information page, click Edit.
2. In the Edit Group Name/Description dialog box, modify the group name/description.
3. Click Confirm to complete the modification.
Step 3: Changing the Group Specifications
1. In the Group Information area, locate the Node Count field and click Change Node Count on the right.
2. In the Change Node Count dialog box, modify the number of nodes.
3. Click Confirm to complete the modification.
Step 4: Deleting a Group
You can manually delete a cluster group in the console if you no longer need it.
1. In the Group Information area, click Delete on the right.
2. In the displayed dialog box, confirm the information and click Delete to delete the group.
Note:
Only groups in the Running/Failed state can be deleted.
After a group is deleted, nodes under the group and their data are deleted. Proceed with caution.
Step 5: Accessing a Route
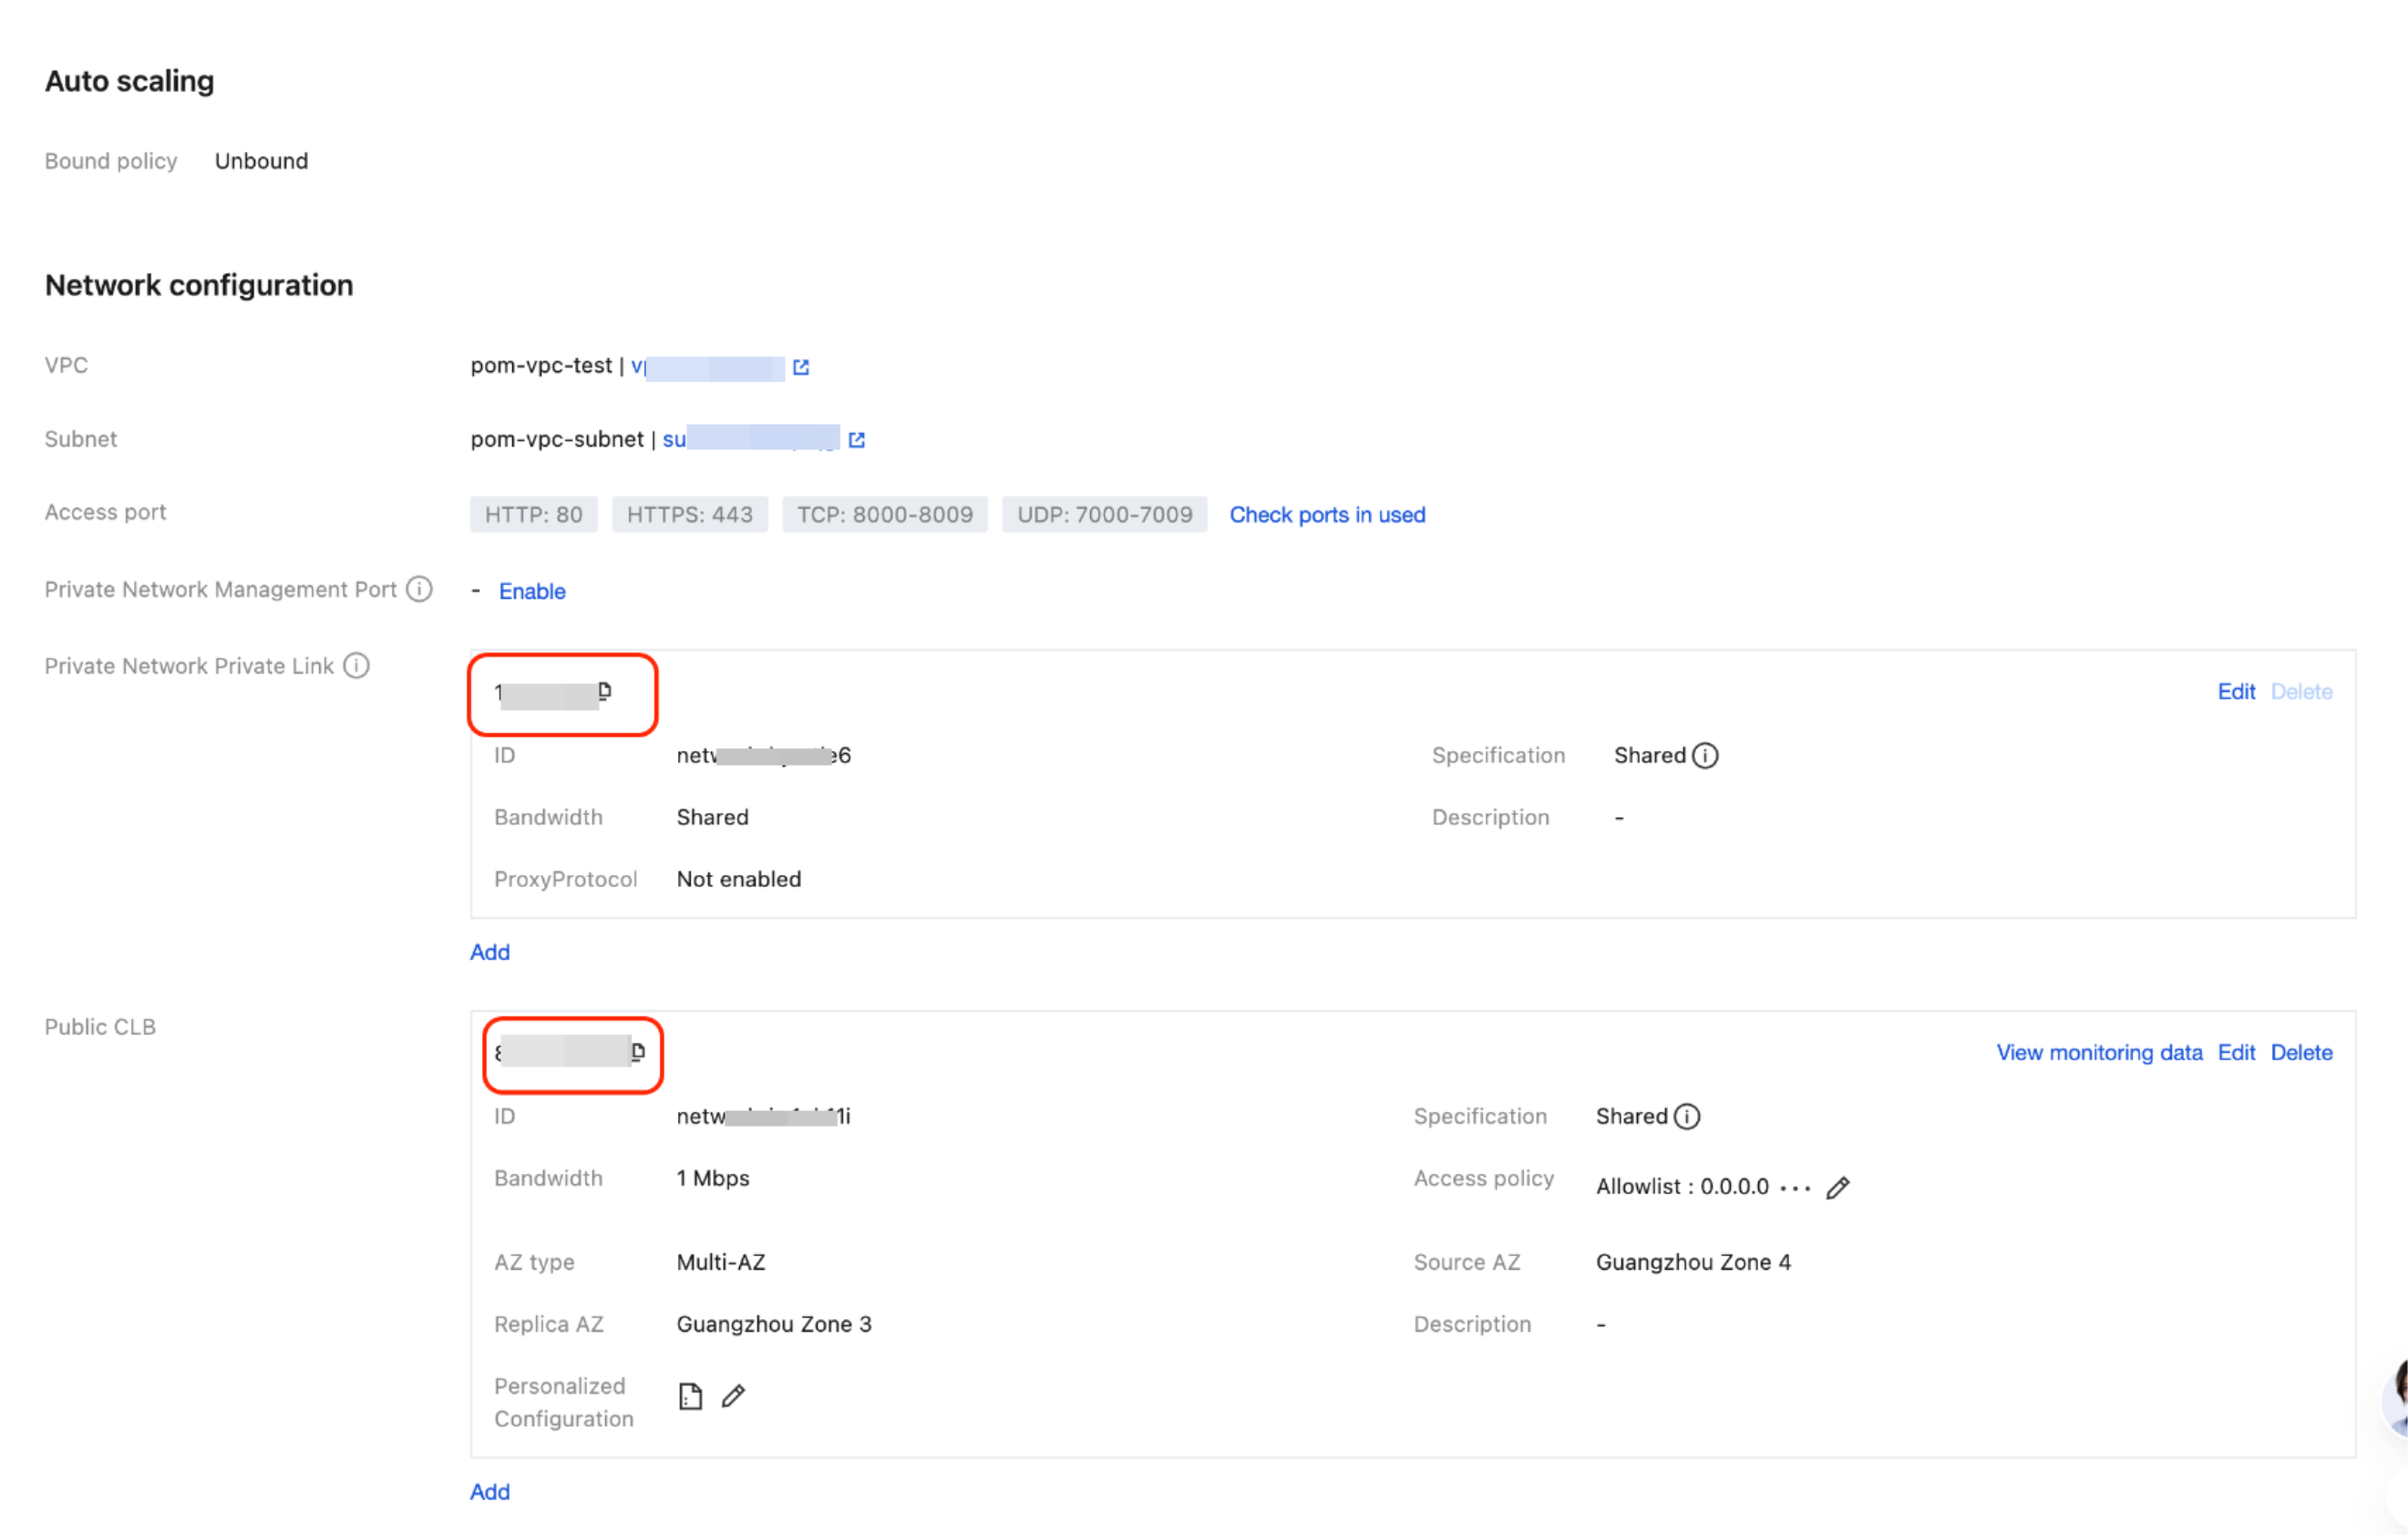
When accessing a route, you need to construct the access URL by concatenating the "group's public network CLB/private network Private Link IP address + route path".
Help and Support
Was this page helpful?
You can also Contact sales or Submit a Ticket for help.
Help us improve! Rate your documentation experience in 5 mins.
Feedback