This document describes how to bind Cloud Native Gateway resources (including services and routes) to WAF by adding domain names, enabling the detection and interception of traffic passing through cloud-native APIs.
Domain name protection provides service-level and route-level protection, which apply to protection of different granularities. You can configure service-level and route-level protection based on business features and API usage of the gateway to reduce costs and ensure API security. The following table describes the differences between service-level protection and route-level protection.
Protection Type
Protection Description
Status Conversion
Service-level protection
Requests to all routes under this service are processed by the WAF default rule engine. If you need to enable WAF protection for a specific service, you can use this granularity of protection.
Disabled by default.
When it is enabled for all routes under a service, the status is automatically changed to All enabled.
When it is disabled for some routes under a service, the status is automatically changed to Partially enabled.
Route-level protection
Requests to only this route are processed by the WAF default rule engine. If you need to enable WAF protection for a specific route, you can use this granularity of protection.
Disabled by default.
When service-level protection is enabled, the status is automatically changed to All enabled.
3. Select the System Plugins tab to check whether the plugins are updated to the latest version.
Operation Steps
Step 1: Configuring WAF
1. Log in to the WAF console, and choose Access Management > Domain Name Access in the left sidebar.
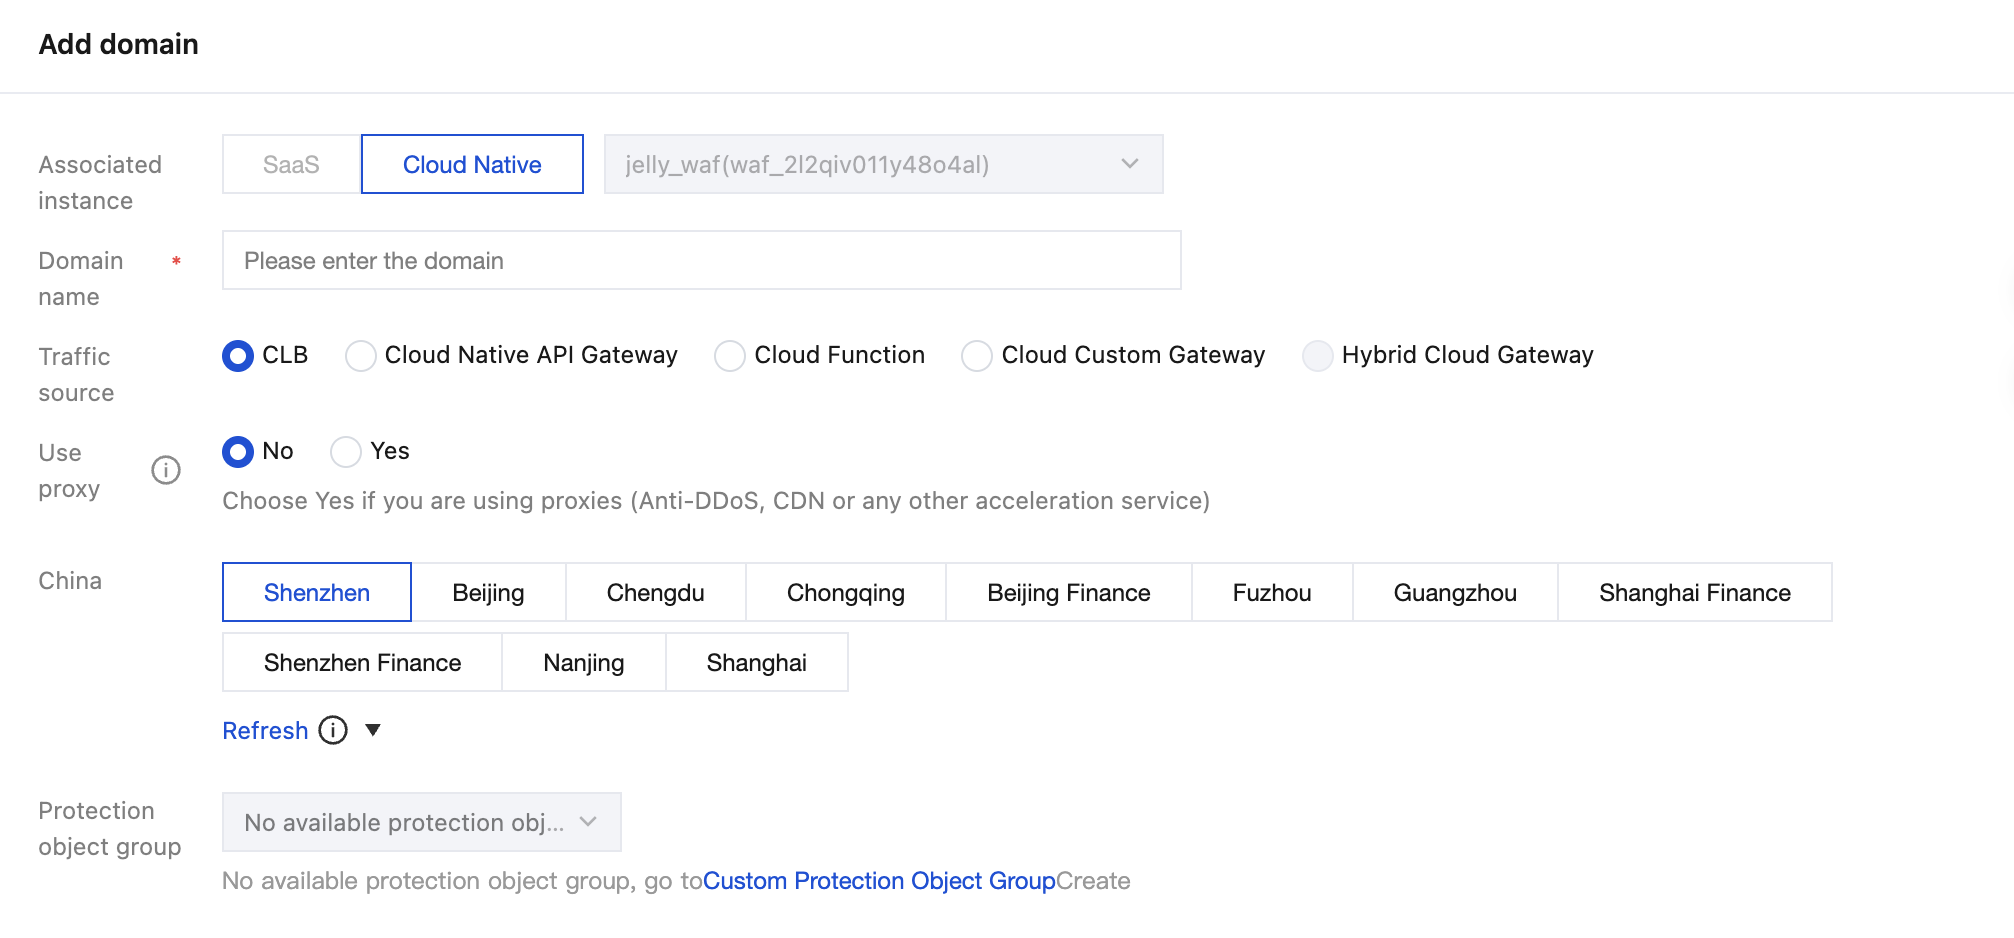
2. On the Domain Name Access page, click Add Domain, specify related parameters, and click OK.
Parameter
Description
Instance
Select CLB-based WAF.
Domain Name
Enter the domain name to be protected.
Traffic Source
Select Cloud Native Gateway.
Agent
Select Yes. WAF obtains the customer's real IP address as the source address through the XFF field. If this option is selected, the source IP address may be forged.
Region
Select the region to be protected.
3. Click OK to return to the Domain Name Access page. On this page, you can view information such as the WAF-protected domain name, gateway instance ID, and name.
Step 2: Adding WAF-protected Domain Names
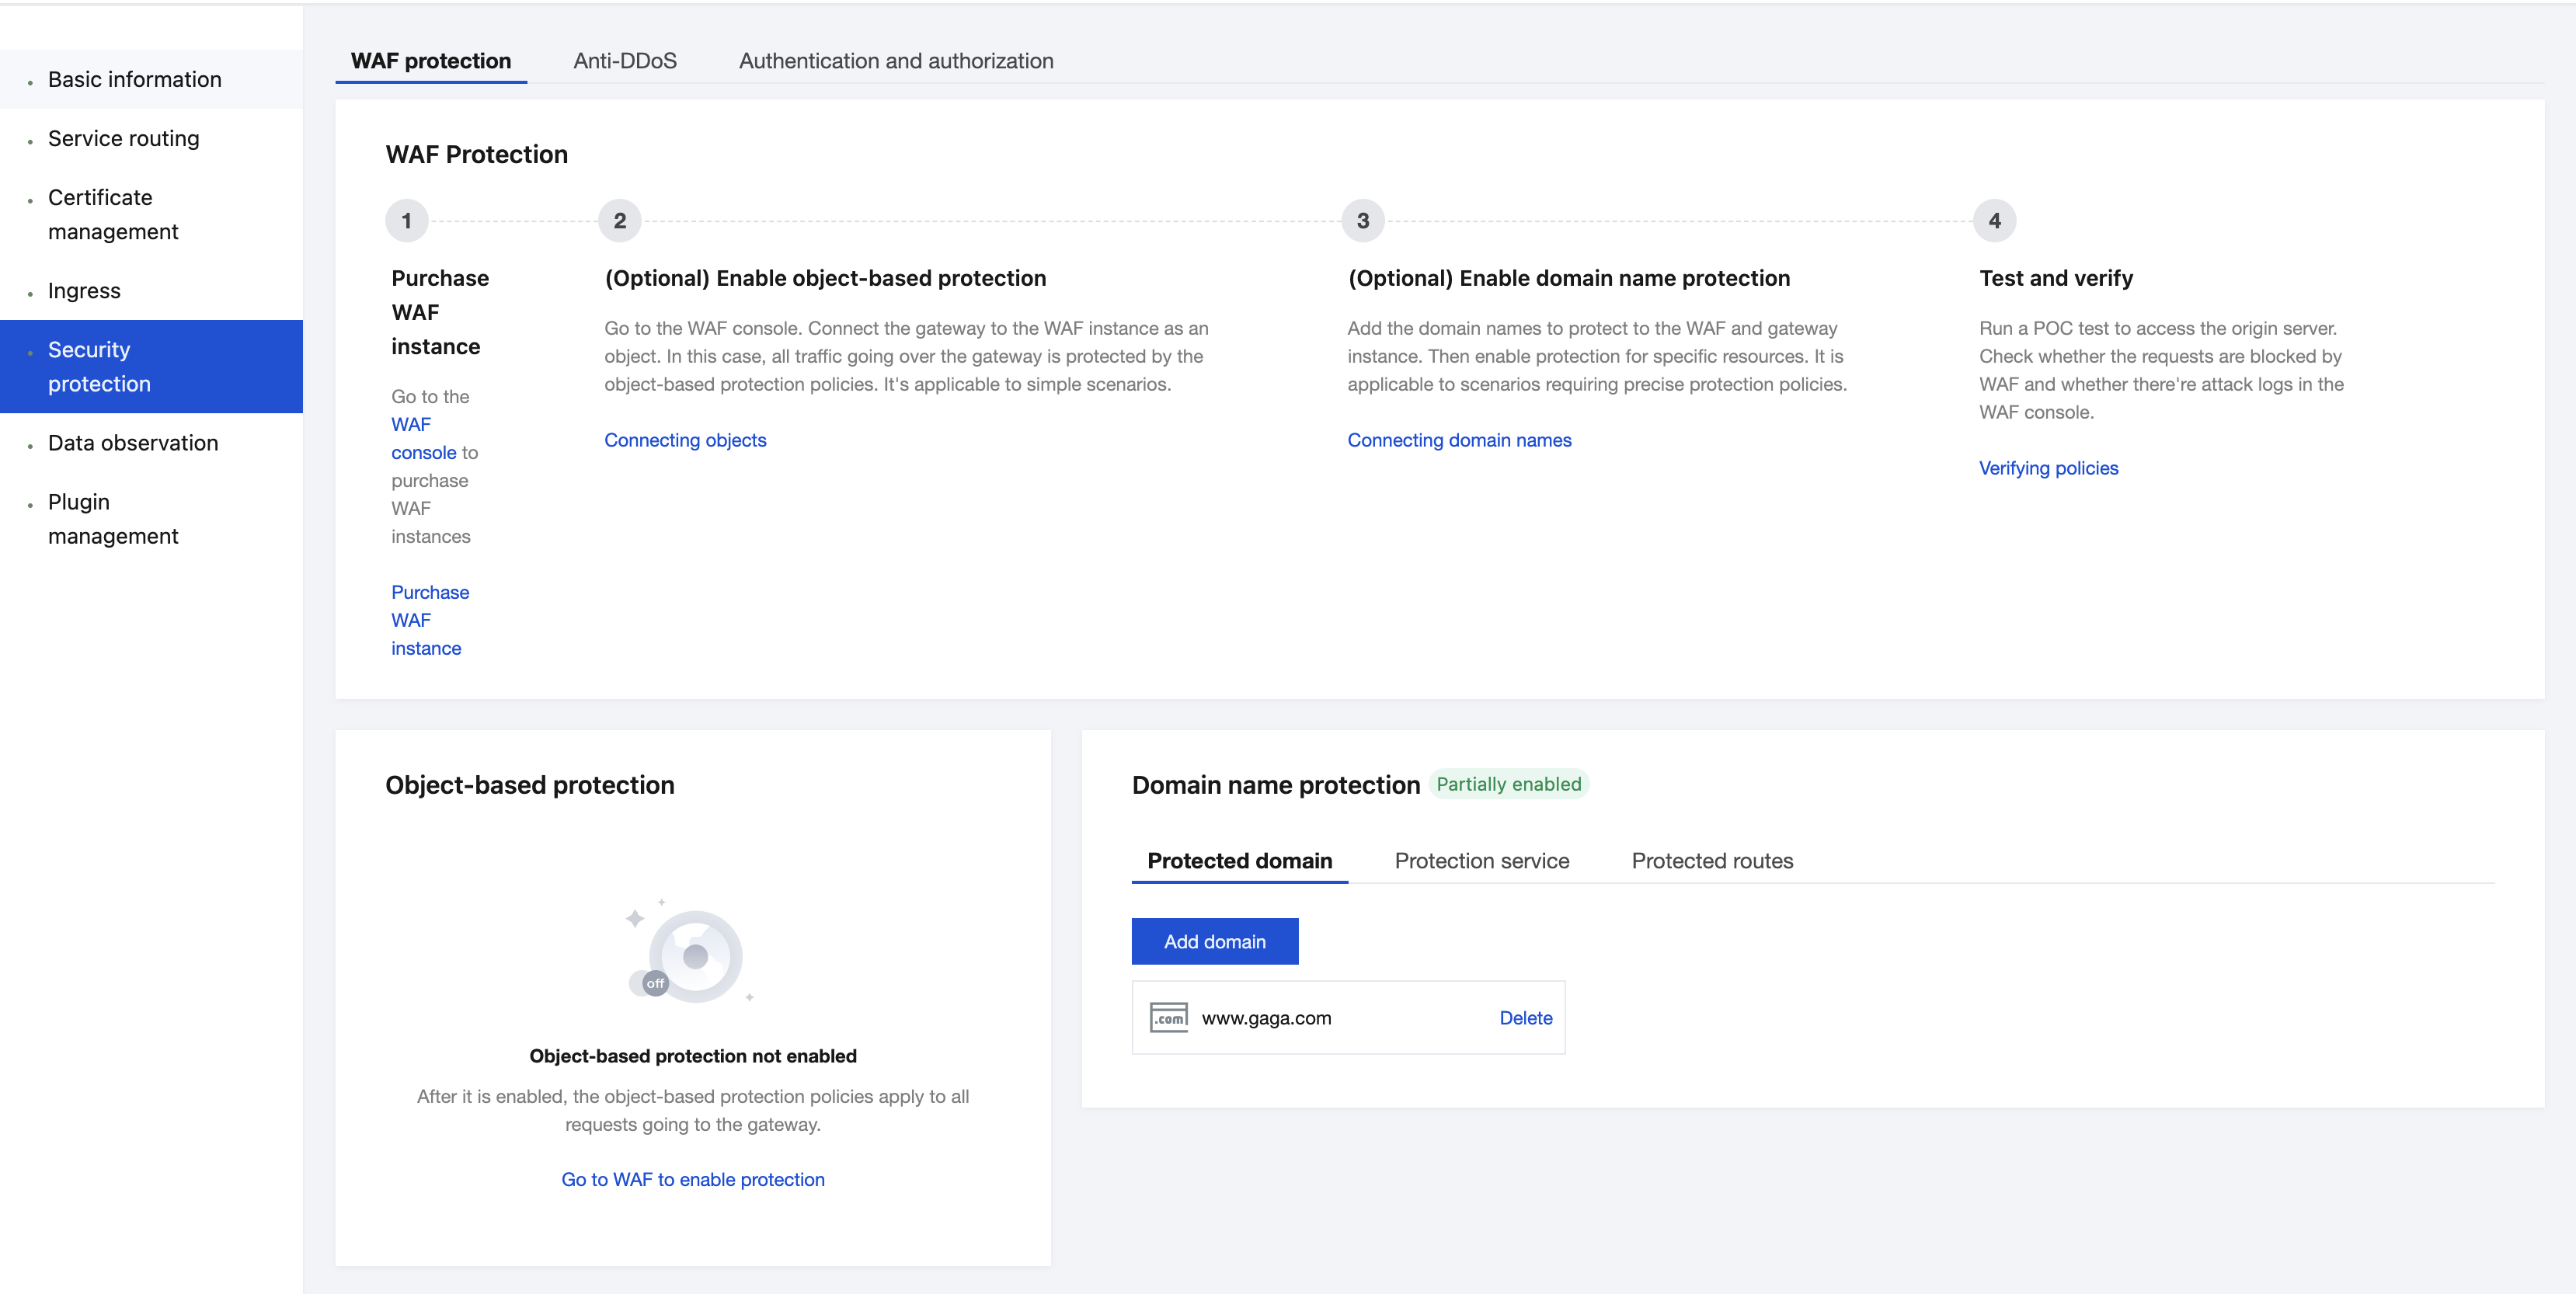
1. Log in to the Cloud Native Gateway console, click the instance name to go to the instance details page, choose Security Protection > WAF Protection in the left sidebar, click Add Domain on the Protected Domain Tab, and select or enter the domain name that has been connected to WAF in Step 1. You can select a domain name that corresponds to a certificate already added in Certificate Management, or manually enter a domain name to add it.
2. Click Confirm to confirm that the WAF-protected domain name is added.
Attention:
Ensure that the WAF-protected domain name is connected to WAF. Otherwise, requests from the domain name cannot be sent for review.
Step 3: Enabling Resource Protection
Cloud Native Gateway supports protection at the service and route levels.
Enabling Service-Level Protection
1. Go to the Protected Service tab. All services under the instance are displayed by default.
2. Select the service that needs to connect to WAF, click Enable Protection, and click OK in the displayed dialog box to enable WAF protection for the service.
Note:
After service-level protection is enabled, it takes effect for the service and all routes under it.
If WAF protection is disabled for some routes under a service, the service protection status and instance protection status are all changed to Partially enabled.
Enabling Route-Level Protection
1. Go to the Protected Route Tab, click a protected route, and all routes under the current instance are displayed by default.
2. Select the route that needs to connect to WAF, click Enable Protection, and click OK in the displayed dialog box to enable WAF protection for the route.
Disabling Service-Level Protection
1. Go to the Protected Service Tab, click a protected service, and all services under the current instance are displayed by default.
2. Select the service that needs to disable WAF access, click Disable Protection, and click OK in the displayed dialog box to disable WAF protection for the service.
Attention:
After service-level protection is disabled, it takes effect for the service and all routes under it.
Disabling Route-Level Protection
1. Go to the Protected Route Tab, click a protected route, and all routes under the current instance are displayed by default.
2. Select the route that needs to disable WAF access, click Disable Protection, and click OK in the displayed dialog box to disable WAF protection for the route.
Step 4: Testing and Verifying the Protection Status
1. Log in to the Cloud Native Gateway console, click the instance name to go to the instance details page, and then select Security Protection in the left sidebar.
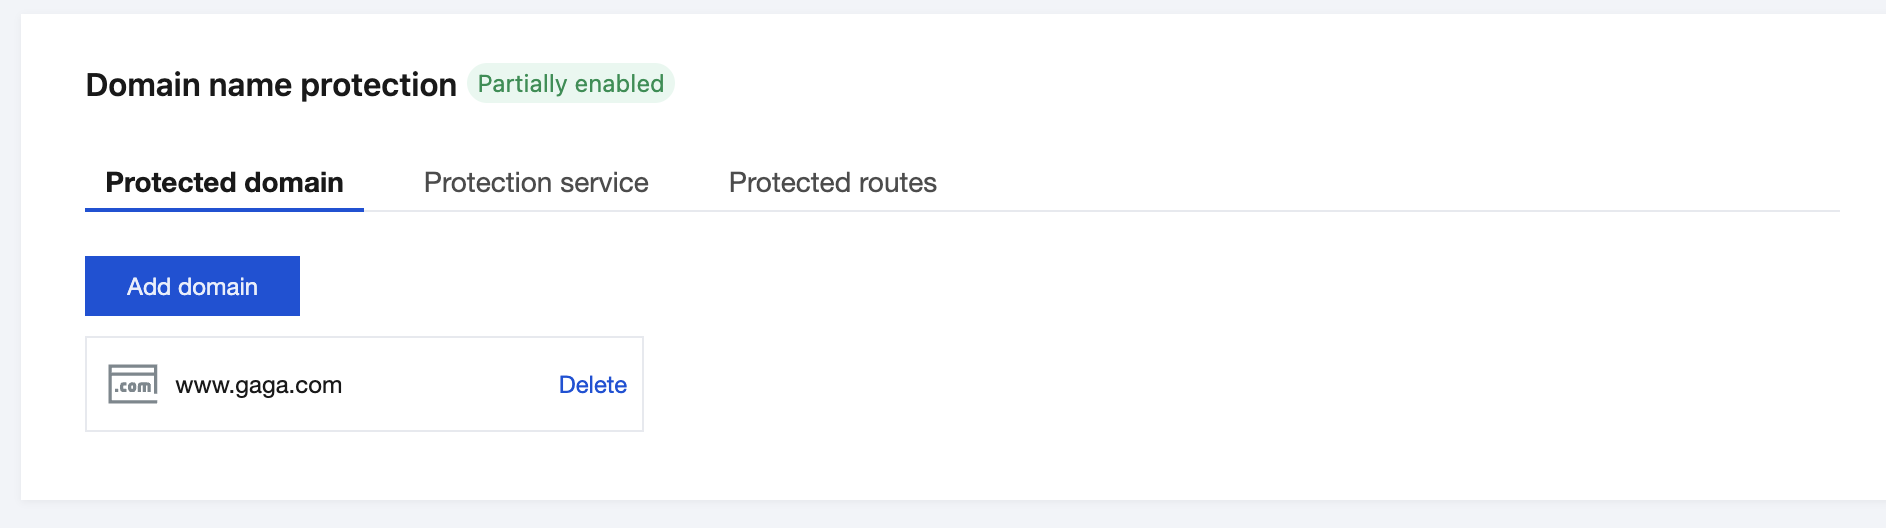
2. Check that the domain name protection status is Partially enabled or All enabled.
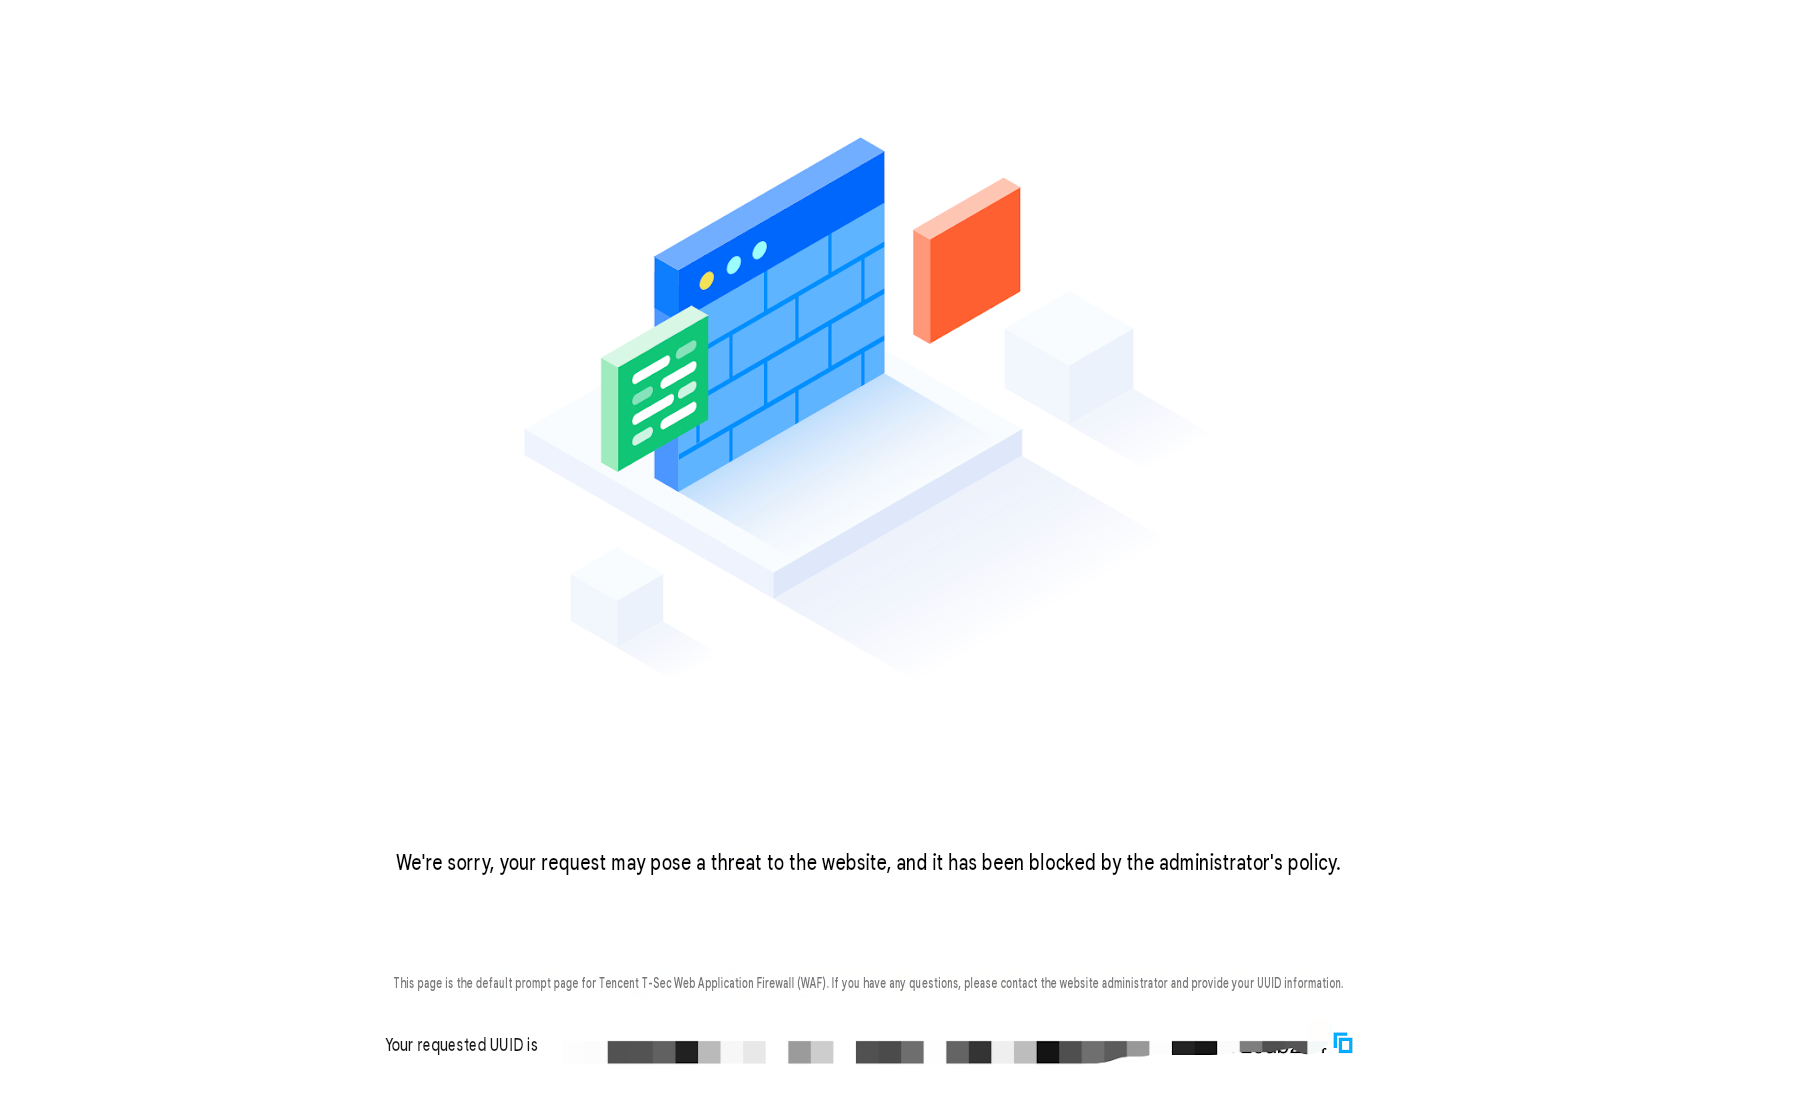
3. Enter http://<gateway domain name or IP address>/?test=alert(123) in the address box of the browser to visit the gateway. The browser displays the blocking page, indicating that WAF protection is normal.