Creating a compute resource
ダウンロード
フォーカスモード
フォントサイズ
This document describes how to create compute resources in a Workspace and manage their full lifecycle, including starting, stopping, editing, and deleting them.
Overview
DataBuddy provides four cluster types: job clusters, interactive clusters, platform clusters, and real-time clusters. You can select the desired type during creation.
Prerequisites
You have joined the target workspace and have the role permission to create compute resources.
Your account has the permission to place orders on Tencent Cloud.
Note:
If the required CAM permissions are missing, a permission prompt appears when you submit the creation request. Go to the CAM console to grant the corresponding policy to your account, and then try again.
Entering Compute Resource Management
In the left sidebar, select Compute Resources to go to the resource list page. The list displays all compute resources created in the current workspace:
Column | Description |
Resource Name/ID | The name is entered by you when you create the resource, and the ID is automatically generated by the system. Click the name to go to the details page. |
Status | Cluster status lifecycle, with filtering supported. |
Resource Type | Job clusters, interactive clusters, platform clusters, and real-time clusters, with filtering supported. |
Cluster Type | Underlying engine type (Spark / Flink, and so on) |
Resource Limit | Configured CU quota limit |
Billing Mode | Pay-as-you-go |
Auto-Stop When Idle | Only interactive clusters display the specific time, while other clusters display -. |
Creator. | User who created the computing resource, with filtering supported. |
Operation | Start / Stop / Edit / Delete / Top Up / More |
The following list operations are supported:
Search: Performs a fuzzy search by resource name / ID.
Filter: Filters by status, resource type, and creator.
Refresh: Manually refreshes the list.
Creating a compute resource
1. In the upper-right corner of the resource list page, click + Create Compute Resource.
2. In the "Create Compute Resource" dialog, configure the settings in the following two sections:
Basic Information
Parameter | Description | Required | Default Value |
Resource Name | Display name that supports Chinese characters, uppercase and lowercase letters, digits, and - and _, with a maximum length of 50 characters. | Yes | - |
Resource Description | Description of the resource purpose for team identification. | No | Null |
Resource Configuration
Parameter | Description | Required | Default Value |
Resource Type | Select job cluster / interactive cluster / platform cluster / real-time cluster. A description of the applicable scenario for each type is displayed below the option card. | Yes | Job cluster |
Cluster Type | Supports Spark clusters and Ray clusters. Displayed only for job clusters. | Yes | Spark |
Compute Type | CPU. Displayed only for job clusters. | Yes | CPU |
Image version | Image version of the underlying cluster engine, such as Standard-S 1.1 / Spark 3.5. For job clusters, you can select Machine Learning to switch to a machine learning scenario image. | Yes | Standard-S 1.1 |
Resources Quotas | Drag the slider to set the CU quota limit. The range is 16 to 1024 CU, with scale marks at 16 / 64 / 128 / 256 / 512 / 1024 and a step size of 1. 1 CU ≈ 1 core 4 GB | Yes | 64 CU |
Network Settings | Select the VPC and subnet to be connected. Displayed only for platform clusters and real-time clusters. | Yes (Platform/Real-time clusters) | Null |
Billing mode | Pay-as-you-go | Yes | Pay-as-you-go |
Configuration Cost | The system dynamically calculates the estimated hourly cost range based on the quota range. Billing is based on actual CU usage. | Automatic | Automatic |
Note:
Job clusters and interactive clusters generate pay-as-you-go orders for DLC Data Lake Compute. Ensure that your account has the required permission to place orders.
Interactive Cluster Exclusive Configuration
Interactive clusters additionally provide the Auto-Stop When Idle configuration:
Parameter | Description | Required | Default Value |
Concurrency of a single instance | Specifies how many SQL statements a single compute resource can run concurrently. Excess tasks are queued. | Yes | 32 |
Auto-stop | Switch. After it is enabled, the cluster automatically stops after no tasks have run for N minutes and automatically starts when a task is about to run. You can set the value to 1–99999 minutes. | Yes | Enabled, 10 minutes |
1. After completing all configurations, click the button at the bottom:
Button | Applicable Cluster | Action |
Create and start | Interactive clusters only | Save the configuration and start the cluster. The cluster status changes to Running. |
Create | All | Save the configuration. Interactive clusters enter the Pending Start state (without consuming resources), and other clusters enter the Running state. |
Cancel | All | Discard configuration |
2. After a successful save, a message appears:
${Resource Name} created successfully!Starting/Stopping a Cluster
Start/stop operations apply only to interactive clusters. For other cluster types, resource usage is controlled by the tasks themselves and does not require manual start or stop.
Start: In the operation column of the list, click Start, or click Start in the upper-right corner of the details page.
Stop: The operation location is the same as above.
Note:
An interactive cluster with "Auto-Stop When Idle" enabled is automatically stopped when idle. When a task runs again, the cluster is automatically started without manual intervention.
Cluster editing
1. In the operation column of the list, click Edit.
2. In the edit window, all configurations except Resource Type can be modified.
Note:
The Resource Type field cannot be modified in edit mode. To change the type, delete the resource and create a new one.
3. After you click Save, the cluster status changes to Resizing. The cluster automatically resumes running after the resizing is complete.
Deleting a Cluster
Procedure:
1. In the operation column of the list or in the upper-right corner of the details page, click Delete.
2. In the confirmation window, enter the resource name. You can click Delete only after the name is entered correctly.
If there are jobs running in the current cluster, select Force Delete. Force Delete stops all jobs in the cluster.
If Force Delete is not selected, the system first checks whether there are running jobs. If running jobs exist, the system prompts: "There are running jobs in this cluster. To continue the deletion, select Force Delete."
3. Click Delete to complete the operation.
Warning:
Deleting a cluster is an irreversible operation and immediately stops all running jobs. Before deletion, confirm that: ① jobs have been migrated to other clusters; ② the job history in the cluster is no longer needed.
Referencing Compute Resources
After the cluster is created and enters the Running state, you can select this compute resource from the following entry points:
Task type | Entries | Available Cluster Type |
Notebook task / Python File task / Ray task / SQL task | Workflow task configuration panel | Job cluster |
Offline data access task | Data access task configuration | Platform cluster |
Real-time data access task | Data access task configuration | Real-time cluster |
SQL Exploration / Dashboard / ChatBI / File Upload | Top of the task editor | Interactive cluster |
The compute resource dropdown list displays the resource name and remaining number of CUs (for example,
Cluster 1 | Remaining CUs for real-time sync: 2 / 16). On the left side of the parentheses is the number of CUs used by the same type of jobs in the current cluster, and on the right side is the resource limit of the cluster.Use Limits
Resource Type cannot be modified: In edit mode, the Resource Type field is read-only. To change the type, delete the resource and create a new one.
Force Delete terminates running jobs: Migrate or stop running jobs before deletion.
CU Quota Step: It is recommended to configure the quota in common increments such as 16 / 64 / 128 to facilitate load issue troubleshooting.
FAQs
How to Resolve Permission Issues When Creating a Cluster?
Contact your account administrator to add order-related policies for the current account in the CAM console. After authorization is complete, return to DataBuddy and create the resource again.
How Long Does It Take for Cluster Quota Modifications to Take Effect?
The resizing process is typically completed within minutes. During resizing, the cluster status displays "Resizing". New jobs cannot be accepted during this period, but running jobs will not be interrupted. It is recommended to perform this operation during off-peak hours.
Are Interactive Clusters in the Pending State Billed?
In the "Pending Start" state, the cluster does not actually occupy compute resources and does not incur CU usage fees. Billing based on actual usage starts only after the cluster enters the "Running" state.
What to Do If a Sub-account Cannot Purchase Compute Resources?
A sub-account cannot purchase DataBuddy compute resources because it lacks the permission to place orders or create the corresponding clusters. You can contact the holder of the root account or a sub-account with higher permissions (such as AdministratorAccess) and authorize the sub-account by referring to the following methods.
Method 1: Authorization via a Preset Policy
1. Select a sub-account: Go to the CAM user list, find the sub-account to authorize, and click Authorize.
2. To authorize a preset policy: Search for the preset policy name "QcloudDataBuddyComputeBy" to complete the authorization.
Note:
Because DataBuddy interactive clusters and job clusters must be created based on the Data Lake Compute (DLC) engine, after the preset policy is authorized, the sub-account will be able to purchase DataBuddy and Data Lake Compute (DLC) related cloud products.
Method 2: Authorization via a Custom Policy
1. To create a custom policy: Go to the CAM policy page, click Create Custom Policy, enter the following JSON in the policy content, and then customize the policy name and description on the Basic Information page. You can also authorize directly on this page (optional).
{"statement": [{"action": ["cam:PassRole"],"condition": {"string_equal": {"qcs:passed_to_service": ["wedata.cloud.tencent.com"]}},"effect": "allow","resource": ["*"]},{"action": ["finance:trade"],"effect": "allow","resource": ["qcs::dlc:::*","qcs::wedata:::*"]},{"action": ["dlc:CreateDataEngine"],"effect": "allow","resource": ["*"]}],"version": "2.0"}
2. Select a sub-account: Go to the user list page, find the sub-account to authorize, and click Authorize.
3. To authorize a preset policy: Search for the custom policy name to complete the authorization.
How to Create an Engine After Compute Resources Are Created?
Some compute resources require an engine to be created before they can be used after the resource is created. The creation steps are as follows:
Step | Operation |
Go to the compute resource list. | As shown in the figure, locate the compute resource for which an engine needs to be created, and click "More - Engine Management": 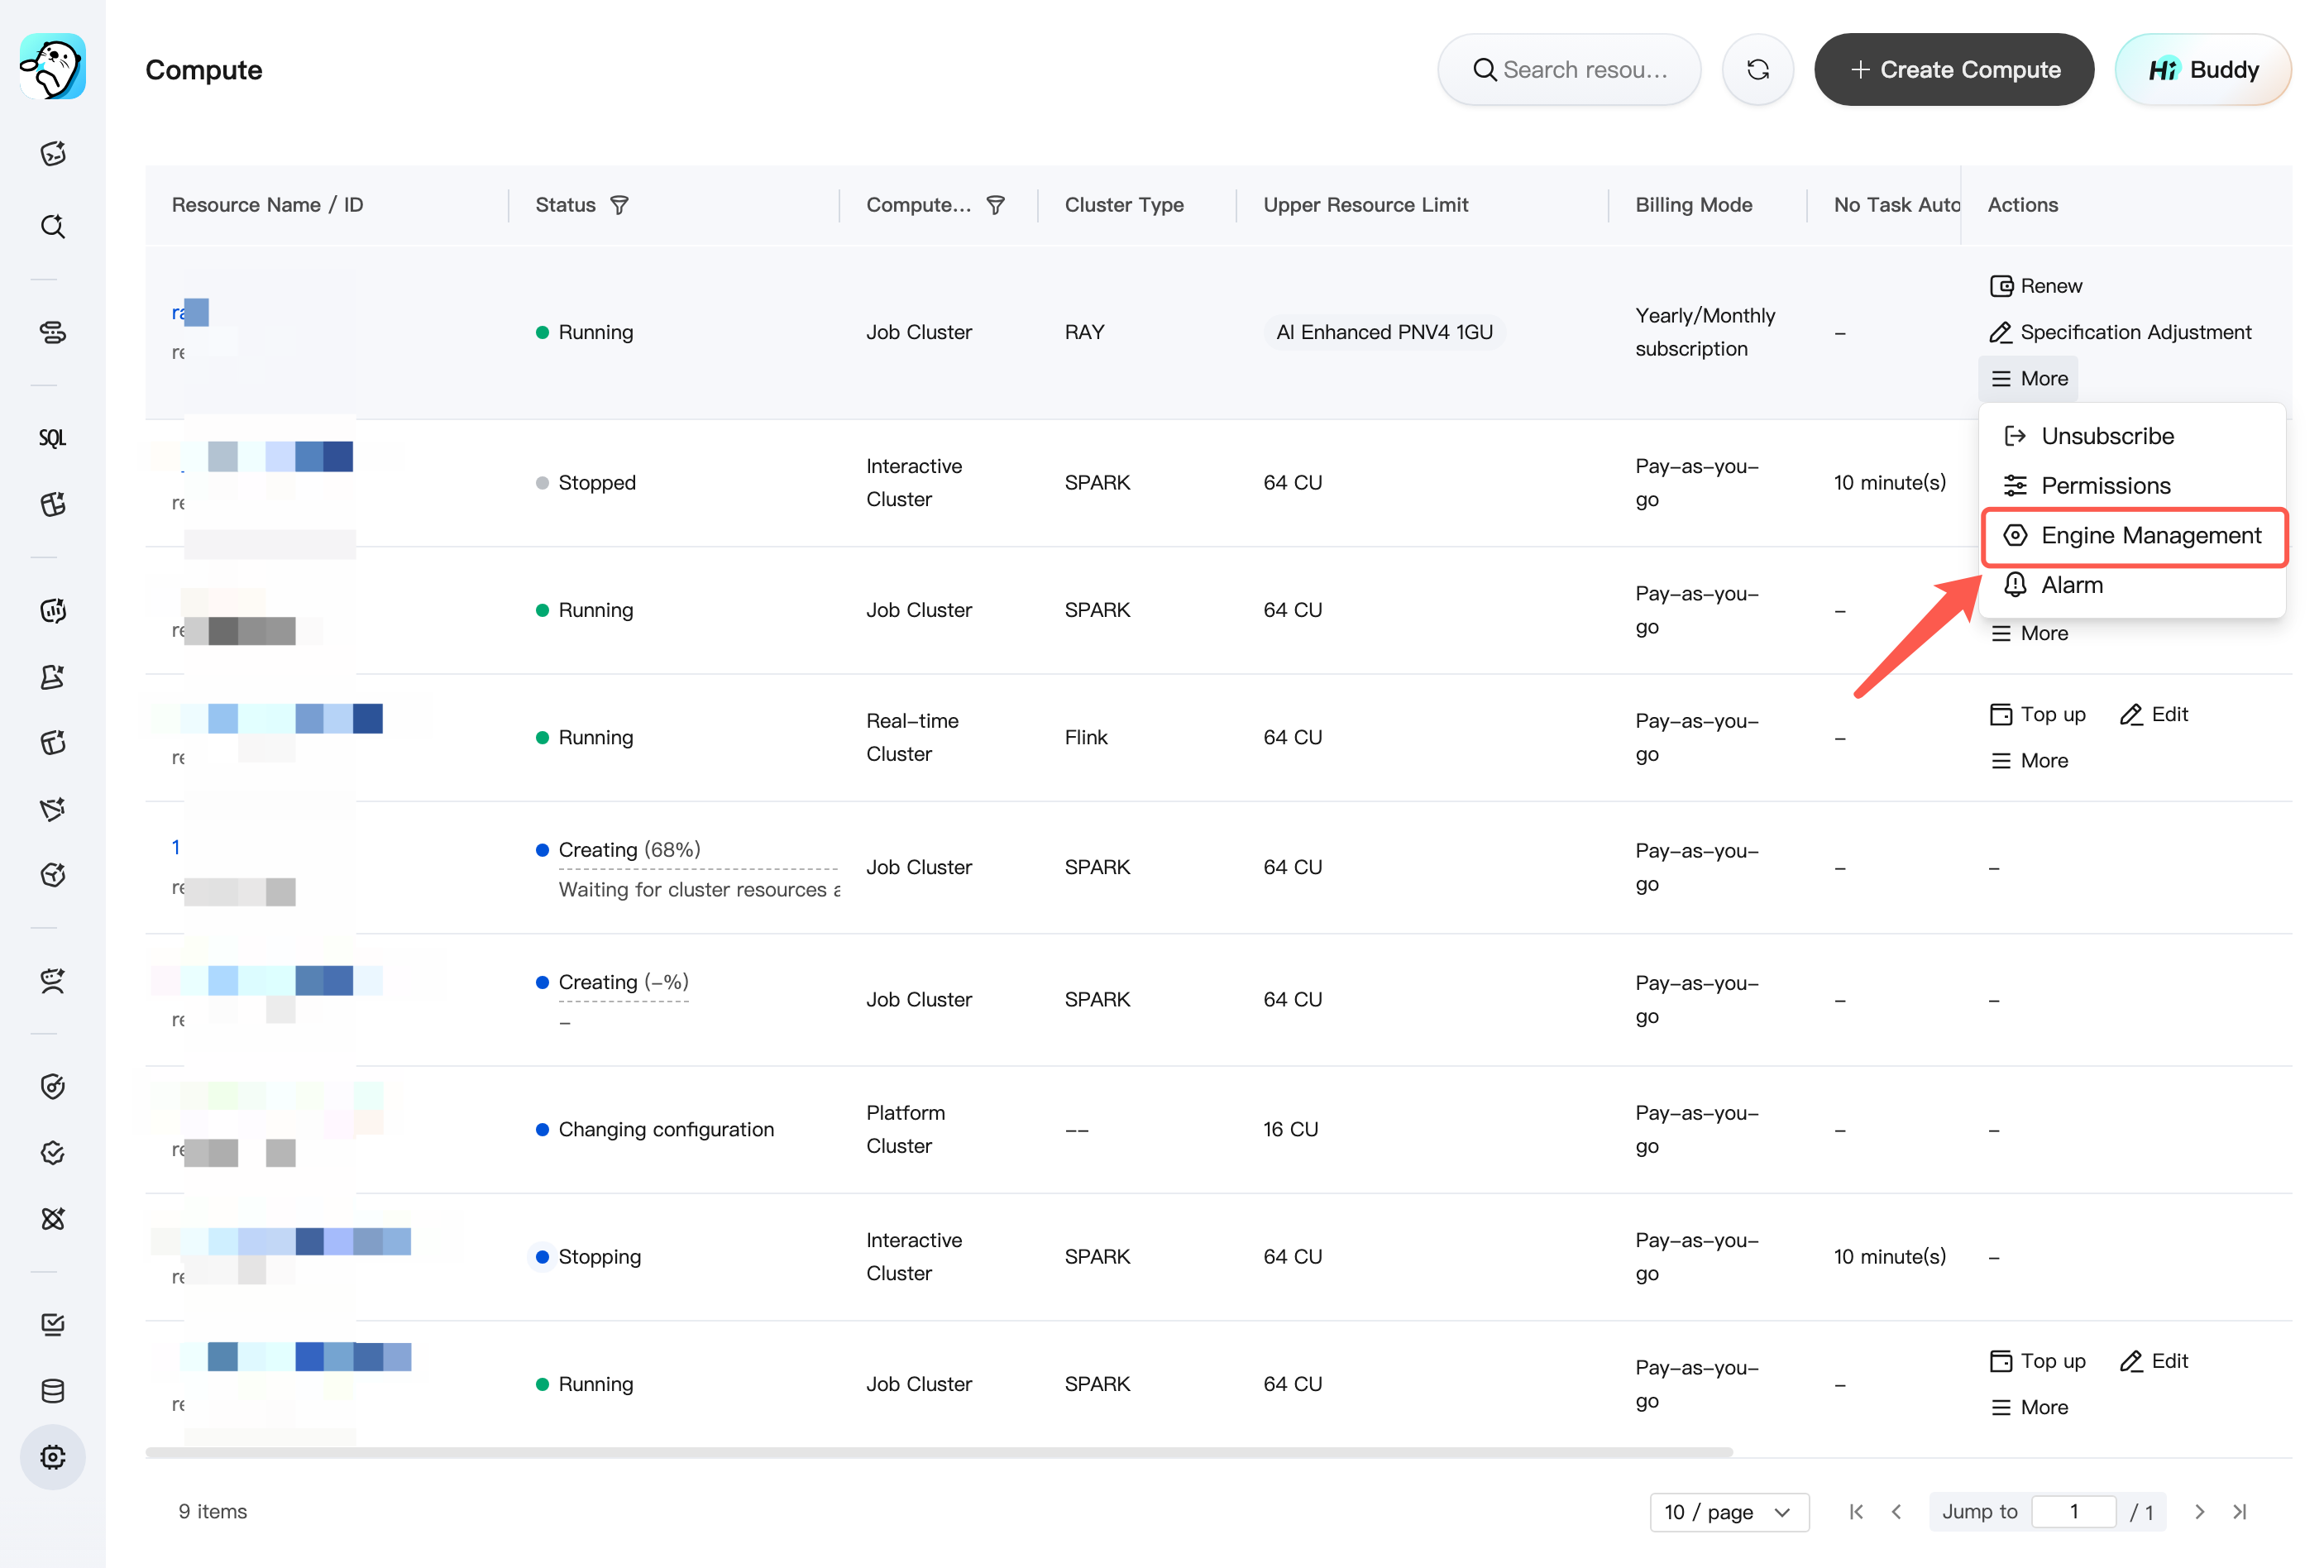 |
Creates a cluster. | As shown in the figure: 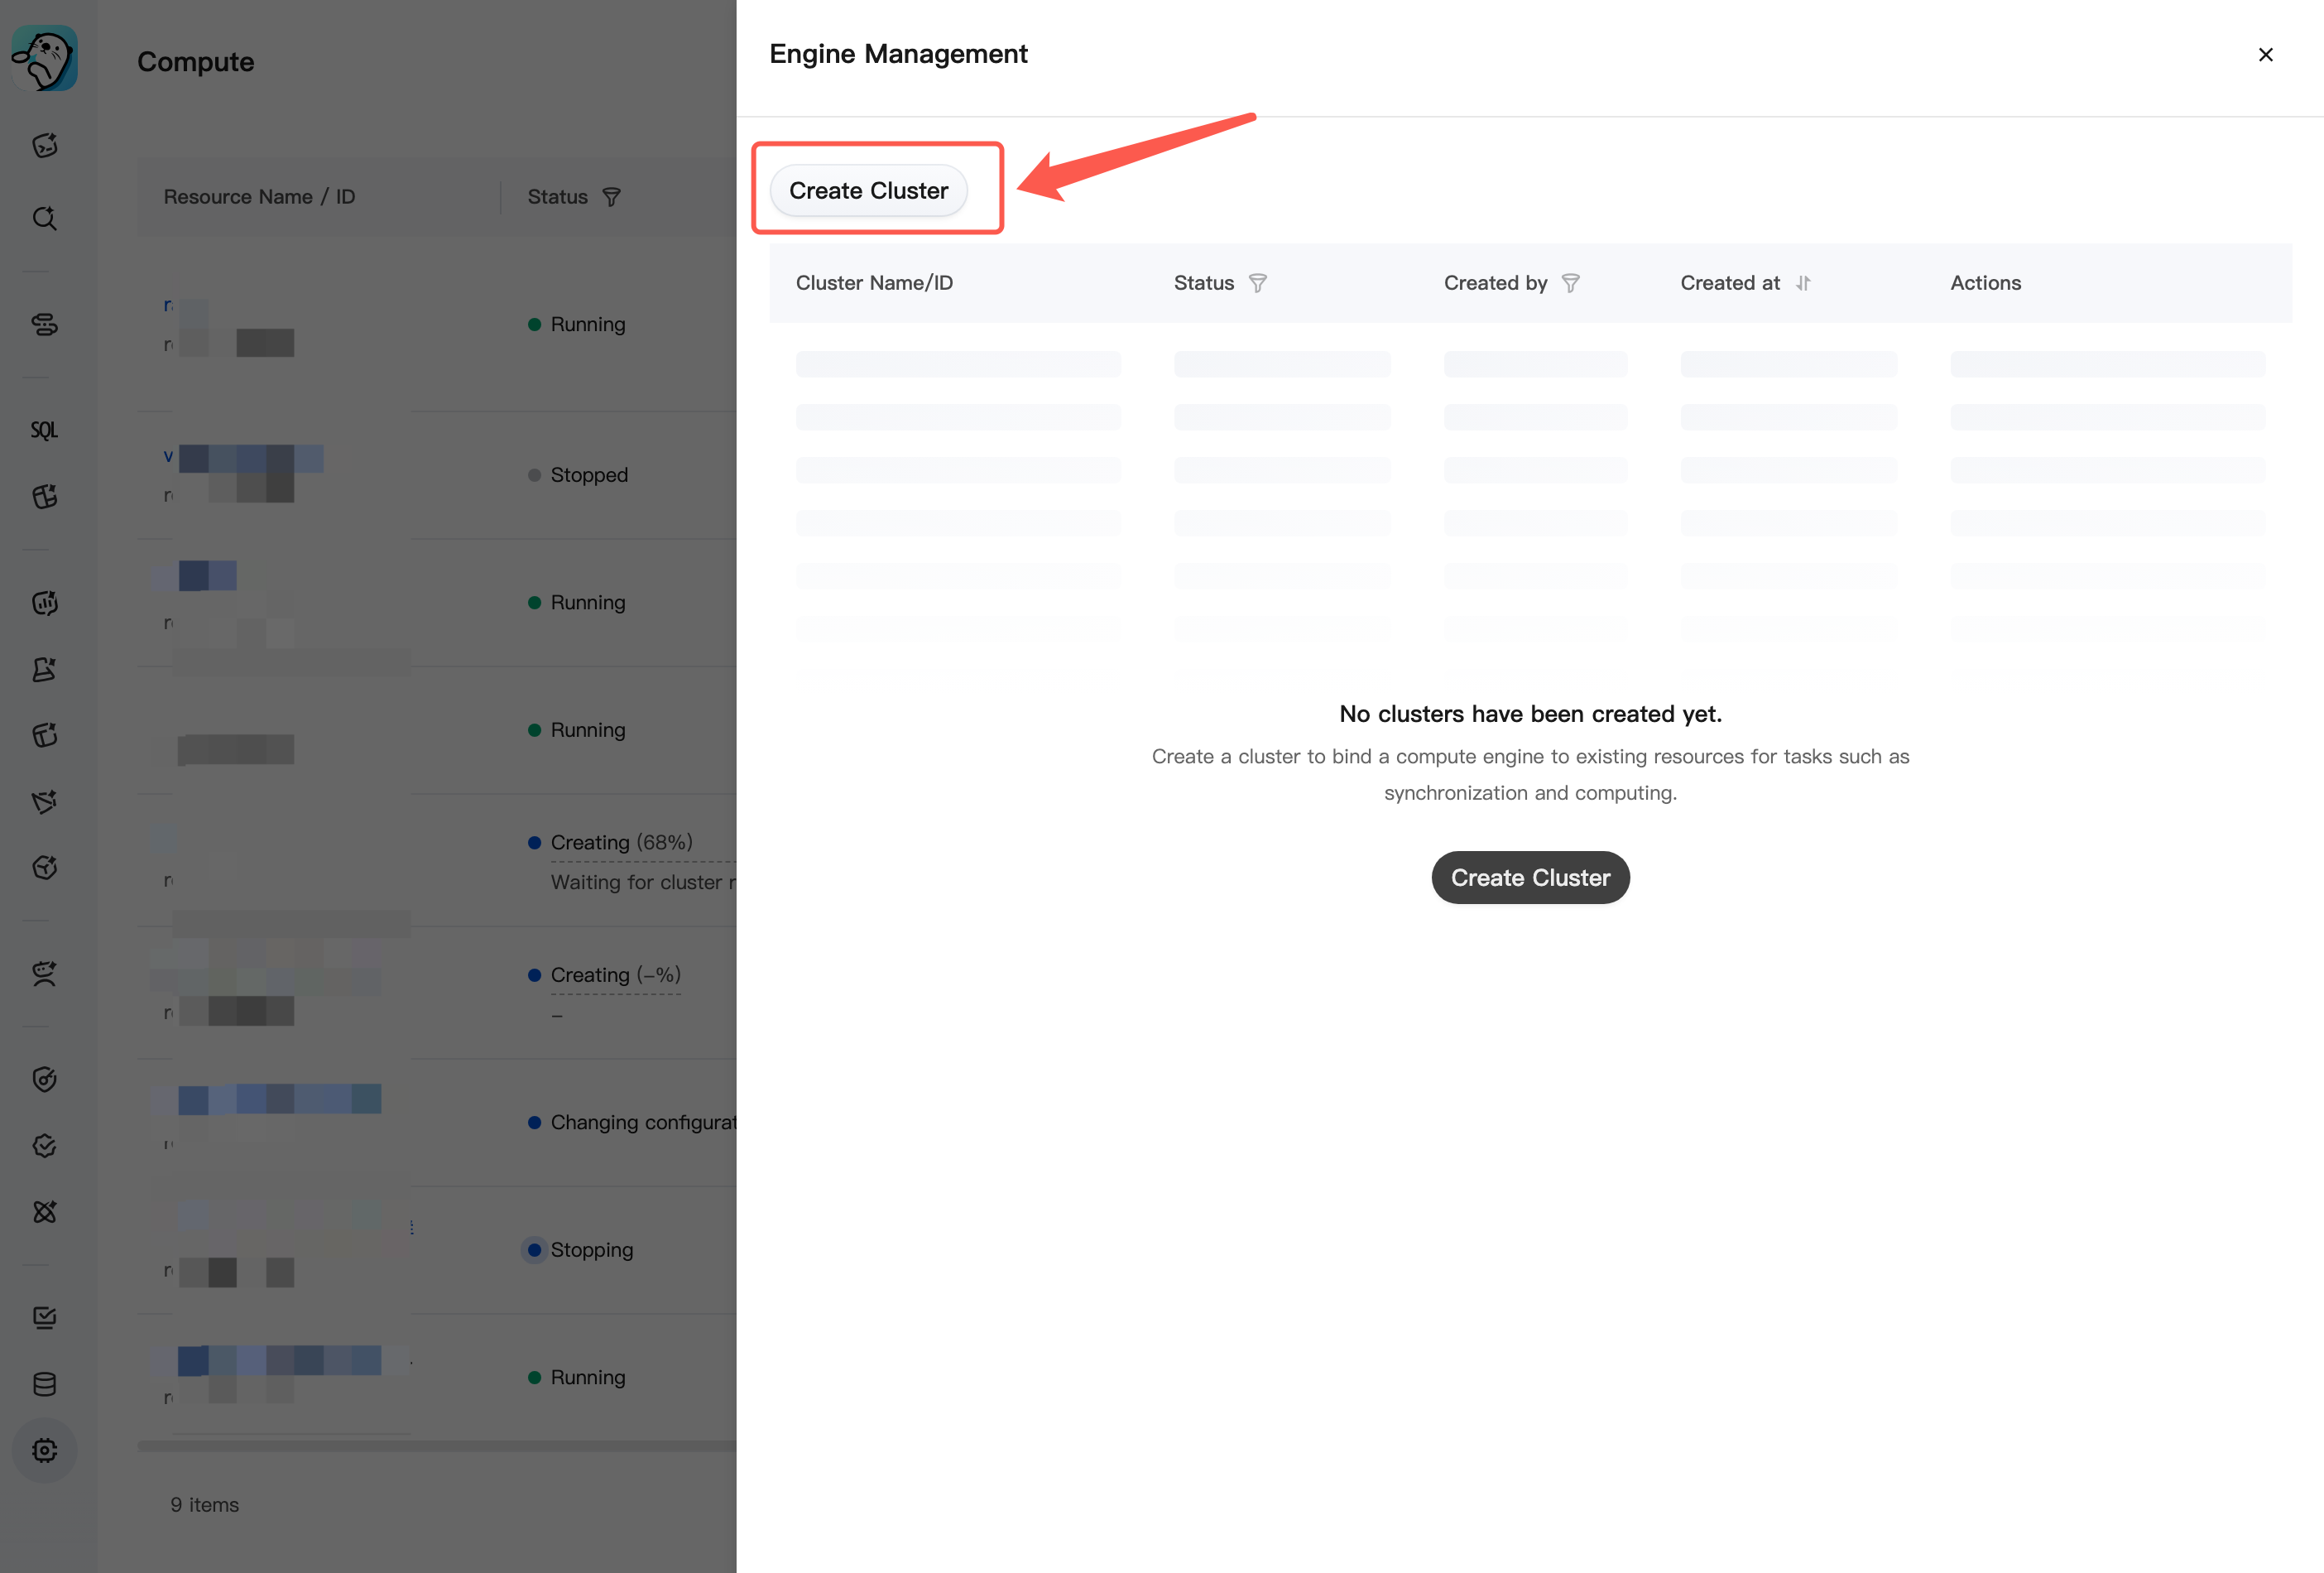 |
フィードバック