This document uses a CVM running Windows Server 2012 R2 as an example to describe how to configure PHP 5.3 and earlier or later versions in a Windows CVM.
Preparations
You have logged in to the Windows CVM and added and installed the IIS role in the CVM. For more information, see Installing IIS.
Installing PHP 5.3 and earlier versions [] (id:jump1)
Note:
PHP official website no longer provides installation packages for versions earlier than PHP 5.2. If you need a version earlier than PHP 5.2, search and download it from the CVM. Alternatively, download the installation package locally and upload it to the CVM. For more information on how to upload files to a Windows CVM, see Uploading Files from Windows to a Windows CVM using MSTSC. The following steps use PHP 5.2.13 as an example.
1. Double-click php-xxxxx.msi to open the PHP installation package in the CVM.
2. Click Next.
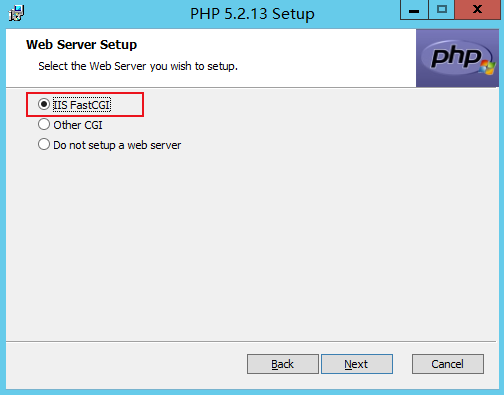
3. On the "Web Server Setup" page, select IIS FastCGI and click Next, as shown in the following figure:
4. Complete PHP installation as prompted.
5. Create a PHP file such as hello.php in C:/inetpub/wwwroot.
6. In the newly created hello.php file, add the following and save the file.
<?php
echo"<title>Test Page</title>";
echo"hello world";
?>
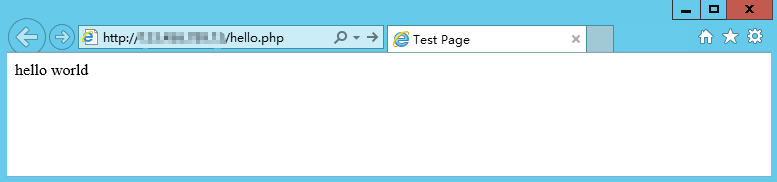
7. On the desktop, open the browser and visit http://<Public IP of the Windows CVM>/hello.php and check whether the environment is successfully configured.
If the page shown below appears, the configuration was successful.
Installing PHP versions later than PHP 5.3 [] (id:jump)
Versions later than PHP 5.3 do not have an installation package and use a zip file or debug pack for installation. The following steps describe how to install PHP in a Windows Server 2012 R2 environment using a zip file.
Downloading software
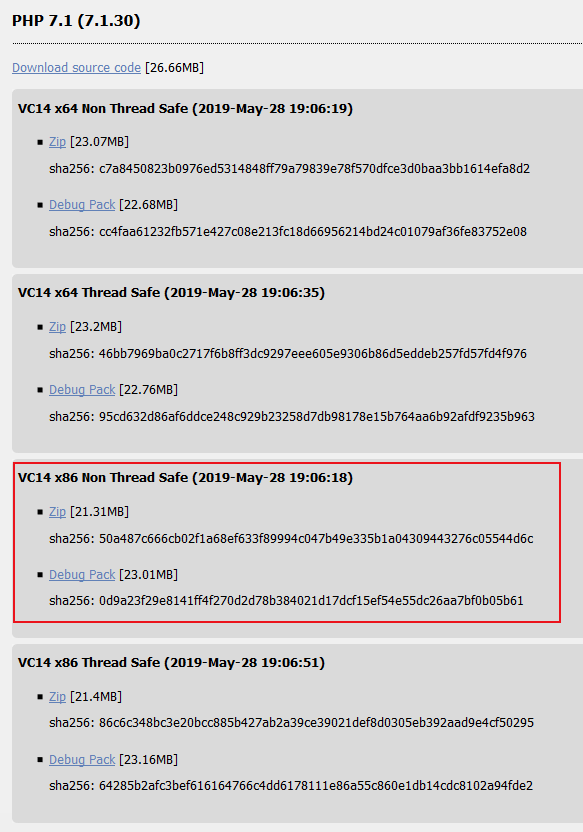
1. In the CVM, go to PHP official website and download the PHP zip file, as shown in the following figure:
Note:
If your server is running Windows Server 64-bit (x64), you must select x86 Non Thread Safe to run PHP under IIS.
If your server is running Windows Server 32-bit (x86), you need to replace IIS with Apache and select x86 Non Thread Safe.
2. Based on the name of the downloaded PHP file, download and install Visual C++ Redistributable Packages.
The following table lists Visual C++ Redistributable Packages that need to be downloaded and installed for the corresponding PHP files.
PHP Zip File Name
Download Address of Visual C++ Redistributable Installation Packages
For example, if the name of the downloaded PHP file is PHP-7.1.30-nts-Win32-VC14-x86.zip, download and install Microsoft Visual C++ Redistributable for Visual Studio 2015 x86 packages.
Installation and configuration
1. Decompress the downloaded PHP zip file, for example, to C:\\PHP.
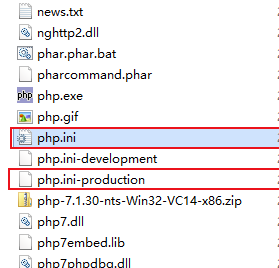
2. Copy the php.ini-production file in C:\\PHP and change the file extension to .ini (i.e., rename it to php.ini), as shown in the following figure:
3. On the desktop, click
to open Server Manager, as shown in the following figure:
4. In the left sidebar, click IIS.
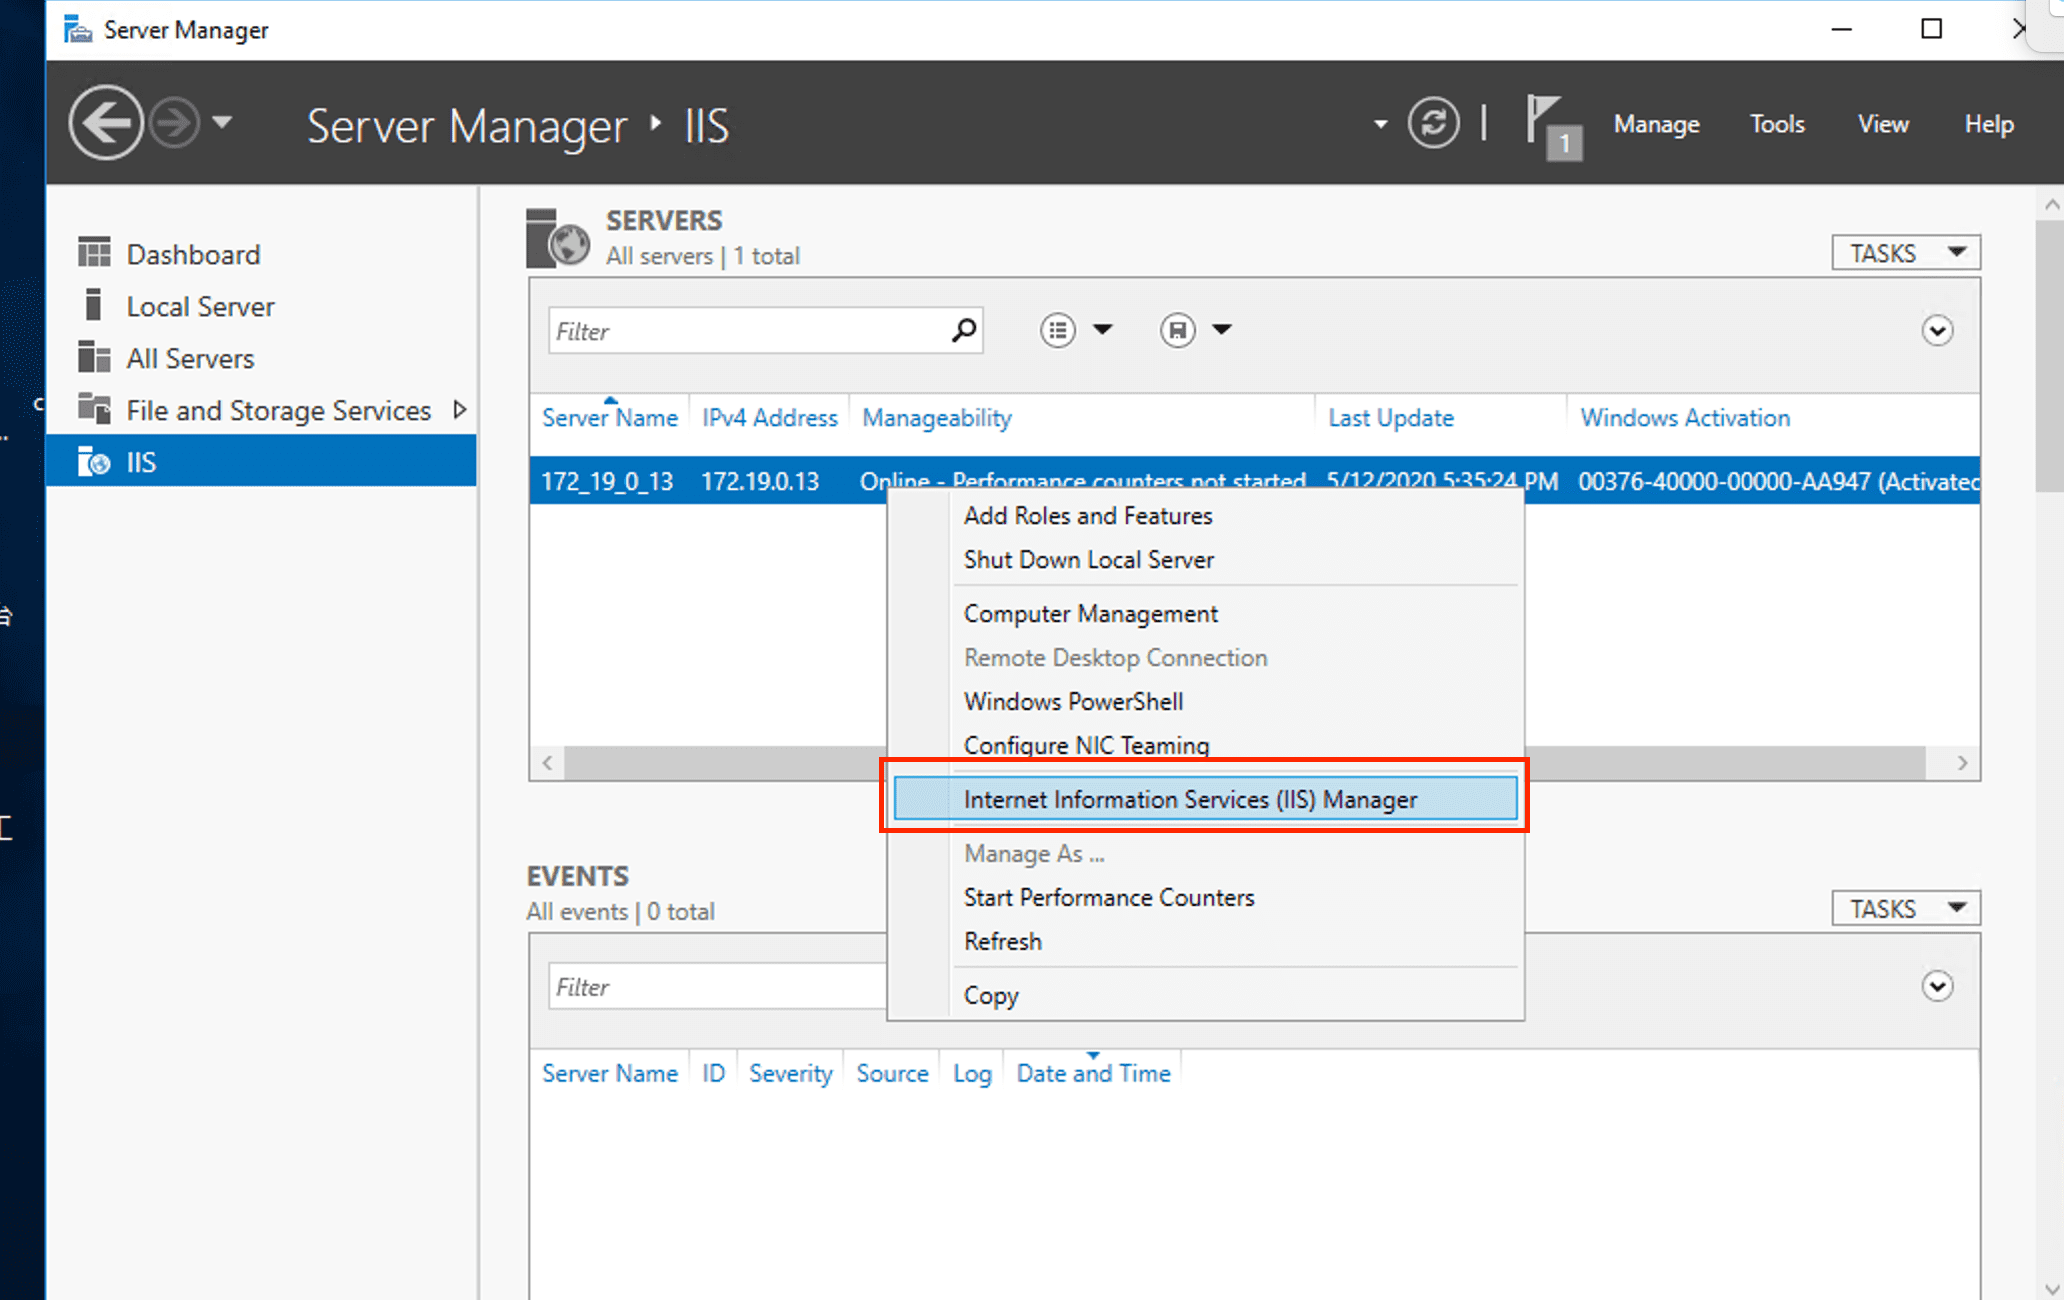
5. In the IIS management window, right-click the server name in the Server column and choose Internet Information Services (IIS) Manager, as shown in the following figure:
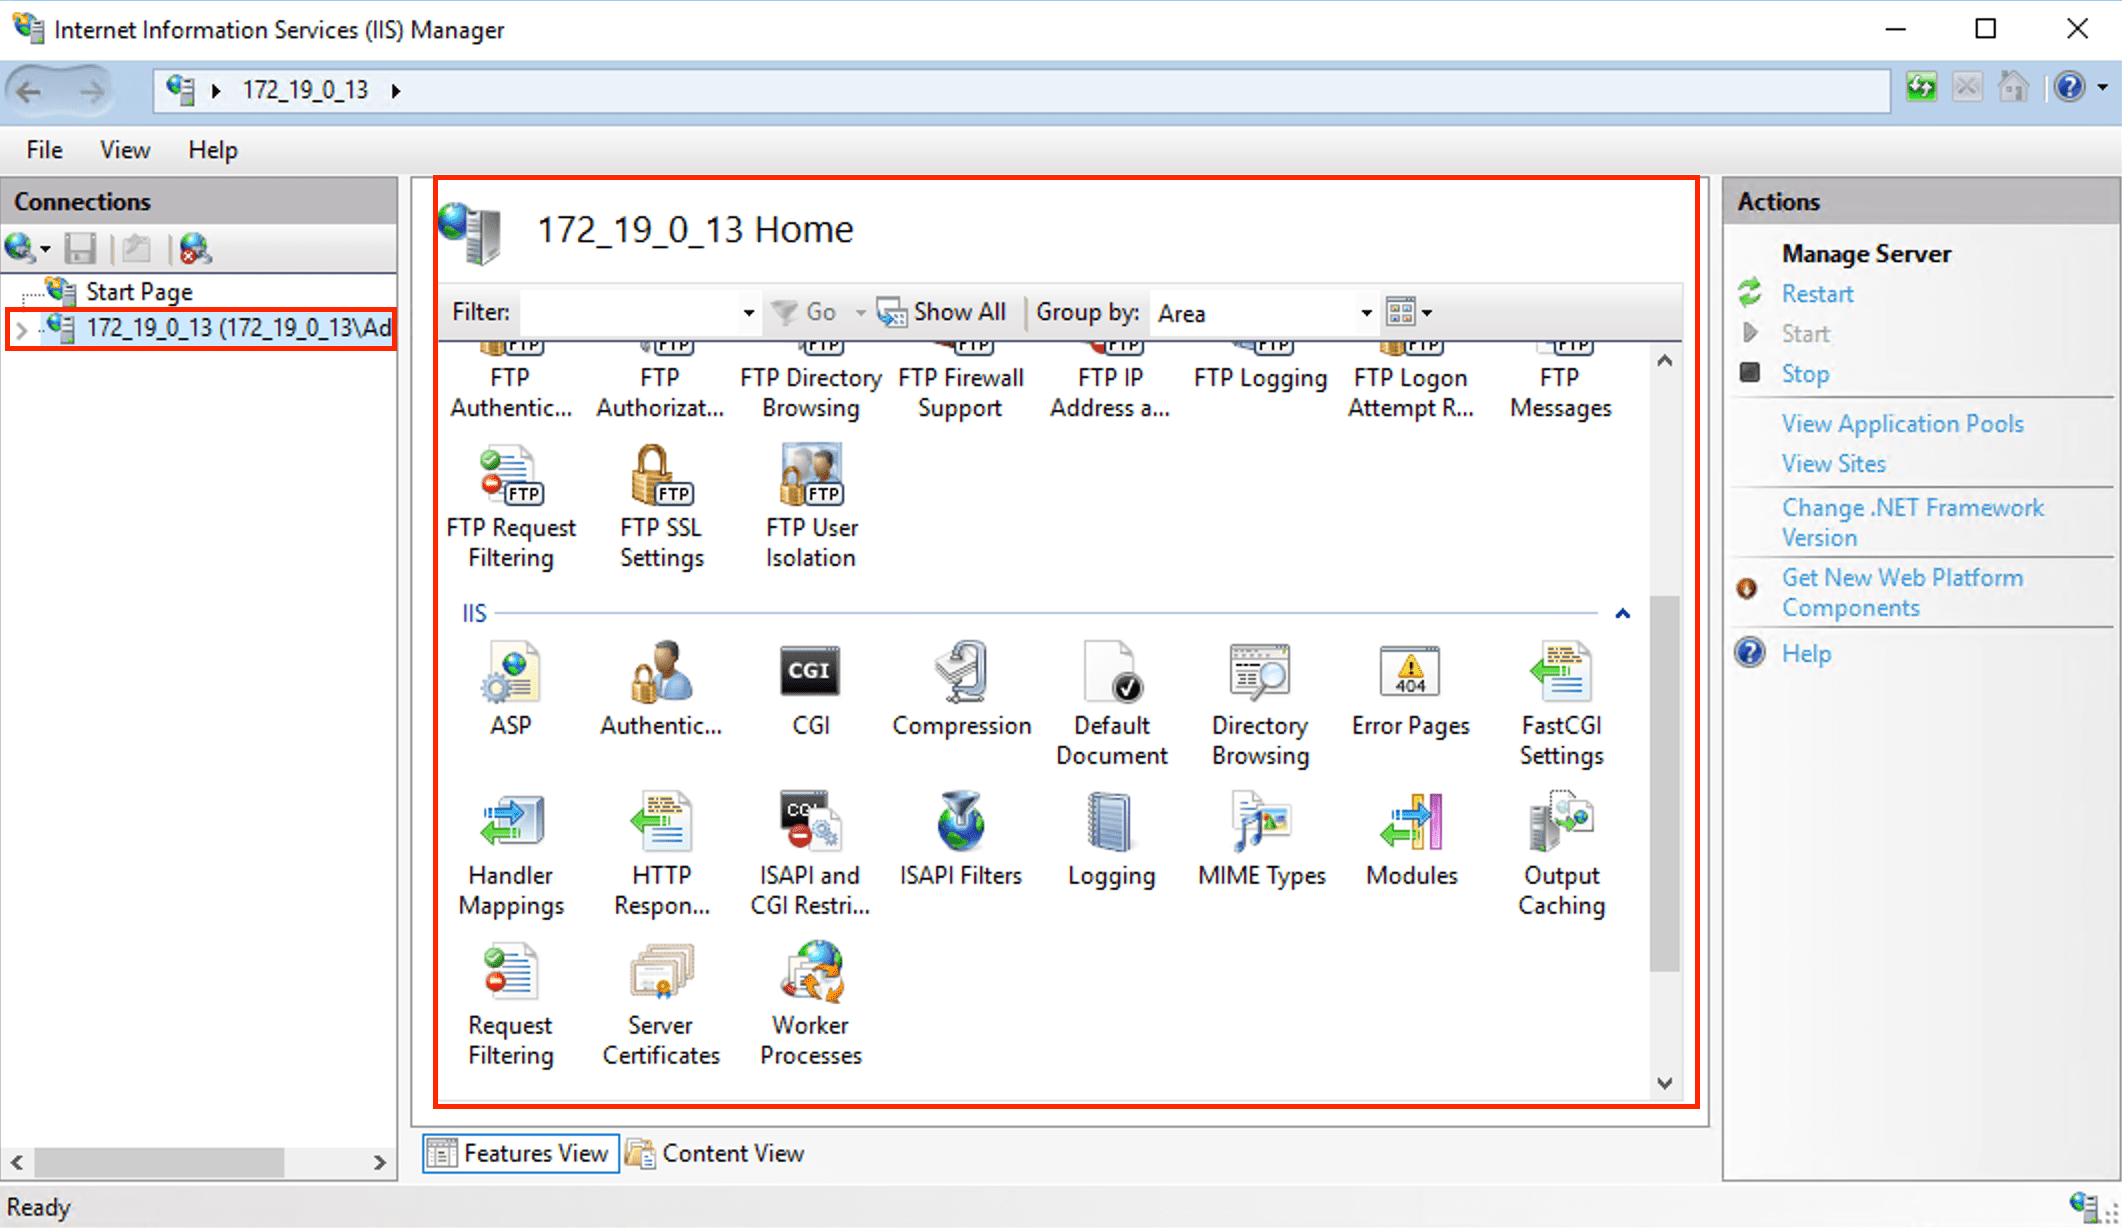
6. In the "Internet Information Service (IIS) Manager" window, click the server name in the left sidebar to go to the server homepage, as shown in the following figure:
For example, click the 10_141_9_72 server name to go to the 10_141_9_72 homepage.
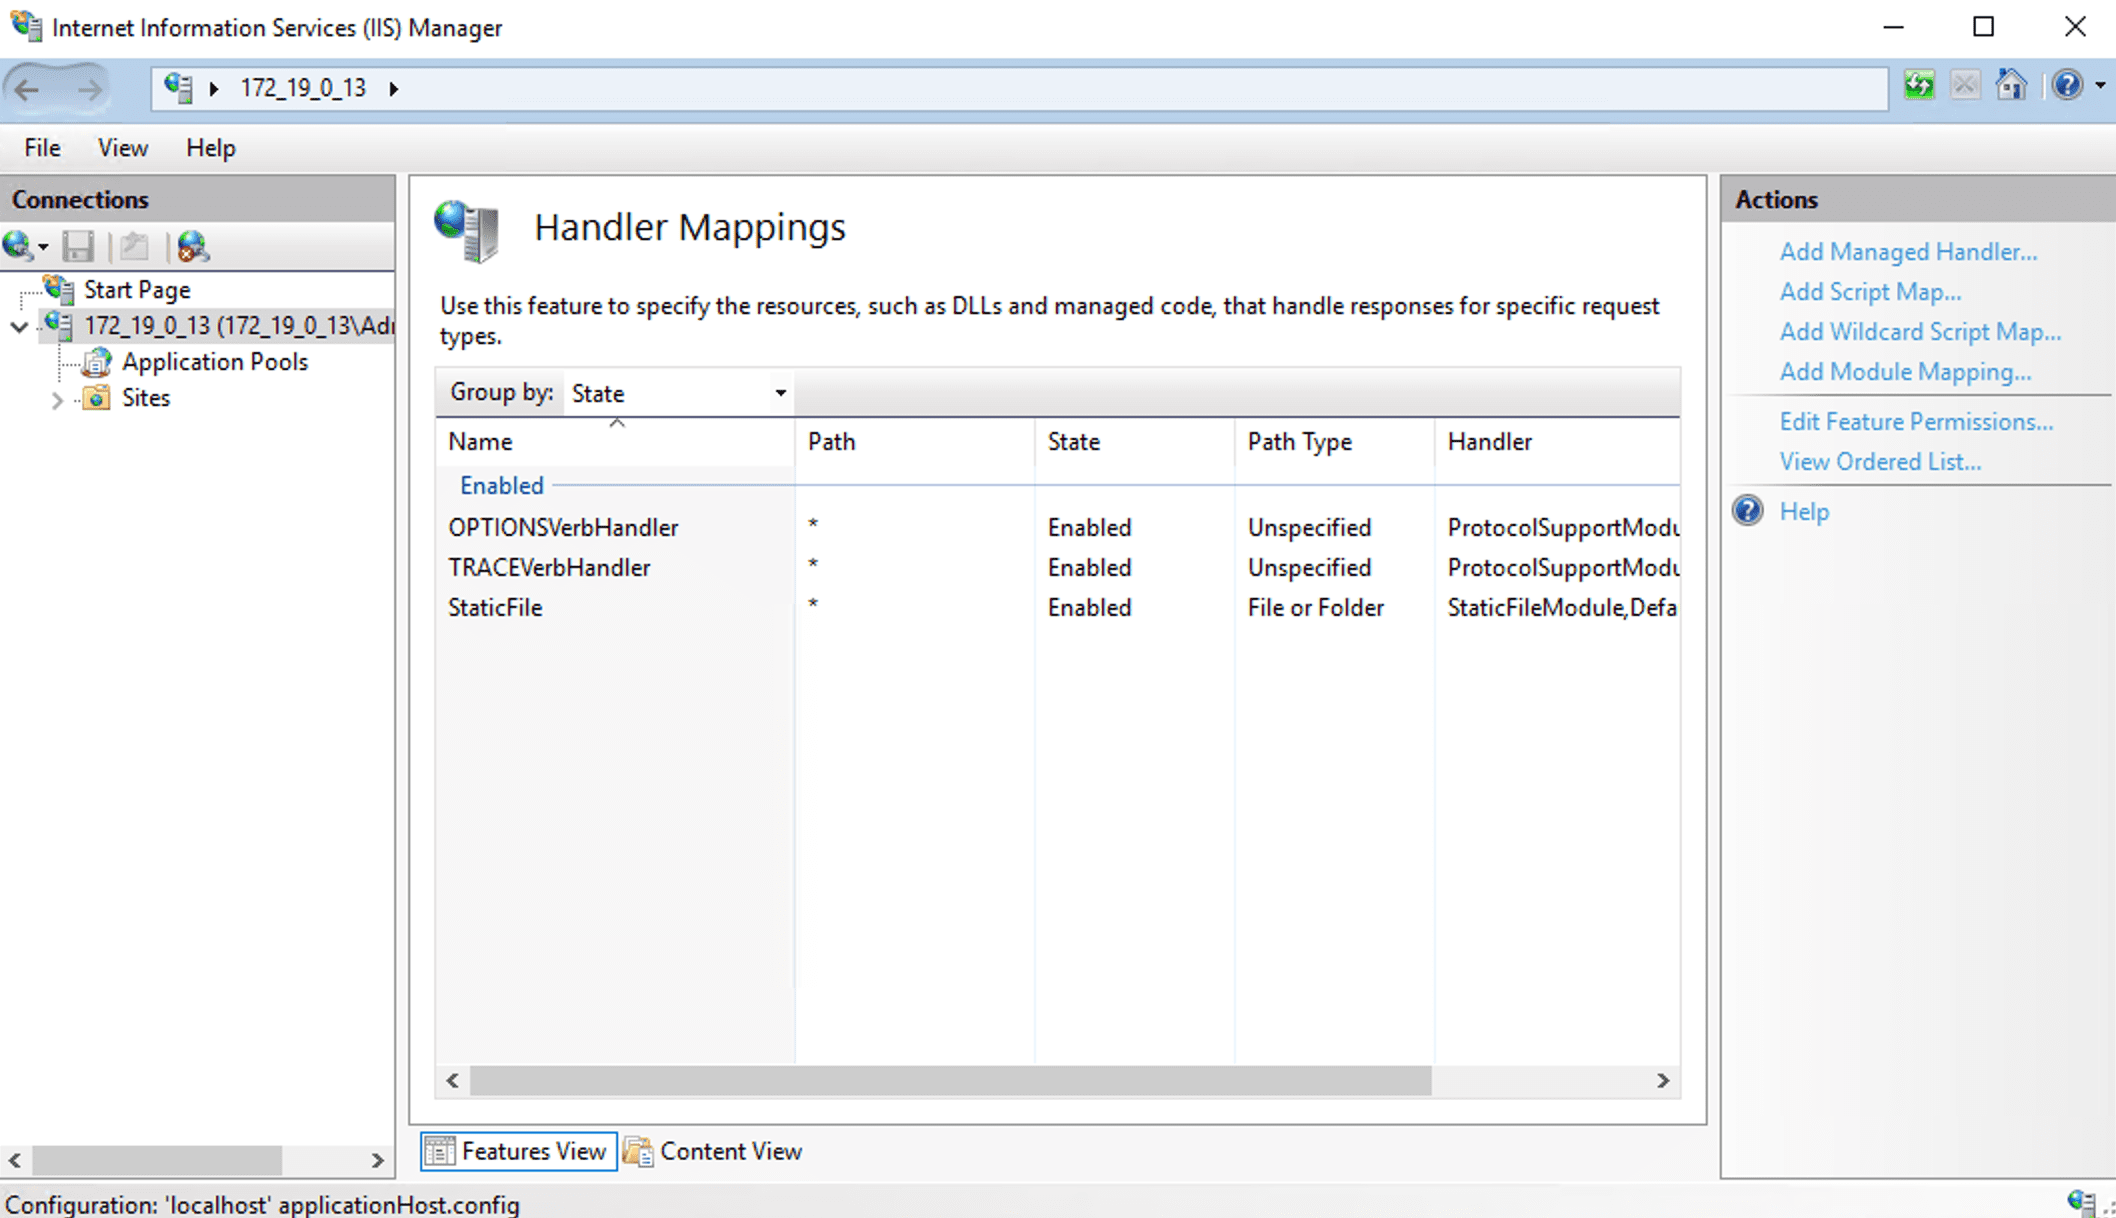
7. On the 10_141_9_72 homepage, double-click Handler Mappings to go to the "Handler Mappings" page, as shown in the following figure:
8. In the Actions column on the right, click Add Module Mapping to open the "Add Module Mapping" window.
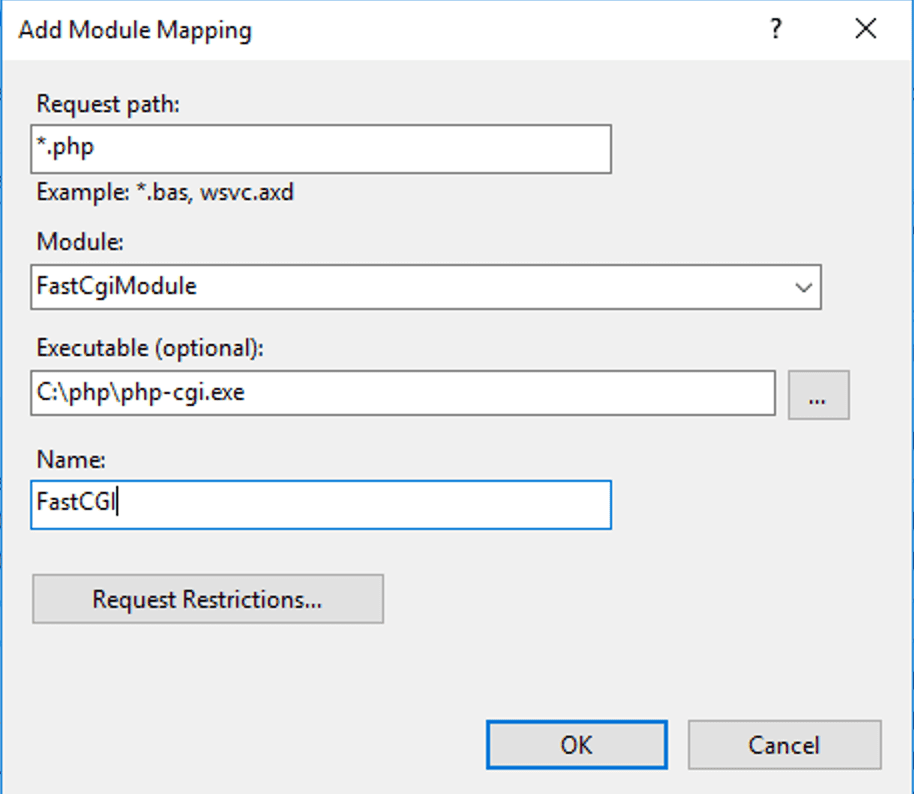
9. In the "Add Module Mapping" window, enter the following information and click OK, as shown in the following figure:
The main parameters include:
Request path: enter *.php.
Module: select "FastCgiModule".
Executable (optional): select the php-cgi.exe file in the PHP zip file (i.e., C:\\PHP\\php-cgi.exe).
Name: enter a custom name, such as FastCGI.
10. In the pop-up window, click OK.
11. Click the 10_141_9_72 server name in the left sidebar to return to the 10_141_9_72 homepage.
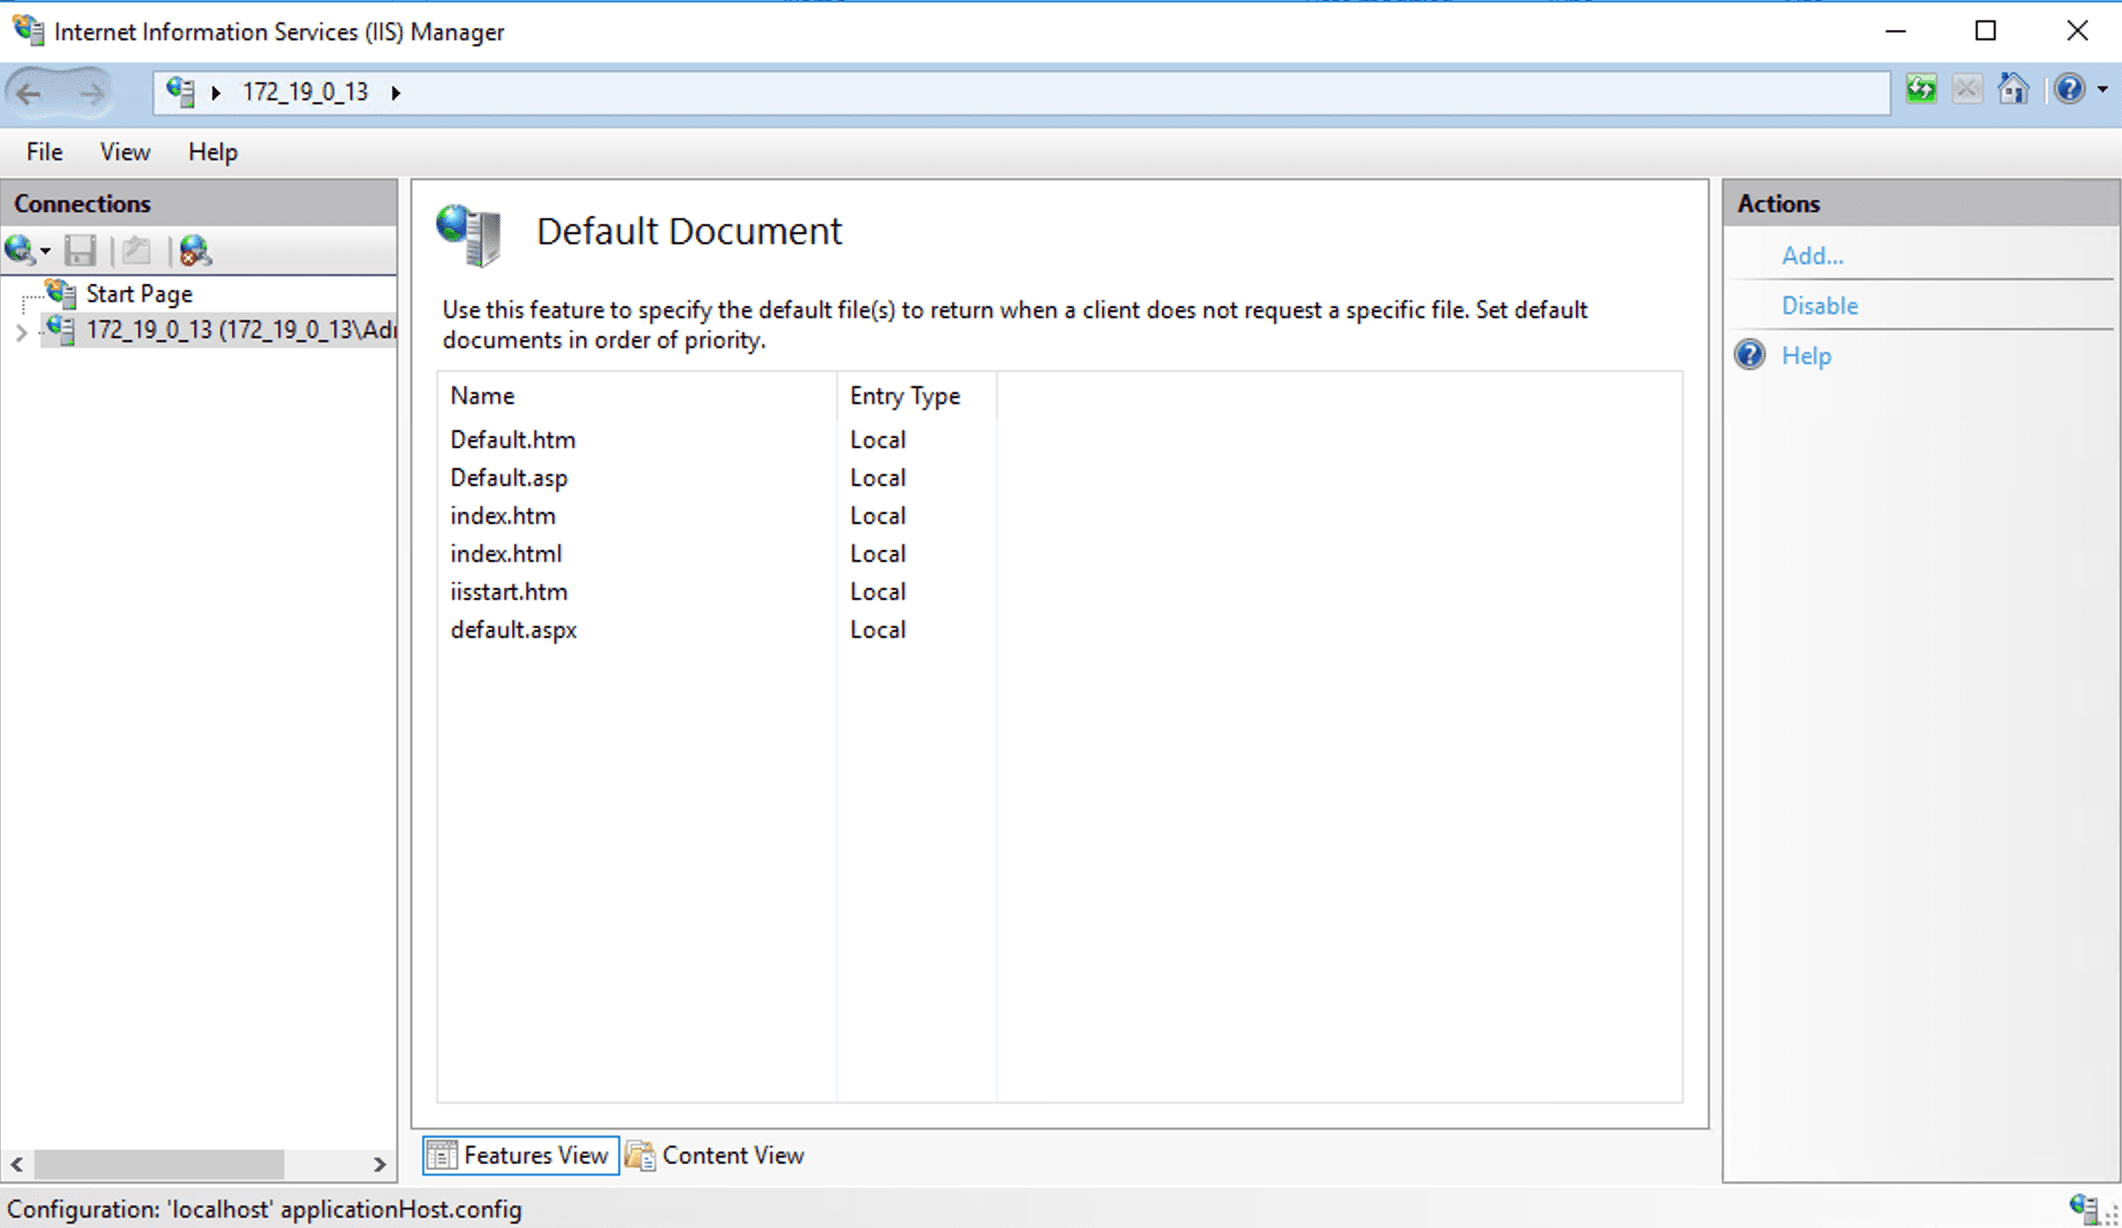
12. On the 10_141_9_72 homepage, double-click Default Document to go to the "Default Document" page, as shown in the following figure:
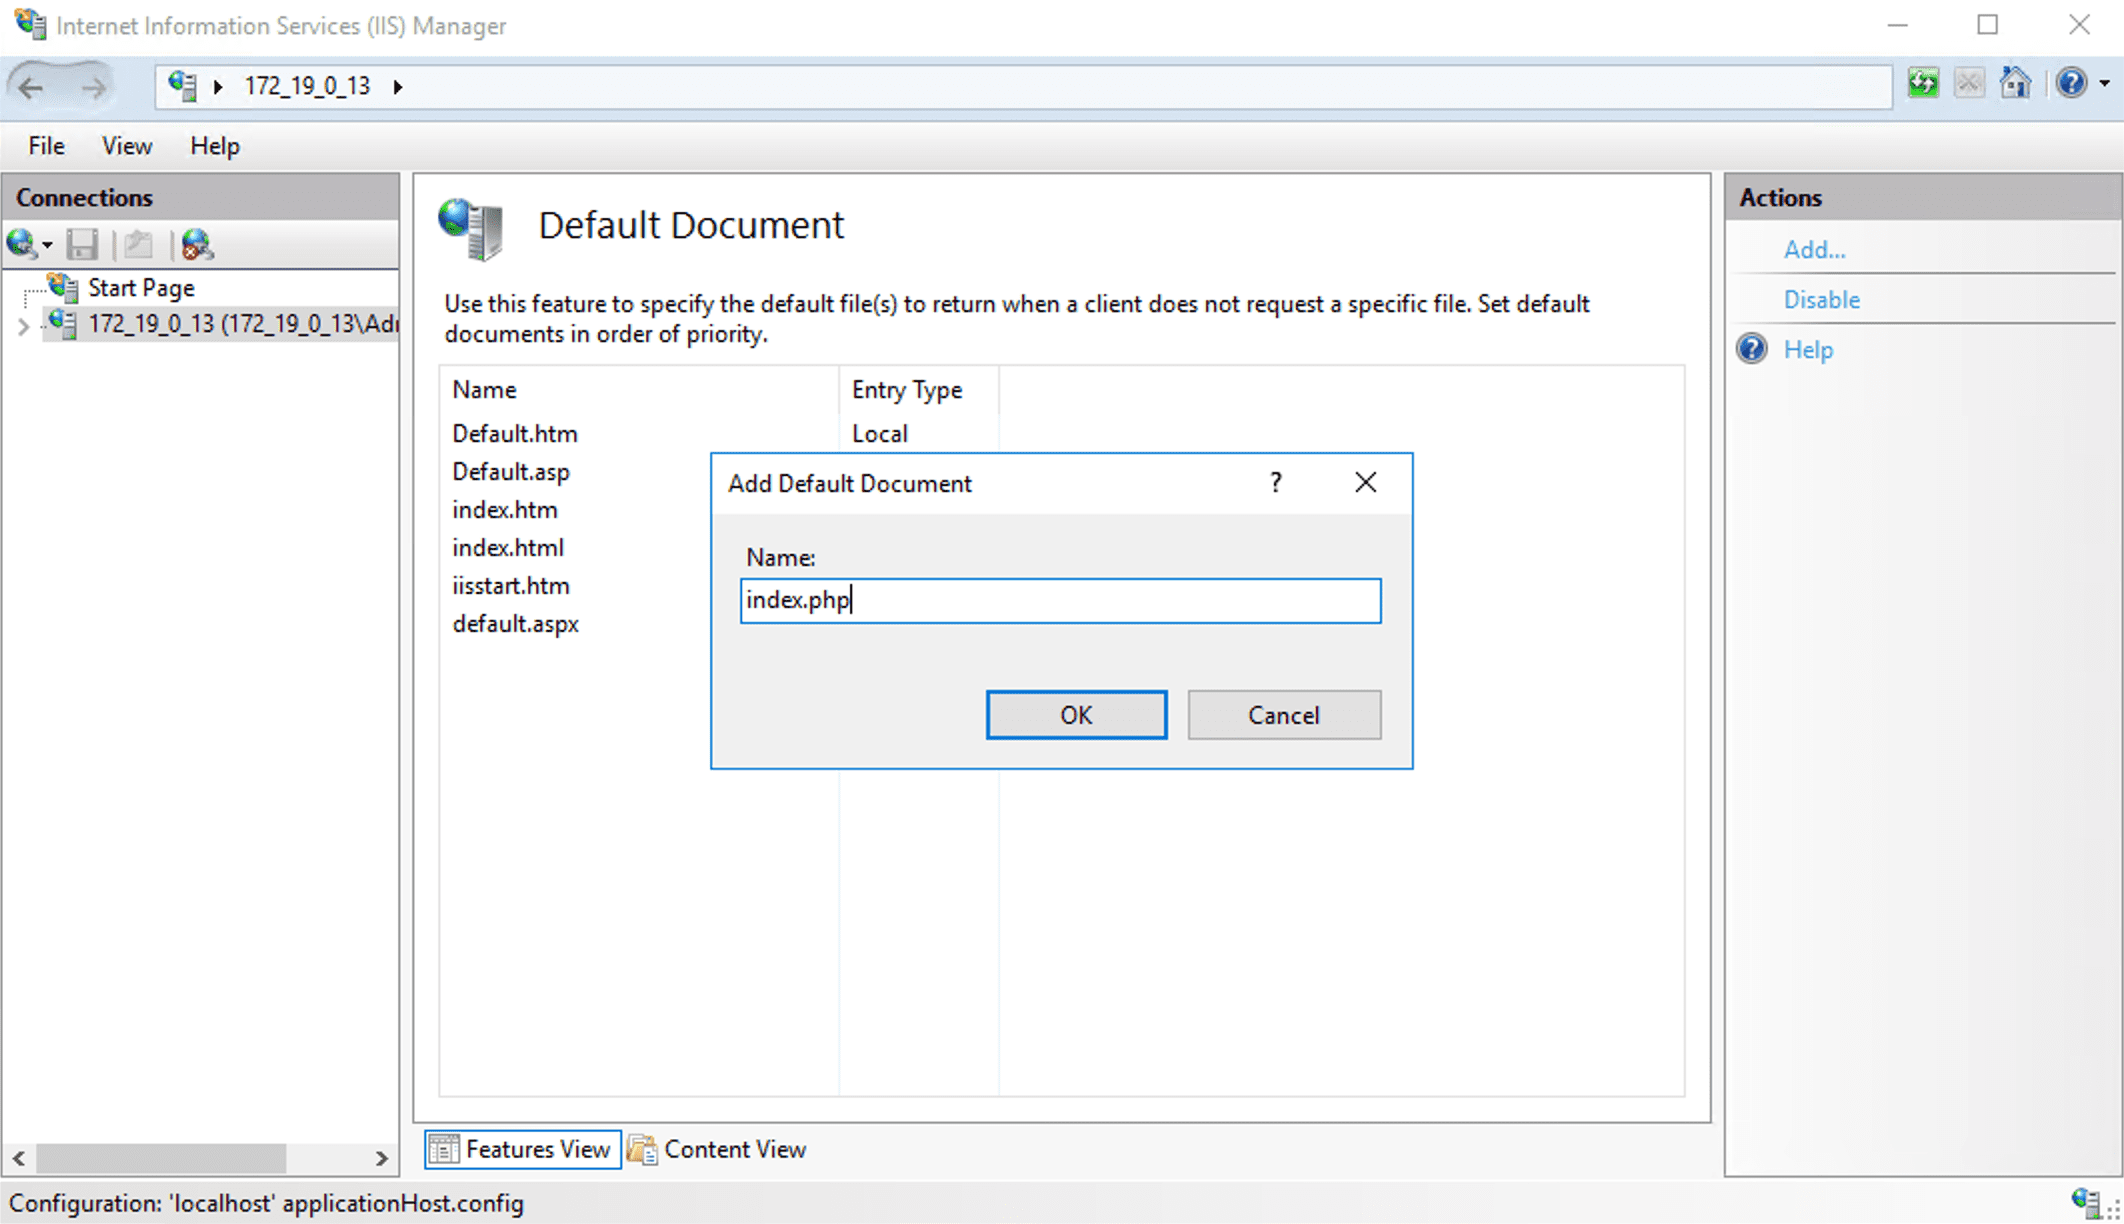
13. In the Actions column on the right, click Add to open the "Add Default Document" window.
14. In the "Add Default Document" window, enter index.php in Name and click OK, as shown in the following figure:
15. Click the 10_141_9_72 server name in the left sidebar to return to the 10_141_9_72 homepage.
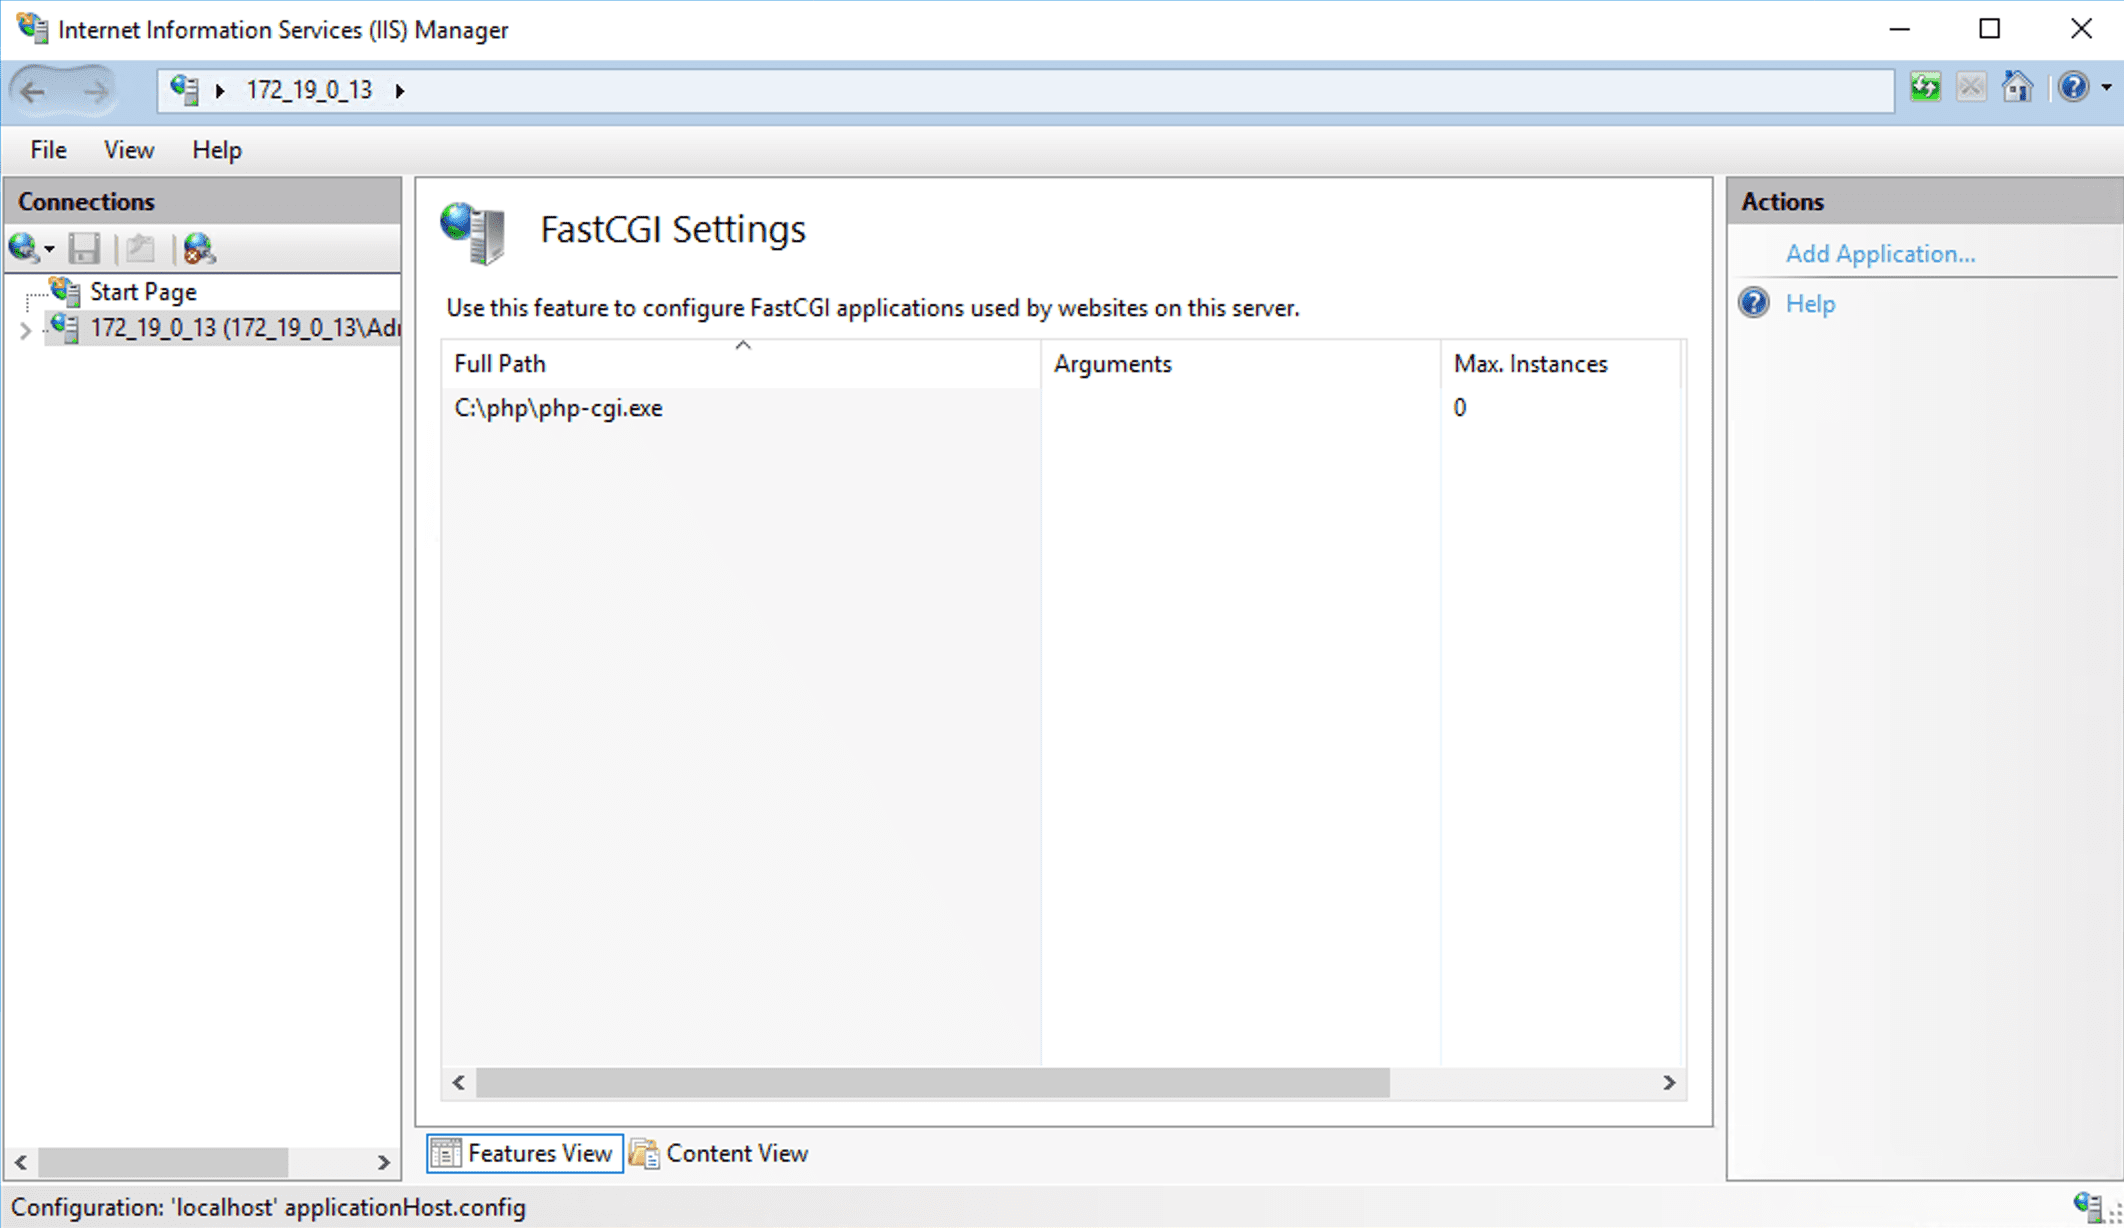
16. On the 10_141_9_72 homepage, double-click FastCGI Settings to open the "FastCGI Settings" page, as shown in the following figure:
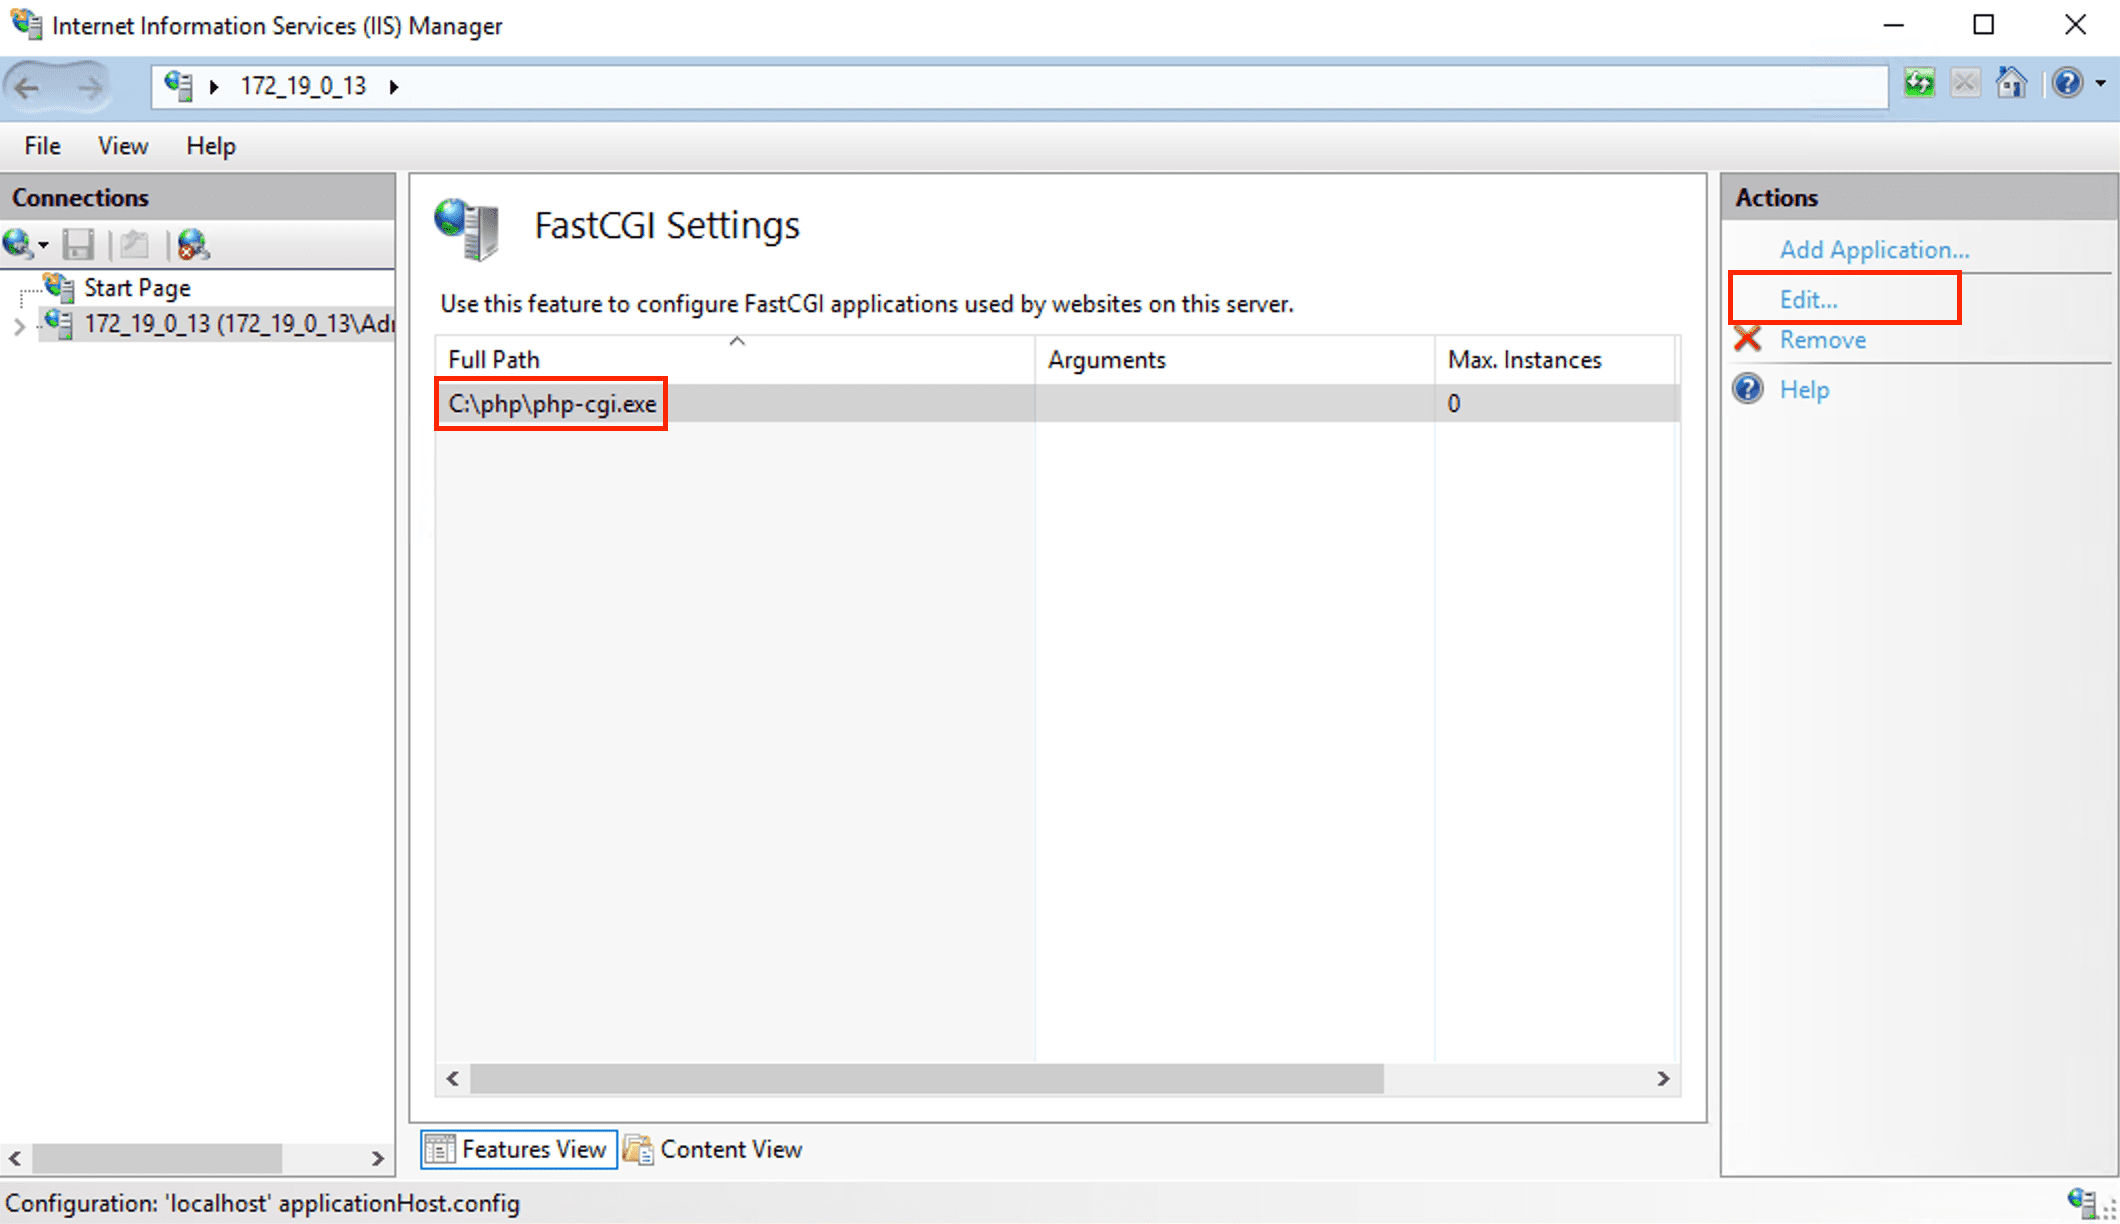
17. On the "FastCGI Settings" page, select the FastCGI application and click Edit, as shown in the following figure:
18. In the Edit FastCGI Application window, configure Monitor changes to file to the php.ini file path, as shown in the following figure:
19. In C:\\inetpub\\wwwroot, create a PHP file, such as index.php.
20. In the newly created index.php file, add the following and save the file.
<?php
phpinfo();
?>
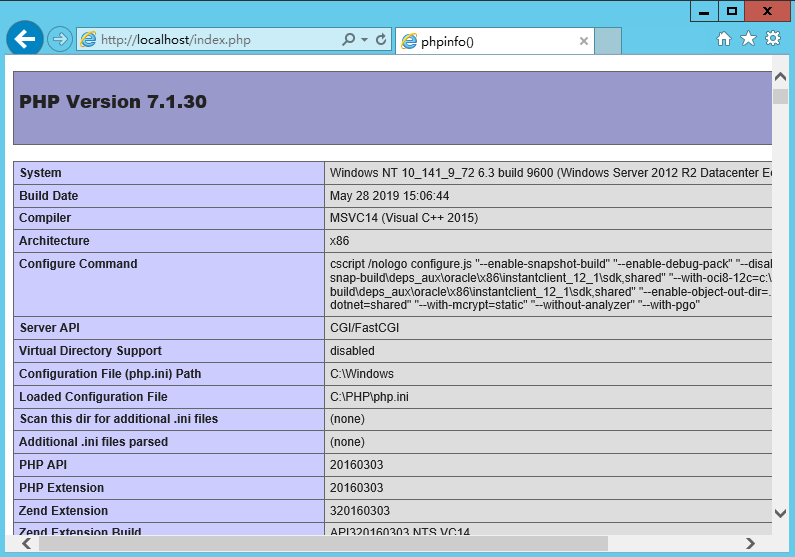
21. On the desktop, open the browser and visit http://localhost/index.php to check whether the environment is configured successfully.
If the page shown below appears, the configuration was successful.


 Yes
Yes
 No
No
Was this page helpful?