Deploy certificate to CLB (mutual authentication)
Download
Mode fokus
Ukuran font
Overview
In traditional one-way authentication scenarios, the client only verifies the identity of the server. For scenarios with relatively high security requirements, one-way authentication cannot meet the security needs. Mutual authentication requires both the client and the server to verify each other's identities, which enhances communication security and can effectively prevent man-in-the-middle attacks, identity forgery, and data leakage. For details of one-way authentication and mutual authentication, see SSL One-Way Authentication and Mutual Authentication.
Prerequisites
1. You have created a CLB instance. For specific operations, see Creating CLB Instances.
2. If domain name access is required, make sure that you have a domain name and have configured the CLB forwarding domain name. For specific operations, see Configuring a CLB Forwarding Domain Name.
3. You have created two CVM instances called rs-1 and rs-2 as real servers for the CLB instance. For specific operations, see Real Server Overview.
Directions
Take self-signed certificates as an example. The specific process is shown in the figure below. The following part describes how to configure HTTPS mutual authentication for a CLB instance.
1. CA certificate: It is a certificate issued by the certificate authority (CA) and can be used to issue server certificates or client certificates.
2. Server certificate: You can obtain a server certificate by purchasing or self-signing.
3. Client certificate: You can use the obtained CA certificate to issue a client certificate.
4. Upload certificates: You need to upload the CA certificate and the purchased or self-signed server certificate to the certificate platform.
5. Configure the CLB instance: When you configure an HTTPS listener, you should enable mutual authentication and select the uploaded certificate as the server certificate and the self-signed root certificate as the CA certificate.
6. Import the client certificate: You need to import the client certificate used for requests on the client.
Step 1: Obtaining a CA Certificate
1. Execute the following command to create the private key file ca.key for the CA certificate.
# Generate a CA private key.openssl genrsa -out ca.key 2048
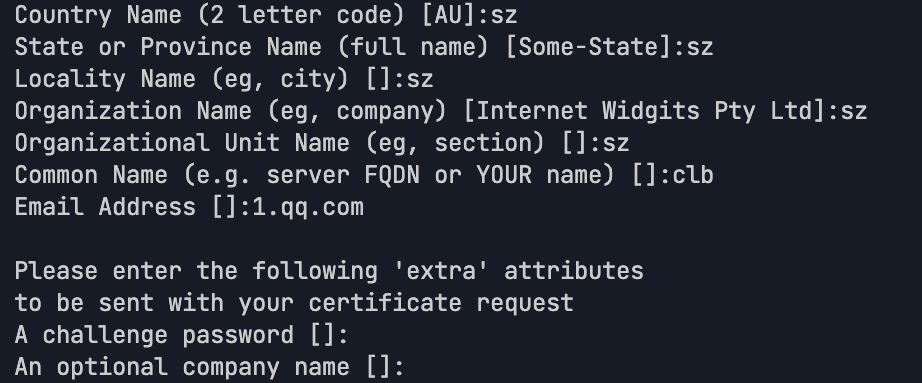
2. Execute the following command to create the request file ca.csr for the CA certificate.
# Generate the request file for the CA certificate.openssl req -new -key ca.key -out ca.csr
Note:
Specify the following parameters, and make sure that the Common Name value is different from that of the server certificate or client certificate.
3. Execute the following command to create a self-signed CA certificate CA.crt.
# Generate a self-signed CA certificate with a validity period of 3,650 days.openssl x509 -req -in ca.csr -out ca.crt -signkey ca.key -days 3650
The result is as shown below if the generation is successful:

Step 2: Obtaining a Server Certificate
1. Execute the following command to create the private key file server.key for the server certificate.
# Generate a server private key.openssl genrsa -out server.key 2048
2. Execute the following command to create the request file server.csr for the server certificate.
# Generate the request file for the server certificate.openssl req -new -key server.key -out server.csr
3. Execute the following command to issue the server certificate server.crt by using the CA certificate.
# Generate a server certificate with a validity period of 365 days by using the CA certificate through signing.openssl x509 -req -in server.csr -out server.crt -CA ca.crt -CAkey ca.key -CAcreateserial -days 3650
Step 3: Obtaining a Client Certificate
1. Execute the following command to create the private key file client.key for the client certificate.
# Generate a client private key.openssl genrsa -out client.key 2048
2. Execute the following command to create the request file client.csr for the client certificate.
# Generate the request file for the client certificate.openssl req -new -key client.key -out client.csr
3. Execute the following command to issue the client certificate client.crt by using the CA certificate.
# Generate a client certificate with a validity period of 365 days by using the CA certificate through signing.openssl x509 -req -in client.csr -out client.crt -CA ca.crt -CAkey ca.key -CAcreateserial -days 3650
4. Execute the following command to convert the generated client certificate client.crt to a .p12 file that can be recognized by browsers.
# Convert the client certificate format.openssl pkcs12 -export -clcerts -in client.crt -inkey client.key -out client.p12
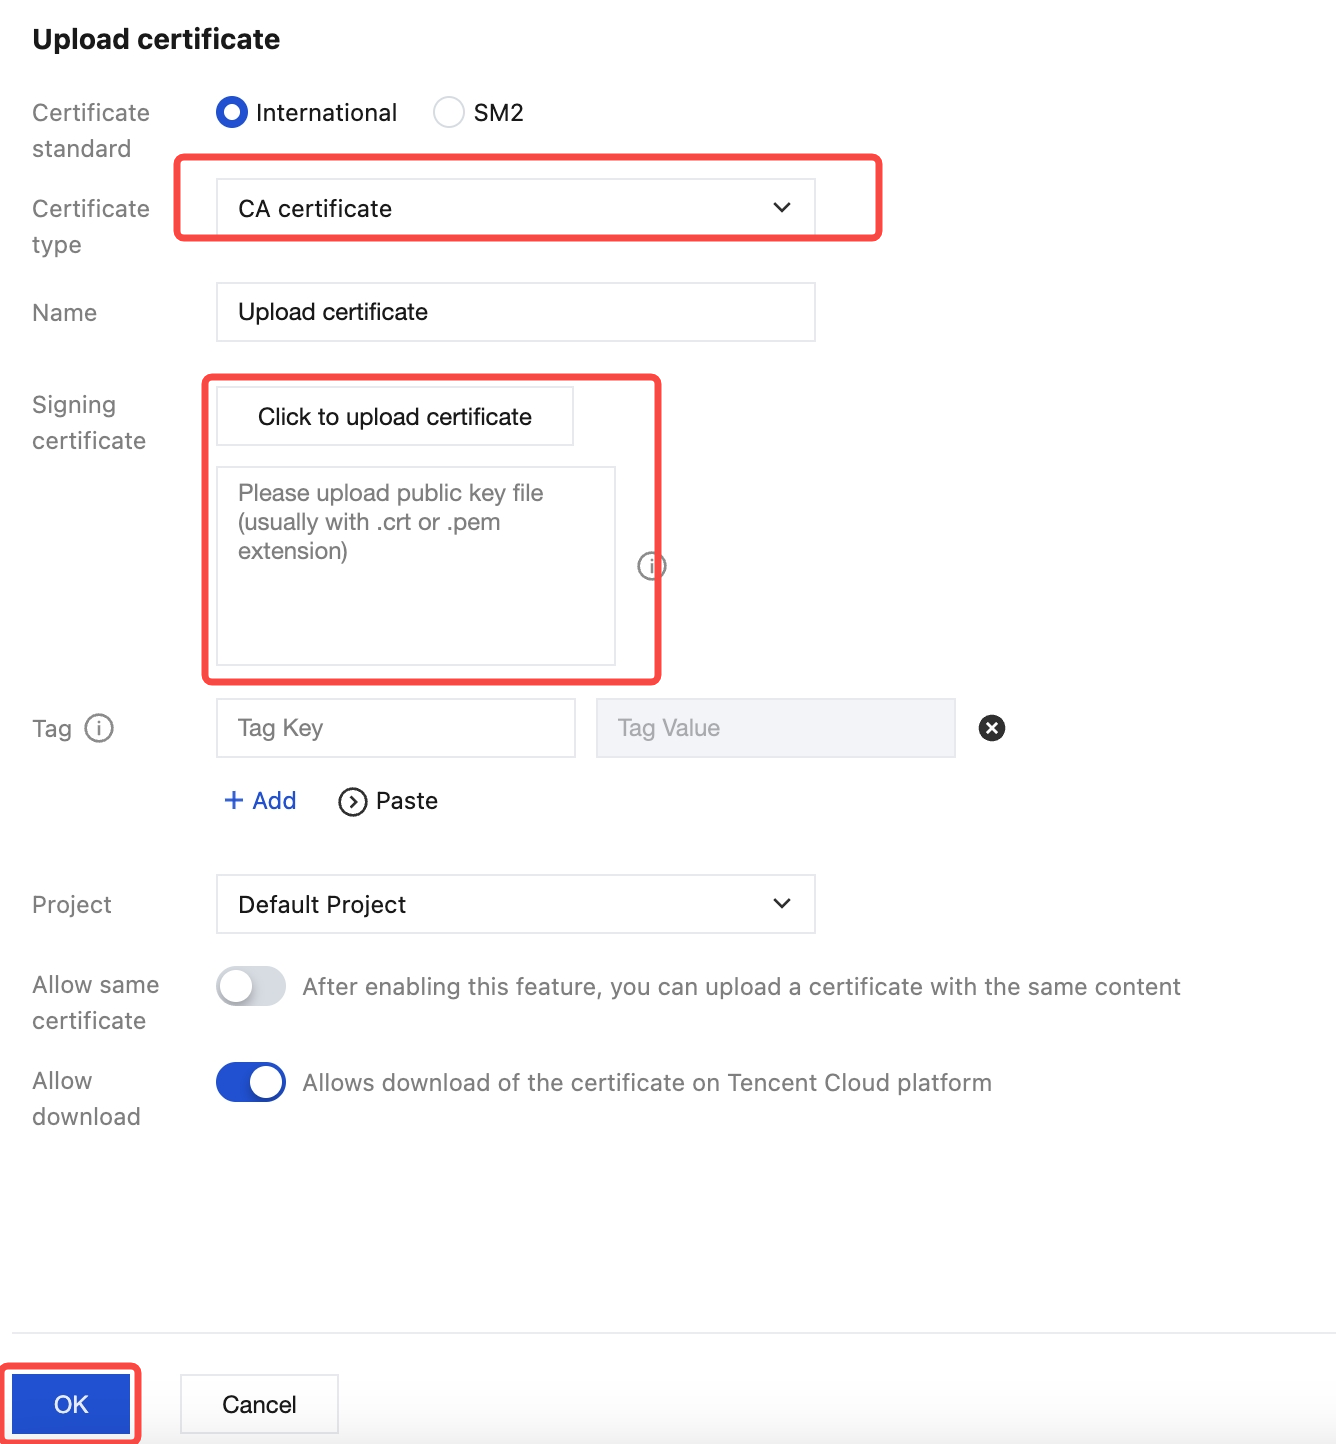
Step 4: Uploading the CA Certificate
1. Log in to the CLB console.
2. Click Certificate Management, and then click Create.

3. On the certificate upload page, select CA certificate as the certificate type, copy the content of the CA certificate ca.crt created in Step 1 to the Signature Certificate area, and click Confirm.
Note:
Delete the line break at the end of the copied content to avoid errors.
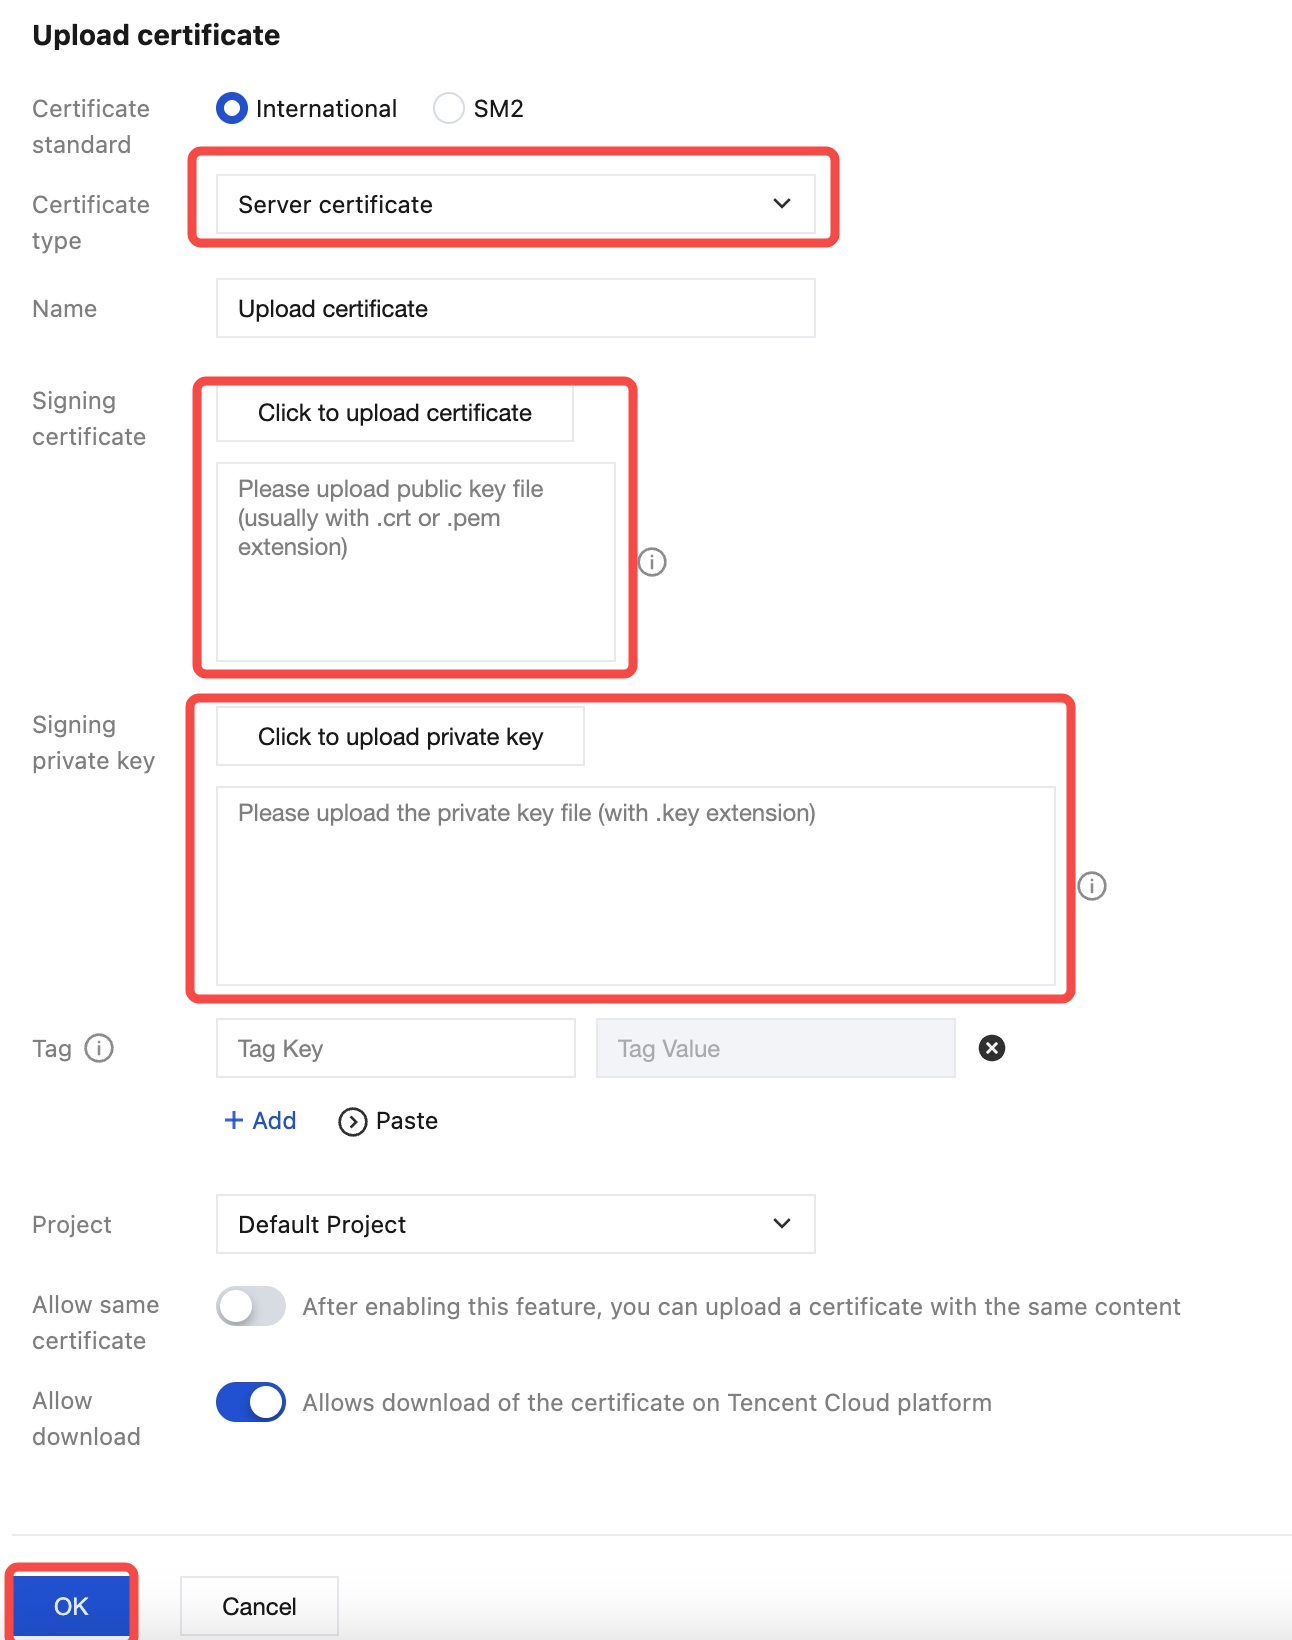
Step 5: Uploading the Server Certificate
1. Log in to the CLB console.
2. Click Certificate Management, and then click Create.
3. On the certificate upload page, select Server certificate as the certificate type, copy the content of the server certificate server.crt and the server private key server.key generated in Step 2 to the Signature Certificate area, and click Confirm.
Step 6: Configuring an HTTPS Mutual Authentication Listener
Method 1: Disabling SNI
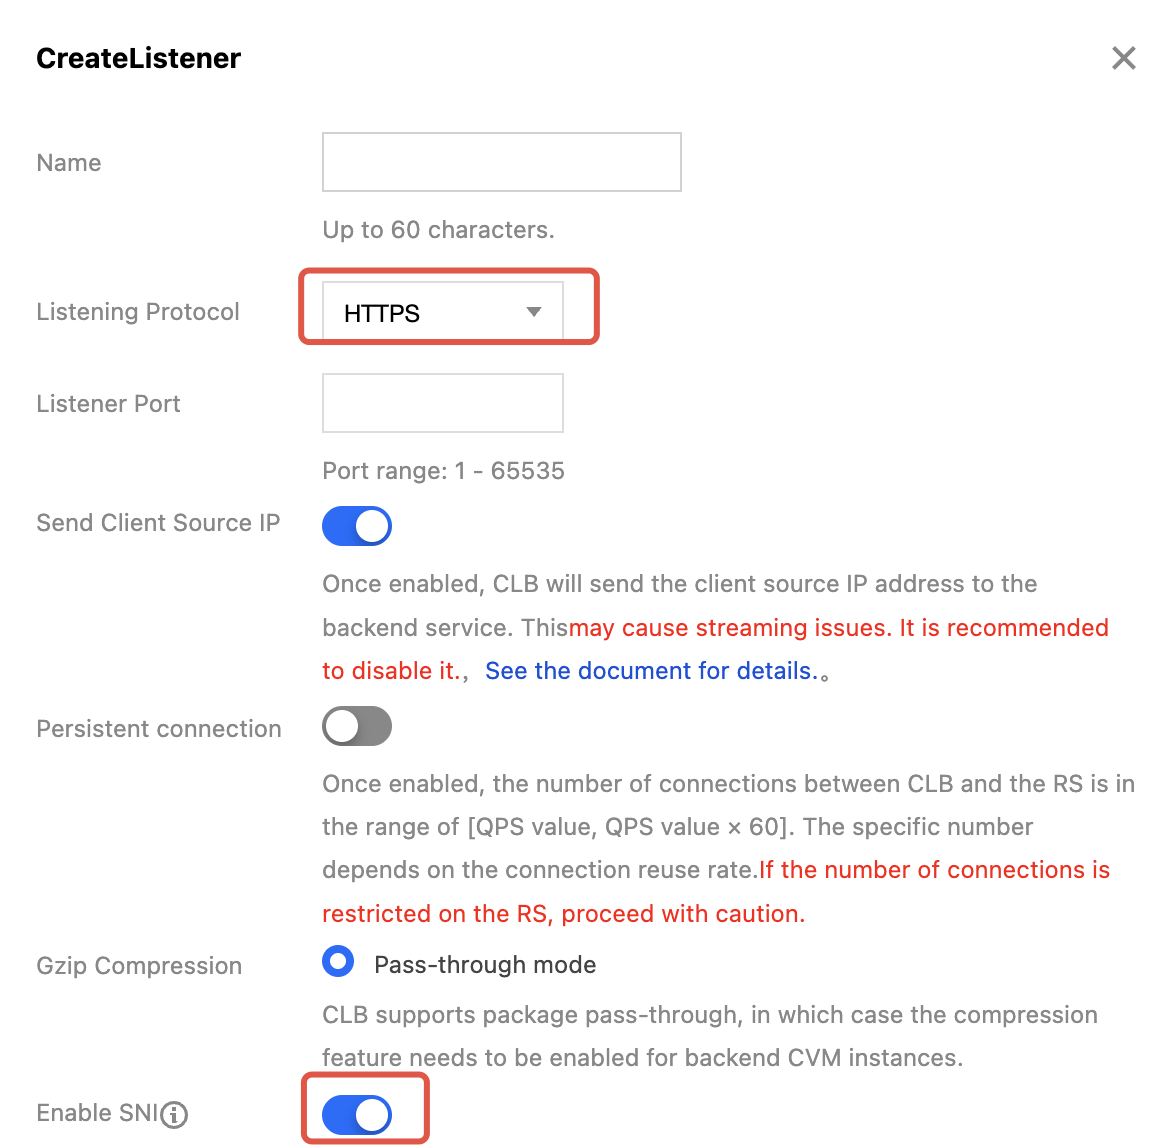
1. Log in to the CLB console, find the target CLB instance on the Instance page, click the instance ID, and click Create on the Listener Management page.
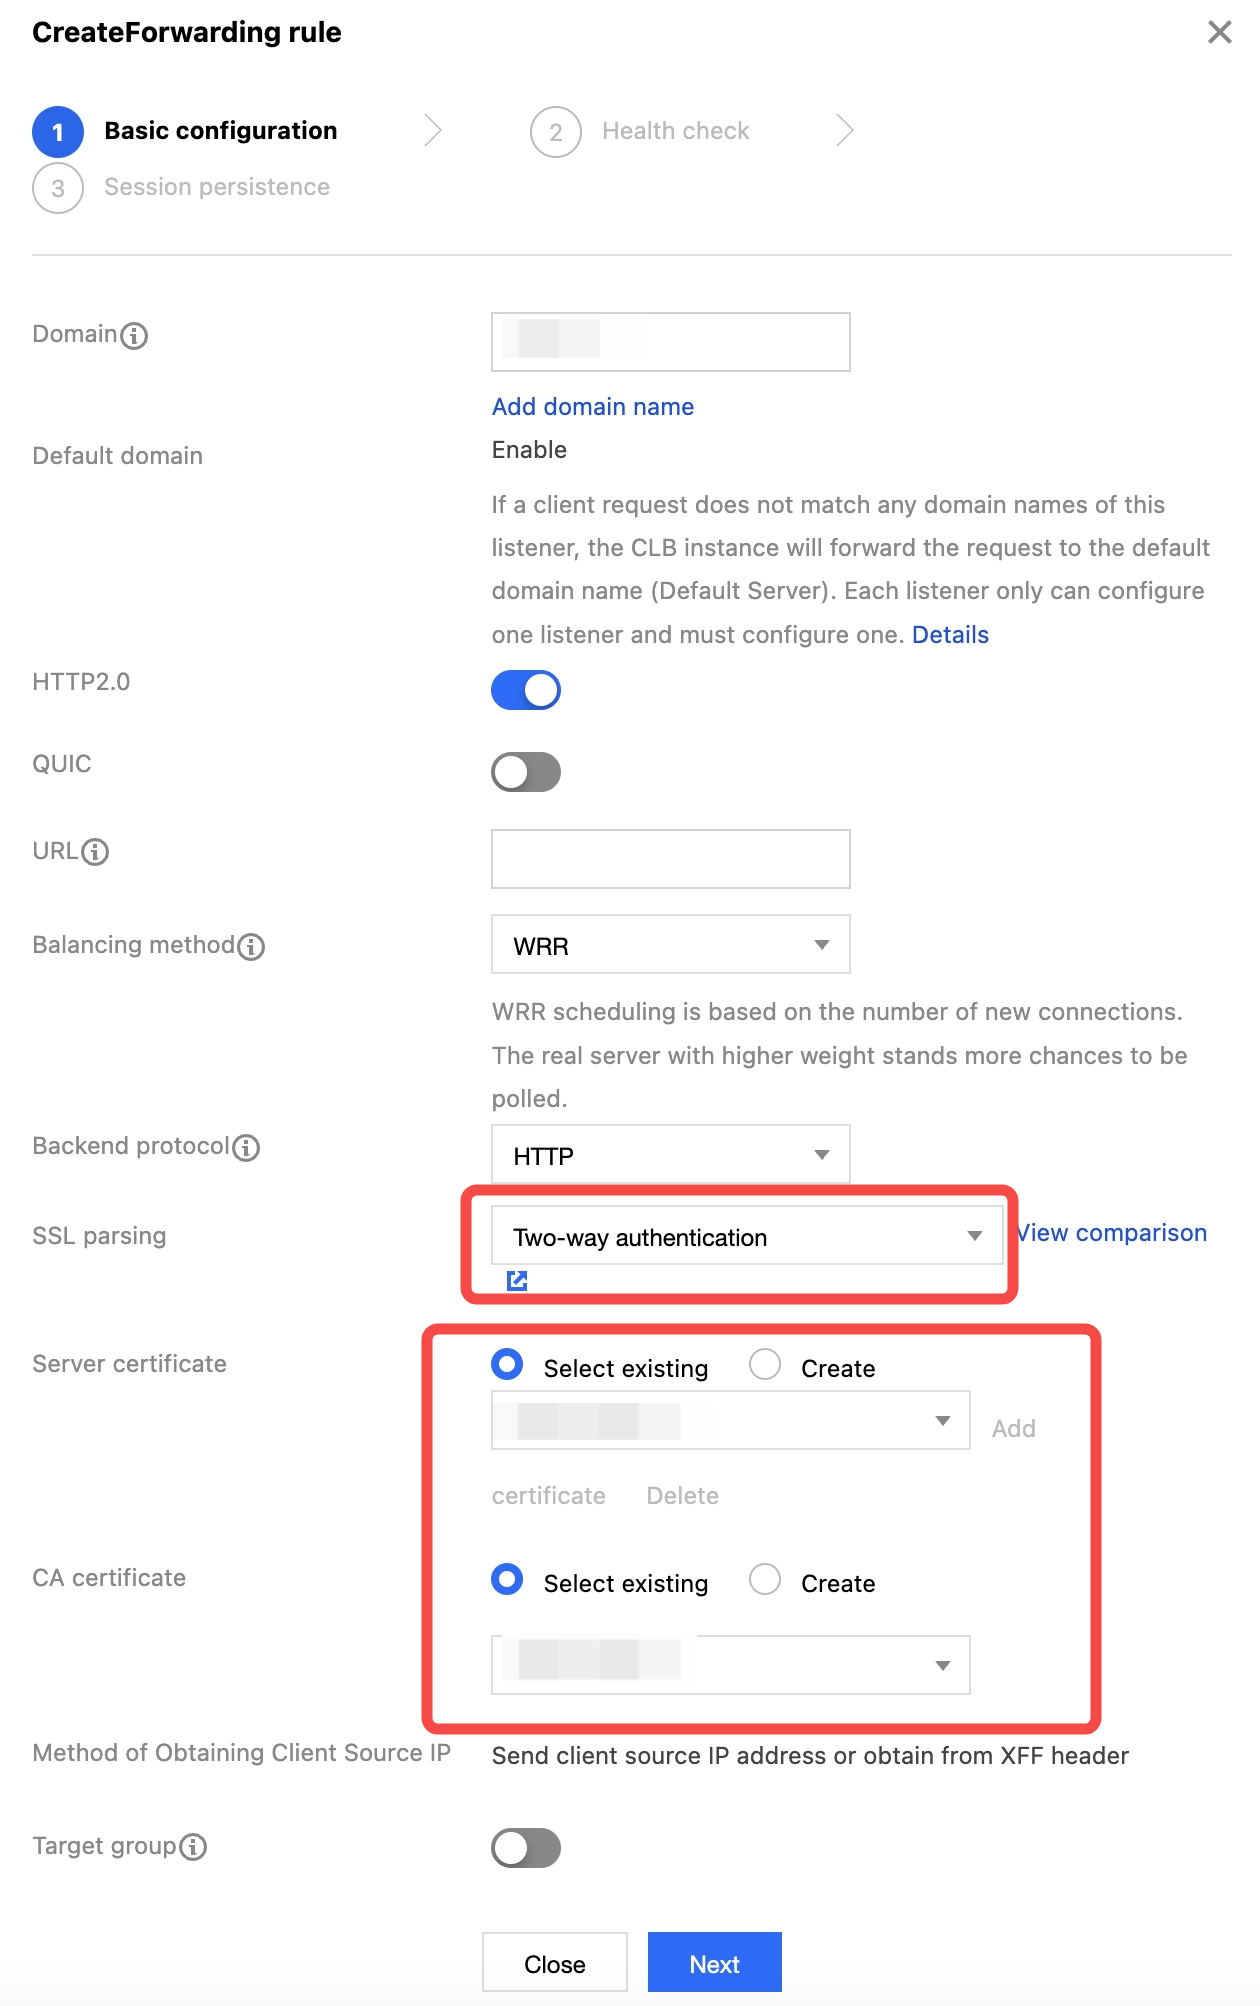
2. On the configuration page, select HTTPS as the listening protocol, specify the port, disable SNI, and select Mutual authentication as the SSL parsing method. Then, upload the obtained server certificate and CA certificate, confirm the configuration, and click Submit.
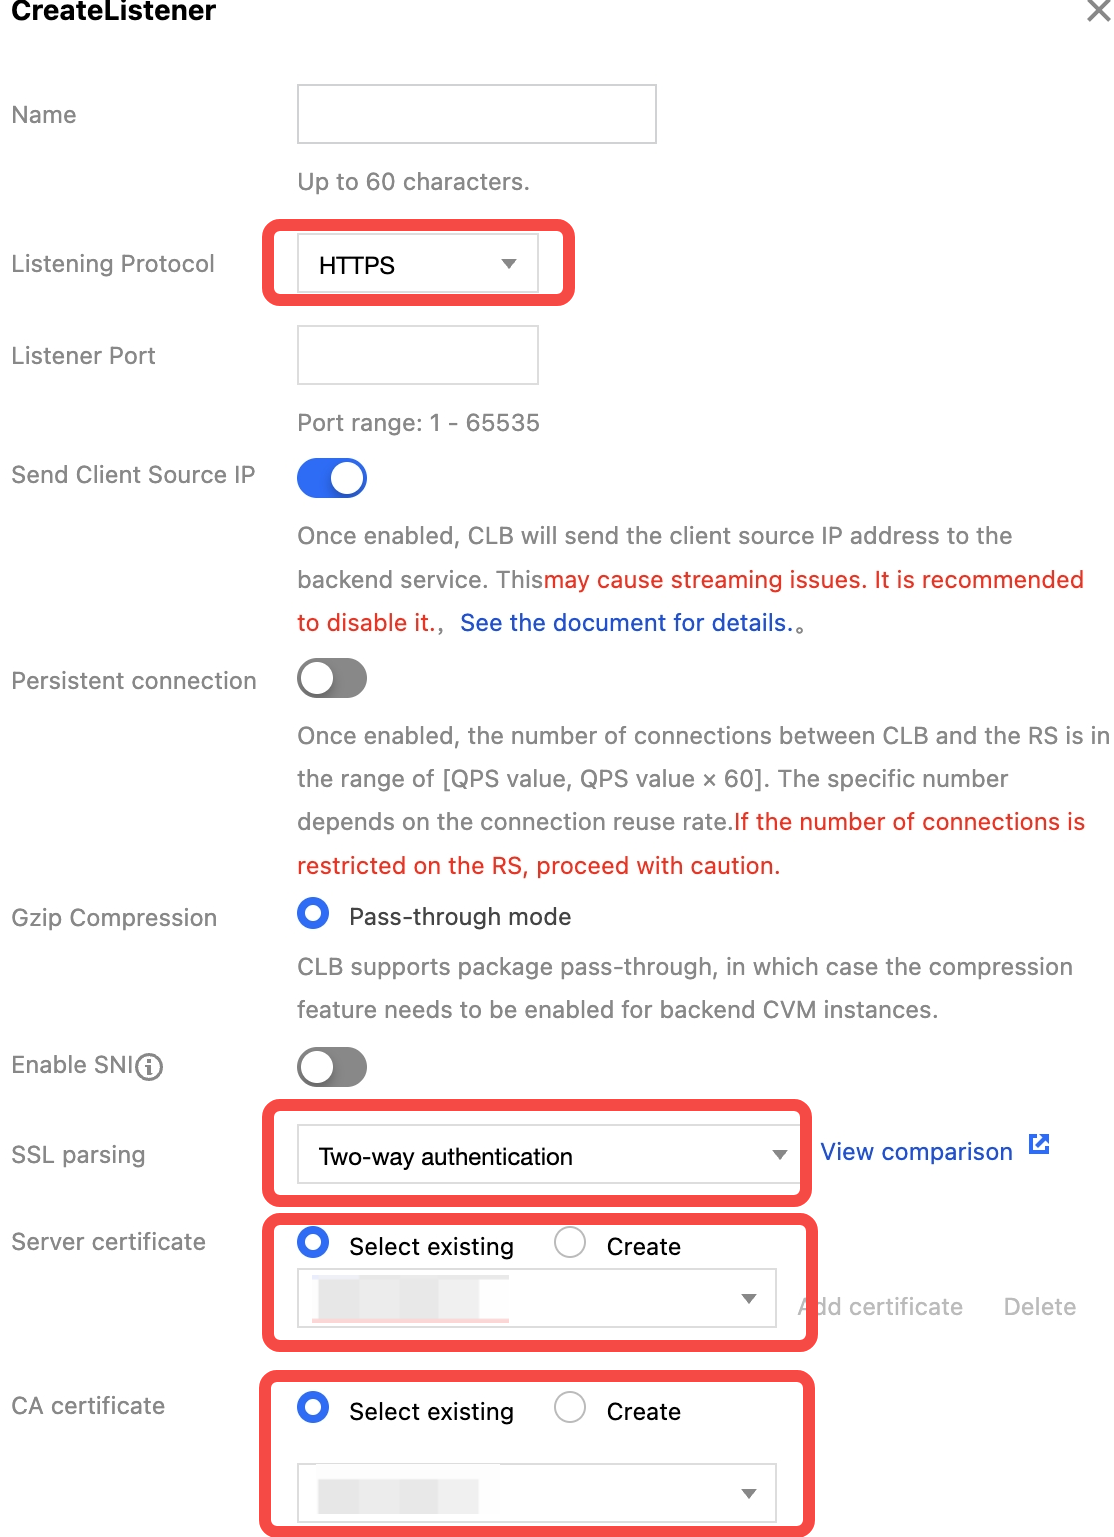
3. Click the + icon to create a forwarding rule. Enter the CLB domain name and URL, select a balancing method and backend protocol, and complete the basic configuration.
Note:
If HTTPS is selected as the listening protocol, the access from the client to the CLB instance is over HTTPS. In this case, the forwarding protocol between the CLB instance and real servers can be HTTP or HTTPS.
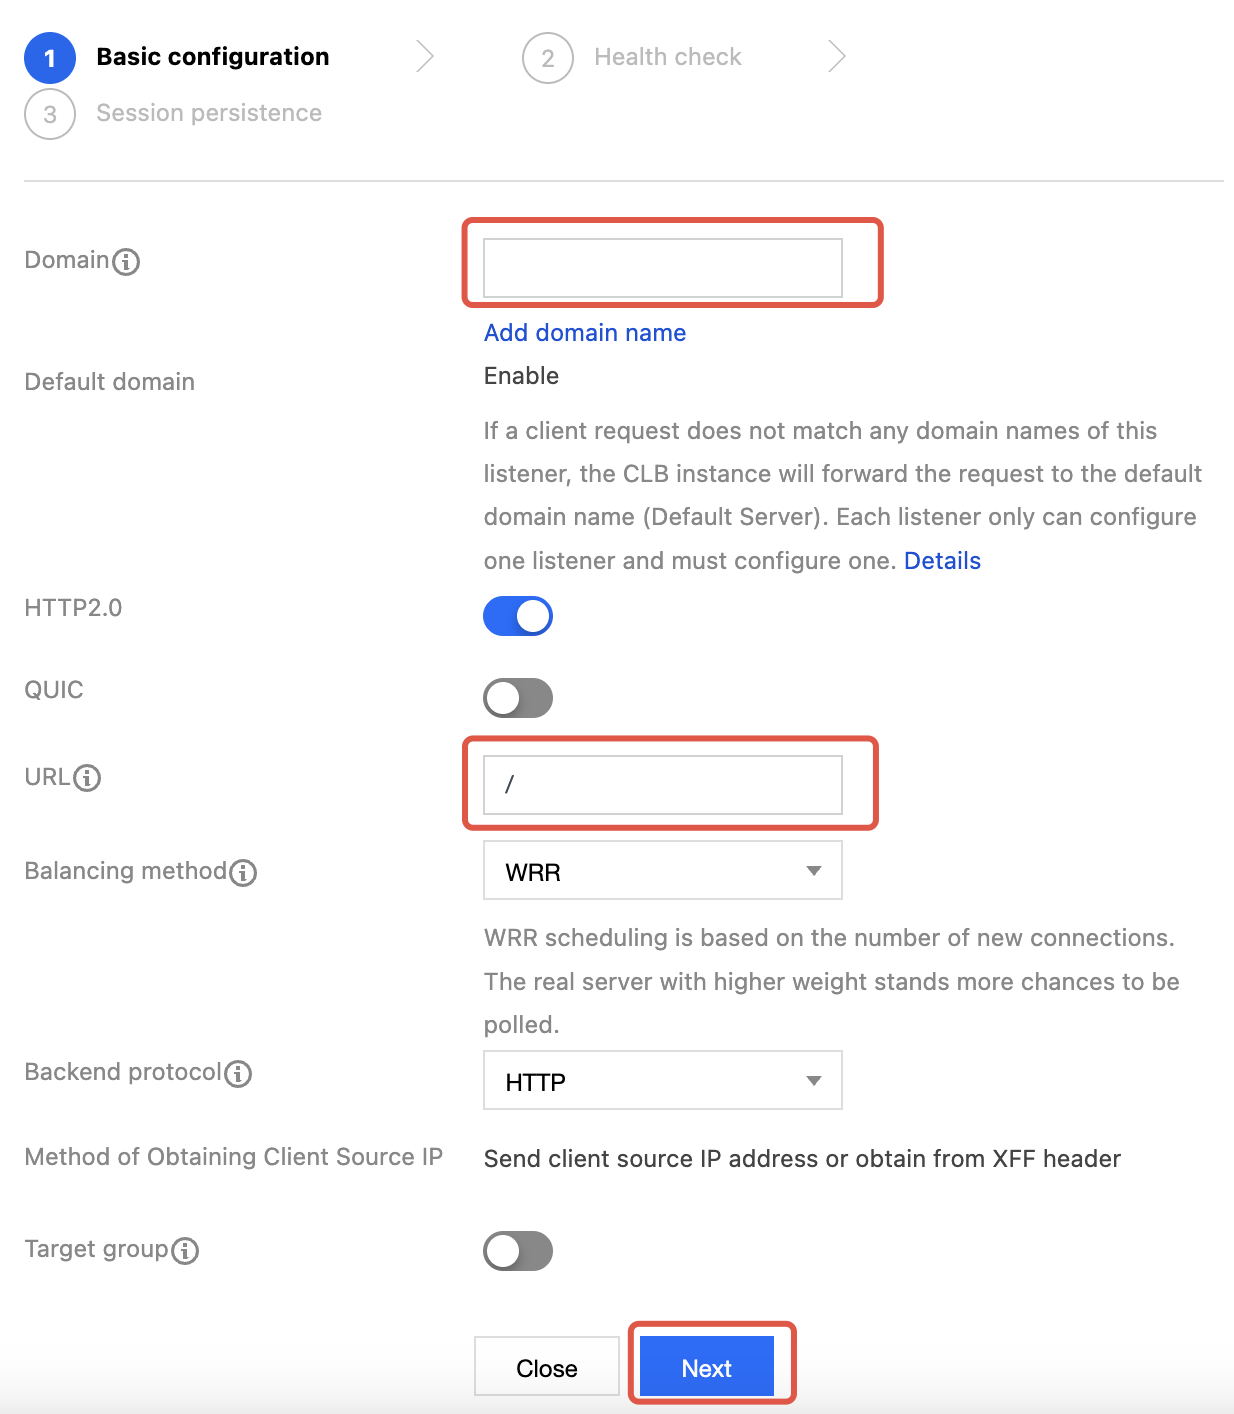
4. Specify the health check port and configure session persistence according to the configuration.
5. Unfold the rule details, click Bind, and select the two created real servers rs-1 and rs-2.
Method 2: Enabling SNI
1. On the configuration page, select HTTPS as the listening protocol, specify the port, enable SNI, and click Submit.
2. Click the + icon to create a forwarding rule. Enter the CLB domain name and URL, select a balancing method and backend protocol, and complete the basic configuration. Then, upload the server certificate corresponding to the domain name and the self-signed CA certificate.
3. The subsequent steps are the same as those of Method 1: Disabling SNI. For details of SNI, see SNI Support for Binding Multiple Certificates to a CLB Instance.
Step 7: Importing the Client Certificate
Method 1: Browser
1. Download the issued client certificate client.p12 to a local path.
2. Double-click the client certificate and complete the client certificate installation following the guide of the Certificate Import Wizard.
Method 2: CLI
1. Copy the client certificate client.crt and the client private key file client.key to a new directory.
2. Run the corresponding command in the CLI tool to import the client certificate in the new directory.
Step 8: Verifying Mutual Authentication
Method 1: Browser
1. Enter the domain name bound to the CLB instance in a browser. If no domain name is bound, use the IP address and port for access. Select the imported client certificate during access.
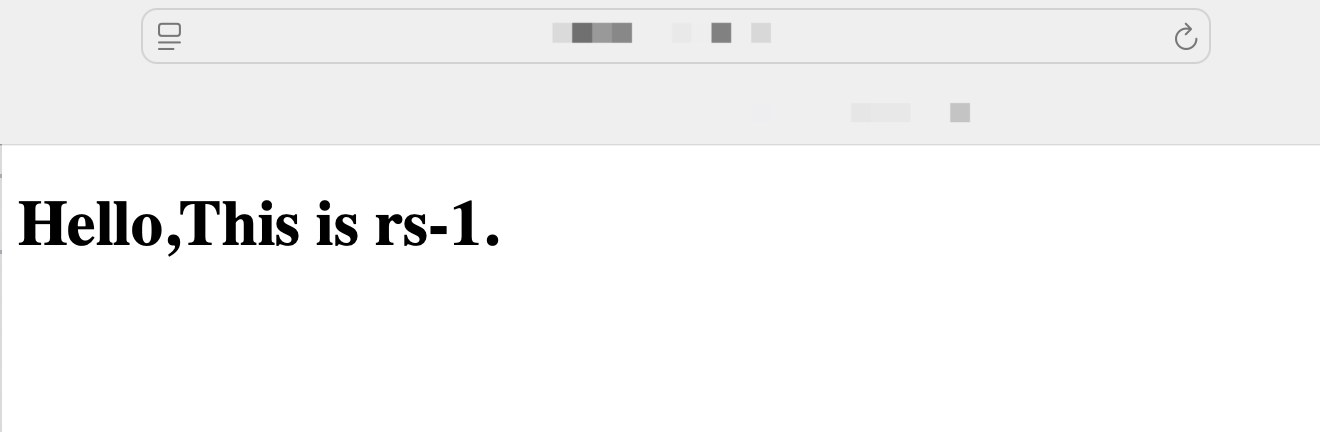
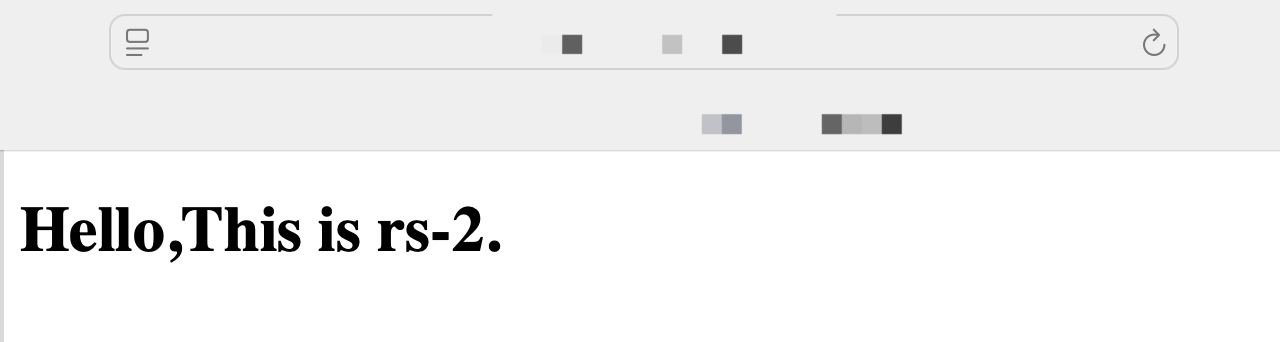
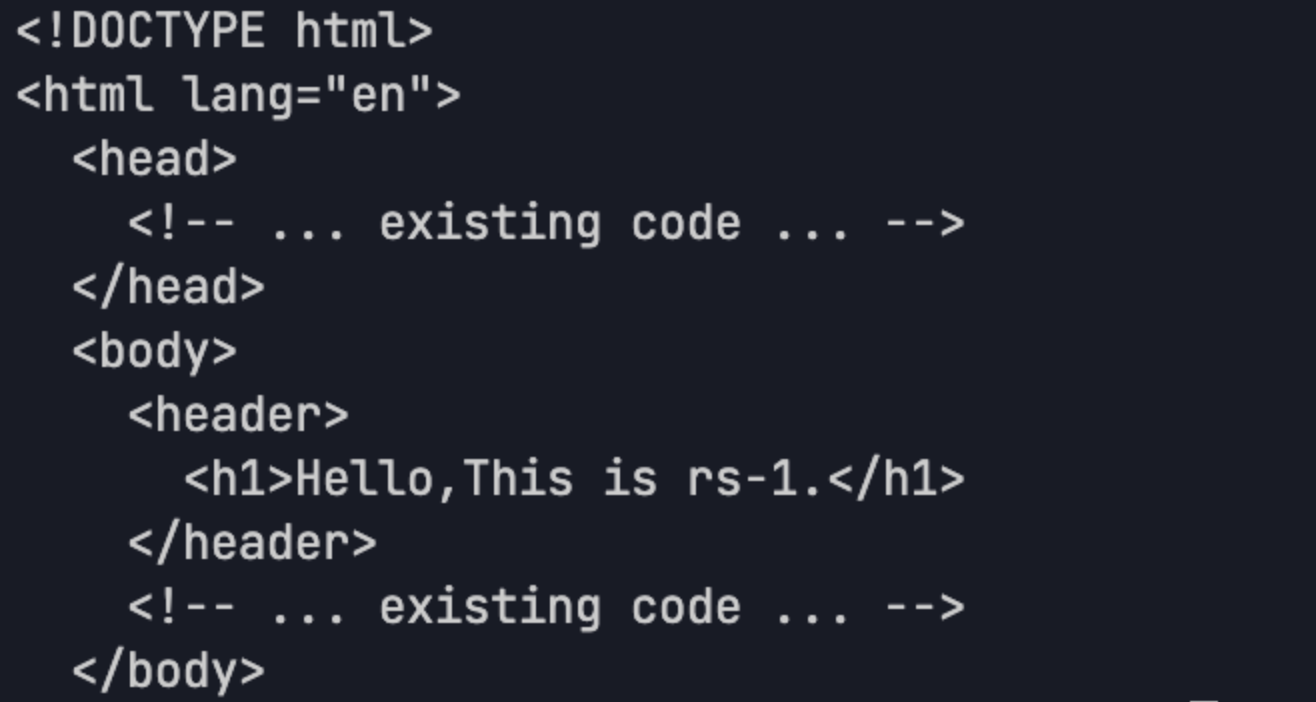
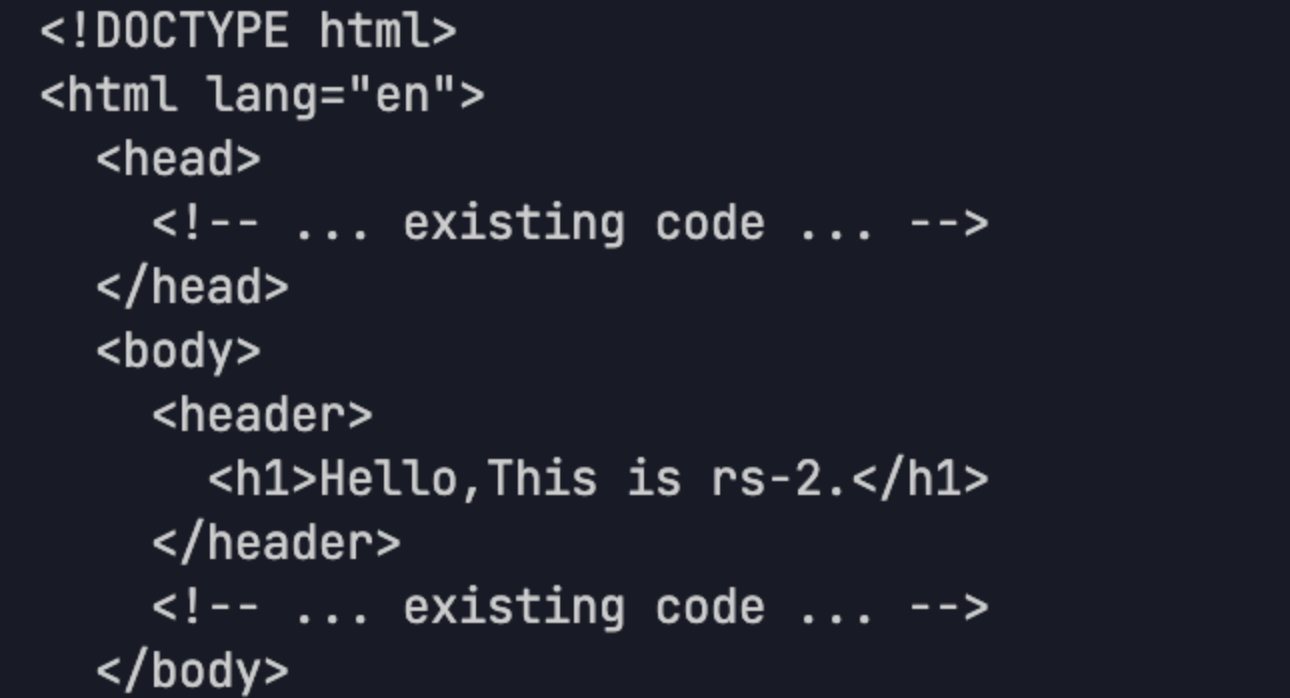
2. Refresh the browser and check whether client requests are forwarded between real servers rs-1 and rs-2. If yes, the verification is successful.
Method 2: CLI
1. Enter the following command in the shell interface, and check the certificate address, key address, and the address of the CLB instance to be accessed.
curl --cert client.crt --key client.key --cacert ca.crt https://xxx.xxx.xxx
2. The verification is successful if the corresponding response code is returned.
Bantuan dan Dukungan
Apakah halaman ini membantu?
Anda juga dapat Menghubungi Penjualan atau Mengirimkan Tiket untuk meminta bantuan.
masukan