Using Debezium to Collect PostgreSQL Data
Download
Focus Mode
Font Size
In business application scenarios, it is often necessary to capture database data changes in real time and synchronize them with other systems. This process can be achieved through Debezium, which is used to monitor database changes and capture data modification events, and export them in the form of event flows.
This document explains how to use Debezium to collect data from TencentDB for PostgreSQL.
Prerequisites
Prepare a TencentDB for PostgreSQL instance and a CVM instance under the same VPC.
Step 1: Deploying the Deployment Environment
Configure Java Environment for CVM
Debezium is a java application. You need to configure a java environment on the CVM to provide a basis for its normal operation.
Execute the following commands in sequence, download the jdk 18 installation package and unzip it.
# Download jdk8[root@VM-10-18-tencentos ~]# wget --no-check-certificate --header "Cookie: oraclelicense=accept-securebackup-cookie" \\https://download.oracle.com/java/18/archive/jdk-18.0.2_linux-x64_bin.tar.gz# Decompress the installation package[root@VM-10-18-tencentos ~]# tar -zxvf jdk-18.0.2_linux-x64_bin.tar.gz -C /usr/local/# Rename directory[root@VM-10-18-tencentos ~]# sudo mv /usr/local/jdk-18.0.2 /usr/local/jdk18
Execute the following commands to access the configuration file content.
[root@VM-10-18-tencentos ~]# vim /etc/profile
Press the i key to enter edit mode and add the following content at the end of the file.
export JAVA_HOME=/usr/local/jdk18export PATH=$JAVA_HOME/bin:$PATHexport CLASSPATH=.:$JAVA_HOME/lib
After adding, press the esc key to exit edit mode, then enter :wq to save changes and exit the file.
Execute the following commands to make the configuration take effect immediately.
[root@VM-10-18-tencentos ~]# source /etc/profile
Check whether java is configured successfully through the following command.
[root@VM-10-18-tencentos ~]# java -versionjava version "18.0.2" 2022-07-19Java(TM) SE Runtime Environment (build 18.0.2+9-61)Java HotSpot(TM) 64-Bit Server VM (build 18.0.2+9-61, mixed mode, sharing)
If java version information is displayed, the configuration is successful.
2.Local Kafka Deployment
You can manually download the required version of the binary package (Binary download) from the official website Apache Kafka, and then upload it to the CVM. For details, please refer to How to copy local files to a CVM.
You can also directly execute the following commands to download. The version number can be replaced as needed.
[root@VM-10-18-tencentos ~]# wget https://downloads.apache.org/kafka/3.7.2/kafka_2.13-3.7.2.tgz
After downloading the kafka package to the CVM, execute the following commands in sequence to complete the installation.
# Create the installation directory for kafka[root@VM-10-18-tencentos ~]# mkdir -p /data/zookeeper# Decompress the kafka installation package[root@VM-10-18-tencentos ~]# tar -zxvf kafka_2.13-3.7.2.tgz -C /data/# Rename the decompressed directory[root@VM-10-18-tencentos ~]# cd /data/[root@VM-10-18-tencentos data]# mv kafka_2.13-3.7.2 kafka_dev
Execute the downstream command, and enter the Zookeeper configuration file.
root@VM-10-18-tencentos data]# cd /data/kafka_dev/config[root@VM-10-18-tencentos config]# vim /data/kafka_dev/config/zookeeper.properties
After entering the file, press the i key to enter edit mode. Find dataDir and change it to /data/zookeeper. Underwrite that dataDir points to the correct storage path.
dataDir =/data/zookeeper
After modification, press the esc key to exit edit mode, then directly enter :wq to save changes and exit the file.
3.Modifying the Kafka Configuration File
Execute the following commands to create the kafka log directory.
[root@VM-10-18-tencentos config]# mkdir -p /data/kafka_dev/logs/
Execute the following commands to enter the kafka configuration file.
[root@VM-10-18-tencentos config]# vim connect-distributed.properties
After entering the file, press the "i" key to enter edit mode and modify the following content. If the CVM and the cloud database are under the same VPC, it is advisable to fill in the private IP address of the CVM.
listeners=PLAINTEXT://ip_of_machines_where_kafka_is_deployed:9092 #If there is a # at the beginning of this line, delete it and modifylog.dirs=/data/kafka_dev/logs/connect.logzookeeper.connect=ip_of_machines_where_kafka_is_deployed:2181
Execute the following commands to enter the configuration file connect-distributed.properties of kafka connect.
[root@VM-10-18-tencentos config]# vim connect-distributed.properties
After entering the file, press the "i" key to enter edit mode and modify the following content. If the CVM and the cloud database are under the same VPC, it is advisable to fill in the private IP address of the CVM.
group.id=connect-clusterbootstrap.servers=ip_of_machines_where_kafka_is_deployed:9092# Define the plug-in pathplugin.path=/data/kafka_connect/plugins
4.Starting Zookeeper and Kafka
Use the following command to start zookeeper.
[root@VM-10-18-tencentos config]# cd /data/kafka_dev[root@VM-10-18-tencentos kafka_dev]# nohup bin/zookeeper-server-start.sh config/zookeeper.properties &> zookeeper.log &
Enter the following command to confirm whether the zookeeper task is running normally in the background.
[root@VM-10-18-tencentos kafka_dev]# jobs
If the returned information contains "zookeeper" and "running", it is running normally.
Execute the following commands to start kafka.
[root@VM-10-18-tencentos kafka_dev]# nohup bin/kafka-server-start.sh config/server.properties &> kafka.log &
Enter the following command to confirm whether the kafka task is running normally in the background.
[root@VM-10-18-tencentos kafka_dev]# jobs
If the returned information contains "kafka" and "running", it is running normally.
Step 2: Create a Logical Replication Publication in PostgreSQL
The logical Publication defines which tables' data changes will be published. Debezium captures the changed data by binding to the logical replication Slot (Failover Slot) associated with the logical Publication. For specific instructions on the logical replication Slot, please refer to Failover Slot. Therefore, you need to create a Publication and a Failover Slot to achieve data capture and synchronization.
Enabling Logical Replication
Enter the console, find the instance that needs data collection. On the instance details page, click Parameter Setting. Change the default value of the wal_level parameter to logical. After modifying the parameter value, the instance needs to be restarted for the changes to take effect.
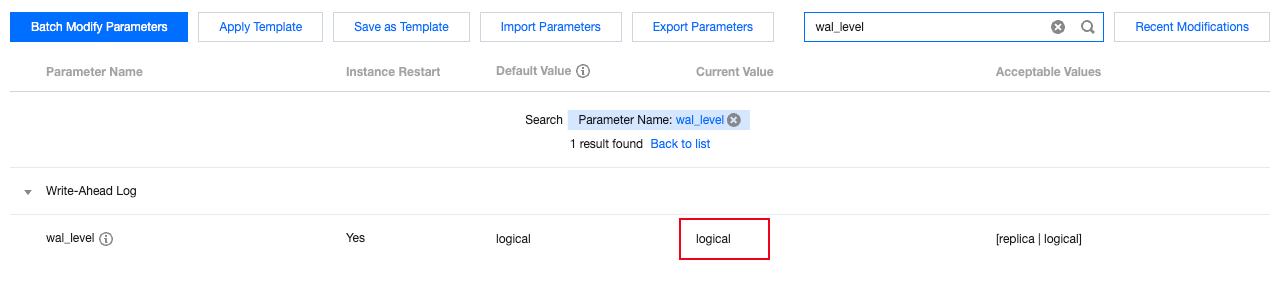
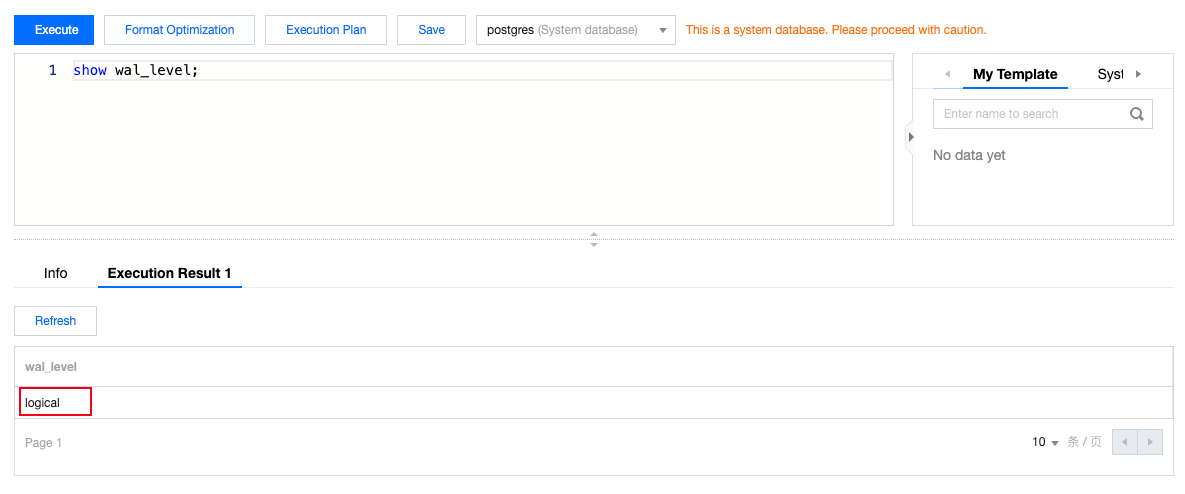
After modification, you can log in to the instance and use the following query statement to check whether the wal_level parameter is successfully modified.
show wal_level;
2.Creating a Publication (Logical Publication)
Log in to the database console of the database to be published with an account whose usage type is pg_tencentdb_superuser. Execute the following commands to create a publication.
CREATE PUBLICATION pg_demo_publication FOR ALL TABLES;
Among them, pg_demo_publication refers to the name of the publication, which you can self-define. FOR ALL TABLES means to publish all tables in the current database. If you need to specify which tables to publish, you can choose to execute the following commands:
CREATE PUBLICATION pg_demo_publication FOR table_name1, table_name2;
Execute the following command to view the just created publication and confirm the tables to be published.
SELECT * FROM pg_publication_tables WHERE pubname = ‘pg_demo_publication’;
To confirm what operations will be published, execute the following command to view.
SELECT * FROM pg_publication WHERE pubname = ‘pg_demo_publication’;
The pg_publication table is used to store information about all created publications. Among them, if the puballtables column is true, it indicates that all tables in the database are published; if the pubinsert column is true, it indicates that the insert operation of the table is published, and the same applies to other columns.
Execute the following commands to create the tencentdb_failover_slot plug-in.
CREATE EXTENSION tencentdb_failover_slot;
Execute the following commands to create logical_failover_slot.
SELECT pg_create_logical_failover_slot(‘failover_alot_name’,’pgoutput’);
After creation, you can use the following command to view Failover Slot info.
SELECT * FROM pg_failover_slots;
Step 3: Enabling Debezium
Installing the Debezium Plug-In
Log in to the CVM and execute the following commands in sequence to download the debezium-connector-postgresql plug-in and extract it to the specified path.
[root@VM-10-18-tencentos ~]# mkdir -p /data/kafka_connect/plugins[root@VM-10-18-tencentos ~]# wget https://repo1.maven.org/maven2/io/debezium/debezium-connector-postgres/2.7.3.Final/debezium-connector-postgres-2.7.3.Final-plugin.tar.gz[root@VM-10-18-tencentos ~]# tar -zxvf debezium-connector-postgres-2.7.3.Final-plugin.tar.gz -C /data/kafka_connect/plugins
2.Starting Kafka Connect
Before starting kafka connect, please ensure that kafka has been started. For the startup and confirmation method, please refer to Step 1.
Execute the following commands to start kafka connect.
[root@VM-10-18-tencentos ~]# cd /data/kafka_dev[root@VM-10-18-tencentos kafka_dev]# nohup bin/connect-distributed.sh config/connect-distributed.properties &> connect.log &
3.Creating a Debezium Connector
Execute the following commands on the CVM to create a debezium connector. Items that need to be filled in according to the actual situation have been marked for you.
Note:
If the CVM and TencentDB for PostgreSQL are under the same VPC, it is advisable to fill in the server machine of the CVM and the internal network IP of the database.
curl -XPOST "http://ip_of_CVM_where_kafka_is_deployed:8083/connectors/" \\-H 'Content-Type: application/json' \\-d '{"name": "test_connector","config": {"connector.class": "io.debezium.connector.postgresql.PostgresConnector","database.hostname": "IP address of the machine where the PostgreSQL database is deployed""database.port": "5432","database.user": "PostgreSQL username with permission to release""database.password": "Password of the publishing user""database.dbname": "Database for creating publication""database.server.name": "pg_demo","slot.name": "pg_demo_failover_slot","topic.prefix": "pg_demo","publication.name": "pg_demo_publication","publication.autocreate.mode": "all_tables","plugin.name": "pgoutput"}}'
The following are the parameters that need to be filled in manually and can be customized, as follows:
Parameter | Description |
name | Connector name. Must be unique. |
database.hostname | IP address of the cloud database. It is recommended to fill in the private network IP. |
database.user | The username used to connect to a cloud database. The user needs sufficient permissions to complete the publishing. It is recommended to use a user of type pg_tecenten_superuser. |
database.password | The user's password. |
database.dbname | Database name for creating publication. |
slot.name | Name of the logical replication slot. Please enter the name of the logical replication slot created earlier. |
publication.name | Name of the logical replication. Please enter the name of the logical release created earlier. |
You can log in to the console and run the following command to view the publication.
SELECT * FROM pg_publication;
Use the following command to view failover Slot info.
SELECT * FROM pg_failover_slots;
After creation, you can confirm the connection status by entering the following command on the CVM.
curl "http://ip_of_machine_where_kafka_is_deployed:8083/connectors/pg_demo_connector/status"
If the returned message contains "running", it is running normally.
Step 4: Test Data Change
Execute the following commands to log in to the cloud database on the CVM. Fill in the IP address of the cloud database after -h. If the CVM and the cloud database are under the same VPC, it is advisable to fill in the private network IP.
[root@VM-10-18-tencentos kafka_dev]# su – postgres[postgres@VM-10-18-tencentos ~]$ /usr/local/pgsql/bin/psql -h *.*.*.* -p 5432 -U dbadmin -d postgresPassword for user dbadmin:psql (16.4, server 16.8)Type "help" for help.postgres=>
Create a new table and insert data for testing.
postgres=> CREATE TABLE linktest (id SERIAL PRIMARY KEY);CREATE TABLEpostgres=> insert into linktest values(1);INSERT 0 1
Monitor kafka logs. If kafka is normal, the connection is established successfully.
Help and Support
Was this page helpful?
You can also Contact sales or Submit a Ticket for help.
Help us improve! Rate your documentation experience in 5 mins.
Feedback