TKE charges cluster management fees based on the specifications of the managed clusters, and charges cloud resources fees based on the actual usage. For billing modes and prices, see TKE Billing Overview. In this document, a managed cluster is created. You still need to pay for services such as cluster worker nodes, persistent storage, and CLB instances bound to the service. Before making a purchase, top up your account as instructed in Payment Methods.
Step 3. Authorize TKE
Log in to the Tencent Cloud console, select Tencent Cloud services > Tencent Kubernetes Engine to enter the TKE console and authorize TKE according to the prompts. If you have already authorized TKE, skip this step.
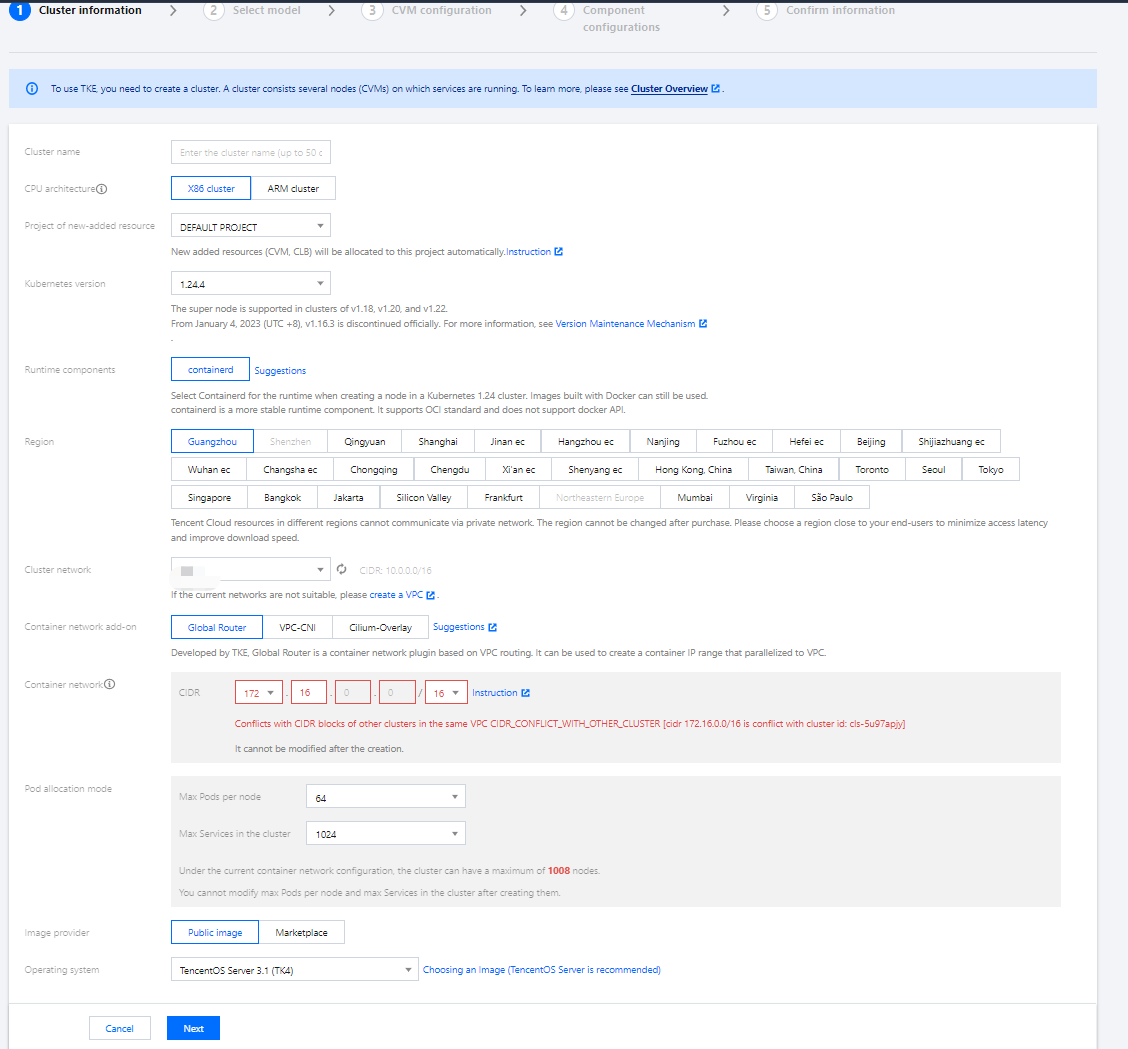
On the Cluster Information page, enter the cluster name and select the region of the cluster, the cluster network, and container network. Keep other default options unchanged and click Next.
Cluster Name: Enter the cluster name. We use "test" as the cluster name in this document.
Region: select a region closest to you. For example, if you are in “Shenzhen”, please select “Guangzhou”.
Cluster Network: Assign IP addresses within the node network address range to the servers in the cluster. Here we select VPC.
Container Network: Assign IP addresses within the container network address range to the containers in the cluster. Here, we select an available container network.
Selecting a model
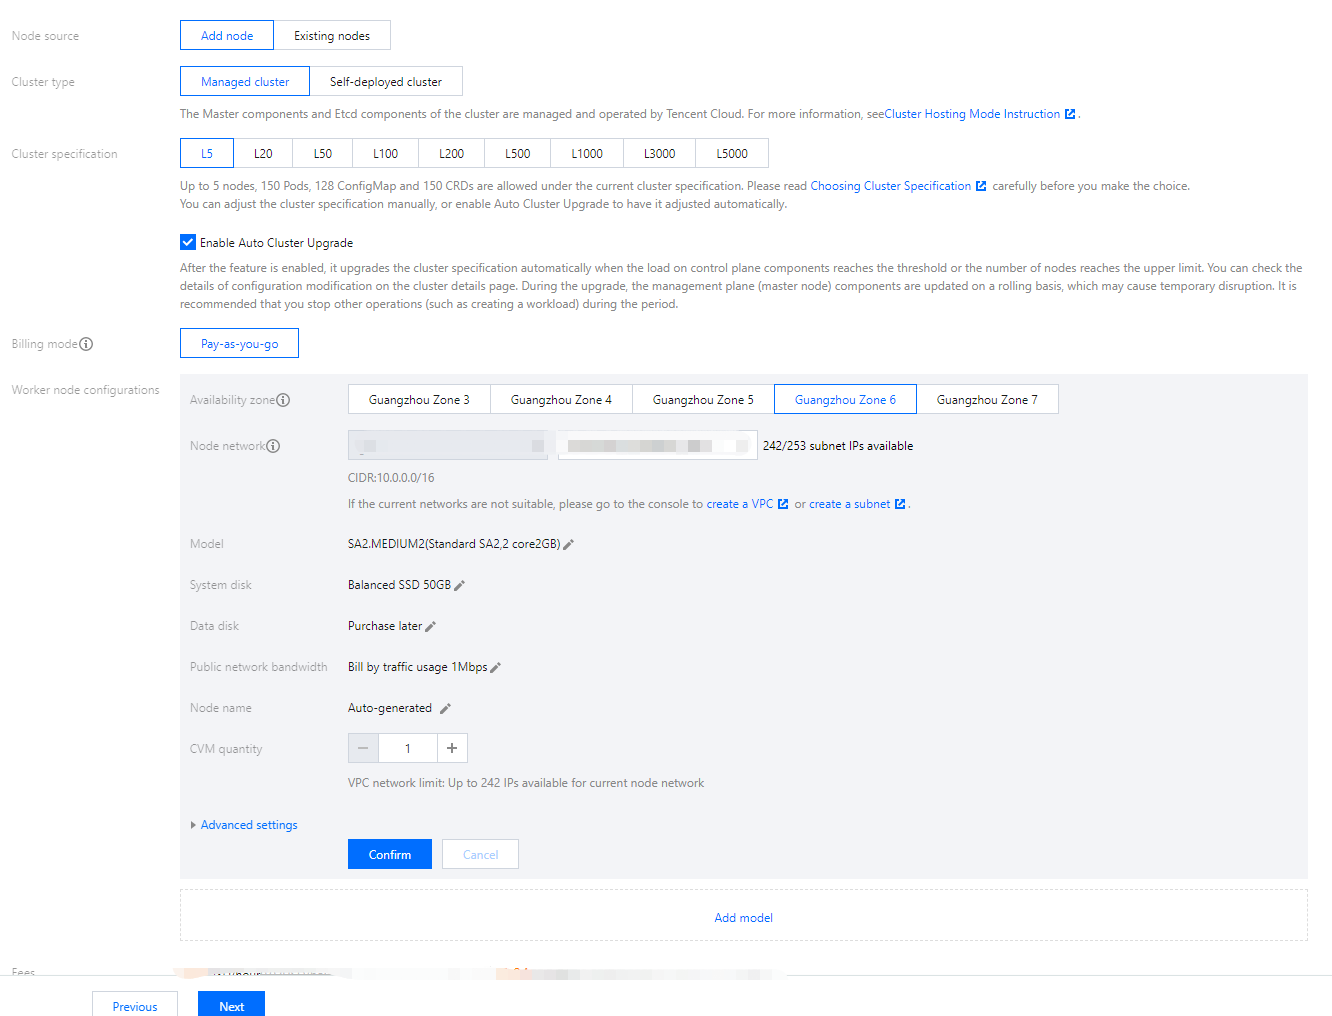
On the Select Model page, confirm the billing mode, select an availability zone and the corresponding subnet, confirm the node model, and click Next.
Node Source: You can select Add Node or Existing Nodes. Here, we select Add Node.
Cluster Type: You can select Self-deployed Cluster or Managed Cluster. Here we select Managed Cluster.
Cluster Specification: Multiple cluster specifications are provided. Here we select L5.
Billing Mode: Only Pay-as-you-go is available.
Worker Configurations: You only need to select an availability zone and the corresponding subnet and confirm the node model. Keep other default settings unchanged.
Availability Zone: Here we select Guangzhou Zone 6.
Node Network: Here we select the subnet under the current VPC.
Model: Here we select **SA2.MEDIUM2 (Standard SA2, 2-core 2 GB)**.
CVM configuration
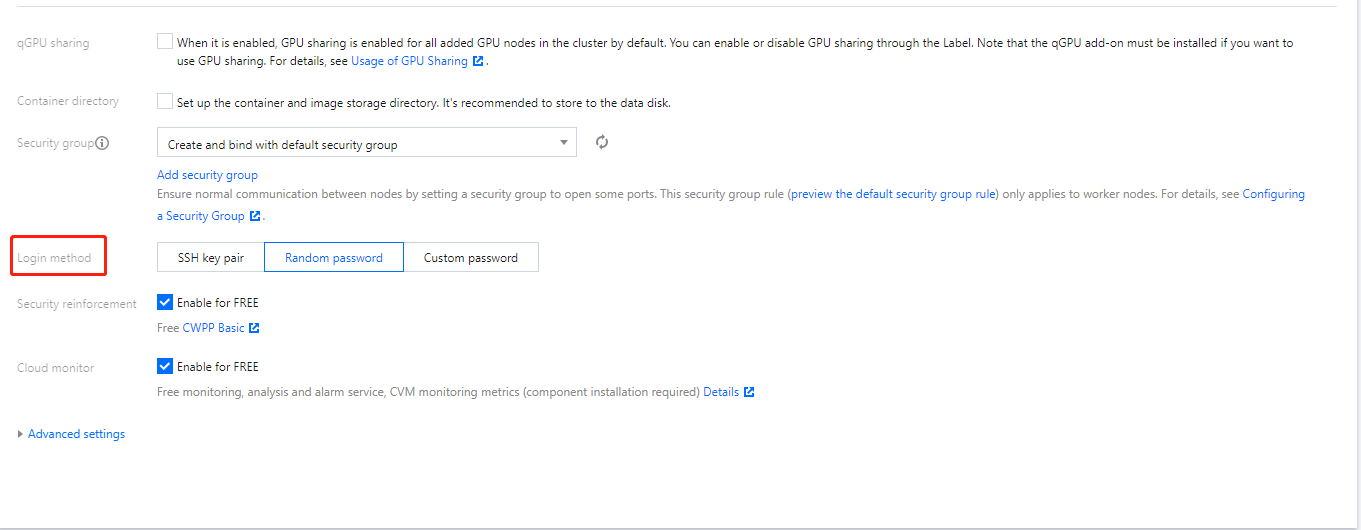
On the CVM configuration page, select the login method, keep other default settings unchanged, and click Next.
Login Method: You can select SSH Key Pair, Random Password or Custom Password. Here we select "Random Password".
Add-on configurations
On the Add-on Configurations page, you can choose the add-ons you need, including storage, monitoring, and image. If you don't need them, click Next. Here, we choose not to install add-ons and keep other default settings unchanged.
Information confirmation
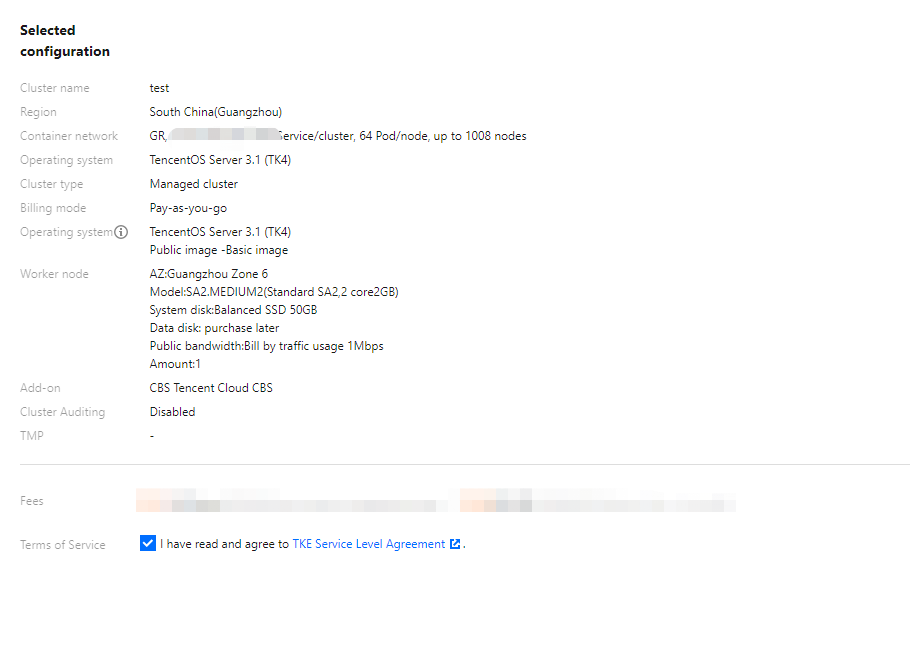
On the Confirm Info page, confirm the selected configuration information and billing mode for the cluster, read and indicate your consent to the TKE SLA, and click Done.
You can create your first TKE general cluster after making the payment. Then, you can view the created cluster in the TKE console.
Step 5. View the Cluster
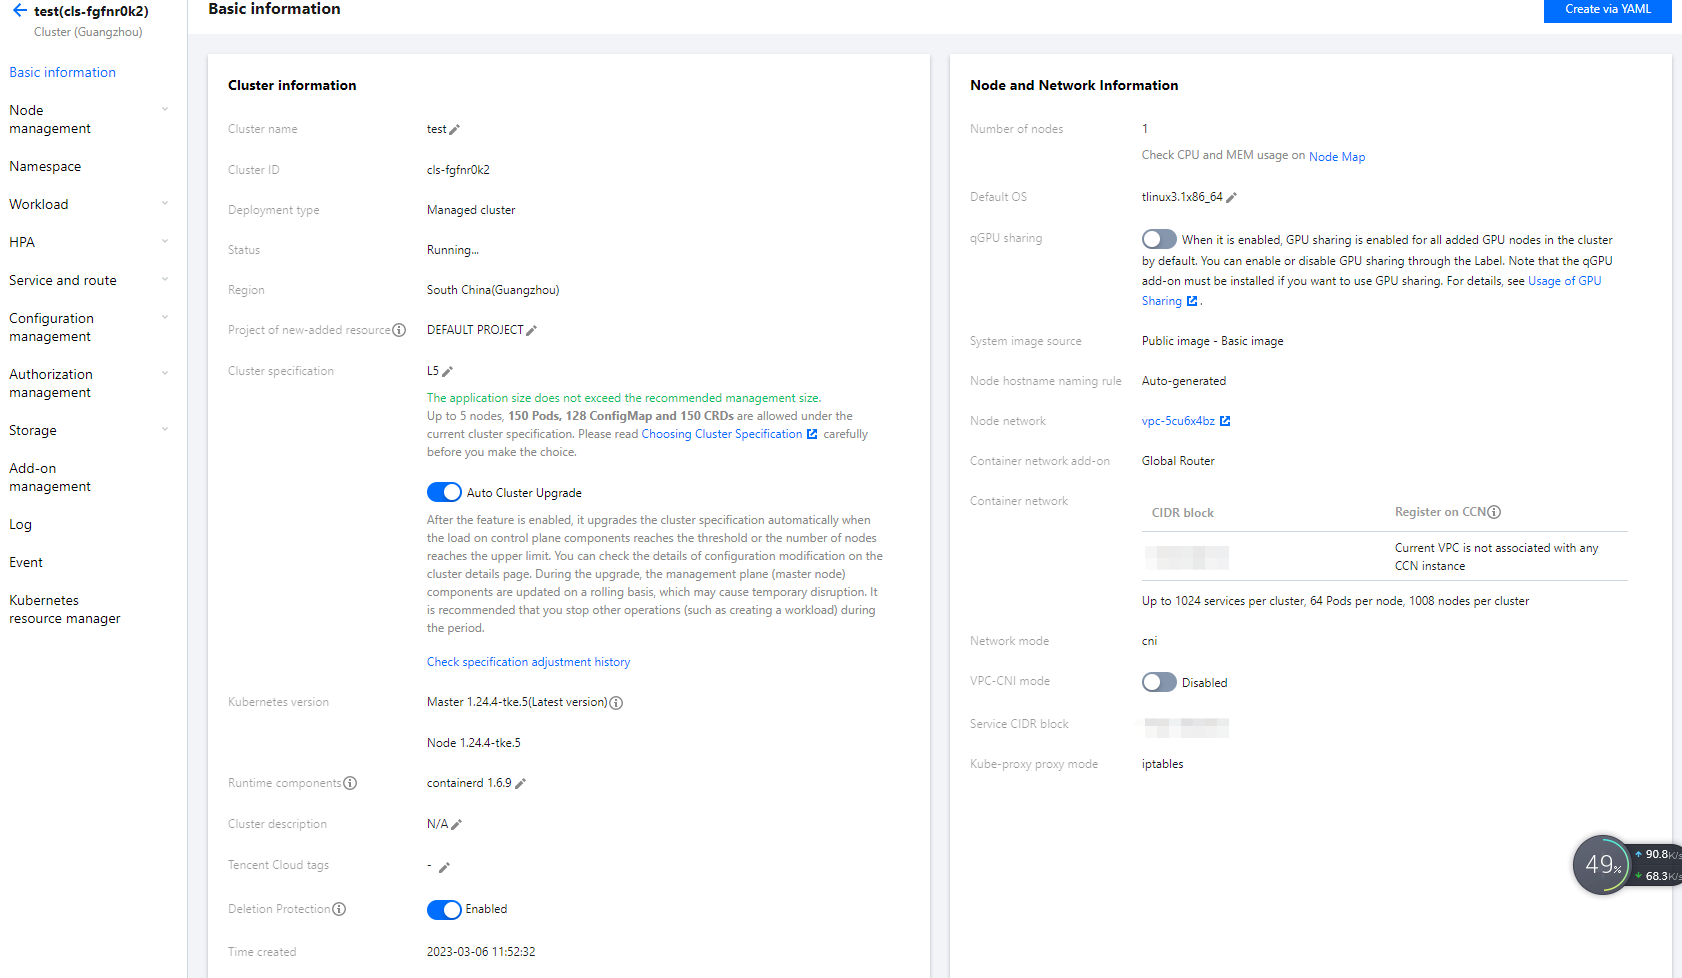
You can view clusters that have been created in the cluster list. You can click the cluster ID to enter the details page, and then view the cluster, node, network, and API Server information on the Basic Information page.
Step 6. Delete Clusters
Once started, clusters will start to consume resources. To avoid unnecessary costs, you can follow the steps below to clear all the resources.
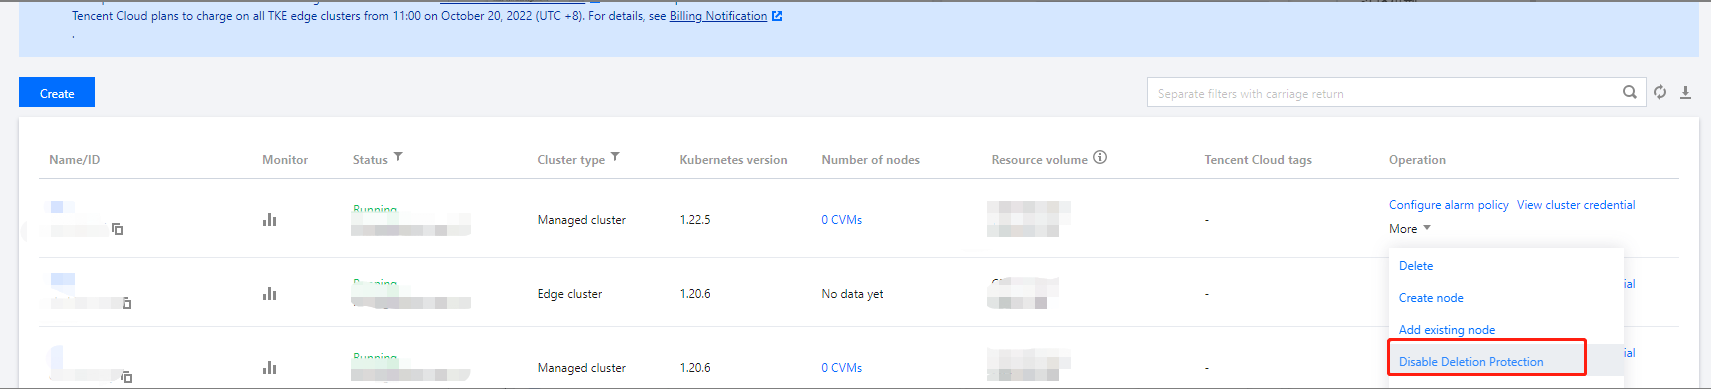
1. Select Cluster on the left sidebar. On the Cluster Management page, select More > Disable Deletion Protection on the right of the target cluster.
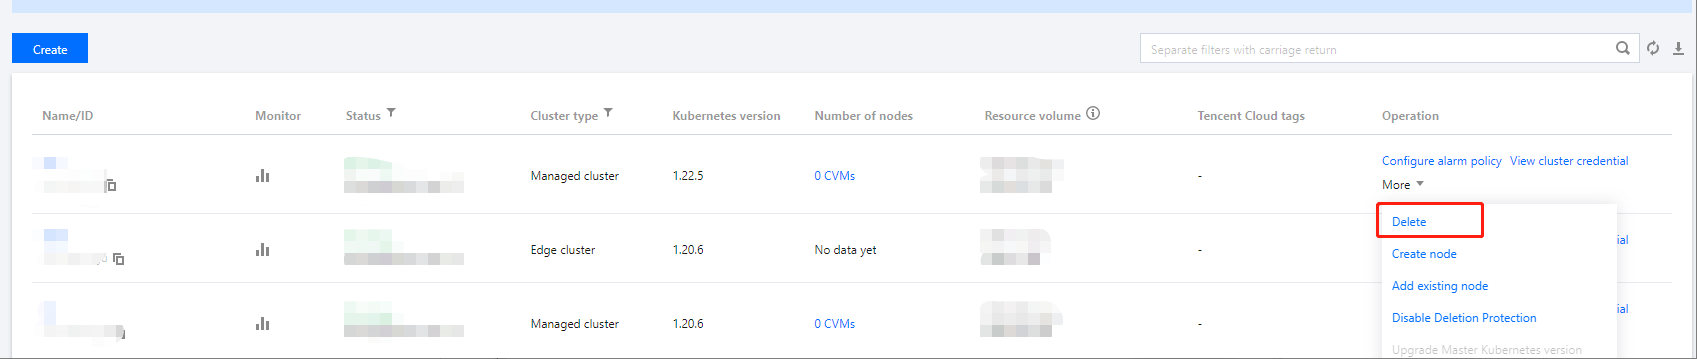
2. Select More > Delete on the right of the cluster.
3. Confirm related information in the Delete clusters pop-up window and click Confirm to delete clusters.
Subsequent Operation: Using a Cluster
Now you know how to create and delete clusters in TKE. You can set workloads and create services in the clusters. Common tasks include:
For detailed directions on how to create a general cluster in the TKE console, see Creating a Cluster. If you encounter any problems during the use, contact us for assistance.