快速部署 Flask 框架
Download
聚焦模式
字号
操作场景
本文将为您指导如何通过 SCF Web Function,快速部署您的 Flask 业务上云。
前提条件
操作步骤
模板部署 -- 一键部署 Flask 项目
1. 登录 Serverless 控制台,单击左侧导航栏的函数服务。
2. 在主界面上方选择期望创建函数的地域,并单击新建,进入函数创建流程。
3. 选择使用模板创建来新建函数,在搜索框里输入 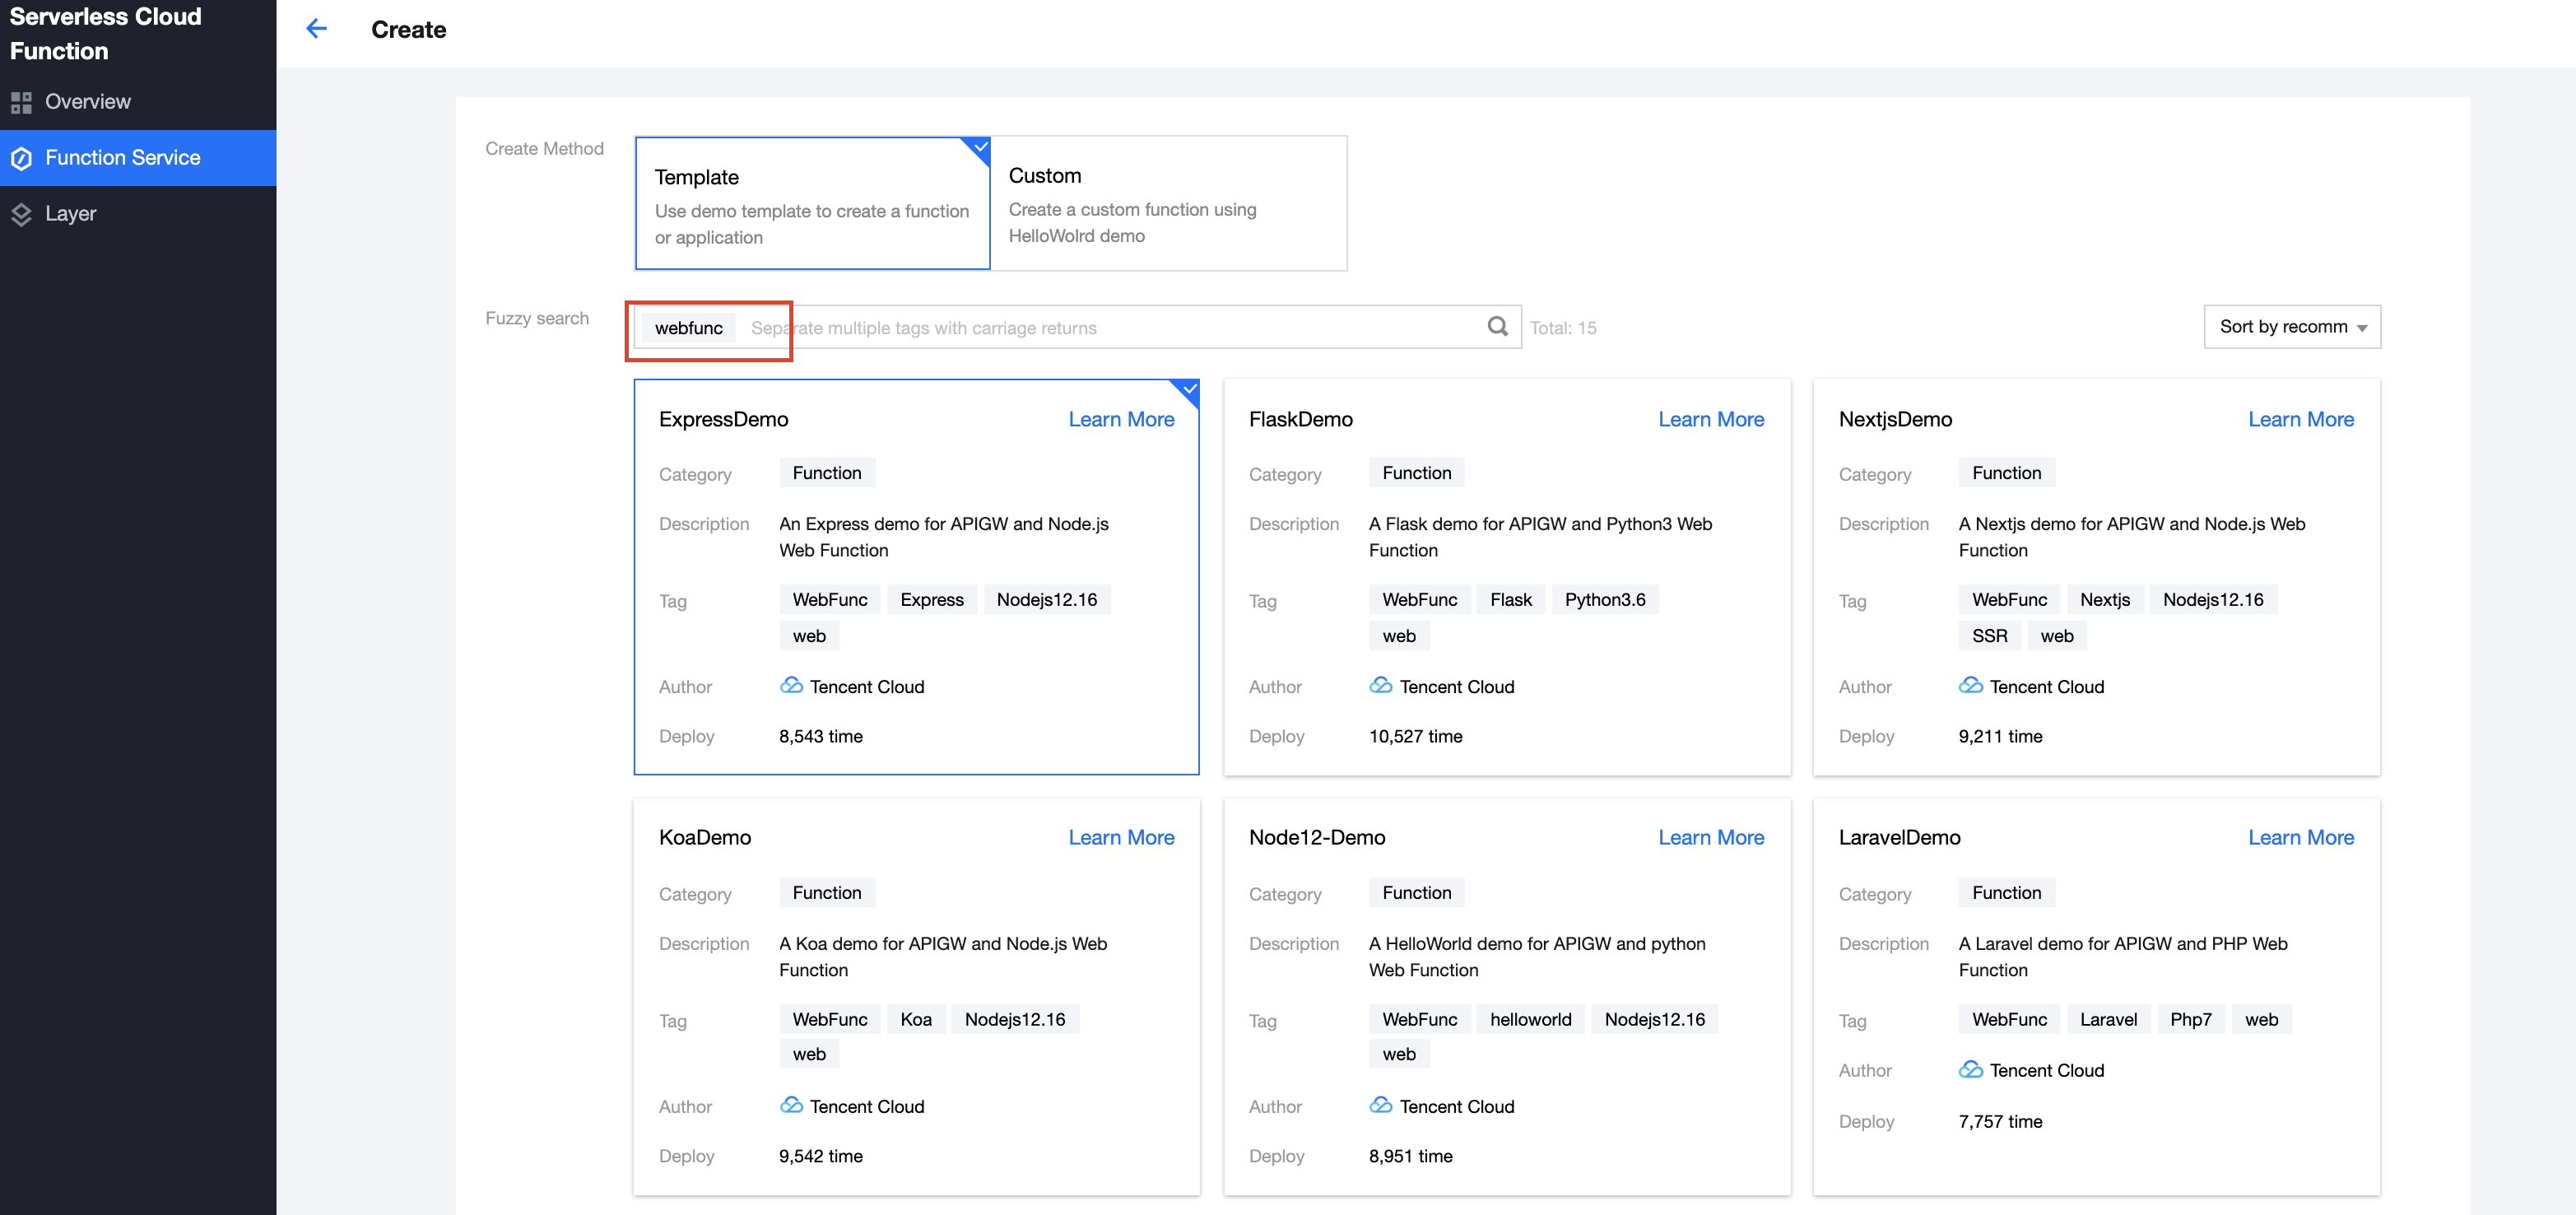
WebFunc 筛选所有 Web 函数模板,选择Flask 框架模板并单击下一步。如下图所示:
4. 在新建页面,您可以查看模板项目的具体配置信息并进行修改。
5. 单击完成即可创建函数。函数创建完成后,您可在函数管理页面查看 Web 函数的基本信息。
6. 您可以通自动生成的访问路径 URL,访问您部署的 Flask 项目。单击左侧菜单栏中的触发管理,查看访问路径。如下图所示:

7. 单击访问路径 URL,即可访问服务 Flask 项目。
自定义部署 -- 快速迁移本地项目上云
本地开发
1. 执行以下命令,确认您本地的环境已安装好 Flask。
pip install Flask
2. 在本地创建
Hello World 示例项目。
在项目目录下,新建 app.py 文件,用于实现 Hello World 应用,示例代码如下:from flask import Flaskapp = Flask(__name__)@app.route('/')def hello_world():return 'Hello World'if __name__ == '__main__':app.run()
3. 在本地执行
python3 app.py 命令运行 app.py 文件。示例如下:$ python3 app.py* Serving Flask app "app" (lazy loading)* Environment: productionWARNING: Do not use the development server in a production environment.Use a production WSGI server instead.* Debug mode: off* Running on http://127.0.0.1:5000/ (Press CTRL+C to quit)127.0.0.1 - - [22/Jun/2021 09:41:04] "GET / HTTP/1.1" 200 -
4. 打开浏览器访问 
http://127.0.0.1:5000,即可在本地完成 Flask 示例项目的访问。如下图所示:
部署上云
接下来执行以下步骤,对本地已创建完成的项目进行简单修改,使其可以通过 Web Function 快速部署,对于 Flask,具体修改步骤如下:
1. 安装依赖包
1.1 由于 SCF 云上标准环境内未提供 Flask 依赖库,此处您必须将依赖文件安装完成后,与项目代码一起打包上传。请先新建
requirements.txt 文件,文件内容如下:#requirements.txtFlask==1.0.2werkzeug==0.16.0
注意:
由于 SCF 内置运行环境版本 (Python 3.6) 限制,werkzeug 只能使用低版本(<=1.0.x),高版本可能无法正常运行,函数运行环境版本升级已在规划中,敬请期待。
1.2 执行以下命令进行安装:
pip install -r requirements.txt
2. 修改监听地址与端口
在 Web 函数内,限制了监听端口必须为9000,因此需要修改监听地址端口为 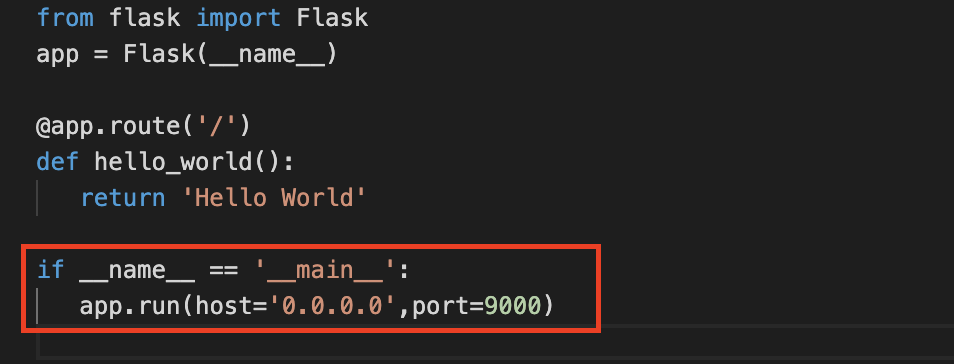
0.0.0.0:9000,如下图所示:
说明:
您也可以在
scf_bootstrap 中,通过环境变量配置监听端口。3. 新增 scf_bootstrap 启动文件
3.1 在项目根目录下新建
scf_bootstrap 启动文件,在该文件添加如下内容(用于完成环境变量配置,指定服务启动命令等自定义操作,确保您的服务可以通过该文件正常启动):#!/bin/bash/var/lang/python3/bin/python3 app.py
3.2 创建完成后,还需执行以下命令修改文件可执行权限,默认需要
777 或 755 权限才可以正常启动。示例如下:chmod 777 scf_bootstrap
注意:
在 SCF 环境内,只有
/tmp 文件可读写,建议输出文件时选择 /tmp,其他目录会由于缺少权限而写入失败。如需在日志中输出环境变量,需在启动命令前加
-u 参数,例如 python -u app.py。4. 本地配置完成后,执行以下命令启动服务(如下命令为在 scf_bootstrap 目录下执行时示例),确保您的服务在本地可以正常启动。
./scf_bootstrap
5. 登录 Serverless 控制台,单击左侧导航栏的函数服务。
6. 在主界面上方选择期望创建函数的地域,并单击新建,进入函数创建流程。
7. 选择从头开始新建函数,根据页面提示配置相关选项。如下图所示:

函数类型:选择 “Web 函数”。
函数名称:填写您自己的函数名称。
地域:填写您的函数部署地域。
部署方式:选择“代码部署”,上传您的本地项目。
运行环境:选择 “Python3.6”。
8. 单击完成完成 Flask 项目的部署。
开发管理
部署完成后,即可在 SCF 控制台快速访问并测试您的 Web 服务,并且体验云函数多项特色功能,例如层绑定、日志管理等,享受 Serverless 架构带来的低成本、弹性扩缩容等优势。
文档反馈