Elastic MapReduce log access
Download
Modo Foco
Tamanho da Fonte
Prerequisites
A Tencent Cloud account has been created. For account creation, see Signing Up.
If logging in with a sub-account, ensure that the account has read and write permissions for ES.
Operation Steps
Logging in to the Console
1. Log in to the ES console.
2. In the left sidebar, choose Log Analysis under the Serverless mode.
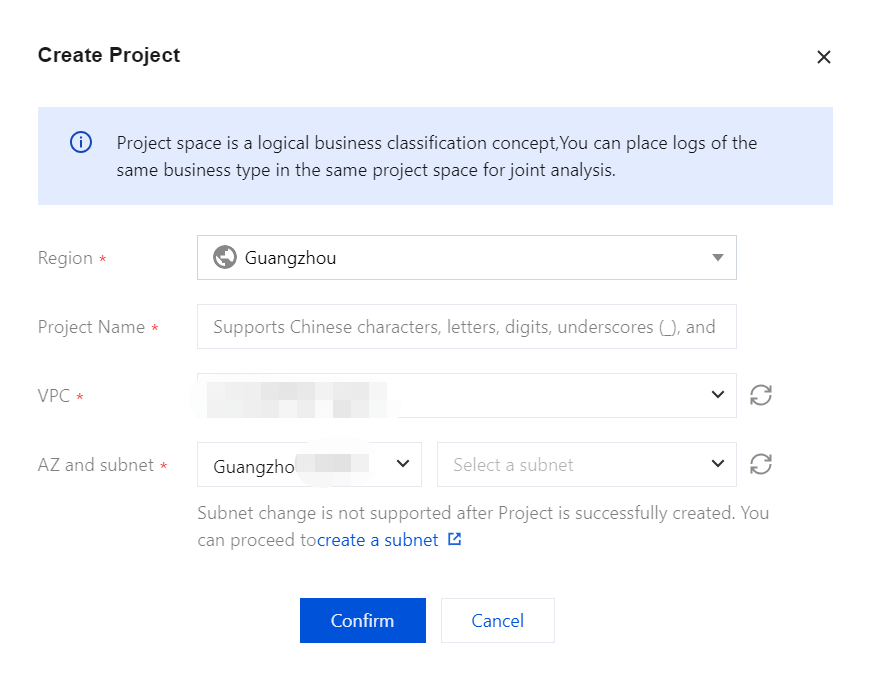
Creating a Project Space
1. click Create a project.
2. Enter a Project Name for the project, which can include 1 - 20 characters, consisting of Chinese characters, letters, digits, underscores, or delimiters (-).
3. Click Confirm. Once validated, the project space will be successfully created.
Note
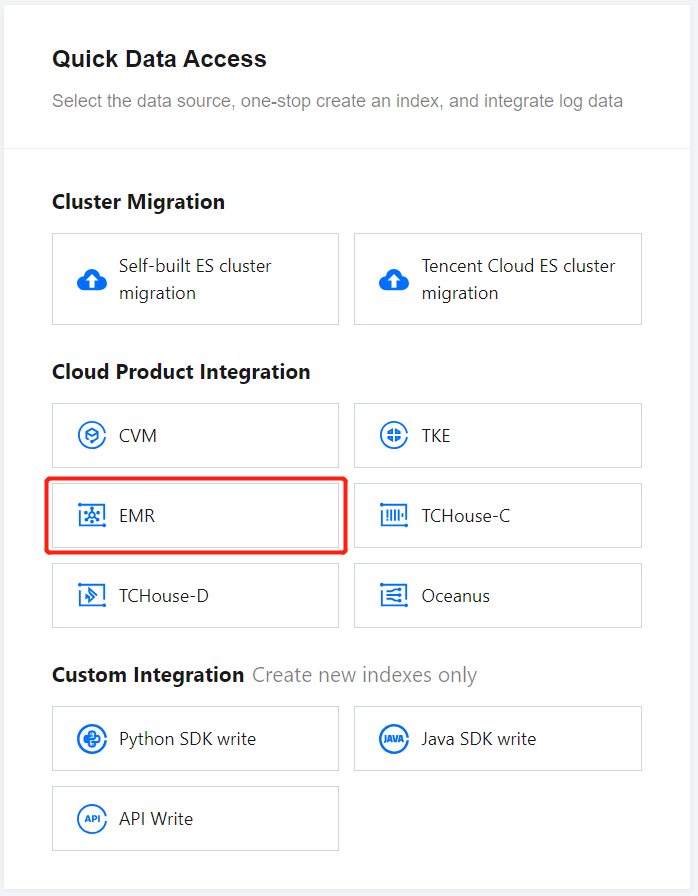
In ES Serverless Log Analysis, you can simply Create an index, then use the API for data writing or access data sources such as CVM or TKE via the Data Access tab of the corresponding index. Alternatively, you can set up data access during index creation, enabling one-stop access for CVM logs, TKE logs, and Elastic MapReduce (EMR) logs. The following introduces the one-stop EMR log access process.
Elastic MapReduce (EMR) Log Access
1. On the ES Serverless Log Analysis homepage, select EMR to enter the EMR Log Access page.
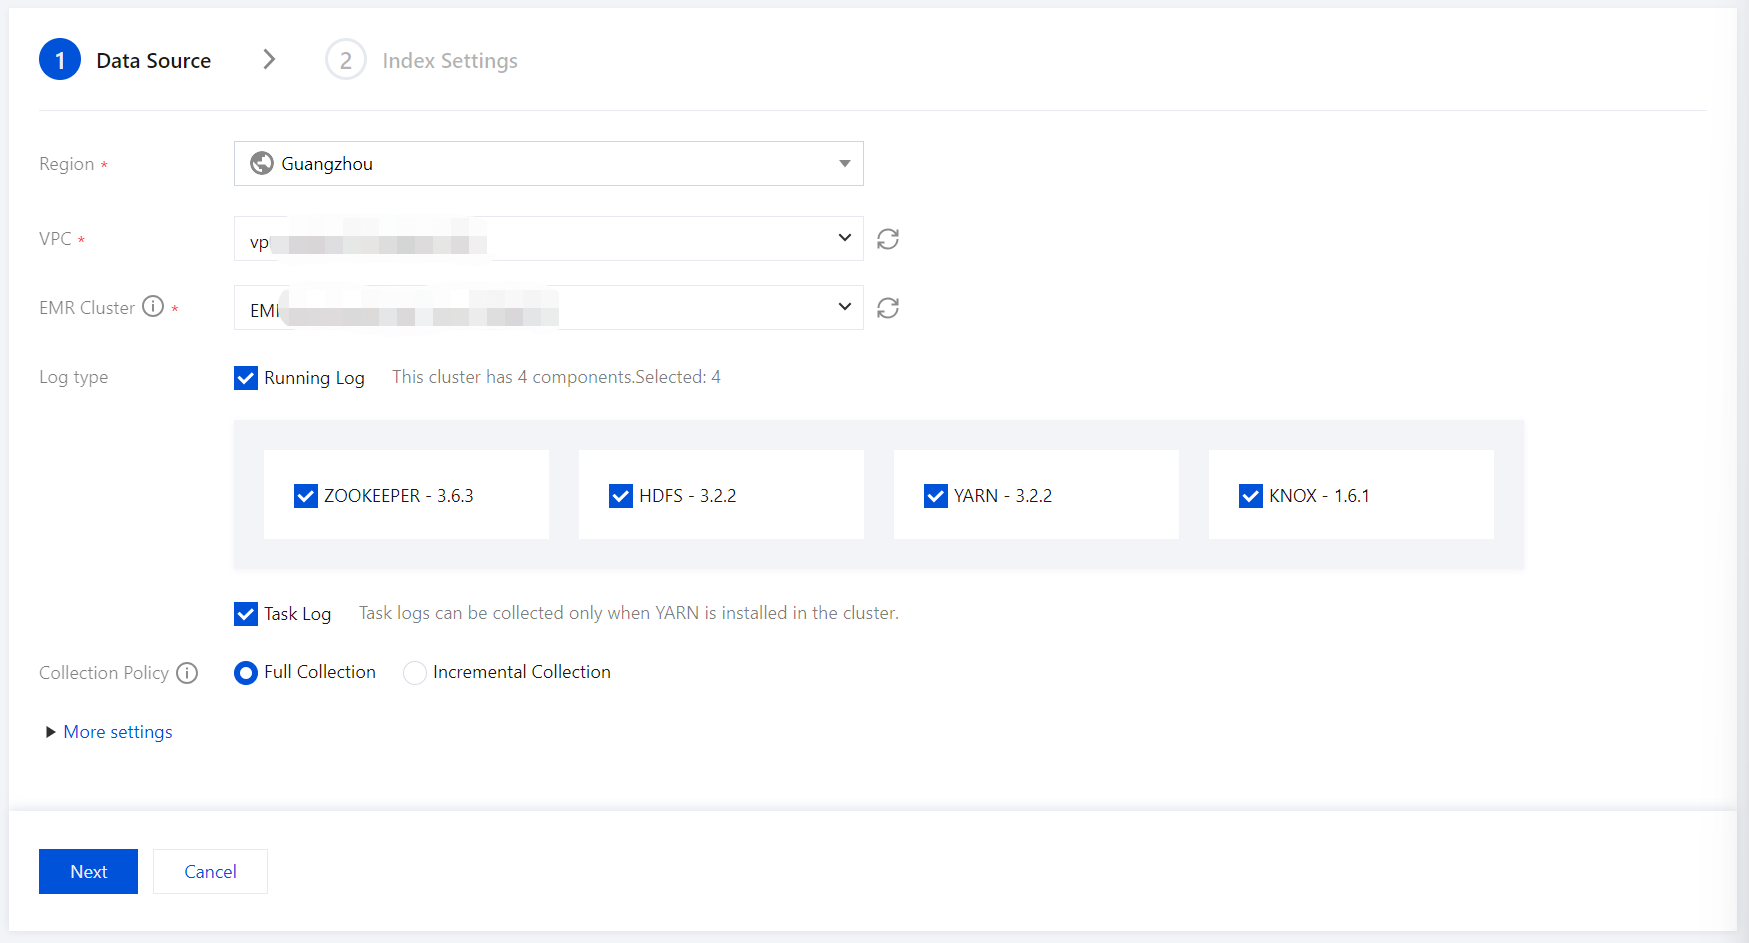
2. Enter the Data Source settings page, configure the data source, and click Next once setup is complete.
Region: Select the region where the EMR cluster is located. If you enter this page from a project space details page, the region aligns with the region of project space by default.
VPC: The Virtual Private Cloud where the EMR cluster is located.
EMR Cluster: The EMR cluster from which logs need to be collected.
Log type: Specify the component runtime logs to collect; for example, task logs can be collected if the YARN component exists in the cluster.
Collection Policy: Supports both full collection and incremental collection. Selecting incremental collection will only collect logs generated after data access setup.
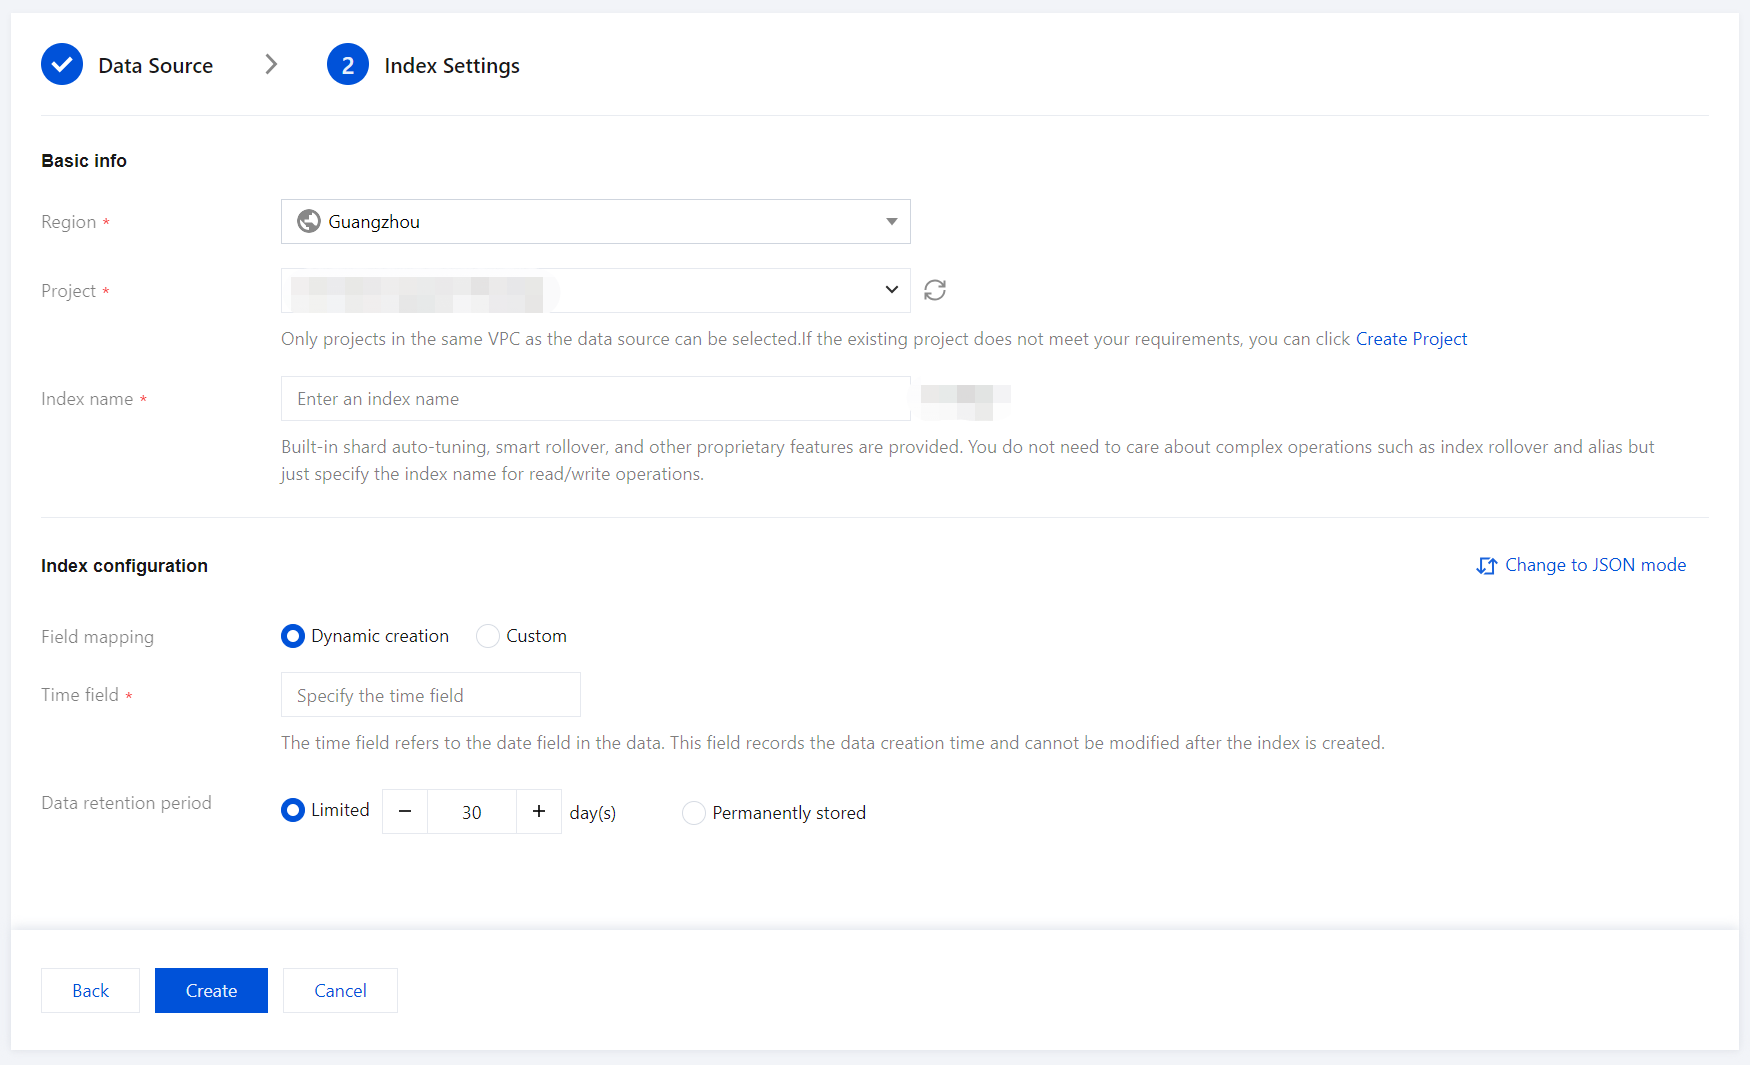
3. Enter the Index Settings page, and configure the index settings.
Region: The project space's region, which aligns with the EMR cluster's region by default.
Project Space: You can assign indexes for the same business to a specific project space for easier management.
Index Name: Length of 1 - 100 characters. Lowercase letters, digits, and the following symbols: -, _, ;, @, &, =, !, ', %, $, ., +, (, ) are supported.
Field Mapping
Dynamic Generation: Enabled by default. When enabled, it automatically parses and generates field settings for the index.
Input Sample Auto-Configuration: When Dynamic Generation is disabled, you can use Input Sample Auto-Configuration to generate field mappings for the index by entering a JSON-formatted data sample. After confirmation, the platform will validate the input; if the validation is successful, the relevant fields will be mapped in the field mapping table.
Field mapping divides the original data into multiple tokens based on fields (key:value) for indexing. Retrieval relies on this mapping, as detailed below:
Parameter | Description |
Field name | The field name in the written data. |
Field type | The data type of the field; the interface supports 9 types: text, date, boolean, keyword, long, double, integer, ip, and geo_point. Additional field types are supported in JSON mode. For details, see Official Documentation. |
Include Chinese | Enable this option if the field contains Chinese text and requires Chinese retrieval. When it is enabled, the ik_max_word tokenizer is applied to the text field by default. |
Enable indexing | When it is enabled, this field will be indexed for search. |
Enable statistics | When it is enabled, statistical analysis can be performed on the field values, which will increase index storage. |
Time Field
The time field refers to a field with the type date in the actual data. Once the index is created, this field cannot be modified.
Note:
By default, the time field enables indexing and statistics, and these settings cannot be disabled.
Data Storage Duration
You can set the data storage duration, with a default of 30 days, or select permanent storage.
Ajuda e Suporte
Esta página foi útil?
Você também pode entrar em contato com a Equipe de vendas ou Enviar um tíquete em caso de ajuda.
comentários