tencent cloud

Chat

Android (View)

Unduh
Mode fokus
Ukuran font
Terakhir diperbarui: 2026-07-06 11:25:24
This document guides you through integrating TUIKit and successfully sending your first message.
For a faster way to integrate TUIKit, you can use AI Integration.

Development Environment Requirements

Android Studio 2022.3.1 or later, JDK 17.
A physical device or emulator running Android 6.0 or later.
Your project must support Kotlin, because TUIKit is developed in Kotlin.
minSdk >= 23.

Prerequisites

Activate the Service

1. Log in to the Console. If you already have an application, note down its SDKAppID and SDKSecretKey, then proceed to the next section.
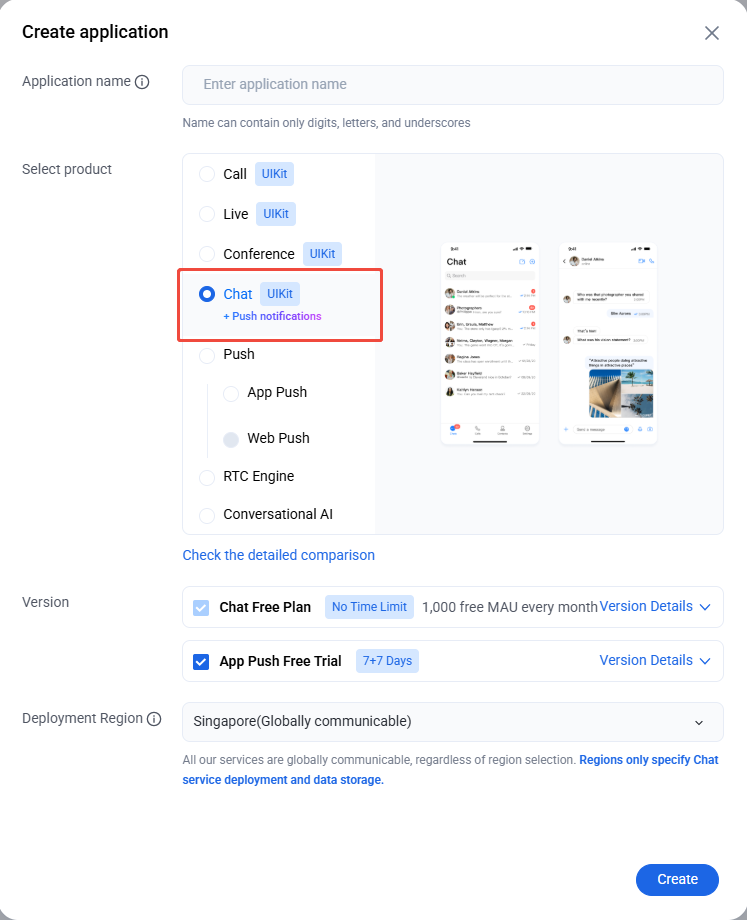
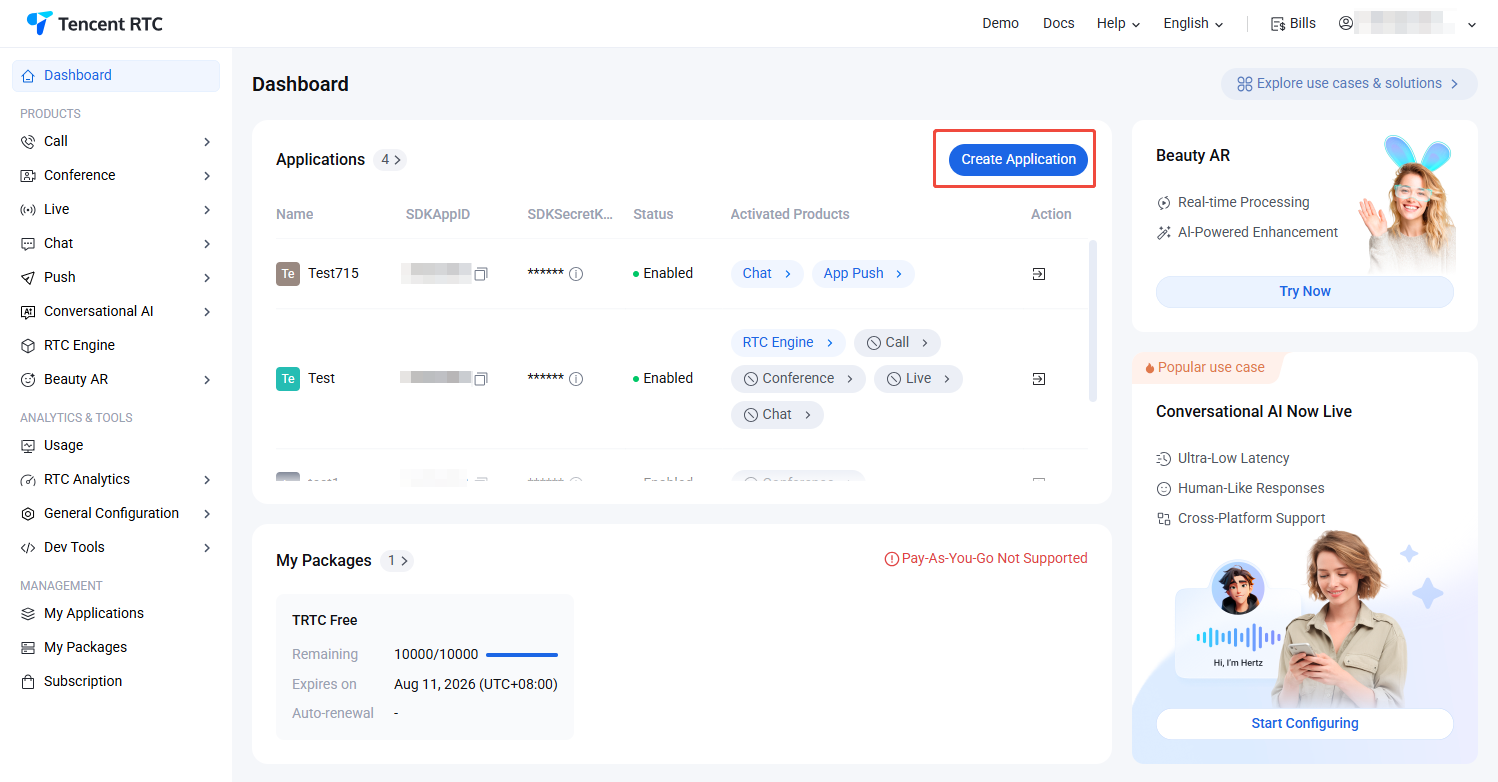
2. Click Create in the overview panel to start a new application.

3. In the application creation dialog, enter the Application Name and select Chat as the product.

4. After choosing the product, select the Deployment Region as needed.

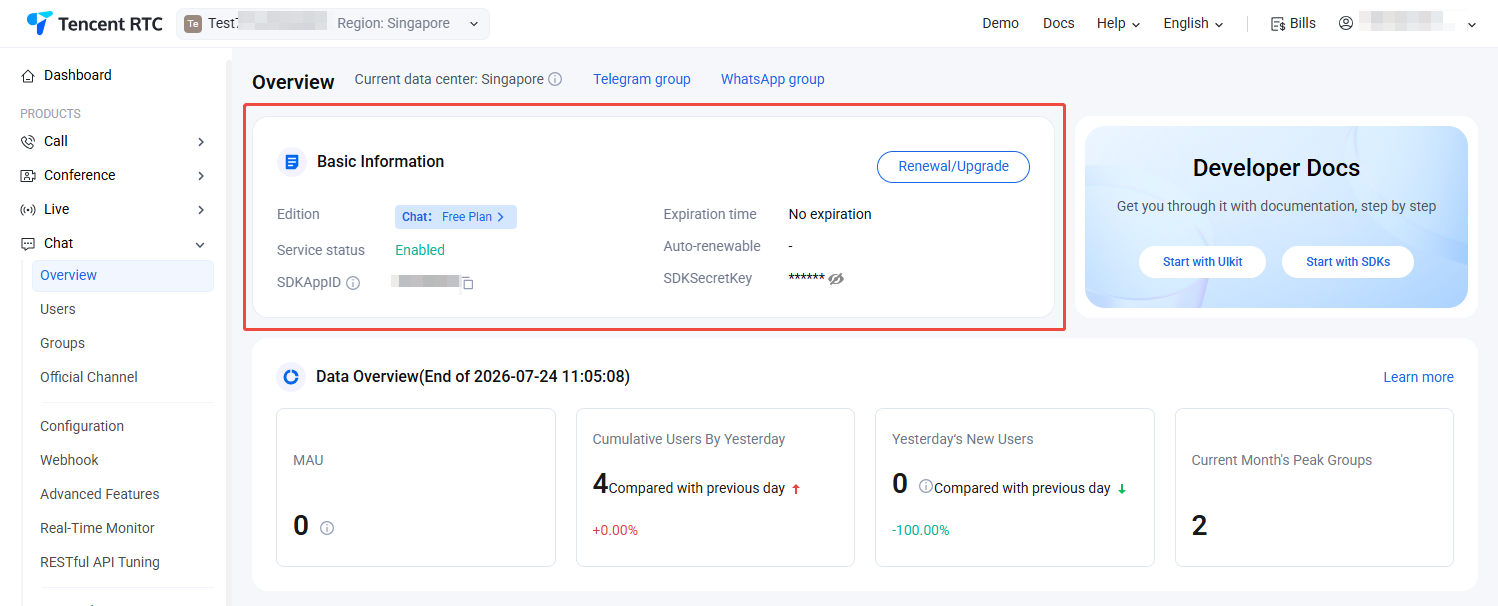
5. After the application is created, locate the SDKAppID and SDKSecretKey in the console overview panel. You will need both to run the Demo.

Prohibited:
Secure your SDKSecretKey to protect your Application from unauthorized access.

Create Accounts

There are two main ways to create accounts. Choose either method based on your needs.
Client Registration
Console Registration
In the Log In to TUIKit section below, pass in a brand-new UserID. TUIKit automatically registers that UserID for you.
Steps:
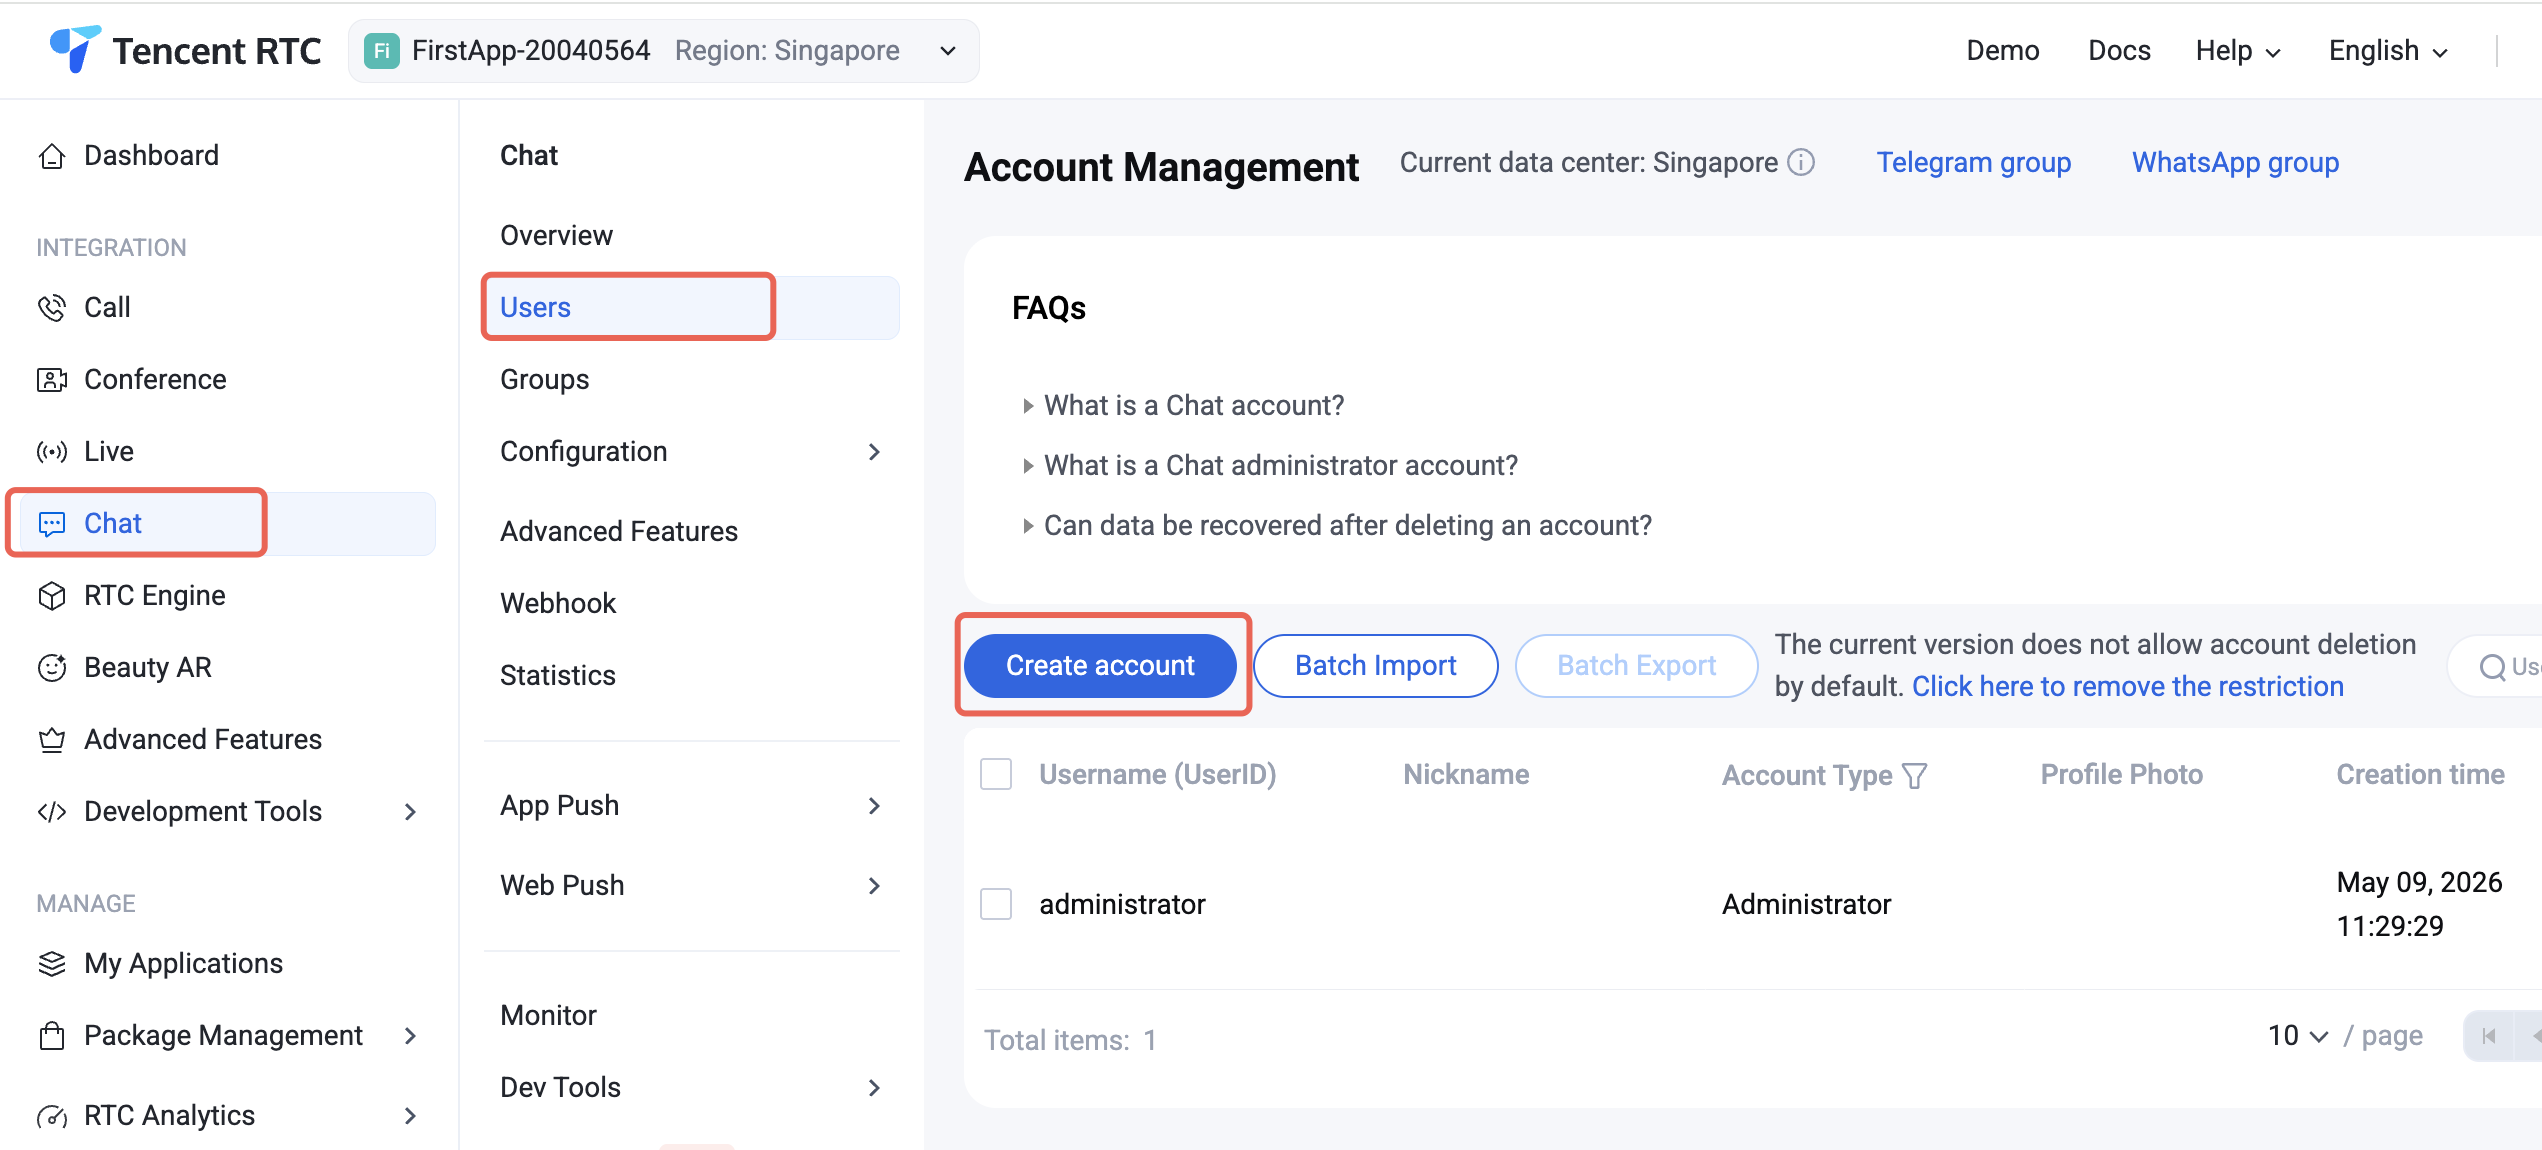
1. Navigate to the Chat > Account Management page.
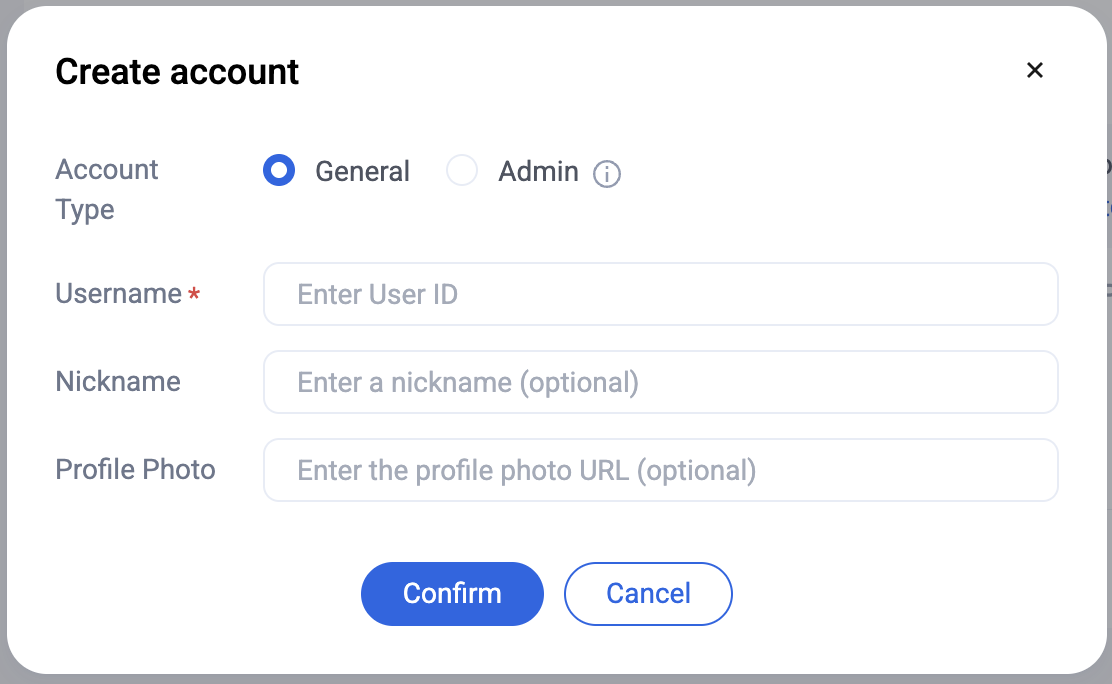
2. Click "Create Account" to open the account creation dialog.

3. For regular users, select "Regular Account". We recommend setting a nickname to help display users distinctly in the UI.

Note:
You need at least two users to send messages. Create at least two accounts at this step, and record their userIDs for use in later steps.

Generate a UserSig

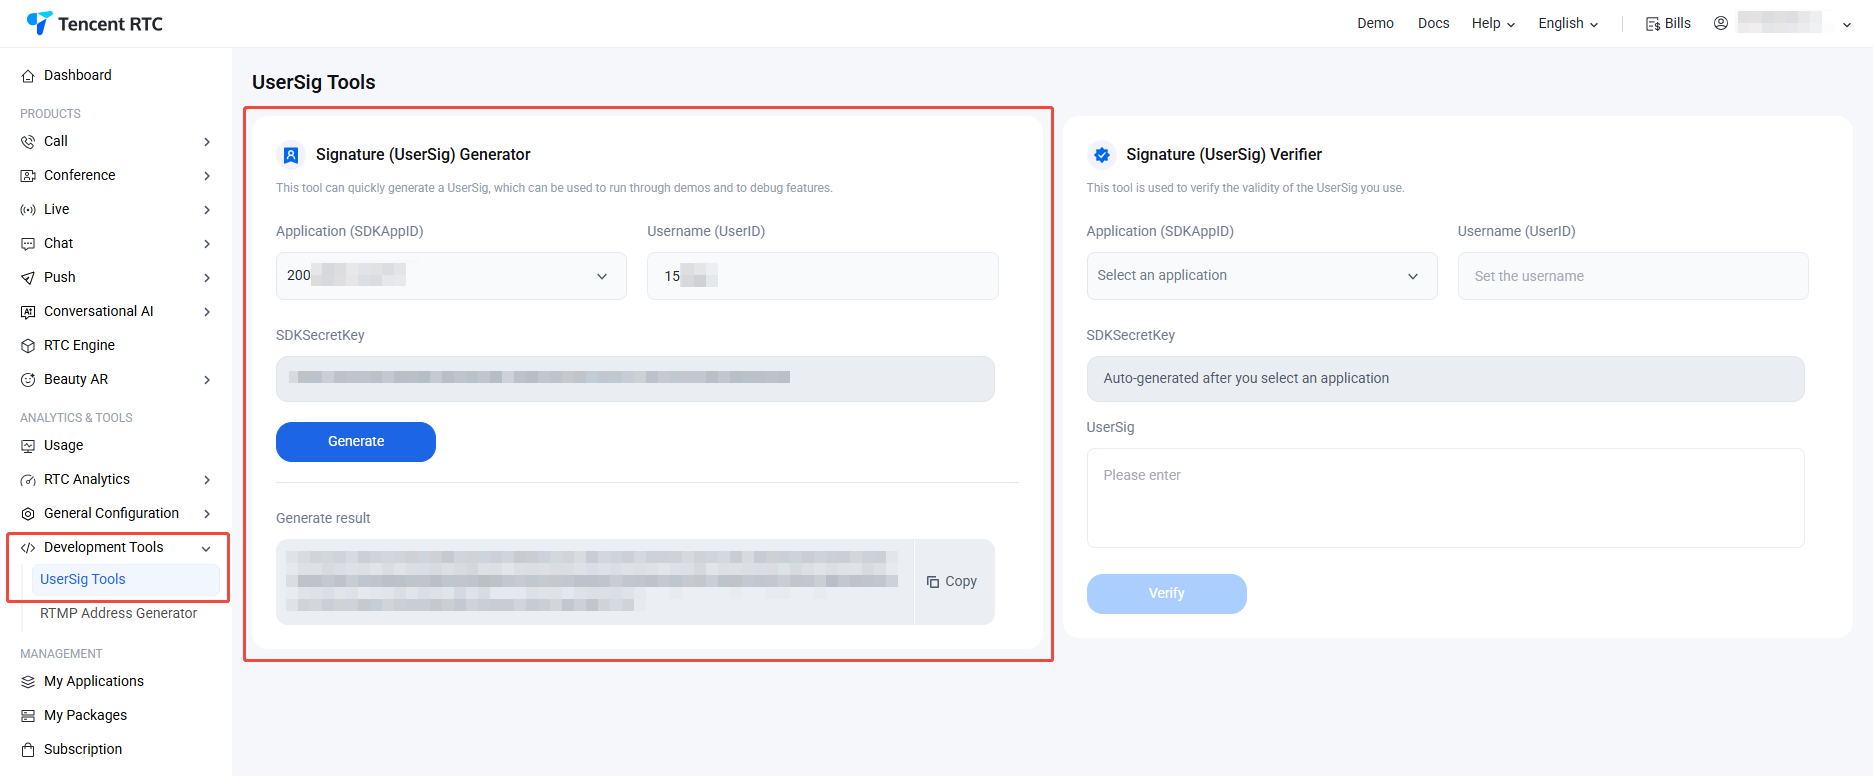
2. In the signature (UserSig) generation tool, select an application and enter the UserID. Click Generate to generate a signature. The default validity period is 180 days. Click Copy to paste and save the signature.

Description:
For more UserSig operations, see UserSig Generation & Verification.

Integrate the TUIKit

For integration steps, see Full-Feature Integration.
Note:
1. If you created an empty Android project to integrate TUIKit, you can follow the steps below to send your first message.
2. If you are integrating TUIKit into an existing project, keep your original UI code unchanged and only refer to the login and chat UI assembly logic below.

Log In to the TUIKit

To use features in TUIKit components, call the login API of LoginStore to log in to a user account. There are two cases:
If you have not created user accounts in the Console in advance, call LoginStore to log in user1 and user2 one after another. Finally, make sure user1 is online.
If you already created user1 and user2 in the Console, only log in user1.
Description:
1. After user1 logs in and sends a message to user2, user2 does not need to log in. By default, Chat allows one-to-one messages between users and friends or strangers.
2. If you want user1 and user2 to chat interactively, log in to user2 on another device and open the chat with user1.
The login API call is shown below:
// API location: io.trtc.tuikit.atomicxcore.api.login.LoginStore
LoginStore.shared.login(
activity, // Activity context
sdkAppID, // Int, SDK application ID
userID, // String, User ID
userSig, // String, User signature
object : CompletionHandler {
override fun onSuccess() {
// Login success
}
override fun onFailure(code: Int, desc: String) {
// Login failed
}
}
)

Load the Chat UI

The following uses an Activity that includes the complete login flow and chat UI as an example. Load this Activity when the app starts.
If you use the sample code directly, prefill the following parameters:
sdkAppID, the sdkAppID obtained above.
senderUserID, the userID of the message sender, that is, user1 above.
senderUserSig, the userSig obtained above for the message sender.
receiverUserID, the userID of the message receiver.
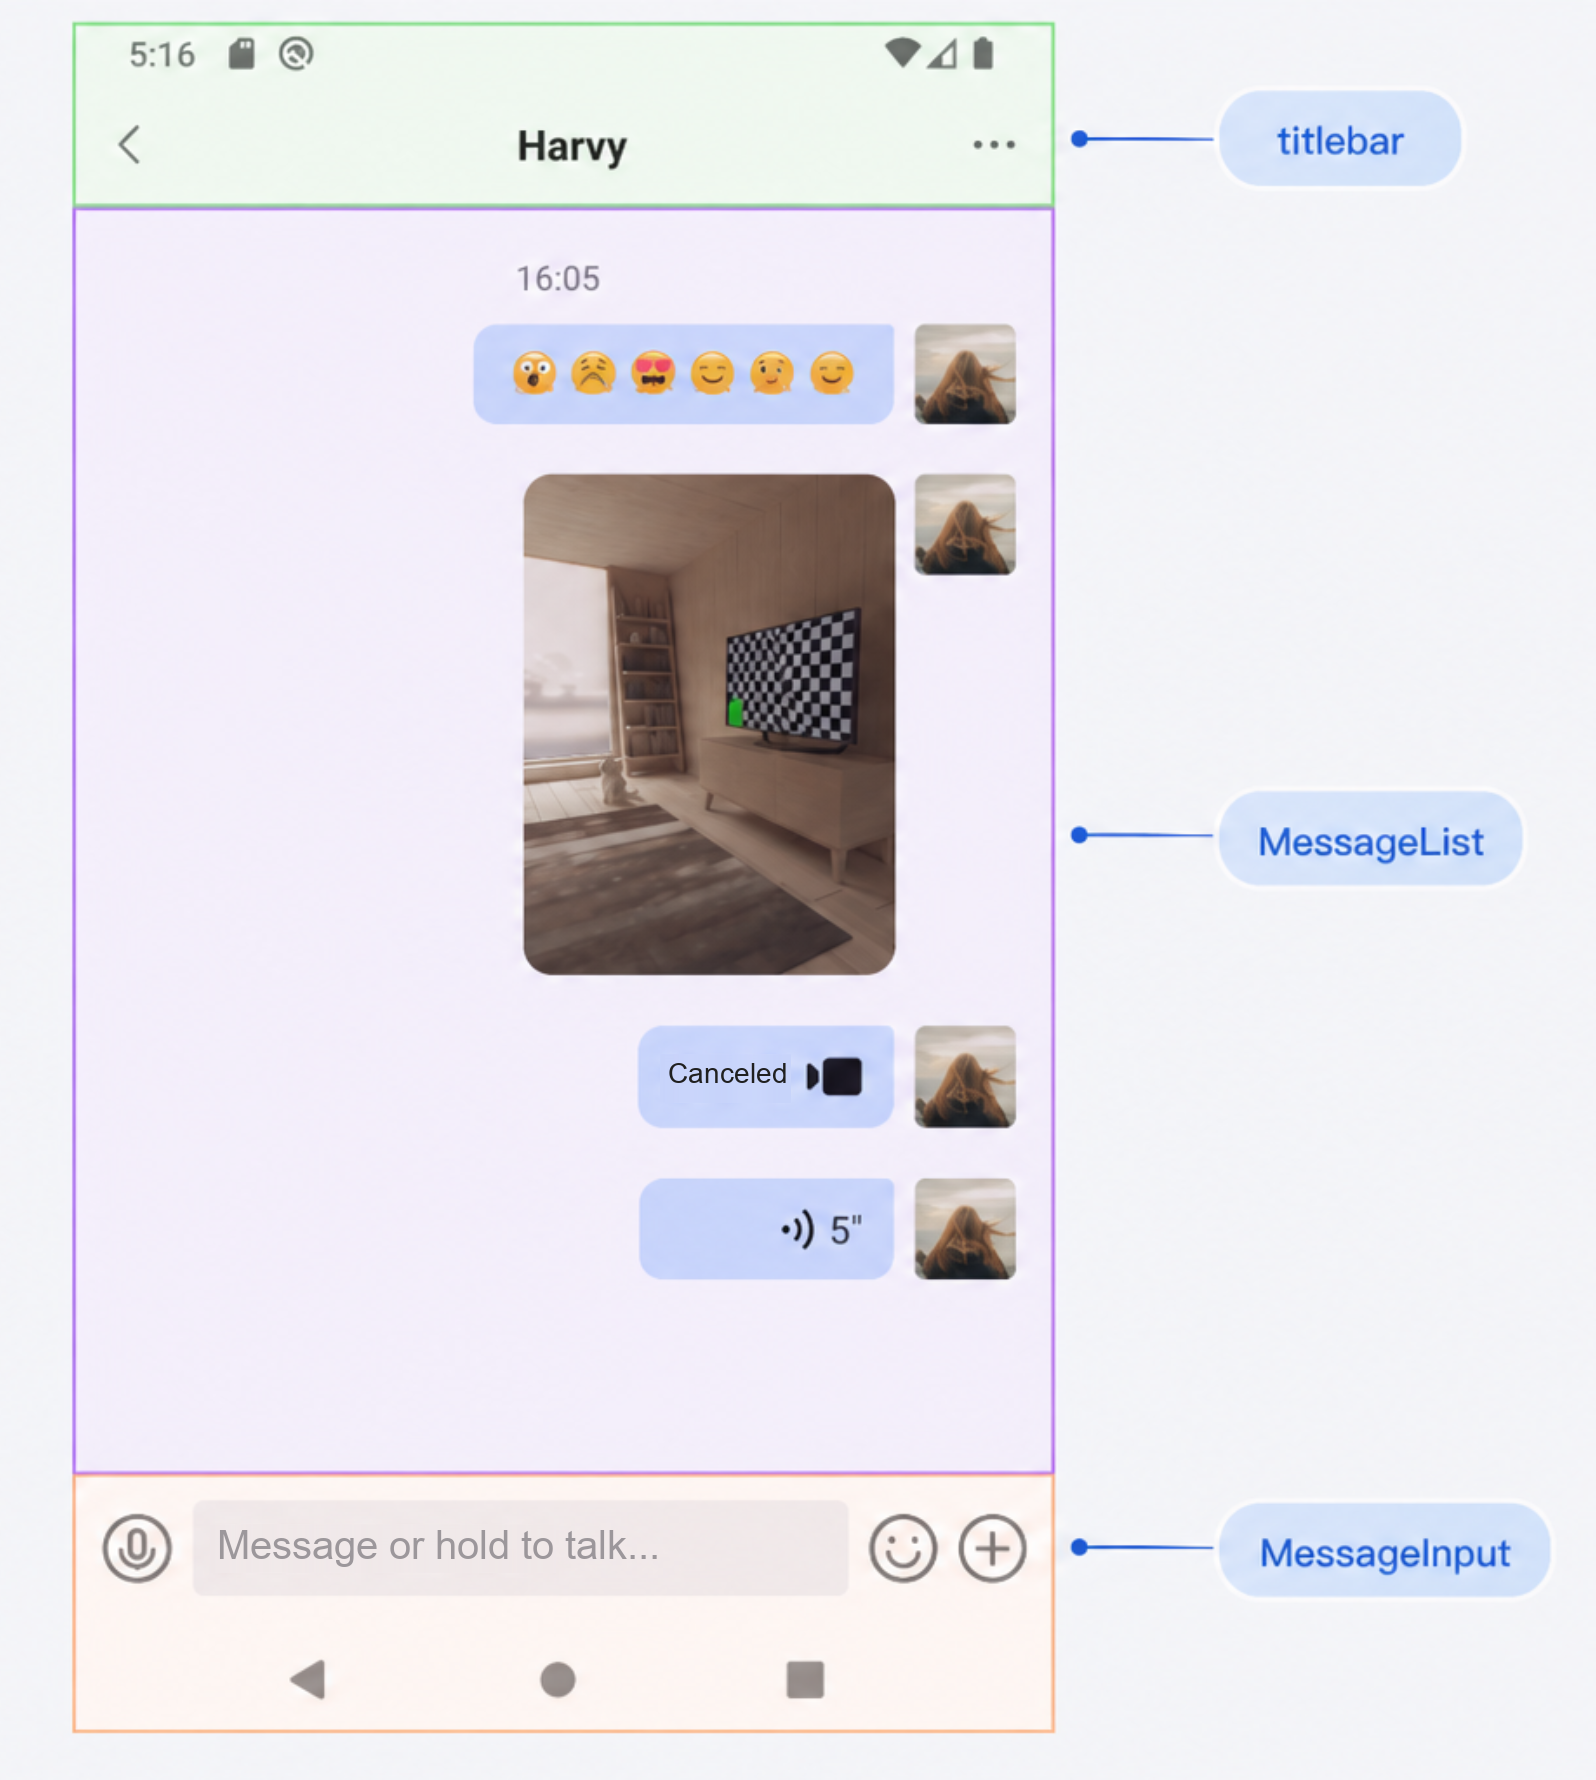
The sample code is as follows:
import android.os.Bundle
import android.view.ViewGroup
import android.widget.FrameLayout
import androidx.appcompat.app.AppCompatActivity
import androidx.core.view.ViewCompat
import androidx.core.view.WindowCompat
import androidx.core.view.WindowInsetsCompat
import androidx.core.view.updatePadding
import io.trtc.tuikit.atomicxcore.api.CompletionHandler
import io.trtc.tuikit.atomicxcore.api.login.LoginStore
import io.trtc.tuikit.chat.uikit.pages.ChatPageView

class ChatPageDemoActivity : AppCompatActivity() {
private val sdkAppID: Int = 0 // TODO
private val senderUserID = "" // TODO
private val senderUserSig = "" // TODO
private val receiverUserID = "" // TODO
private val conversationID: String get() = "c2c_${receiverUserID}"
private var chatPageView: ChatPageView? = null
override fun onCreate(savedInstanceState: Bundle?) {
super.onCreate(savedInstanceState)
WindowCompat.setDecorFitsSystemWindows(window, false)
LoginStore.shared.login(this, sdkAppID, senderUserID, senderUserSig, object : CompletionHandler {
override fun onSuccess() = showChatPage()
override fun onFailure(code: Int, desc: String) {}
})
}
private fun showChatPage() {
val container = FrameLayout(this).apply {
layoutParams = ViewGroup.LayoutParams(
ViewGroup.LayoutParams.MATCH_PARENT,
ViewGroup.LayoutParams.MATCH_PARENT
)
}
ViewCompat.setOnApplyWindowInsetsListener(container) { view, insets ->
val bars = insets.getInsets(WindowInsetsCompat.Type.systemBars())
view.updatePadding(top = bars.top, bottom = bars.bottom)
insets
}
setContentView(container)
val page = ChatPageView(this)
container.addView(page)
page.setup(
conversationID = conversationID,
onUserClick = { /* Handle user avatar click */ }
)
chatPageView = page
}
override fun onDestroy() {
chatPageView?.release()
super.onDestroy()
}
}

Send Your First Message

After completing the steps above, start the app to automatically log in and load the chat UI. Tap the input box and send your first message:


Contact Us

If you have any questions or suggestions during integration or usage, contact us to submit feedback.

Bantuan dan Dukungan

Apakah halaman ini membantu?

masukan