tencent cloud

Mobile Live Video Broadcasting

Live Stream List (Web Desktop Browser)

Download
Mode fokus
Ukuran font
Terakhir diperbarui: 2026-06-25 15:09:57

Overview

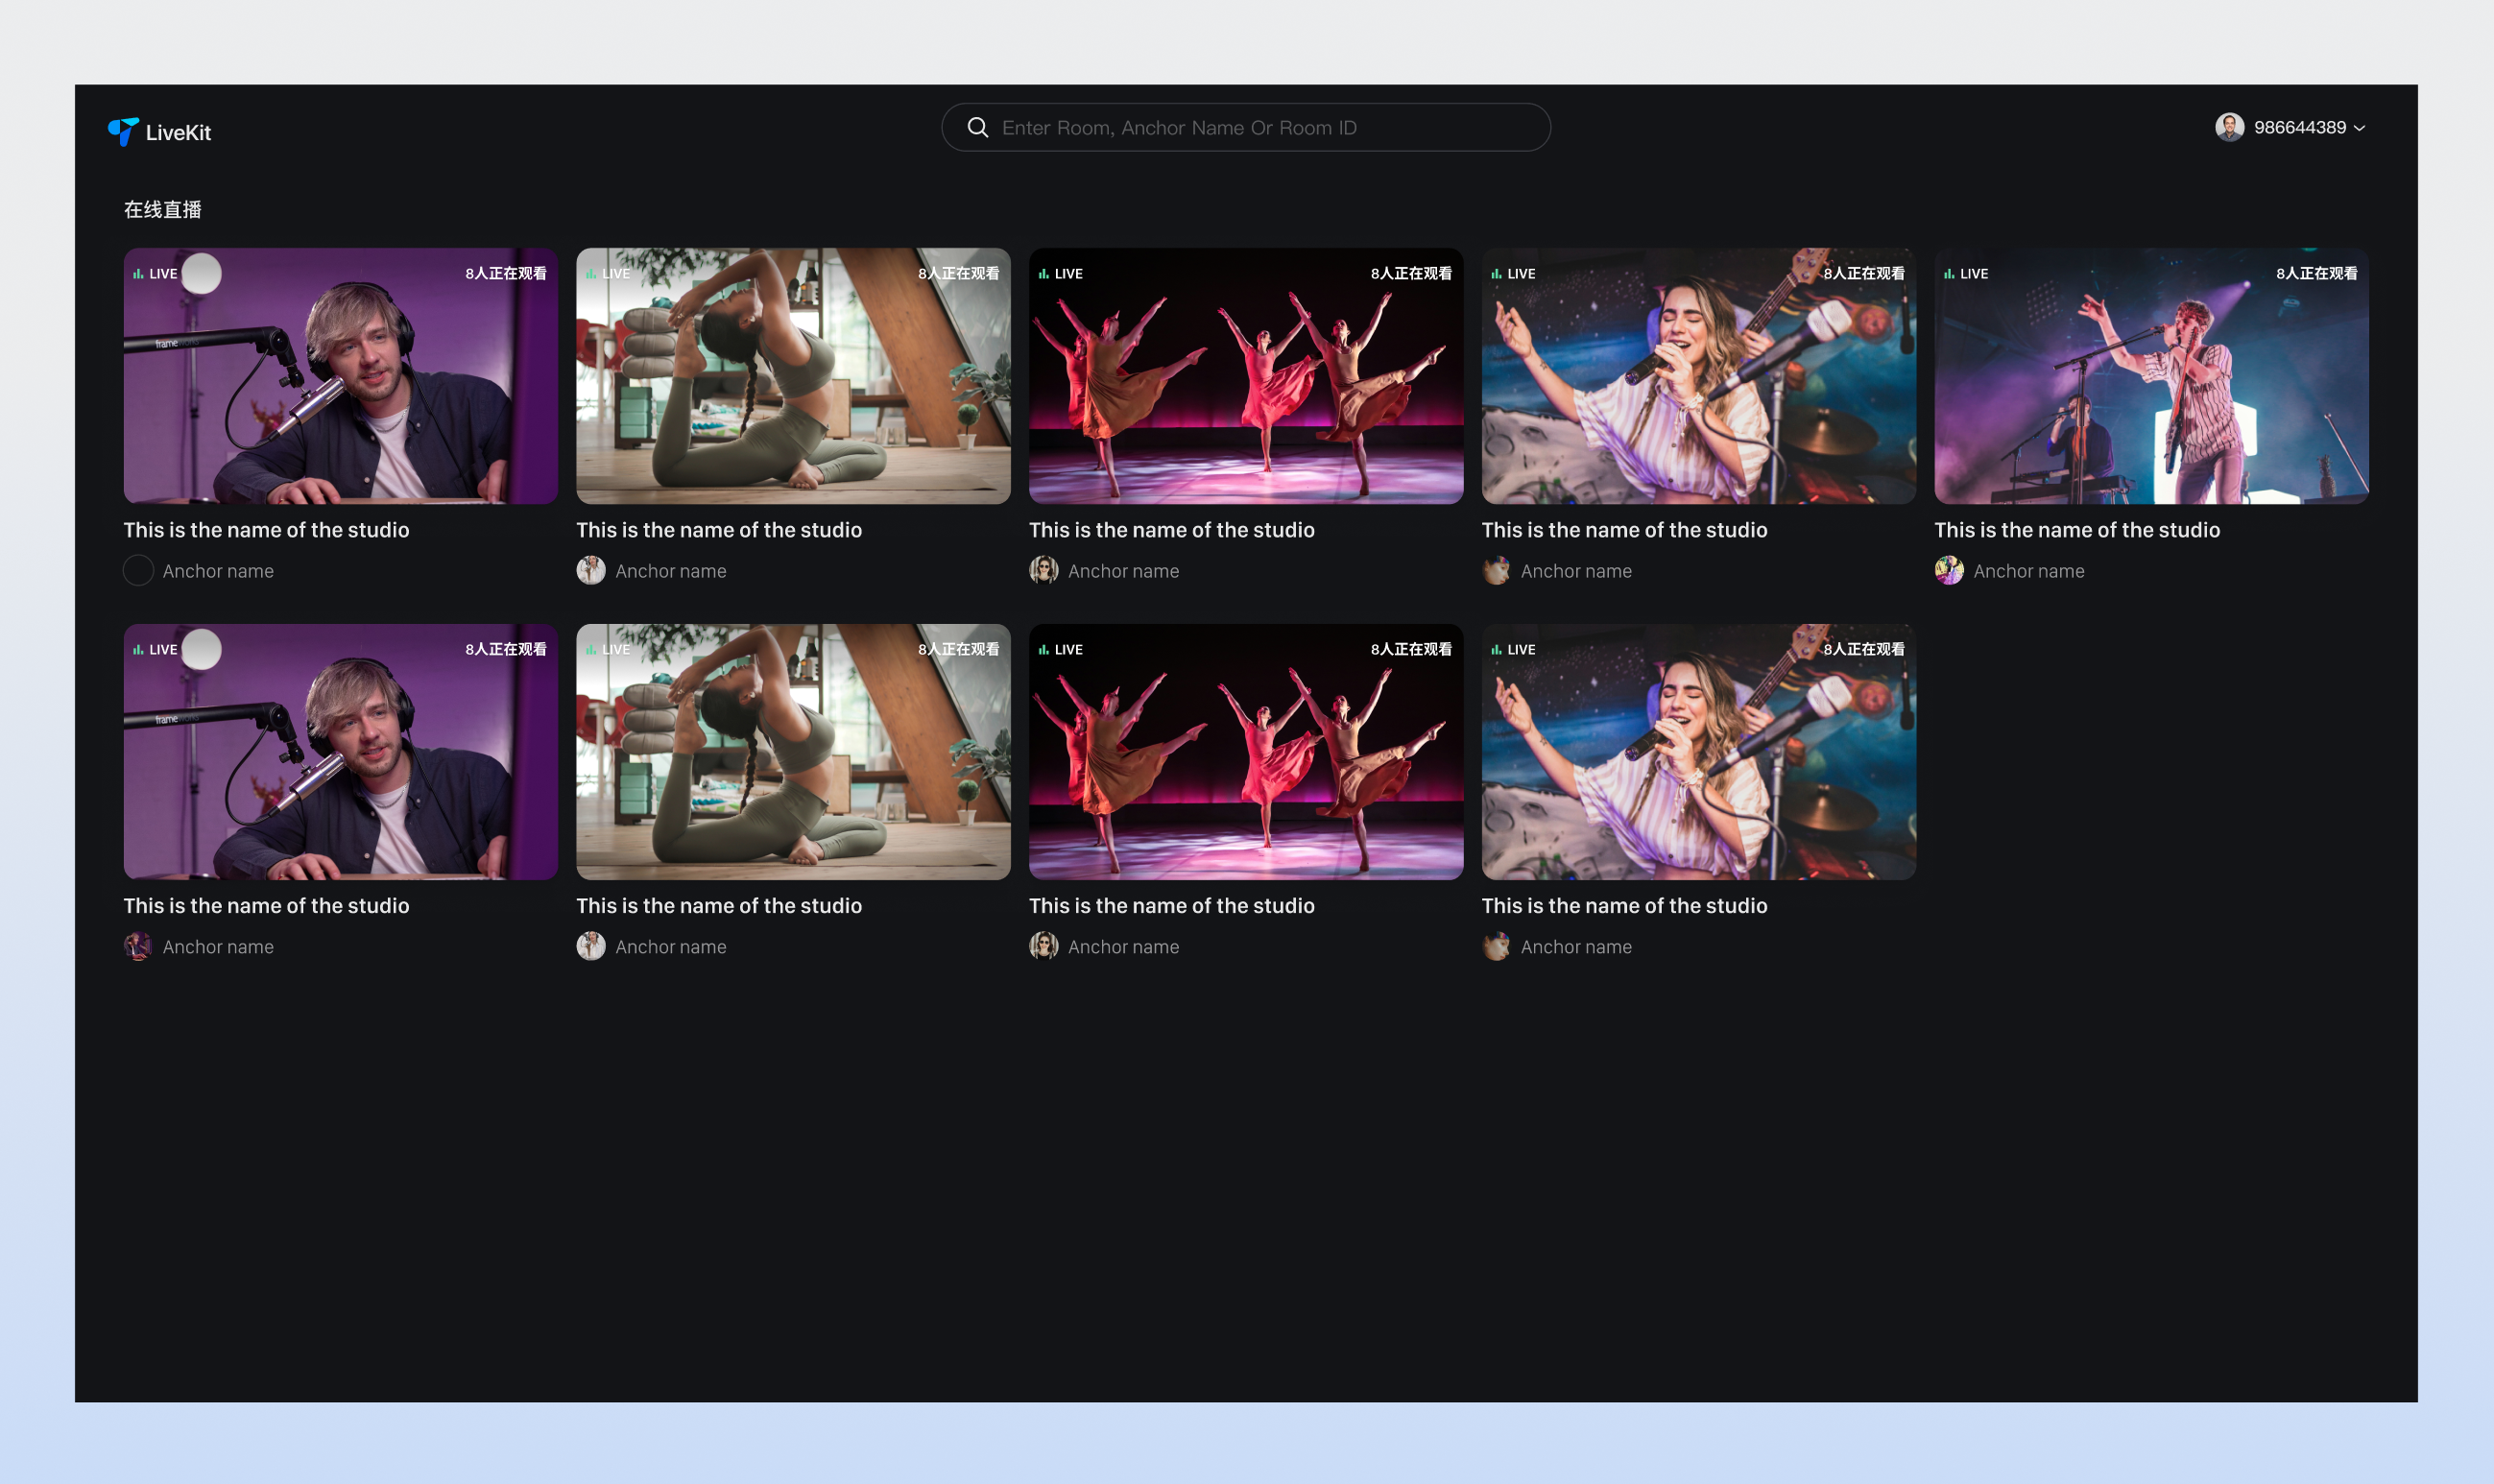
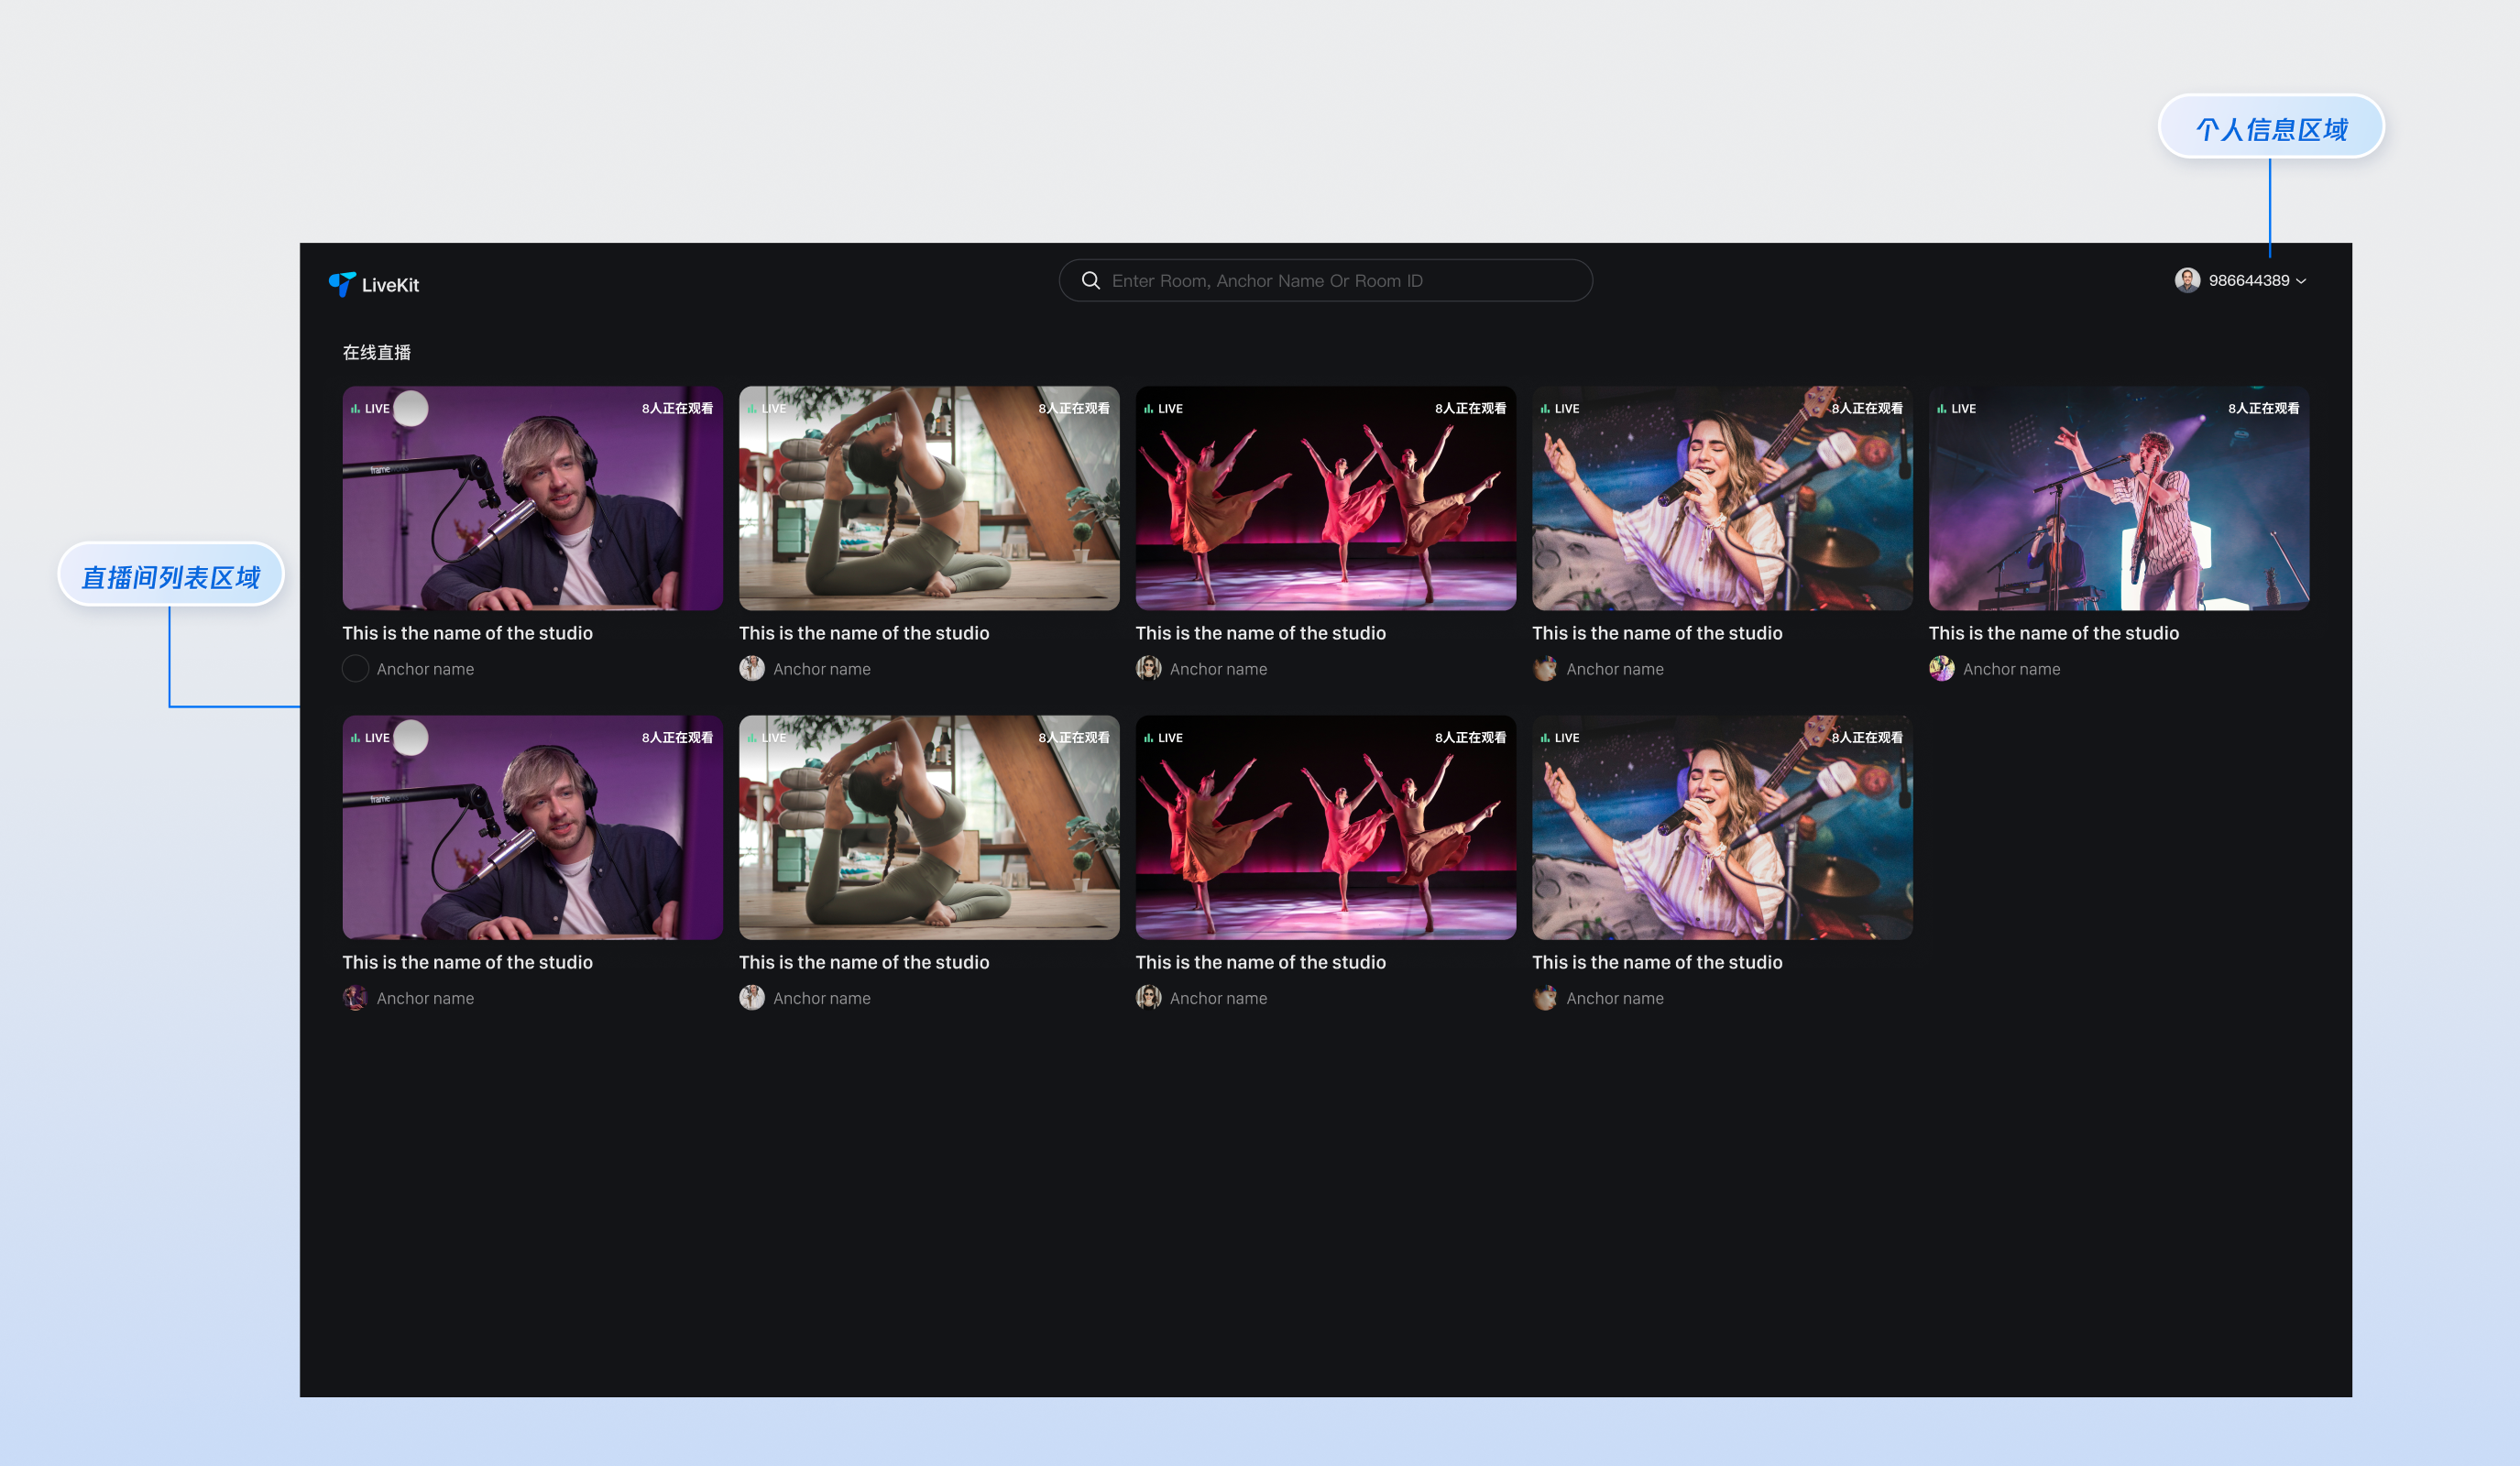
This guide introduces the Live Stream List page in the TUILiveKit Demo. Use this documentation to quickly integrate our ready-made Live Stream List page into your project, or customize its appearance, layout, and features to fit your needs.


Quick Experience

Start a live stream instantly using the Online Hosting Site, and view your Live Stream List from your account on the Online Viewing Site.

Quick Integration

Step 1: Environment Setup and Activate the Service

Before you begin, follow the Preparation guide to integrate required components and enable login functionality.

Step 2: Install Dependencies

Install the necessary dependencies using one of the following package managers:
npm
pnpm
yarn
npm install tuikit-atomicx-vue3 @tencentcloud/uikit-base-component-vue3 --save
pnpm add tuikit-atomicx-vue3 @tencentcloud/uikit-base-component-vue3
yarn add tuikit-atomicx-vue3 @tencentcloud/uikit-base-component-vue3

Step 3: Integrate Live Stream List Page

Create a live-list.vue file in your project and add the following code to embed the Live Stream List page.
Note:
You can copy the code below directly into your project, or check the Live Stream List for the full source code.
<template>
<UIKitProvider theme="dark">
<div class="container">
<header class="header">
<h1 class="title">Online Live</h1>
</header>
<main class="main">
<LiveList />
</main>
</div>
</UIKitProvider>
</template>

<script setup lang="ts">
import { onMounted } from 'vue';
import { LiveList, useLoginState } from 'tuikit-atomicx-vue3';
import { UIKitProvider } from '@tencentcloud/uikit-base-component-vue3';

const { login } = useLoginState();

async function initLogin() {
try {
await login({
sdkAppId: 0, // SDKAppID, see Step 1 for details
userId: '', // UserID, see Step 1 for details
userSig: '', // userSig, see Step 1 for details
});
} catch (error) {
console.error('Login failed:', error);
}
}

onMounted(async () => {
await initLogin();
});
</script>

<style scoped>:global(*),:global(::after),:global(::before){box-sizing:border-box;margin:0}.container{display:flex;flex-direction:column;height:100vh;width:100vw;background:var(--bg-color-default)}.header{display:flex;align-items:center;flex-shrink:0}.title{margin:0;font-size:16px;font-weight:600;color:var(--text-color-primary);letter-spacing:-.5px}.main{flex:1;padding:24px;overflow-y:auto;min-height:0}</style>
注意:
To enable navigation from the Live Stream List to a specific live room, see the Specify Live Room section below.

Start the Project

Launch Live Stream List Page

After running the following command, open your browser and visit your local address to access the Live Stream List page.
Tip:
Once the command completes, enter your local address in the browser (for example, http://localhost:5173/live-list; your port number may differ based on your project setup) to view the Live Stream List page.
npm run dev


Specify Live Room

To enable navigation from the Live Stream List (or homepage) to the viewing page, set up Vue Router. Create a router folder inside your project's src directory and add an index.ts file. Then, import and register the router in your main file (such as main.ts or index.ts). For reference, see the GitHub code example.

Step 1: Configure Page Routing

Set up Vue Router to map live-list.vue to the Live Stream List page.
Note:
If your project already has a src/router/index.ts file, merge the following code into your existing file.
If you haven't set up routing, create a new src/router/index.ts file and add the configuration below.
import { createRouter, createWebHistory } from 'vue-router';

const routes = [
{
// Live Stream List page; update the path below to match your project structure
path: '/live-list',
component: () => import('../live-list.vue'),
},
// To enable navigation from the Live Stream List cover to the corresponding live room, configure the viewing page route as shown below
{
// Route to the viewing page; update the path below to match your project structure
path: '/live-player',
component: () => import('../live-player.vue'),
},
];

const router = createRouter({
history: createWebHistory(),
routes,
});
export default router;

Step 2: Configure src/main.ts

Add the router and localization setup to your project's entry file, src/main.ts:
// src/main.ts
import { createApp } from 'vue';
import App from './App.vue';
import router from './router';

const app = createApp(App);
app.use(router);
app.mount('#app');

Step 3: Configure live-list File

Add the following code to your live-list.vue file to enable navigation from the Live Stream List to the viewing page.
// live-list.vue (can be incrementally added to your code)
<template>
<UIKitProvider>
<!-- Refer to Step 3 in Quick Integration above -->
<LiveList @live-room-click="handleLiveRoomClick" />
</UIKitProvider>
</template>

<script setup lang="ts">
import { useRouter, useRoute } from 'vue-router';

const router = useRouter();
const route = useRoute();

function handleLiveRoomClick(liveInfo: LiveInfo) {
if (liveInfo?.liveId) {
router.push({ path: '/live-player', query: { ...route.query, liveId: liveInfo.liveId } });
}
}

</script>

Customization

You can tailor the Live Stream List page UI to fit your project’s requirements. The table below summarizes key customization options.
Category
Feature
Description
Live Room List
Customize Live Room List display area
Supports: - Show/hide live room info text, customize UI. - Set the number of live rooms per row/column.
Personal Info
Customize personal info display
Supports: - Show/hide personal info. - Customize font, color, and UI settings for personal info.

Color Theme and Language

Change the default theme and language by configuring the UIKitProvider parameters in App.vue.
UIKitProvider Parameter
Options
Default
theme
"light"
"dark"
language
"zh-CN"
"en-US"
<UIKitProvider theme="light">
<router-view />
</UIKitProvider>
<script setup lang="ts">
import { UIKitProvider } from '@tencentcloud/uikit-base-component-vue3';

Button and Icon Customization

Customize buttons, icons, and other controls as needed. For example, in live-list.vue, you can add, remove, or modify Button and Icon components. Beyond layout, you have full control over colors, fonts, border radius, input fields, and pop-ups to match your UI design.
Category
Feature
Description
Asset Management
Customize asset management display area
Supports adjusting icon size, color, or replacing icons.
Live Tools
Customize live tool info display
Supports adjusting icon size, color, or replacing icons.
Online Audience
Customize audience info display
Supports: - Show/hide audience level. - Customize audience info font, color, and UI settings. - Replace with your preferred icon style.
Message List
Customize live comments display area
Supports: - Show/hide chat input area. - Customize chat bubble style, audience level, and more.

Set Nickname and Avatar

To customize the nickname or avatar, use setSelfInfo as shown in the sample code below:
import { useLoginState } from 'tuikit-atomicx-vue3';

const { setSelfInfo } = useLoginState();

// Set user personal info
await setSelfInfo({
userName: 'Zhang San',
avatarUrl: 'https://example.com/avatar.png',
});

Next Steps

You’ve now integrated the Live Stream List page. Next, you can add the Host Streaming Page, Audience Viewing Page, and further UI Customization features. See the table below for links to each integration guide:
Feature
Description
Integration Guide
Audience Viewing
Allow audience to join the host’s live room and watch the stream, with features like guest co-hosting, live room info, online audience, and live comments.
Host Streaming
Host starts streaming and configures related settings on the current page.

Bantuan dan Dukungan

Apakah halaman ini membantu?

masukan