tencent cloud

Multiple Network Acceleration

    DokumentasiMultiple Network Acceleration

    Quick Connection

    Unduh
    Mode fokus
    Ukuran font
    Terakhir diperbarui: 2026-05-21 16:44:41

    Configuration Instructions

    1. VPN Access Configuration

    1.1 Developer Certificate Configuration

    Adding Network Extensions and AppGroup configuration is required.
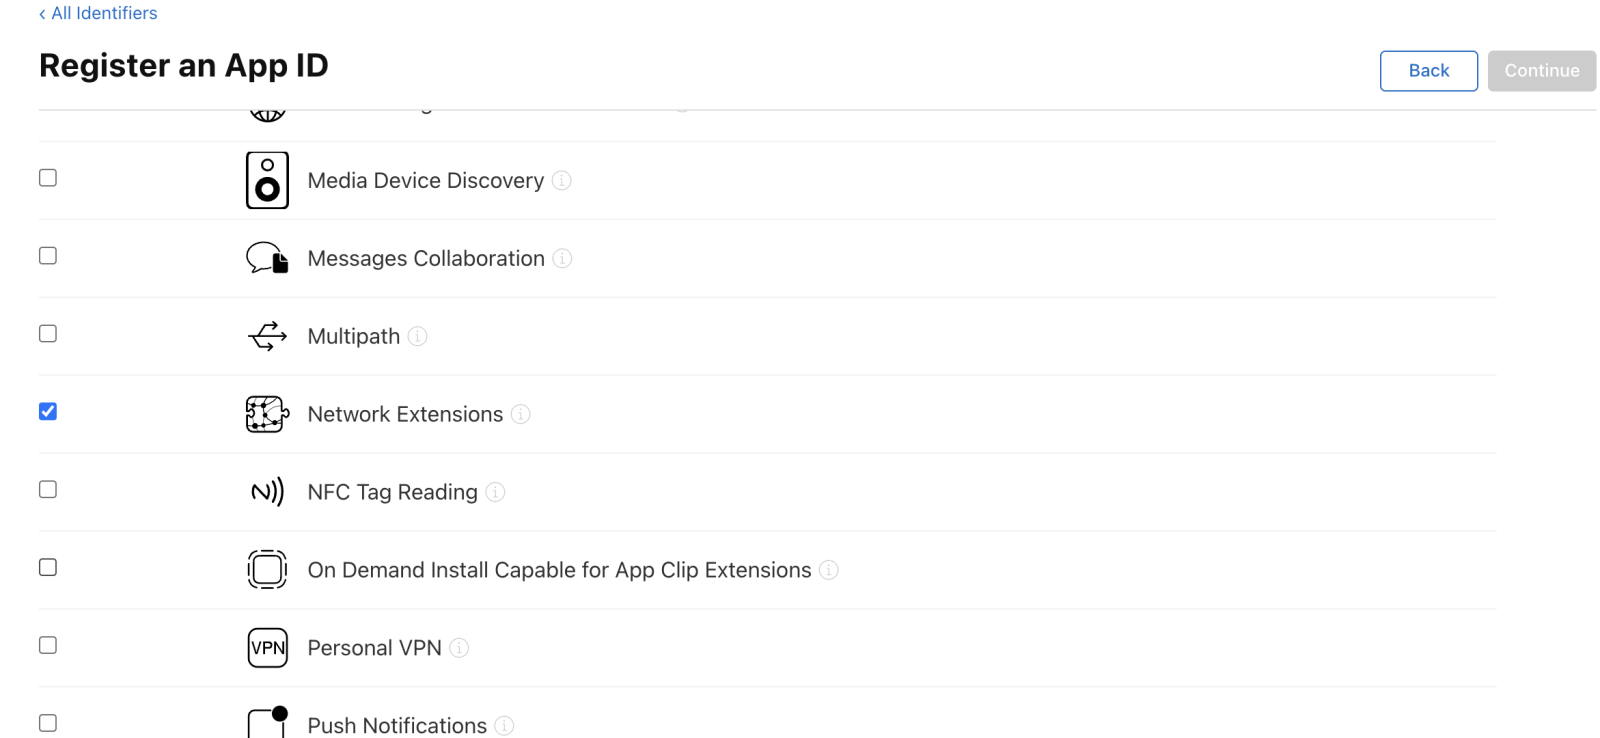
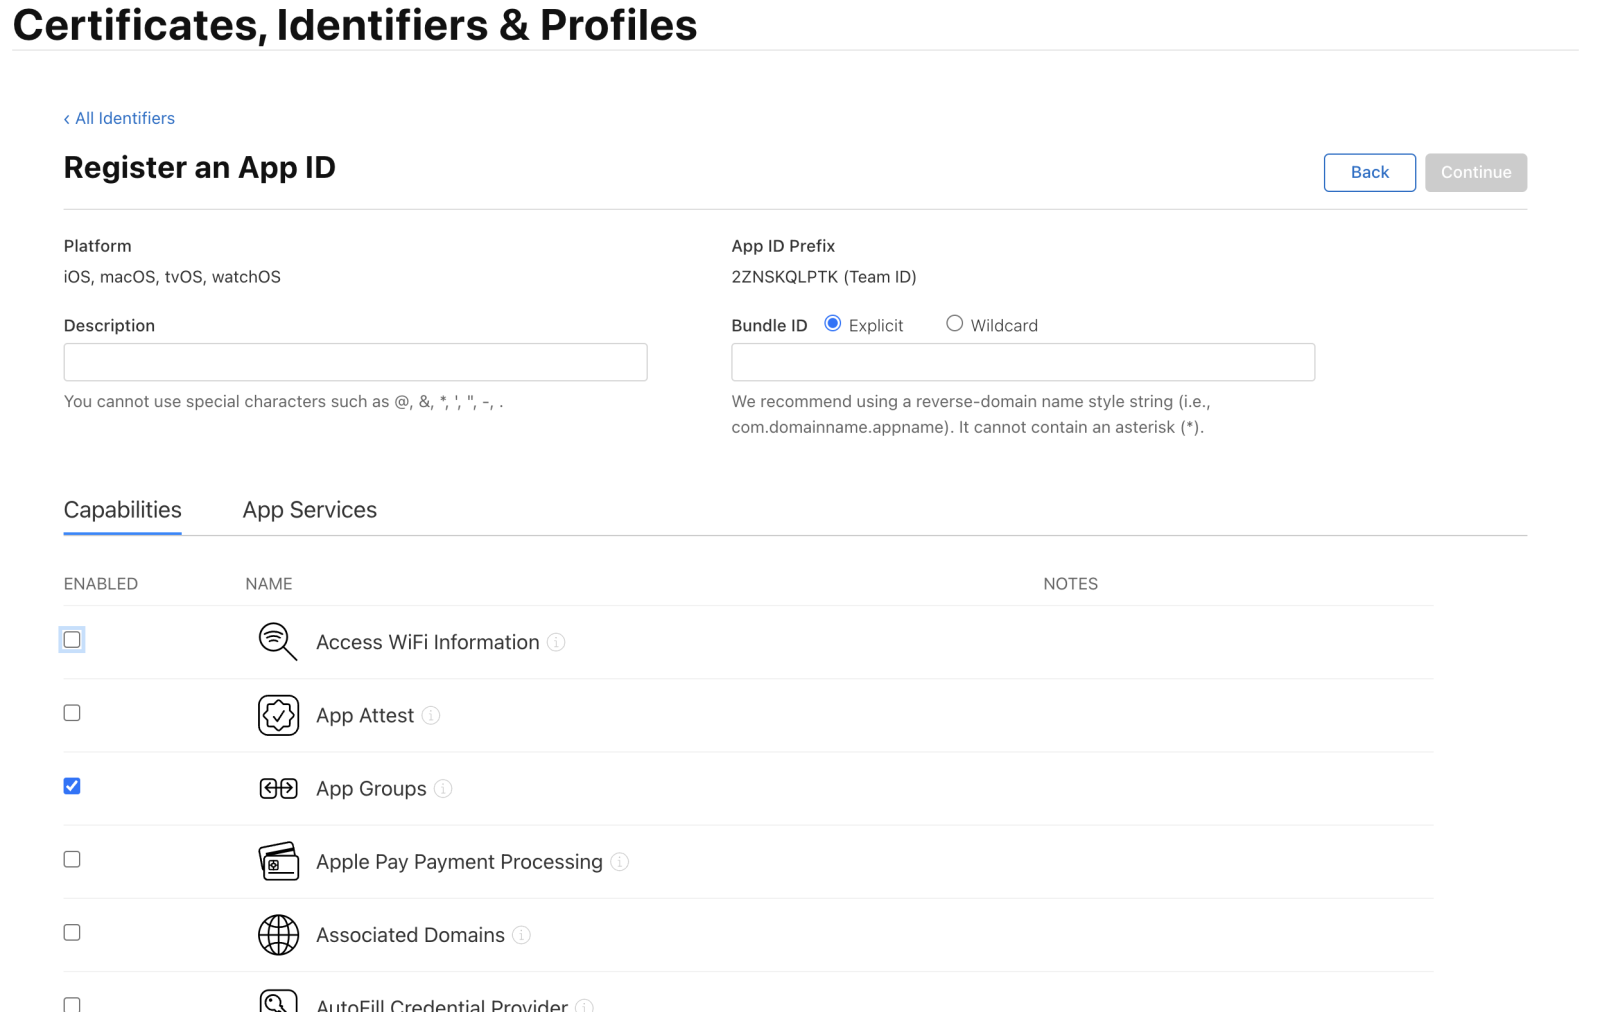
    Add Network Extensions to the App ID configuration.


    Create an AppGroup (AppGroup is used for communication between the Extension process and the main process. If one exists in the project, it can be reused).


    1.2 Xcode Configuration

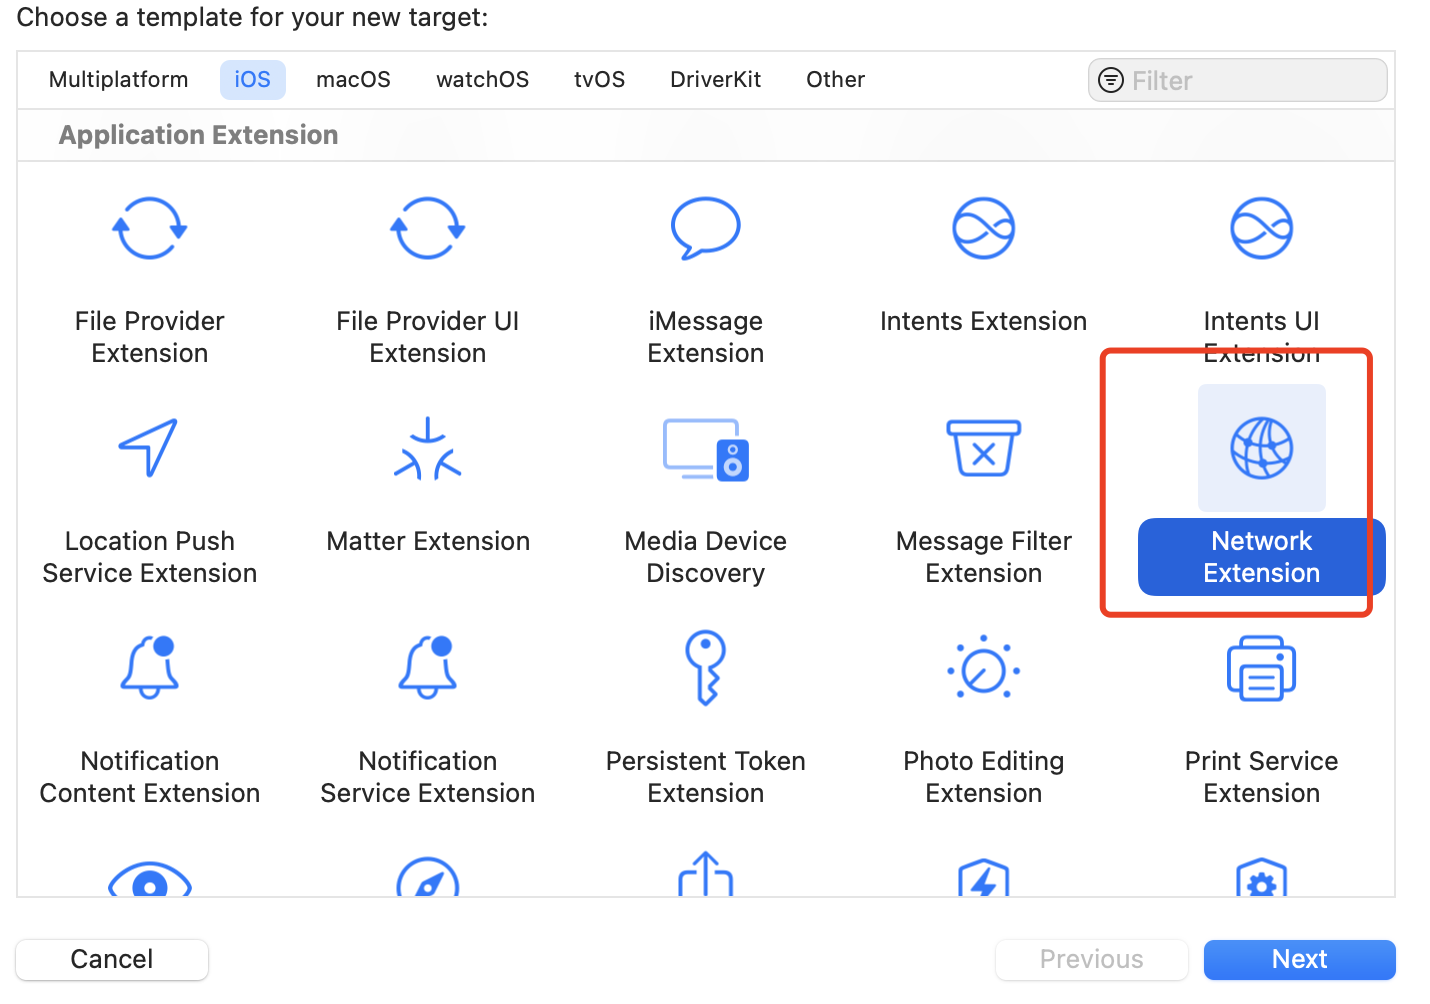
    Create a NetworkExtension target.


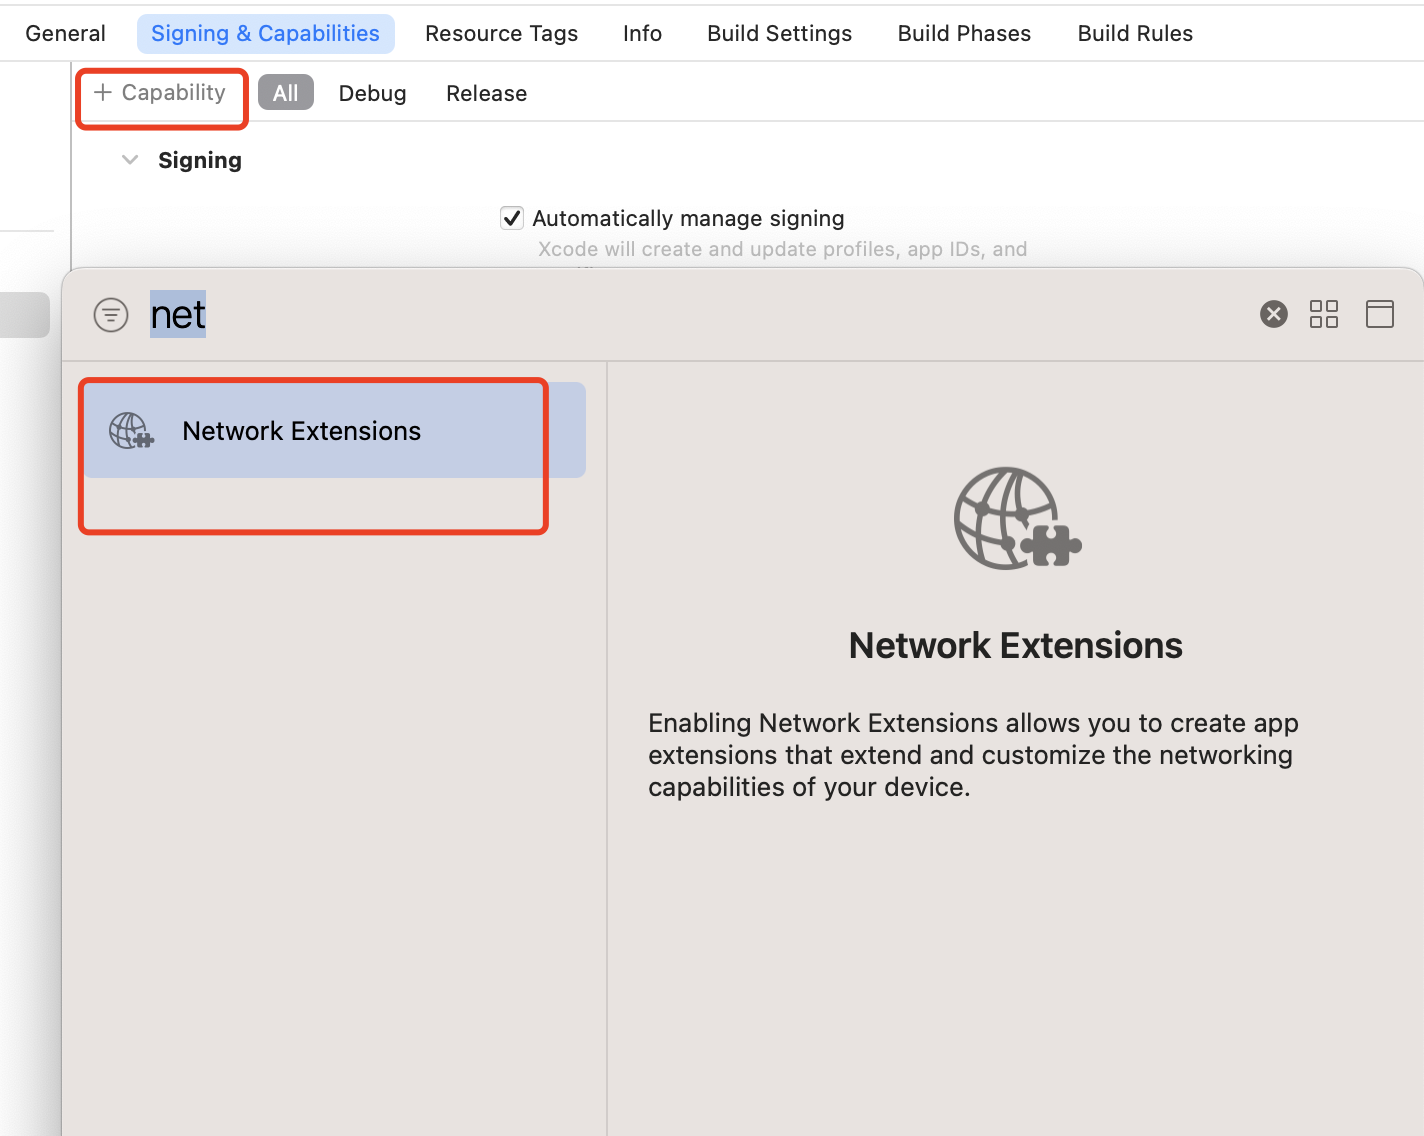
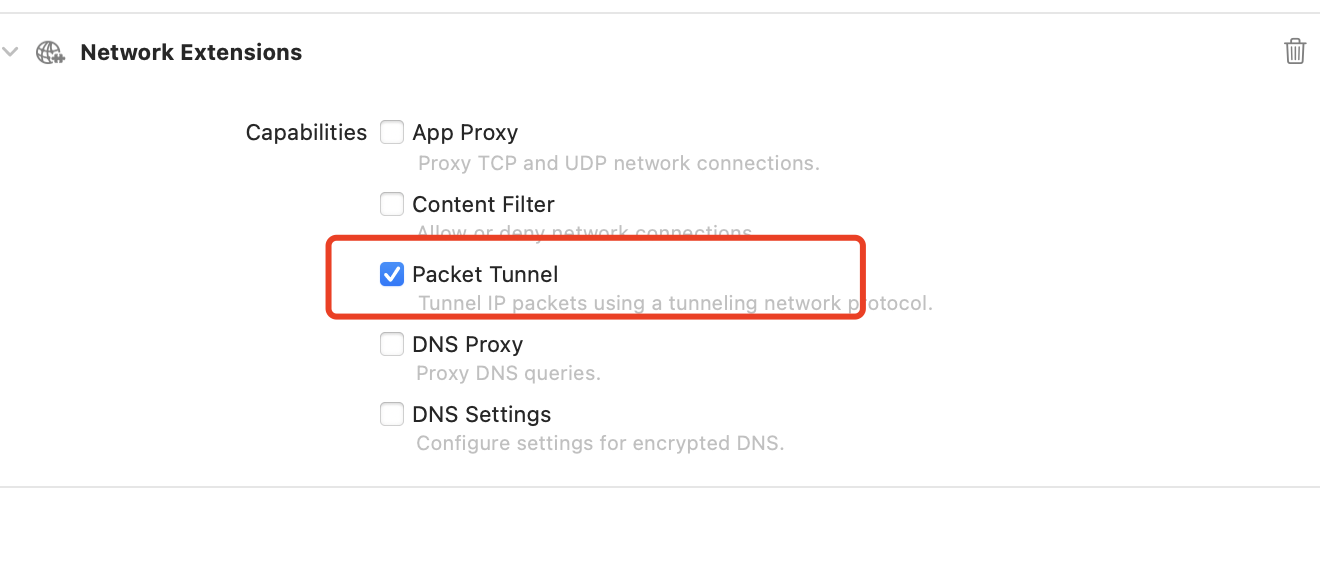
    Add Capability to both main target and NetworkExtension target, then select Network Extension.


    Then, check Packet Tunnel.


    1.3 framework Reference Configuration

    Manually import xcframework
    MpAccSDK.framework: Integrate with the main target and Extension target. Select "Embed & Sign" for the main target.
    NetworkExtension.framework: A system framework integrated with the main target and Extension target.
    Configuration of the main target as follows:


    Configuration of the Extension target as follows:


    Integrate xcframework via pod
    Podfile file:
    target 'XXX' do
    pod 'MpAccSDK', :podspec => 'https://mpspeedr-online-1258344699.cos.ap-guangzhou.myqcloud.com/go/ios/2.9.8.0/MpAccSDK.podspec'
    end
    Configuration of the main target as follows:


    Configuration of the Extension target as follows:


    2. 4 Adding the Following Environment Variables to the App'S Scheme

    2.1 Importing an xcframework

    Manually import xcframework: Integrate the following two frameworks in the App target with configuration as follows:


    Integrate xcframework via pod
    target 'XXX' do
    pod 'MpAccSDK', :podspec => 'https://mpspeedr-online-1258344699.cos.ap-guangzhou.myqcloud.com/go/ios/2.9.8.0/MpAccSDK.podspec'
    end
    Integrate only Network.framework in the App target with the configuration as follows:


    2.2 Adding Privacy - Local Network Usage Description

    For SOCKS5 proxy, the App needs to perform data read/write on the local port, which can cause some system models to pop up a local network ask pop-up. It is necessary to configure this permission.

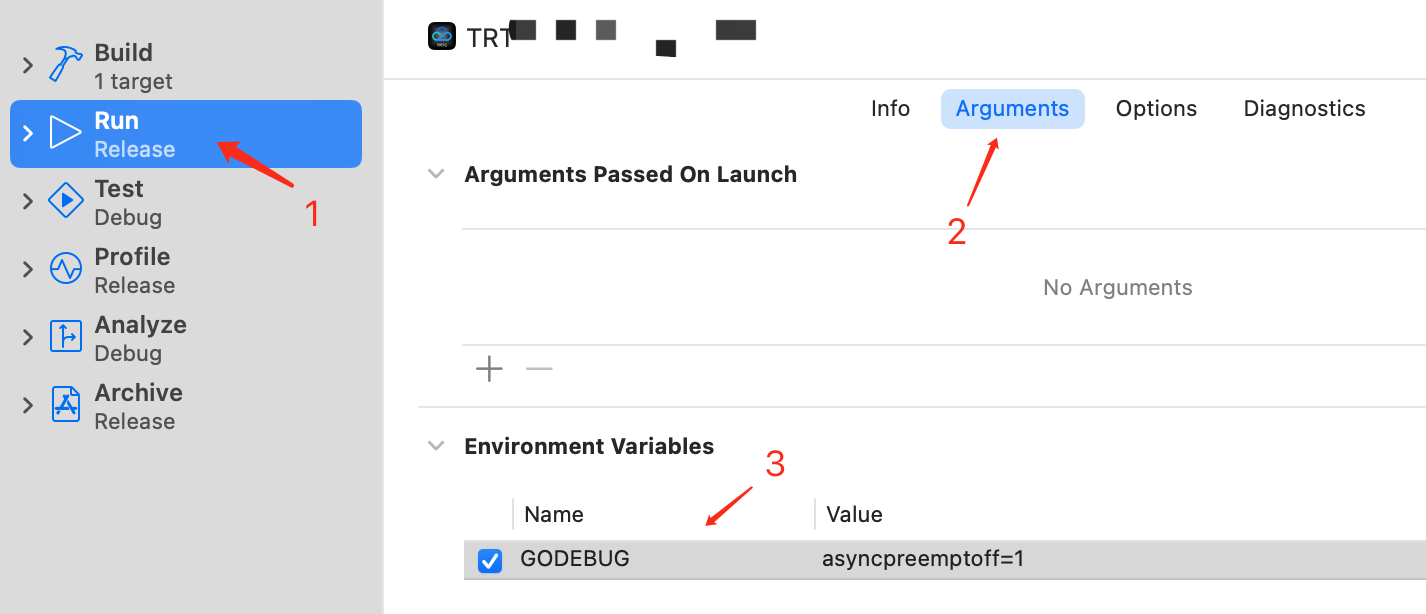
    2.3 Adding the Following Environment Variables to the App'S Scheme

    Name: GODEBUG
    Value: asyncpreemptoff=1
    Note:
    This variable is valid only when DEBUG. The operation mechanism of the network library has conflicts with the Xcode DEBUG signal (SIGURG), leading to deteriorating performance in Xcode debugging. You can use the environment variable above to disable the response to this signal. Archive packages are unaffected.


    Example Code

    Note:
    During initialization, SDK authentication can also be performed via application-based integration by calling the API MpAccClient.setSign("appid","*****"). Only one of device-based integration or application-based integration needs to be configured.
    For the sign generation method, see Console Getting Started Guidein the console.

    1. VPN Acceleration Example

    1.1 App-Side Startup Code

    Swift Code

    class VPNViewController: UIViewController {
    override func viewDidLoad() {
    super.viewDidLoad()
    // If the SDK is in single vpn mode, you do not need to configure this parameter.
    MpAccClient.shared.accType = .vpn
    // You only need to configure either device-based integration or application-based integration.
    // Device-based integration
    MpAccClient.shared.setupDatakey(datakey: "xxxxx",
    deviceId: "xxxxx")
    // Application-based integration
    // MpAccClient.shared.setSign(appId:"xxx", sign:"xxx")
    // Register callback
    MpAccClient.shared.registerAccCallback(self)
    // Attempt to restore VPN
    MpAccClient.shared.resumeVpn()
    }
    //Start acceleration
    func startAcc() {
    let config = AccConfig()
    config.accMode = .Redundant // Acceleration mode 1: Aggregation 2: Dual-send 3: rtc
    config.pingInterval = 2
    config.groupId = "com.xxxx" // AppGroup
    config.vpnName = "XXXXXX" // VPN name
    // Start VPN
    MpAccClient.shared.start(config: config)
    }
    //Stop acceleration
    func stopAcc() {
    MpAccClient.shared.stop()
    }
    }
    
    extension VPNViewController: AccCallback {
    func onAccSuccess(ip: String, port: Int) -> Void { }
    func onAccFail(_ error: NSError?) -> Void { }
    func onAccDataUpdate(tRx: Int64, tTx: Int64, pathDetails: [MpPathDetail]) -> Void { }
    func onSummaryInfoUpdate(_ summaryInfo: String) -> Void { }
    func onNetworkStateChanged(_ type: MpInterfaceType, available: Bool, ip: String) -> Void { }
    }

    OC Code

    @interface ViewController () <AccCallback>
    @end
    
    @implementation ViewController
    
    - (void)viewDidLoad {
    [super viewDidLoad];
    // If it is a single vpn mode SDK, this parameter does not need to be configured
    MpAccClient.shared.accType = AccTypeVpn;
    // Do any additional setup after loading the view.
    [MpAccClient.shared registerAccCallback:self];
    // You only need to configure either device-based integration or application-based integration.
    // Device-based integration
    [MpAccClient.shared setupDatakey:@"xxxxxxx"
    deviceId:@"xxxxxxx"];
    
    // Application-based integration
    // MpAccClient.shared.setSign(appId:"xxx", sign:"xxx")
    
    [MpAccClient.shared resumeVpn];
    }
    
    - (void)startVpn {
    AccConfig *config = [AccConfig new];
    /// Acceleration mode 1: Aggregation 2: Dual-send 3: rtc
    config.accMode = AccModeRedundant;
    config.pingInterval = 2;
    config.congrestionMode = MpCongrestionModeBBR;
    config.groupId = @"group.xxxxxxxx";
    config.vpnName = @"Test_name3";
    config.whiteList = @[];
    config.blackList = @[];
    [MpAccClient.shared startWithConfig:config];
    }
    - (void)stopAcc {
    [MpAccClient.shared stop];
    }
    
    // AccCallback
    - (void)onAccSuccessWithIp:(NSString *)ip port:(NSInteger)port {
    }
    - (void)onAccFail:(NSError *)error {
    }
    - (void)onAccDataUpdateWithTRx:(int64_t)tRx tTx:(int64_t)tTx pathDetails:(NSArray<MpPathDetail *> *)pathDetails {
    }
    - (void)onSummaryInfoUpdate:(NSString *)summaryInfo {
    }
    - (void)onNetworkStateChanged:(enum MpInterfaceType)type available:(BOOL)available ip:(NSString *)ip {
    }
    @end

    1.2 VPN Extension

    Add the following code to the automatically generated PacketTunnelProvider in the Extension target of Xcode:

    Swift Code

    class PacketTunnelProvider: NEPacketTunnelProvider {
    var tunnelManager: MpPacketTunnelManager = MpPacketTunnelManager()
    override func startTunnel(options: [String : NSObject]?, completionHandler: @escaping (Error?) -> Void) {
    //Call the startTunnel method of the SDK
    tunnelManager.startTunnel(packetTunnel: self, options: options, completionHandler: completionHandler);
    }
    override func stopTunnel(with reason: NEProviderStopReason, completionHandler: @escaping () -> Void) {
    //Call the stopTunnel method of the SDK
    tunnelManager.stopTunnel()
    completionHandler()
    }
    override func handleAppMessage(_ messageData: Data, completionHandler: ((Data?) -> Void)?) {
    //Call the handleAppMessage method of the SDK
    tunnelManager.handleAppMessage(messageData, completionHandler: completionHandler);
    }
    }

    OC Code

    @interface PacketTunnelProvider() {
    MpPacketTunnelManager *tunnelManager;
    }
    @end
    @implementation PacketTunnelProvider
    
    - (id)init {
    self = [super init];
    if (self != NULL) {
    tunnelManager = [[MpPacketTunnelManager alloc] init];
    }
    return self;
    }
    
    - (void)startTunnelWithOptions:(NSDictionary *)options completionHandler:(void (^)(NSError *))completionHandler {
    //Call the startTunnel method of the SDK
    [tunnelManager startTunnelWithPacketTunnel:self options:options completionHandler:completionHandler];
    }
    
    - (void)stopTunnelWithReason:(NEProviderStopReason)reason completionHandler:(void (^)(void))completionHandler {
    //Call the stopTunnel method of the SDK
    [tunnelManager stopTunnel];
    completionHandler();
    }
    
    - (void)handleAppMessage:(NSData *)messageData completionHandler:(void (^)(NSData *))completionHandler {
    //Call the handleAppMessage method of the SDK
    [tunnelManager handleAppMessage:messageData completionHandler:completionHandler];
    }
    @end

    2. SOCKS5 Acceleration Example

    Note:
    After acceleration is successfully started in SOCKS mode (that is, after receiving the onAccSuccess callback), your service must send network requests through the SOCKS protocol. The proxy IP address is the local IP, and the proxy port must be the same as the port set through config.socksProxyPort when starting acceleration. Only then can the traffic enter the acceleration tunnel.

    2.1 Swift Code (Using Alamofire as an Example)

    import Alamofire
    class Socks5ViewController: UIViewController {
    private var afs: Session = AF
    //Start acceleration
    func startAcc() {
    //Acceleration method. If it's a single SOCKS5_SDK, ignore it.
    MpAccClient.shared.accType = .socks5;
    let config = AccConfig()
    config.socksProxyPort = xxx
    // Start socks5
    MpAccClient.shared.start(config: config)
    }
    }
    extension Socks5ViewController: AccCallback {
    func onAccSuccess(ip: String, port: Int) -> Void {
    // Traffic switchover required
    let sessionConfig = URLSessionConfiguration.default
    sessionConfig.connectionProxyDictionary = [
    kCFStreamPropertySOCKSProxyHost : "127.0.0.1",
    // config.socksProxyPort
    kCFStreamPropertySOCKSProxyPort : "xxxxxx",
    ]
    afs = Session(configuration: sessionConfig)
    }
    }

    2.2 OC Code (Startup Only, Refer to Swift Code for HTTP Requests)

    @interface ViewController () <AccCallback>
    @end
    
    @implementation ViewController
    - (void)startVpn {
    // If it's a single SOCKS5_SDK, skip this field
    MpAccClient.shared.accType = AccTypeSocks5;
    AccConfig *config = [AccConfig new];
    // Set parameters
    [MpAccClient.shared startWithConfig:config];
    }
    
    // AccCallback
    - (void)onAccSuccessWithIp:(NSString *)ip port:(NSInteger)port {
    // Traffic switchover required
    // AFNetworking settings are similar to Alamofire
    }
    @end

    FAQ

    1. Swift Compilation Error
    Since the SDK is written in Swift, a Swift runtime environment is required. For Objective-C SDK integration, create a Swift empty file in the application project or CocoaPods repository.
    SDK is compiled with Xcode 15. Using SDK with Xcode 14 will report Swift compatibility issues. Upgrade Xcode.
    2. Signature issue
    Xcode does not sign nested SDKs by default. Therefore, do not nest MpAccSDK within your SDK. Alternatively, you can write a script to sign it.
    3. TRTC plug-in integration notes
    The TRTC xcframework reports an error. Upgrade CocoaPods, as versions prior to 12.1 contain a Bug.
    Acceleration should be initiated after the room is entered. Otherwise, the acceleration component cannot obtain TRTC-related information.
    4. SOCKS5 mode acceleration, Xcode debugging lag issue
    Reason: The operation mechanism of the network library has conflicts with the Xcode DEBUG signal (SIGURG), leading to deteriorating performance in Xcode debugging.
    Solution: Add the GODEBUG environment variable with the value asyncpreemptoff=1. You can use this environment variable to disable the response to this signal. Archive packages remain unaffected.
    For specific setting methods, see configuration instructions and SOCKS5 access configuration.
    5. SOCKS5 mode Privacy - Local Network Usage Description pop-up issue
    Reason: During acceleration, the App needs to perform data read/write on the local port network, which may cause pop-up queries on some system models.
    Solution: Need to configure Privacy - Local Network Usage Description permission description.
    6. VPN Mode APP Store Rejection Issue
    When submitting an APP for store listing, you must also upload the VPN qualification document. Otherwise, the submission will be rejected.

    Bantuan dan Dukungan

    Apakah halaman ini membantu?

    masukan