tencent cloud

Tencent Real-Time Communication

DokumentasiTencent Real-Time Communication

iframe

Download
Mode fokus
Ukuran font
Terakhir diperbarui: 2026-05-08 17:10:33
This guide walks you through embedding TUIRoomKit in your web app via an iframe. The conferencing UI is hosted in a sandboxed environment, which keeps your app code clean and avoids heavy UI integration work. You only need to provide a few URL parameters to start a conference.
Use cases: quick prototyping and integration tests, cross-framework embedding, and fast rollout of conferencing.
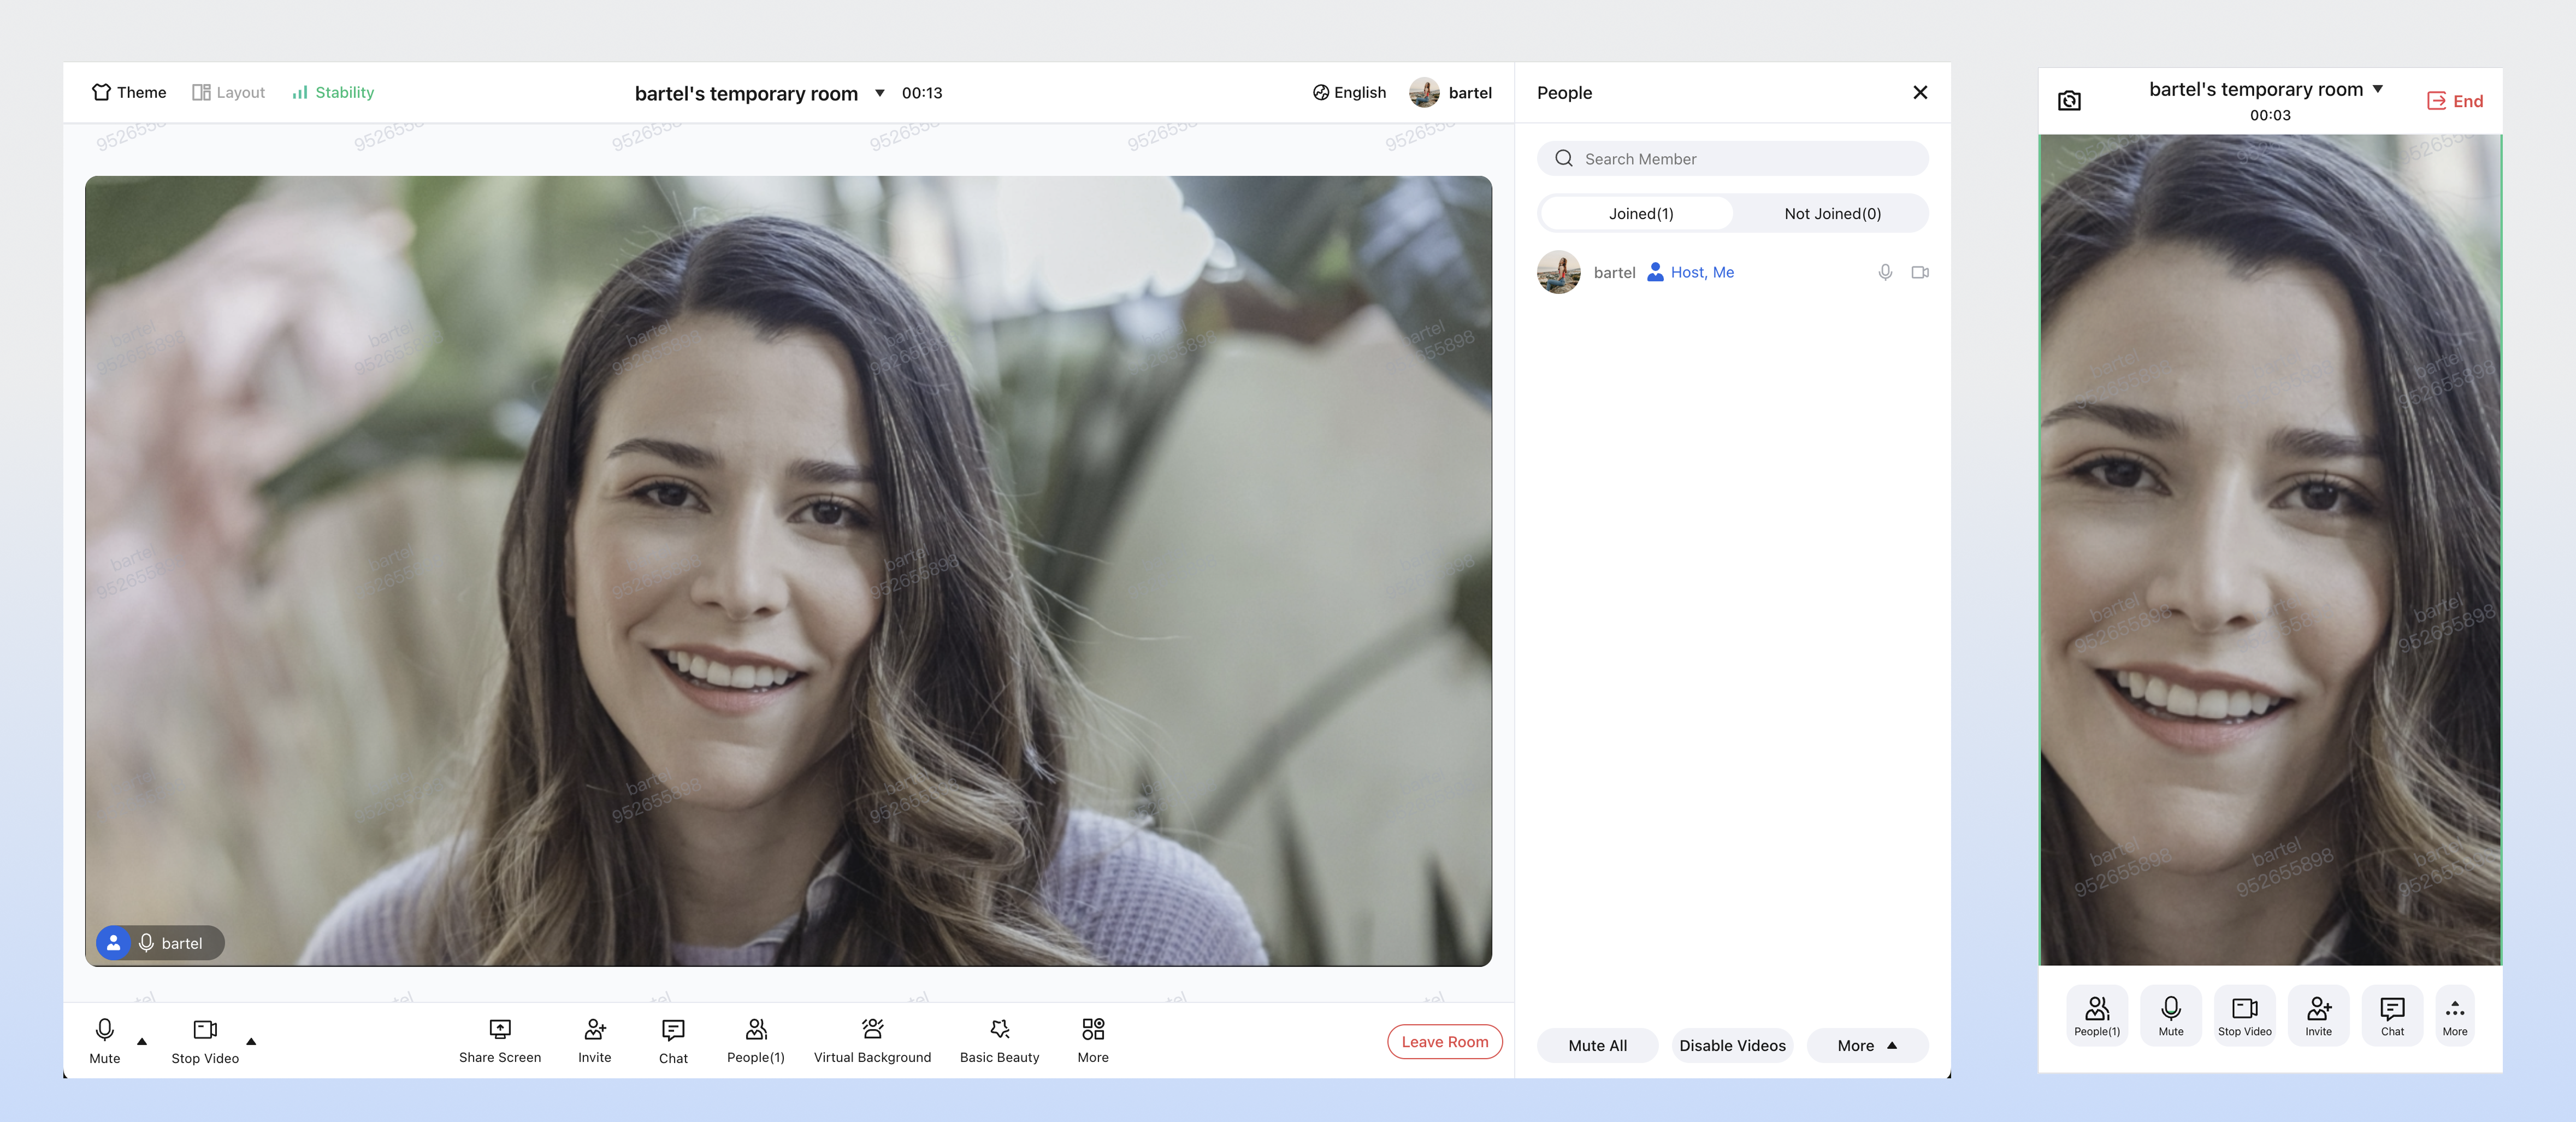
Core features: host room creation, participant join/leave, screen sharing, and more.


Prerequisites

Activate the Service

See Activate the Service to obtain a TUIRoomKit trial and retrieve your SDKAppID and SDKSecretKey.
SDKAppID: Application identifier. TRTC uses SDKAppID for billing and analytics.
SDKSecretKey: Application secret key, used to initialize secret information in configuration files.

Environment Preparation

Browser security policies require the following conditions to access camera and microphone:
Production environment: Both the parent page and the iframe must be served over HTTPS.
Development environment: Access via localhost is allowed.
Note:
Using HTTP (except for localhost) will prevent audio/video device access.

iframe Integration

Step 1: Build and Deploy the TUIRoomKit Page

Build a dedicated TUIRoomKit project for embedding via iframe.
1.
Create a new Vue 3 project.
npm
pnpm
yarn
npm create vite@latest roomkit-vue3 -- --template vue
pnpm create vite roomkit-vue3 --template vue
yarn create vite roomkit-vue3 --template vue
2.
Install TUIRoomKit dependencies.
npm
pnpm
yarn
cd roomkit-vue3/

npm install @tencentcloud/roomkit-web-vue3@latest tuikit-atomicx-vue3 @tencentcloud/uikit-base-component-vue3 @tencentcloud/universal-api
cd roomkit-vue3/

pnpm install @tencentcloud/roomkit-web-vue3@latest tuikit-atomicx-vue3 @tencentcloud/uikit-base-component-vue3 @tencentcloud/universal-api
cd roomkit-vue3/

yarn add @tencentcloud/roomkit-web-vue3@latest tuikit-atomicx-vue3 @tencentcloud/uikit-base-component-vue3 @tencentcloud/universal-api
3.
Update the roomkit-vue3/src/App.vue file.
<template>
<UIKitProvider theme="light" language="zh-CN">
<ConferenceMainView v-if="isPC"></ConferenceMainView>
<ConferenceMainViewH5 v-else></ConferenceMainViewH5>
</UIKitProvider>
</template>

<script setup>
import { ref, onMounted } from 'vue';
import { UIKitProvider } from '@tencentcloud/uikit-base-component-vue3';
import { ConferenceMainView, ConferenceMainViewH5, conference } from '@tencentcloud/roomkit-web-vue3';
import { getPlatform } from '@tencentcloud/universal-api';
import { RoomType } from 'tuikit-atomicx-vue3/room';

const isPC = ref(getPlatform() === 'pc');

function getUrlParam(key) {
const params = new URLSearchParams(window.location.search);
return params.get(key) || '';
}

const sdkAppId = Number(getUrlParam('sdkAppId'));
const userId = getUrlParam('userId');
const userSig = getUrlParam('userSig');
const roomId = getUrlParam('roomId');
const action = getUrlParam('action') || 'start';

onMounted(async () => {
try {
await conference.login({ sdkAppId, userId, userSig });
if (action === 'start') {
await conference.start({ roomId, roomType: RoomType.Standard });
} else {
await conference.join({ roomId, roomType: RoomType.Standard });
}
} catch (error) {
console.error('Initialization failed:', error);
}
});
</script>

<style>
html, body {
padding: 0 !important;
margin: 0 !important;
}

#app {
width: 100% !important;
height: 100% !important;
padding: 0 !important;
margin: 0 !important;
max-width: 100% !important;
max-height: 100% !important;
text-align: left !important;
overflow: hidden;
}
</style>
4. Build and deploy.
cd roomkit-vue3/
npm run build
Deploy the generated static assets (the dist directory) to your web server (such as Nginx, COS, etc.) to obtain the access URL.

Step 2: Embed the iframe in the Parent Page

Add an tag to your HTML, Vue, or React business page, and set the src attribute to the URL of your deployed TUIRoomKit page.
Note:
Permission configuration: The iframe must include the allow attribute, or the browser will block access to camera, microphone, and screen sharing.
Parameter passing: The TUIRoomKit page URL must include these key parameters:
sdkAppId: Number, application identifier.
userId: String, user ID.
userSig: String, user signature (see User Authentication for generation details).
roomId: String, room number.
action: String, operation type. Use start to create a room, join to join a room.
<iframe
id="tuiRoomFrame"
src="https://your-domain.com/index.html?sdkAppId=xxxx&userId=xxxx&userSig=xxxx&roomId=xxxx&action=start"
allow="microphone; camera; fullscreen; display-capture;"
width="100%"
height="100%"
style="border: none; min-height: 600px;"
></iframe>

Step 3: Handle Communication with the Parent Page

To monitor meeting status (such as when the room is dissolved) from the parent page, use the postMessage API to send messages between the iframe and the parent.
// Send events from the TUIRoomKit integration project
import { useRoomState, RoomEvent } from 'tuikit-atomicx-vue3/room';
const { subscribeEvent } = useRoomState();

subscribeEvent(RoomEvent.onRoomEnded, () => {
window.parent.postMessage({ event: 'onRoomEnded', data: {} }, '*');
});

// Receive events in your parent page
window.addEventListener('message', (event) => {
if (event.data.event === 'onRoomEnded') {
console.log('The room has been dissolved');
}
});

Step 4: Deployment Verification

After completing the steps above, verify the integration as follows:
Check Item
Verification Criteria
Page Load
The TUIRoomKit meeting interface displays correctly in the iframe.
Audio/Video Permissions
Click "Unmute" or "Turn on Video" in the meeting interface and confirm the status icon updates as expected.
Screen Sharing
Click screen sharing and confirm the system-level sharing window appears.

FAQs

Why can’t I enable the camera and microphone after deployment?

Check the protocol: Ensure both the parent page and the iframe URL use https://.
Check the allow attribute: Verify the tag includes allow="microphone; camera; fullscreen; display-capture;".

Does TUIRoomKit support configuring an internal network proxy?

Yes. Follow the guide below to configure internal network proxy parameters. For details on internal network proxies, see Handling Firewall Restrictions.
// Set internal network proxy parameters before entering the room
import TUIRoomEngine from '@tencentcloud/tuiroom-engine-js';
import { useRoomEngine } from 'tuikit-atomicx-vue3/room';
const { roomEngine } = useRoomEngine();

TUIRoomEngine.once('ready', () => {
const trtcCloud = roomEngine.instance?.getTRTCCloud();
trtcCloud.callExperimentalAPI(JSON.stringify({
api: 'setNetworkProxy',
params: {
websocketProxy: "wss://proxy.example.com/ws/",
turnServer: [{
url: '14.3.3.3:3478',
username: 'turn',
credential: 'turn',
}],
iceTransportPolicy: 'relay',
},
}));
});

Contact Us

If you have any questions or suggestions during integration or usage, contact info_rtc@tencent.com.

Bantuan dan Dukungan

Apakah halaman ini membantu?

masukan