Building a Website Using the WordPress Application Template
Download
フォーカスモード
フォントサイズ
最終更新日: 2023-02-16 15:38:35
Overview
WordPress is the world's most popular open source blog and content management website building platform. It is easy to use, flexible and extensible. It has powerful features and provides rich theme plugins. Tencent Cloud Lighthouse provides WordPress application image, allowing you to quickly build various websites such as blogs, corporate official websites, e-commerce websites, and forums.
Note:
In the following example, we use the WordPress application image, which is based on CentOS 7.6 64-bit. Note that application images are subject to updates from time to time, and the actual image information on the purchase page shall prevail.
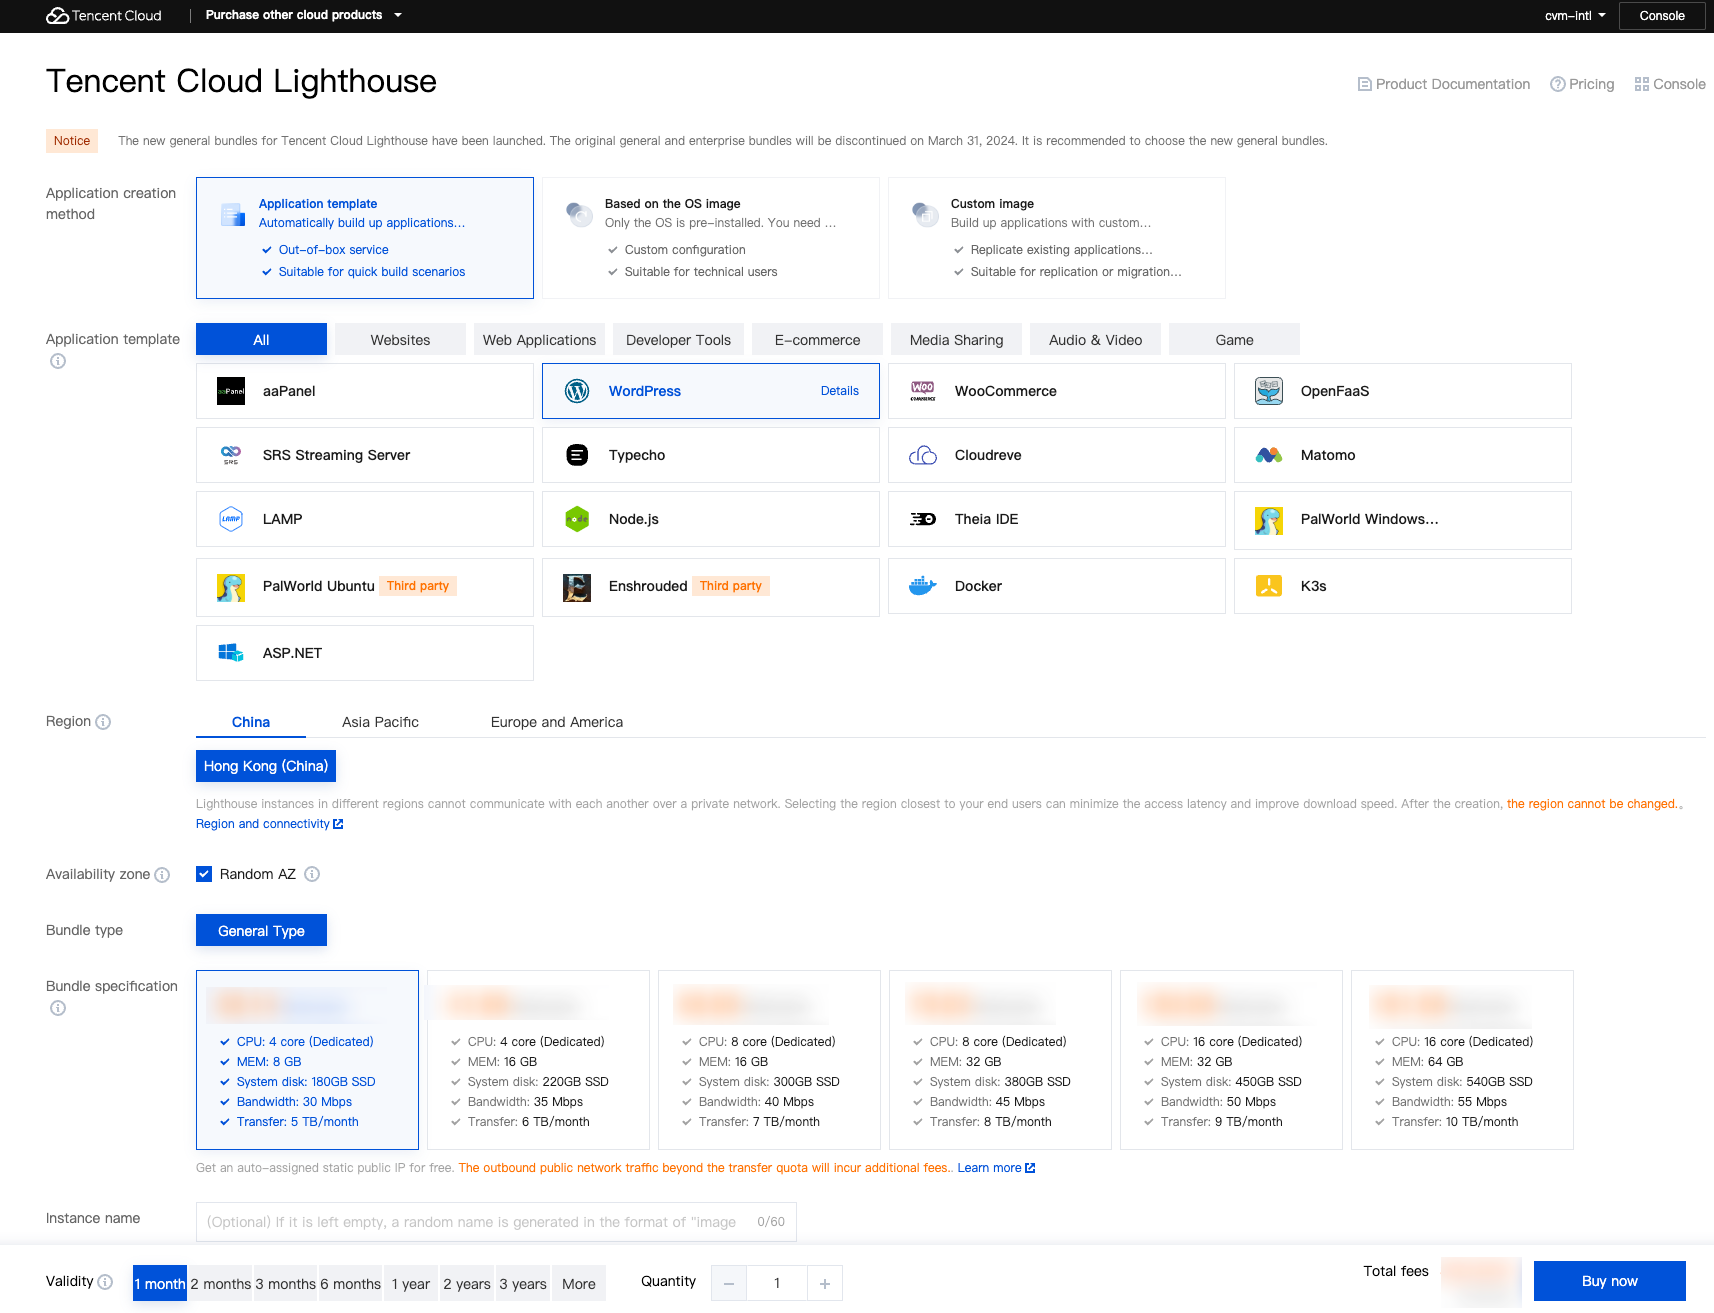
2. Click Create to enter the Lighthouse purchase page.
Region: We recommend you select a region near your target users to reduce the network latency and improve their access speed.
Availability zone: Randomly assigned is selected by default. You can select one as well.
Image: Select the "WordPress 5.7.1 Community" application image.
Instance bundle: Select an instance bundle according to the required instance configuration (including CPU, memory, system disk, bandwidth, and monthly traffic).
Instance name: Enter a custom instance name. If it is left empty, an "image name + 4-digit random string" will be used as the name by default. When multiple instances are created in a batch, their names will be consecutive with auto-incrementing suffixes. For example, if you enter "LH" as the name and purchase three instances, the three instances are named "LH1", "LH2", and "LH3".
Purchase period: Default to 1 month.
Quantity: One instance by default.
3. Click Buy now to submit your order and make the payment as prompted.
4. Go back to the Lighthouse console.
5. After the instance is created, select the instance from the list to enter its details page.
You can view the configurations of the WordPress application on this details page.
6. Select the Pre-installed application tab, and enter the application details page.
7.
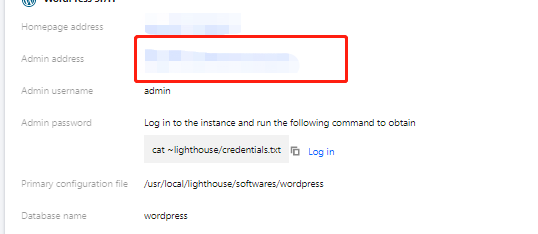
In the Pre-installed software section
, click
to copy the command for obtaining WordPress admin account and password.
8. In the Pre-installed software section, click Log in beside the command or at the upper right corner.
9. In the pop-up login window, paste the command obtained in step 7 and press Enter.
Then, you can get the WordPress admin account (admin) and the corresponding password.
10.
Copy and record the WordPress admin account and password.
11. Close the login window and go back to the application details page of the instance.
12. In the Pre-installed software section, click Admin address of WordPress.
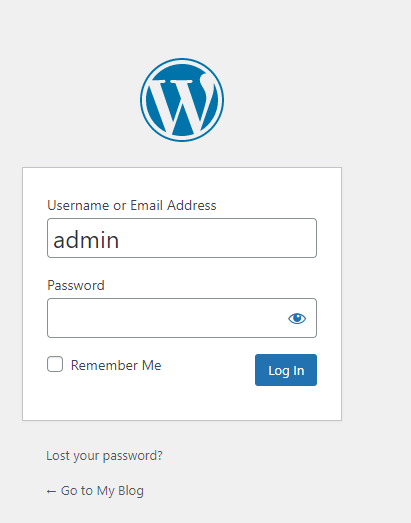
13. In the newly opened browser window, enter the username and password recorded in Step 10 and click Log in.
Note:
For Wordpress 5.7.1 application image, you need to check the email and database updates, and confirm the information by clicking This address is correct and Upgrade Wordpress database.
After successful login, you can manage, customize, and configure WordPress based on your actual needs.
Related Operations
Updating WordPress Admin Profile
1. In the left sidebar of the WordPress admin interface, select Users > All users.
2. Find the admin user and click Edit.
3. Set personal information according to actual needs.
For example:
In the "Contact information" field, enter your email address.
In the "Account management" column, click Generate password and enter a new admin password.
4. Click Update profile.
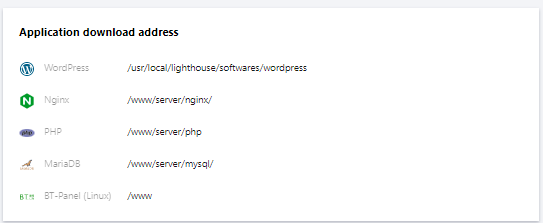
Viewing Other Configuration Information
You can view the configuration information of WordPress and other items such as homepage address, Nginx master configuration file saving path, MariaDB admin password, and software installation path on the application details page of the WordPress instance.