Release Notes
Quickly grant business system-level access privileges
Application Performance Management (APM) provides a comprehensive permission management mechanism. You can flexibly configure access permissions through Cloud Access Management (CAM). For details, see APM Access Management. APM has created preset policies by default: QcloudAPMFullAccess (full read-write access permission) and QcloudAPMReadOnlyFullAccess (read-only access permission). If you want to perform coarse-grained permission management for APM, you can refer to Associating with Policies to grant sub-users full read-write access permission or read-only access permission for APM.
Another typical usage scenario is permission management based on the granularity of business systems. For example, you have two business systems under your account, namely A and B. You want a sub-user to be able to access only business system A and not business system B. You can refer to the methods provided in this document to quickly implement business system-level access permission management.
Preparatory Operations
When a sub-user accesses the APM business system, some pre-checks are involved, such as obtaining the version information of the APM product for that account. The operations involved in these pre-checks do not belong to resource-level operations, so it is necessary to pre-authorize permissions for these operations to the sub-user. APM has created a preset policy QcloudAPMOperationalPrecondition (operational API preconditions) by default, which includes all the pre-check operations. You can directly associate this preset policy with the sub-user to reduce configuration complexity.
1. Use the root account or a sub-user with QcloudCamFullAccess permissions to go to Cloud Access Management > Policies.
2. Search to find the preset policy QcloudAPMOperationalPrecondition, and click Associate User/Group/Role on the right.

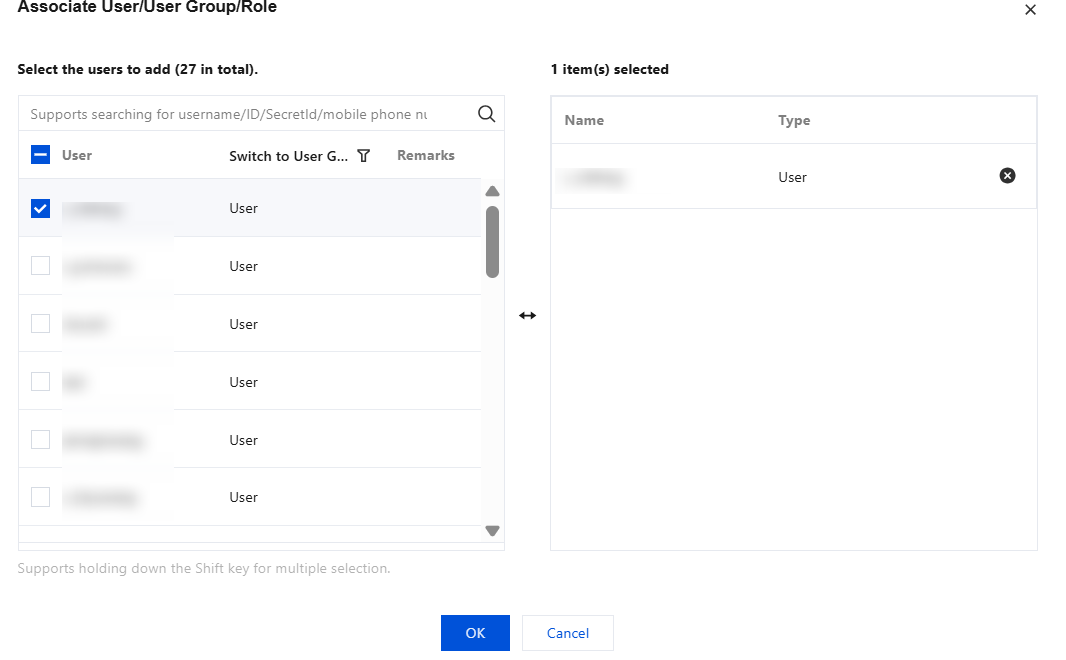
3. In the pop-up dialog box, find the user/user group/role to which you want to grant permissions, select it, and click OK.
Granting Access Privileges to the Specified Business System
1. You need to obtain the business system ID in advance. You can go to APM Console > Resource Management to get it. The business system ID has the apm- prefix. In this document, apm-Y7o7aeOPA is used as an example.
2. Use a root account or a sub-user with QcloudCamFullAccess permissions to go to Cloud Access Management > Policies.
3. Click Create a custom policy, create a custom policy according to the following two scenarios, and complete the association of the custom policy with users/user groups/roles.
Granting Full Read/Write Access Privileges to the Business System
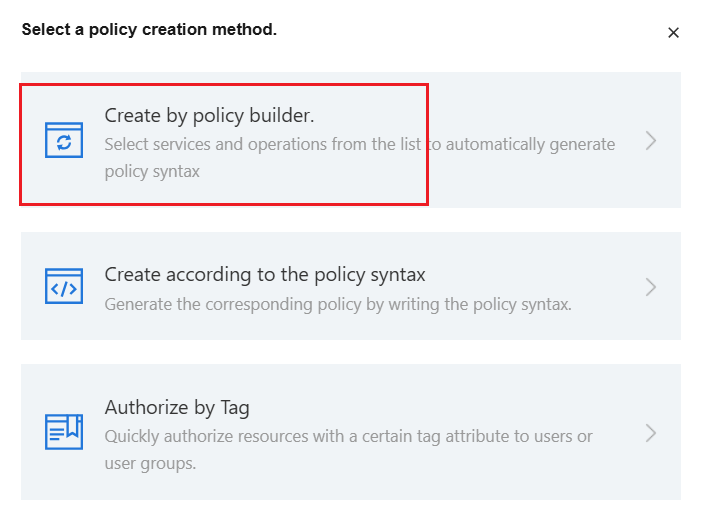
1. In the pop-up dialog box, select Create by Policy builder.
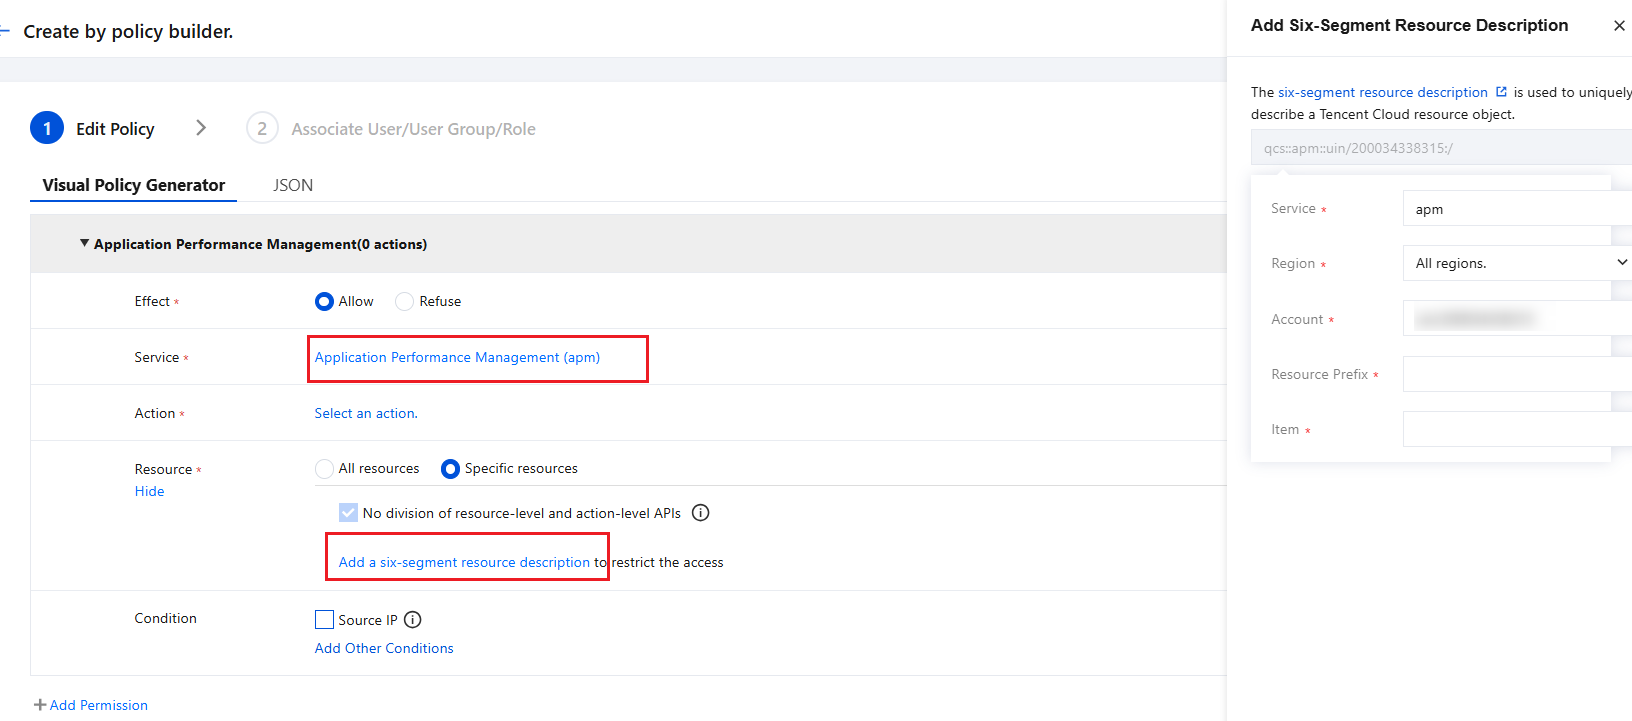
2. Enter the visual editor, select the service and operation according to the prompts in the figure below, select Specific resources in the resource column, and click apm-instance corresponding to Add a six-segment resource description. In the window that slides out on the right side of the page, fill in the business system ID in the resource column and click OK.
You can also click on the JSON tab to check if the generated policy looks like the one in the figure below.

3. Click Next, name this custom policy, and associate it with the specified user/user group/role.
Granting Read-Only Access Privileges to the Business System
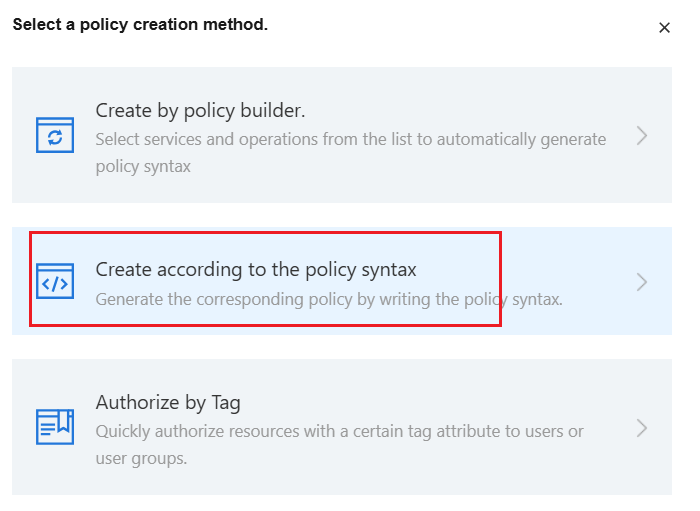
1. In the pop-up dialog box, select Create according to the policy syntax.
2. Select Blank Template, click Next.
3. In Policy Content, enter the following JSON.
Note:
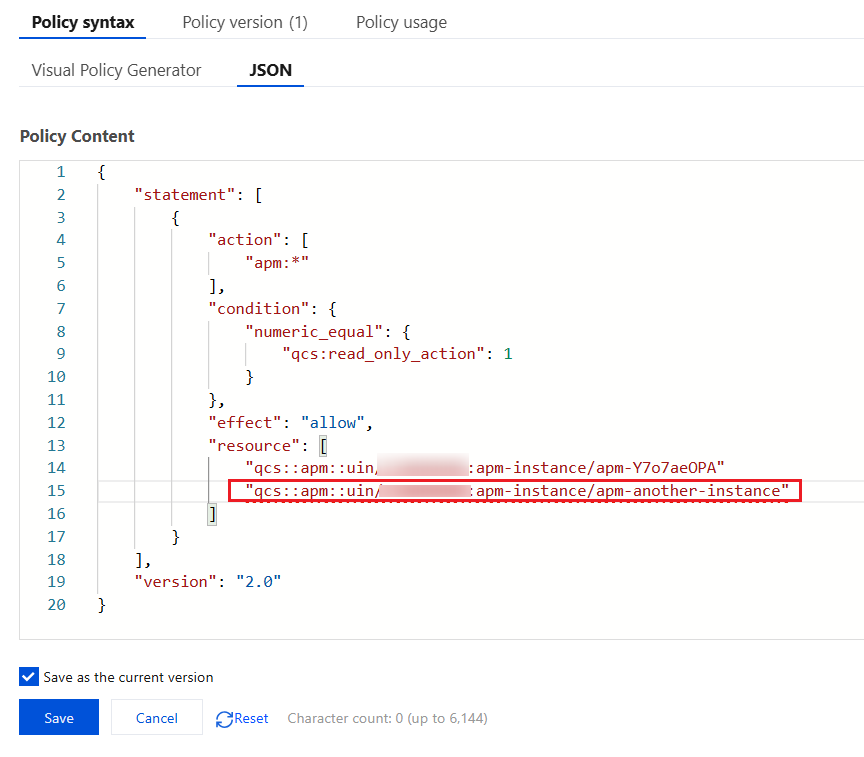
In the resource field, replace the number after uin/ with your root account ID, and replace the content after apm-instance/ with your target business system ID.
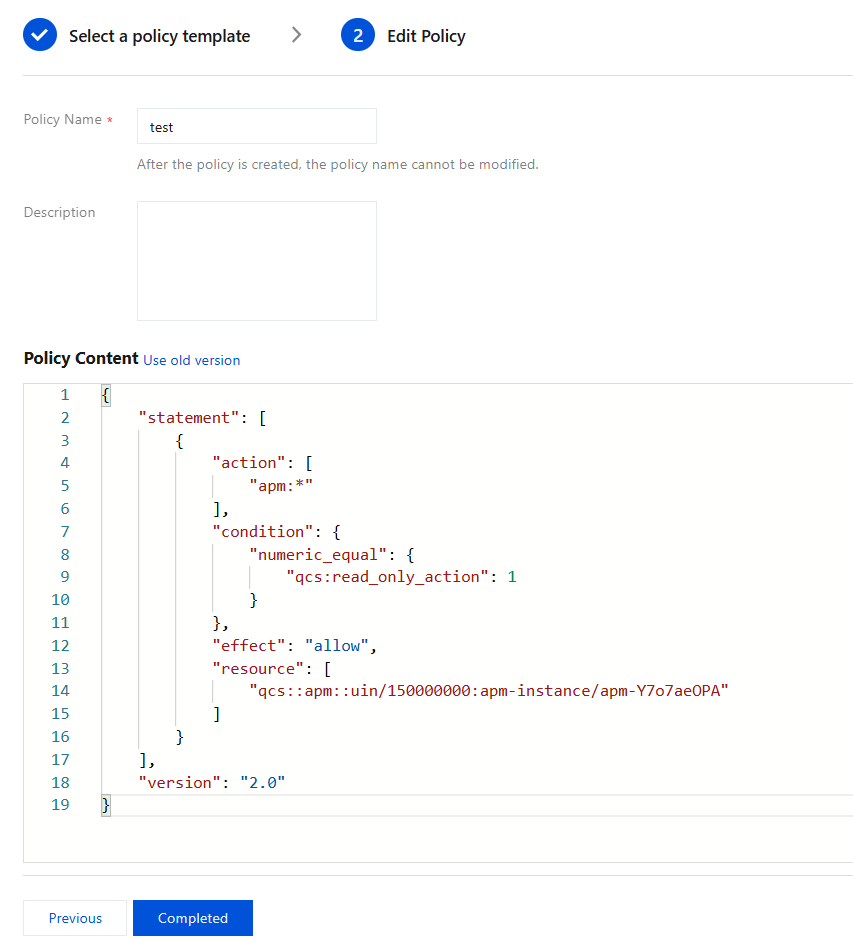
{"statement": [{"action": ["apm:*"],"condition": {"numeric_equal": {"qcs:read_only_action": 1}},"effect": "allow","resource": ["qcs::apm::uin/150000000:apm-instance/apm-Y7o7aeOPA"]}],"version": "2.0"}
4. Enter the policy name and confirm whether the policy content is as shown in the figure below, and then click Completed.
5. After the custom policy is created, click Associate User/Group/Role to complete the association with the target user.
How to Grant Access Privileges to Multiple Business Systems Simultaneously?
The CAM policy syntax supports flexible configuration. You can specify multiple APM business systems in the resource field of the JSON content simultaneously.
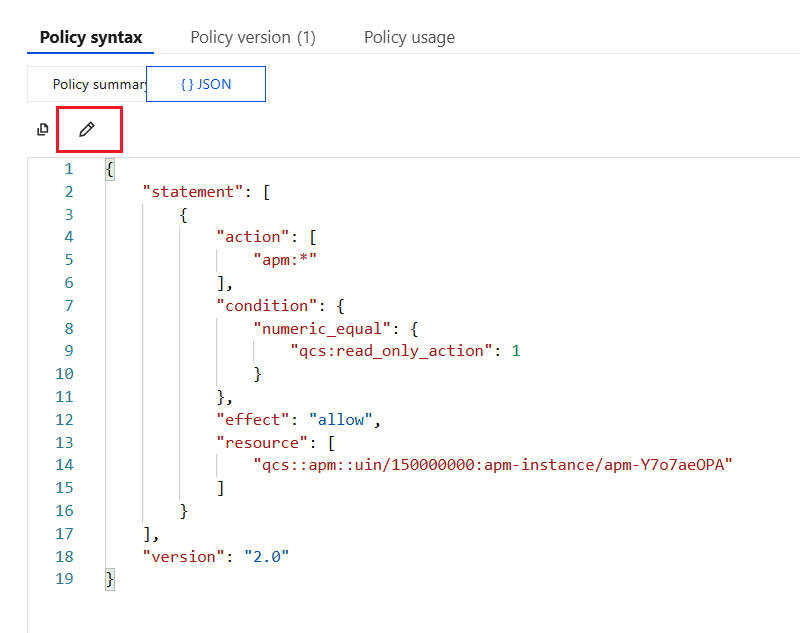
1. Enter the custom policy created in the previous step, enter JSON mode in the policy syntax, and click the edit icon.
2. In the resource field, add more business systems based on the policy syntax, and then click save.
Besides, you can also modify the policy syntax based on the visual policy generator to achieve the same effect, which will not be elaborated in this document.
フィードバック