2. Click Create to enter the purchase page and configure the parameters as prompted.
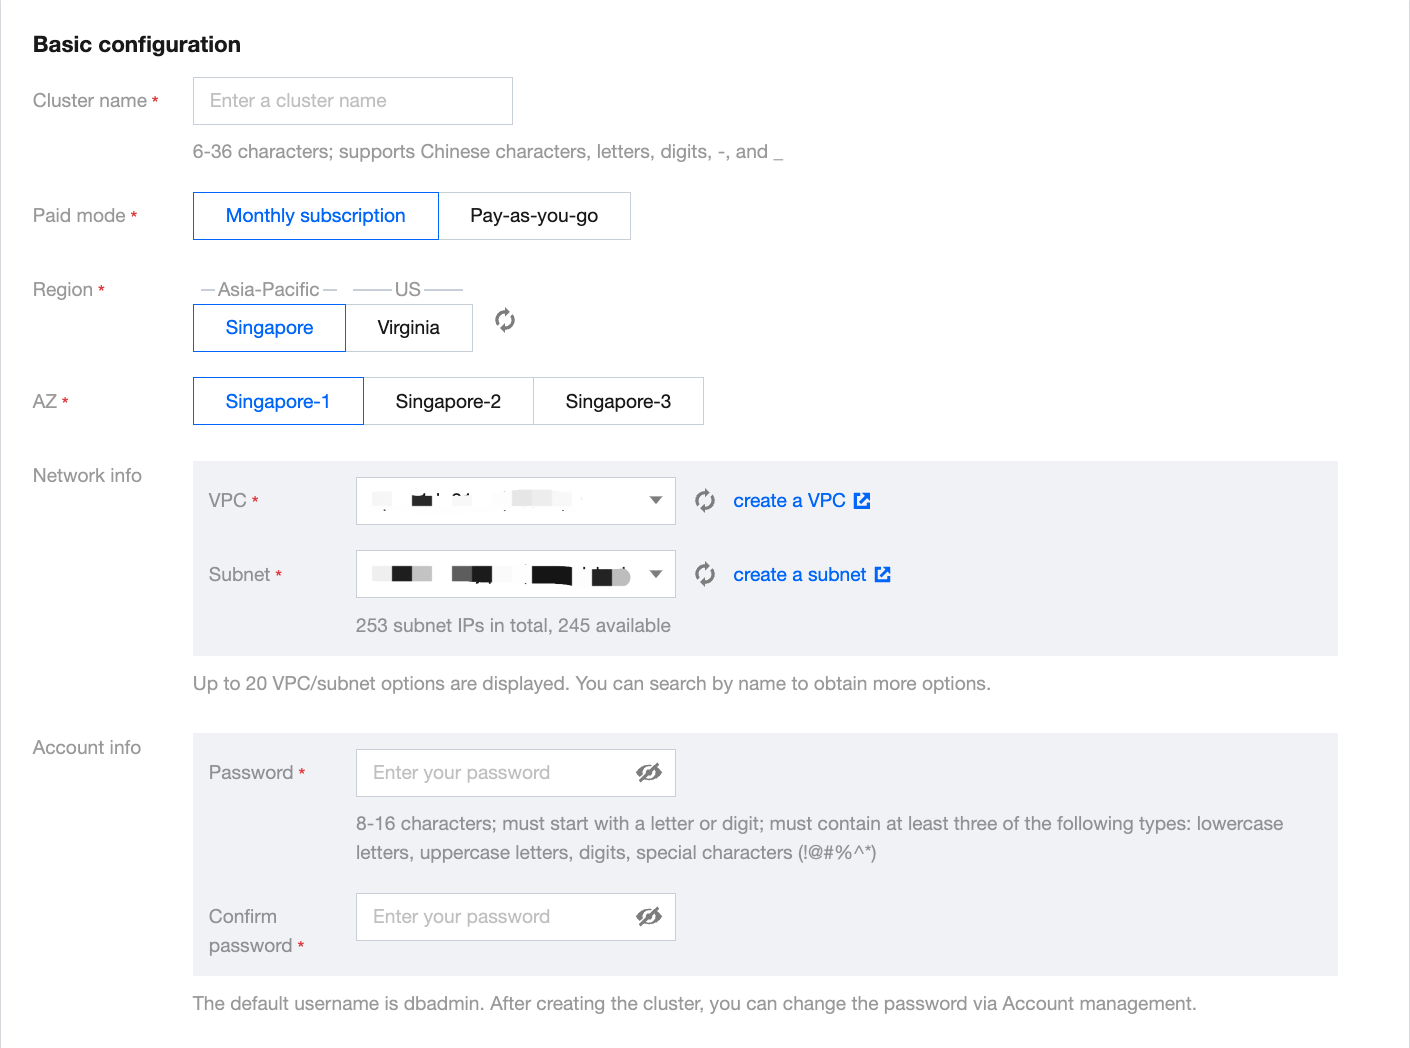
Billing Mode: Monthly subscription and pay-as-you-go billing are supported.
Region: Guangzhou, Shanghai, Beijing, and Singapore regions are supported currently.
AZ: Different AZs are not interconnected.
Network: Configure the VPC and subnet of the Tencent Cloud TCHouse-P cluster as instructed in VPC.For access from other subnets or public network, see Applying for Public IP and Creating IP Allowlist.
Cluster Name: Used to distinguish between clusters.
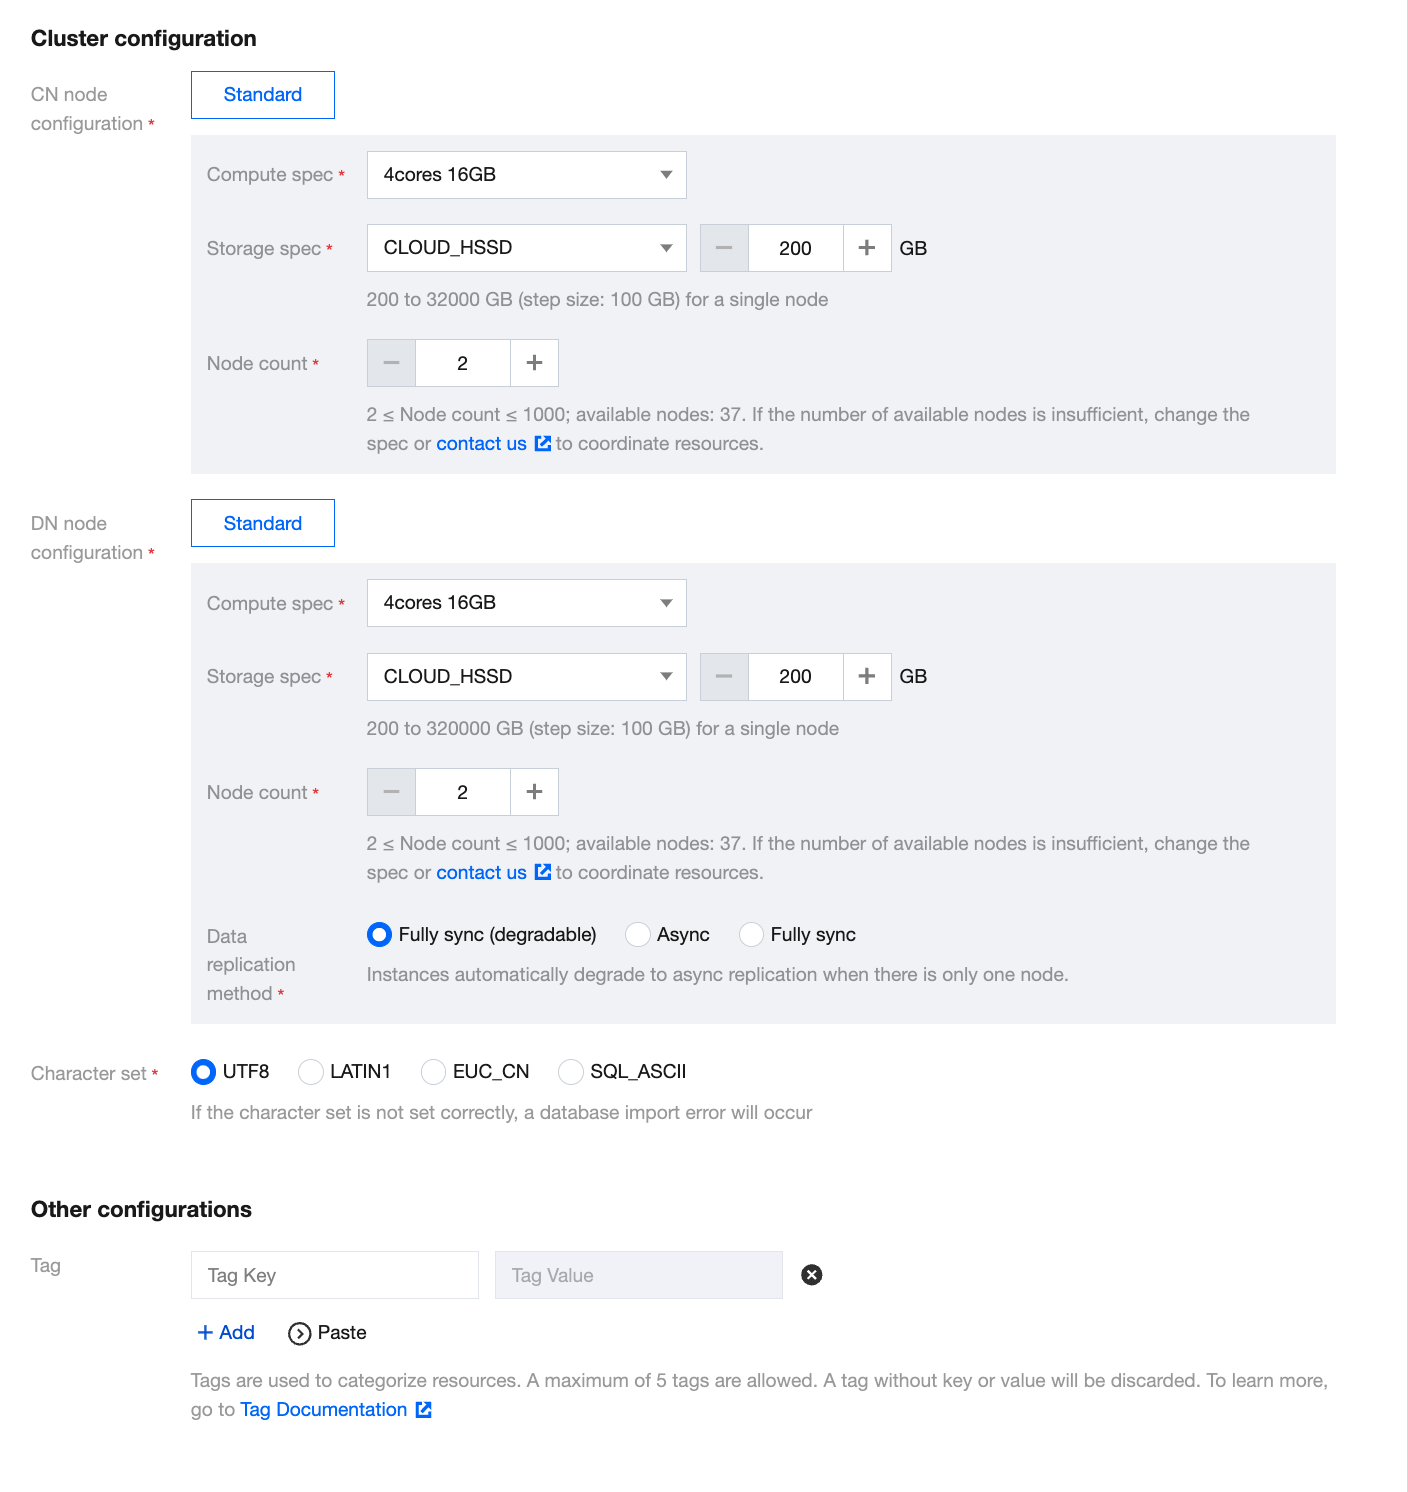
Cluster Version: Versions supported by the cluster.
Node Type: nc.large, nc.4xlarge, nc2.large, nc2.4xlarge, ns.large, and ns2.large are currently available. For more information, see Billing Overview.
Number of Nodes: 2–50 nodes are supported. Generally, two or more (50 at maximum) nodes are required.
Database Port: 5436, which cannot be modified currently.
Username: Username to log in to the Tencent Cloud TCHouse-P cluster, which is the cluster admin account and cannot be changed after creation.
Password: Password to log in to the Tencent Cloud TCHouse-P cluster, which can be changed in the console.
3. After completing the configuration, click Buy Now or Activate to create the cluster.
4. Return to the cluster list and use the cluster after its status changes to Running.