Dynamic devices are supported only on mobile devices (Android, iOS).
1. Creating an Application
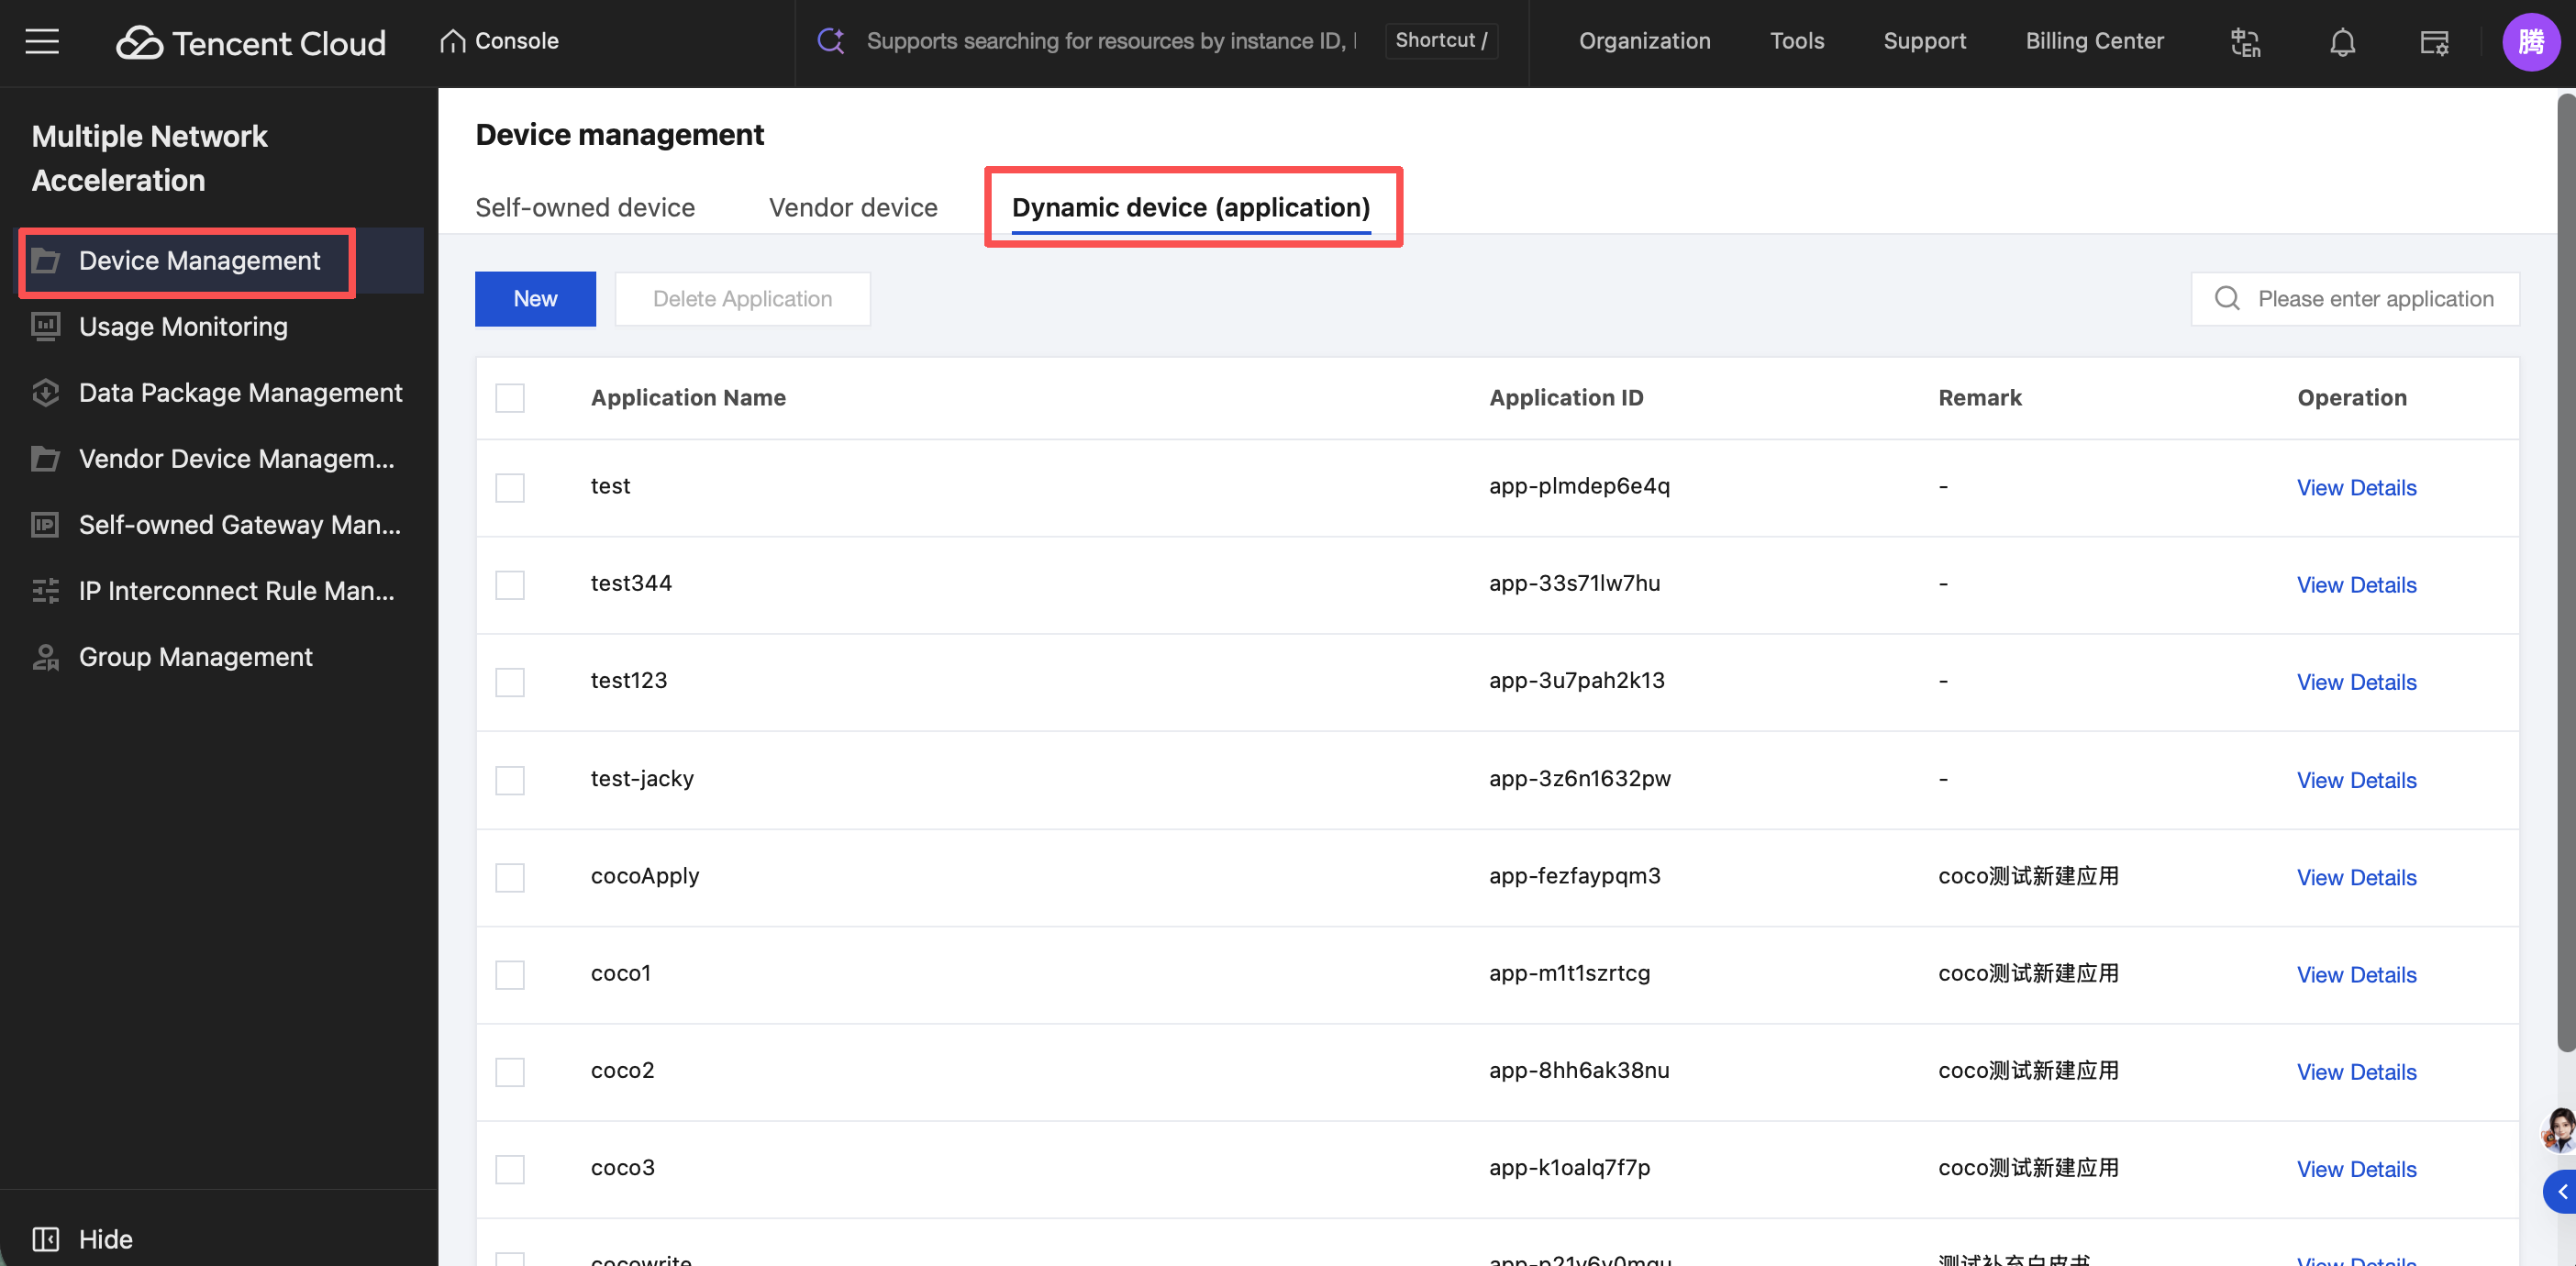
In the left menu bar, click Device Management, select the Dynamic devices (application) list, and go to the Dynamic App Management page.
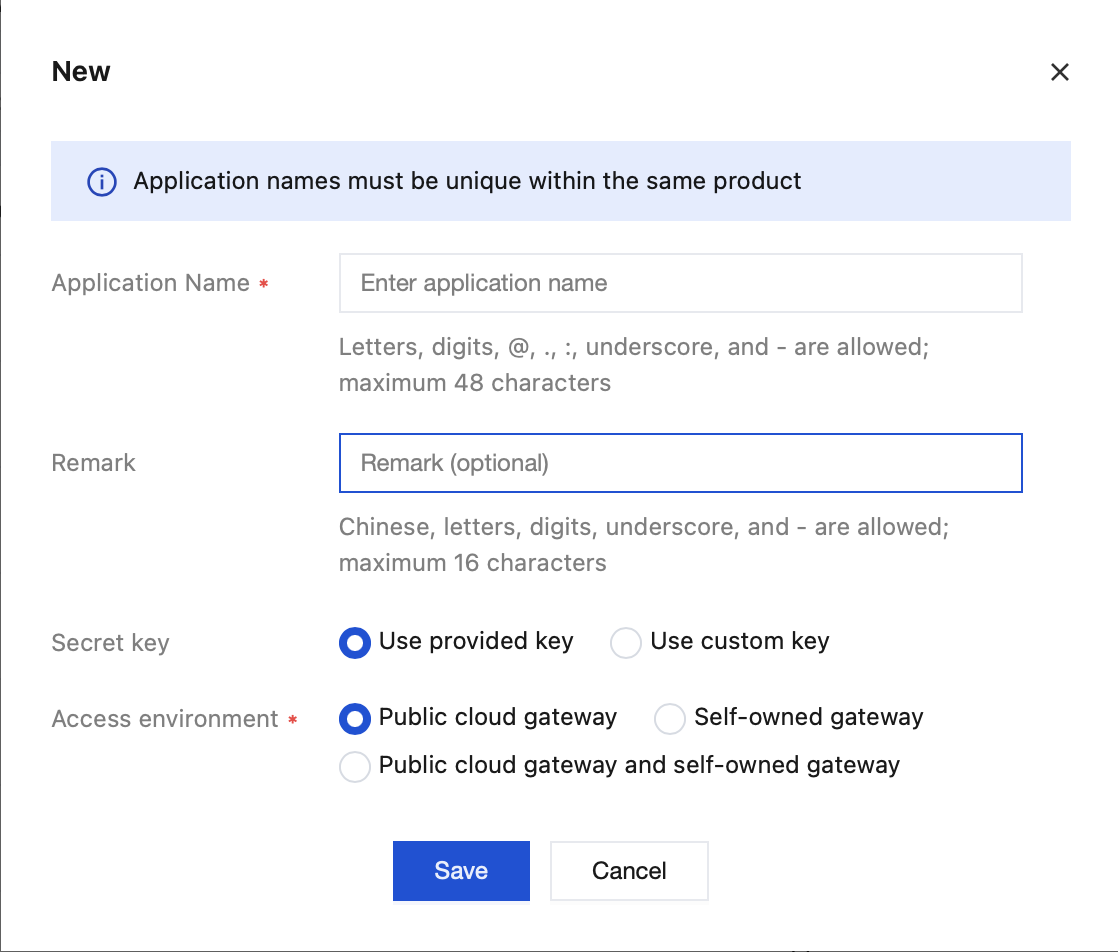
Click New to go to the New Application page. On the page, enter the application name, fill in and configure the information in sequence, and then click Save to successfully create the application.
Note:
Secret key: It is recommended to prioritize selecting Use the Provided Key.
Access environment: Customers can select the gateway type to be accessed.
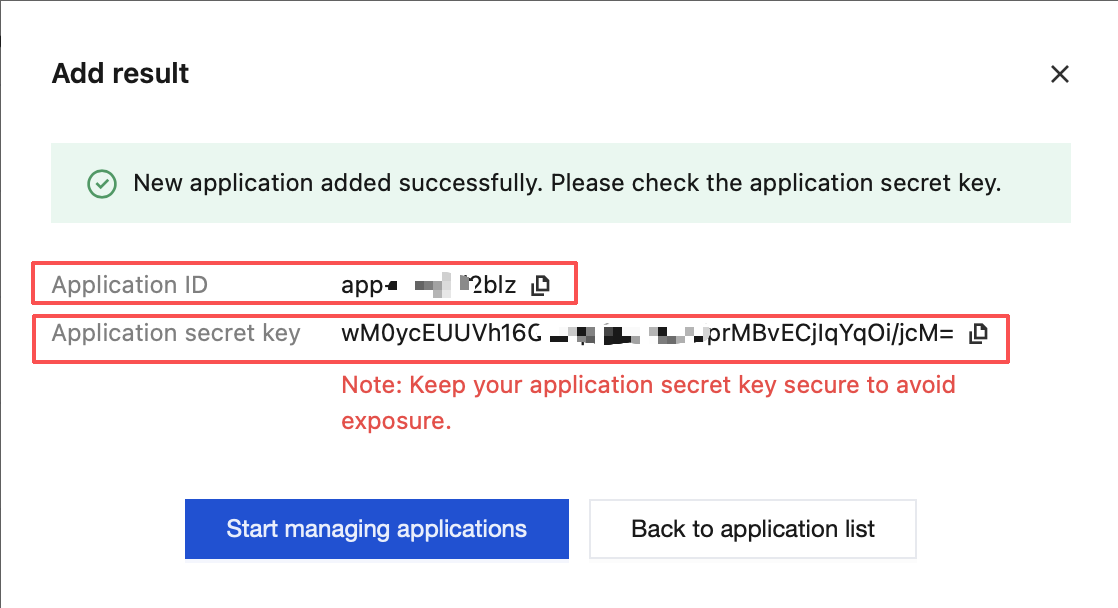
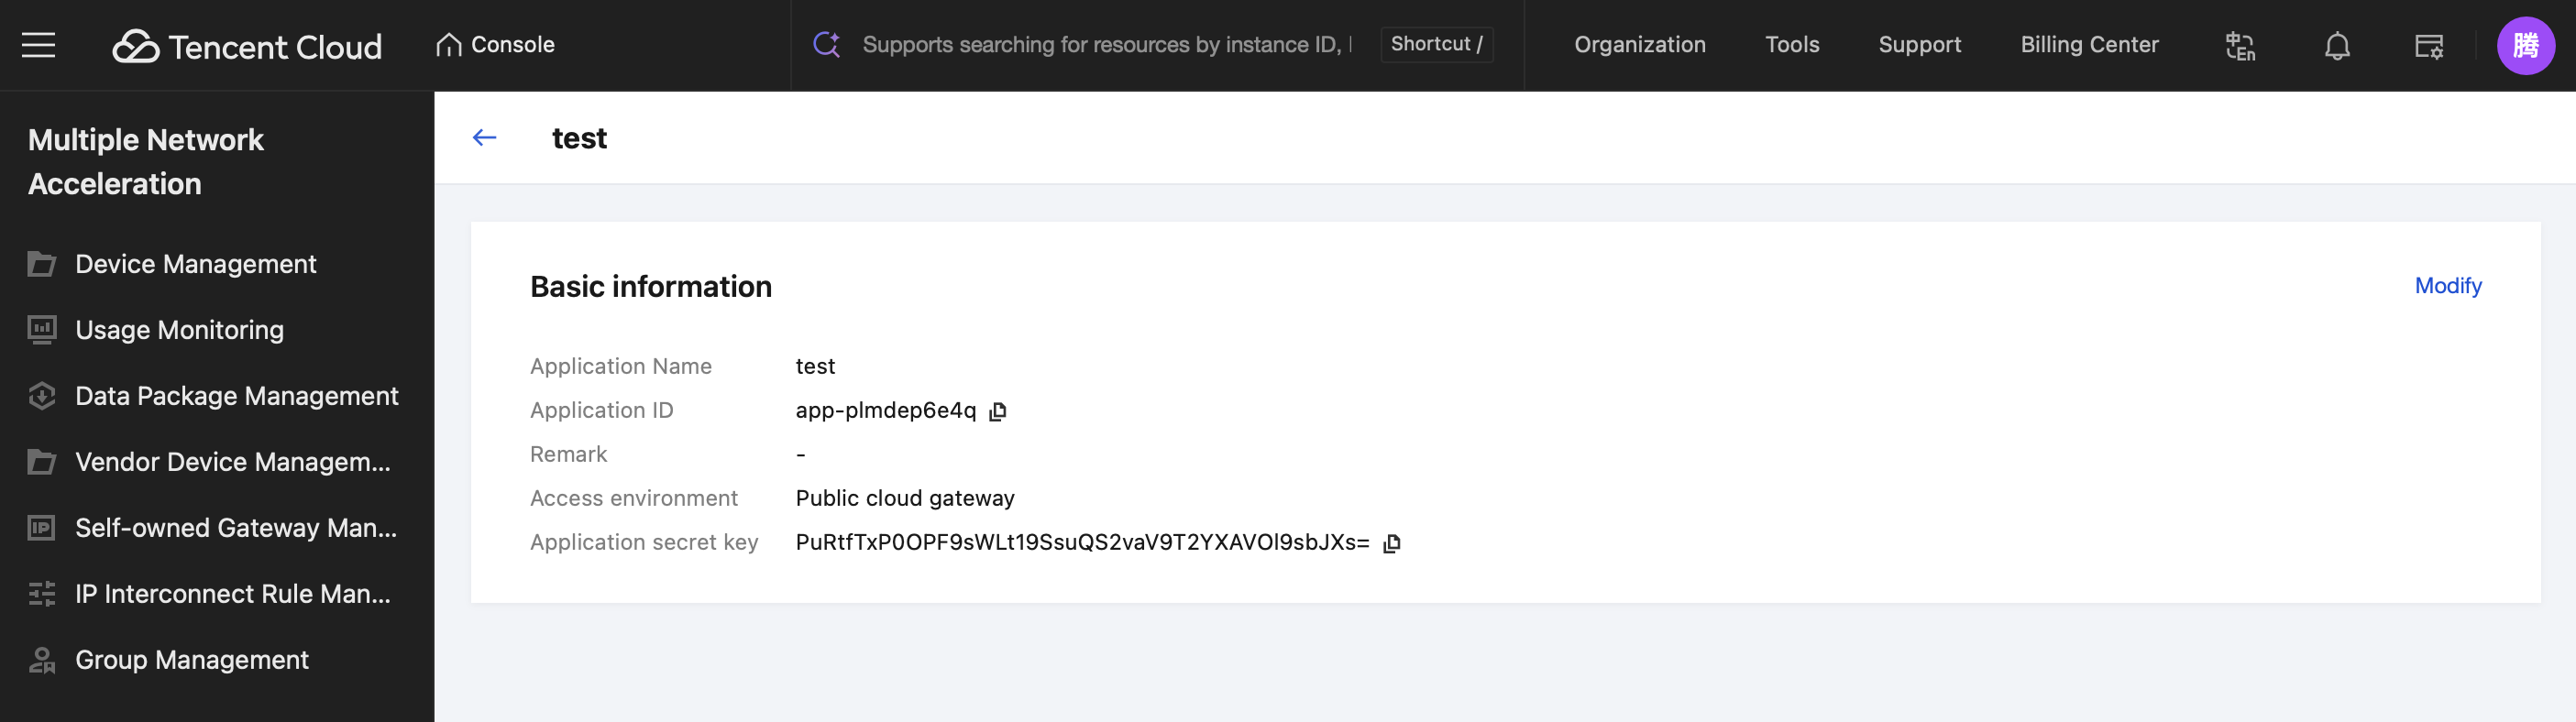
After a device/application is successfully created, its secret key (dataKey) is displayed on the page. Please store this record securely. If it is lost or forgotten later, contact us to retrieve it.
Customers who access through SDK Integration must perform Signature Operations. These operations are available in Java, Objective-C, and Go language versions. Refer to the following sections for details.
Record the application ID and secret key displayed on the console to facilitate the subsequent generation and authentication of Sign signatures for application-created devices.
Generate Sign Signatures for Application-Created Devices.
Generating Sign signatures for application-created devices requires two parameters: the customer-defined unique business control device identifier (deviceName) and the application secret key returned after successful creation in the figure above. Use these two parameters to run the script and complete the generation of Sign signatures for application-created devices.
Java Language
package com.android.tencentvpn.util;
import io.jsonwebtoken.Jwts;
import io.jsonwebtoken.SignatureAlgorithm;
import java.security.Key;
import java.util.Date;
import javax.crypto.spec.SecretKeySpec;
public class SignGenerate{
private static final long EXPIRE_TIME = 72 * 60 * 60 * 1000; // Expiration time, in milliseconds
/**
* @param deviceName The unique identifier for a business-controlled device
* @param SecretKey The application secret key returned by TencentCloud api
* @return The signature string required by the multi-network sdk, which is ultimately invoked via setSign.
*
*/
public static String generateSign(String deviceName, String SecretKey){
try{
Date now = new Date();
Date expireDate = new Date(now.getTime() + EXPIRE_TIME);
Key key =
new SecretKeySpec(SecretKey.getBytes(), SignatureAlgorithm.HS256.getJcaName());
return Jwts.builder()
.claim("deviceName", deviceName)
.expiration(expireDate)
.signWith(key)
.compact();
}catch (Exception e){
e.printStackTrace();
}
return "";
}
}
Objective-C Language
// Add pod 'JWT' to the podfile to integrate the JWT library.
// .h file:
@interface SignGenerator: NSObject
/**
* @deviceName The unique identifier for a business-controlled device
* @param SecretKey The application secret key returned by TencentCloud api
* @return The signature string required by the multi-network sdk, which is ultimately invoked via setSign.
Call the setSign API, passing in the appId (application ID) and sign (signature string) recorded during application creation, to configure application signature authentication for application-created devices.
Note:
1. It is recommended to generate and distribute signatures on the server side to the client. Avoid exposing and storing the application ID, application secret key, and other sensitive information on the device side to mitigate security risks.
2. Strictly maintain a one-to-one correspondence between each physical device and its deviceName. Under the application-based authentication method, device usage monitoring/traffic statistics are obtained using deviceName as the index. Using the same deviceName across multiple devices or using multiple deviceNames for a single device will cause query exceptions.
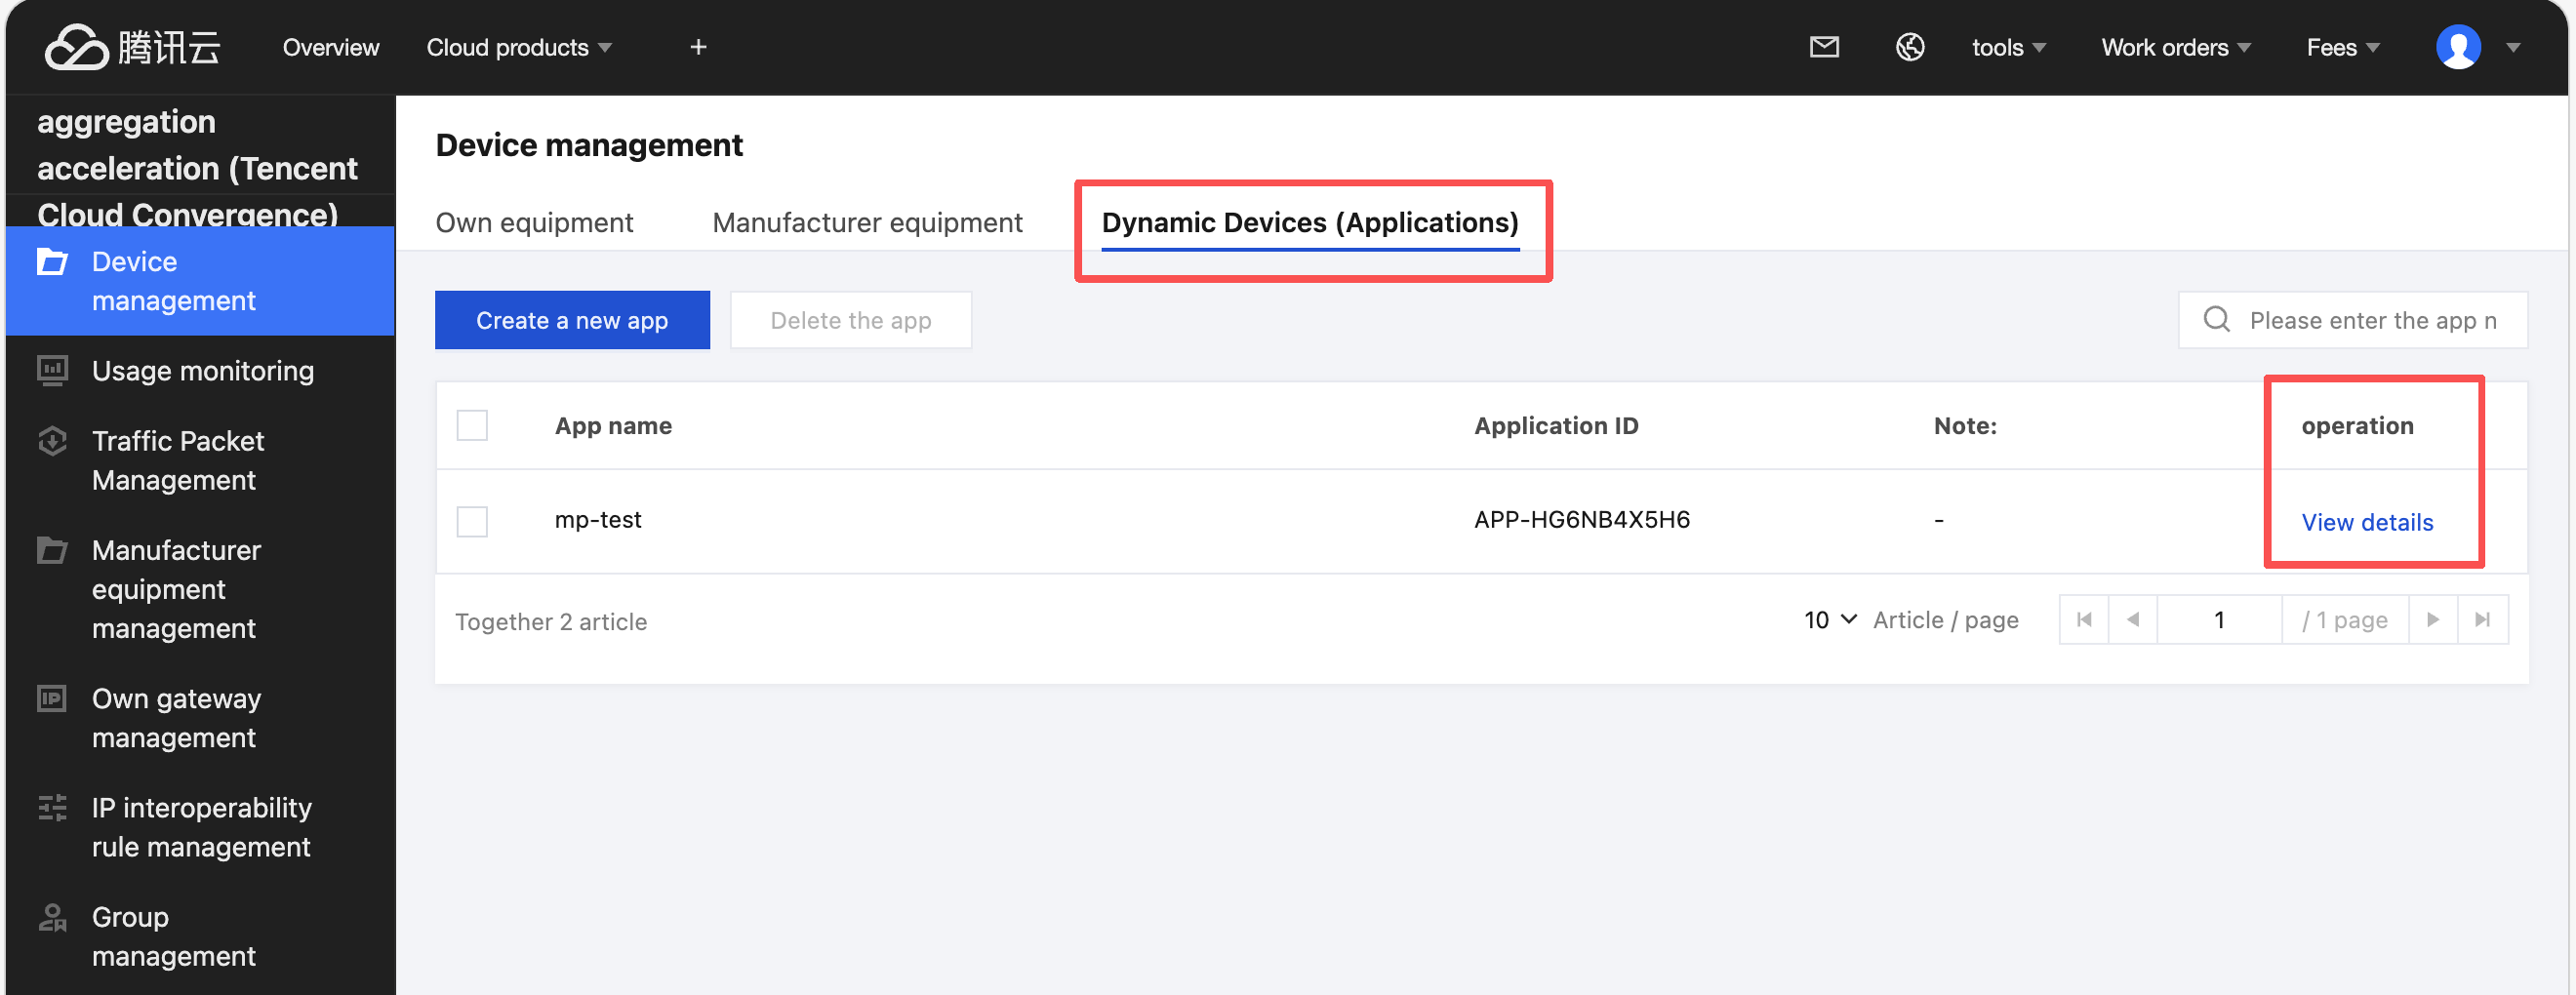
2. Viewing Dynamic Device/Application Details
Click View details to go to the details page of the device/application.
The details page displays device information, related network conditions, aggregated server nodes, uplink/downlink rate statistics, and the data package list.
Go to Device Management > Network Information and click View traffic monitoring. You will be redirected to the real-time traffic monitoring page for that device.
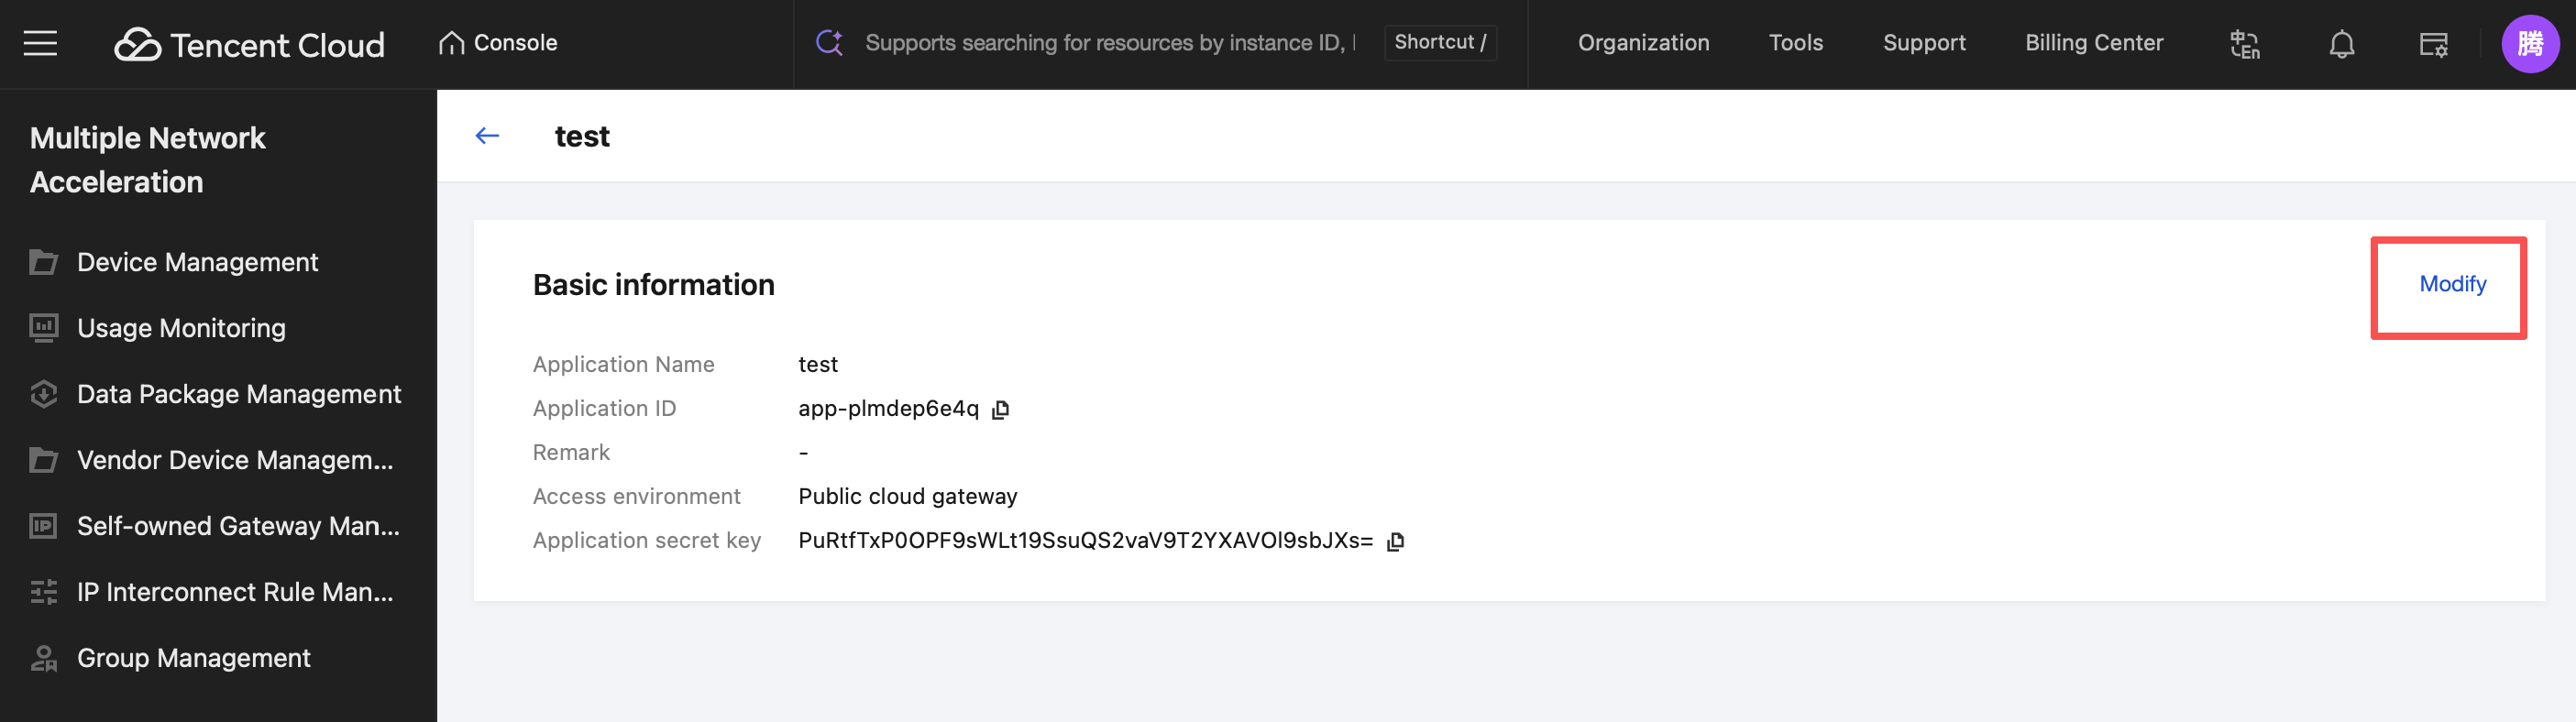
3. Modifying Dynamic Device/Application Information
On the Basic Information card of the application details page, click Modify to edit the device name and remarks fields.
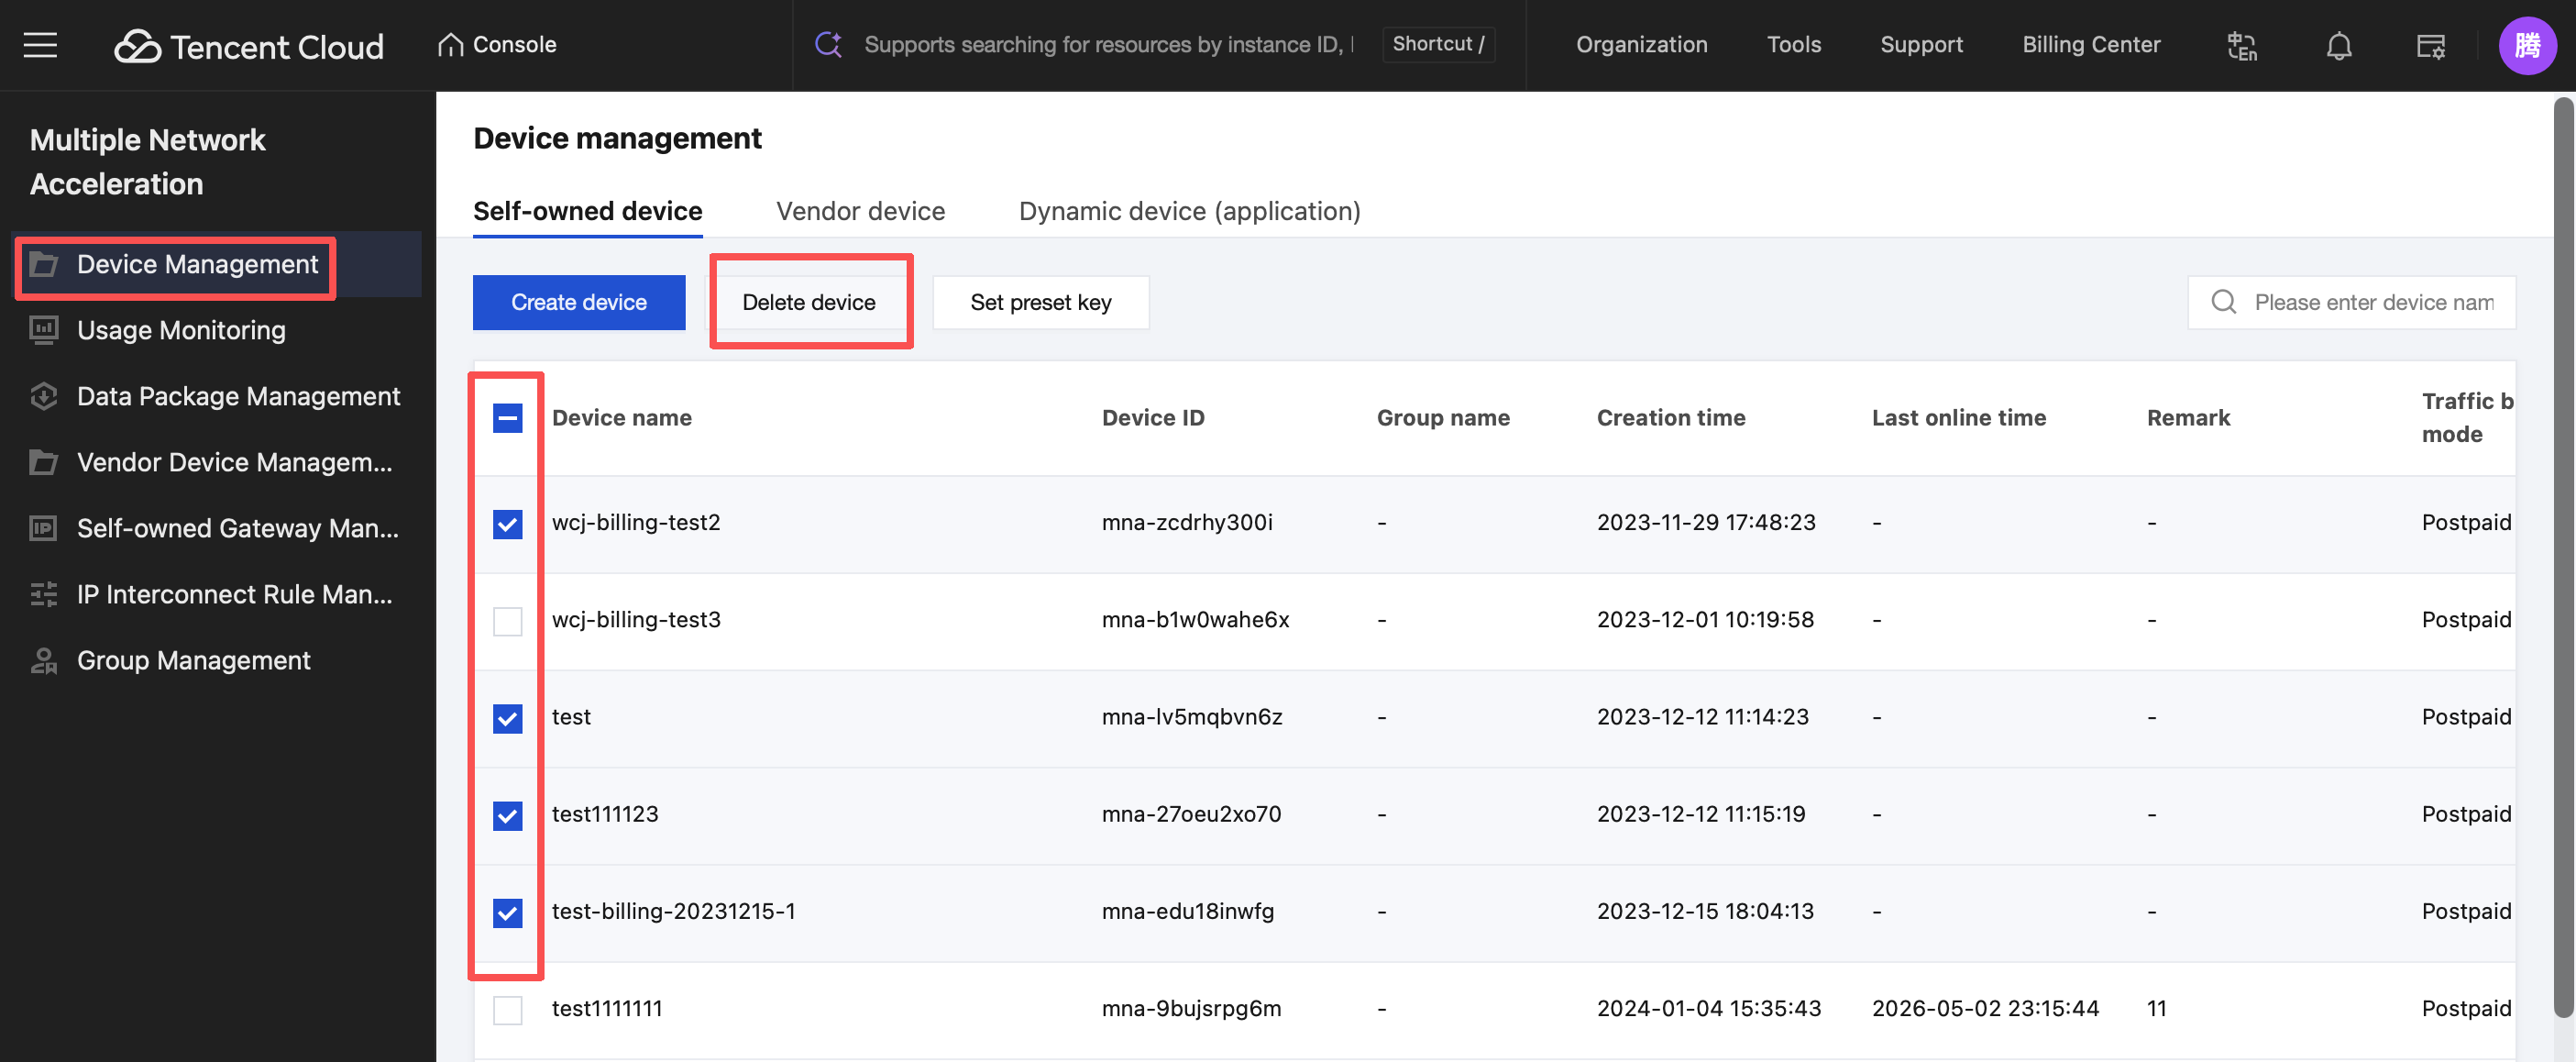
4. Deleting an Application
On the Device Management page, you can delete your devices/applications. The delete operation supports both single and multiple device selection.
Select the checkbox in front of the device you want to delete. At the top of the list, click Delete Device. A secondary confirmation pop-up window will appear. Click Confirm to delete the device.
Note:
After a device/application is deleted, the keys for that device will be invalidated. License fees and traffic charges already incurred will not be waived and will be settled according to the normal billing cycle.
5.Related SDK APIs
5.1 Android SDK
Note:
Complete the environment configuration in advance. MpAccRegister class, setEnv API.
//Context is the ApplicationContext.
MpAccRegister.setEnv(context, 1);
For SDK downloads and detailed documentation, see the API Overview. This section only lists the specific APIs corresponding to the features described in this document.
setSign
Set application signature authentication for application-created devices.a
public static void setSign(String appId, String sign)
Parameter description:
Parameter
Type
Description
appId
String
Application appId
sign
String
Signature string
5.2 iOS SDK
Note:
Complete the environment configuration in advance. During SDK initialization, call MpAccClient.shared.enableOverseas(true) to switch to the international site environment.
funcenableOverseas(enabled:Bool)
For SDK downloads and detailed documentation, see the API Overview. This section only lists the specific APIs corresponding to the features described in this document.
setSign
Set application signature authentication.
funcsetSign(appId:String, sign:String)
Parameter
Description
appId
Application ID
sign
Signature
5.3 Windows SDK
Configuring Acceleration Parameters
Before starting the acceleration process, the vendor must collect the required parameters. These parameters must be provided when the SDK acceleration is started.
appId and appSign: For app mode registration, obtain them from the console.
scheduleMode: The default working mode is RTC.
Call the following interface to configure acceleration parameters (only configuration, no acceleration is started):
curl -X POST "http://127.0.0.1:9801/api/v2/client/mp-speeder" ^