TDMQ for CKafka uses private network transmission by default to achieve lower network latency, higher transmission bandwidth, and better security isolation. When your consumers or producers are located in a self-built data center or another cloud service and cannot communicate directly with the CKafka cluster, you can enable a public network route to achieve cross-network production and consumption. If public network access is enabled, it is recommended that you configure ACL policies to control user access permissions and ensure data security. For specific operations, see Configuring ACL Policies. This document describes how to enable and manage public network access on the TDMQ for CKafka console.
Note:
TDMQ for CKafka has supported the new version of public network access since April 2026. This new version of public network access has been comprehensively upgraded in terms of isolation, security, and public network management capabilities. It supports features such as configuring an IP address allowlist and public network bandwidth specification adjustment.
The creation of legacy public network routes will be discontinued. Existing routing policies for legacy public network access can be used normally and are not affected by the new version of public network. After you unsubscribe from legacy public network access, only the new version of public network access can be enabled.
Constraints and Limitations
TDMQ for CKafka Serverless Edition does not support public network access for now.
Only one public network route can be created for a cluster.
Comparison between the new and legacy versions of public network:
Item
New Public Network Access
Legacy Public Network Access (2022)
Stability
Route-level isolation, with isolation and stability significantly improved.
Isolation capability is weak.
Security
Security is significantly enhanced.
Supports Configuring Security Policies
Supports SASL_PLAINTEXT and SASL_SSL
Supporting SASL_PLAINTEXT and SASL_SSL
Feature completeness
High feature completeness
Supports Enabling and Unsubscribing from Public Network Access
Supports Public Network Bandwidth Specification Adjustment
Supports Route Creation and Deletion, and Security Policy Configuration
Supports Enabling and Unsubscribing from Public Network Access
The Pro Edition only supports public network bandwidth configuration upgrades and does not support configuration downgrades.
Supports Route Creation and Deletion
Observability
The Pro Edition supports monitoring metrics for public network inbound/outbound bandwidth at the instance and node levels
The Advanced Edition supports monitoring metrics at the instance level.
Only the Pro Edition supports monitoring metrics at the node level.
Public network-related monitoring metrics are not supported by the Advanced Edition.
Billing
Supports payment based on monthly or hourly public network bandwidth. The billing mode for public network bandwidth does not change when the instance billing mode is switched.
A free quota of 3 Mbps is not provided. For specific pricing, see Serverful instances.
Supports payment based on monthly or hourly public network bandwidth. The billing mode for public network bandwidth is not affected when the instance billing mode is switched.
A free quota of 3 Mbps is not provided. If you require higher bandwidth, you can purchase it by paying an additional fee.
Operation Steps
New Public Network Routing
Prerequisites
The instance is a Serverful Pro Edition or Advanced Edition.
The instance is not subscribed to or has unsubscribed from the legacy public network access service.
Note:
For instances that have legacy public network routes enabled, first delete the legacy public network routing policy and unsubscribe from legacy public network access. Then you can experience the new public network access capability.
Deleting the public network route will cause load balancing. Proceed with caution.
2. In the left sidebar, click Instance List, click the "ID/Name" of the target instance, and go to the Basic Information page.
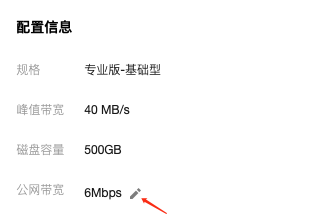
3. On the Instance Basic Information page, configure the information card and click "Enable" next to Public Network Access.
4. In the pop-up window, enable the public network access switch and select the billing mode and public network bandwidth.
5. Click Submit to complete the activation of public network access.
Note:
After you enable public network access, the system allocates resources and starts public network billing. Even if you enable public network access but do not create a public network routing policy, you will still be charged normally.
2. In the left sidebar, click Instance List, click the "ID/Name" of the target instance, and go to the Basic Information page.
3. On the Instance Basic Information page, click Add a routing policy in the Access Method module.
4. In the pop-up window, select Public domain name access as the route type. The access method supports SASL_PLAINTEXT and SASL_SSL. Configure a security policy.
2. In the left sidebar, click Instance List, click the "ID/Name" of the target instance, and go to the Basic Information page.
3. In the Access Mode module, click Delete in the Operation column of the public network bandwidth you want to delete, then select the execution time in the pop-up window.
Execution Time: Supports immediate execution and custom execution.
Right now: The public network route will be deleted immediately.
Custom time: Schedule the deletion (you can select any time within the next 24 hours). The public network route will enter a pending deletion state. You can modify the scheduled deletion time in the Operation column.
Whether to unsubscribe public network bandwidth simultaneously: Only public networks billed by the hour support scheduled route deletion and simultaneous unsubscription of public network access.
Disabling Public Network Access
Note:
Before disabling public network access, you need to Delete Public Network Route first.
2. In the left sidebar, click Instance List, click the "ID/Name" of the target instance, and go to the Basic Information page.
3. On the Instance Basic Information page, click "Disable" next to Public Network Access in the configuration information card.
Legacy Public Network Routing
Starting from January 7, 2022, the subscription method and subscription mode for public network bandwidth are adjusted in CKafka. New users can purchase public network bandwidth when purchasing instances. The postpaid by hour billing mode is still used for existing instances that can be upgraded.
You can click the following tags to view the subscription methods and relevant operation methods for old and new instances.
2. In the left sidebar, click Instance List, click the "ID/Name" of the target instance, and go to the Basic Information page.
3. On the Instance Basic Information page, click Add a routing policy in the Access Method module.
4. In the pop-up window, select Public domain name access as the route type. The access method supports SASL_PLAINTEXT and SASL_SSL. Enter remarks.
5. Click Submit to complete the public network route creation. You can obtain the public network access point information in the Network column, which is used to connect to the cluster for message production and consumption.
6. Click View All IPs and Ports in the Operation column to view the list of IP addresses and ports that need to be allowed.
Note:
If your server has access restrictions (security groups) configured, open the port range 50000 - 53000 on the server. Ports may change after cluster configuration adjustments or migrations, and the actual public network communication IP addresses may also change (while the access point address remains unchanged). Therefore, do not only add the IP addresses and ports from the current list to avoid business exceptions after configuration adjustments or migrations.
Currently, it is not supported to downgrade the public network bandwidth in the console. Purchase with caution. If you indeed need to downgrade it, submit a ticket to consult.
If you have purchased a Pro Edition instance, purchasing a higher specification of public network bandwidth at an additional cost is supported. Currently, two purchase entries are supported:
Entry 1: Purchase public network bandwidth directly in the Network Configuration module while purchasing an instance.
Either monthly bandwidth or hourly bandwidth is supported in yearly/monthly subscription instances, while the hourly bandwidth is only supported in postpaid by hour instances.
Entry 2: If you did not purchase public network bandwidth when buying the instance, you can perform configuration upgrades in the Public Network Billing Information module after enabling the public network route. The specific steps are as follows:
2. In the left sidebar, click Instance List, click the "ID/Name" of the target instance, and go to the Basic Information page.
3. In the Access Mode module, click Delete in the Operation column of the public network bandwidth you want to delete, then select the execution time in the pop-up window.
Execution Time: Supports immediate execution and custom execution.
Right now: The public network route will be deleted immediately.
Custom time: Schedule the deletion (you can select any time within the next 24 hours). The public network route will enter a pending deletion state. You can modify the scheduled deletion time in the Operation column.
Whether to unsubscribe public network bandwidth simultaneously: Only the hourly billing mode supports unsubscribing from public network bandwidth.
Unsubscribing from Public Network Bandwidth.
Note:
When there are no public network routes under the instance, you can unsubscribe from the public network bandwidth. Before unsubscribing, you need to delete the public network routes.
2. In the left sidebar, click Instance List, click the "ID/Name" of the target instance, and go to the Basic Information page.
3. On the Instance Basic Information page, click Unsubscribe next to the public network bandwidth in the Public Network Billing Information module.
4. In the pop-up window, click Submit to complete unsubscription from the public network bandwidth. After unsubscription, the bandwidth will no longer be charged.
2. In the left sidebar, click Instance List, and click ID/Name of the target instance to go to the basic information page.
3. On the basic instance information page, click Add a routing policy in the Access Method module.
4. In the pop-up window, select Public Domain Name Access as the route type. Select your desired size of the public network bandwidth, and click Submit to complete the purchase.
Adjusting the Public Network Bandwidth
Note:
Billing of the public network bandwidth is settled hourly. If the network bandwidth is changed multiple times within 1 hour, billing will be based on the highest bandwidth.
2. In the left sidebar, click Instance List, and click ID/Name of the target instance to go to the basic information page.
3. In the Access Mode module, click Delete in the Operation column of the public network bandwidth you want to delete, then select the execution time in the pop-up window.
Execute: The public network route will be deleted immediately.
Custom time: Schedule the deletion (you can select any time within the next 24 hours). The public network route will enter a pending deletion state. You can modify the scheduled deletion time in the Operation column.