Configuring Loglistener Heartbeat Monitoring Alarms
Download
포커스 모드
폰트 크기
Monitoring and alarms ensure the reliability and availability of your business when you use CLS.
This document primarily illustrates how to configure the CLS LogListener heartbeat alarm policy, enabling users to promptly detect exceptions at the LogListener collection end.
Step 1: Creating an Alarm Policy
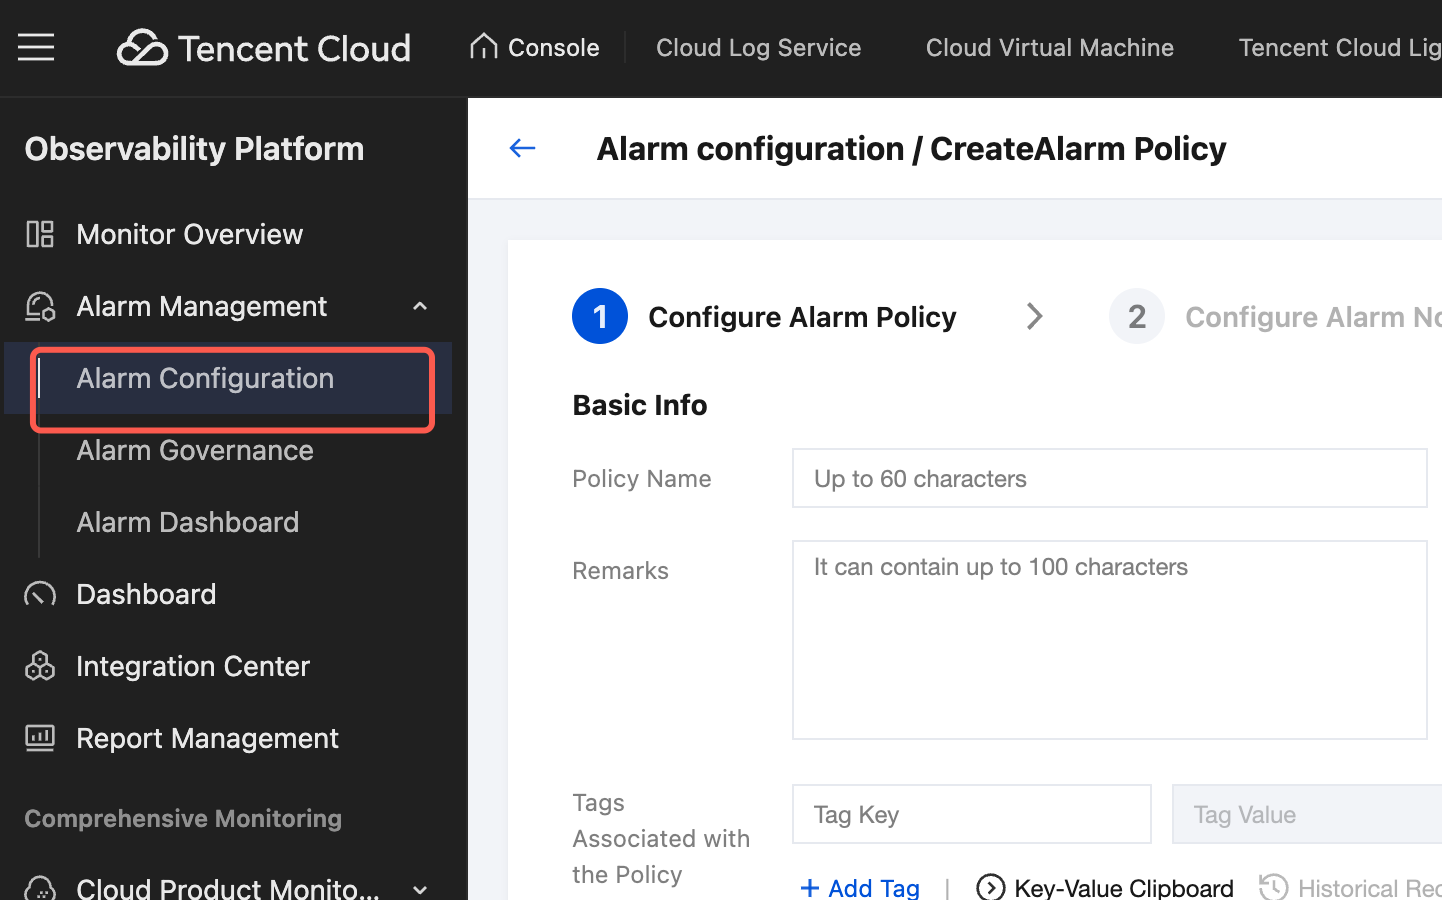
1. Log in to TCOP. In the left-side menu bar, choose Alarm Management > Alarm Configuration to go to the Alarm Policy page.
2. Click Create Policy to go to the Create Policy page. Then, configure the policy type, alarm object, conditions, and recipients.
Policy Name: Define a custom name for the policy.
Remarks: Add custom remarks for the policy.
Monitoring Type: Select Cloud Product Monitoring.
Policy Type: Search for and select Cloud Log Service / Machine Group.
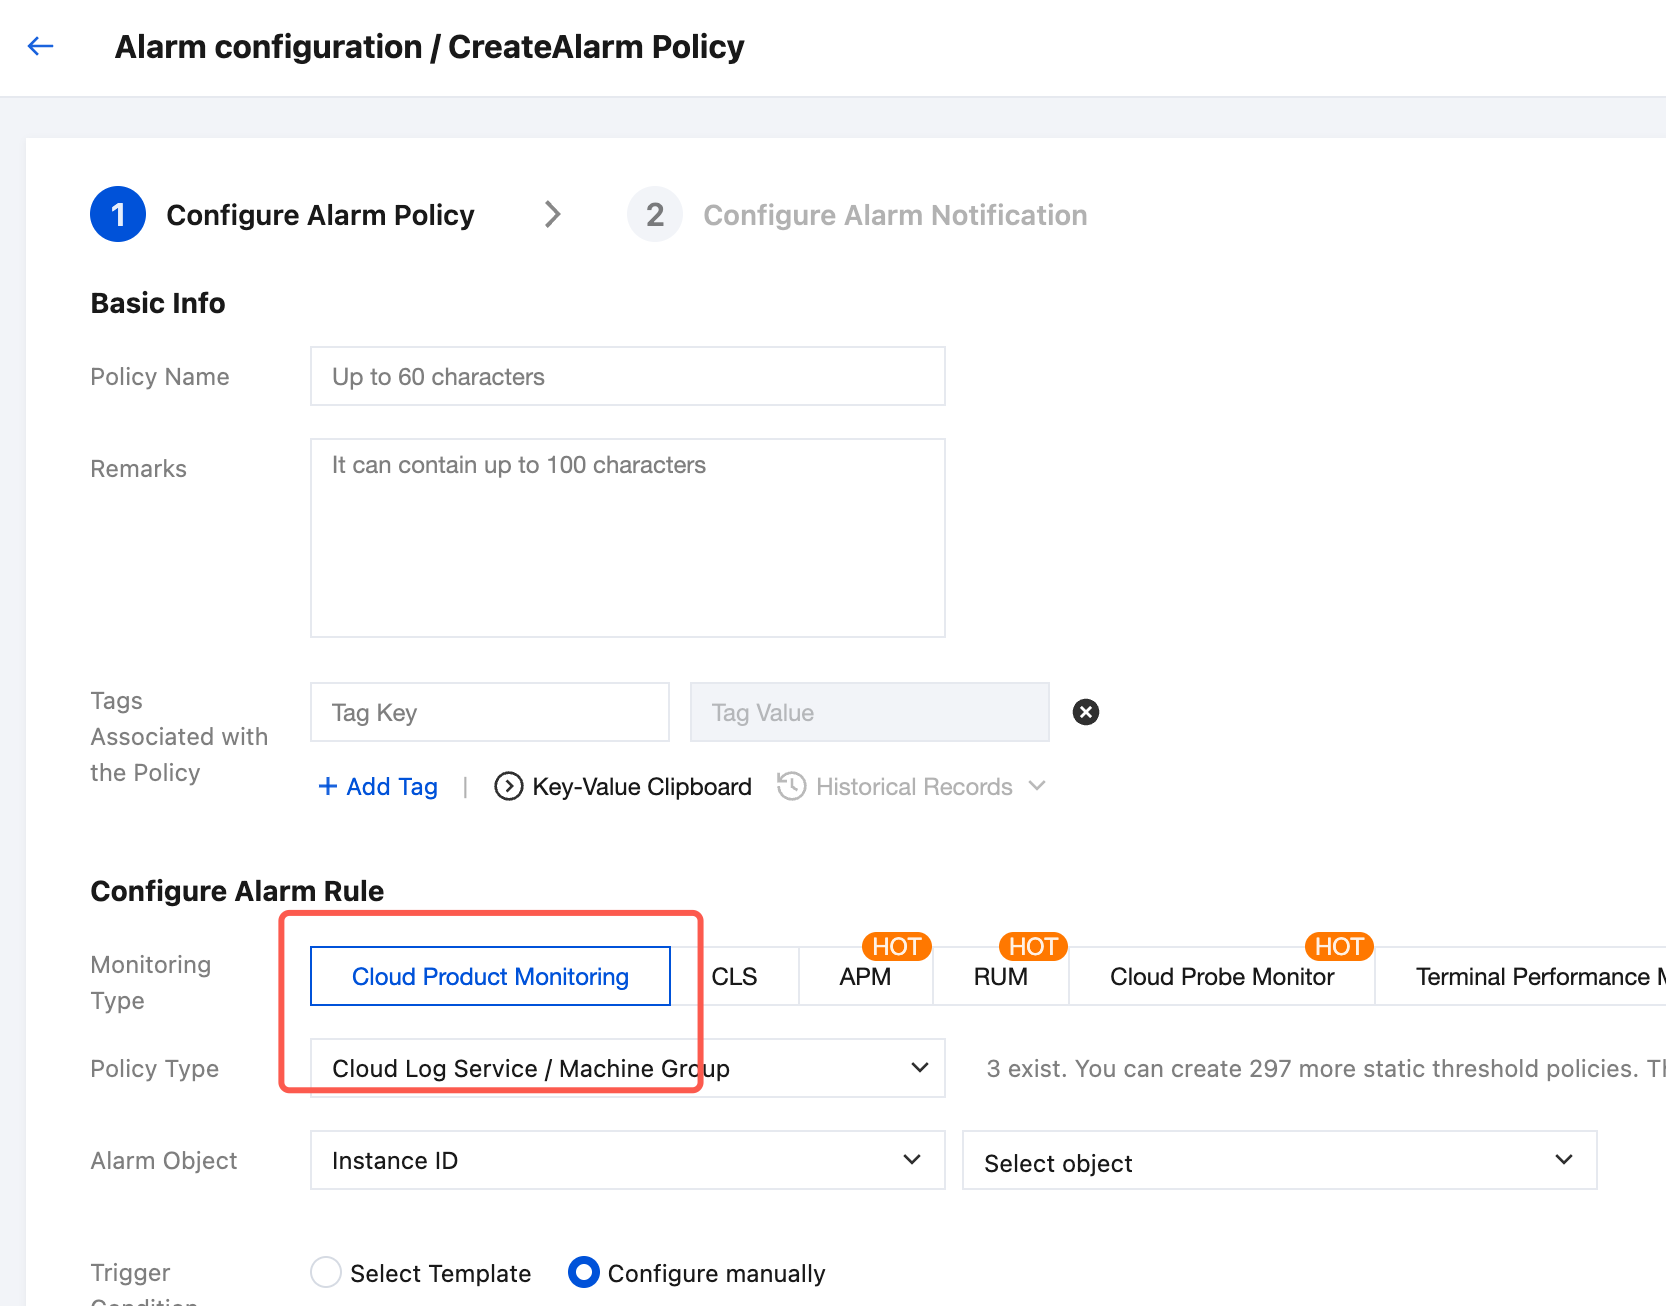
Tag: Select tags for the policy to facilitate tag-based management. You can associate multiple tags with a single policy. To create a tag, see Creating Tags.
Alarm Object: You can filter alarm objects by instance ID, instance group, or all available objects.
Instance ID: Filter target alarm objects based on machine group ID.
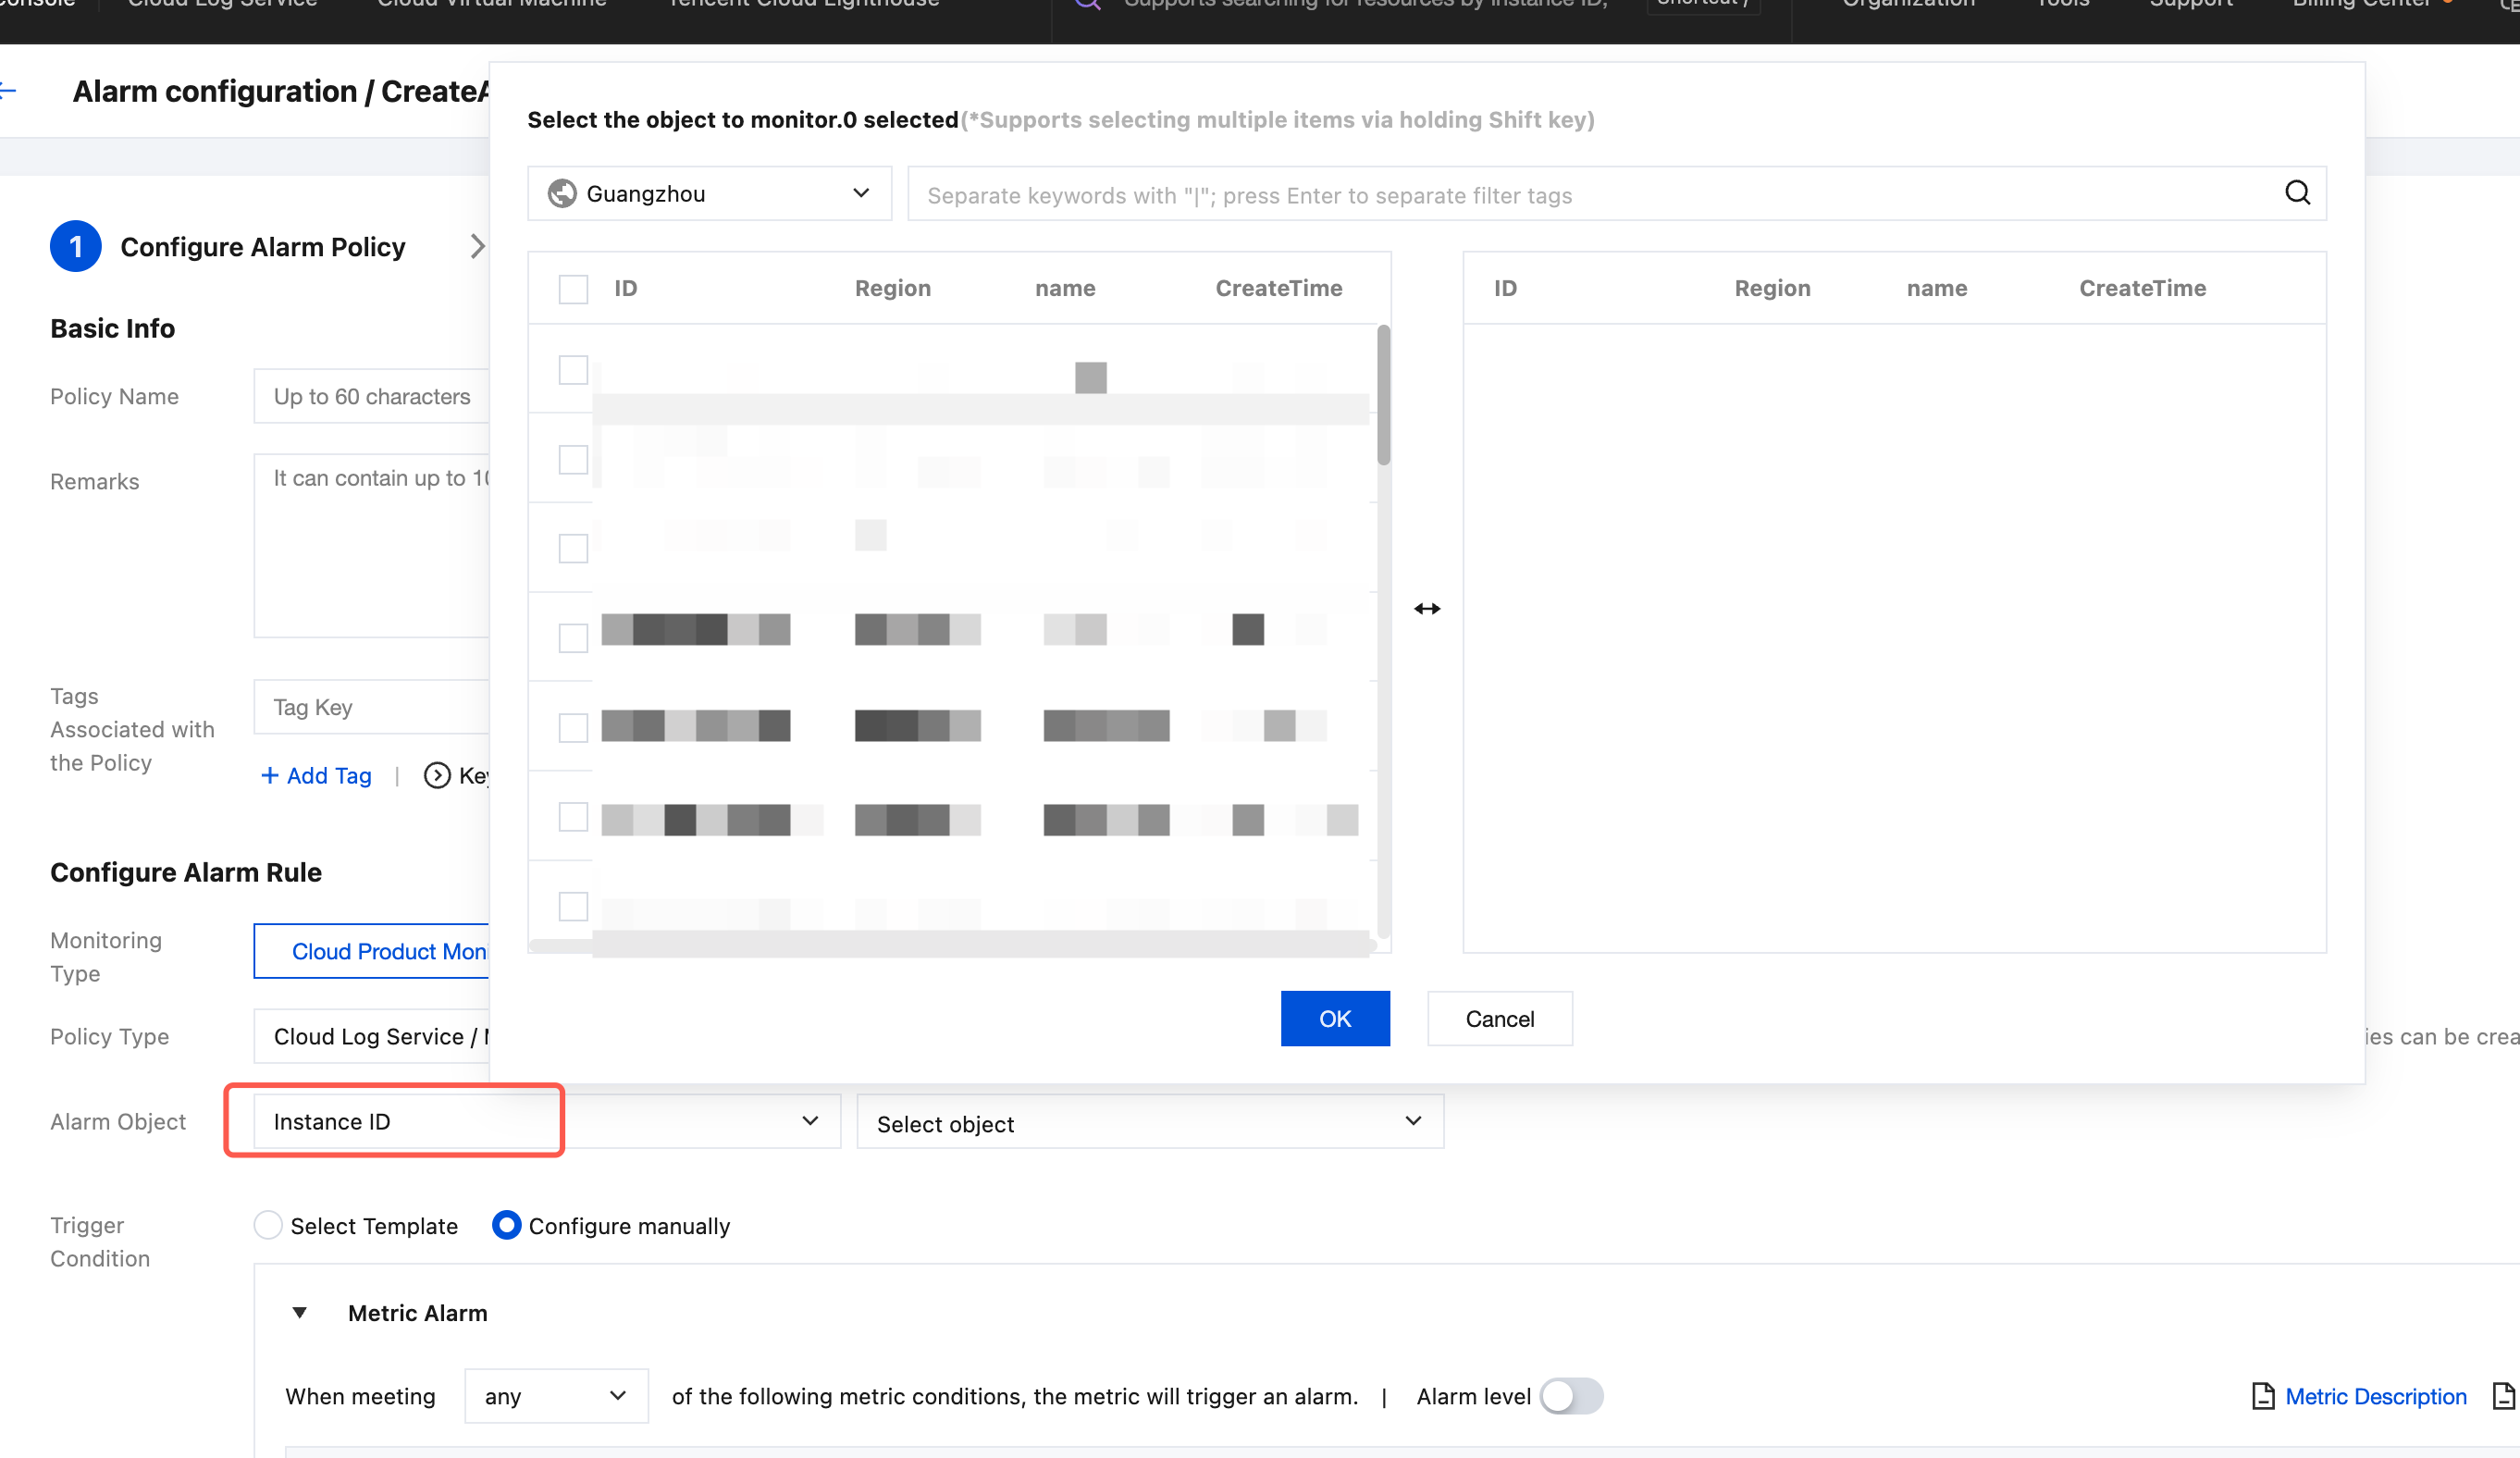
Instance Group: Filter target alarm objects based on machine group classifications. You can also create instance groups.
All Objects: Use all your machine groups as alarm objects.
Configure alarm trigger conditions:
CLS reports the number of abnormal/normal heartbeats from machine groups to TCOP. After you select the monitoring type and policy type, the system automatically configures the commonly used trigger criteria for the alarm policy of the corresponding cloud product.
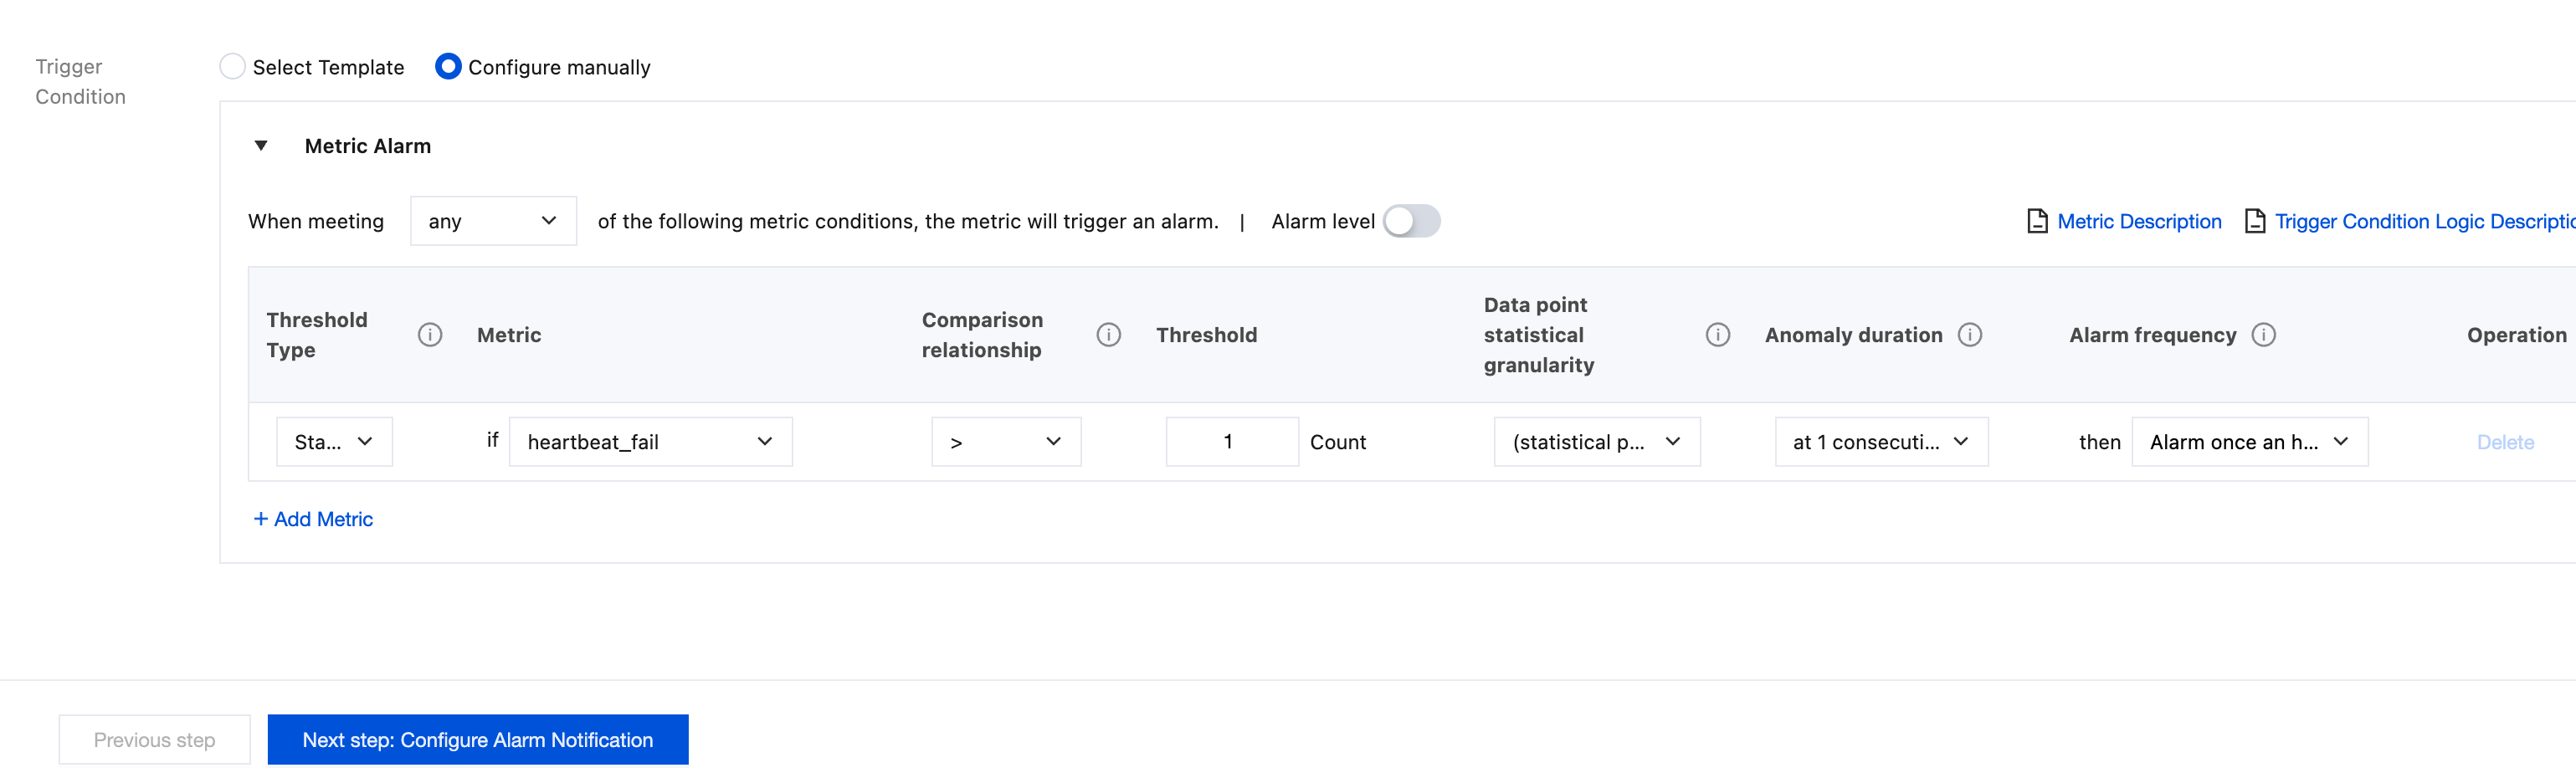
Example 1: An alarm is triggered when the number of abnormal heartbeats >= 1 and persists for 2 data points (with a statistical granularity of 1 minute). The alarm policy is set to trigger an alarm every five minutes. The configuration is shown in the following figure:

Example 2: An alarm is triggered when the number of normal heartbeats < 100 and persists for 2 data points (with a statistical granularity of 1 minute). The alarm policy is set to trigger an alarm every five minutes. The configuration is shown in the following figure:

3. After the configuration is completed, click Next: Configure Alarm Notification.
Step 2: Configuring an Alarm Notification
You can select an existing notification template or create a new one to receive alarm messages. For instructions on creating a template, see Creating a Notification Template. After completing the configuration, click Complete.
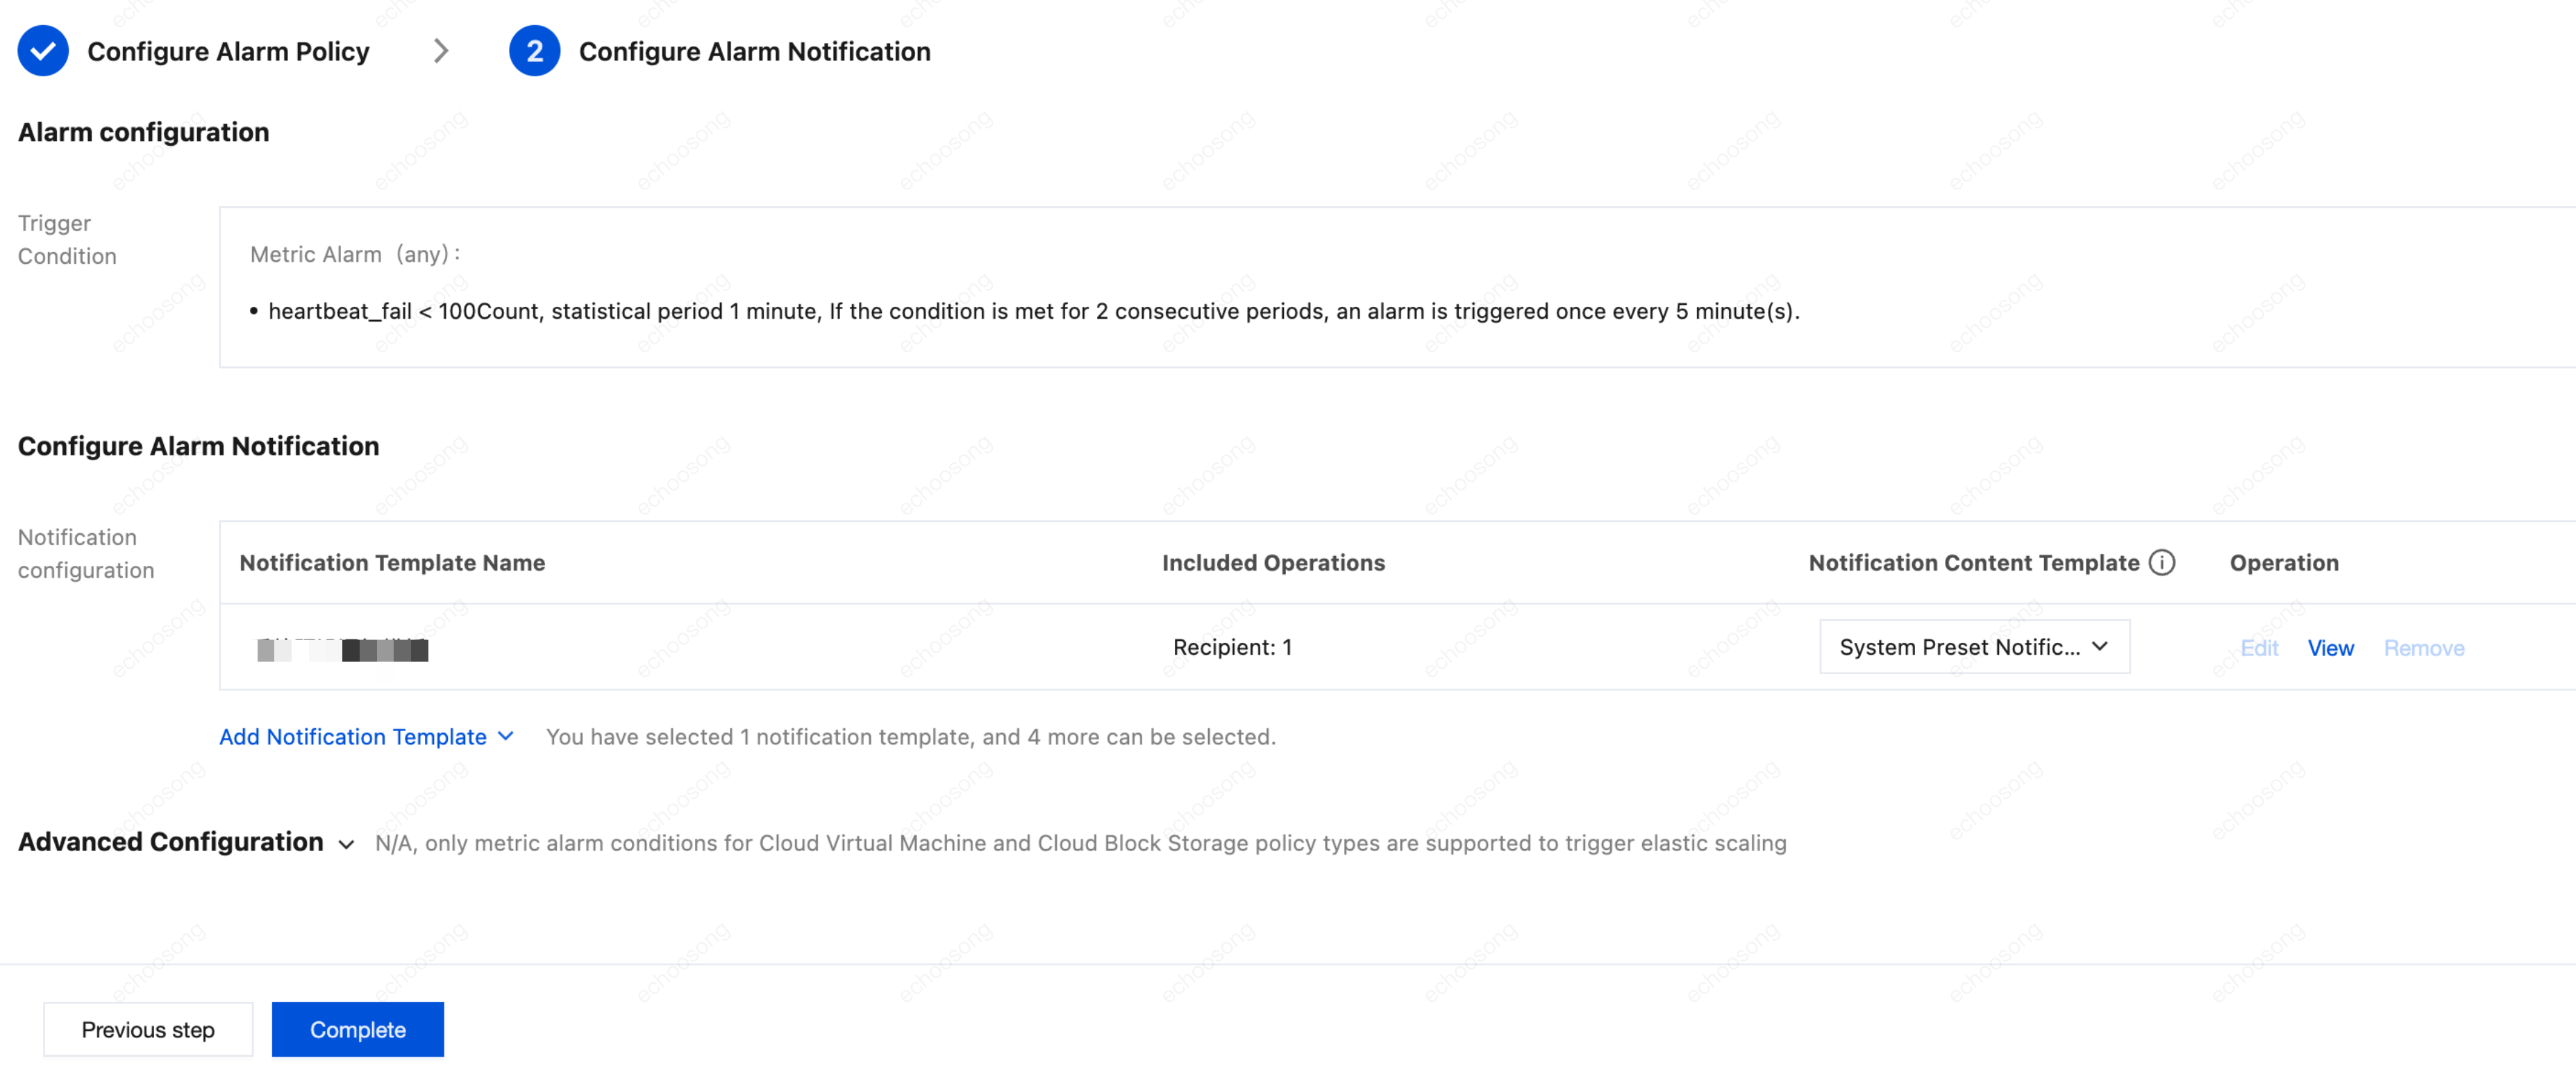
Note:
The alarm channel specifies alarm contacts (or a recipient group). Alarm messages can be received normally only if the recipient's phone number and email address have been verified.
Step 3: Receiving an Alarm
Tencent Cloud monitors according to the configured alarm policy. When the trigger conditions are met, alarm messages will be sent through the specified alarm channel.
Step 4: Viewing the Alarm History
1. Log in to the TCOP Console.
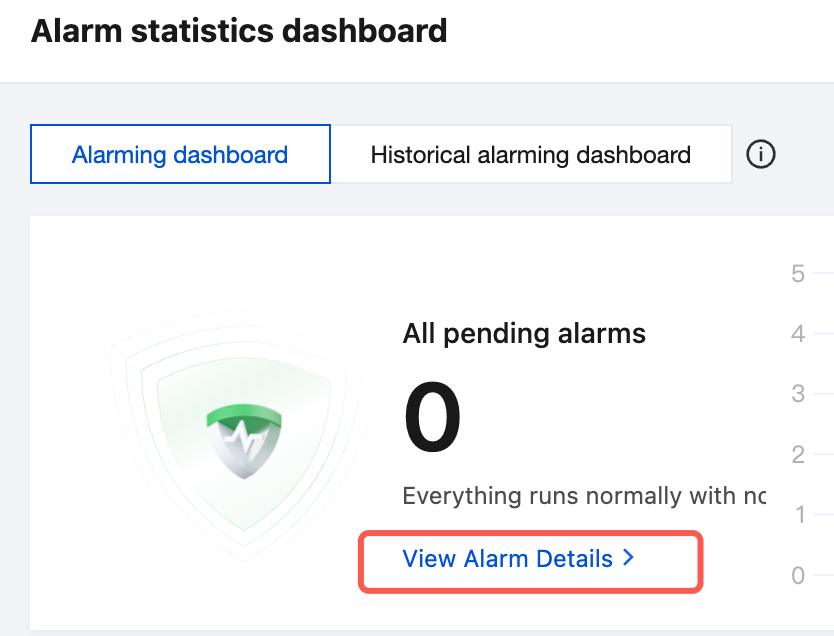
2. Click Alarm Management > Alarm statistics dashboard in the left menu bar to view the alarm dashboard. In View Alarm Details, you can view historical information about triggered alarms, including details such as the start time and duration of the alarm.
피드백