Adding IPs to an Allowlist
Baixar
Modo Foco
Tamanho da Fonte
This document will provide you with a detailed guide on how to add Tencent CSC's monitoring IP to the allowlist.
Operation scenarios
CSC uses simulated hacker intrusion attacks for public network asset discovery and risk monitoring. If your server is equipped with security protection or monitoring deployment (such as WAF), it's recommended to add Tencent Cloud CSC's monitoring IP to the allowlist, enabling scan access permission to ensure the normal operation of the monitoring service. CSC scanning node IPs are:
129.211.162.110
129.211.162.87
129.211.163.253
129.211.164.19
129.211.166.123
129.211.167.182
129.211.167.200
129.211.167.70
129.211.162.158
129.211.162.23
129.211.166.134
129.211.167.108
129.211.167.181
129.211.166.142
129.211.166.163
129.211.167.128
129.211.167.166
43.139.244.231
43.139.243.246
119.28.101.45
119.28.101.51
150.109.12.53
129.226.197.194
129.226.197.196
129.226.197.199
129.226.197.200
129.226.197.201
129.226.197.204
129.226.197.205
129.226.197.207
129.226.197.209
129.226.197.21
43.134.229.58
101.33.220.146
182.254.192.73
175.178.79.94
106.55.172.224
119.91.226.99
43.139.53.159
106.55.100.23
106.53.104.226
123.207.45.218
43.136.98.102
43.139.150.105
175.178.22.156
122.152.222.70
159.75.140.45
193.112.176.100
43.136.103.134
101.33.244.20
114.132.180.83
159.75.80.121
43.136.56.35
106.52.219.11
42.193.249.24
43.136.123.68
123.207.72.172
43.139.233.146
119.91.227.203
175.178.108.10
43.136.85.179
111.230.104.109
119.91.226.24
119.91.48.196
101.33.203.139
134.175.222.22
175.178.72.188
175.178.90.4
119.29.244.62
123.207.72.179
175.178.79.108
111.230.243.60
43.138.175.184
134.175.53.125
43.139.204.202
122.152.233.202
175.178.176.234
43.139.244.105
43.139.188.254
159.75.154.2
106.52.244.65
43.138.233.4
159.75.110.155
134.175.248.145
If your website requires log in to access, you must first lift the security policy (i.e., ensure all IPs can access), and then reinstate the restriction once your cookie validity verification passes.
Operation step
Note
Applicable for Tencent Cloud WAF. If you're using another WAF product, please add it yourself.
Purchased WAF .
You have added a protected domain name and connected it normally. The domain name is under normal protection, and the BOT management rules are enabled. For details, see Quick Start.
Method 1: allow IPs through IP query
1. Log in to the WAF Console, and in the left sidebar, click IP Lookup.
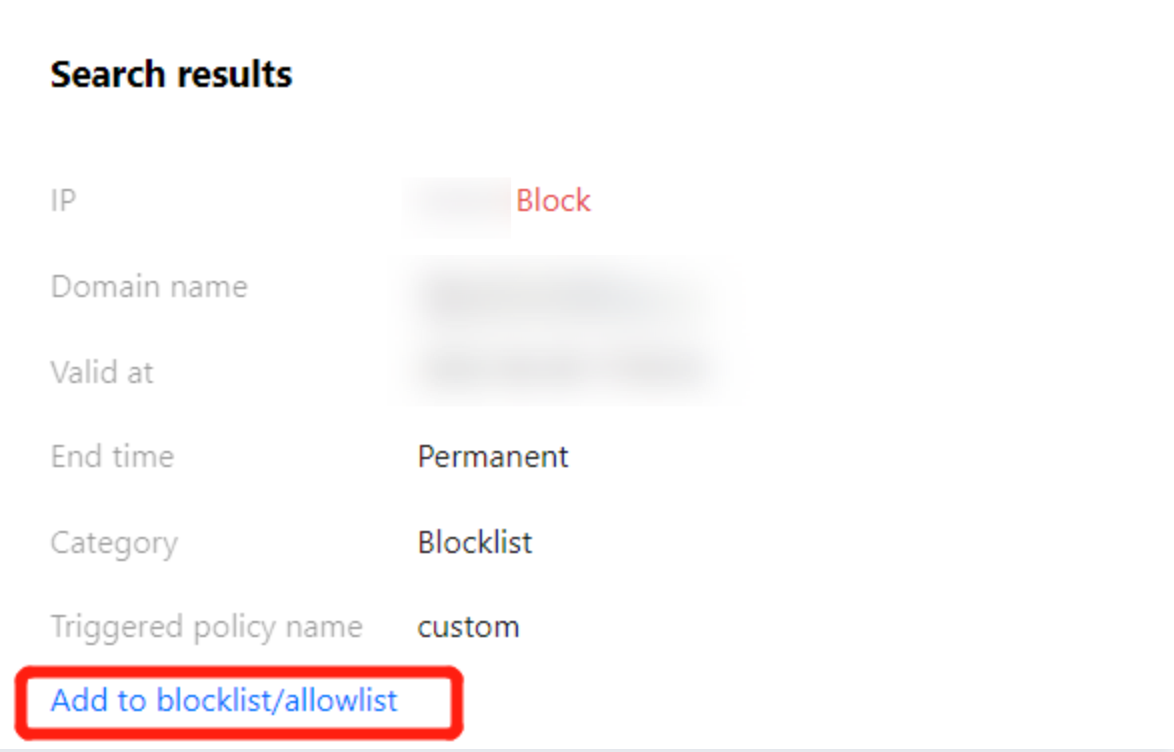
2. On the IP Query page, select the domain name to be protected in the upper left corner, enter the IP to be queried, and click Search.

3. In the query results, you can view the specific IP details, and click Add to blocklist/ allowlist to manually add to the blocklist.
4. On the add to blocklist/allowlist page, you can manually add to the allowlist. Configure the relevant parameters and click Add to complete adding to the allowlist.
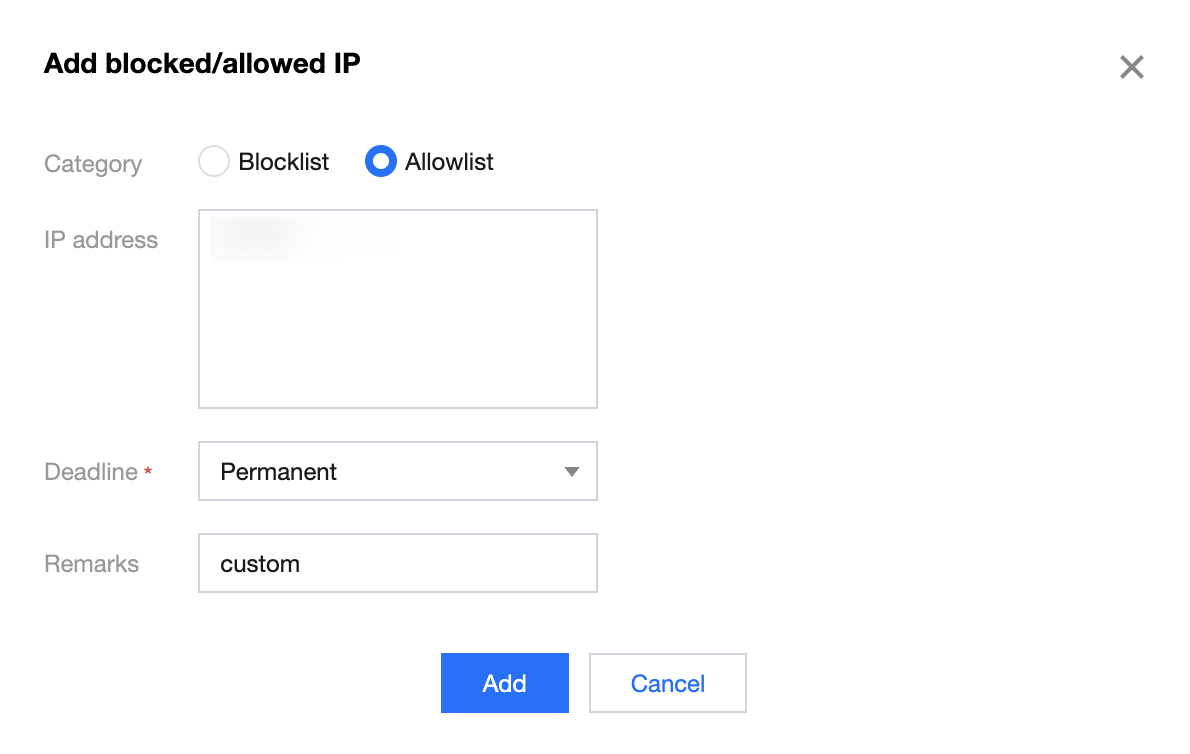
5. Parameter description:
Category: Select Allowlist.
IP Address: Enter the address to be added to the allowlist.
Expire Time: Enter the expiration time for the allowlist.
Remarks: Custom description.
Method 2: add IPs directly to the allowlist
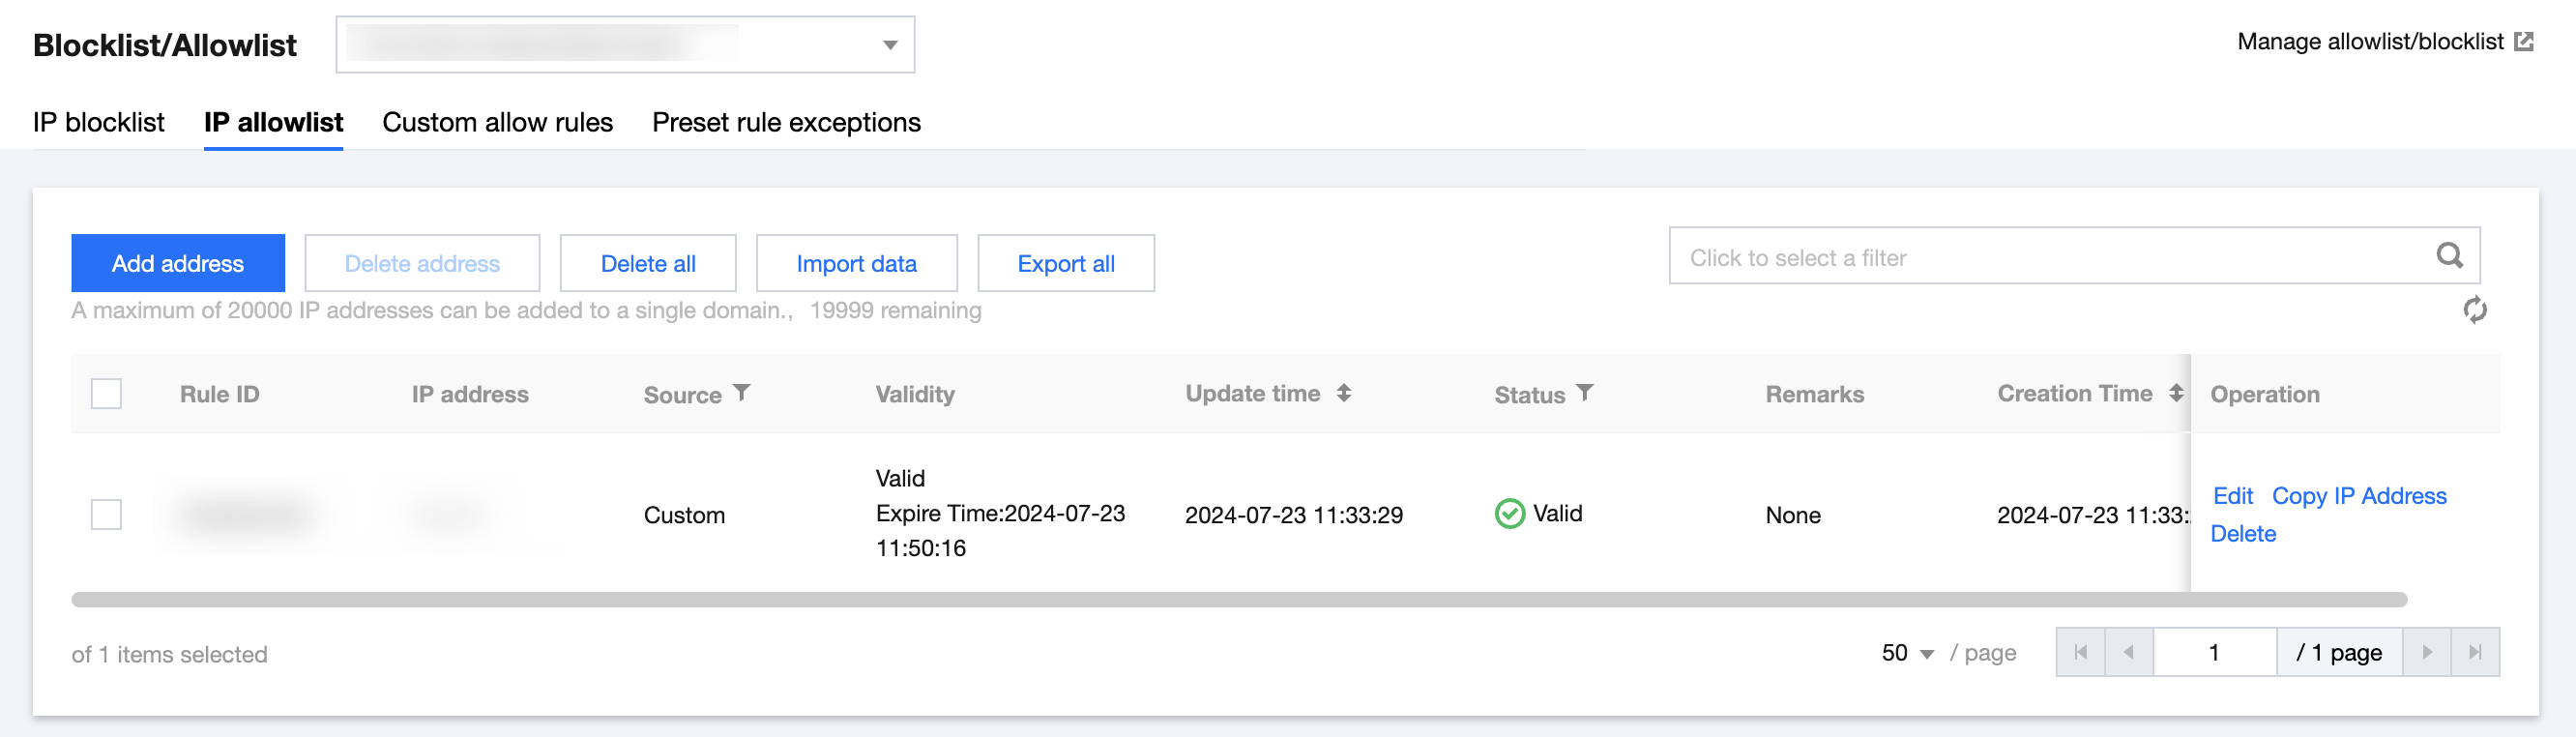
Log in to the WAF Console, and in the left sidebar, click Configuration Center > Blocklist, select the domain to be protected in the upper left corner, and click IP Allowlist to enter the IP allowlist page.
Manually add to the allowlist
1. On the IP allowlist page, click Add address to enter the add to allowlist page.
2. On the add to allowlist page, configure the relevant parameters, and click OK.
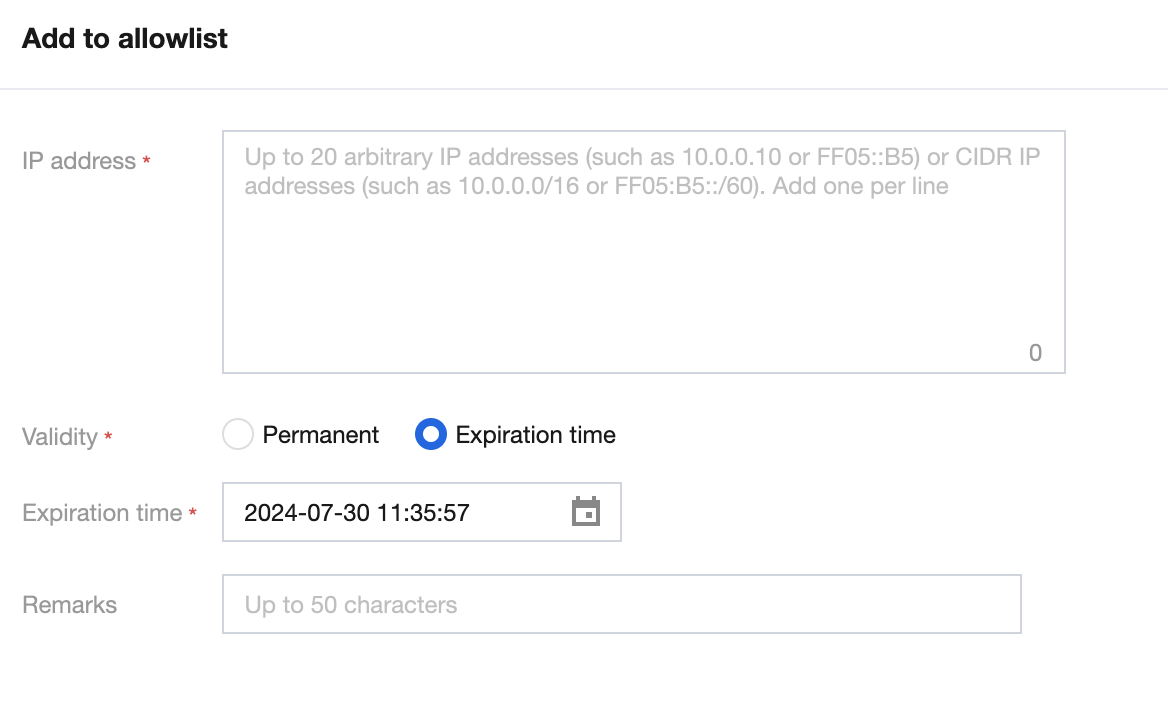
Field description
IP address:Supports any IP address, such as 10.0.0.10 or FF05::B5; supports CIDR format addresses, such as 10.0.0.0/16 or FF05:B5::/60. Use line breaks for separation, up to 20 entries at a time.
Note
When selecting the domain name as ALL, the added IP addresses or ranges will be a global allowlist.
The domain name quotas in each edition are as follows: Premium Edition: 1,000 entries/domain name; Enterprise Edition: 5,000 entries/domain name; Ultimate Edition: 20,000 entries/domain. Each IP address or range occupies one entry in the quota.
Validity: Permanent or Expiration time.
Remarks: Custom, within 50 characters.
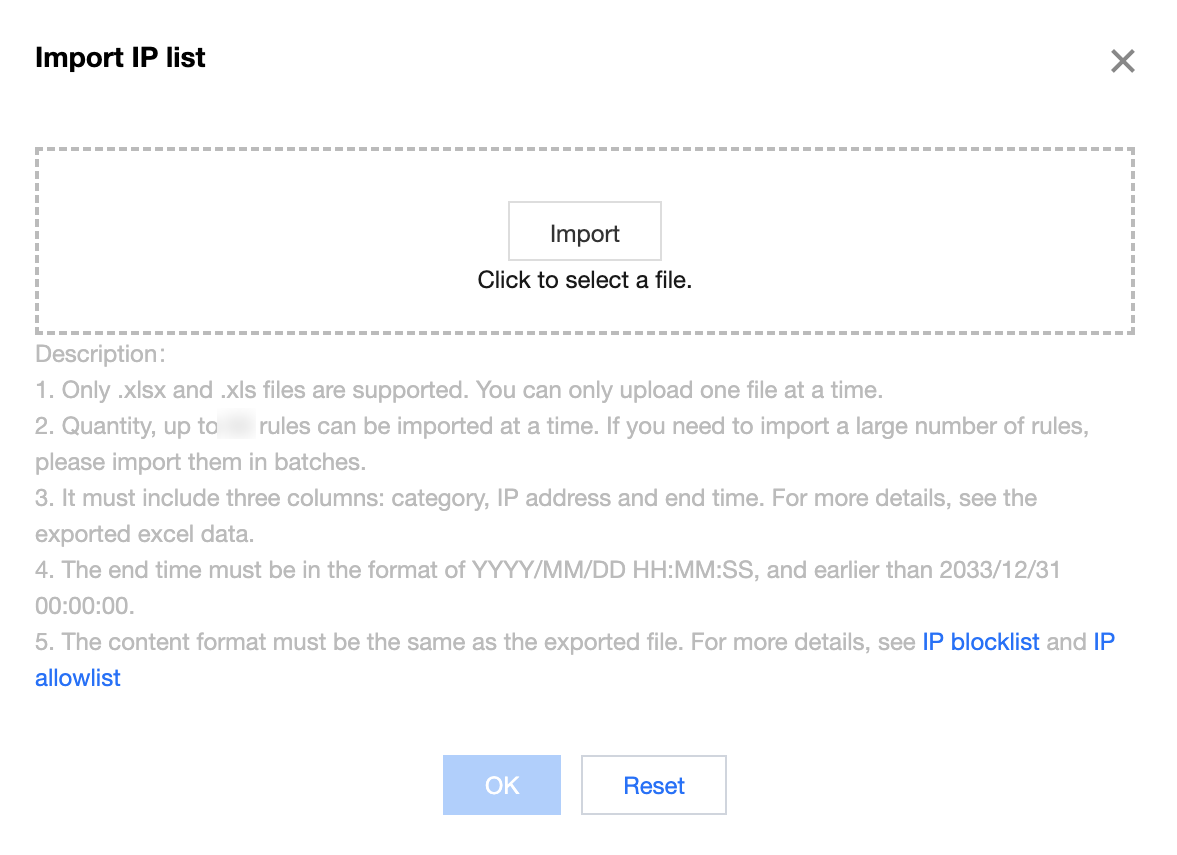
Batch import allowlist
1. On the IP allowlist page, click Import data, and the "Import IP List" window will pop up.
2. In the "Import IP List" window, click Import, select the allowlist file to import, and after the upload is complete, click OK.
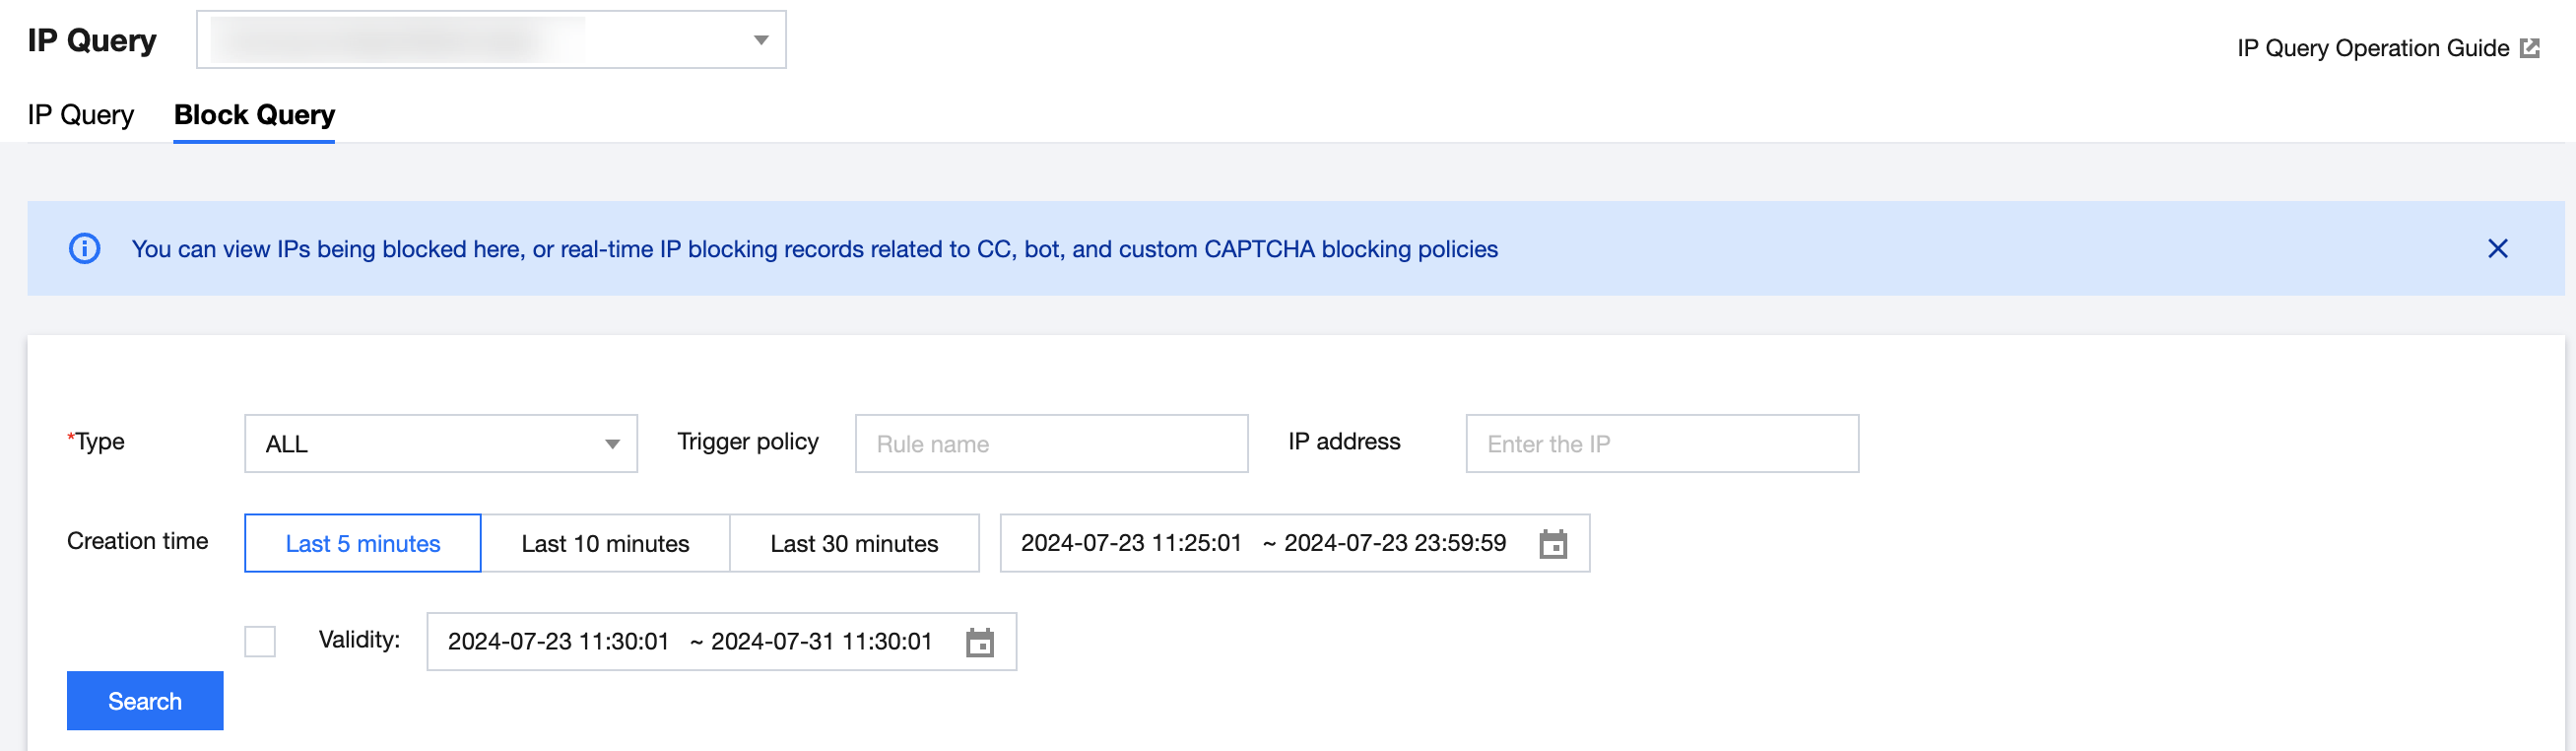
Method 3: Add blocked IP to the allowlist
1. Log in to the WAF Console, and on the left sidebar, select IP Inquiry > Block Query.
2. On the Block Query page, enter the relevant information, click Search to query the relevant IPs of CSC, and then proceed with the whitelist operation for the blocked IPs.
Ajuda e Suporte
Esta página foi útil?
Você também pode entrar em contato com a Equipe de vendas ou Enviar um tíquete em caso de ajuda.
comentários