tencent cloud

Tencent Real-Time Communication

Video Chat

Baixar
Modo Foco
Tamanho da Fonte
Última atualização: 2026-07-08 17:40:26
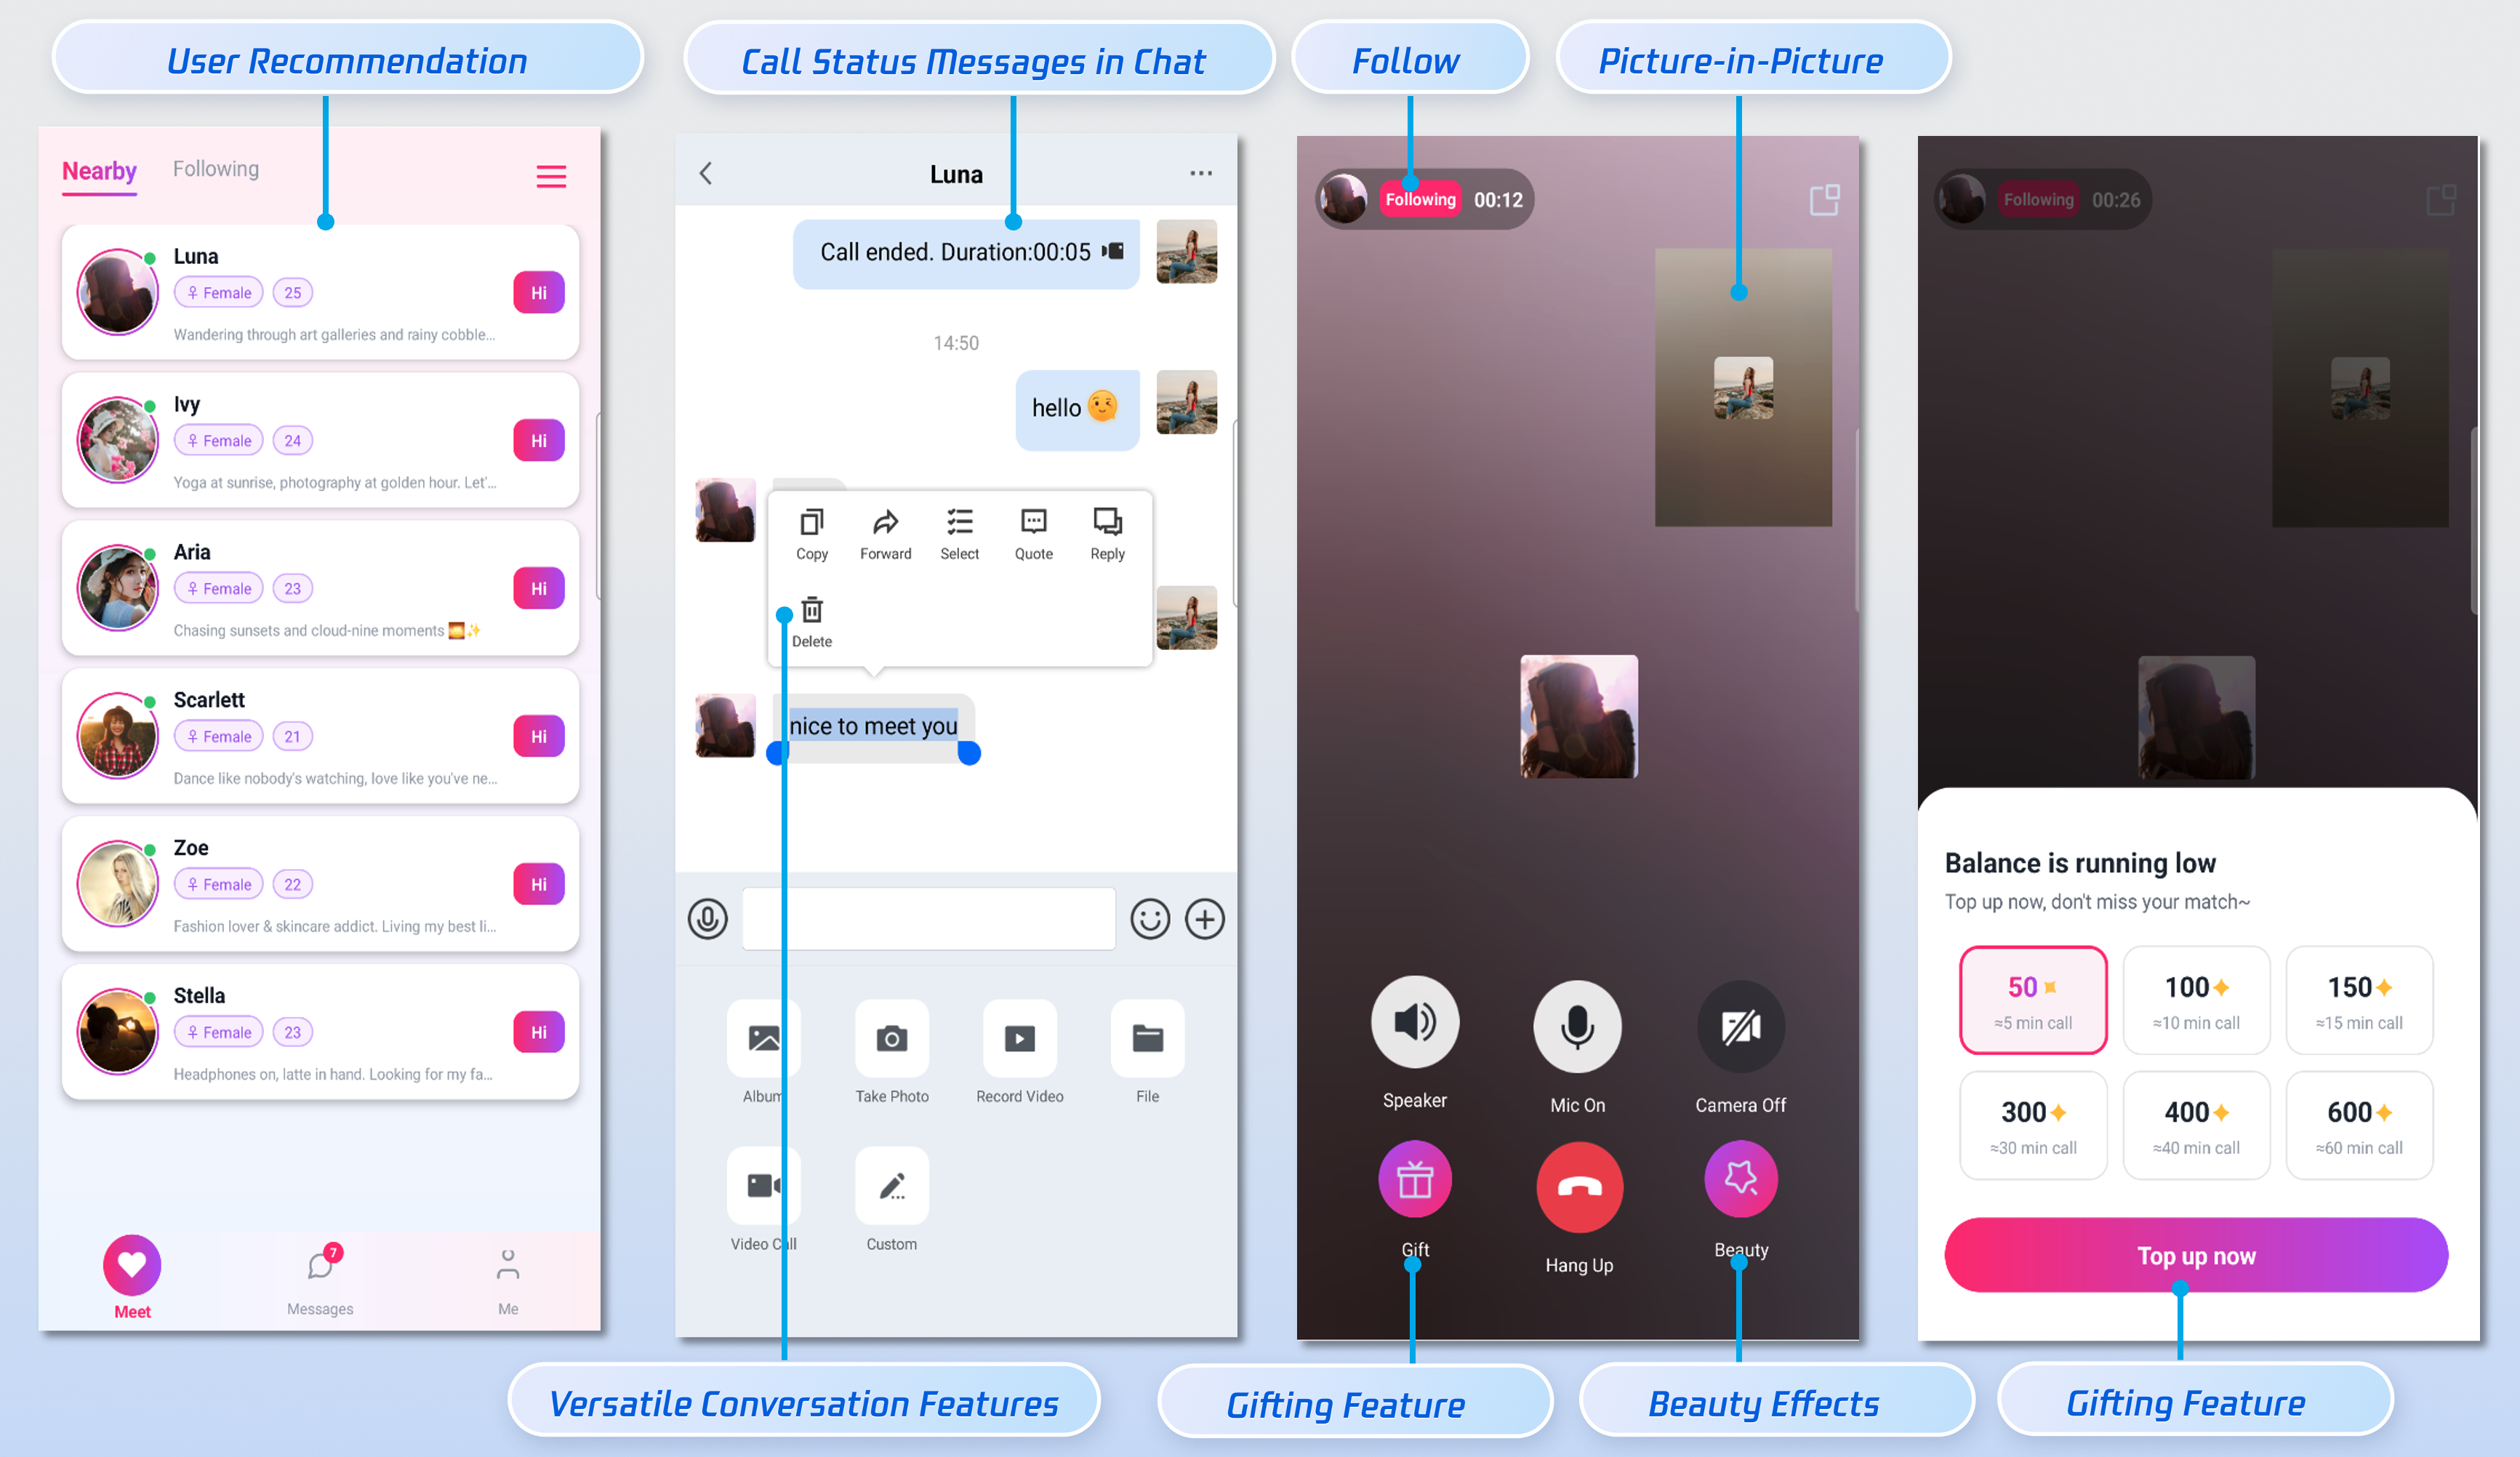
This document introduces how to quickly run the Audio/Video Calling Demo. By following this guide, you can get the Demo running within 10 minutes and experience a 1v1 video social feature with a complete UI.


Prerequisites

Environment Setup

Two devices running Android 5.0 or above.

Activate the Service

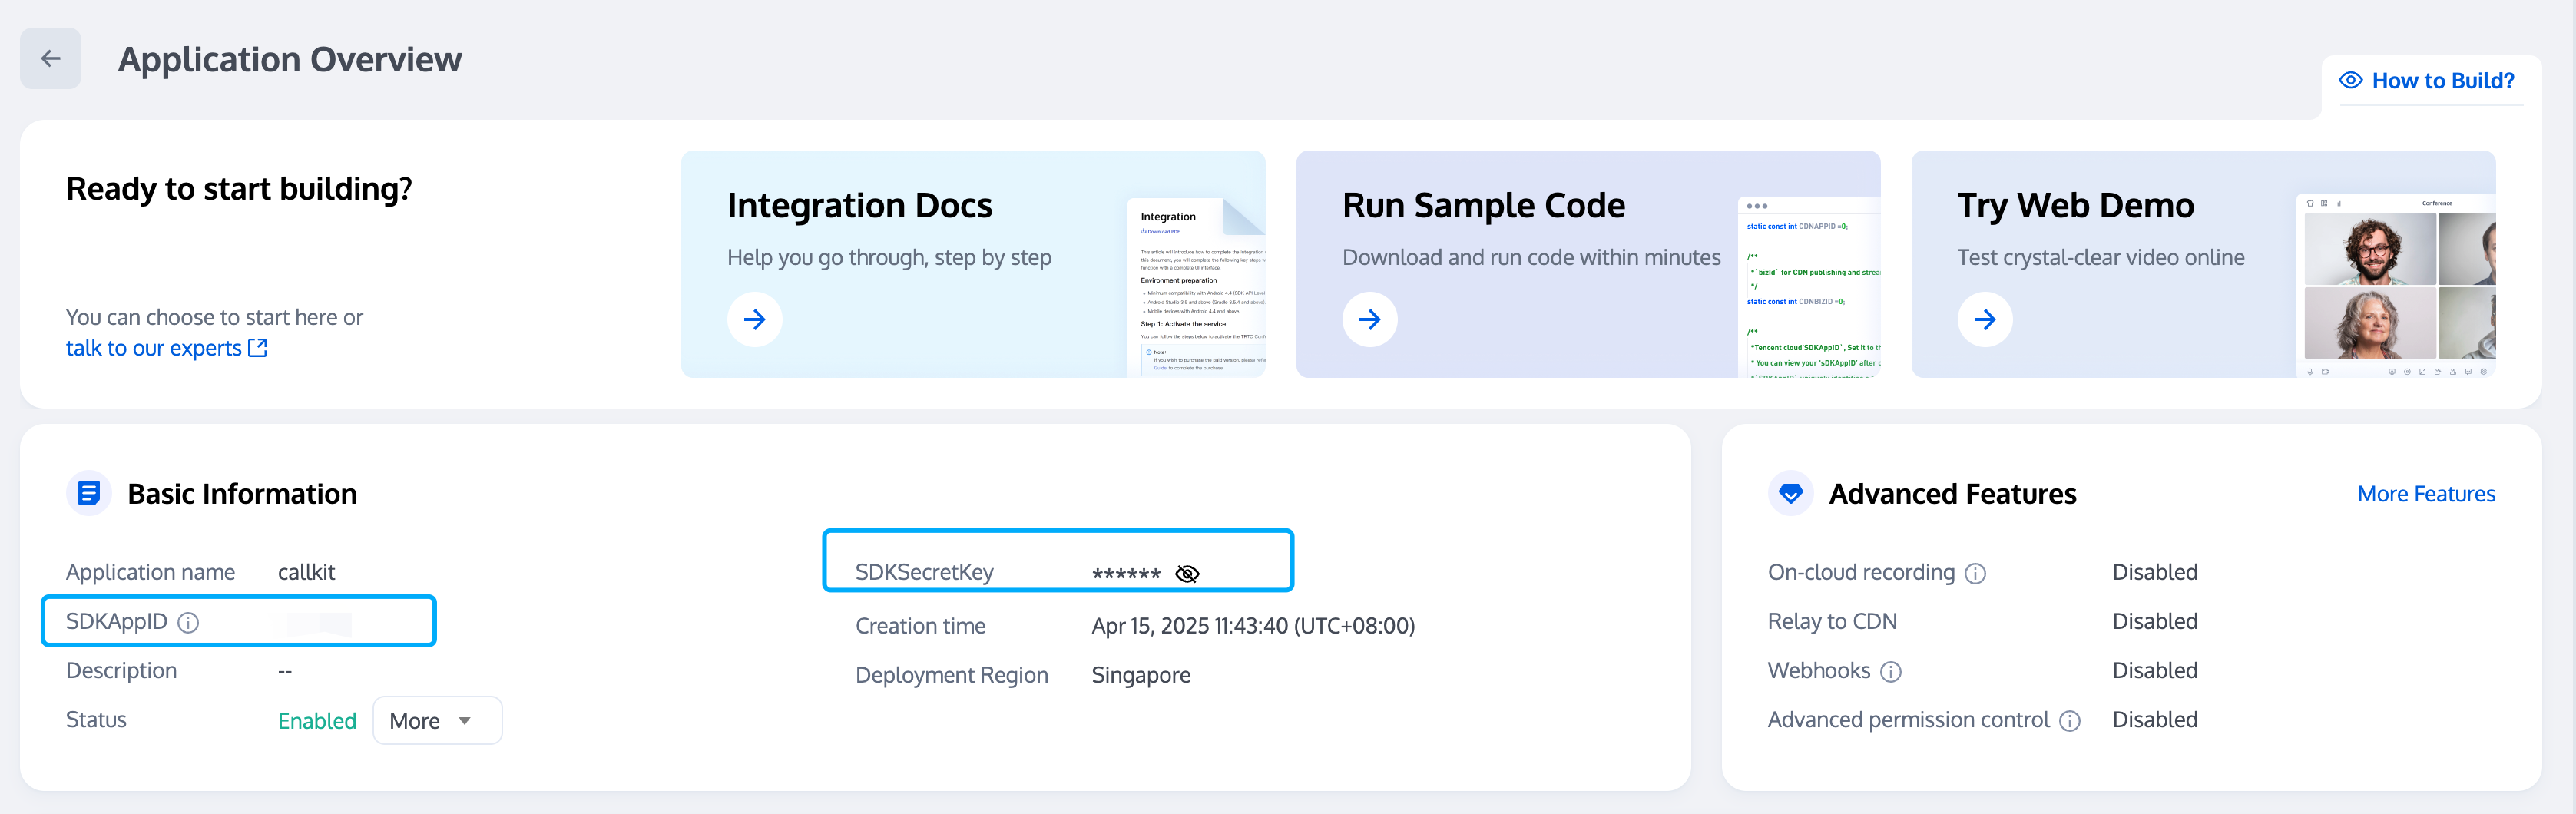
Please refer to Activate the Service to obtain your SDKAppID and SDKSecretKey. These will be used in a later step (Configure and Run the Demo).


Run the Demo

Step 1: Download the Demo

Download the VideoChat Demo source code from GitHub, or run the following command in the command line:
git clone https://github.com/Tencent-RTC/video-chat-solution.git

Step 2: Configure the Demo

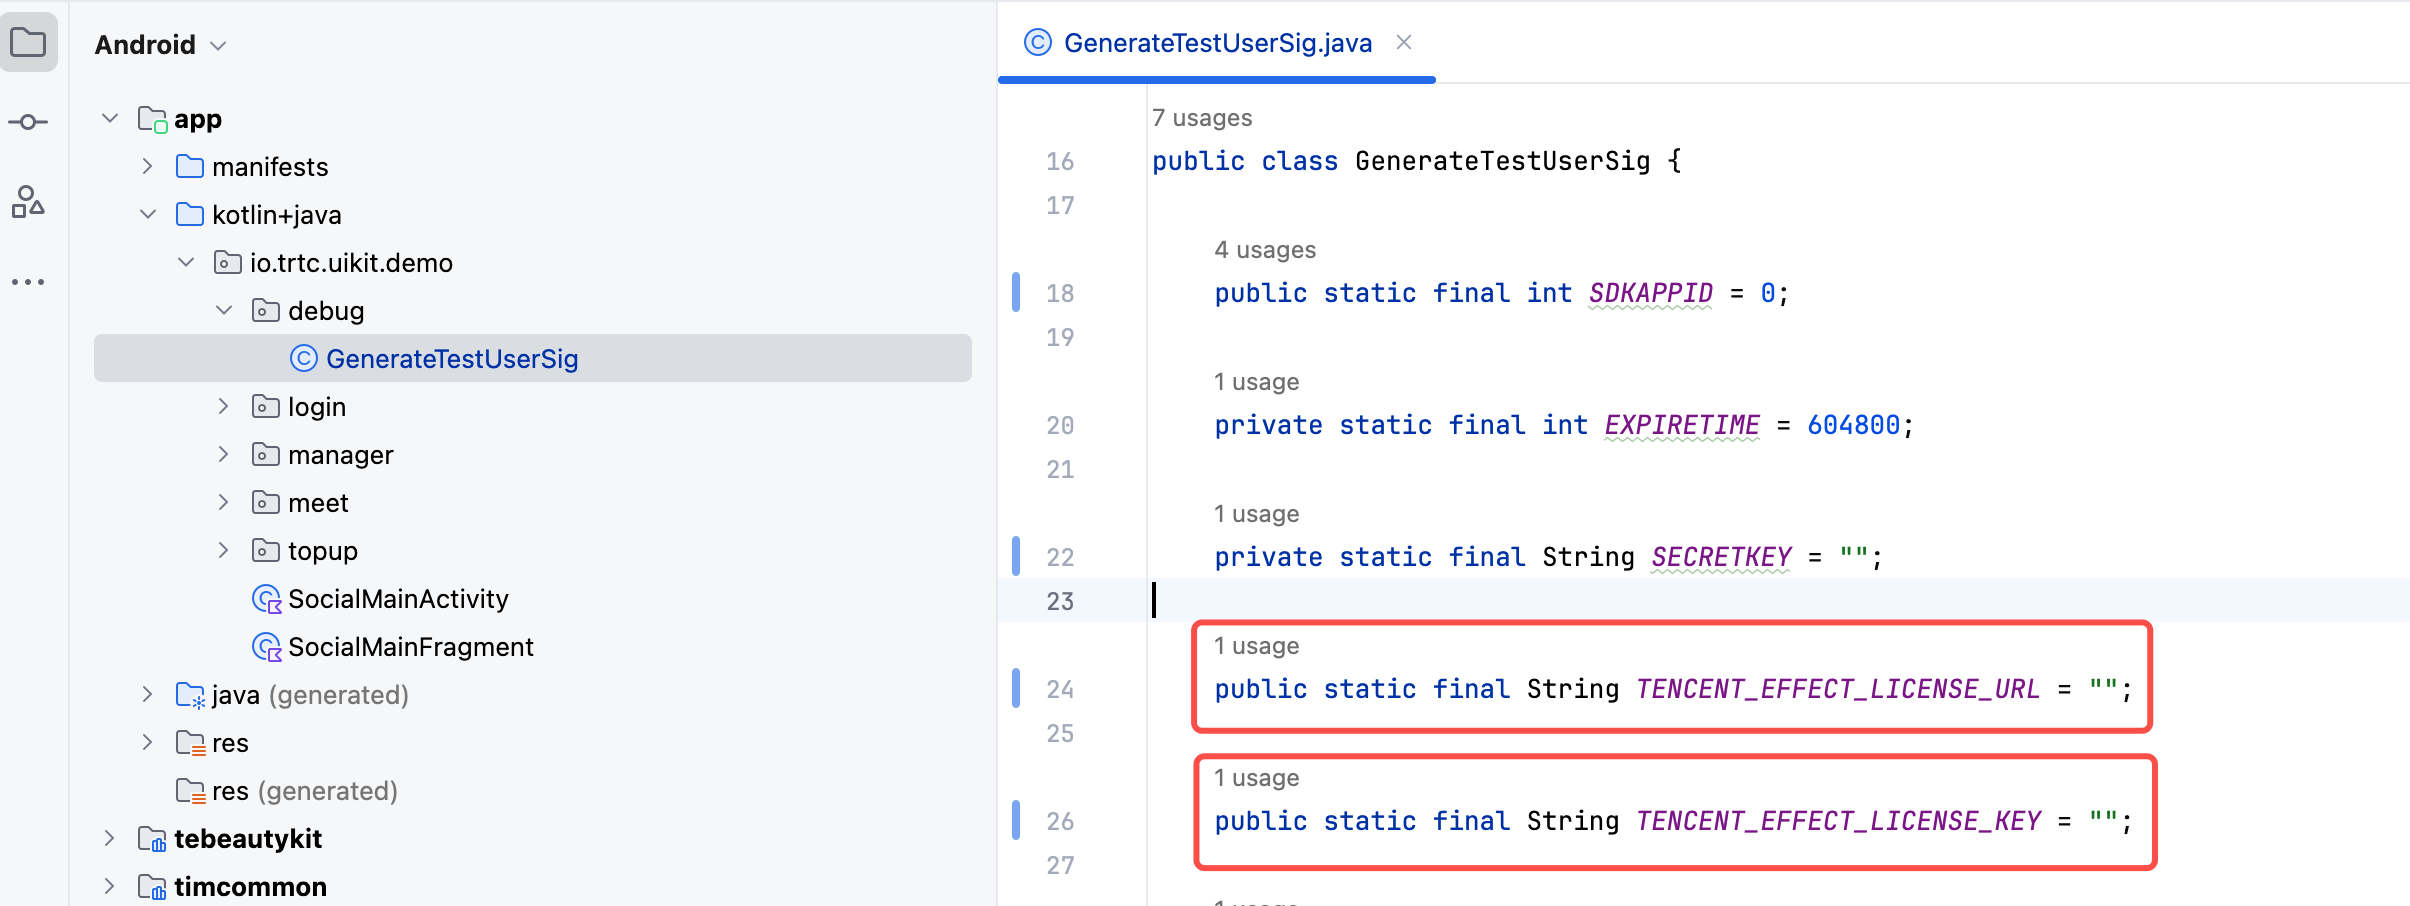
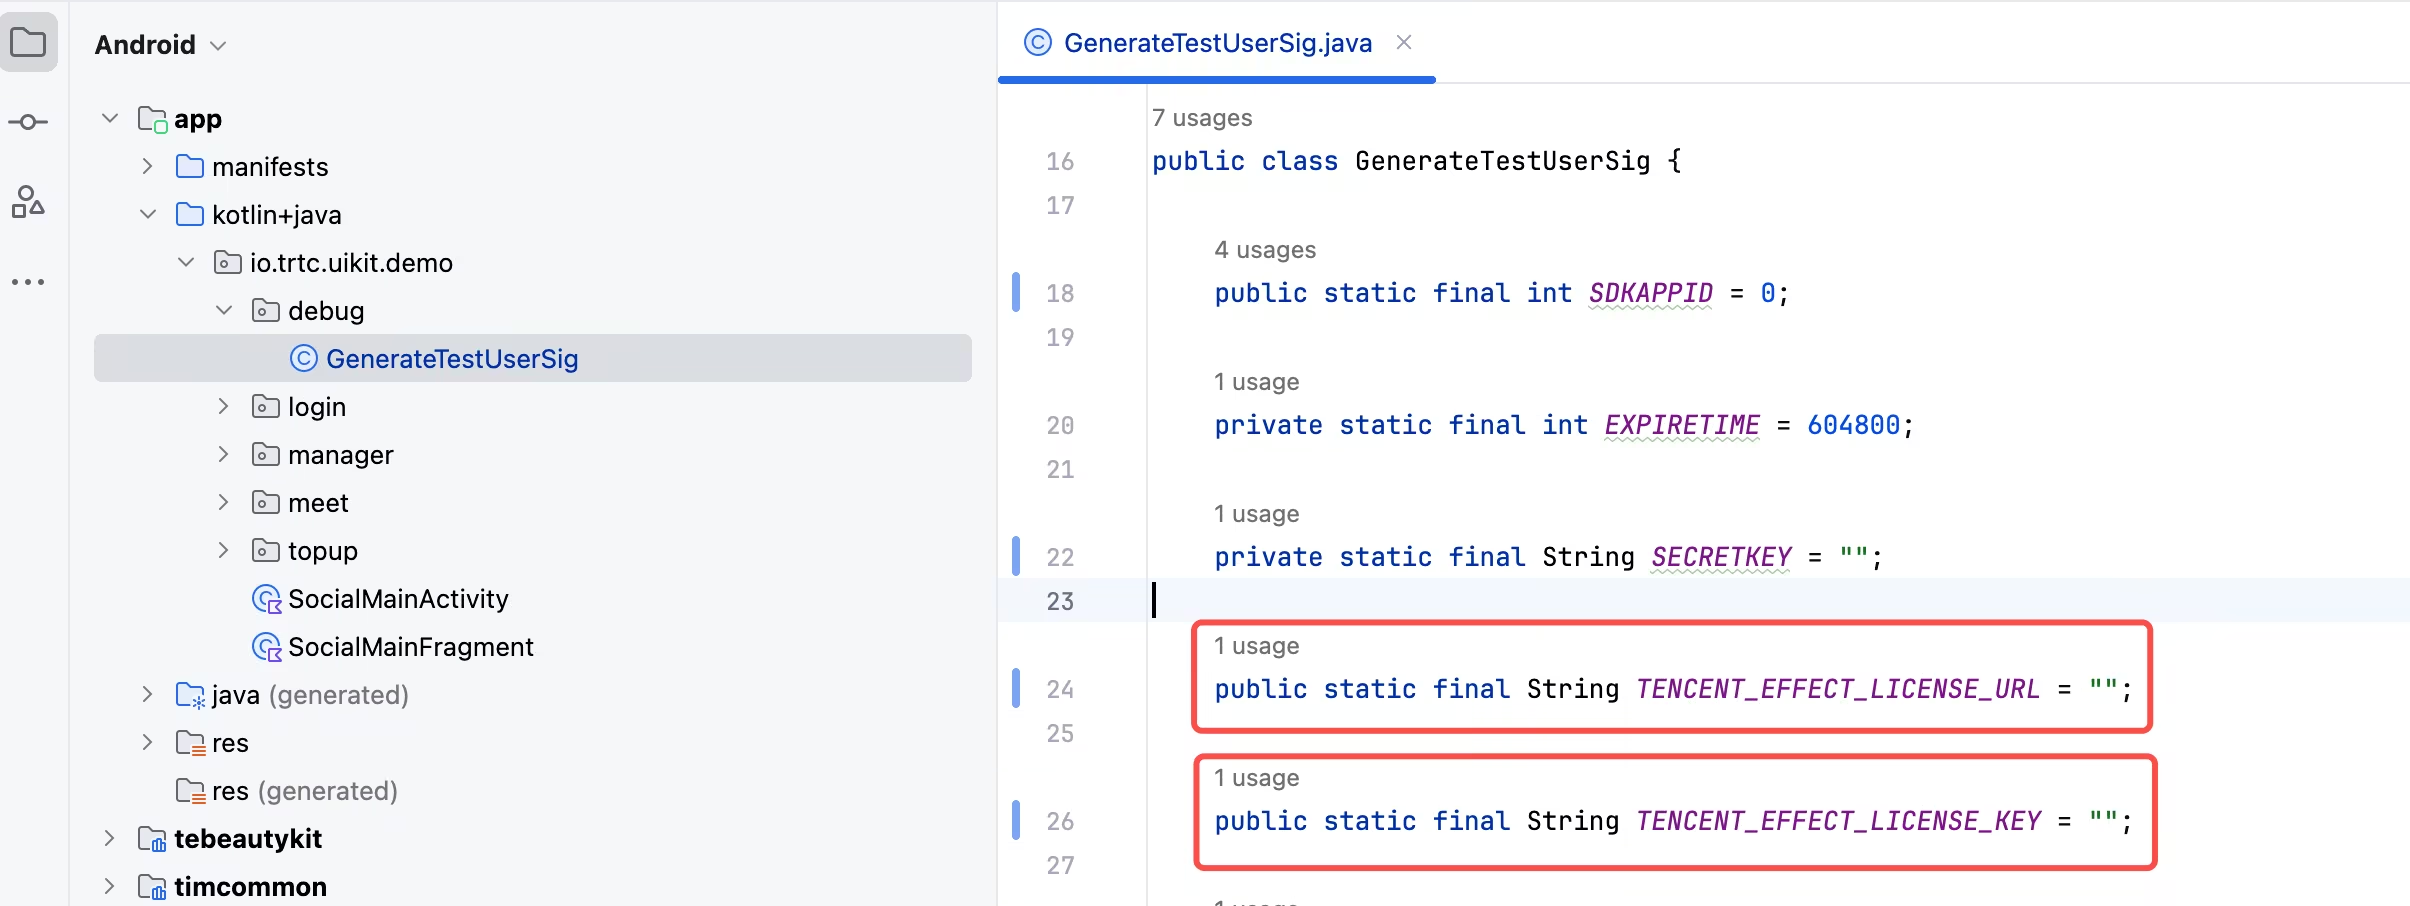
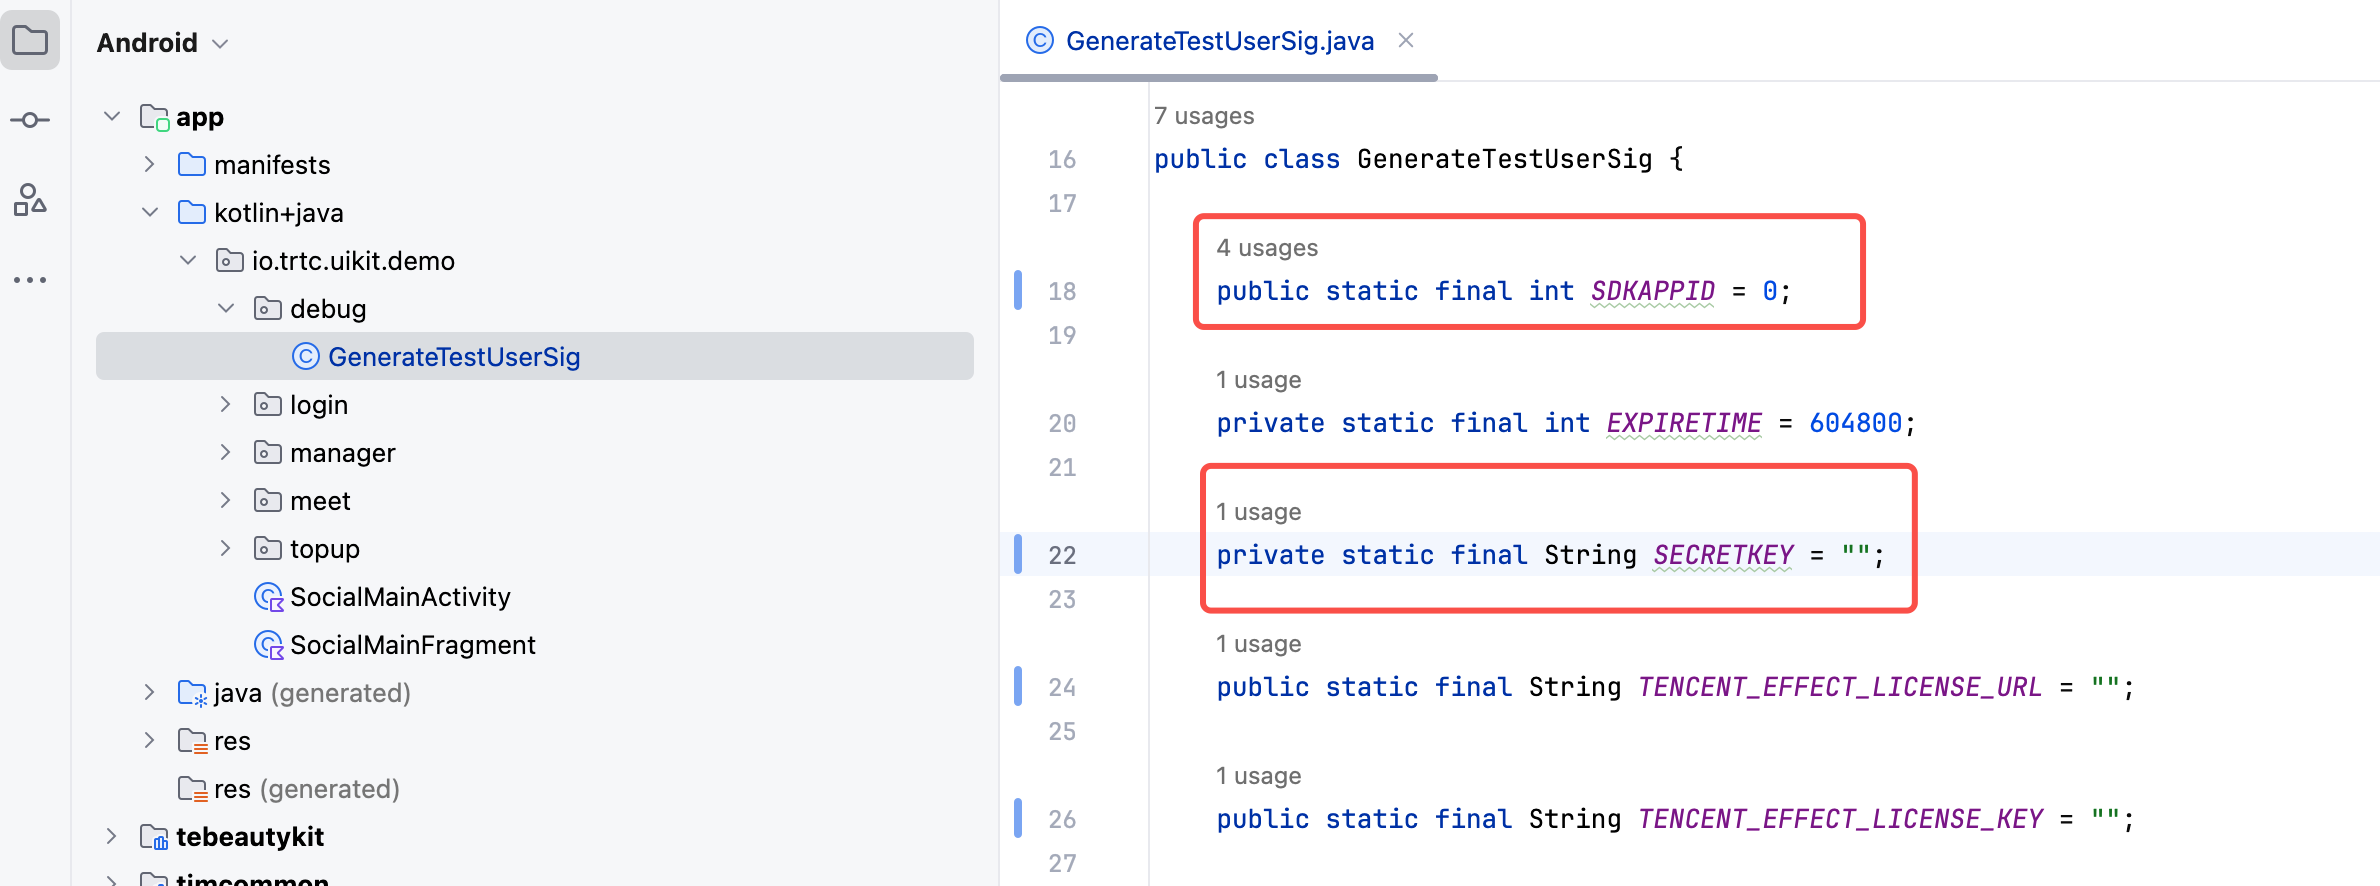
1. Configure SDKAppID and SecretKey (Required): Open the video-chat-solution/blob/main/android/app/src/main/java/io/trtc/uikit/demo/debug/GenerateTestUserSig.java file, and enter the SDKAppID and SDKSecretKey obtained when enabling the service:

2. Configure Beauty Filters (Optional): The Demo integrates Tencent's basic beauty filters by default, but a License must be configured for them to take effect. Please refer to the License Guide to obtain the LicenseURL and LicenseKey, and enter them into the video-chat-solution/android/app/src/main/java/io/trtc/uikit/demo/debug/GenerateTestUserSig.java file.


Step 3: Test the Demo

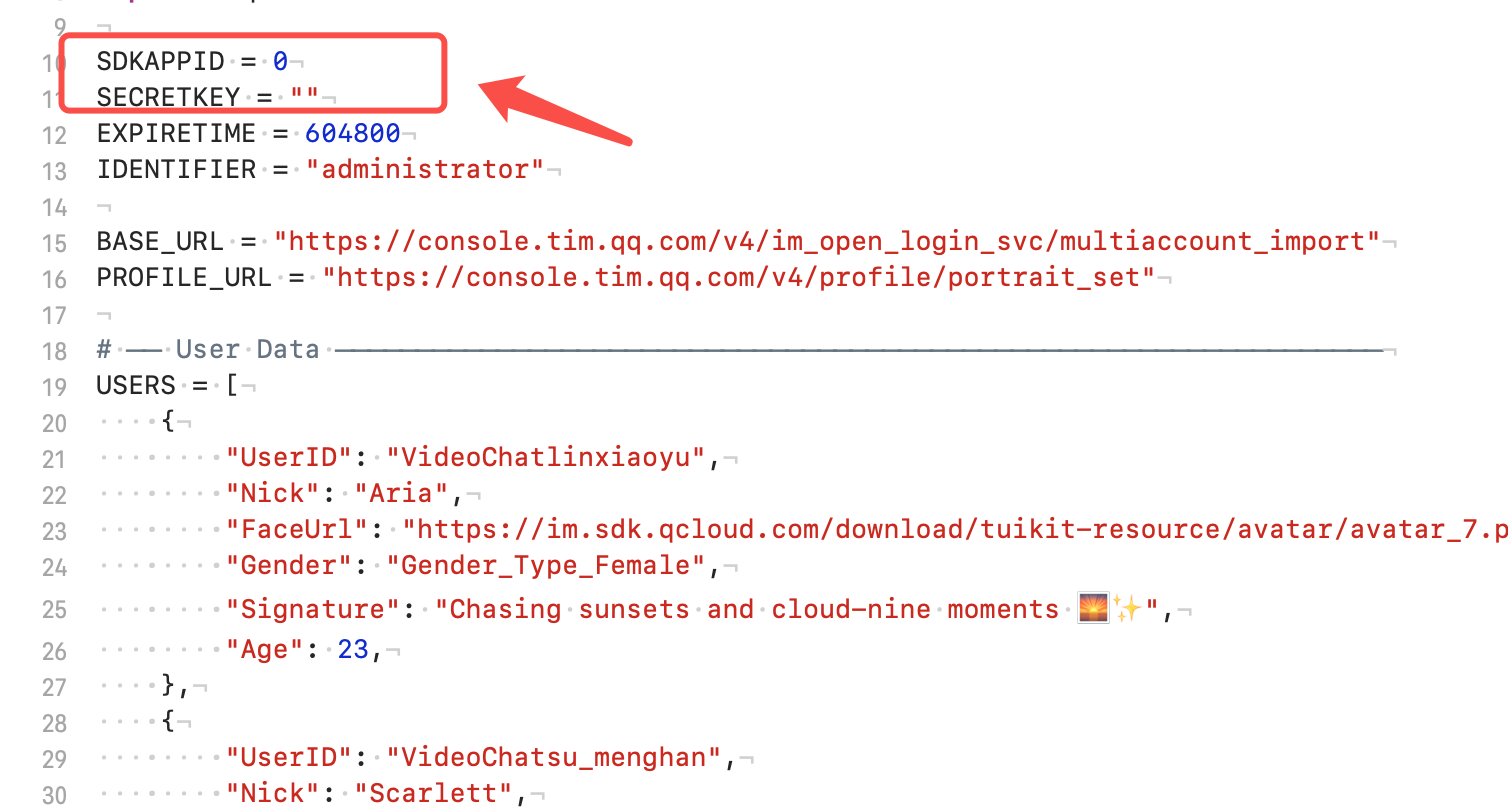
1. Import test users: For quick testing, please run the video-chat-solution/tools/import_users_to_video_chat.py script (you will need to enter your AppID and SecretKey). This script will automatically register 6 recommended test accounts. Once logged in, you will be able to see them in the "Social" module.


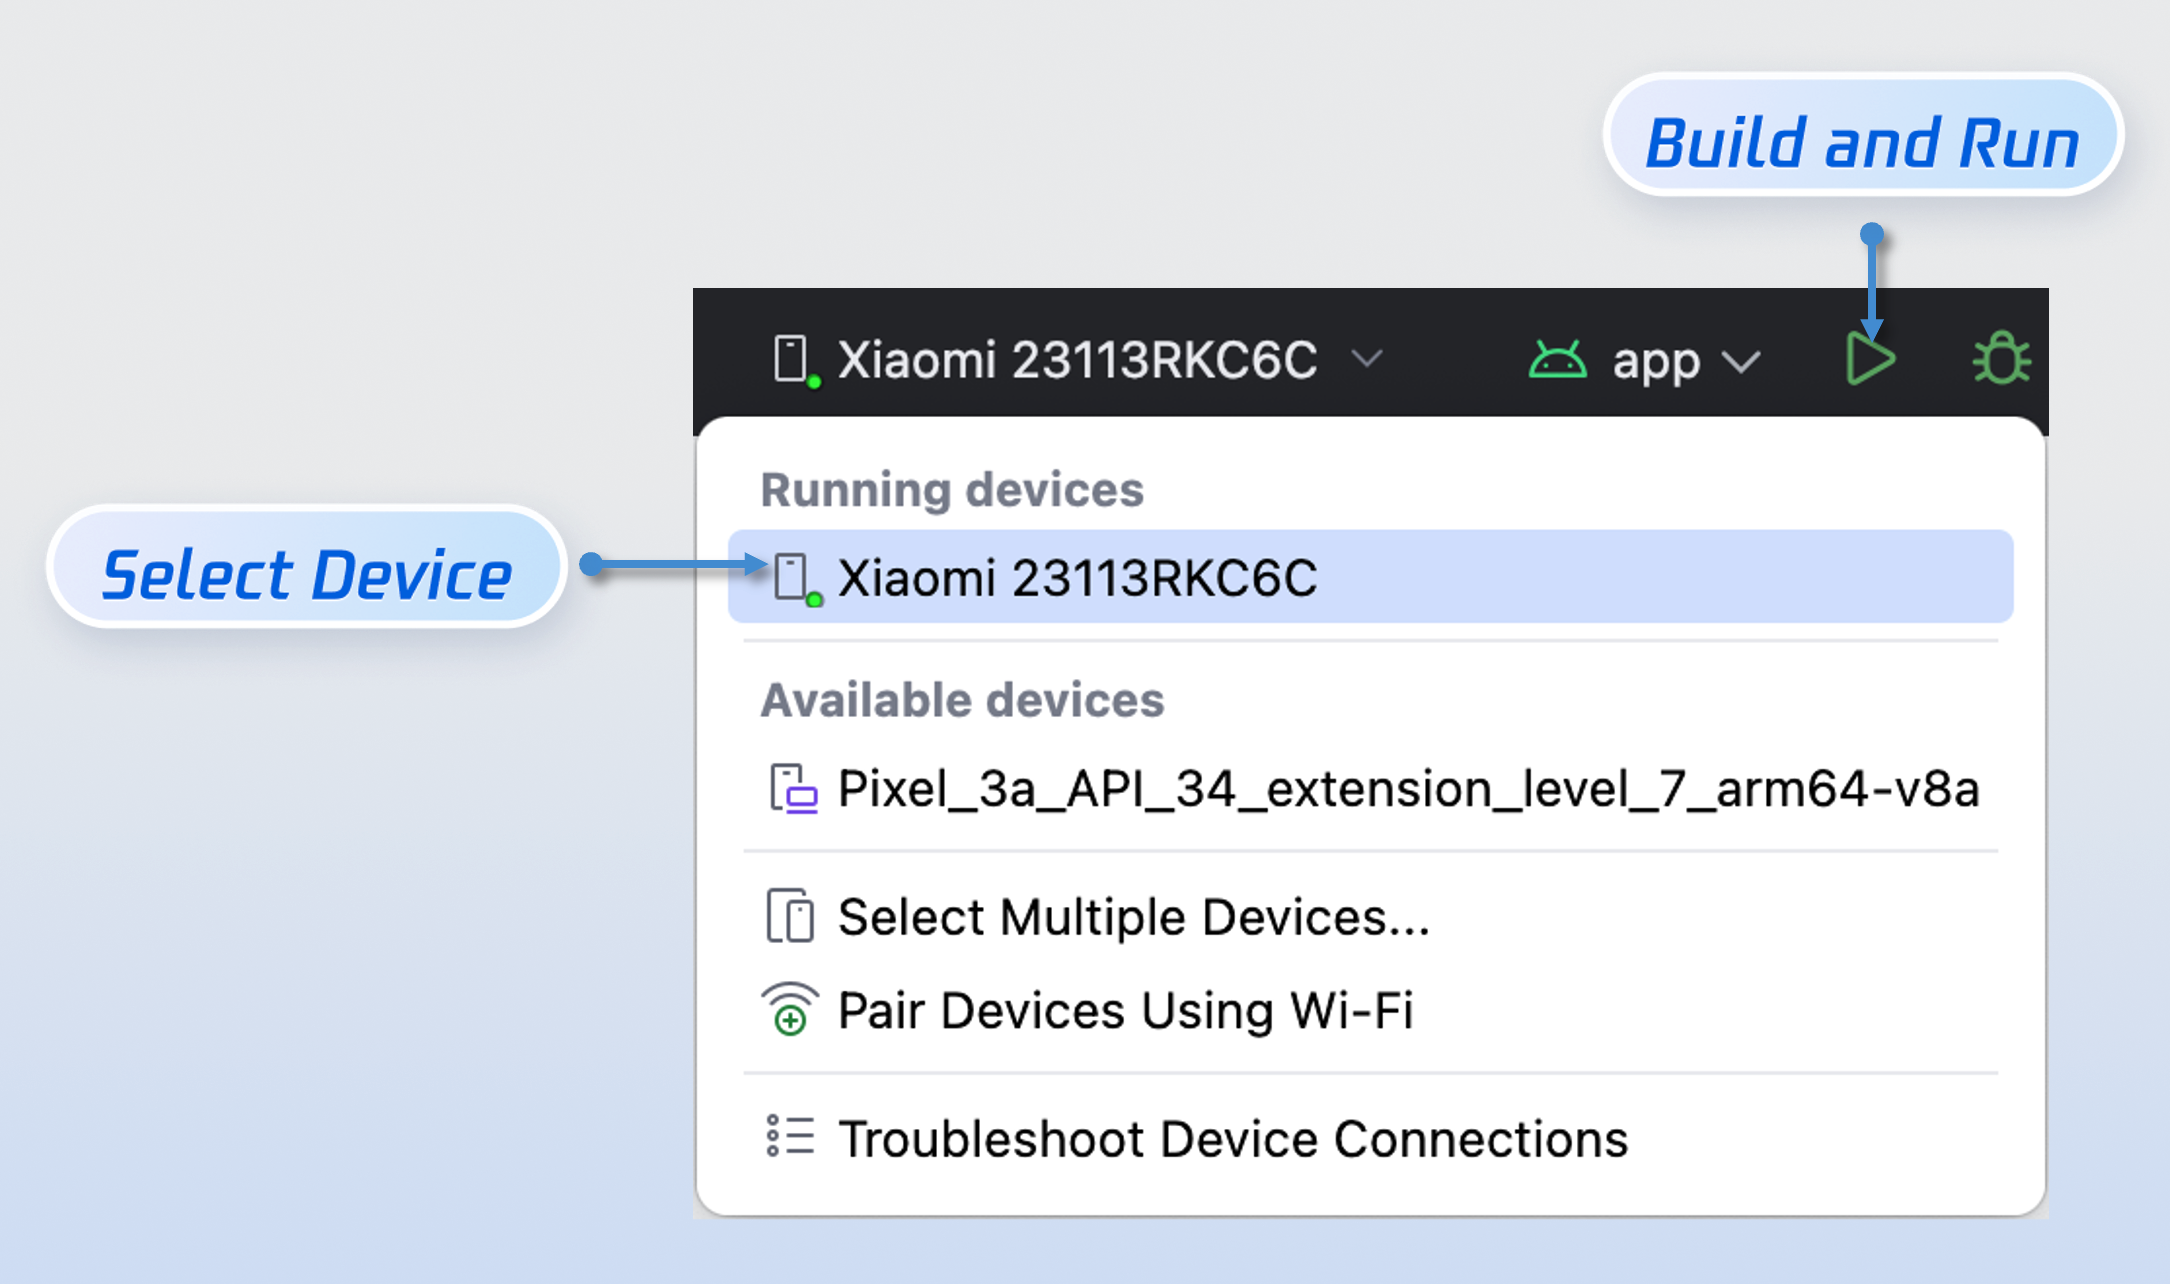
2. Build and run: Select a target device and run the Demo.


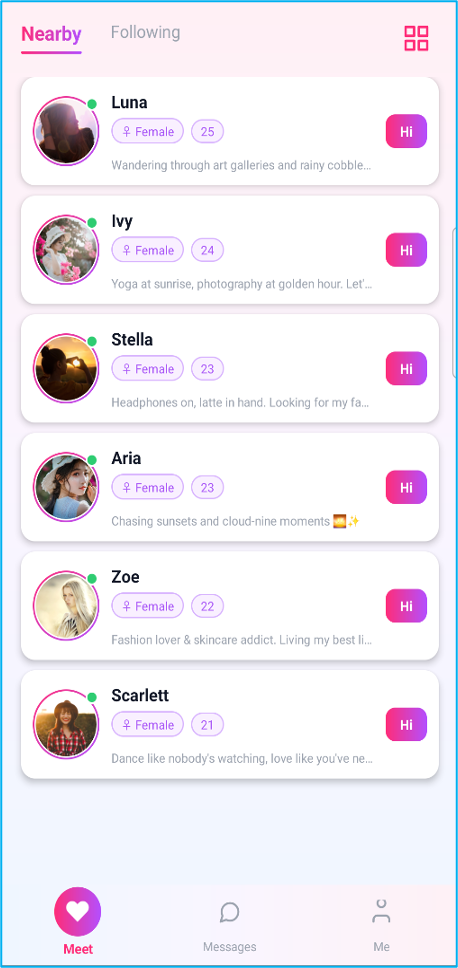
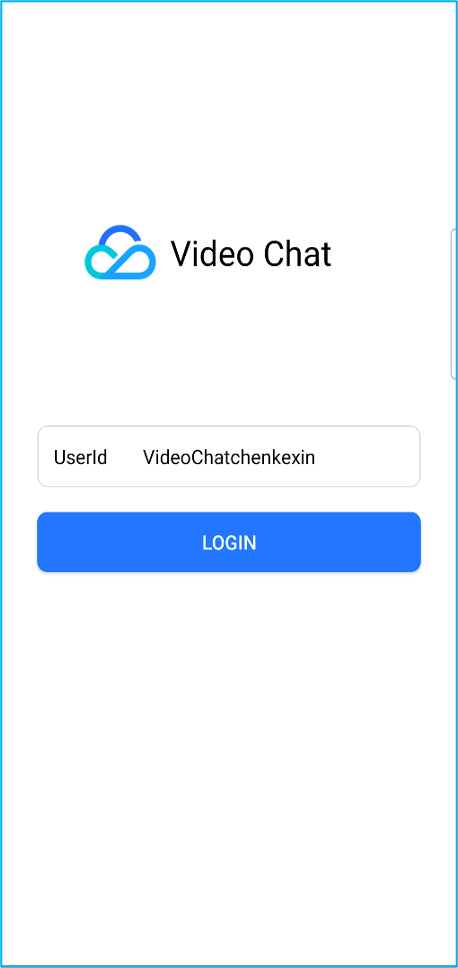
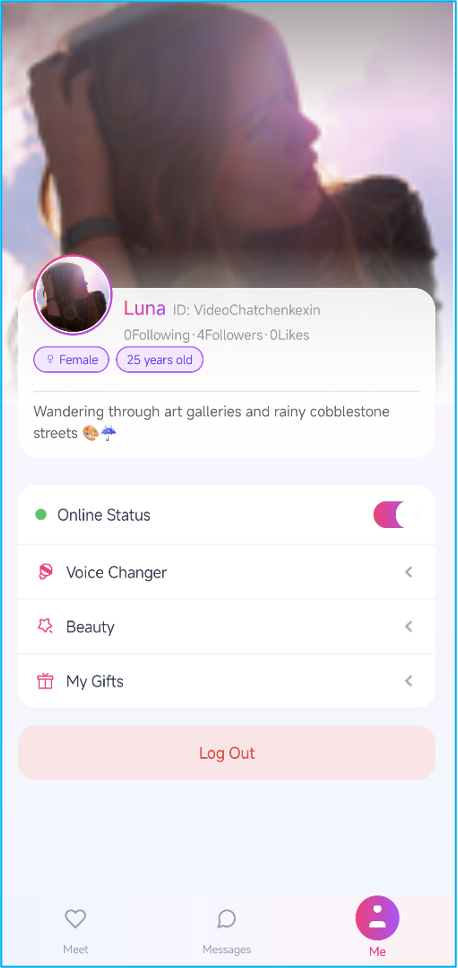
3. Successful run: After logging in, the following interface will be displayed.
Meet List
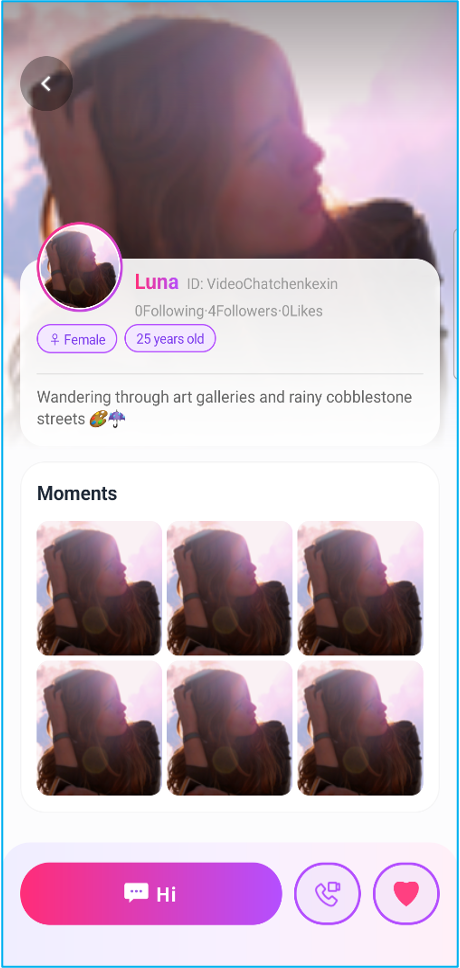
User Profile
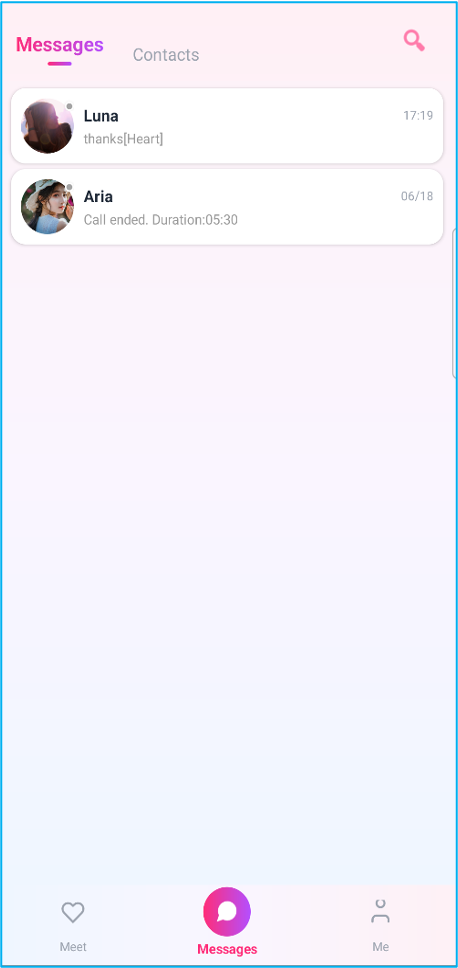
Message List
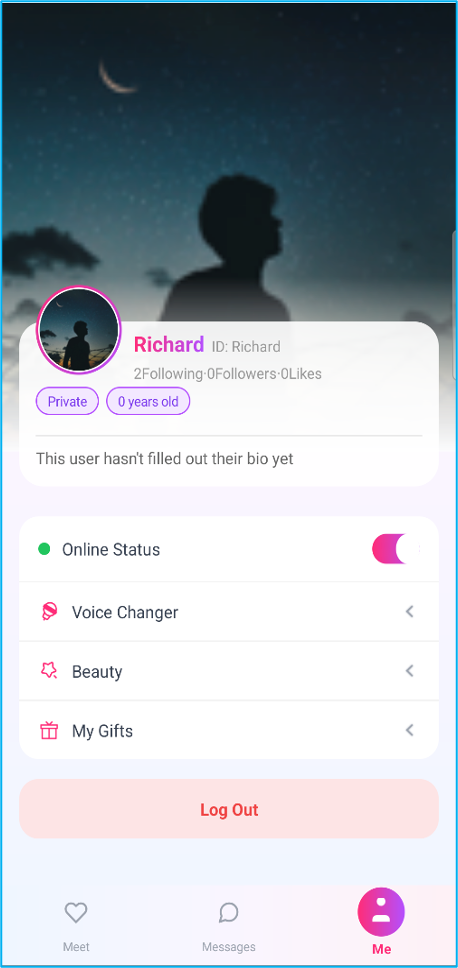
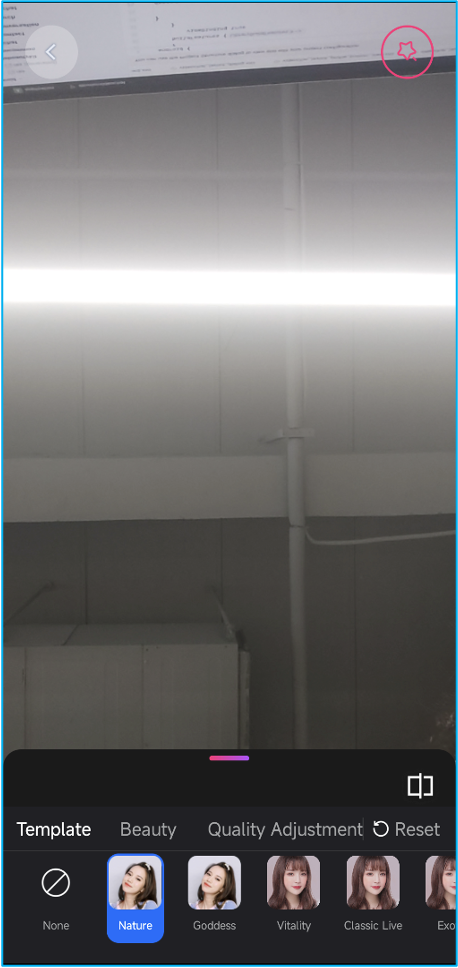
Personal Settings


Step 4: Video and Chat Interaction

1. Interact with recommended users: You can use another device (Device B) to log in as a "recommended user" (e.g., UserID: VideoChatlinxiaoyu) to engage in 1v1 text and video chats.
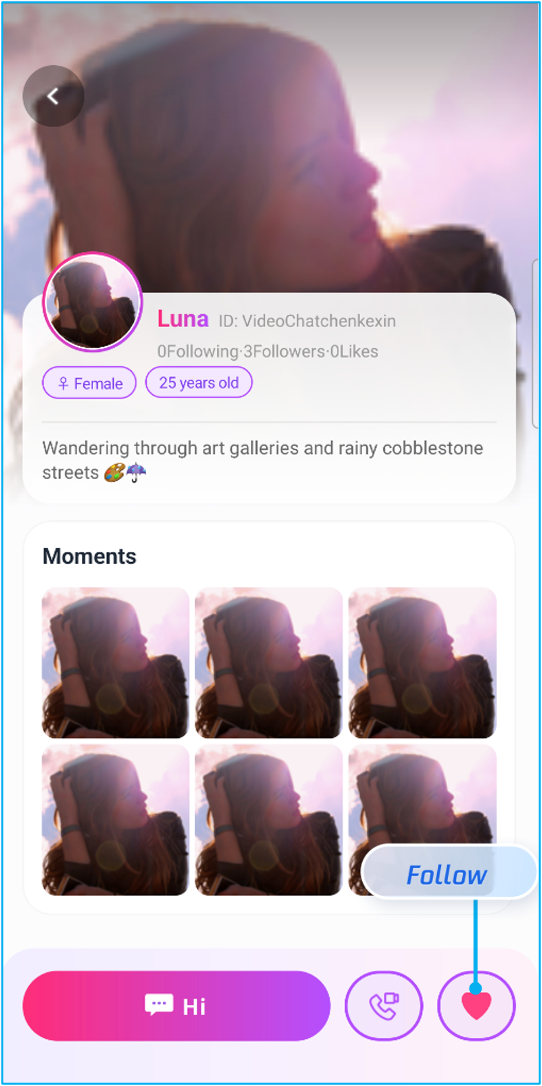
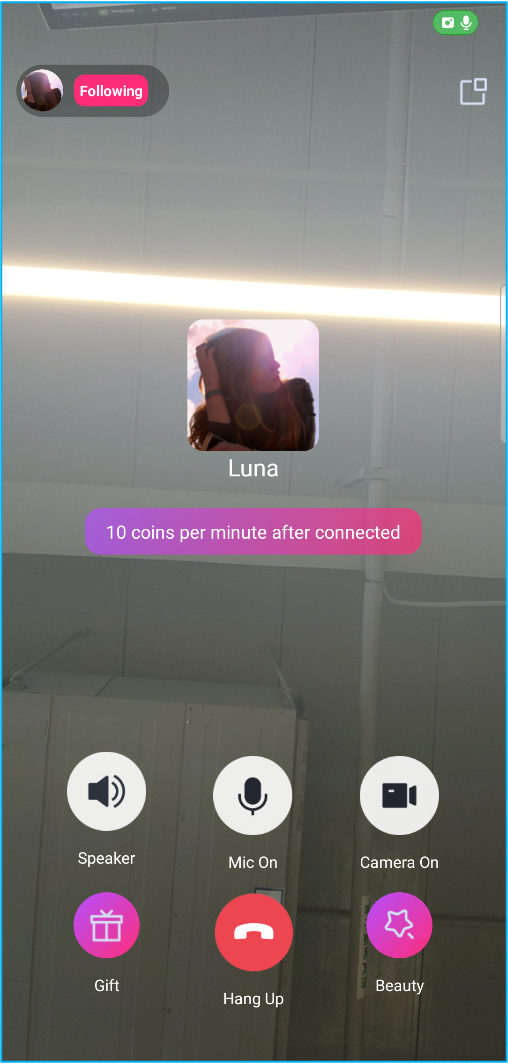
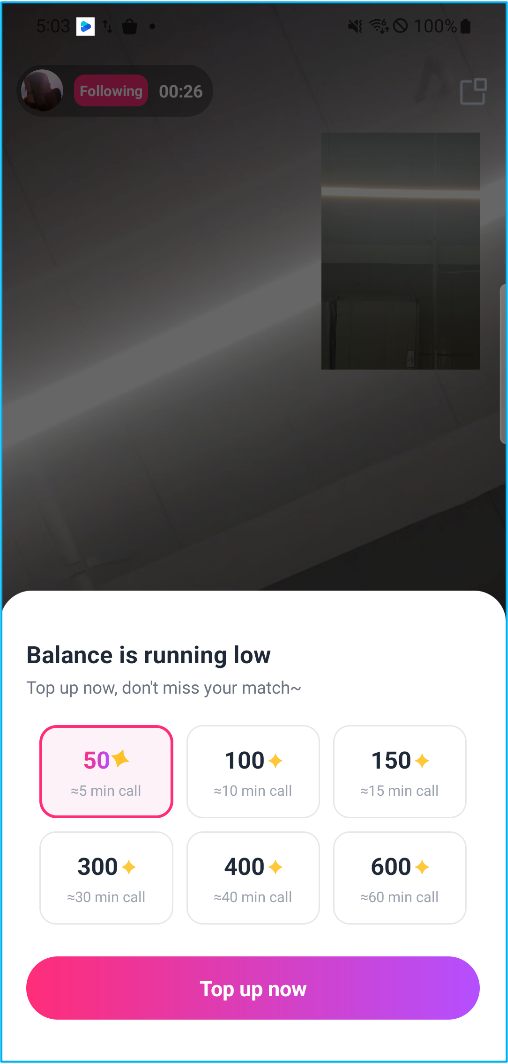
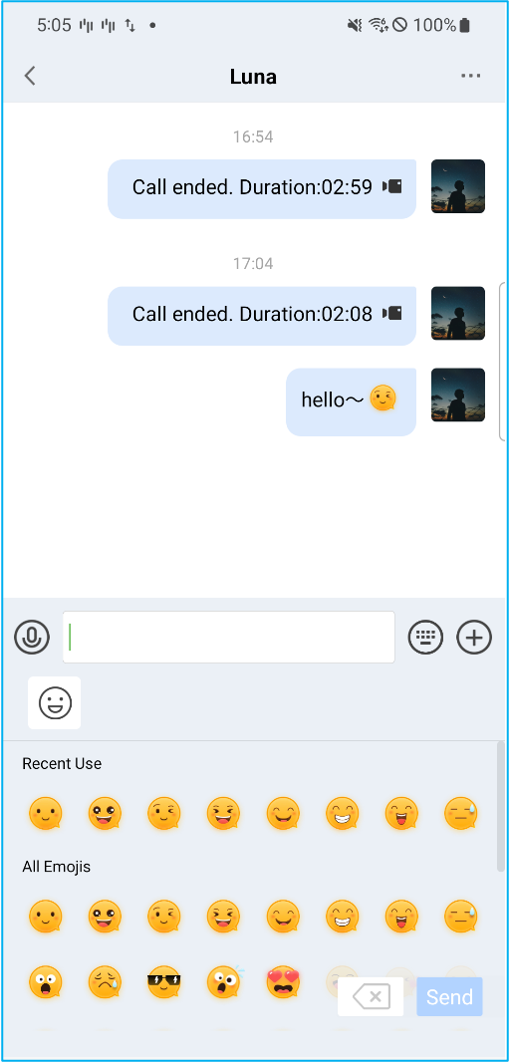
Device A: Log in to your account (UserID: Richard), follow the recommended user "Luna", and initiate a text or video chat.
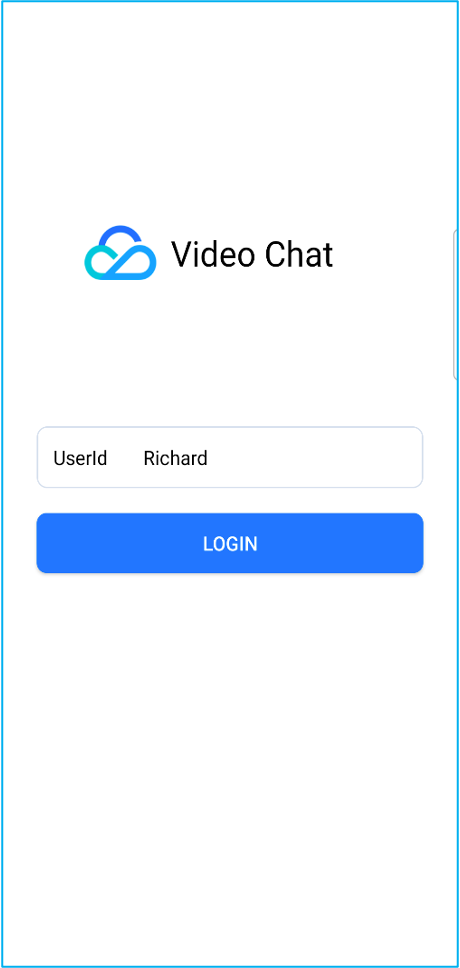
Log in to account "Richard"
Follow the recommended user "Luna"
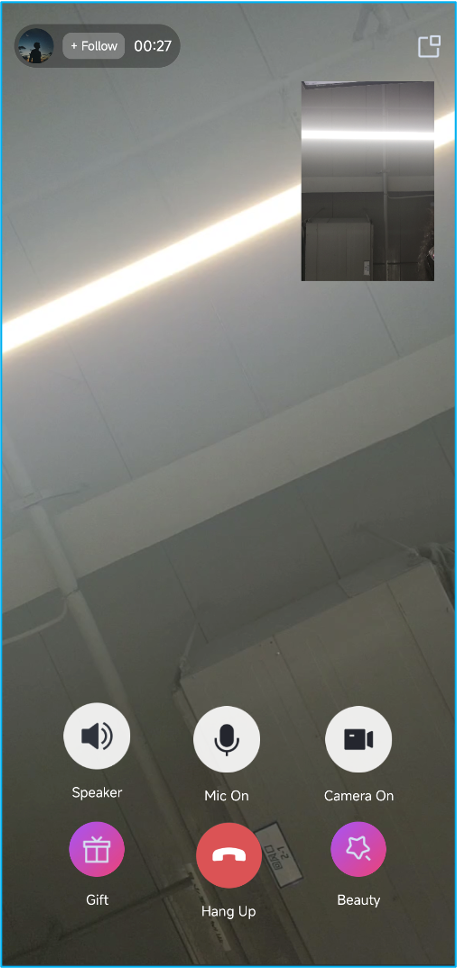
Start a video call with "Luna"
Insufficient balance for the call
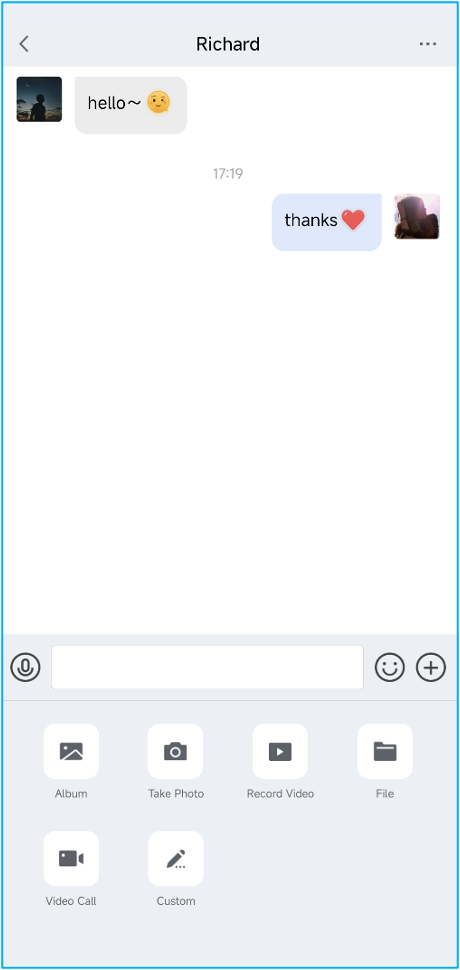
Chat with "Luna"


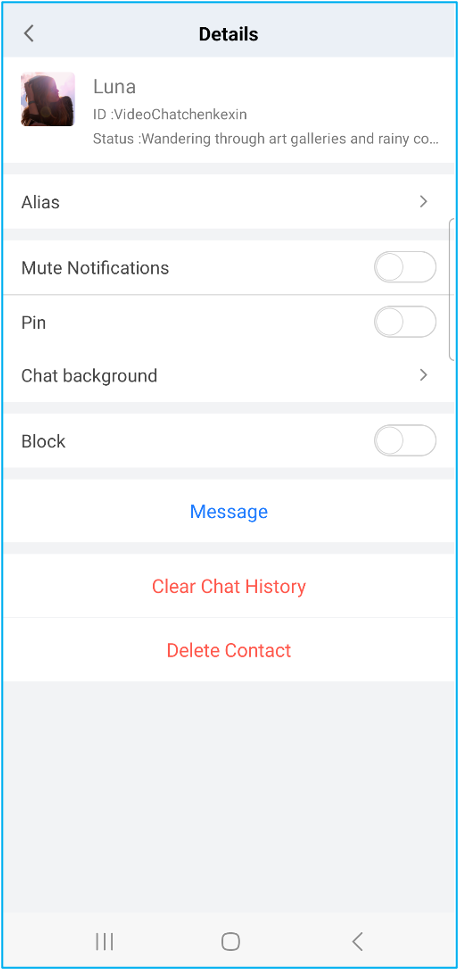
Device B: Log in to the account (UserID: VideoChatchenkexin) and engage in text and video chats with Richard.
Log in to Luna's account "VideoChatchenkexin"
Enter the Settings page
Adjust beauty filters
Answer the call from "Richard"
Chat with "Richard"


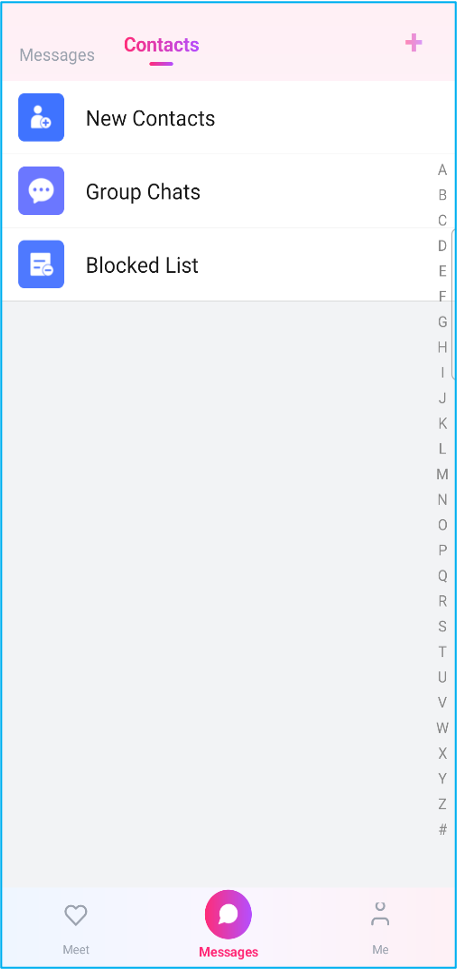
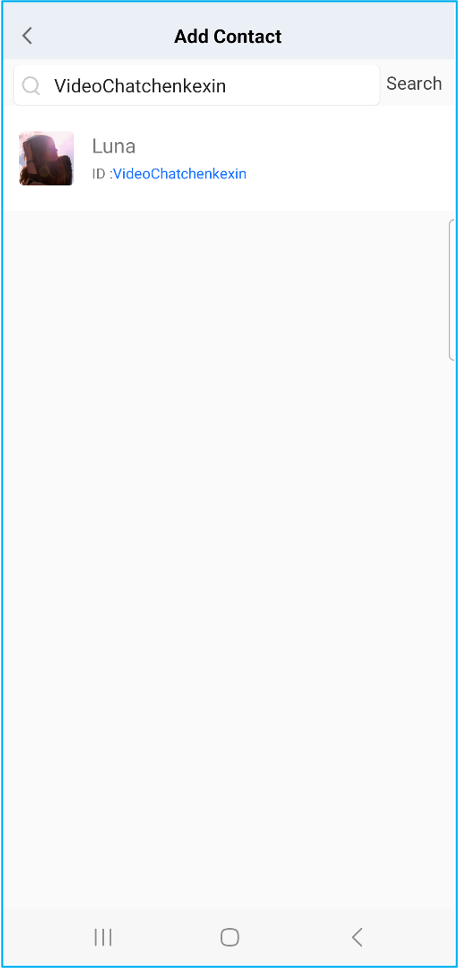
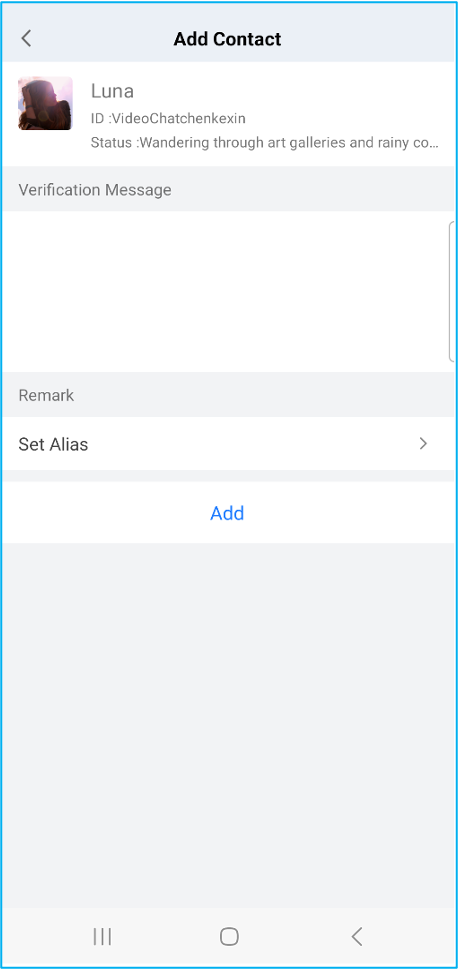
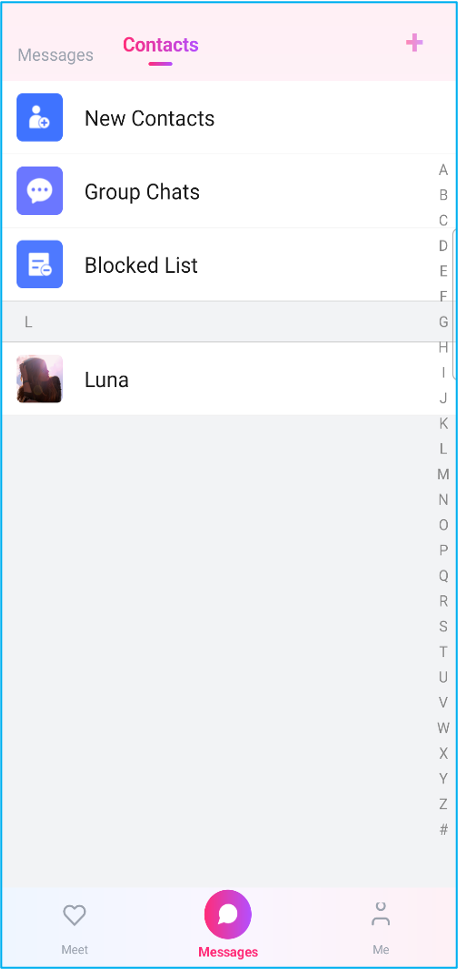
2. Interact via adding friends: Alternatively, you can log in to different accounts on two devices and interact using the "Add Friend" feature.
Select the "Contacts" tab
Search for the target user and add them as a friend
Select the user in "Contacts" to start a chat


Integration

To help you go live quickly, you can directly integrate the UI components from the Demo to implement core features like 1v1 chat and calling.

Step 1: Integrate Components

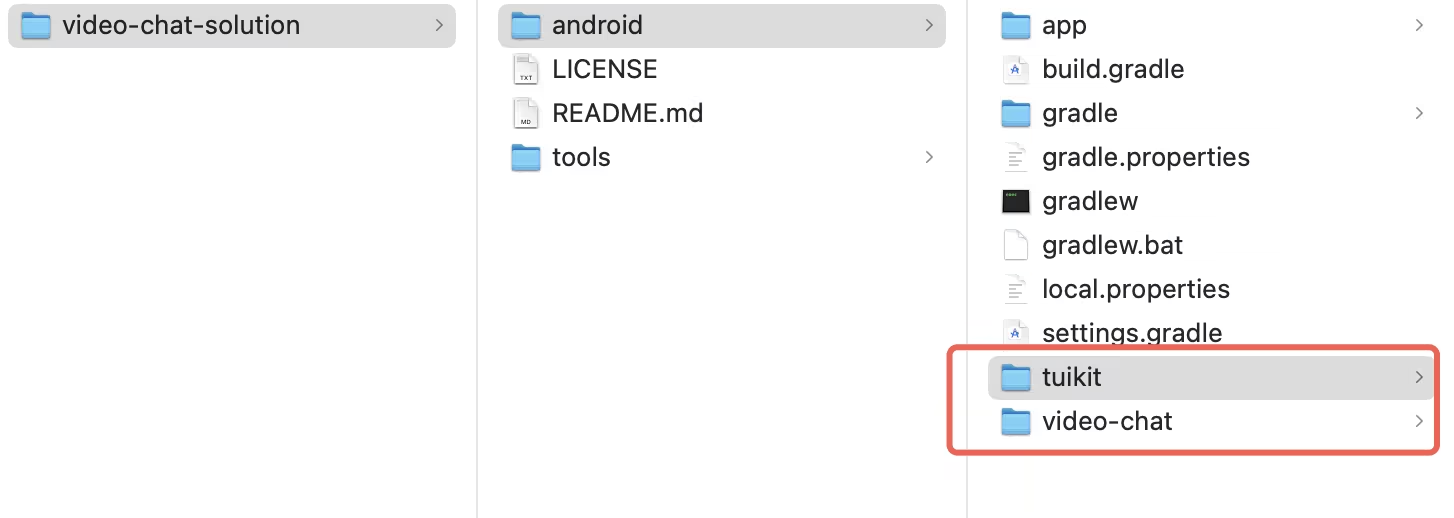
1. Download the VideoChat Demo source code from the GitHub repository, and copy the video-chat and tuikit components into your project directory:

2. Add the following code to settings.gradle to complete the integration.
// Include the app module
include ':app'

// Include the 1v1 video social UI module
include ':video-chat'

// Include the beauty filter module
include ':tebeautykit'
project(':tebeautykit').projectDir = file("./tuikit/tebeautykit")

// Include the IM common module
include ':timcommon'
project(':timcommon').projectDir = file("./tuikit/timcommon")

// Include the conversation module (core module)
include ':tuiconversation'
project(':tuiconversation').projectDir = file("./tuikit/tuiconversation")

// Include the chat module (core module)
include ':tuichat'
project(':tuichat').projectDir = file("./tuikit/tuichat")

// Include the contact module (core module)
include ':tuicontact'
project(':tuicontact').projectDir = file("./tuikit/tuicontact")

// Include the search module (requires the Ultimate or Enterprise Edition plan)
include ':tuisearch'
project(':tuisearch').projectDir = file("./tuikit/tuisearch")

Step 2: Complete the Login

Login authentication is required before you can use the component's features. Call the login API of LoginStore and pass in the sdkAppID, userID, and userSig obtained earlier for authentication:
import io.trtc.tuikit.atomicxcore.api.CompletionHandler
import io.trtc.tuikit.atomicxcore.api.login.LoginStore

LoginStore.shared.login(
context,
sdkAppID, // Int, obtained from the console
userID, // String
userSig, // String, generated in the console or by your server
object : CompletionHandler {
override fun onSuccess() {
// Login successful. You can navigate to the conversation list or chat page.
}
override fun onFailure(code: Int, desc: String) {
// Login failed. You can show an error prompt.
}
}
)
Note:
In a production environment, we highly recommend generating the UserSig on your server. Your App should request a dynamic UserSig from your business server for authentication when needed. For details, see Generating UserSig on the Server.

Step 3: Build the Recommended User List UI

1. Add the UI: Add the "Recommended User List (MeetPage)" to your project:
import com.tencent.qcloud.tuikit.videochat.page.meet.MeetPage

class MeetPageFragment : Fragment() {
override fun onViewCreated(view: View, savedInstanceState: Bundle?) {
super.onViewCreated(view, savedInstanceState)
addMeetPage()
}
private fun addMeetPage() {
val meetPage = MeetPage(requireContext())
val container = findViewById<FrameLayout>(R.id.meet_container)
container.addView(meetPage, MATCH_PARENT, MATCH_PARENT)
}
}
2. Populate data: You can pass the recommended user list via setPageUsers. You should also listen for the pull-up-to-load-more callback (onLoadMoreRequested) to append user data to the end of the list, and the pull-down-to-refresh callback (onRefreshRequested) to fully update the user data.
import com.tencent.qcloud.tuikit.videochat.page.meet.MeetPage

meetPage.setListener(object : MeetPage.Listener {
// Triggered upon a pull-down-to-refresh action
override fun onRefreshRequested() {
// Fully update the user list
fetchUsers { users, hasMore ->
// Pass in the user list
meetPage.setPageUsers(users, hasMore)
}
}
// Triggered upon a pull-up-to-load-more action
override fun onLoadMoreRequested() {
// Append new users to the end of the list
fetchNextPage { users, hasMore ->
// Pass in the user list
meetPage.setPageUsers(users, hasMore)
}
}
})
Detailed Description of setPageUsers:
fun setPageUsers(users: List<V2TIMUserFullInfo>, hasMore: Boolean)
Parameter
Type
Description
users
The user list. V2TIMUserFullInfo is an object containing essential user information such as ID, nickname, avatar, and gender.
hasMore
Boolean
Indicates whether there is a next page:
true: There is a next page. Scrolling to the bottom will continue to trigger onLoadMoreRequested().
false: No more data is available. Scrolling to the bottom will no longer trigger the callback.
3. Switch Layout (Optional): MeetPage provides two layout modes: "Grid" and "List". You can choose your preferred layout by calling setLayoutTemplate.
import com.tencent.qcloud.tuikit.videochat.page.meet.MeetPage

class MeetPageFragment : Fragment() {
override fun onViewCreated(view: View, savedInstanceState: Bundle?) {
super.onViewCreated(view, savedInstanceState)
addMeetPage()
}
private fun addMeetPage() {
val meetPage = MeetPage(requireContext())
// Set the layout
meetPage.setLayoutTemplate(MeetPage.Template.LIST) // Set to list layout (default)
// meetPage.setLayoutTemplate(MeetPage.Template.GRID) // Set to grid layout
val container = findViewById<FrameLayout>(R.id.meet_container)
container.addView(meetPage, MATCH_PARENT, MATCH_PARENT)
}
}
Detailed Description of setLayoutTemplate:
fun setLayoutTemplate(template: MeetPage.Template)
Parameter
Type
Description
template
MeetPage.Template
The layout type :
MeetPage.Template.LIST :List layout.
MeetPage.Template.GRID :Grid layout.

Step 4: Build the Conversation List UI

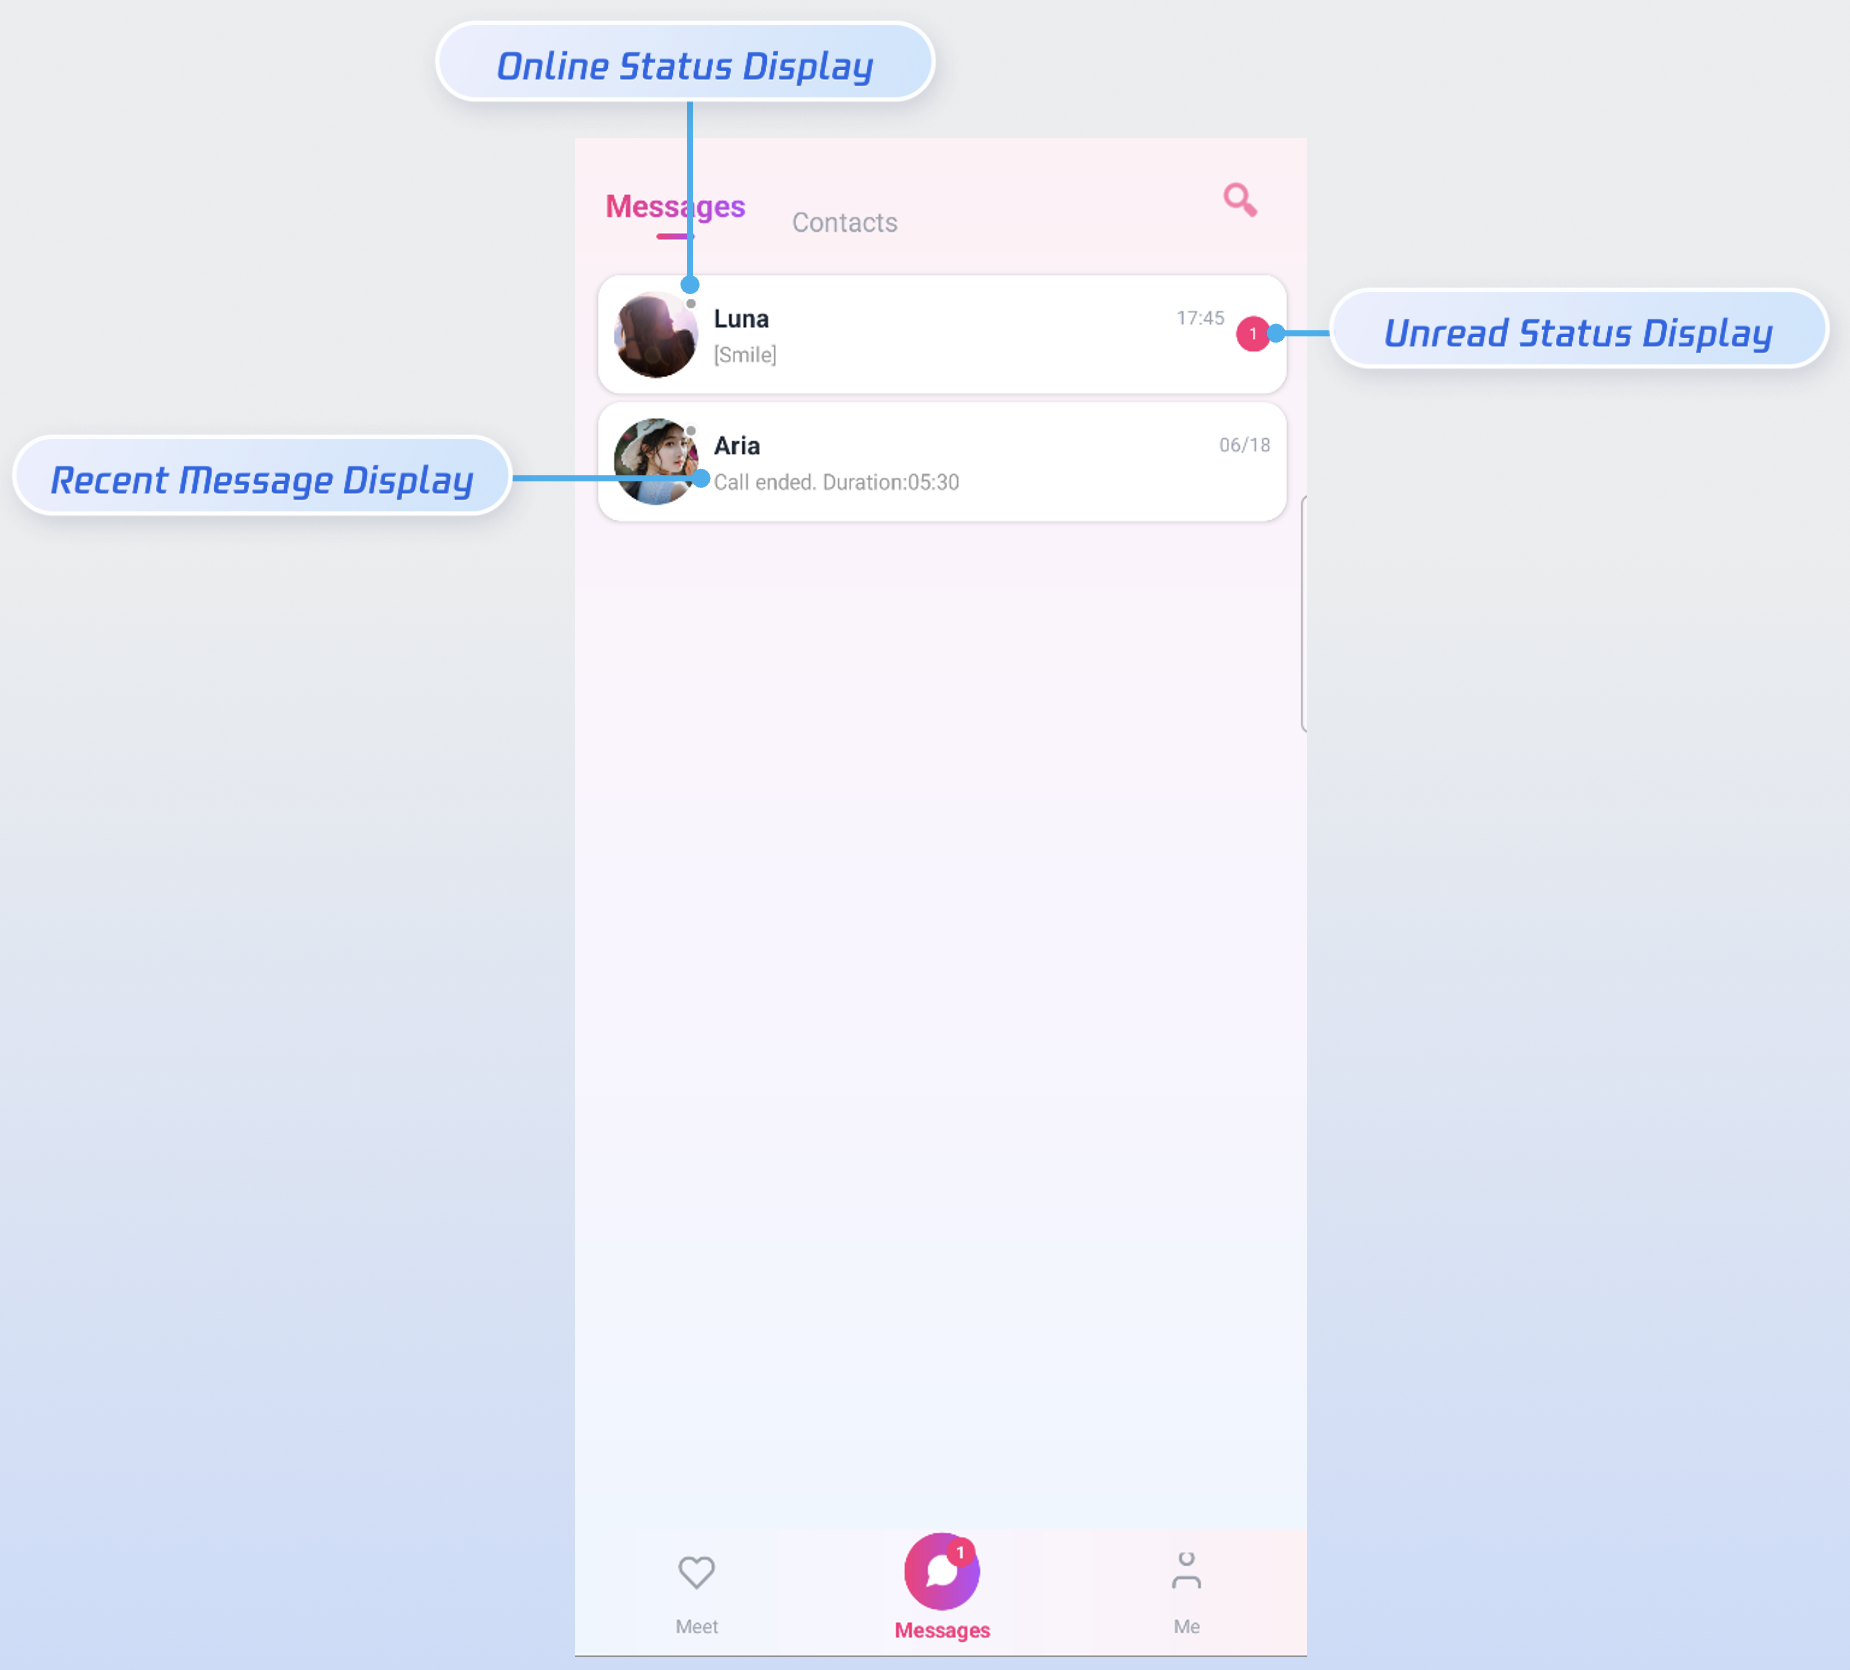
To build the conversation list, you simply need to create a ConversationPage object and add it to your layout. The conversation list automatically reads recent chat records from the database. When a user taps on a chat record, the ConversationPage navigates to the chat page by default.


Sample code is as follows:
val conversationPage = ConversationPage()

// R.id.container is the FrameLayout in your layout that hosts the conversation list Fragment
supportFragmentManager.beginTransaction()
.add(R.id.container, conversationPage)
.commit()

Step 5: Build the Chat UI

The chat UI is used to display and send messages. You can build the UI as follows.

Sample code is as follows:
Bundle param = new Bundle();
param.putInt(TUIConstants.TUIChat.CHAT_TYPE, V2TIMConversation.V2TIM_C2C);
val userId = "jack" // The peer's UserId
param.putString(TUIConstants.TUIChat.CHAT_ID, userId);
TUICore.startActivity("TUIC2CChatActivity", param);

Step 6: Audio/Video Calls

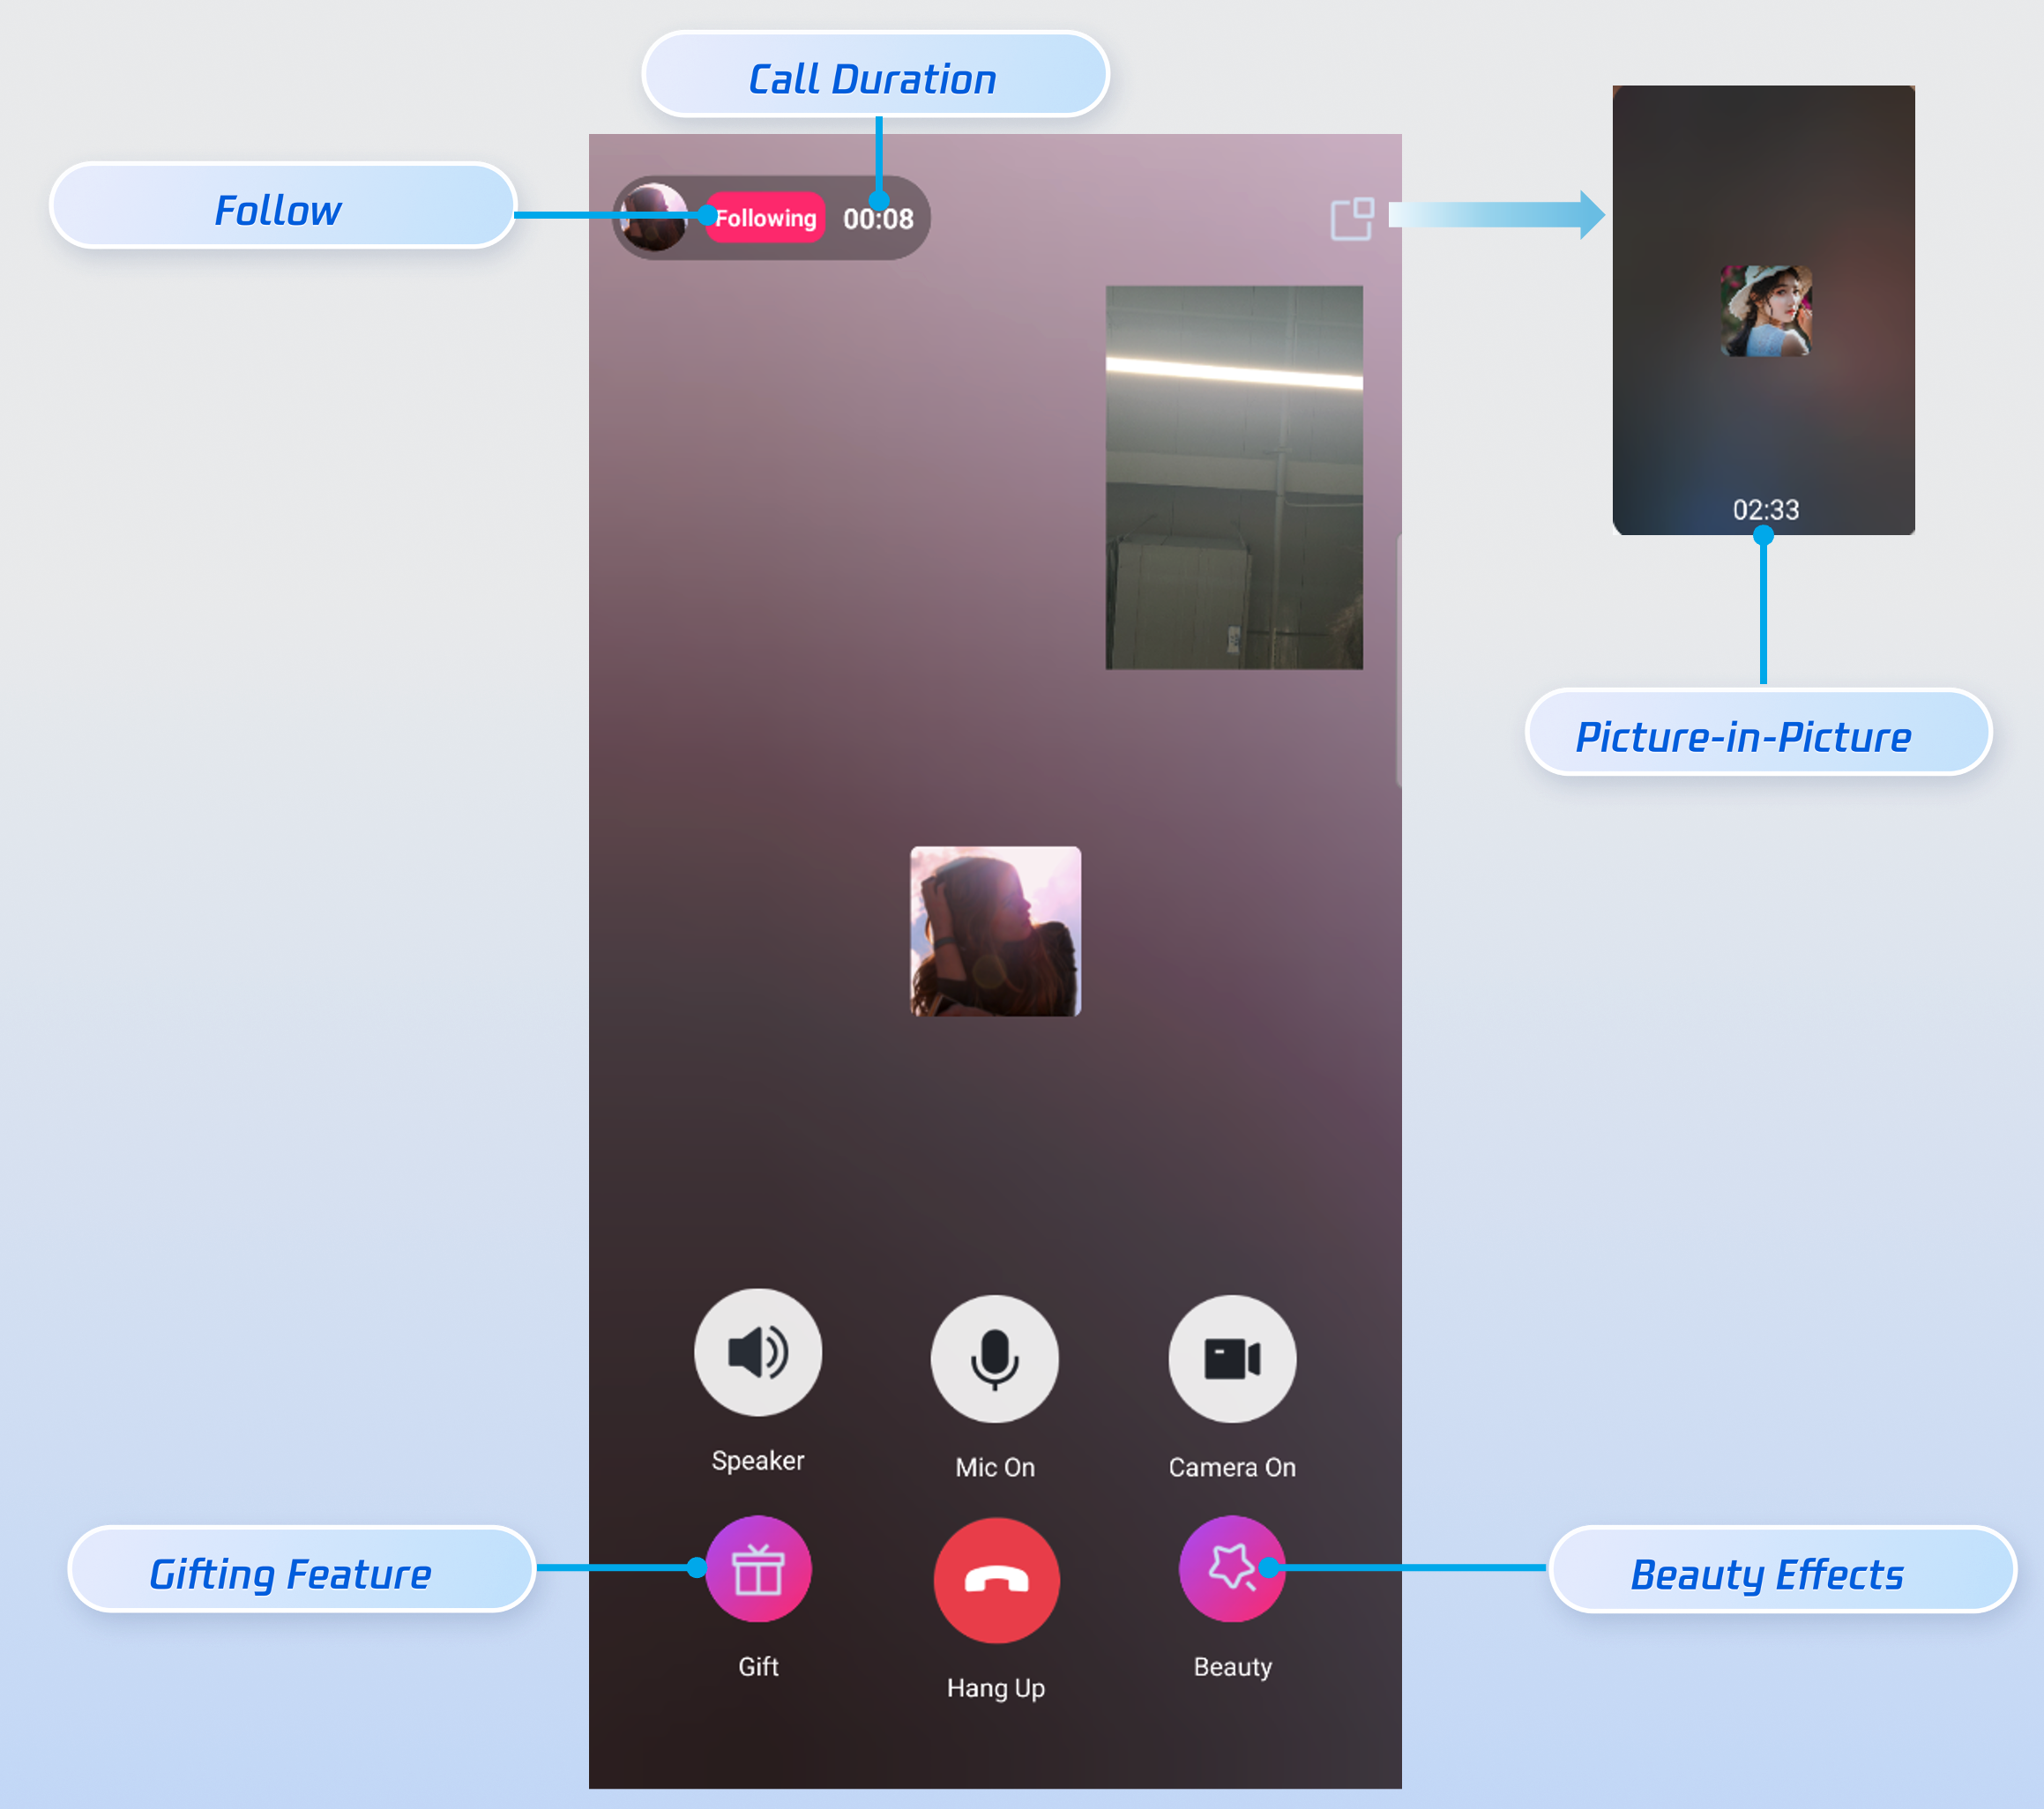
In social entertainment scenarios, calling requirements can be complex and diverse. Therefore, we recommend using the AtomicxCore SDK to flexibly customize your calling features. Take the call UI (VideoCallPage) in the video-chat module as an example: built upon the SDK's CallStore module, it deeply integrates core UI elements such as beauty filters, follow actions, and peer information display. You can use it as a source code reference or integrate it directly into your project to quickly build your own custom call UI.

Sample code for initiating a video call: You can initiate a video call via CallStore.calls and navigate to the call UI upon the success callback.
// Initiate a video call via CallStore.calls of the AtomicxCore SDK calling module.
CallStore.shared.calls(list, mediaType, params, object : CompletionHandler {
override fun onFailure(code: Int, desc: String) {
completion?.onFailure(code, desc)
}

override fun onSuccess() {
completion?.onSuccess()
// Call succeeded. Navigate to the VideoCallPage UI.
val intent = Intent(context, VideoCallPage::class.java)
intent.flags = Intent.FLAG_ACTIVITY_NEW_TASK
context.startActivity(intent)
}
})
Core APIs of the AtomicxCore SDK Calling Module:
Module
Description
Core component of the call view. Automatically listens to CallStore data to render the video, while providing UI customization options such as layout switching, and avatar/icon configuration.
CallStore
Call lifecycle management: making, answering, rejecting, and hanging up calls. Retrieves real-time audio/video status of participants, call duration, call logs, and other data.
Audio/video device control: microphone (on/off / volume), camera (on/off / switch / quality), and screen sharing, along with real-time monitoring of device status.

More Features

You can integrate the following features to enhance your app's core competitiveness and deliver a better user experience.
Feature
Description
Integration Guide
Call Billing
We provide highly accurate server-side call status callbacks. You can listen for the server-side callbacks for call start and call end to implement call billing functionality.
Integrate Beauty Effects
We provide two beauty effect solutions: Basic Beauty (built-in) and Advanced Beauty (requires additional integration and payment). You can choose the solution that best fits your needs.
Integrate Voice Effects
Implementation methods and application scenarios for TRTC voice effects, helping developers create a rich and diverse interactive audio experience for users.
Integrate AI Real-Time Translation
An essential feature for globalizing your app, helping you break down language barriers for your users.

FAQs

Why isn't the beauty filter working in the Demo?

The Demo integrates the beauty filter feature by default, but it requires License authentication. Please check whether the LicenseURL and LicenseKey in video-chat-solution/android/app/src/main/java/io/trtc/uikit/demo/debug/GenerateTestUserSig.java are correct. For how to obtain them, please refer to the License Guide.


How do I customize the UI?

If you have highly customized UI requirements, we recommend the following:
1. Calling module: You can use the AtomicxCore SDK (for sample code, refer to UI-free Integration) to customize the calling UI. Its core modules are as follows:
Module
Description
The login management class used to handle business logic such as user login, logout, and user information management. LoginStore provides a complete set of login management APIs, including functions for logging in, logging out, and setting personal information. You can use this class to manage user login states and profiles.
Core component for the call view. It automatically listens to CallStore data to handle video rendering, and provides UI customization capabilities such as layout switching, and avatar/icon configurations.
CallStore
Call lifecycle management: making, answering, rejecting, and hanging up calls. It obtains real-time data including the audio/video status of call participants, call duration, and call logs.
Audio/video device control: microphone (on/off/volume), camera (on/off/switch/quality), and screen sharing, along with real-time monitoring of device status.
2. Chat and interaction module: Please refer to Chat SDK UI-free Integration.

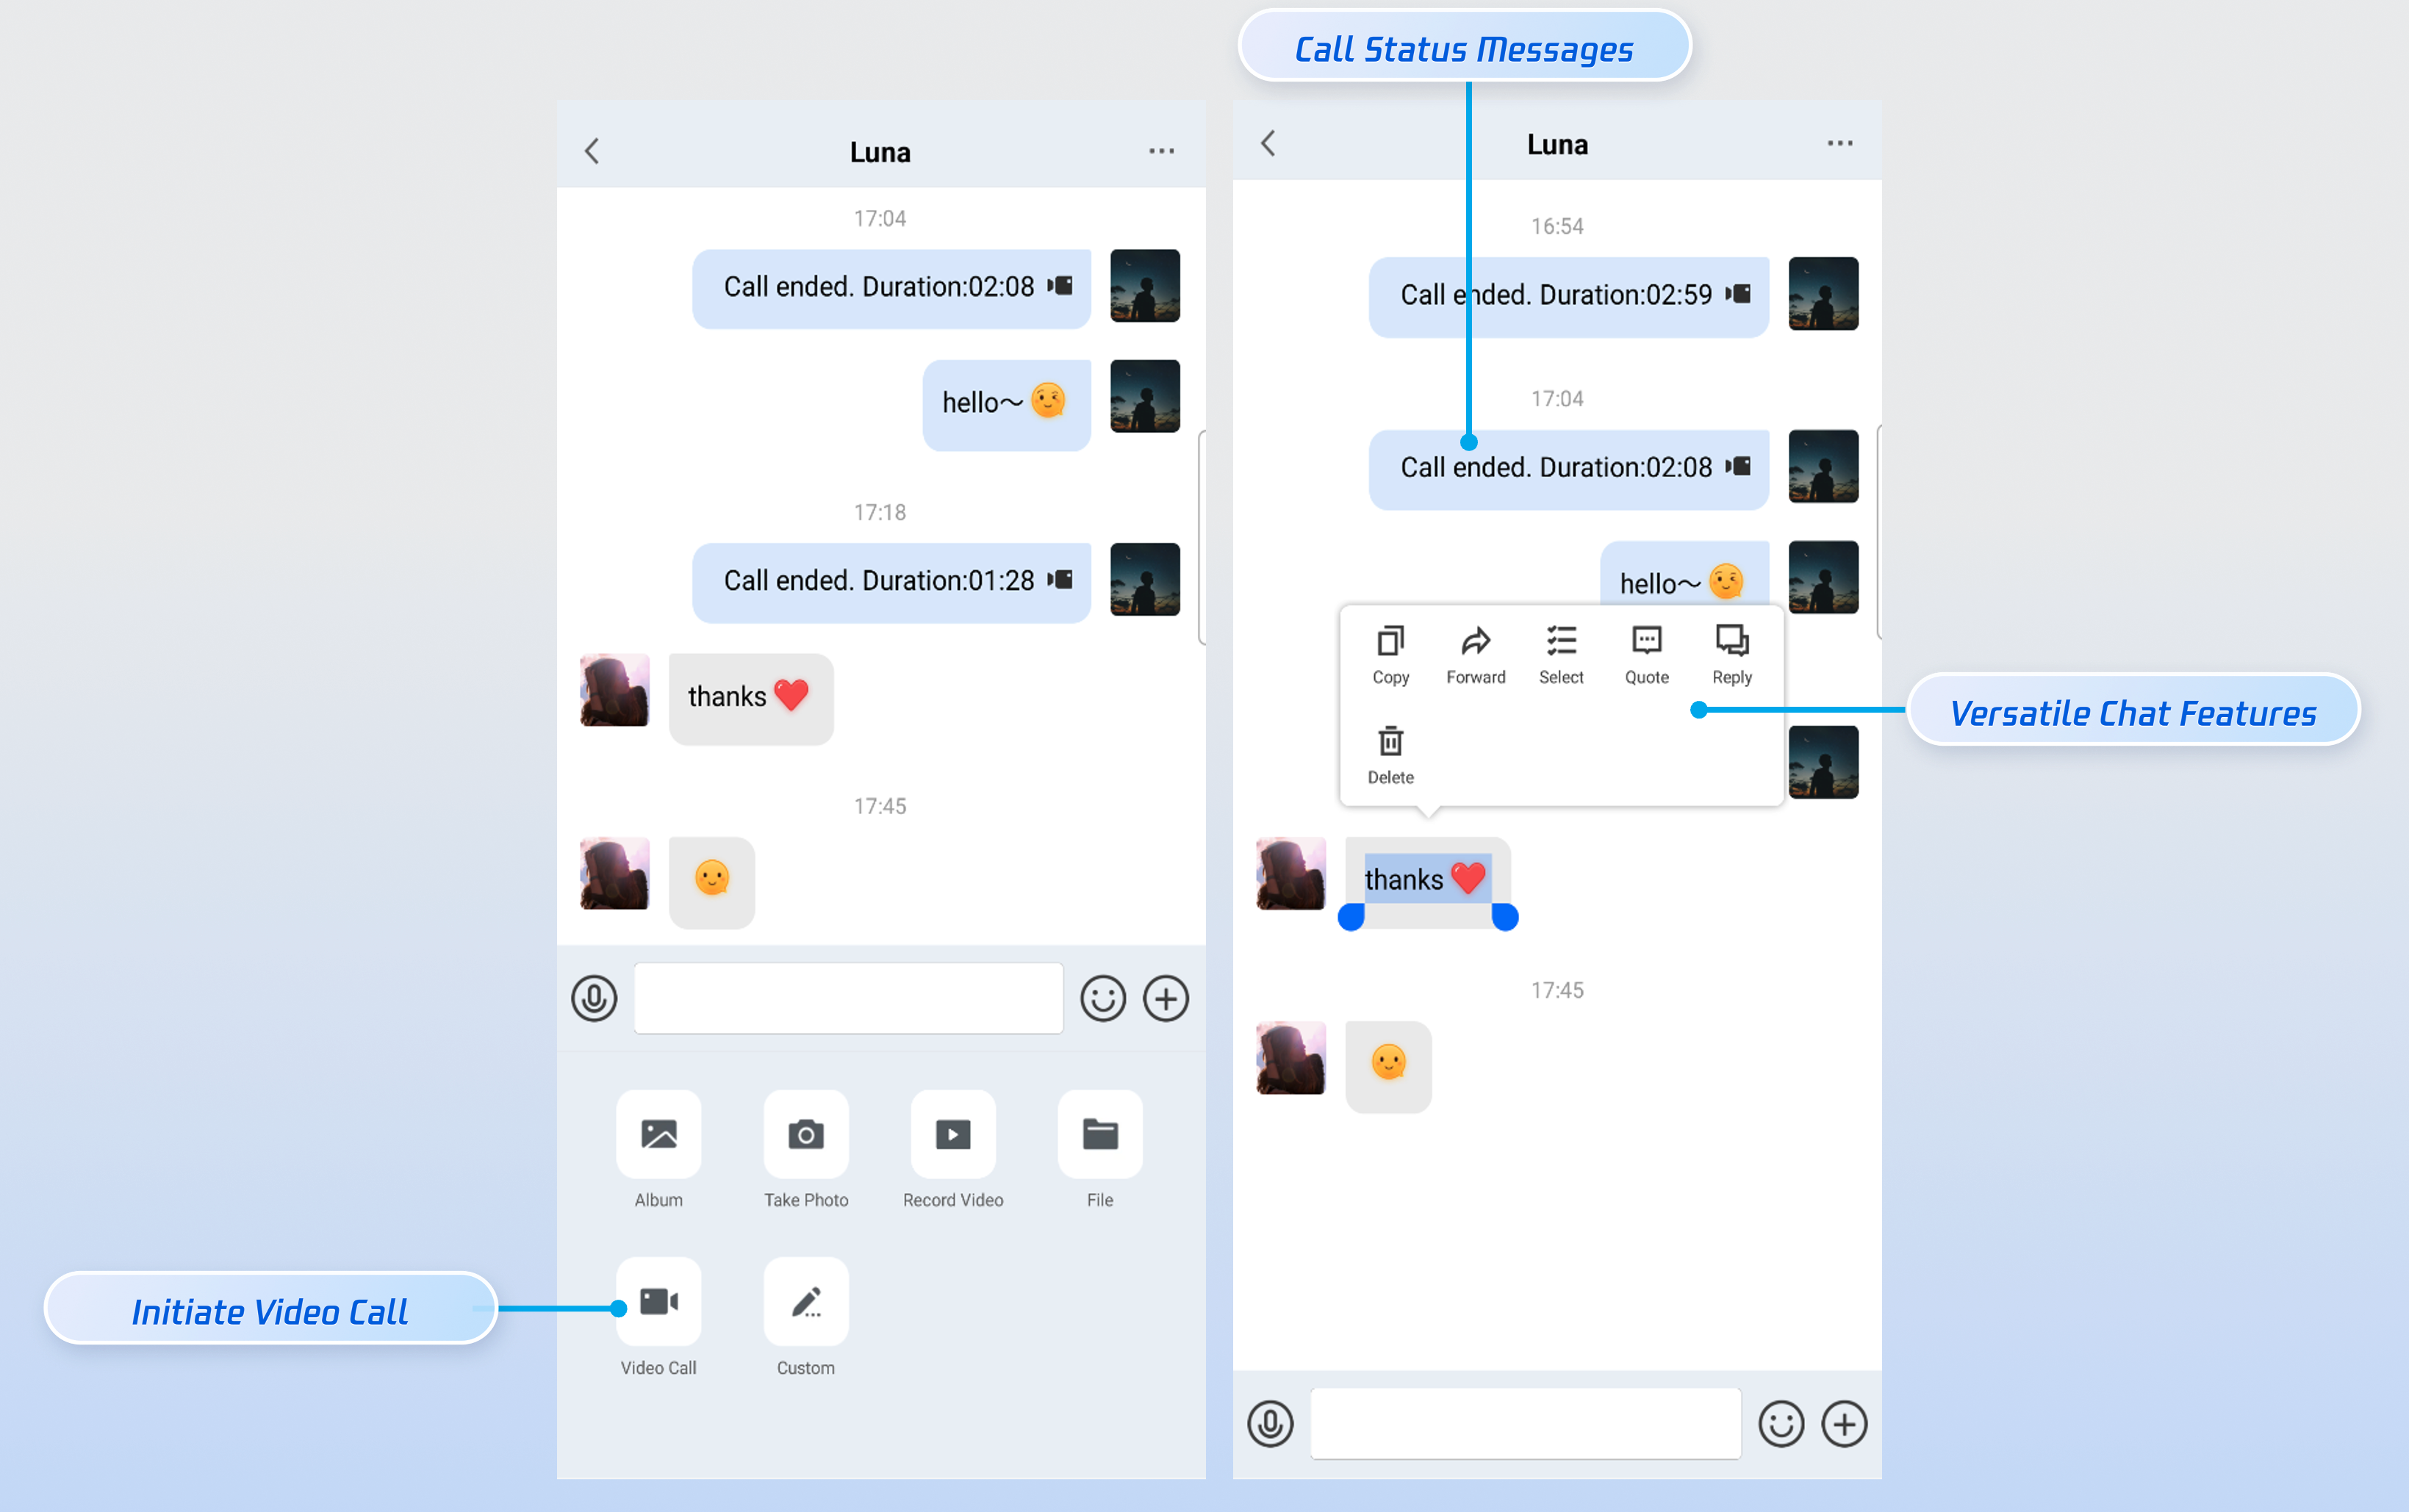
How to Customize the Display of Call Status Messages in Chat?

When the call status changes, the Chat SDK will dispatch a call status change message based on the following signaling protocol:
Scenario
Judgment Logic
Identify "Call Initiated"
actionType = 1 and cmd = 'videoCall' or 'audioCall'
Identify "Call Answered"
actionType = 3
Identify "Call Ended" & "Call Duration"
actionType = 1 and cmd = 'hangup'. The duration is obtained from the call_end field (in seconds).
Identify "Call Canceled"
actionType = 2
Identify "Call Rejected"
actionType = 4
Identify "Call Rejected due to Line Busy"
actionType = 4 and cmd = "line_busy"
Identify "Call Timeout" (unanswered)
actionType = 5
With UI Integration
You can locate the source code in tuikit/TUIChat/tuichat/src/main/java/com/tencent/qcloud/tuikit/tuichat/bean/CallModel.java and modify the getContentForSimplifyAppearance function to customize how call status messages are displayed on the UI.
/**
* Customize the display text for 1v1 call status messages
*
* Modification location: CallModel.java -> getContentForSimplifyAppearance()
* You only need to modify the text inside the `participantType == CALL_PARTICIPANT_TYPE_C2C` branch.
*
* The following fields can be used directly within the method:
* - protocolType: Call protocol type (Initiated/Answered/Rejected/Canceled/Hung up/Timeout/Line Busy)
* - participantRole: Current user role (CALLER / CALLEE)
* - streamMediaType: Media type (VOICE / VIDEO)
* - duration: Call duration (in seconds)
*/

// =================== Example: Customizing 1v1 Call Display Text ===================

// In the getContentForSimplifyAppearance() method,
// locate the `if (participantType == CALL_PARTICIPANT_TYPE_C2C)` branch and modify it as follows:

if (participantType == CALL_PARTICIPANT_TYPE_C2C) {
// Determine the media type to append the text prefix
val mediaPrefix = if (streamMediaType == CALL_STREAM_MEDIA_TYPE_VIDEO) {
"[Video Call]" // Enter your custom text for video calls
} else {
"[Voice Call]" // Enter your custom text for voice calls
}

val isCaller = (participantRole == CALL_PARTICIPANT_ROLE_CALLER)
// `display` is the call status message shown on the UI
display = when (protocolType) {
// Call rejected (actionType = 4, excluding line_busy)
CALL_PROTOCOL_TYPE_REJECT -> {
if (isCaller) {
"$mediaPrefix The peer rejected the call"
} else {
"$mediaPrefix Call rejected"
}
}

// Call canceled (actionType = 2, canceled by caller)
CALL_PROTOCOL_TYPE_CANCEL -> {
if (isCaller) {
"$mediaPrefix Call canceled"
} else {
"$mediaPrefix The peer canceled the call"
}
}

// Call ended (actionType = 1, cmd = "hangup")
// The `duration` field indicates the call duration in seconds
CALL_PROTOCOL_TYPE_HANGUP -> {
val formattedDuration = DateTimeUtil.formatSecondsTo00(duration)
"$mediaPrefix Call duration: $formattedDuration"
}

// Timeout/Unanswered (actionType = 5)
CALL_PROTOCOL_TYPE_TIMEOUT -> {
if (isCaller) {
"$mediaPrefix No response from the peer"
} else {
"$mediaPrefix Unanswered"
}
}

// Rejected due to line busy (actionType = 4, top-level JSON contains the "line_busy" field)
CALL_PROTOCOL_TYPE_LINE_BUSY -> {
if (isCaller) {
"$mediaPrefix The peer is busy"
} else {
"$mediaPrefix Line busy"
}
}

// Call initiated (actionType = 1, cmd = "videoCall" or "audioCall")
CALL_PROTOCOL_TYPE_SEND -> {
"$mediaPrefix Call initiated"
}

// Call answered (actionType = 3)
CALL_PROTOCOL_TYPE_ACCEPT -> {
"$mediaPrefix Call answered"
}

else -> {
context.getString(R.string.invalid_command)
}
}
}
UI-free Integration
If you are using a UI-free integration, you can set up an Chat message listener to handle the display of call status messages. The sample code is as follows:
// Set the message listener
V2TIMManager.getMessageManager().addAdvancedMsgListener(advancedMsgListener)

/**
* Received a new message
* @param msg The message object
*/
override fun onRecvNewMessage(msg: V2TIMMessage) {
// Get signaling information. Returns null for non-signaling messages
val signalingInfo = V2TIMManager.getSignalingManager().getSignalingInfo(msg)
?: return

// Only process 1v1 chats (an empty groupID indicates a 1v1 chat; non-empty indicates a group chat)
if (!signalingInfo.groupID.isNullOrEmpty()) {
return
}

// Parse the data field of the signaling message (JSON format)
val gson = Gson()
val jsonData: Map<String, Any> = try {
gson.fromJson(signalingInfo.data, object : TypeToken<Map<String, Any>>() {}.type)
} catch (e: Exception) {
return
}

// Verify businessID to confirm it is a call signaling message
val businessId = jsonData["businessID"] as? String
if (businessId != "av_call" && businessId != "tuikit_calling") {
return
}

// Extract `cmd` from the nested `data` object
val dataMap = jsonData["data"] as? Map<*, *>
val cmd = dataMap?.get("cmd") as? String

// Determine the call status based on actionType
when (signalingInfo.actionType) {

// ========== actionType = 1: Initiate Invitation ==========
V2TIMSignalingInfo.SIGNALING_ACTION_TYPE_INVITE -> {
when (cmd) {
// Initiate a video call
"videoCall" -> {
val mediaType = "video"
Log.i(TAG, "Call initiated | Type: $mediaType, Caller: ${msg.sender}")
}
// Initiate a voice call
"audioCall" -> {
val mediaType = "audio"
Log.i(TAG, "Call initiated | Type: $mediaType, Caller: ${msg.sender}")
}
// Hang up (Call ended)
"hangup" -> {
// Call duration is obtained from the top-level `call_end` field (in seconds)
val duration = jsonData["call_end"]
?.toString()?.toDoubleOrNull()?.toInt() ?: 0
Log.i(TAG, "Call ended | Duration: ${duration}s")
}
}
}

// ========== actionType = 2: Cancel Call (Canceled by Caller) ==========
V2TIMSignalingInfo.SIGNALING_ACTION_TYPE_CANCEL_INVITE -> {
Log.i(TAG, "Call canceled | Caller: ${msg.sender}")
}

// ========== actionType = 3: Answer Call (Accepted by Callee) ==========
V2TIMSignalingInfo.SIGNALING_ACTION_TYPE_ACCEPT_INVITE -> {
Log.i(TAG, "Call answered")
}

// ========== actionType = 4: Reject Call (Rejected by Callee) ==========
V2TIMSignalingInfo.SIGNALING_ACTION_TYPE_REJECT_INVITE -> {
// Determine if it was rejected due to line busy: the top-level JSON contains a "line_busy" field
if (jsonData.containsKey("line_busy")) {
Log.i(TAG, "Rejected: The peer is busy")
} else {
Log.i(TAG, "Call rejected")
}
}

// ========== actionType = 5: Timeout (Unanswered) ==========
V2TIMSignalingInfo.SIGNALING_ACTION_TYPE_INVITE_TIMEOUT -> {
Log.i(TAG, "Call timeout (Unanswered)")
}
}
}

How to Improve Call Reachability?

1. Integrate offline push notifications to improve call reachability: Integrate FCM (Firebase Cloud Messaging)
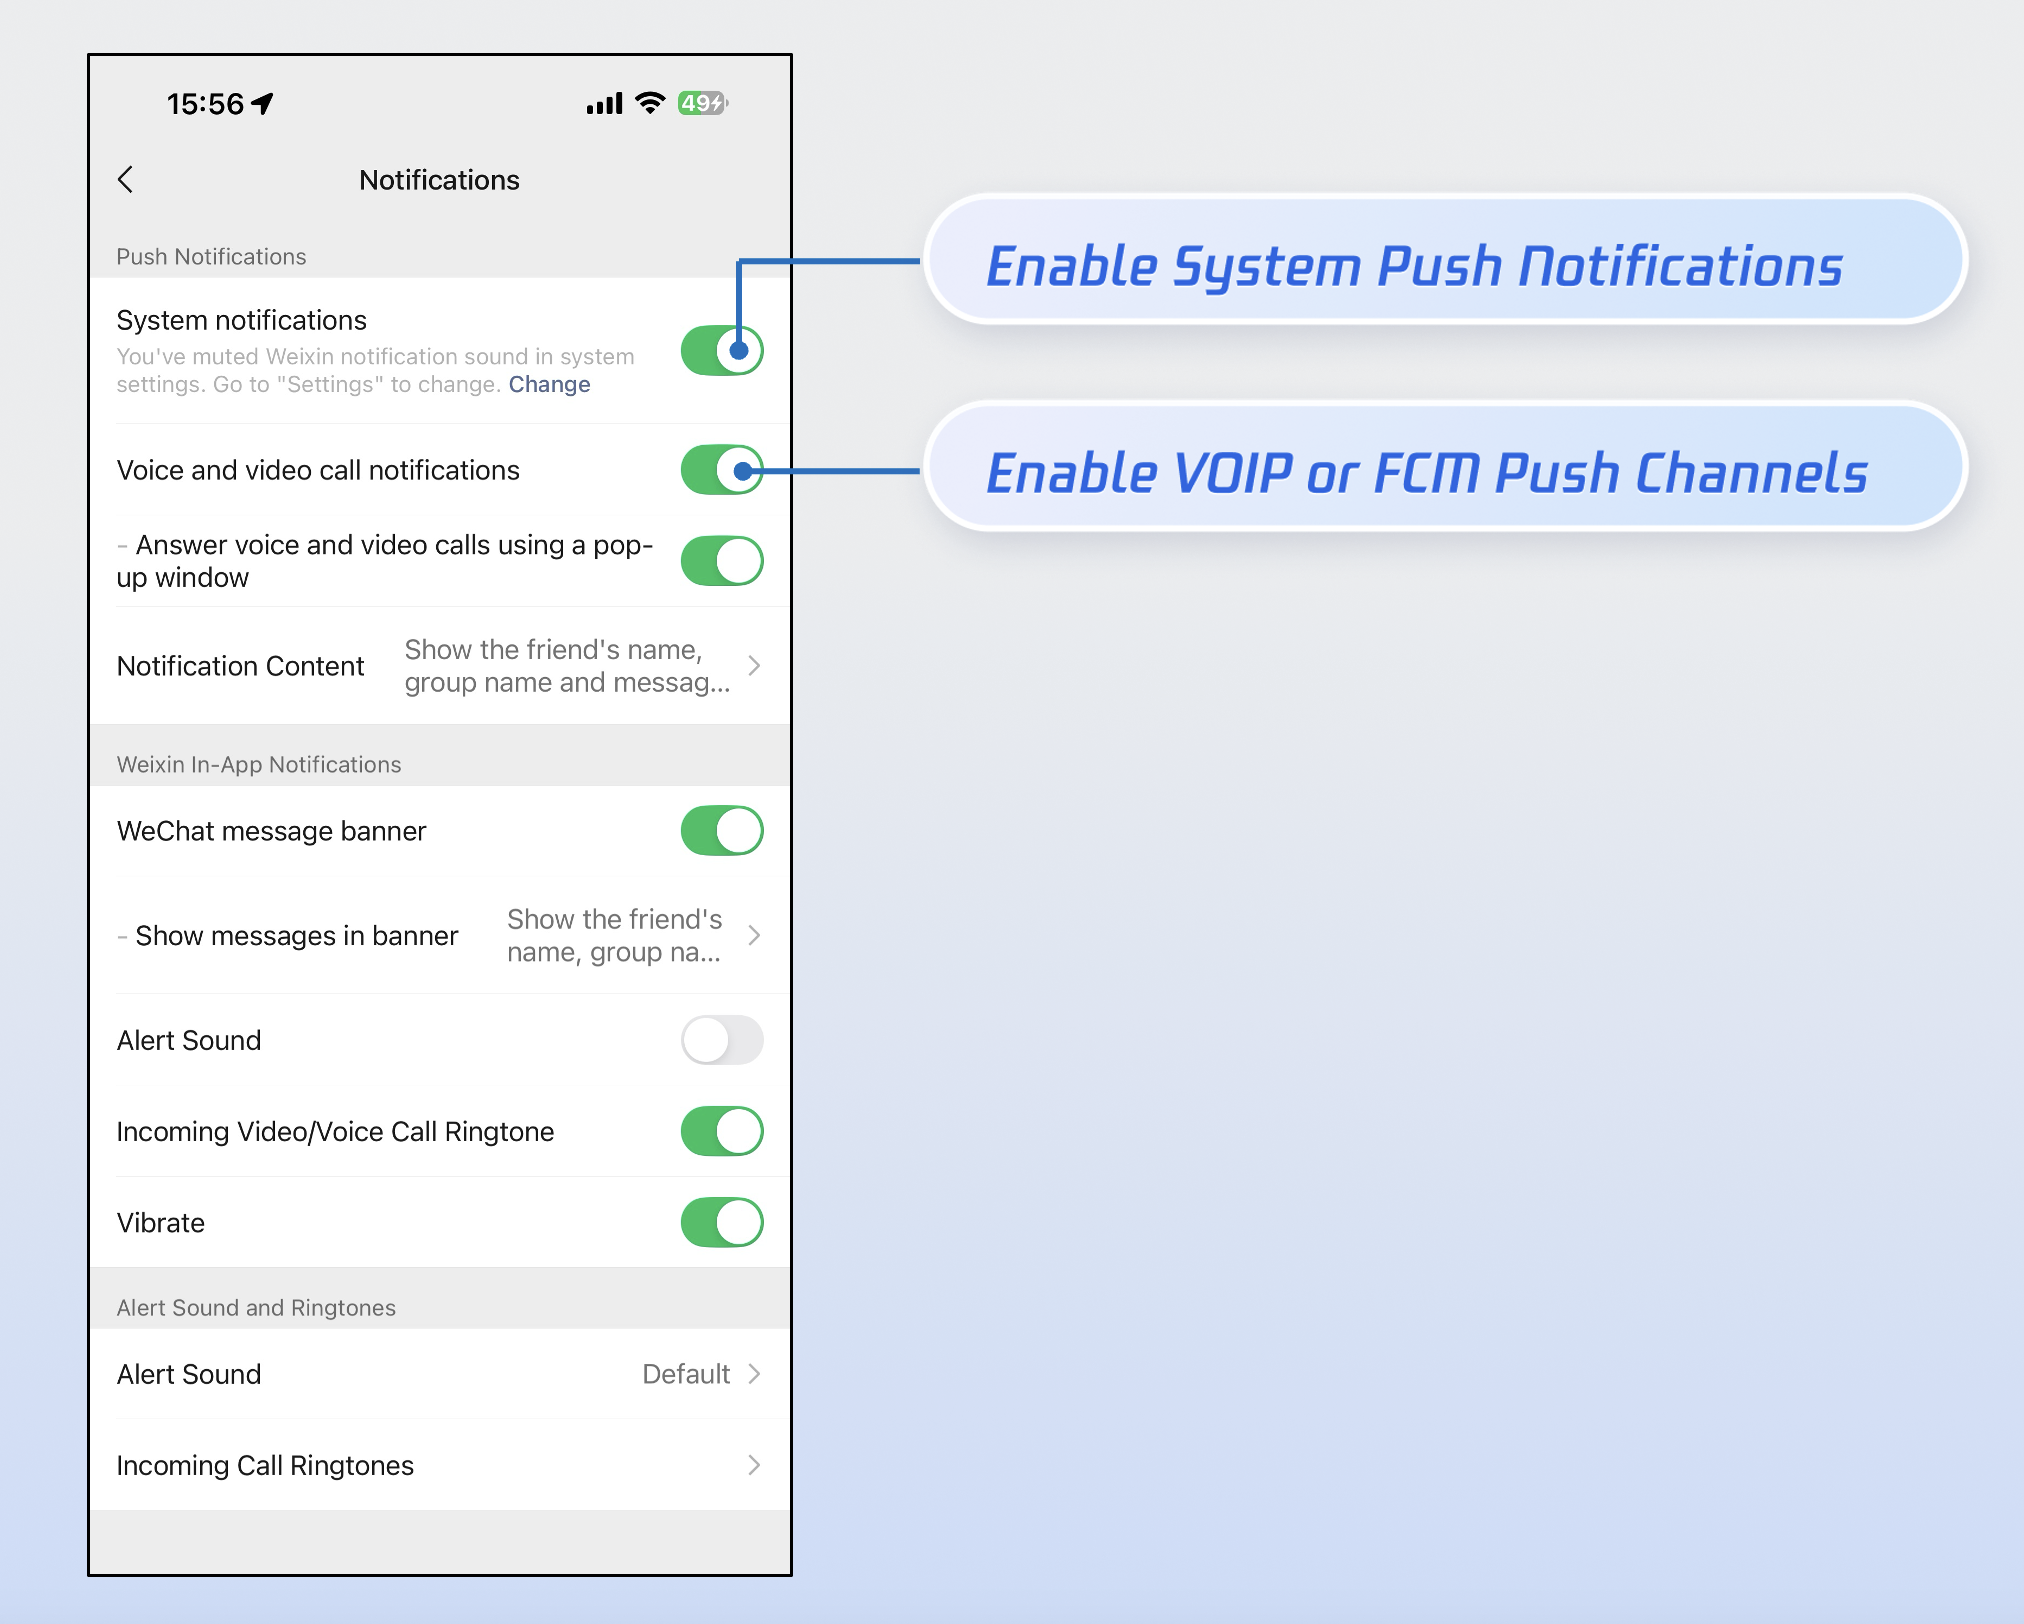
2. Provide push notification controls:Based on our experience, over 90% of cases where users fail to receive call notifications are due to them manually disabling the app's notification permissions. To ensure high call reachability, we strongly recommend the following:
Send notifications prudently: Avoid sending low-quality or irrelevant notifications. This minimizes the likelihood of users disabling notification permissions out of frustration over spam.
Provide granular controls: Following the best practices of leading apps like WeChat, provide independent toggles within your app's internal settings to control "Notification" and "FCM Data Message" separately, rather than driving users to the system settings to disable all notifications across the board.


Contact Us

If you have any questions or suggestions during integration or usage, feel free to join our Telegram group or contact us for support.
Ajuda e Suporte

Esta página foi útil?

comentários