Compute Unified Device Architecture (CUDA™) is a computing platform developed by NVIDIA. With a generic parallel computing architecture, CUDA allows GPUs to solve complex computing problems. It includes the CUDA instruction set architecture (ISA) and the parallel computing engine within the GPU. The CUDA platform is designed to work with programming languages such as C, C++, and Fortran. The compiled programs can be run on CUDA-enabled processors.
Because GPU instances use NVIDIA graphic cards, you must install the CUDA Toolkit. This document uses the most common CUDA Toolkit 10.1 as an example to describe how to install CUDA Toolkit on a GPU instance.
Directions
Installing CUDA Toolkit on a Linux instance
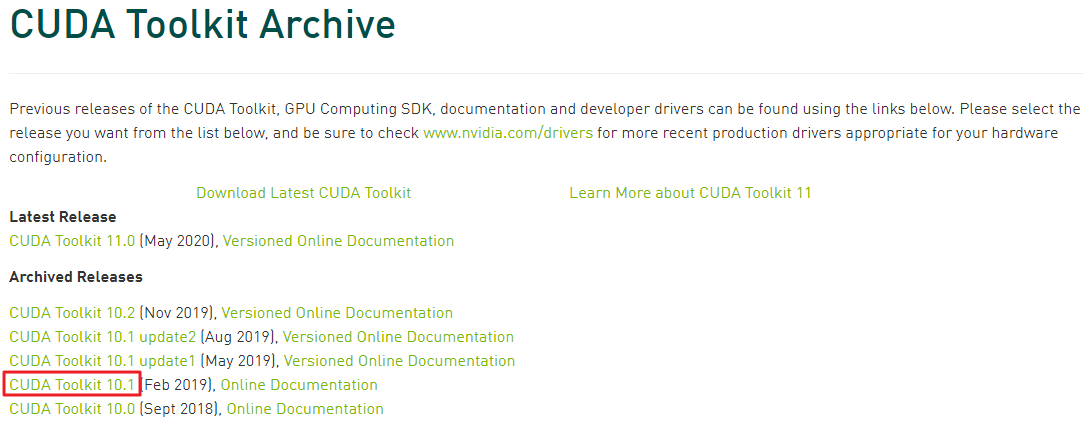
1. Go to the CUDA Toolkit download page or visit https://developer.nvidia.com/cuda-toolkit-archive.
2. Select the CUDA Toolkit version, as shown in the following figure. Below uses CUDA Toolkit 10.1 as an example.
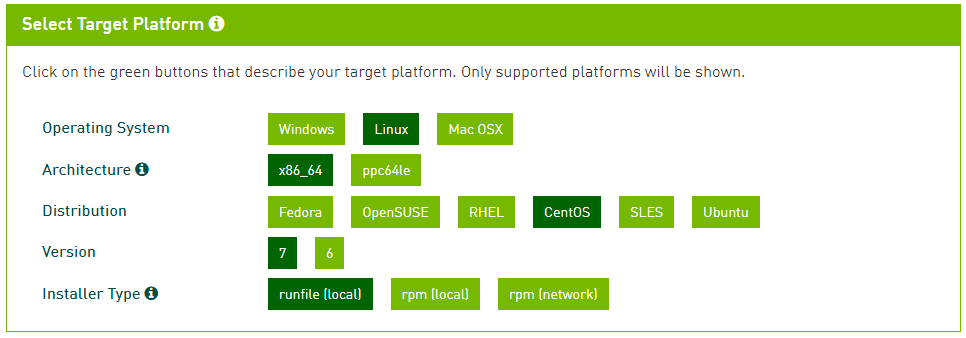
3. Configure the platform information as instructed, as shown in the following figure.
Note:
Installer Type: We recommend selecting runfile (local).
network: the network installer. It is a small executable and an internet connection is required during the installation.
local: the local installer. It is very large and has all of the components embedded into it.
4.
Whe
n the following information appears, right-click Download and select Copy link address, as shown in the following figure.
6. Run the wget command to download the installer using the URL copied in Step 4, as shown in the following figure.
You can also download the installer to your local computer and upload it to the GPU instance.
7. Add execution permissions to the installer. For example, to add execution permissions to the cuda_10.1.105_418.39_linux.run file, run the following commands in sequence:
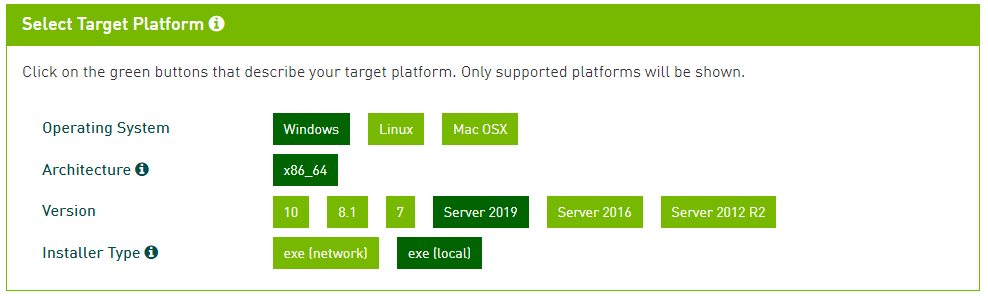
3. Select the CUDA Toolkit version, as shown in the following figure. Below uses CUDA Toolkit 10.1 as an example.
4. Configure the platform information as instructed, as shown in the following figure.
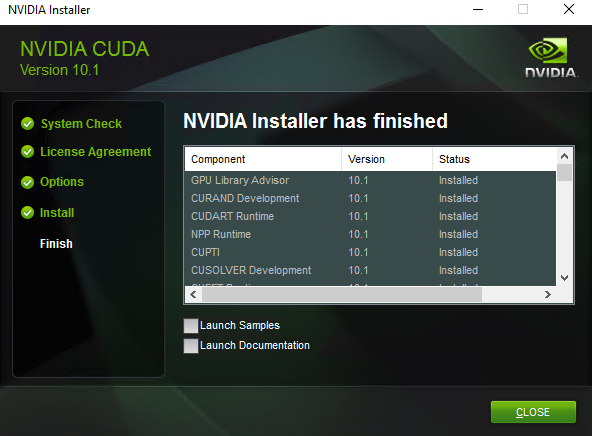
5. Go to the directory where the downloaded installer is located, double-click on it to install CUDA Toolkit as instructed, and restart the GPU instance as required.
If the dialog box shown in the following figure appears, CUDA Toolkit has been installed.


 Yes
Yes
 No
No
Was this page helpful?