Cloudreve is an open source network disk software that supports various storage methods such as server native storage and Tencent Cloud COS. Its features, such as offline download, drag and drop file upload, and online preview, allow you to quickly build a private or shared cloud storage system. The Cloudreve application image, with Nginx, Aria2, and MariaDB software pre-installed, is based on the CentOS 8.2 64-bit operating system.
This document introduces how to use the Cloudreve application image to build a Cloudreve cloud disk to implement file upload, share and offline download features.
Directions
Creating a Lighthouse Instance Using Cloudreve Image
1. Log in to the Lighthouse console. On the Instances page, click Create.
2. On the Lighthouse purchase page, purchase a Lighthouse instance with needed configurations selected.
For image configuration, select Application image > Cloudreve 3.3.1. Configure other parameters as instructed in Purchase Methods.
Note:
If the instance is in the Chinese mainland region, it is recommended that you choose a storage-optimized bundle for creating cloud disks. For details, see Basic Bundle.
In this example, we uses the application image Cloudreve 3.3.1. Note that the image may undergo version upgrades and updates. The actual version on the purchase page shall prevail.
Using Cloudreve
Logging in to Cloudreve
1. On the instance details page, select the Pre-installed application tab, and enter the application details page. You can view various configuration information of the Cloudreve application on this page.
2.
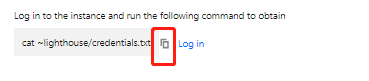
In the Pre-installed software section
, click
to copy the command for getting the Cloudreve admin account and password.
3. In the Pre-installed software section, click Log in.
4. In the pop-up window, paste the command obtained in step 2 and press Enter.
5.
Record the Cloudreve admin name and password
(that is, the "cloudreve_username" and "cloudreve_password" values) in the returned result.
6. Use a browser to access the Homepage address in Pre-installed software, enter the username and password obtained in Step 5, and click Log in.
Uploading files to Cloudreve
On the Cloudreve page, you can directly drag and drop local files to the specified area, or right-click to select files/directories for uploading.
Sharing files
Cloudreve supports sharing the download link of a file or folder. It also enables you to set a password or expiration time for the download link as instructed below:
1. On the Cloudreve page, right-click the file to be shared, and select Create share link in the pop-up menu.
2. In the pop-up window, make settings as required, and click Create share link.
3. After obtaining the link, you can download the file simply with Homepage address + share link.
For example, if the homepage address is http://xxx.xxx.xxx, and the share link is /s/jRfM, you can download the file via http://xxx.xxx.xxx/s/jRfM.
Offline download
Aria2 is pre-configured in the Cloudreve application image. Cloudreve supports offline download of Aria2 drivers. Before using this feature, you need to understand Aria2 configuration and Cloudreve access settings via the following steps.
1. On the Cloudreve page, click the user profile photo in the upper right corner, and click Admin panel in the pop-up menu.
2. Go to the Cloudreve dashboard page, and select Parameter settings > Offline download in the left sidebar.
You can refer to Offline download to modify relevant parameter settings as needed.
The steps to create an offline download are as follows:
1. On the Cloudreve page, select Offline download in the left sidebar.
2. Go to the Offline download page and select the + in the lower right corner of the page.
3. In the Create offline download task pop-up window, follow the instructions to create a download task.
Admin panel
1. On the Cloudreve page, click the user profile photo in the upper right corner, and click Admin panel in the pop-up menu.
2. Enter the Cloudreve dashboard page, and configure parameters such as user group permissions and storage policies.
You can configure the permissions on capacity limit, download speed, creating share, sharing download link and webDAV according to the type of user group the user belongs to.
You can change the default storage policy. For a comparison of various storage policies, see Comparison - Cloudreve.


 Yes
Yes
 No
No
Was this page helpful?