tencent cloud

Chat

News and Announcements
Release Notes
Announcements
Product Introduction
Overview
Basic Concepts
Scenarios
Features
Account System
User Profile and Relationship Chain
Message Management
Group Related
Official Account
Audio/Video Call
Use Limits
Purchase Guide
Billing Overview
Pricing
Purchase Instructions
Renewal Guide
Service Suspension Explanation
Refund Policy
Development Guidelines
Demo Zone
Activate Service
Free Demos
Quick Run
Download
SDK and Demo Source Code
Update Log
Chat Interaction (UI Included)
TUIKit Introduction
Getting Started
Full-feature Integration
Single-function Integration
Build with AI
Build Basic Interfaces
More Features
Customizing Appearance
Internationalization
Push Service
Overview
Noun explanation
Activate the Service
Quick Start
Manufacturer Channel
Statistics
Troubleshooting Tool
Client APIs
REST API
Push Callback
Advanced Features
Release Notes
Error Codes
FAQS
Desk
Overview
Quick Start
Integration Guide
Admin Operation Manual
Agent Manual
More Practices
Live Streaming Setup Guide
AI Chatbot
Super Large Entertainment and Collaboration Community
Discord Implementation Guide
How to Integrate Chat into Games
WhatsApp Channel-style Official Account Integration Solution
Send Red Packet
Firewall Restrictions
No UI Integration
Quick Start
SDK Integration
Initialization
Login and Logout
Message
Conversation
Group
Community Topic
User Profile and Relationship Chain
Offline Push
Cloud Search
Local Search
Official Channel Management
Client APIs
JavaScript
Android
iOS & macOS
Swift
Flutter
Electron
Unity
React Native
C APIs
C++
Server APIs
Secure authentication with UserSig
RESTful APIs
Webhooks
Console Guide
New Console Introduction
Creating and Upgrading an Application
Basic Configuration
Feature Configuration
Account Management
Group Management
Official Channel Management
Webhook Configuration
Usage
Viewing Guide for Resource Packages
Real-Time Monitor
Auxiliary Development Tools
Access Management
Advanced Features
FAQs
uni-app FAQs
Purchase
SDK
Account Authentication
User Profile and Relationship Chain
Message
Group
Audio-Video Group
Nickname and Profile Photo
Security Compliance Certification
Service Level Agreement
Security Compliance Certification
Chat Policies
Privacy Policy
Data Privacy and Security Agreement
Migration
Migration Solutions
Migration Solutions Lite
Error Codes
Contact Us

HarmonyOS

PDF
Focus Mode
Font Size
Last updated: 2025-11-18 20:29:32

Operation Steps

Step 1: TIMPush Integration

// For the version number "VERSION", please refer to the changelog for configuration.
// Configure the integration package in oh-package.json5
dependencies: {
"@tencentcloud/timpush": "^VERSION",
"@tencentcloud/imsdk": "^VERSION",
}

Step 2: Register for Push Services

Call the API to push after registration is successful, and you can receive offline push notifications.
import { TIMPushListener, TIMPushManager, TIMPushMessage } from '@tencentcloud/timpush';

TIMPushManager.getInstance()
.registerPush(context, your sdkAppId, "client secret", Chat console certificate ID)
.then((result) => {
HiLog("registerPush success:", result.message);
})
.catch((error: Error) => {
HiLog("registerPush failed", error.code, error.message);
})

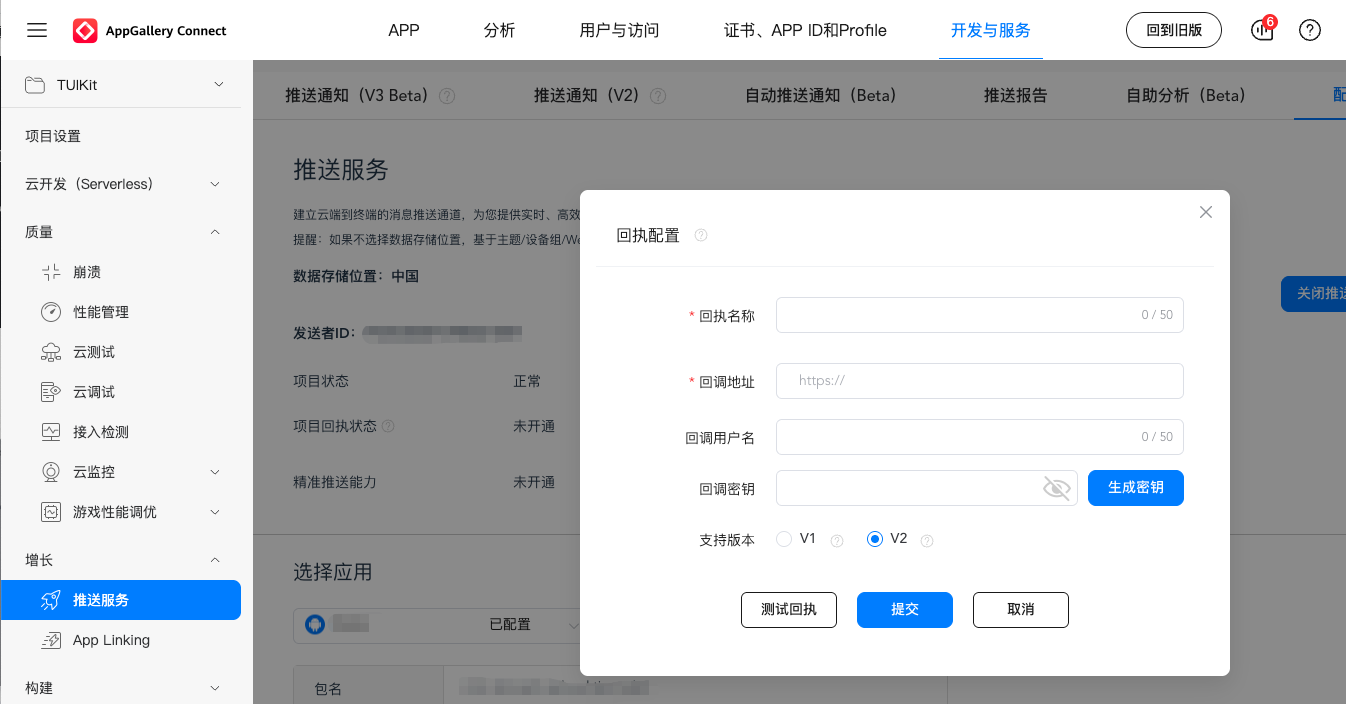
Step 3: Message Delivery Statistics Configuration

If you need statistics on reach data, complete the configuration as follows:

Receipt address: https://api.im.qcloud.com/v3/offline_push_report/harmony

Step 4: Sending Push Notifications

For detailed API instructions, see RESTful APIs - Initiate Push to All Users/Tag Push.

Step 5: Parsing Offline Push Messages

After receiving the push message and clicking the notification, the component will Webhook the click event and offline message pass-through.
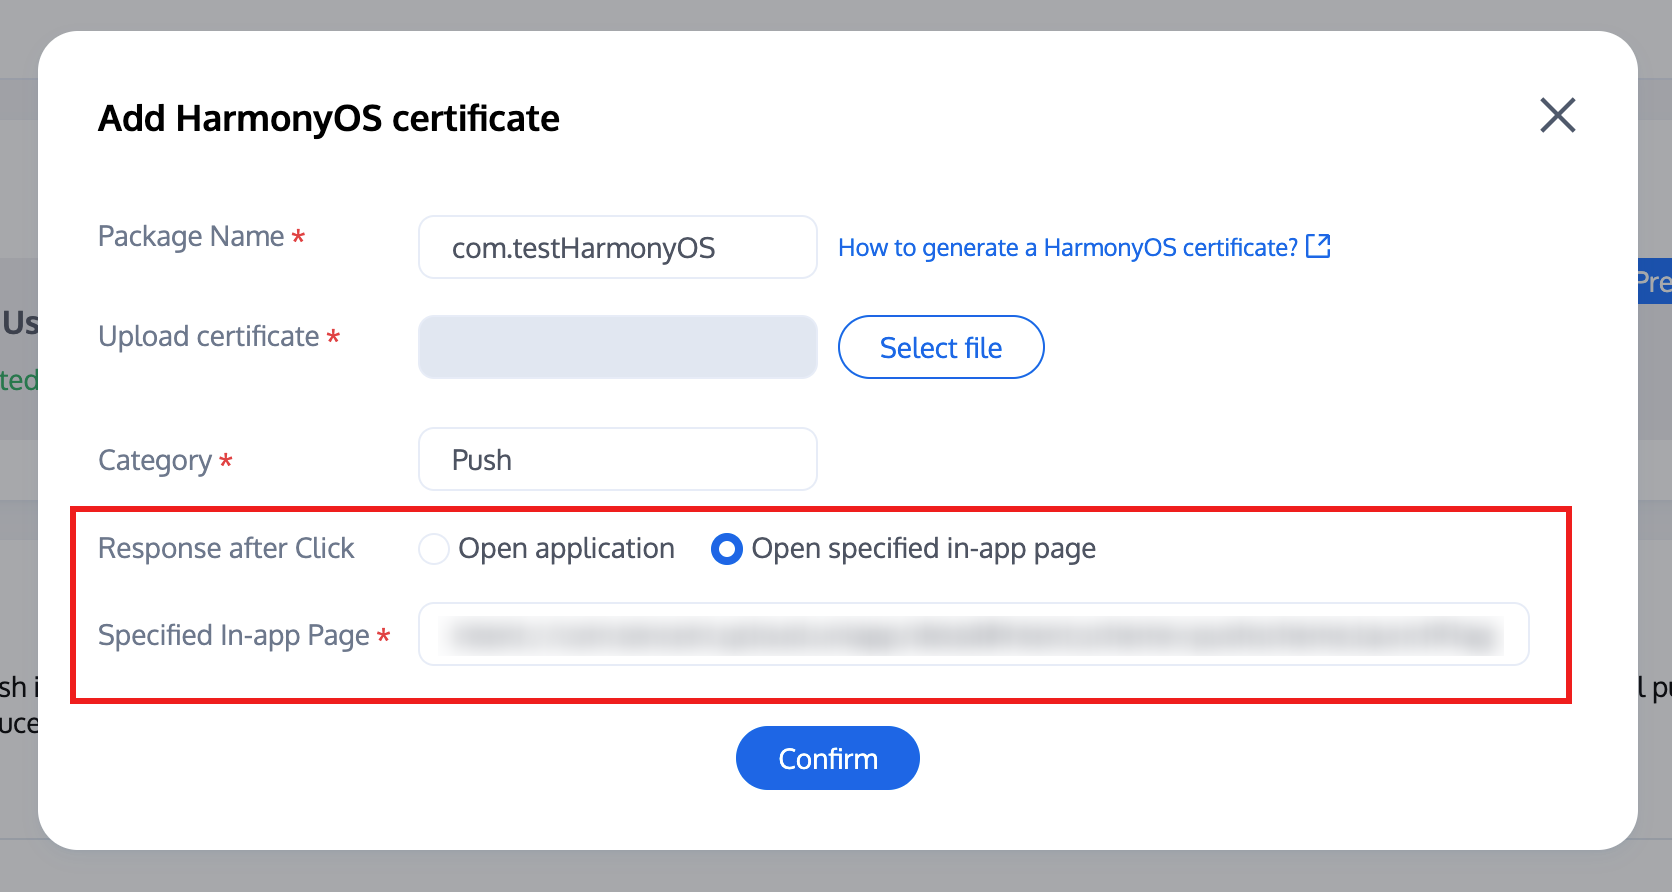
Note:
Register the callback timing in the oncreate() function of the application UIAbility.
Console configuration click subsequent actions with the following configuration, select open specified in-app page, do not modify use default values.

let pushListener: TIMPushListener = {
onNotificationClicked: (data) => {
HiLog("onNotificationClicked", data);
}
}

TIMPushManager.getInstance().addPushListener(pushListener);
Congratulations on completing the Push Plugin access. Remind you: After trial or purchase expiry, the Push Plugin will automatically stop providing push service (including offline push for regular messages, Tag Push, etc.). To avoid affecting normal business operation, please proceed to purchase or renew in advance.
Note:
Integration completed but not receiving push notifications? Please first use the troubleshooting tool to check the reason. To view push metrics data, use data statistics for querying.
For push notification feature to all users/Tag Push, please refer to: RESTful APIs - Initiate Push to All Users/Tag Push.


Help and Support

Was this page helpful?

Help us improve! Rate your documentation experience in 5 mins.

Feedback