SES는 DKIM(DomainKeys Identified Mail), SPF(Sender Policy Framework), DMARC(Domain-Based Message Authentication, Reporting and Conformance), MX 레코드(Mail Exchanger record)를 비롯한 모든 산업 표준 인증 메커니즘을 지원합니다.
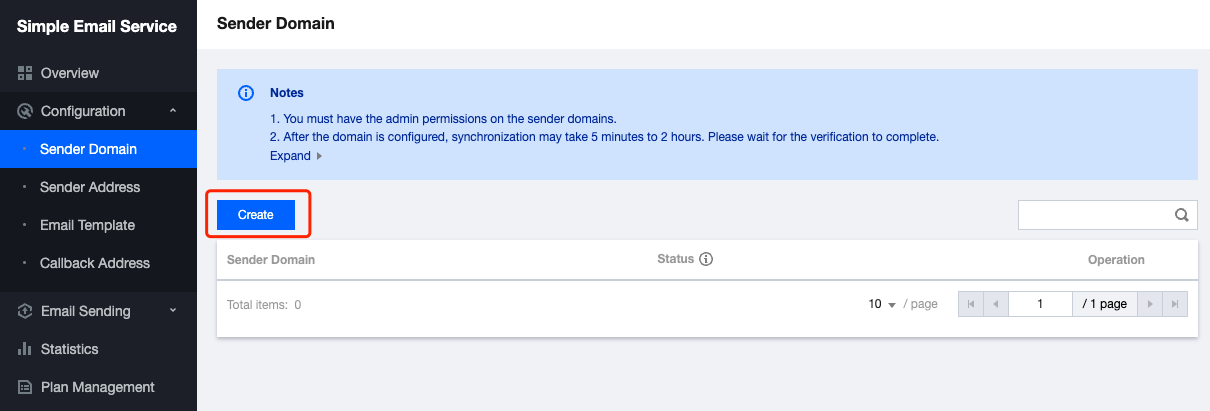
5. Tencent Cloud로 도메인을 호스팅하는 경우 DNSPod 콘솔에 로그인하여 인증 정보를 구성합니다. 발신자 도메인을 클릭하여 구성 페이지로 이동할 수 있습니다.
설명:
도메인이 다른 도메인 서비스 제공 업체에서 호스팅되는 경우 체크리스트의 지침에 따라 구성합니다.
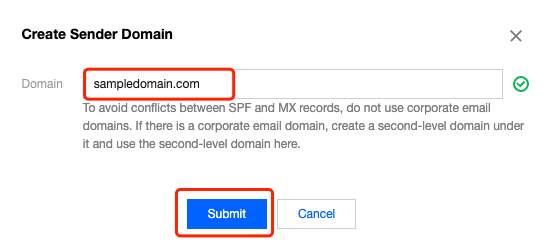
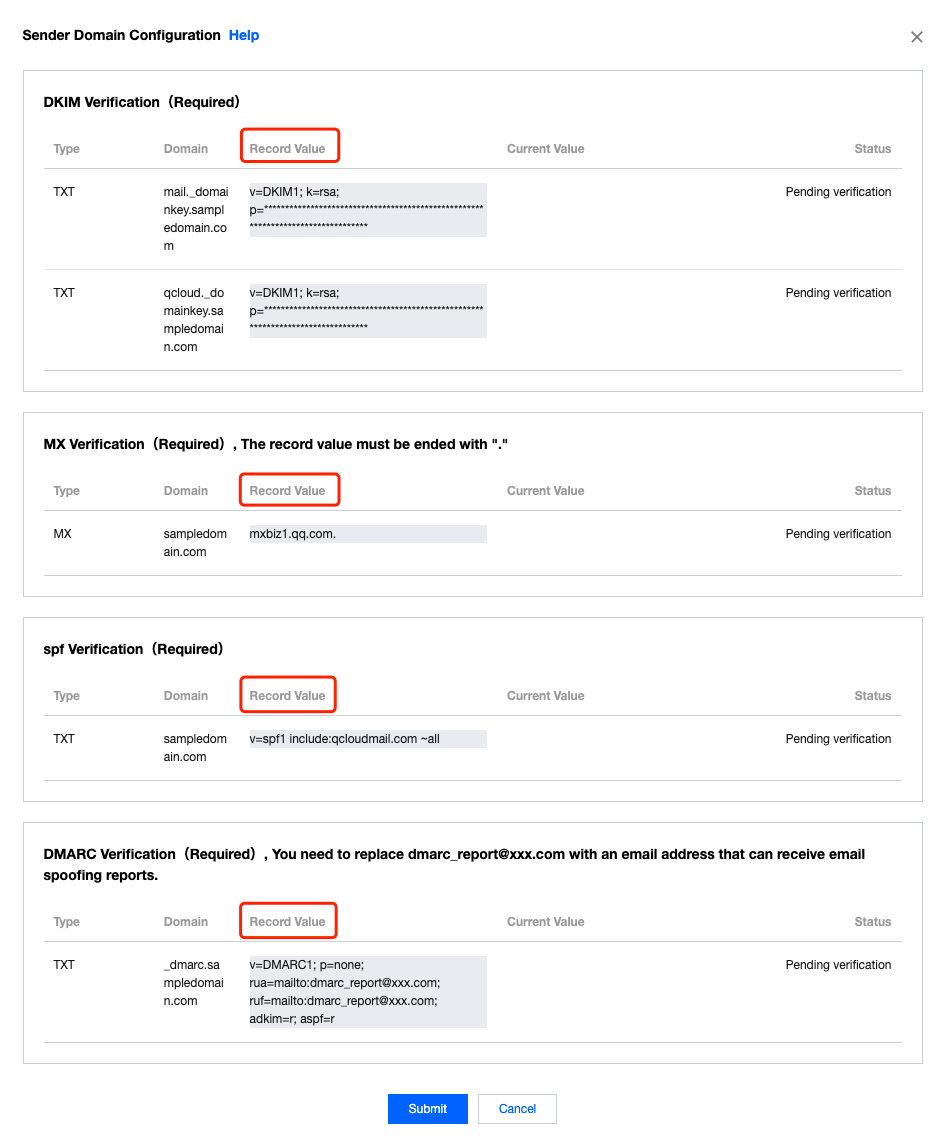
6. 기본 도메인 sampledomain.com을 예로 들어 레코드를 추가합니다. 위의 4단계에서 얻은 ‘레코드 값’을 입력합니다.
MX 인증
호스트 레코드: @
레코드 유형: MX
레코드 값: mxbiz1.qq.com. 이메일 서버가 있는 경우 레코드 값에 이메일 서버 주소를 입력합니다.
설명:
기본이 아닌 도메인(예: abc.sampledomain.com)의 경우 호스트 레코드는 abc여야 합니다.
레코드 값이 ‘.’로 끝나는지 확인하십시오. 일부 도메인 서비스 제공 업체는 기본적으로 MX 레코드의 끝에 ‘.’를 추가합니다.
SPF 인증:
호스트 레코드: @
레코드 유형: TXT
레코드 값: v=spf1 include:qcloudmail.com ~all
설명:
기본이 아닌 도메인(예: abc.sampledomain.com)의 경우 호스트 레코드는 abc여야 합니다.
여러 이메일 푸시 서비스 제공 업체가 있는 경우 이러한 모든 서비스 제공 업체의 도메인을 포함해야 합니다(예: v=spf1 include:qcloudmail.com include:domain1.com ~all ). 여기서 domain1.com은 다른 이메일 푸시 서비스 제공 업체의 도메인을 나타냅니다. 발신 도메인의 DNS 구성에 SPF 레코드가 하나만 있는지 확인합니다.
DKIM 인증:
호스트 레코드: qcloud._domainkey
레코드 유형: TXT
레코드 값은 귀하의 ‘레코드 값’이어야 합니다.
설명:
기본이 아닌 도메인(예: abc.sampledomain.com)의 경우 호스트 레코드는 qcloud._domainkey.abc여야 합니다.
DMARC 인증:
호스트 레코드: _dmarc
레코드 유형: TXT
레코드 값: v=DMARC1; p=none
설명:
기본이 아닌 도메인(예: abc.sampledomain.com)의 경우 호스트 레코드는 _dmarc.abc여야 합니다.
DMARC 레코드는 v 및 p 플래그를 포함해야 합니다. DMARC에 대해 많이 알고 있는 경우 필요에 따라 다른 플래그를 추가하거나 플래그 값을 수정할 수 있습니다.
7. 4단계 인터페이스로 돌아가 제출을 눌러 인증합니다. ‘현재 값’은 위의 DNS 구성에서 구성한 것을 보여줍니다. 인증 상태가 인증됨이 되면 구성이 완료된 것입니다.
설명:
‘1단계’의 구성 작업이 완료되고 발신자 도메인이 ‘인증됨’인 경우 이 인증 단계를 건너뜁니다.
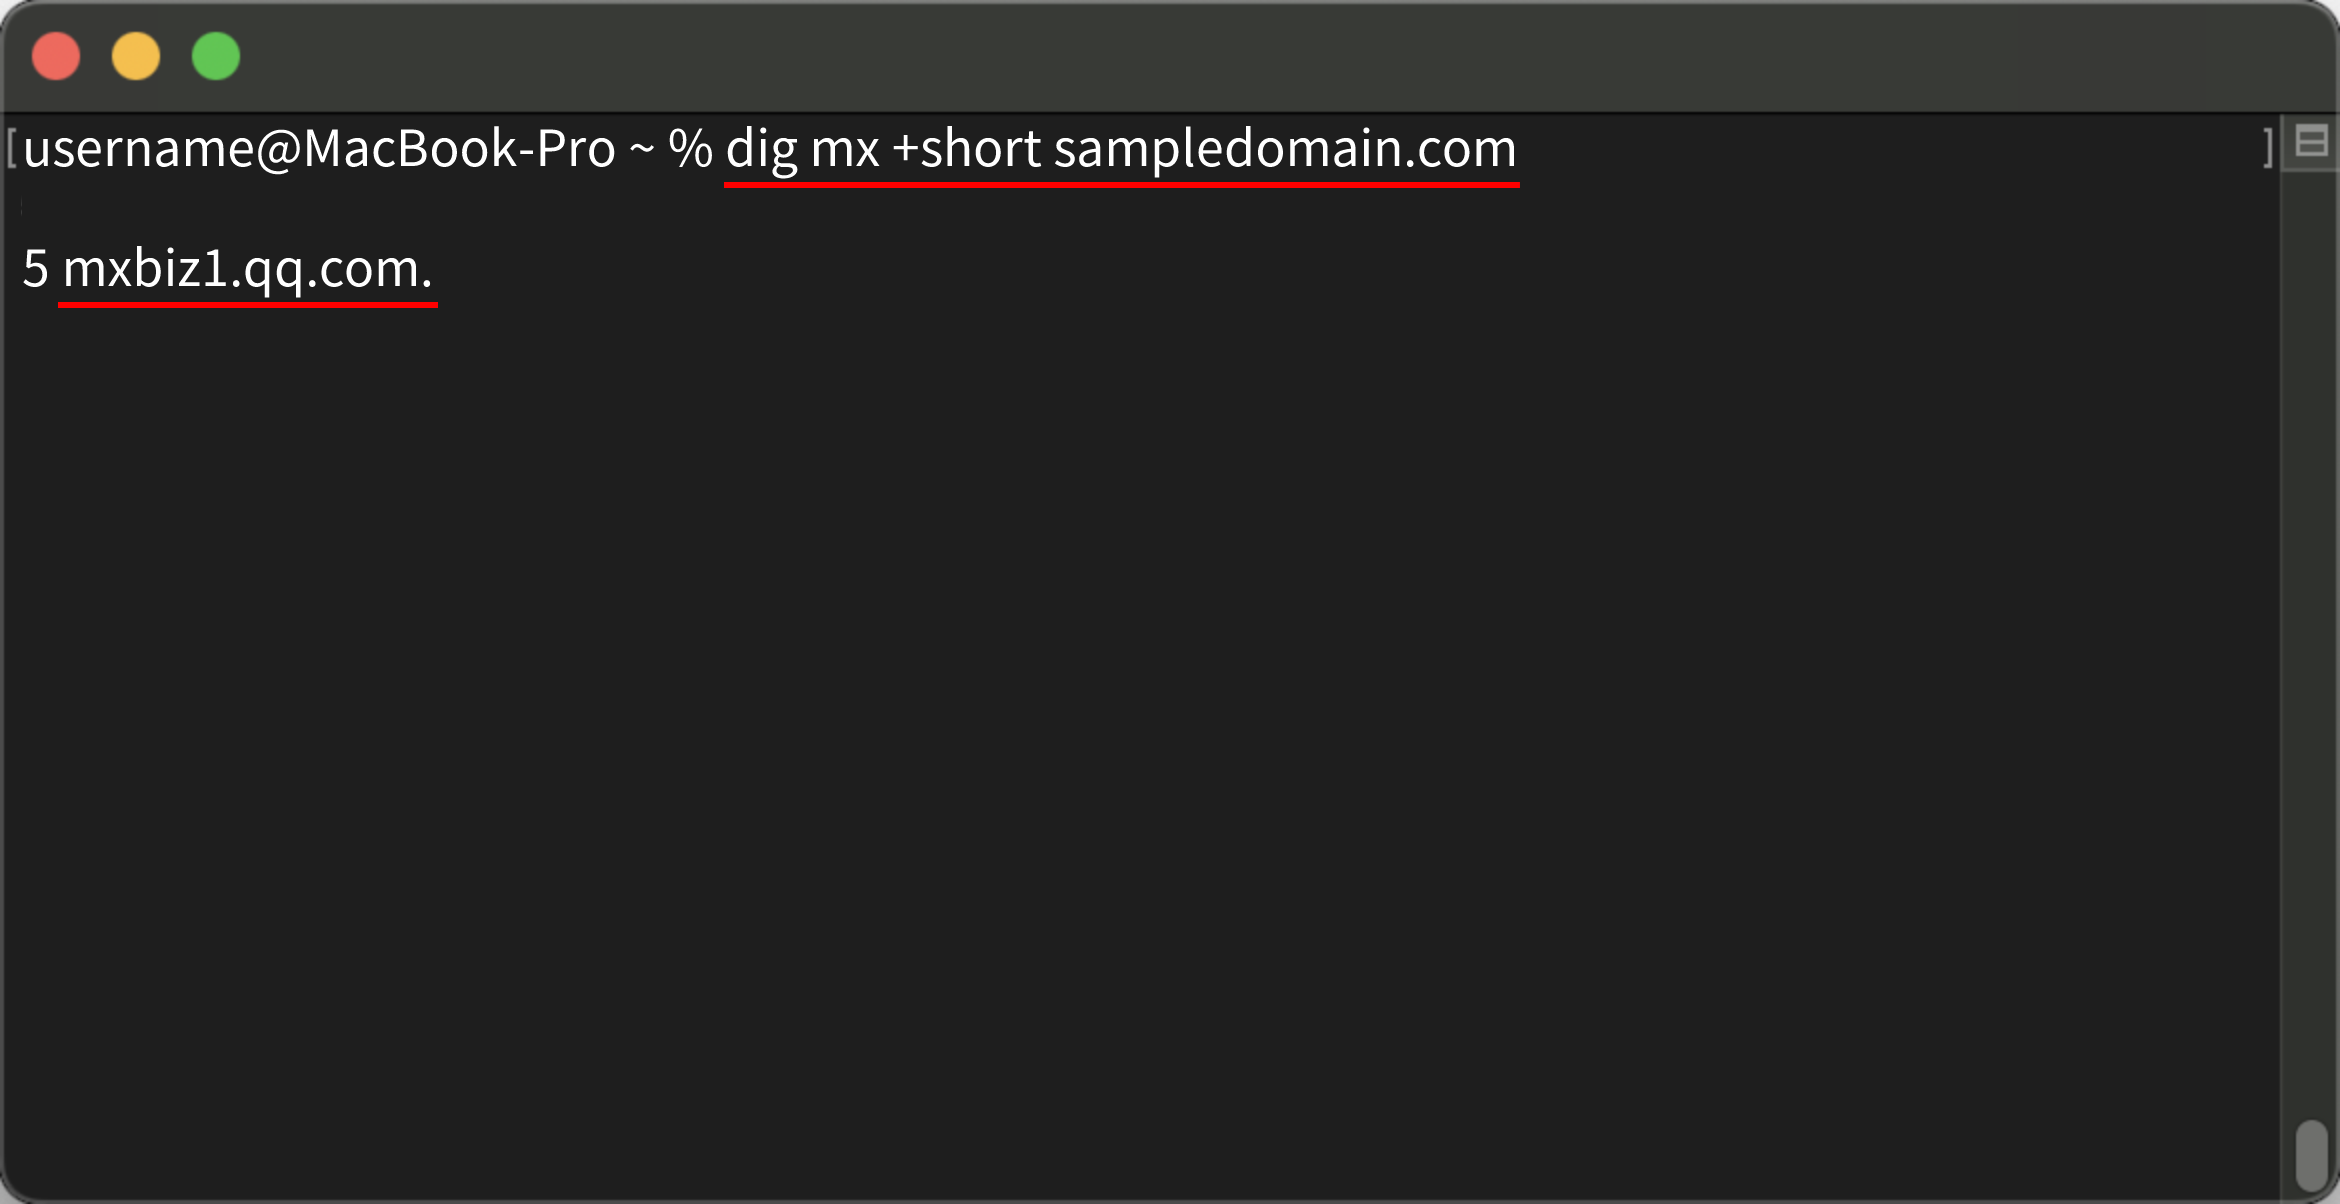
본문은 dig 명령으로 DNS 도메인 서버를 쿼리하고 발신자 도메인이 올바르게 설정되었는지 확인하는 방법을 설명합니다.
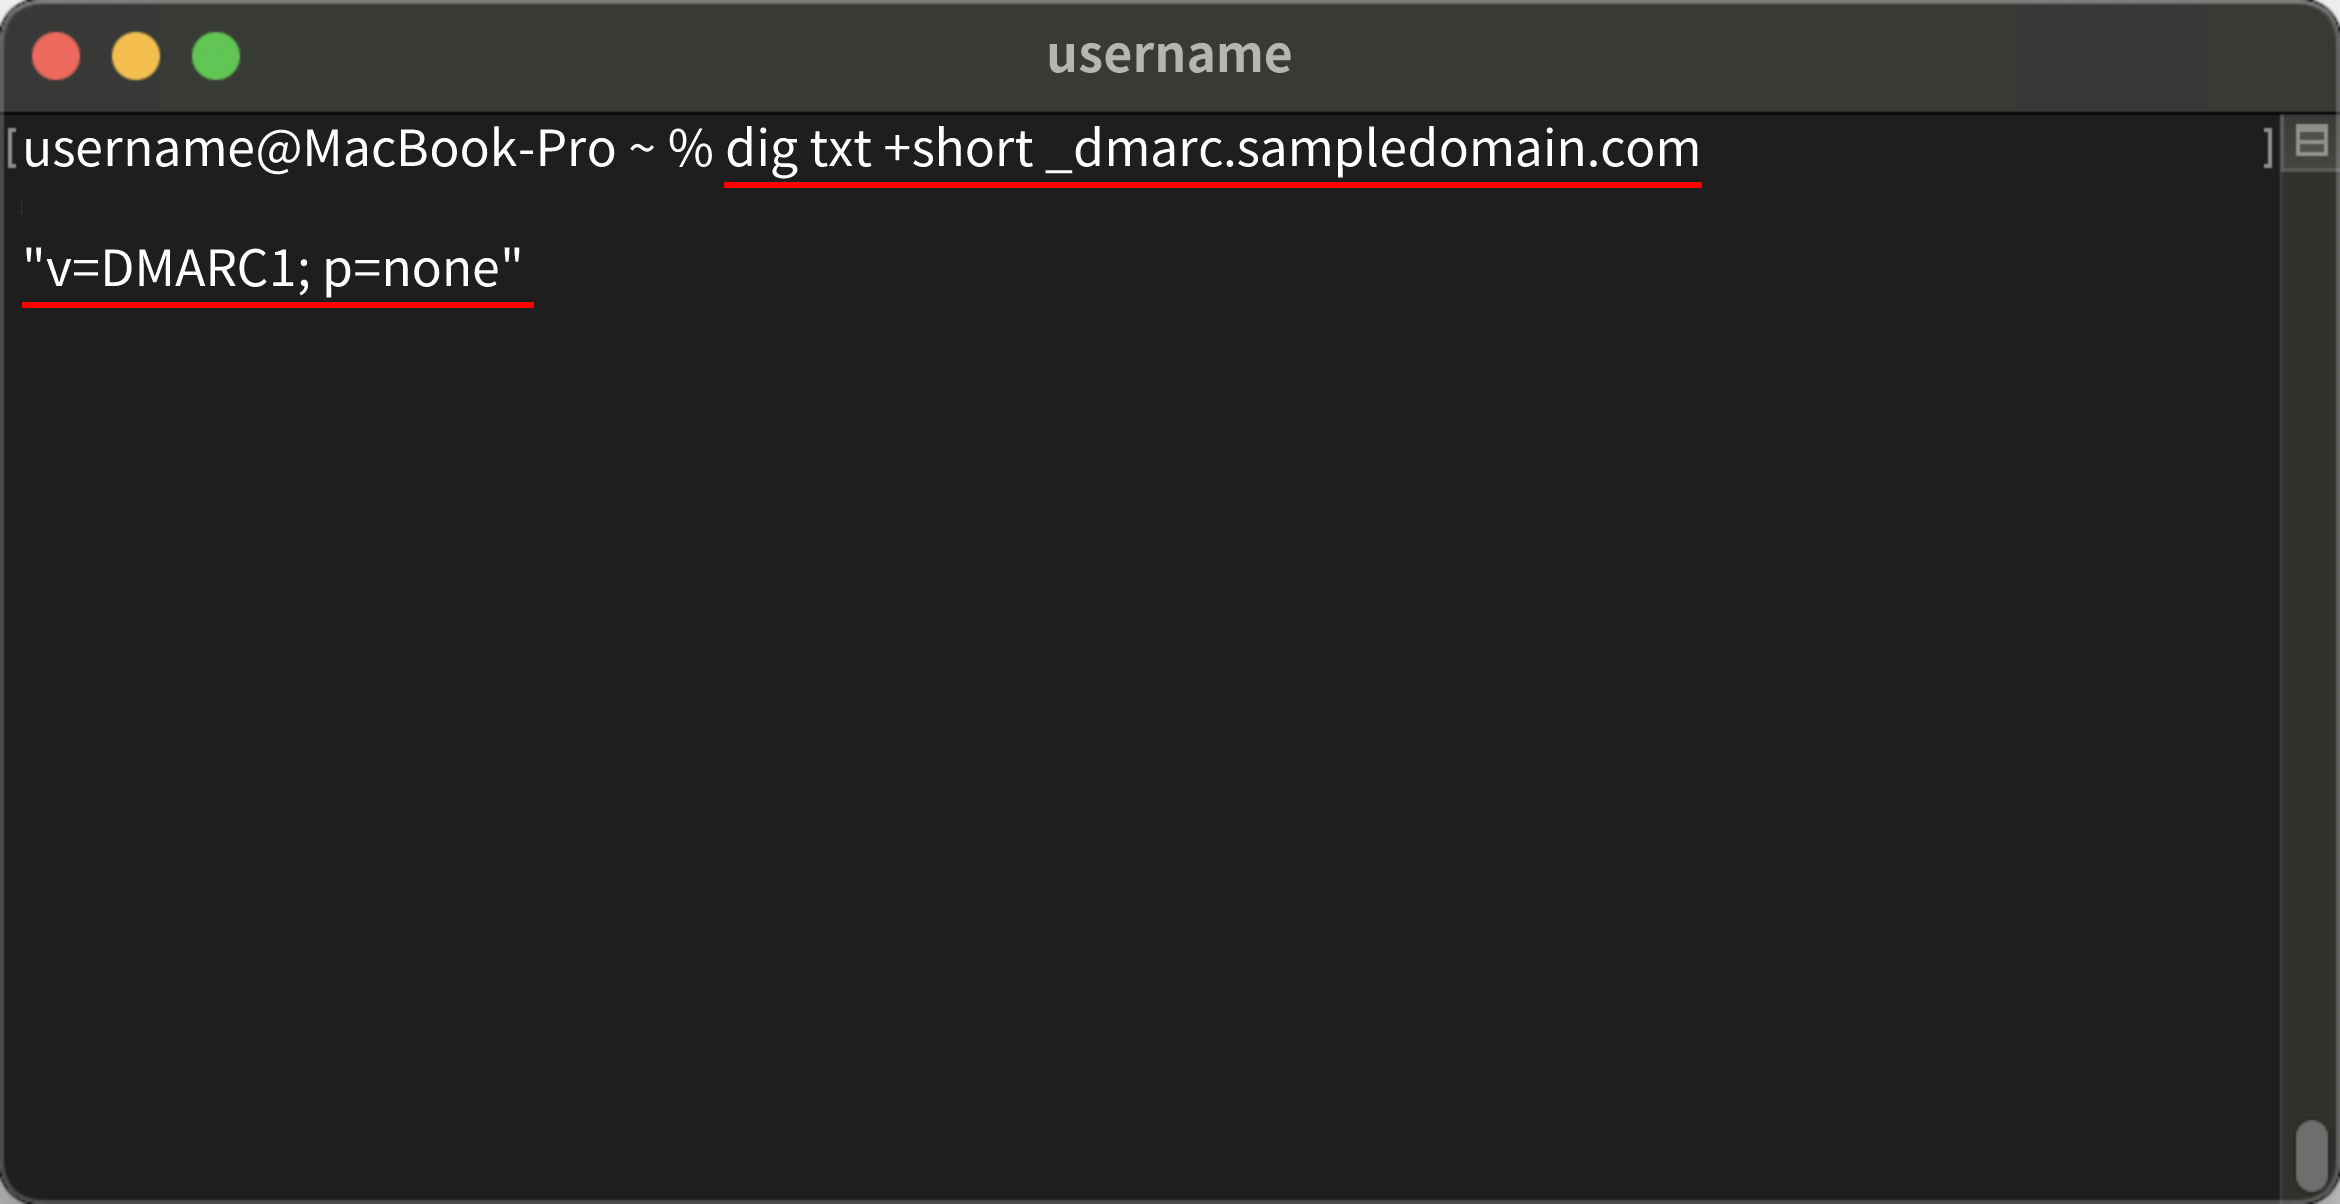
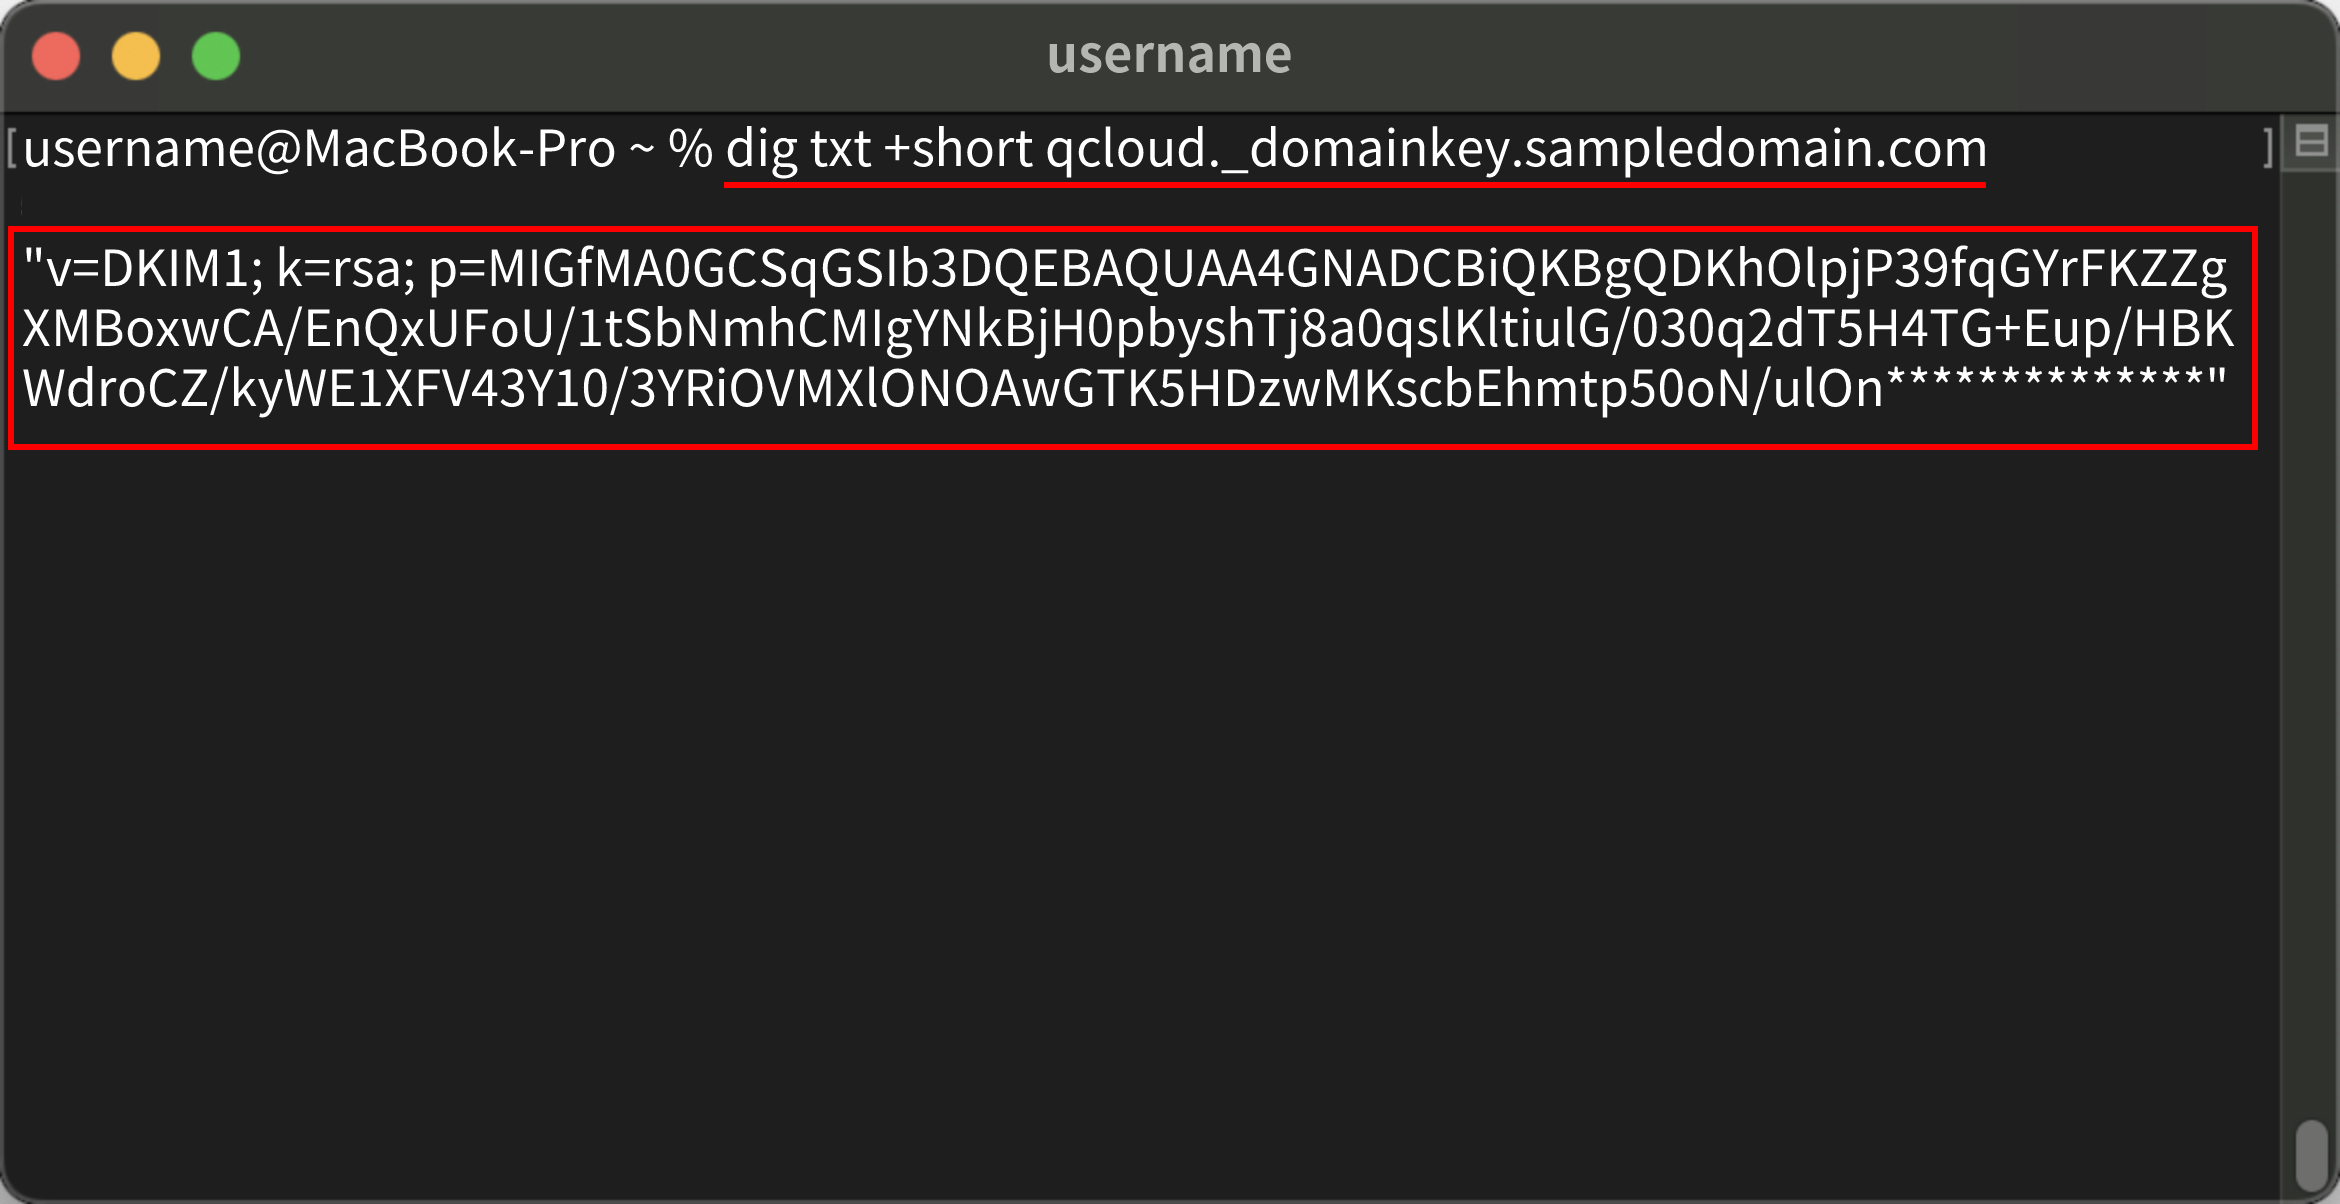
명령 라인에 다음 명령을 각각 입력하고 엔터 키를 눌러 반환된 값이 발신자 도메인 구성 페이지에 표시된 값과 동일한지 확인합니다.
dig mx +short sampledomain.com
dig txt +short sampledomain.com
dig txt +short _dmarc.sampledomain.com
dig txt +short qcloud._domainkey.sampledomain.com
설명:
상기 명령의 sampledomain.com은 예시일 뿐이며 발신자 도메인 이름으로 대체해야 합니다.